2006 CHEVROLET AVALANCHE hood release
[x] Cancel search: hood releasePage 102 of 532

Testing the Alarm
The alarm can be tested by following these steps:
1. From inside the vehicle, lower the driver’s window
and open the driver’s door.
2. Activate the system by locking the doors with the
power door lock switch while the door is open, or
with the remote keyless entry transmitter.
3. Get out of the vehicle, close the door and wait for
the security light to go out.
4. Then reach in through the window, unlock the door
with the manual door lock and open the door. This
should set off the alarm.
While the alarm is set, the power door unlock switch is
not operational.
If the alarm does not sound when it should but the
headlamps �ash, check to see if the horn works. The
horn fuse may be blown. To replace the fuse, see
Instrument Panel Fuse Block on page 5-114and
Underhood Fuse Block on page 5-117.
If the alarm does not sound or the headlamps do not
�ash, the vehicle should be serviced by your dealer.
Passlock®
Your vehicle is equipped with the Passlock®
theft-deterrent system.
Passlock
®is a passive theft-deterrent system. Passlock®
enables fuel if the ignition lock cylinder is turned with
a valid key. If a correct key is not used or the ignition
lock cylinder is tampered with, the fuel system is
disabled and the vehicle will not start.
During normal operation, the security light will turn off
approximately �ve seconds after the key is turned
to RUN.
If the engine stalls and the security light �ashes, wait
about 10 minutes until the light stops �ashing before
trying to restart the engine. Remember to release
the key from START as soon as the engine starts.
If the engine does not start after three tries, the vehicle
needs service.
If the engine is running and the security light comes on,
you will be able to restart the engine if you turn the engine
off. However, your Passlock
®system is not working
properly and must be serviced by your dealer. Your
vehicle is not protected by Passlock
®at this time. You
may also want to check the fuse. SeeFuses and Circuit
Breakers on page 5-113. See your dealer for service.
In an emergency, call the Roadside Assistance Center.
SeeRoadside Assistance Program on page 7-5.
2-26
Page 173 of 532

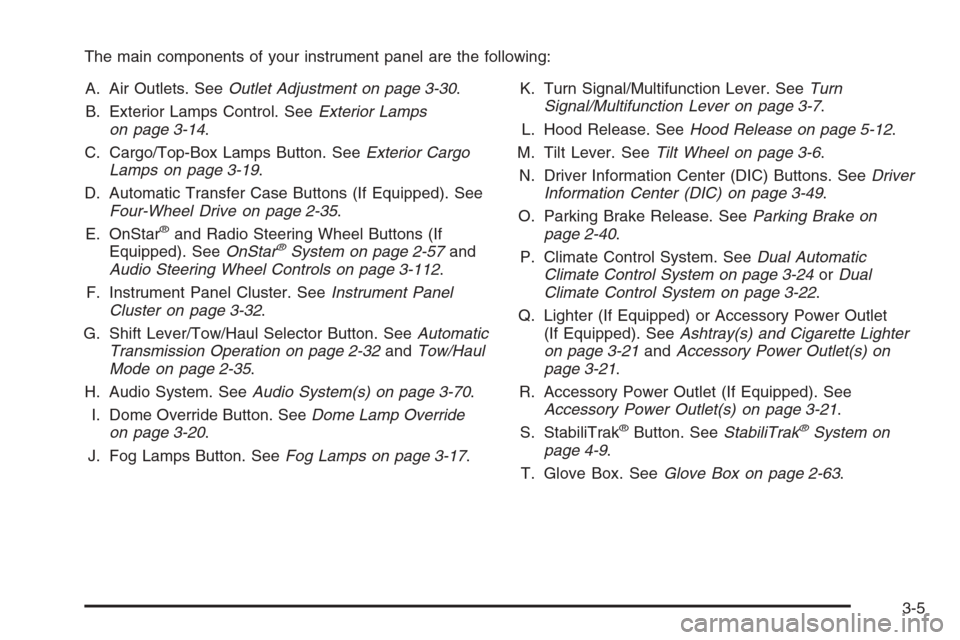
The main components of your instrument panel are the following:
A. Air Outlets. SeeOutlet Adjustment on page 3-30.
B. Exterior Lamps Control. SeeExterior Lamps
on page 3-14.
C. Cargo/Top-Box Lamps Button. SeeExterior Cargo
Lamps on page 3-19.
D. Automatic Transfer Case Buttons (If Equipped). See
Four-Wheel Drive on page 2-35.
E. OnStar
®and Radio Steering Wheel Buttons (If
Equipped). SeeOnStar®System on page 2-57and
Audio Steering Wheel Controls on page 3-112.
F. Instrument Panel Cluster. SeeInstrument Panel
Cluster on page 3-32.
G. Shift Lever/Tow/Haul Selector Button. SeeAutomatic
Transmission Operation on page 2-32andTow/Haul
Mode on page 2-35.
H. Audio System. SeeAudio System(s) on page 3-70.
I. Dome Override Button. SeeDome Lamp Override
on page 3-20.
J. Fog Lamps Button. SeeFog Lamps on page 3-17.K. Turn Signal/Multifunction Lever. SeeTurn
Signal/Multifunction Lever on page 3-7.
L. Hood Release. SeeHood Release on page 5-12.
M. Tilt Lever. SeeTilt Wheel on page 3-6.
N. Driver Information Center (DIC) Buttons. SeeDriver
Information Center (DIC) on page 3-49.
O. Parking Brake Release. SeeParking Brake on
page 2-40.
P. Climate Control System. SeeDual Automatic
Climate Control System on page 3-24orDual
Climate Control System on page 3-22.
Q. Lighter (If Equipped) or Accessory Power Outlet
(If Equipped). SeeAshtray(s) and Cigarette Lighter
on page 3-21andAccessory Power Outlet(s) on
page 3-21.
R. Accessory Power Outlet (If Equipped). See
Accessory Power Outlet(s) on page 3-21.
S. StabiliTrak
®Button. SeeStabiliTrak®System on
page 4-9.
T. Glove Box. SeeGlove Box on page 2-63.
3-5
Page 176 of 532

Turn and Lane-Change Signals
The turn signal has two upward (for right) and two
downward (for left) positions. These positions allow you
to signal a turn or a lane change.
To signal a turn, move the lever all the way up or down.
When the turn is �nished, the lever will return
automatically.
To signal a lane change, raise or lower the lever for
less than one second until the arrow starts to �ash. This
will cause the turn signals to automatically �ash three
times. It will �ash six times if the tow-haul mode is
active. Holding the turn signal lever for more than one
second will cause the turn signals to �ash until you
release the lever. The lever will return by itself when it
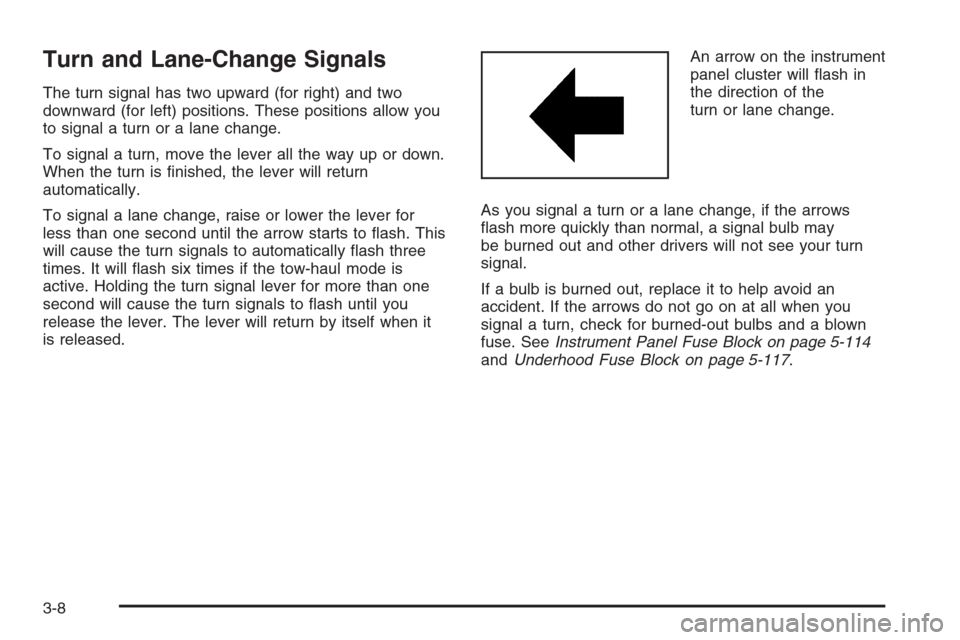
is released.An arrow on the instrument
panel cluster will �ash in
the direction of the
turn or lane change.
As you signal a turn or a lane change, if the arrows
�ash more quickly than normal, a signal bulb may
be burned out and other drivers will not see your turn
signal.
If a bulb is burned out, replace it to help avoid an
accident. If the arrows do not go on at all when you
signal a turn, check for burned-out bulbs and a blown
fuse. SeeInstrument Panel Fuse Block on page 5-114
andUnderhood Fuse Block on page 5-117.
3-8
Page 310 of 532

Q:Am I likely to stall when going downhill?
A:It is much more likely to happen going uphill. But if
it happens going downhill, here is what to do.
1. Stop your vehicle by applying the regular brakes.
Apply the parking brake.
2. Shift to PARK (P) and, while still braking, restart the
engine.
3. Shift back to a low gear, release the parking brake,
and drive straight down.
4. If the engine will not start, get out and get help.
Driving Across an Incline
Sooner or later, an off-road trail will probably go across
the incline of a hill. If this happens, you have to
decide whether to try to drive across the incline. Here
are some things to consider:
A hill that can be driven straight up or down may
be too steep to drive across. When you go
straight up or down a hill, the length of the wheel
base — the distance from the front wheels to
the rear wheels — reduces the likelihood the vehicle
will tumble end over end. But when you drive
across an incline, the much more narrow track
width — the distance between the left and
right wheels — may not prevent the vehicle from
tilting and rolling over. Also, driving across an incline
puts more weight on the downhill wheels. This
could cause a downhill slide or a rollover.
Surface conditions can be a problem when you
drive across a hill. Loose gravel, muddy spots,
or even wet grass can cause the tires to slip
sideways, downhill. If the vehicle slips sideways, it
can hit something that will trip it — a rock, a
rut, etc. — and roll over.
Hidden obstacles can make the steepness of the
incline even worse. If you drive across a rock with the
uphill wheels, or if the downhill wheels drop into a rut
or depression, your vehicle can tilt even more.
4-26
Page 361 of 532

Service............................................................5-3
Accessories and Modi�cations..........................5-3
California Proposition 65 Warning.....................5-4
Doing Your Own Service Work.........................5-4
Adding Equipment to the Outside of
Your Vehicle..............................................5-5
Fuel................................................................5-5
Gasoline Octane............................................5-5
Gasoline Speci�cations....................................5-6
California Fuel...............................................5-6
Additives.......................................................5-6
Fuel E85 (85% Ethanol)..................................5-7
Fuels in Foreign Countries...............................5-8
Filling the Tank..............................................5-9
Filling a Portable Fuel Container.....................5-11
Checking Things Under the Hood....................5-11
Hood Release..............................................5-12
Engine Compartment Overview.......................5-14
Engine Oil...................................................5-18
Engine Oil Life System..................................5-21
Engine Air Cleaner/Filter................................5-23
Automatic Transmission Fluid.........................5-25
Engine Coolant.............................................5-28
Coolant Surge Tank Pressure Cap..................5-30
Engine Overheating.......................................5-30Overheated Engine Protection
Operating Mode........................................5-32
Cooling System............................................5-32
Engine Fan Noise.........................................5-38
Power Steering Fluid.....................................5-39
Windshield Washer Fluid................................5-40
Brakes........................................................5-41
Battery........................................................5-44
Jump Starting...............................................5-45
Rear Axle.......................................................5-51
Four-Wheel Drive............................................5-52
Front Axle......................................................5-53
Bulb Replacement..........................................5-54
Halogen Bulbs..............................................5-54
Headlamps..................................................5-55
Front Turn Signal, Sidemarker and
Parking Lamps..........................................5-57
Front Turn Signal, Sidemarker and
Daytime Running Lamps.............................5-59
Daytime Running Lamps (DRL).......................5-61
Taillamps, Turn Signal, Stoplamps and
Back-up Lamps.........................................5-61
License Plate Lamp......................................5-62
Replacement Bulbs.......................................5-63
Windshield Wiper Blade Replacement..............5-63
Section 5 Service and Appearance Care
5-1
Page 372 of 532

Hood Release
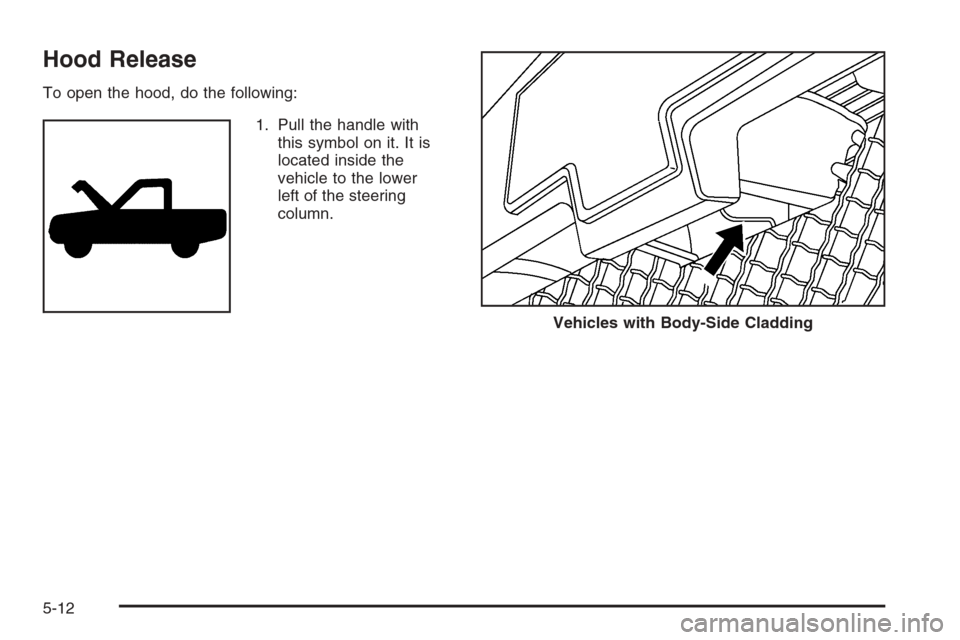
To open the hood, do the following:
1. Pull the handle with
this symbol on it. It is
located inside the
vehicle to the lower
left of the steering
column.
Vehicles with Body-Side Cladding
5-12
Page 373 of 532

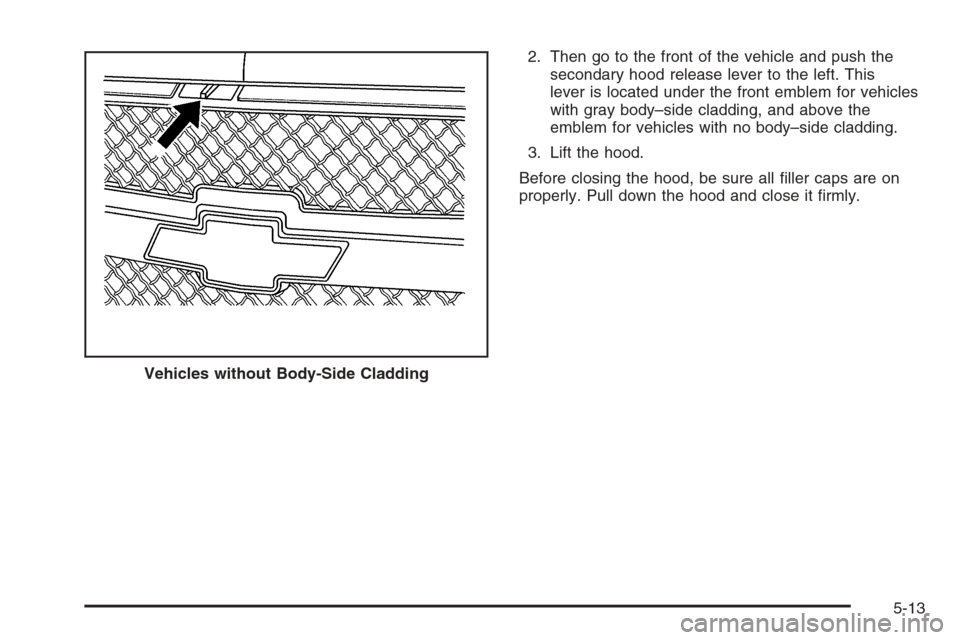
2. Then go to the front of the vehicle and push the
secondary hood release lever to the left. This
lever is located under the front emblem for vehicles
with gray body–side cladding, and above the
emblem for vehicles with no body–side cladding.
3. Lift the hood.
Before closing the hood, be sure all �ller caps are on
properly. Pull down the hood and close it �rmly.
Vehicles without Body-Side Cladding
5-13
Page 415 of 532

Headlamps
Vehicles with Body-Side Cladding
To replace a headlamp bulb, do the following:
1. Open the hood. SeeHood Release on page 5-12
for more information.
2. Remove the turn
signal/parking lamp
assembly by pressing
the release clip on
the outboard side of the
assembly and pulling
the outboard end
toward you.
3. Pull the inboard side of the assembly out from the
vehicle.4. Pull the pins away from their clips and pull them up
until they completely release from the vehicle.
5. Pull the headlamp assembly out of the vehicle.
5-55