2006 CADILLAC CTS center console
[x] Cancel search: center consolePage 78 of 442

Mirrors...........................................................2-39
Automatic Dimming Rearview Mirror
with OnStar
®............................................2-39
Automatic Dimming Rearview Mirror
with OnStar
®and Compass........................2-39
Outside Power Mirrors...................................2-42
Outside Curb View Assist Mirror.....................2-42
Outside Convex Mirror...................................2-43
Outside Heated Mirrors..................................2-43
OnStar
®System.............................................2-43
Universal Home Remote System......................2-45
Universal Home Remote System Operation......2-46Storage Areas................................................2-49
Glove Box...................................................2-49
Cupholder(s)................................................2-49
Center Console Storage Area (CTS Only)........2-49
Map Pocket.................................................2-49
Roof Rack ...................................................2-50
Convenience Net..........................................2-50
Sunroof.........................................................2-51
Vehicle Personalization...................................2-52
Memory Seat and Mirrors..............................2-52
Section 2 Features and Controls
2-2
Page 103 of 442

Automatic Transmission Operation
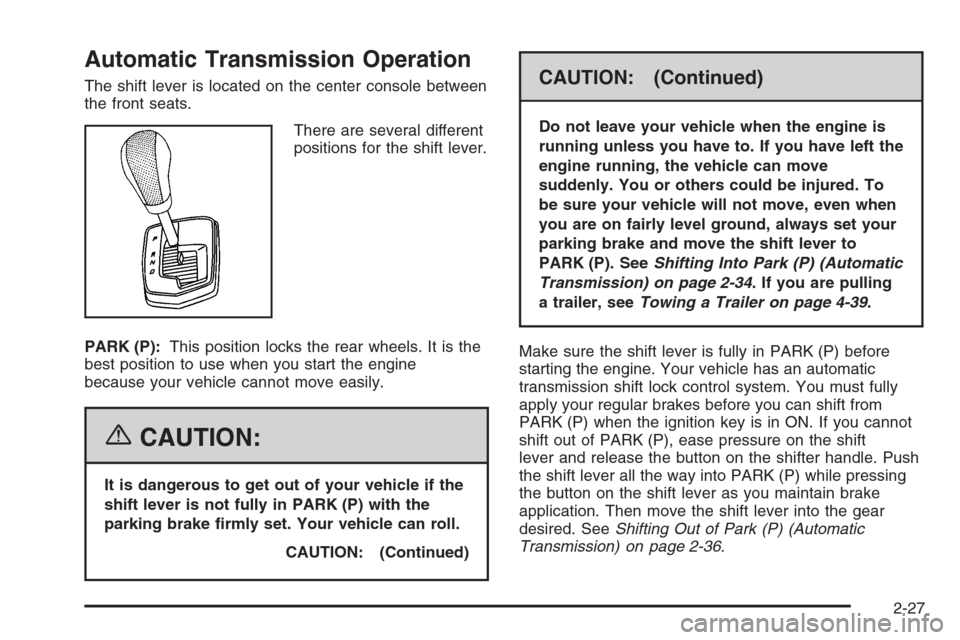
The shift lever is located on the center console between
the front seats.
There are several different
positions for the shift lever.
PARK (P):This position locks the rear wheels. It is the
best position to use when you start the engine
because your vehicle cannot move easily.
{CAUTION:
It is dangerous to get out of your vehicle if the
shift lever is not fully in PARK (P) with the
parking brake �rmly set. Your vehicle can roll.
CAUTION: (Continued)
CAUTION: (Continued)
Do not leave your vehicle when the engine is
running unless you have to. If you have left the
engine running, the vehicle can move
suddenly. You or others could be injured. To
be sure your vehicle will not move, even when
you are on fairly level ground, always set your
parking brake and move the shift lever to
PARK (P). SeeShifting Into Park (P) (Automatic
Transmission) on page 2-34. If you are pulling
a trailer, seeTowing a Trailer on page 4-39.
Make sure the shift lever is fully in PARK (P) before
starting the engine. Your vehicle has an automatic
transmission shift lock control system. You must fully
apply your regular brakes before you can shift from
PARK (P) when the ignition key is in ON. If you cannot
shift out of PARK (P), ease pressure on the shift
lever and release the button on the shifter handle. Push
the shift lever all the way into PARK (P) while pressing
the button on the shift lever as you maintain brake
application. Then move the shift lever into the gear
desired. SeeShifting Out of Park (P) (Automatic
Transmission) on page 2-36.
2-27
Page 106 of 442

Manual Transmission Operation
If your vehicle has a manual transmission, the shift lever
is located on the center console between the front
seats. The following explains how to operate the manual
transmission.
These are the shift patterns for the six-speed manual
transmissions.Here is how to operate your transmission:
FIRST (1):Press the clutch pedal and shift into
FIRST (1). Then slowly let up on the clutch pedal as
you press the accelerator pedal.
For the CTS, you can shift into FIRST (1) when you are
going less than 25 mph (40 km/h). If you come to a
complete stop and it is hard to shift into FIRST (1), put the
shift lever in NEUTRAL and let up on the clutch. Press
the clutch pedal back down. Then shift into FIRST (1).
For the CTS-V, you can shift into FIRST (1) when you are
going less than 40 mph (64 km/h).
SECOND (2):Press the clutch pedal as you let up on
the accelerator pedal and shift into SECOND (2).
Then, slowly let up on the clutch pedal as you press the
accelerator pedal.
CTS
CTS-V
2-30
Page 125 of 442

Reprogramming a Single Universal
Home Remote Button
To program a device to Universal Home Remote using
a Universal Home Remote button previously trained,
follow these steps:
1. Press and hold the desired Universal Home
Remote button. Do not release the button.
2. The indicator light will begin to �ash after
20 seconds. While still holding the Universal Home
Remote button, proceed with Step 2 under
“Programming Universal Home Remote” shown
earlier in this section.
For additional information on Universal Home Remote,
seeCustomer Assistance Offices on page 7-5.
Storage Areas
Glove Box
To open the glove box, lift up on the lever. Use your
door key to lock or unlock it.
Cupholder(s)
There are two cupholders for the front seat passengers.
They are located in the center console.
There are two cupholders located in the rear seat
center armrest. Pull the armrest down to access the
cupholders.
Center Console Storage Area
(CTS Only)
Your vehicle may have a center console with a storage
tray, a storage compartment, a dual cupholder with
a removable rubber liner and an armrest. To access the
storage area, pull up on the latch located at the front
of the armrest.
Map Pocket
The map/storage pockets are located on each door as
well as on the back of the front seatbacks.
2-49
Page 151 of 442

Entry Lighting
The entry lighting system turns on the reading and dome
lamps and the backlighting to the exterior lamp control
when a door is opened or if the Remote Keyless Entry
(RKE) transmitter unlock button is pressed. If activated by
the (RKE), the lighting will remain active for about
25 seconds. The entry lighting system uses the light
sensor on the instrument panel; so it must be dark
outside in order for the lamps to turn on. The lamps turn
off about 25 seconds after the last door is closed. They
will dim to off if the ignition key is turned to ON, or
immediately turn off if the power locks are used.
Parade Dimming
This feature prohibits dimming of the instrument panel
displays and backlighting during daylight hours when
the key is in the ignition and the headlamps are on.
This feature operates with the light sensor and is fully
automatic. When the light sensor reads darkness outside
and the parking lamps are active, the instrument
panel displays can be adjusted by sliding the instrument
panel brightness lever toward the symbol to brighten
or away from the symbol to dim the lighting.
Reading Lamps
The reading lamps are located on the overhead console.
These lamps come on automatically when any door is
opened.
For manual operation, press the button next to each
lamp to turn it on or off.
If the reading lamps are left on, they automatically shut
off 10 minutes after the ignition has been turned off.
Accessory Power Outlet(s)
With accessory power outlets, you can plug in auxiliary
electrical equipment such as a cellular telephone or
CB radio.
The front accessory power outlet is located in the
ashtray on the instrument panel below the climate
control system. The outlet will have a cigarette lighter if
your vehicle has this option. Remove the cigarette
lighter to access the outlet.
The rear accessory power outlet is located on the back
of the center console.
Your vehicle may have a small cap that must be
removed to access the accessory power outlet. If it
does, when not using the outlet be sure to cover it with
the protective cap.
3-21
Page 382 of 442

Fuses Usage
ELEC PRNDL Electronic PRNDL (Export)
SPARE Not Used
SPARE Not Used
IGN SWIgnition Switch (Power to IGN-3
and CRANK)
VOLT CHECK DIM (Dash Integration Module)
ECM/TCMTCM (Transmission Control
Module), ECM (Engine Control
Module), IPC (Instrument Panel
Cluster), PASS-Key
®III+ Module
WPR MODWindshield Wiper Module
Assembly
ODD INJ/COILSOdd Ignition Coils, Fuel Injectors,
Odd Injection Coils
COMP CLUTCH Compressor Clutch
WPR SW Windshield Wiper/Washer Switch
FOG LAMP Fog Lamps
OUTLETCenter Console Accessory Power
Outlet
Fuses Usage
POST 02Driver’s and Passenger’s Side
Oxygen Sensors, LRPDB
(Pusher Cooling Fan Relay)
I/P OUTLETInstrument Panel Accessory
Power Outlet
CCP Climate Control
EVEN INJ/COILS Even Injection Coils
SPARE Not Used
SPARE Not Used
SPARE Not Used
Circuit
BreakersUsage
HDLP WASH
C/B-OPTHeadlamp Washer Motor
5-108
Page 430 of 442

Audio System(s) (cont.)
Radio with CD............................................3-85
Setting the Time..........................................3-85
Theft-Deterrent Feature...............................3-101
Understanding Radio Reception...................3-102
XM™ Satellite Radio Antenna System...........3-104
Automatic Transmission
Fluid..........................................................5-23
Operation...................................................2-27
B
Battery..........................................................5-41
Exterior Lighting Battery Saver......................3-20
Before Leaving on a Long Trip.........................4-24
Brake
Anti-Lock Brake System (ABS)........................ 4-7
Emergencies................................................ 4-9
Panic Assist................................................4-13
Parking......................................................2-33
System Warning Light..................................3-38
Brakes..........................................................5-38
Braking........................................................... 4-6
Braking in Emergencies..................................... 4-9
Break-In, New Vehicle.....................................2-22
Bulb Replacement...........................................5-52
Back-Up and License Plate Lamps.................5-54
Front Turn Signal and Fog Lamps..................5-53
Halogen Bulbs............................................5-52Bulb Replacement (cont.)
Headlamp Aiming........................................5-49
High Intensity Discharge (HID) Lighting...........5-52
Replacement Bulbs......................................5-55
Taillamps, Turn Signal, Stoplamps and
Sidemarker Lamps...................................5-53
Buying New Tires...........................................5-73
C
Calibration.....................................................2-39
California Fuel.................................................. 5-6
California Proposition 65 Warning....................... 5-3
Canadian Owners................................................ ii
Capacities and Speci�cations..........................5-115
Carbon Monoxide...................2-12, 2-37, 4-27, 4-39
Care of
Safety Belts................................................5-97
Your CD Player.........................................3-104
Your CDs .................................................3-103
Center Console Storage Area...........................2-49
Chains, Tire...................................................5-78
Charging System Light....................................3-37
Check
Engine Light...............................................3-41
Engine Oil Pressure Message.......................3-51
Checking Things Under the Hood......................5-10
Chemical Paint Spotting.................................5-101
2
Page 440 of 442

Steering Wheel, Tilt Wheel................................. 3-6
Storage Areas
Center Console Storage Area........................2-49
Convenience Net.........................................2-50
Cupholder(s)...............................................2-49
Glove Box..................................................2-49
Map Pocket................................................2-49
Roof Rack Provisions...................................2-50
Stuck in Sand, Mud, Ice, or Snow.....................4-31
Sun Visors.....................................................2-18
Sunroof.........................................................2-51
System Controls, DIC......................................3-53
T
Tachometer....................................................3-33
Taillamps
Turn Signal, Stoplamps and
Sidemarker Lamps...................................5-53
TCS Warning Light..........................................3-39
Theft-Deterrent, Radio....................................3-101
Theft-Deterrent System....................................2-18
Theft-Deterrent Systems...................................2-18
Immobilizer.................................................2-20
Immobilizer Operation...................................2-20
Tilt Wheel........................................................ 3-6
Tire
Pressure Light.............................................3-41
Pressure Warning Message...........................3-52Tires.............................................................5-57
Aluminum or Chrome-Plated Wheels,
Cleaning.................................................5-99
Buying New Tires........................................5-73
Chains.......................................................5-78
Changing a Flat Tire....................................5-84
Cleaning...................................................5-100
Compact Spare Tire.....................................5-94
Different Size..............................................5-75
If a Tire Goes Flat.......................................5-82
In�ation - Tire Pressure................................5-65
Inspection and Rotation................................5-71
Installing the Spare Tire................................5-87
Lifting Your Vehicle......................................5-79
Pressure Monitor System..............................5-68
Removing the Flat Tire.................................5-87
Removing the Spare Tire and Tools...............5-85
Run-Flat.....................................................5-64
Storing a Flat or Spare Tire and Tools............5-93
Tire Sidewall Labeling..................................5-58
Tire Terminology and De�nitions....................5-61
Uniform Tire Quality Grading.........................5-75
Wheel Alignment and Tire Balance.................5-77
Wheel Replacement.....................................5-77
When It Is Time for New Tires......................5-72
Towing
Recreational Vehicle.....................................4-37
Towing a Trailer..........................................4-39
Your Vehicle...............................................4-37
12