2006 BMW Z4 ROADSTER light
[x] Cancel search: lightPage 29 of 128
Reference
At a glance
Controls
Driving tips
Mobility
27
Closing
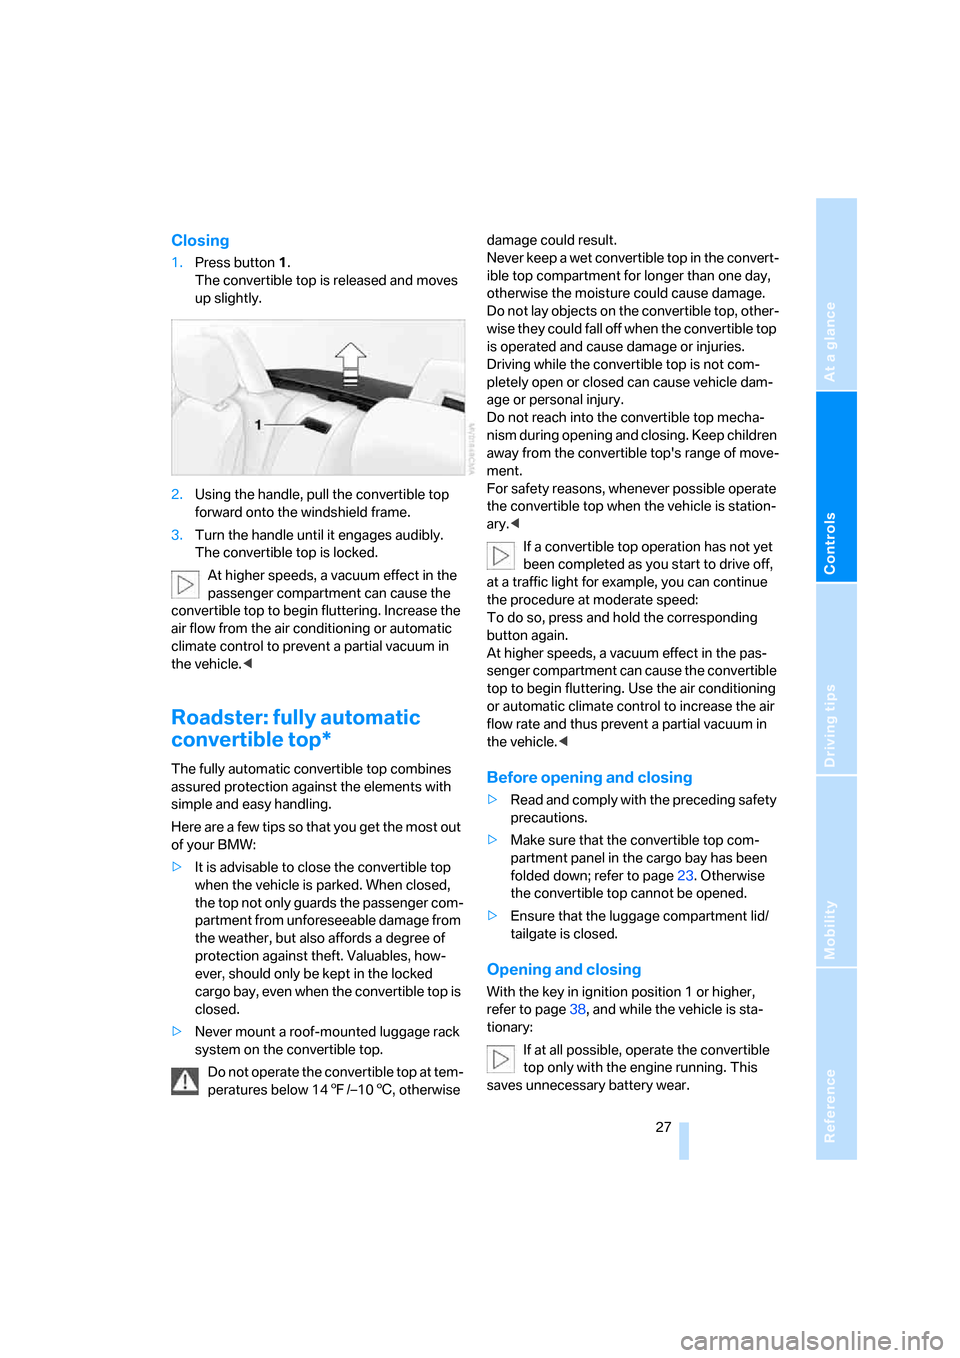
1.Press button1.
The convertible top is released and moves
up slightly.
2.Using the handle, pull the convertible top
forward onto the windshield frame.
3.Turn the handle until it engages audibly.
The convertible top is locked.
At higher speeds, a vacuum effect in the
passenger compartment can cause the
convertible top to begin fluttering. Increase the
air flow from the air conditioning or automatic
climate control to prevent a partial vacuum in
the vehicle.<
Roadster: fully automatic
convertible top*
The fully automatic convertible top combines
assured protection against the elements with
simple and easy handling.
Here are a few tips so that you get the most out
of your BMW:
>It is advisable to close the convertible top
when the vehicle is parked. When closed,
the top not only guards the passenger com-
partment from unforeseeable damage from
the weather, but also affords a degree of
protection against theft. Valuables, how-
ever, should only be kept in the locked
cargo bay, even when the convertible top is
closed.
>Never mount a roof-mounted luggage rack
system on the convertible top.
Do not operate the convertible top at tem-
peratures below 147/–106, otherwise damage could result.
Never keep a wet convertible top in the convert-
ible top compartment for longer than one day,
otherwise the moisture could cause damage.
Do not lay objects on the convertible top, other-
wise they could fall off when the convertible top
is operated and cause damage or injuries.
Driving while the convertible top is not com-
pletely open or closed can cause vehicle dam-
age or personal injury.
Do not reach into the convertible top mecha-
nism during opening and closing. Keep children
away from the convertible top's range of move-
ment.
For safety reasons, whenever possible operate
the convertible top when the vehicle is station-
ary.<
If a convertible top operation has not yet
been completed as you start to drive off,
at a traffic light for example, you can continue
the procedure at moderate speed:
To do so, press and hold the corresponding
button again.
At higher speeds, a vacuum effect in the pas-
senger compartment can cause the convertible
top to begin fluttering. Use the air conditioning
or automatic climate control to increase the air
flow rate and thus prevent a partial vacuum in
the vehicle.
precautions.
>Make sure that the convertible top com-
partment panel in the cargo bay has been
folded down; refer to page23. Otherwise
the convertible top cannot be opened.
>Ensure that the luggage compartment lid/
tailgate is closed.
Opening and closing
With the key in ignition position 1 or higher,
refer to page38, and while the vehicle is sta-
tionary:
If at all possible, operate the convertible
top only with the engine running. This
saves unnecessary battery wear.
Page 30 of 128
Opening and closing
28 Before closing the convertible top, remove any
objects from the windshield frame that other-
wise could prevent the convertible top from
closing properly.<
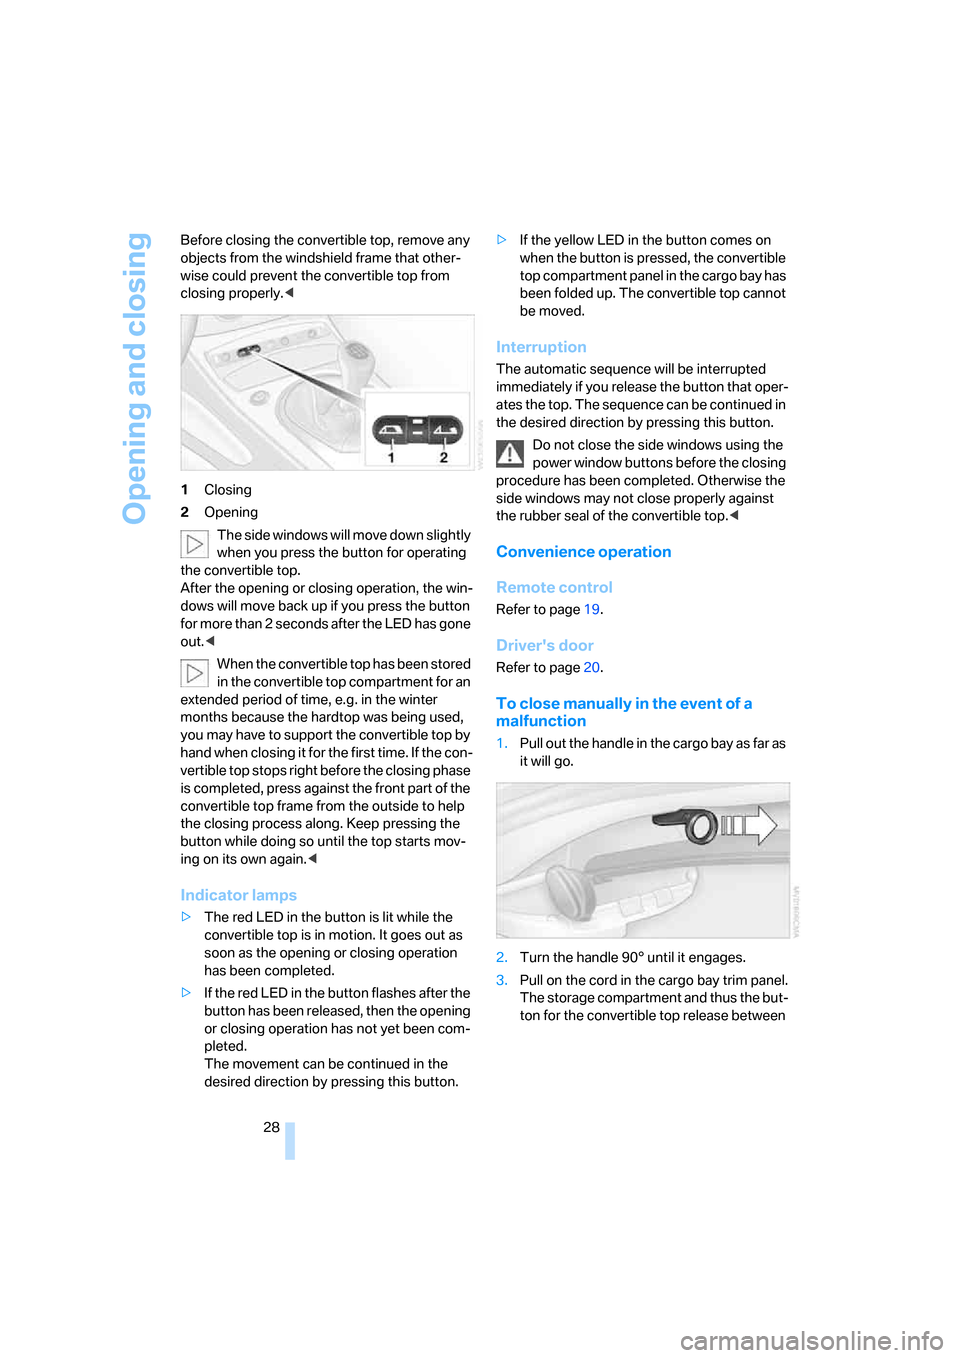
1Closing
2Opening
The side windows will move down slightly
when you press the button for operating
the convertible top.
After the opening or closing operation, the win-
dows will move back up if you press the button
for more than 2 seconds after the LED has gone
out.<
When the convertible top has been stored
in the convertible top compartment for an
extended period of time, e.g. in the winter
months because the hardtop was being used,
you may have to support the convertible top by
hand when closing it for the first time. If the con-
vertible top stops right before the closing phase
is completed, press against the front part of the
convertible top frame from the outside to help
the closing process along. Keep pressing the
button while doing so until the top starts mov-
ing on its own again.<
Indicator lamps
>The red LED in the button is lit while the
convertible top is in motion. It goes out as
soon as the opening or closing operation
has been completed.
>If the red LED in the button flashes after the
button has been released, then the opening
or closing operation has not yet been com-
pleted.
The movement can be continued in the
desired direction by pressing this button.>If the yellow LED in the button comes on
when the button is pressed, the convertible
top compartment panel in the cargo bay has
been folded up. The convertible top cannot
be moved.
Interruption
The automatic sequence will be interrupted
immediately if you release the button that oper-
ates the top. The sequence can be continued in
the desired direction by pressing this button.
Do not close the side windows using the
power window buttons before the closing
procedure has been completed. Otherwise the
side windows may not close properly against
the rubber seal of the convertible top.<
Convenience operation
Remote control
Refer to page19.
Driver's door
Refer to page20.
To close manually in the event of a
malfunction
1.Pull out the handle in the cargo bay as far as
it will go.
2.Turn the handle 90° until it engages.
3.Pull on the cord in the cargo bay trim panel.
The storage compartment and thus the but-
ton for the convertible top release between
Page 31 of 128
Reference
At a glance
Controls
Driving tips
Mobility
29
the seat backrests are unlocked, refer also
to page64.
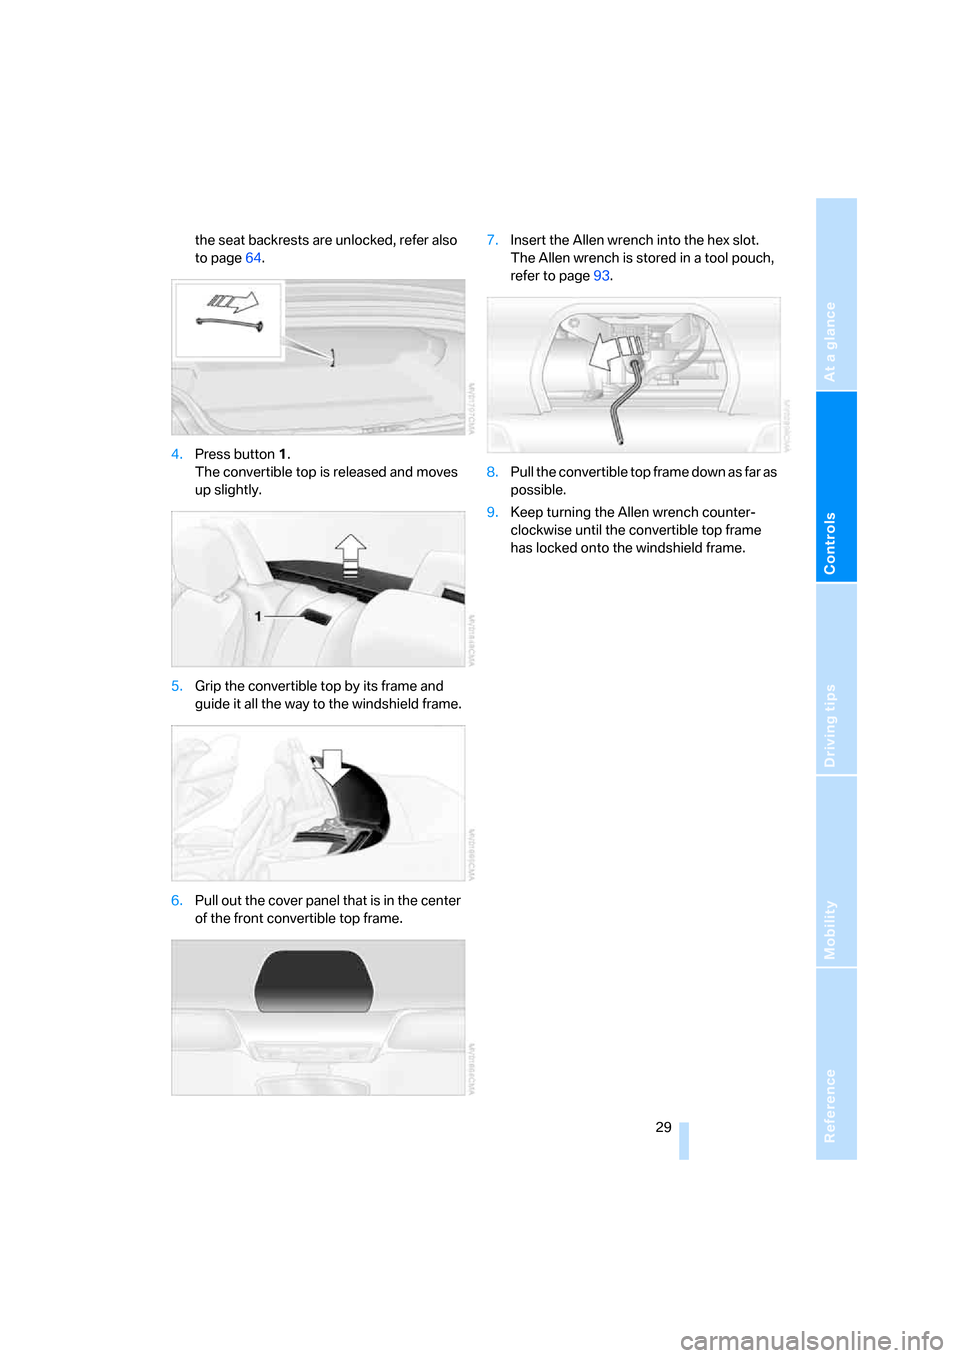
4.Press button1.
The convertible top is released and moves
up slightly.
5.Grip the convertible top by its frame and
guide it all the way to the windshield frame.
6.Pull out the cover panel that is in the center
of the front convertible top frame.7.Insert the Allen wrench into the hex slot.
The Allen wrench is stored in a tool pouch,
refer to page93.
8.Pull the convertible top frame down as far as
possible.
9.Keep turning the Allen wrench counter-
clockwise until the convertible top frame
has locked onto the windshield frame.
Page 34 of 128

Adjustments
32
Tilting upward
Pull lever1 repeatedly until the desired tilt has
been reached.
Tilting downward
Press lever2 repeatedly until the desired tilt has
been reached.
Thigh support
Pull lever3 and move the thigh support forward
or back.
Head restraints
A correctly adjusted head restraint reduces the
risk of neck injury in the event of an accident.
Adjust the head restraint in such a way
that its center is at approx. ear level. Oth-
erwise, there is an increased risk of injury in the
event of an accident.<
Adjusting the height
>To move up: pull up.
>To move down: press button1 and push
the head restraint downward.
M Sports seat*
The head restraints are integrated in the back-
rests and cannot be adjusted in height.
Removal
1.Pull up all the way.
2.Press button1 and pull out the head
restraint completely.
M Sports seat*
The head restraints are integrated in the back-
rests and cannot be removed.
Seat memory*
You can store and recall three different driver's
seat positions.
Storing
Ignition key in position 1 or higher
1.Adjust seat to desired position.
2.Press the M
EMORY button.
The LED in the button lights up.
3.Press memory button 1, 2 or 3.
The LED goes out.
Manual call-up
Do not select a memory position while the
vehicle is moving. If you do, there is a risk
of accident from an unexpected movement of
the seat.<
Page 35 of 128
Reference
At a glance
Controls
Driving tips
Mobility
33
Convenience function
1.Unlock and open the driver's door or turn
the key to position 1, refer to page38.
2.Press memory button 1, 2 or 3 briefly.
Movement stops immediately when one of the
seat adjustment or memory buttons is operated
during the adjustment process.
You can have this feature programmed so
that after you use the remote control from
your personalized key to unlock your door, your
seat will move into your own preferred posi-
tion.<
Safety function
1.Close the driver's door and turn the key to
position 0 or 2.
2.Press the desired memory button 1, 2 or 3
until the adjustment process is completed.
If you press the M
EMORY button accidentally:
Press the button again; the LED goes out.
Before activating the programmed
adjustment feature, ensure that the space
behind the driver's seat is empty and unob-
structed. If you fail to do so, objects behind the
seat could be damaged, should the seat move
backward.<
Seat heating*
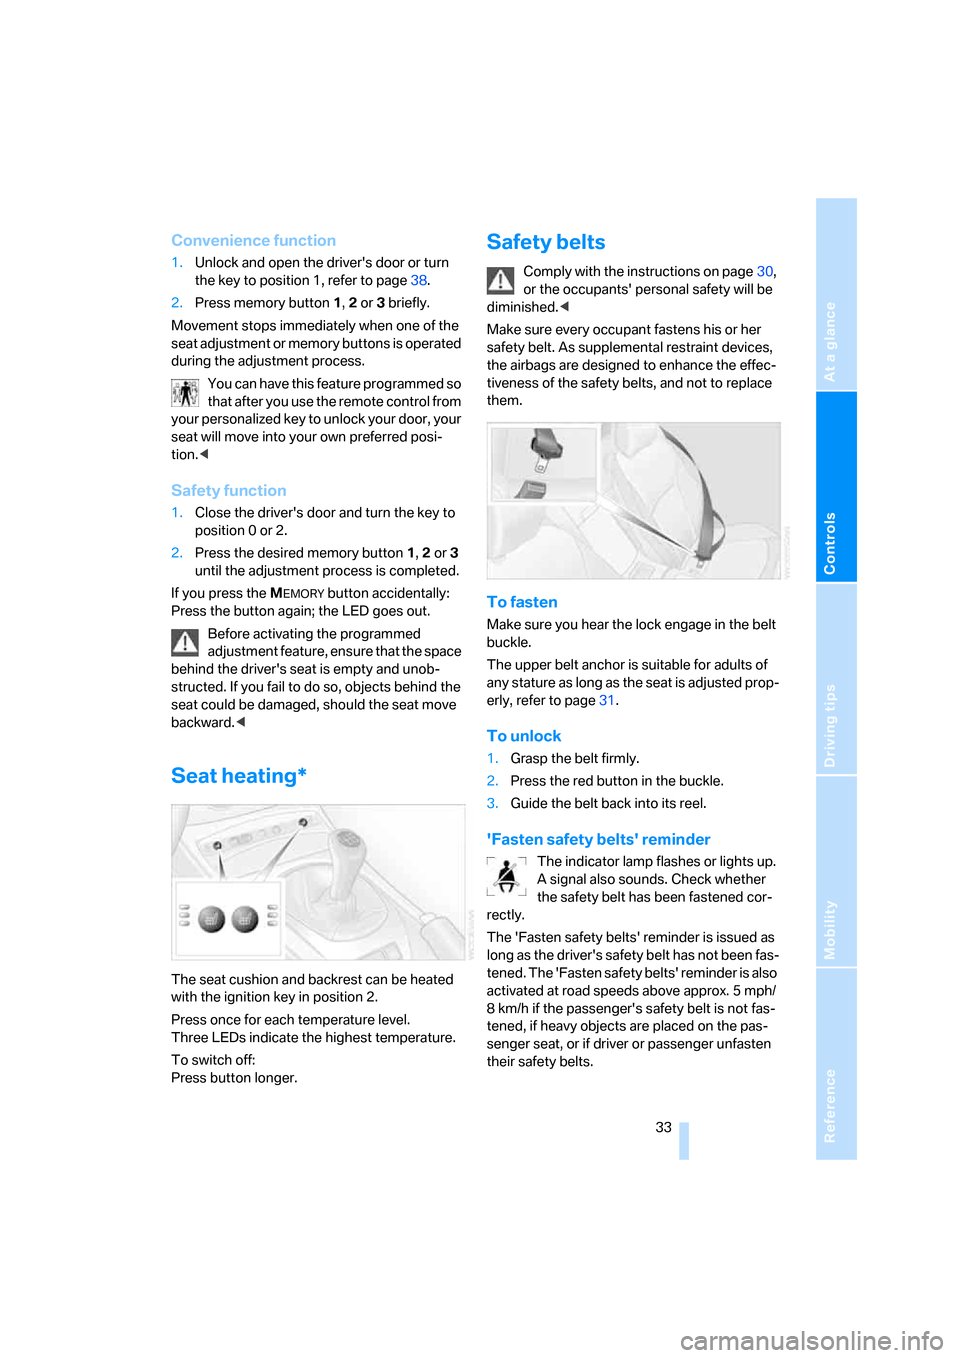
The seat cushion and backrest can be heated
with the ignition key in position 2.
Press once for each temperature level.
Three LEDs indicate the highest temperature.
To switch off:
Press button longer.
Safety belts
Comply with the instructions on page30,
or the occupants' personal safety will be
diminished.<
Make sure every occupant fastens his or her
safety belt. As supplemental restraint devices,
the airbags are designed to enhance the effec-
tiveness of the safety belts, and not to replace
them.
To fasten
Make sure you hear the lock engage in the belt
buckle.
The upper belt anchor is suitable for adults of
any stature as long as the seat is adjusted prop-
erly, refer to page31.
To unlock
1.Grasp the belt firmly.
2.Press the red button in the buckle.
3.Guide the belt back into its reel.
'Fasten safety belts' reminder
The indicator lamp flashes or lights up.
A signal also sounds. Check whether
the safety belt has been fastened cor-
rectly.
The 'Fasten safety belts' reminder is issued as
long as the driver's safety belt has not been fas-
tened. The 'Fasten safety belts' reminder is also
activated at road speeds above approx. 5 mph/
8 km/h if the passenger's safety belt is not fas-
tened, if heavy objects are placed on the pas-
senger seat, or if driver or passenger unfasten
their safety belts.
Page 40 of 128
Driving
38
Driving
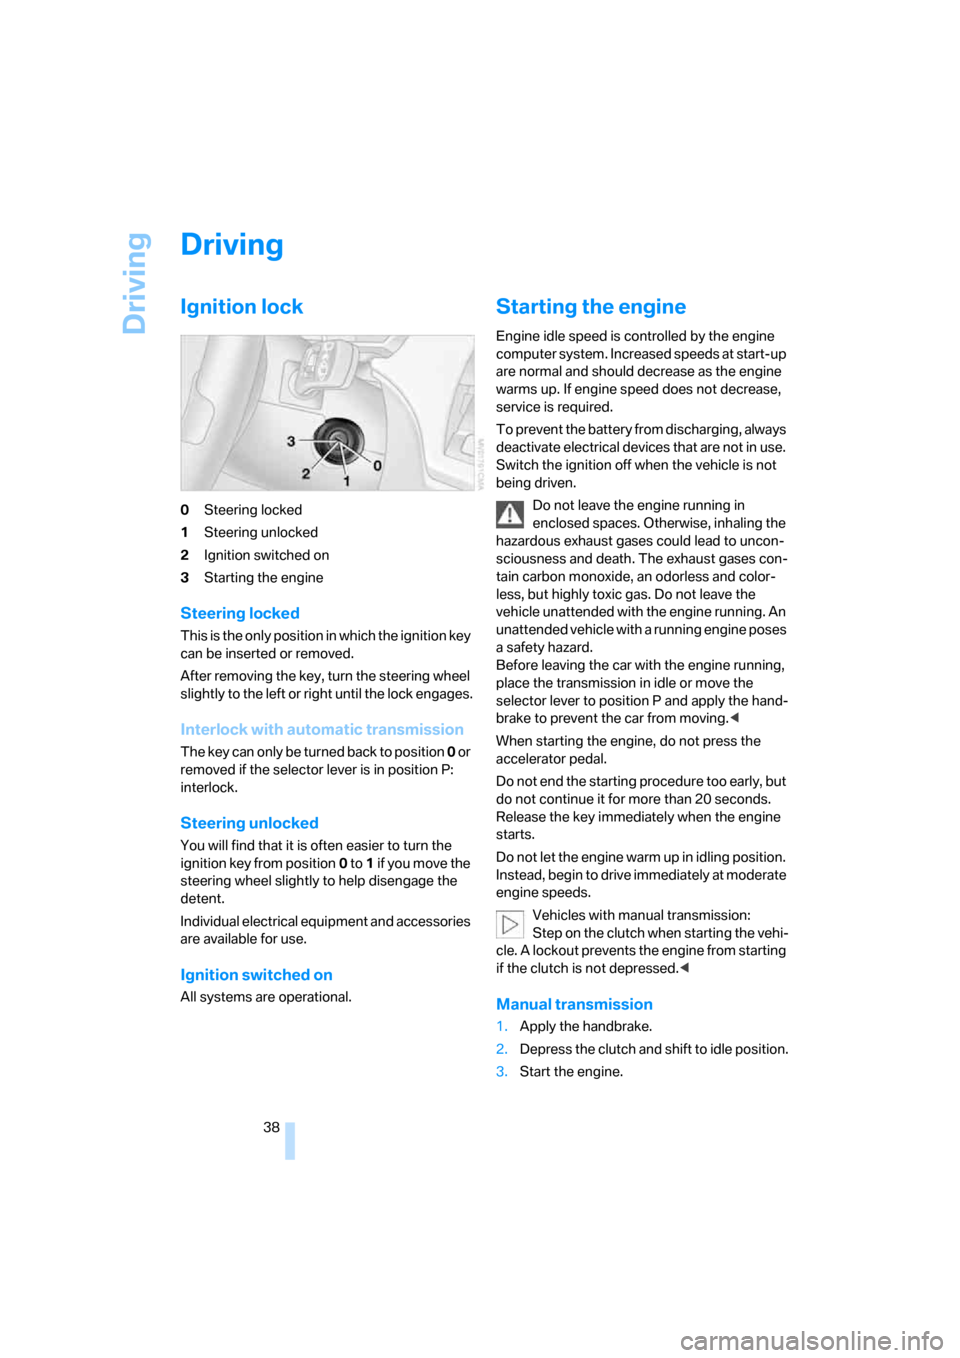
Ignition lock
0Steering locked
1Steering unlocked
2Ignition switched on
3Starting the engine
Steering locked
This is the only position in which the ignition key
can be inserted or removed.
After removing the key, turn the steering wheel
slightly to the left or right until the lock engages.
Interlock with automatic transmission
The key can only be turned back to position 0 or
removed if the selector lever is in position P:
interlock.
Steering unlocked
You will find that it is often easier to turn the
ignition key from position0 to 1 if yo u m ove the
steering wheel slightly to help disengage the
detent.
Individual electrical equipment and accessories
are available for use.
Ignition switched on
All systems are operational.
Starting the engine
Engine idle speed is controlled by the engine
computer system. Increased speeds at start-up
are normal and should decrease as the engine
warms up. If engine speed does not decrease,
service is required.
To prevent the battery from discharging, always
deactivate electrical devices that are not in use.
Switch the ignition off when the vehicle is not
being driven.
Do not leave the engine running in
enclosed spaces. Otherwise, inhaling the
hazardous exhaust gases could lead to uncon-
sciousness and death. The exhaust gases con-
tain carbon monoxide, an odorless and color-
less, but highly toxic gas. Do not leave the
vehicle unattended with the engine running. An
unattended vehicle with a running engine poses
a safety hazard.
Before leaving the car with the engine running,
place the transmission in idle or move the
selector lever to position P and apply the hand-
brake to prevent the car from moving.<
When starting the engine, do not press the
accelerator pedal.
Do not end the starting procedure too early, but
do not continue it for more than 20 seconds.
Release the key immediately when the engine
starts.
Do not let the engine warm up in idling position.
Instead, begin to drive immediately at moderate
engine speeds.
Vehicles with manual transmission:
Step on the clutch when starting the vehi-
cle. A lockout prevents the engine from starting
if the clutch is not depressed.<
Manual transmission
1.Apply the handbrake.
2.Depress the clutch and shift to idle position.
3.Start the engine.
Page 41 of 128
Reference
At a glance
Controls
Driving tips
Mobility
39
Automatic transmission
1.Depress the brake.
2.Start the engine.
Special starting conditions
In the following situations, press the accelerator
pedal halfway down when starting the engine:
>If the engine does not start on the first
attempt, for instance when it is extremely
hot or cold.
>If the engine is started at very low tempera-
tures, below approx. +57/–156, at high
altitudes above approx. 3,300 ft/1,000 m.
Avoid frequent starting attempts in quick
succession or repeated starting attempts
during which the engine does not start. Other-
wise, the fuel is not burned or inadequately
burned; there is a danger of overheating and
damaging the catalytic converter.<
Switching off the engine
Do not remove the key while the vehicle is
still moving. Otherwise, the steering lock
would engage when the steering wheel is
turned.
When you leave the vehicle, always remove the
key and engage the steering lock.
Apply the parking brake when parking on steep
gradients, otherwise the vehicle could start to
roll.<
You can have an acoustic signal set as a
reminder that the key is still in the ignition
switch after the driver's door has been
opened.<
Manual transmission
1.Turn the key to position 1 or 0.
2.Engage first gear or reverse gear.
3.Apply the handbrake.
Automatic transmission
1.With the car at a standstill, move the selec-
tor lever to position P.
2.Turn the key to position 1 or 0.
Parking brake
The parking brake is designed primarily to pre-
vent the vehicle from rolling when parked. It
operates against the rear wheels.
Indicator lamp
The indicator lamp is lit, and when you
drive off a signal sounds in addition.
The handbrake is still applied.
Indicator lamp for Canadian models.
Applying
The lever locks in position automatically.
Releasing
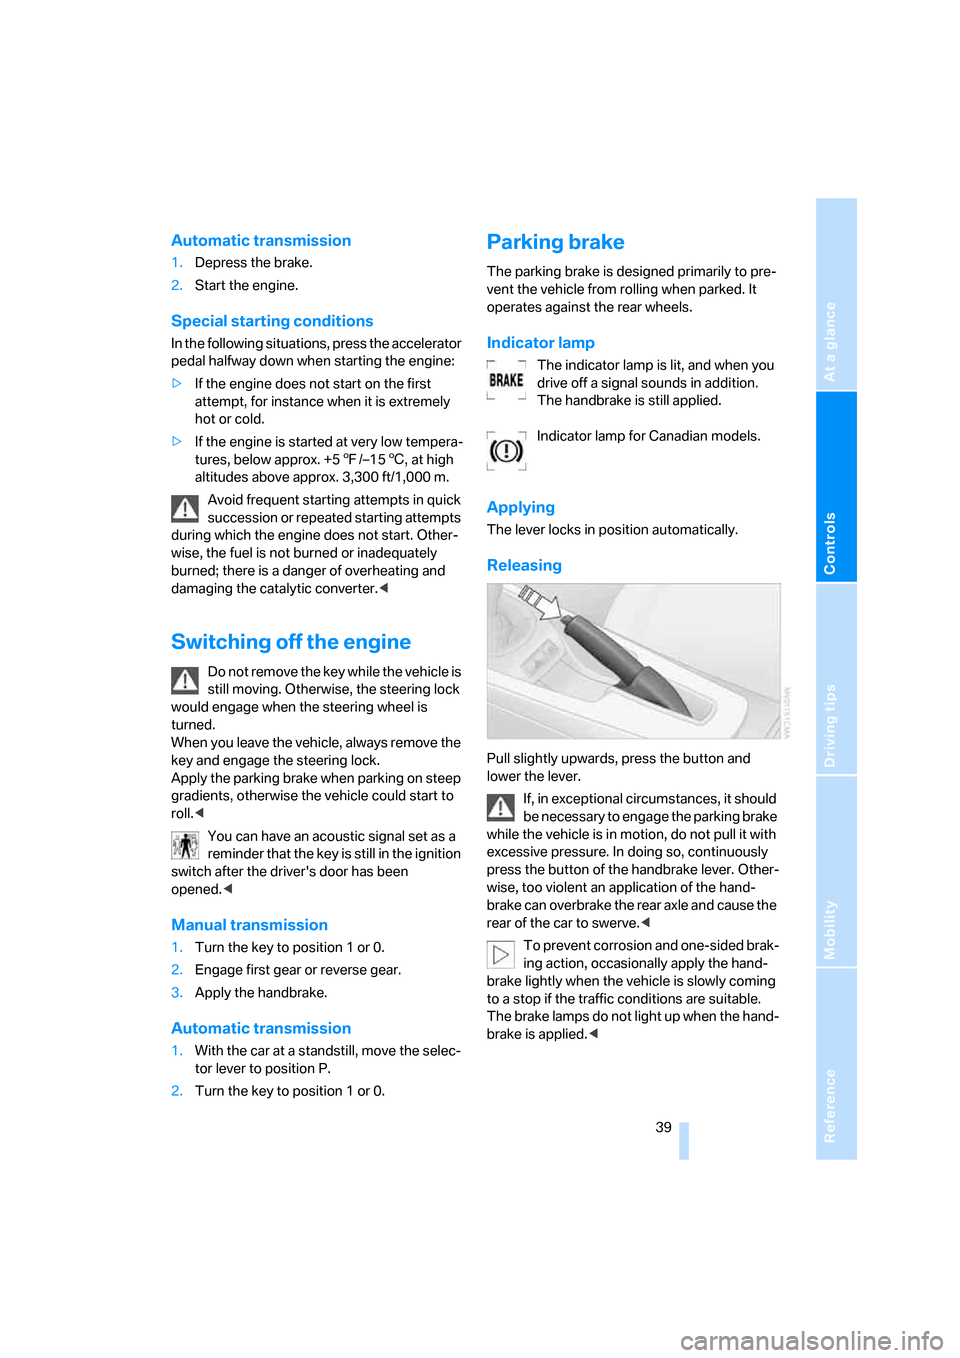
Pull slightly upwards, press the button and
lower the lever.
If, in exceptional circumstances, it should
be necessary to engage the parking brake
while the vehicle is in motion, do not pull it with
excessive pressure. In doing so, continuously
press the button of the handbrake lever. Other-
wise, too violent an application of the hand-
brake can overbrake the rear axle and cause the
rear of the car to swerve.<
To prevent corrosion and one-sided brak-
ing action, occasionally apply the hand-
brake lightly when the vehicle is slowly coming
to a stop if the traffic conditions are suitable.
The brake lamps do not light up when the hand-
brake is applied.<
Page 42 of 128

Driving
40
Manual transmission
When shifting into 5th or 6th gear, press
the gearshift lever to the right. Otherwise,
the engine could be damaged by accidentally
engaging 3rd or 4th gear.<
Reverse
Select only when the vehicle is stationary.
When the gearshift lever is pressed to the left, a
slight resistance has to be overcome.
Automatic transmission with
Steptronic*
In addition to operating the Steptronic as a fully
automatic transmission, you can also shift
gears manually with it, refer to page41.
Vehicle parking
To prevent the vehicle from rolling,
always select position P before leaving
the vehicle with the engine running.<
Removing the key
To turn the key in the ignition lock back to posi-
tion 0 or to remove it, first engage selector lever
position P and switch off the engine: interlock.
Selector lever positions
P R N D M/S + –
Displays in the instrument cluster
P R N D SD M1 to M6
The selector lever position is displayed; in the
manual mode, the gear currently engaged is
shown.
Range selection
>With the ignition switched on or the engine
running, the selector lever can be moved
out of position P: interlock.
>Before moving the lever away from P or N
with the vehicle stationary, first depress the
brake; otherwise the selector lever will
refuse to move: shiftlock.
To prevent the vehicle from creeping
after you select a driving position,
depress the brake until you are ready to
start.<
A lock prevents you from inadvertently engag-
ing selector lever positions R and P. To cancel
the lock, press the button on the front of the
selector lever, see arrow.
P Park
Select only when the vehicle is stationary. The
transmission locks to prevent the drive wheels
from turning.