2006 BMW Z4 3.0SI ROADSTER fuel
[x] Cancel search: fuelPage 5 of 128

Reference
At a glance
Controls
Driving tips
Mobility
Contents
The fastest way to find information on special
topics is by using the index starting on
page112.
Using this Owner's Manual
4Notes
7Reporting safety defects
At a glance
10Cockpit
Controls
18Opening and closing
30Adjustments
35Transporting children safely
38Driving
46Everything under control
49Technology for driving comfort and
safety
55Lamps
58Climate
64Practical interior accessories
Driving tips
70Special operating instructions
Mobility
78Refueling
80Wheels and tires
86Under the hood
91Maintenance
93Replacing components
98Giving and receiving assistance
Reference
106Technical data
112Everything from A to Z
Page 14 of 128

Cockpit
12
Instrument cluster
1Speedometer
2Indicator lamps for turn signals
3Indicator and warning lamps12
4Tachometer46
with indicator and warning lamps12
5Engine coolant temperature gauge47
6Fuel gauge46
7Button for
>Displaying the clock47
>Service interval display47
>Checking the oil level88
8Position of automatic transmission
*40
9Button for
>Resetting trip odometer46
>Setting the clock47
10Display for
>Trip odometer/Odometer46
>Clock47
>Service interval47
>Computer
*48
>Checking the oil level88
Indicator and warning lamps
Technology that monitors itself
Indicator and warning lamps that are identified
by
+ are tested for proper functioning whenever
the key is turned. They each light up once for
different periods of time.
If a malfunction occurs in one of the monitored
systems, the corresponding lamp does not go
out after the engine has started, or it lights up
again while the vehicle is in motion. You can find
more information about each system on the
specified pages.
Turn signal indicators42
Battery charge current
+97
Headlamp flasher/High beams42, 56
Engine oil pressure/
Engine oil level
+87
Antilock Brake System ABS/Driving
stability control systems
+49
Page 21 of 128

Reference
At a glance
Controls
Driving tips
Mobility
19
>Activation/deactivation and duration of
pathway lighting, refer to page56
>Adjustment of sensitivity of automatic
headlamp control
*, refer to page55
>Setting unit of measure for displaying the
time and outside temperature in the instru-
ment cluster, refer to page48
Examples for Key Memory
>Automatic call-up* of the driver's seat posi-
tion after unlocking, refer to page33
>Locking of the vehicle after starting off, refer
to page21
Central locking system
The concept
The central locking system is ready for opera-
tion whenever the driver's door is closed.
The system simultaneously engages and
releases the locks on the following:
>Doors
>Luggage compartment lid/tailgate
>Fuel filler door
>Storage compartment between the back-
rests
>Roadster: opened manual convertible top
Operating from outside
>Via the remote control
>Via the door lock
The anti-theft system is operated at the same
time. It prevents the doors from being unlocked
with the lock buttons or release handles. The
remote control is also used to switch the interior
lamps on and off. In addition, the alarm system
*
is armed or disarmed.
For further details of the alarm system
*, refer to
page23.
Operating from inside
By means of the button for central locking, refer
to page21.In the event of a sufficiently severe accident, the
central locking system unlocks automatically. In
addition, the hazard warning flashers and inte-
rior lamps come on.
Opening and closing:
from outside
With the remote control
Persons or animals in the vehicle could
lock the doors from the inside. You should
therefore take the remote control with you so
that the car can be opened from the outside.<
Unlocking
1.Press the button once.
The driver's door and fuel filler door are
unlocked.
2.Press the button again.
The entire vehicle is unlocked.
Convenience opening
Hold the button down.
Coupe: the windows are opened.
Roadster: the windows and the fully automatic
convertible top
* are opened.
Locking
Press the button.
The hazard warning flashers light up once.
If you wish, you can have this special fea-
ture activated/deactivated.<
Switching on interior lamps
With the vehicle locked:
Press the button.
With this function, you can also search for your
vehicle when parked in an underground garage,
for instance.
Unlocking the luggage compartment
lid/tailgate
Press the button for approx. 1 second.
Page 22 of 128

Opening and closing
20 The luggage compartment lid/tailgate opens a
short distance, regardless of whether it was
locked or unlocked.
A previously locked luggage compart-
ment lid/tailgate is locked again after
closing.
Before and after each trip, check that the lug-
gage compartment lid/tailgate has not been
inadvertently unlocked.<
Panic mode*
You can also trigger the alarm system* if you
find yourself in a dangerous situation:
Press the button for at least 3 seconds.
To switch off the alarm: press any button.
Malfunctions
The remote control may malfunction due to
local radio waves. If this occurs, unlock and lock
the car at the door lock or luggage compart-
ment lid/tailgate lock with the key.
If the car can no longer be locked with a remote
control, the battery in the remote control is dis-
charged. Use this remote control key while driv-
ing for an extended period in order to recharge
the battery, refer to page18.
For US owners only
The transmitter and receiver units comply with
part 15 of the FCC/Federal Communications
Commission regulations. Operation is gov-
erned by the following:
FCC ID:
LX8EWS
LX8FZVS
LX8FZVE
Compliance statement:
This device complies with part 15 of the FCC
Rules. Operation is subject to the following two
conditions:
>This device may not cause harmful interfer-
ence, and
>this device must accept any interference
received, including interference that may
cause undesired operation.Any unauthorized modifications or
changes to these devices could void the
user’s authority to operate this equipment.<
At the door lock
1.Turn the key.
The driver's door and fuel filler door are
unlocked.
2.Turn the key again.
The entire vehicle is unlocked.
When the vehicle is locked, the hazard warning
flashers light up once.
If you wish, you can have these special
features activated/deactivated.<
Convenience operation
You can also operate the windows and the
Roadster's fully automatic convertible top
* via
the door lock.
Hold the key in the position for unlocking or
locking.
Watch the closing process to ensure that
no one is trapped. Releasing the key
stops the operation.<
Manual operation
If there is a malfunction, you can unlock or lock
the driver's door by turning the key in the lock all
the way to the left or right.
Page 23 of 128

Reference
At a glance
Controls
Driving tips
Mobility
21
Opening and closing:
from inside
This button serves to unlock or lock doors and
the luggage compartment lid/tailgate when the
doors are closed, but does not activate the anti-
theft system. The fuel filler door remains
unlocked.
If only the driver's door was unlocked from the
outside and you press the button, then, with the
driver's door still open, the luggage compart-
ment lid/tailgate and the fuel filler door will
unlock, too. If the driver's door is closed, it will
be locked.
If you prefer, the central locking system is
activated automatically as soon as you
begin to drive. You can have the corresponding
adjustment made for each key specifically.<
Unlocking and opening
>Either unlock the doors together using the
button for the central locking system and
then pull the door handle above the armrest
or
>pull the release handle for each door twice:
the initial pull unlocks the door, and the sec-
ond one opens it.
Locking
>Either use the central locking button to lock
both doors simultaneously, or
>press down the safety lock button of a door.
To prevent you from being locked out, the
open driver's door cannot be locked using
the lock button.
Persons or animals in the vehicle could
lock the doors from the inside. You should therefore take the key with you so that the car
can be opened from the outside.<
Coupe: tailgate
The tailgate swings upward and towards
the rear when it is opened. Make sure that
it has enough clearance.<
Opening from inside the vehicle
If the tailgate has not been locked separately,
you can open it with this button in the footwell
on the driver's side when the vehicle is station-
ary.
Opening from the outside
Press the top half of the BMW emblem or press
the button on the remote control for approx.
1 second:
The tailgate will open.
Page 41 of 128

Reference
At a glance
Controls
Driving tips
Mobility
39
Automatic transmission
1.Depress the brake.
2.Start the engine.
Special starting conditions
In the following situations, press the accelerator
pedal halfway down when starting the engine:
>If the engine does not start on the first
attempt, for instance when it is extremely
hot or cold.
>If the engine is started at very low tempera-
tures, below approx. +57/–156, at high
altitudes above approx. 3,300 ft/1,000 m.
Avoid frequent starting attempts in quick
succession or repeated starting attempts
during which the engine does not start. Other-
wise, the fuel is not burned or inadequately
burned; there is a danger of overheating and
damaging the catalytic converter.<
Switching off the engine
Do not remove the key while the vehicle is
still moving. Otherwise, the steering lock
would engage when the steering wheel is
turned.
When you leave the vehicle, always remove the
key and engage the steering lock.
Apply the parking brake when parking on steep
gradients, otherwise the vehicle could start to
roll.<
You can have an acoustic signal set as a
reminder that the key is still in the ignition
switch after the driver's door has been
opened.<
Manual transmission
1.Turn the key to position 1 or 0.
2.Engage first gear or reverse gear.
3.Apply the handbrake.
Automatic transmission
1.With the car at a standstill, move the selec-
tor lever to position P.
2.Turn the key to position 1 or 0.
Parking brake
The parking brake is designed primarily to pre-
vent the vehicle from rolling when parked. It
operates against the rear wheels.
Indicator lamp
The indicator lamp is lit, and when you
drive off a signal sounds in addition.
The handbrake is still applied.
Indicator lamp for Canadian models.
Applying
The lever locks in position automatically.
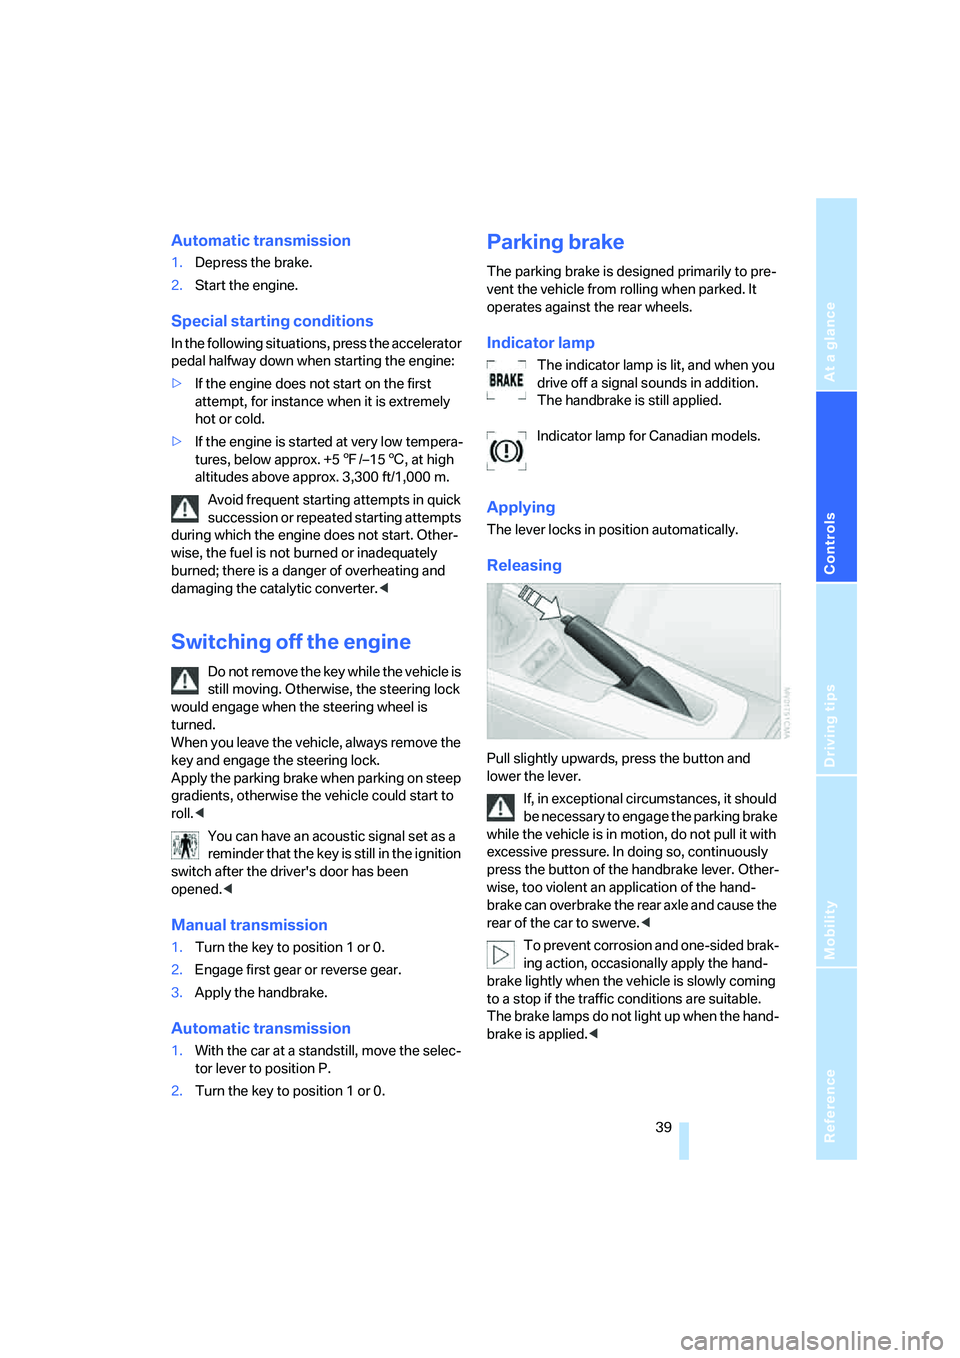
Releasing
Pull slightly upwards, press the button and
lower the lever.
If, in exceptional circumstances, it should
be necessary to engage the parking brake
while the vehicle is in motion, do not pull it with
excessive pressure. In doing so, continuously
press the button of the handbrake lever. Other-
wise, too violent an application of the hand-
brake can overbrake the rear axle and cause the
rear of the car to swerve.<
To prevent corrosion and one-sided brak-
ing action, occasionally apply the hand-
brake lightly when the vehicle is slowly coming
to a stop if the traffic conditions are suitable.
The brake lamps do not light up when the hand-
brake is applied.<
Page 43 of 128

Reference
At a glance
Controls
Driving tips
Mobility
41
R Reverse
Select only when the vehicle is stationary.
N Neutral, idle
You can select this in a car wash, for example.
The vehicle can roll.
D Drive, automatic position
This position is designed for driving under all
normal operating conditions. All forward gears
are selected automatically.
Under normal operating conditions, fuel con-
sumption is lowest when you are driving in posi-
tion D.
Kickdown
Kick-down enables you to achieve maximum
performance.
Press the accelerator pedal beyond the full-
throttle resistance point.
Manual operation and Sport program
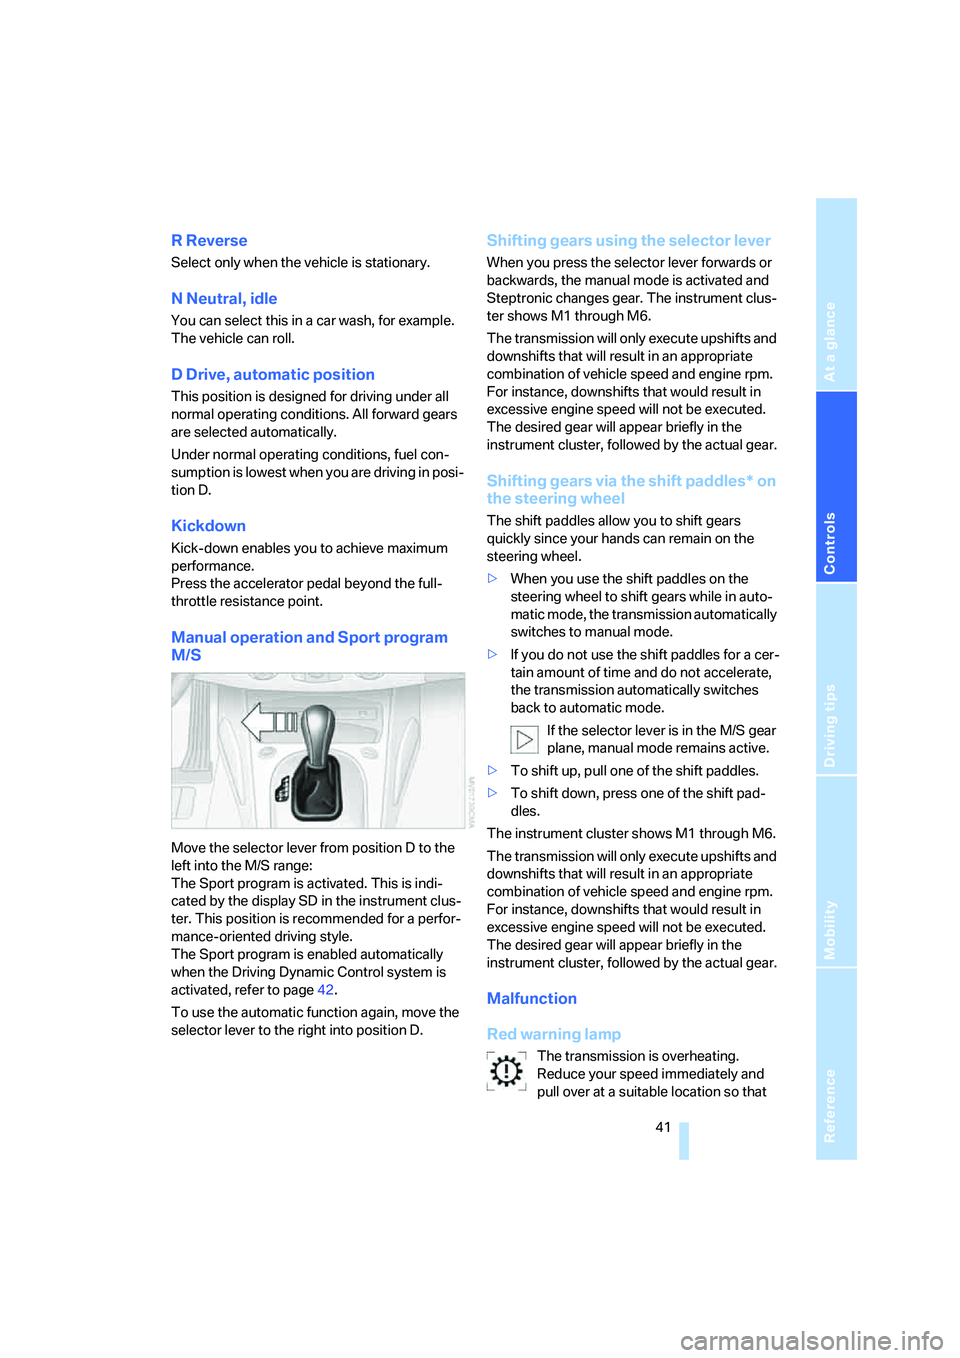
M/S
Move the selector lever from position D to the
left into the M/S range:
The Sport program is activated. This is indi-
cated by the display SD in the instrument clus-
ter. This position is recommended for a perfor-
mance-oriented driving style.
The Sport program is enabled automatically
when the Driving Dynamic Control system is
activated, refer to page42.
To use the automatic function again, move the
selector lever to the right into position D.
Shifting gears using the selector lever
When you press the selector lever forwards or
backwards, the manual mode is activated and
Steptronic changes gear. The instrument clus-
ter shows M1 through M6.
The transmission will only execute upshifts and
downshifts that will result in an appropriate
combination of vehicle speed and engine rpm.
For instance, downshifts that would result in
excessive engine speed will not be executed.
The desired gear will appear briefly in the
instrument cluster, followed by the actual gear.
Shifting gears via the shift paddles* on
the steering wheel
The shift paddles allow you to shift gears
quickly since your hands can remain on the
steering wheel.
>When you use the shift paddles on the
steering wheel to shift gears while in auto-
matic mode, the transmission automatically
switches to manual mode.
>If you do not use the shift paddles for a cer-
tain amount of time and do not accelerate,
the transmission automatically switches
back to automatic mode.
If the selector lever is in the M/S gear
plane, manual mode remains active.
>To shift up, pull one of the shift paddles.
>To shift down, press one of the shift pad-
dles.
The instrument cluster shows M1 through M6.
The transmission will only execute upshifts and
downshifts that will result in an appropriate
combination of vehicle speed and engine rpm.
For instance, downshifts that would result in
excessive engine speed will not be executed.
The desired gear will appear briefly in the
instrument cluster, followed by the actual gear.
Malfunction
Red warning lamp
The transmission is overheating.
Reduce your speed immediately and
pull over at a suitable location so that
Page 48 of 128

Everything under control
46
Everything under control
Odometer
1Odometer
2Trip odometer
3Resetting trip odometer
4Outside temperature or computer dis-
plays
*
Trip odometer
Resetting trip odometer:
While the ignition is switched on, press button 3
in the instrument cluster until the trip odometer
is set to zero.
Outside temperature display, clock*
Setting the clock, refer to page48.
Outside temperature warning
If the outside temperature drops to approx.
377/+36, the computer automatically
switches to the outside temperature display.
A signal also sounds and the display flashes for
a short time. There is an increased risk of black
ice.
After an outside temperature warning has
been issued, the computer switches back
to its previous screen. You can have this acti-
vated/deactivated.<
Black ice can also form at temperatures
above 377/+36. You should therefore
drive carefully on bridges and shaded roads, for
example, otherwise there is an increased risk of
an accident.<
When the vehicle is parked
If you still want to view the time and odometer
reading briefly after the ignition has been
switched off or the key has been removed:
Press button 3 in the instrument cluster.
Tachometer
Never allow the engine to operate with the nee-
dle in the red overspeed sector of the gauge.
To protect the engine, the fuel supply is inter-
rupted when speed reaches this sector.
Fuel gauge
Fuel tank capacity: approx. 14.5 US gallons/
55 liters. You can find information on refueling
on page78.
If the tilt of the vehicle varies for a longer period,
when you are driving in mountainous areas, for
example, the indicator may fluctuate slightly.