2006 BMW Z4 3.0SI ROADSTER warning
[x] Cancel search: warningPage 56 of 128
Technology for driving comfort and safety
54 >The indicator lamp does not come on as
long as a person of sufficient size and in a
correct sitting position is detected on the
seat. The front and side airbags for the pas-
senger are activated.
>The indicator lamp does not come on if the
seat is empty. However, the front and side
airbags for the passenger are not activated.
Operational readiness of the airbag
system
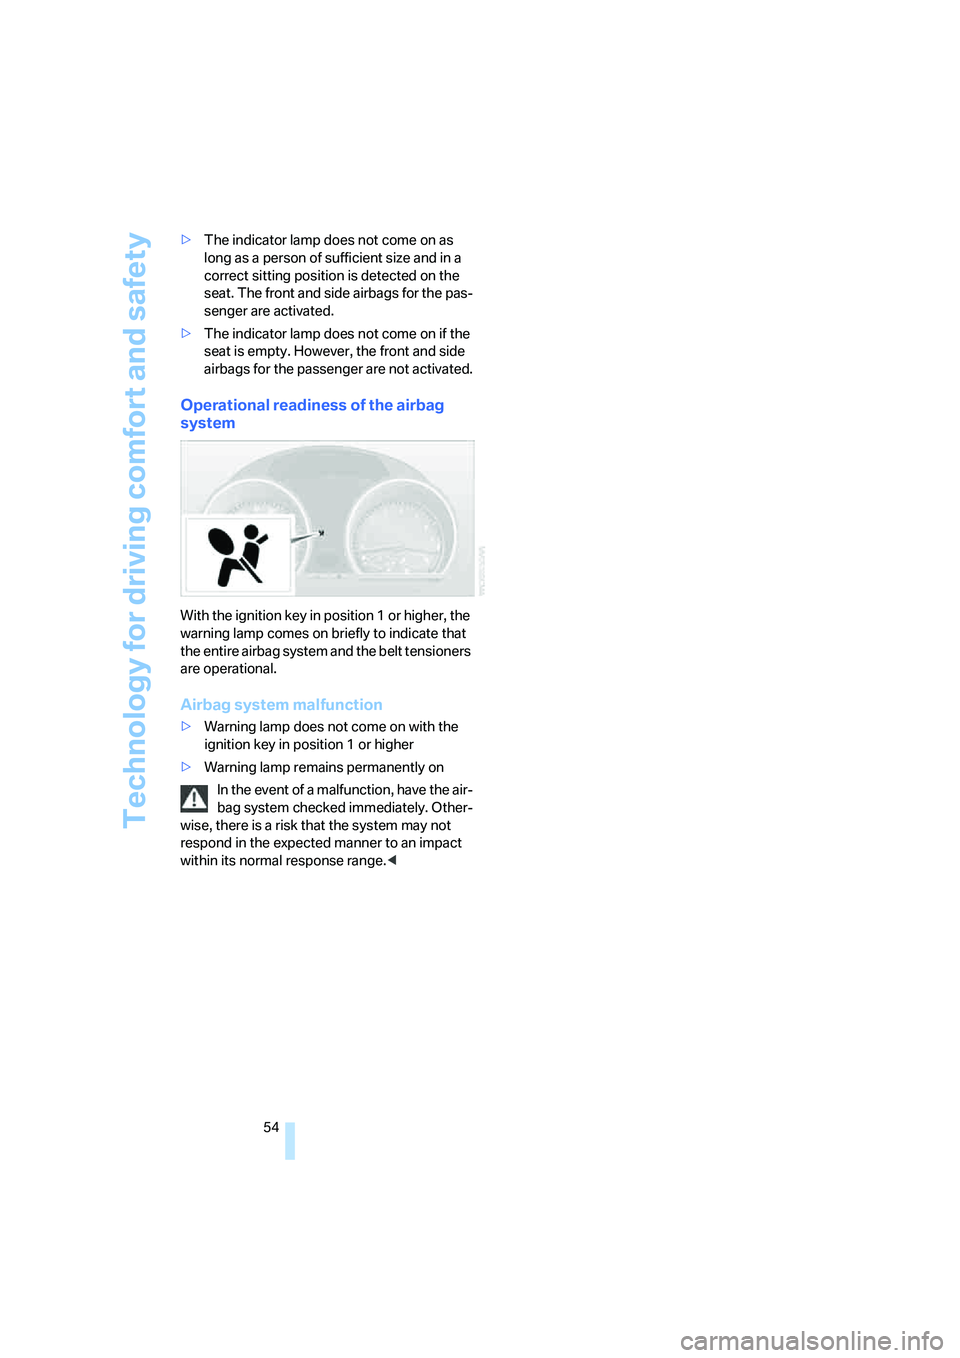
With the ignition key in position 1 or higher, the
warning lamp comes on briefly to indicate that
the entire airbag system and the belt tensioners
are operational.
Airbag system malfunction
>Warning lamp does not come on with the
ignition key in position 1 or higher
>Warning lamp remains permanently on
In the event of a malfunction, have the air-
bag system checked immediately. Other-
wise, there is a risk that the system may not
respond in the expected manner to an impact
within its normal response range.<
Page 58 of 128
Lamps
56 You can have daytime running light acti-
vated/deactivated on your vehicle.<
Pathway lighting
If you activate the headlamp flasher after park-
ing the car, with the lights switched off, the low
beams come on and remain on for a certain
time.
You can have this function activated/
deactivated as well as the duration of the
pathway lighting set.<
LIGHTS ON warning
Whenever you open the driver's door after hav-
ing turned the key to position 0, you will hear an
acoustic signal for a few seconds to remind you
that the lamps have not been switched off.
High beams/Roadside
parking lamps
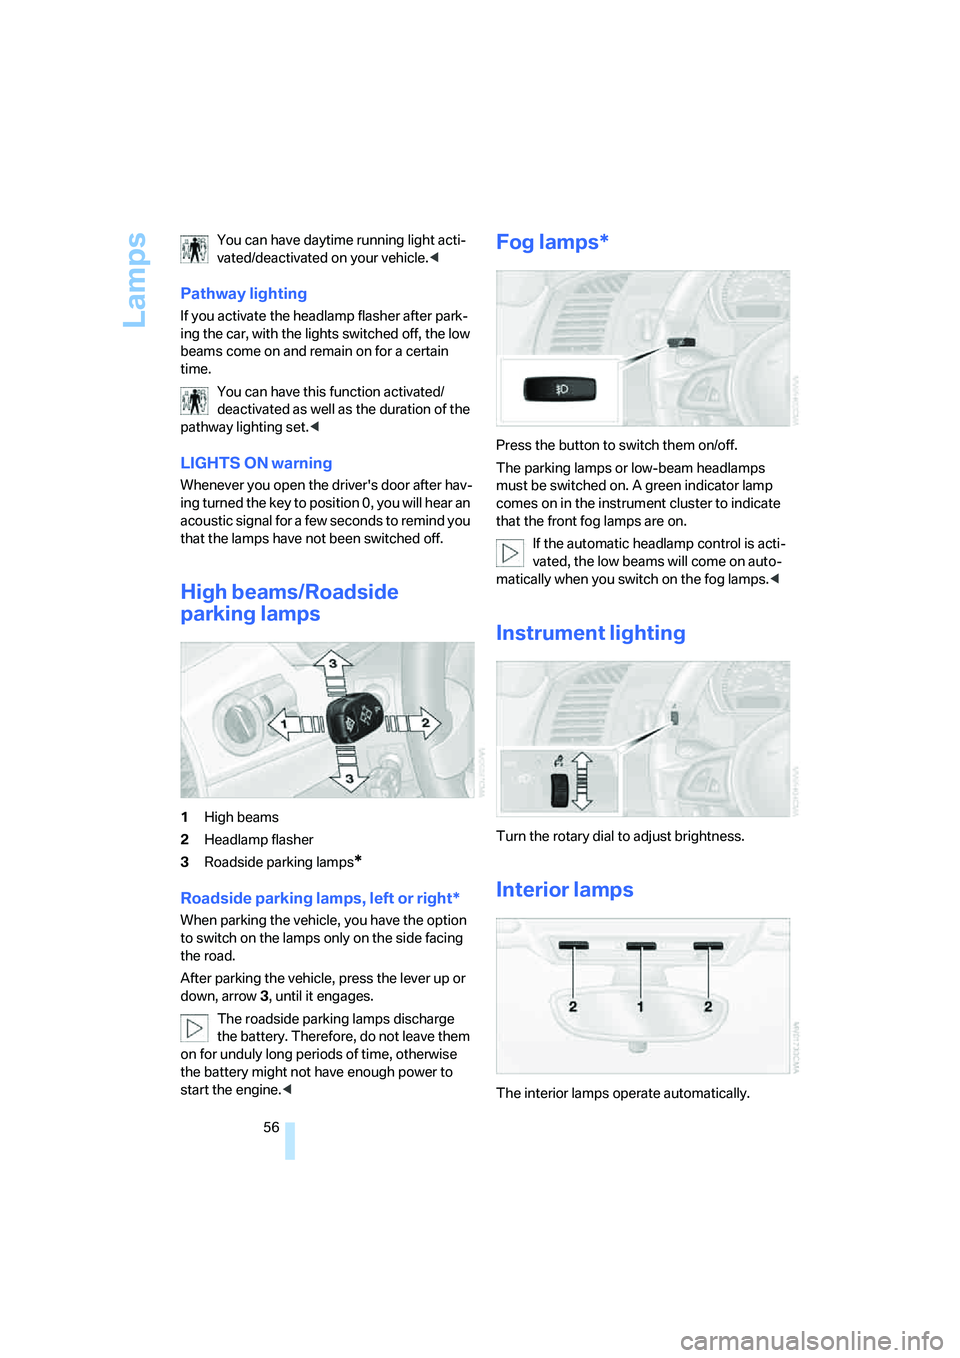
1High beams
2Headlamp flasher
3Roadside parking lamps
*
Roadside parking lamps, left or right*
When parking the vehicle, you have the option
to switch on the lamps only on the side facing
the road.
After parking the vehicle, press the lever up or
down, arrow 3, until it engages.
The roadside parking lamps discharge
the battery. Therefore, do not leave them
on for unduly long periods of time, otherwise
the battery might not have enough power to
start the engine.<
Fog lamps*
Press the button to switch them on/off.
The parking lamps or low-beam headlamps
must be switched on. A green indicator lamp
comes on in the instrument cluster to indicate
that the front fog lamps are on.
If the automatic headlamp control is acti-
vated, the low beams will come on auto-
matically when you switch on the fog lamps.<
Instrument lighting
Turn the rotary dial to adjust brightness.
Interior lamps
The interior lamps operate automatically.
Page 80 of 128
Refueling
78
Refueling
Always switch off the engine before refu-
eling. Otherwise the tank cannot be
refilled. The Service Engine Soon warning lamp
will come on.<
Take all precautionary measures and
observe all applicable regulations when
handling fuel. Do not carry any spare fuel con-
tainers in your vehicle. They can develop a leak
and cause an explosion or cause a fire in the
event of an accident.<
Gas cap
Opening
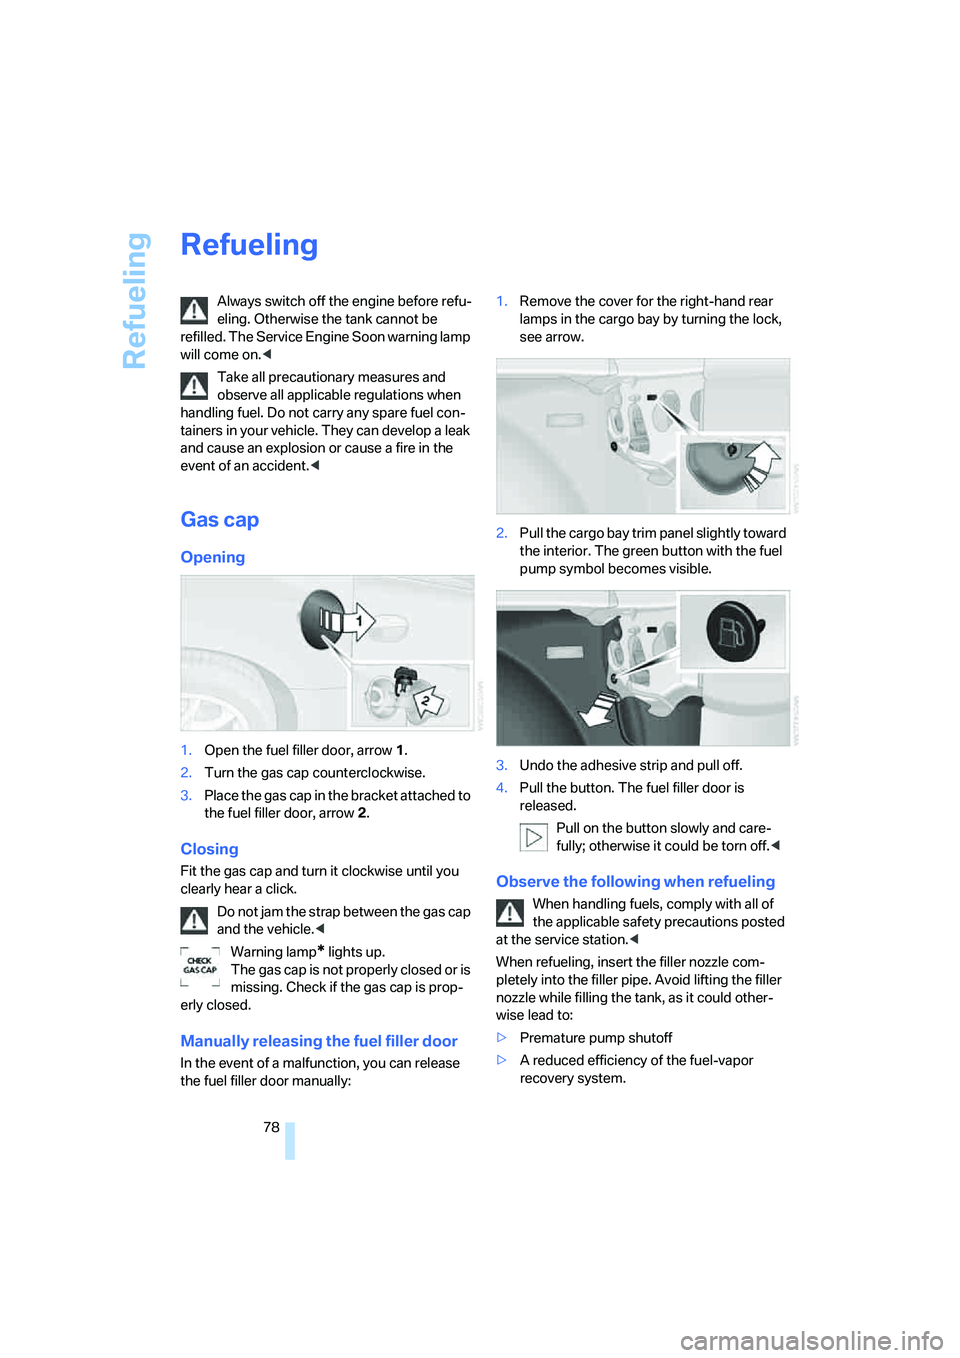
1.Open the fuel filler door, arrow 1.
2.Turn the gas cap counterclockwise.
3.Place the gas cap in the bracket attached to
the fuel filler door, arrow 2.
Closing
Fit the gas cap and turn it clockwise until you
clearly hear a click.
Do not jam the strap between the gas cap
and the vehicle.<
Warning lamp
* lights up.
The gas cap is not properly closed or is
missing. Check if the gas cap is prop-
erly closed.
Manually releasing the fuel filler door
In the event of a malfunction, you can release
the fuel filler door manually:1.Remove the cover for the right-hand rear
lamps in the cargo bay by turning the lock,
see arrow.
2.Pull the cargo bay trim panel slightly toward
the interior. The green button with the fuel
pump symbol becomes visible.
3.Undo the adhesive strip and pull off.
4.Pull the button. The fuel filler door is
released.
Pull on the button slowly and care-
fully; otherwise it could be torn off.<
Observe the following when refueling
When handling fuels, comply with all of
the applicable safety precautions posted
at the service station.<
When refueling, insert the filler nozzle com-
pletely into the filler pipe. Avoid lifting the filler
nozzle while filling the tank, as it could other-
wise lead to:
>Premature pump shutoff
>A reduced efficiency of the fuel-vapor
recovery system.
Page 86 of 128
Wheels and tires
84 the letters TWI, for Tread Wear Indicator, on the
tire's sidewalls identify tires that incorporate
these wear indicators. Once the tire tread has
worn down to the wear indicators, the tire has
worn to a depth of 1/16 in/1.6 mm.
Wheel/tire damage
Due to low-profile tires, please note that
wheels, tires and suspension parts are
more susceptible to road hazards and conse-
quential damages.<
Unusual vibrations encountered during normal
vehicle operation can indicate tire failure or
some other vehicle malfunction. This can, for
example, be caused by driving over curbs. The
same applies to any other abnormal road
behavior, such as pulling severely to the right or
left.
In these cases, reduce speed immedi-
ately and have wheels and tires thor-
oughly checked. To do so, drive carefully to the
nearest BMW Center or tire shop that works
according to BMW repair procedures with cor-
respondingly trained personnel. If necessary,
have the vehicle towed there.
Tire damage can be extremely dangerous for
vehicle occupants and other road users.<
Tire age
For various reasons, such as the development
of brittleness, BMW recommends tire replace-
ment after no more than 6 years, regardless of
the actual wear of the tires.
The date on which the tire was manufactured is
indicated by the code on the sidewall:
DOT … 5005 indicates that the tire was manu-
factured in week 50 of the year 2005.
Run-Flat Tires
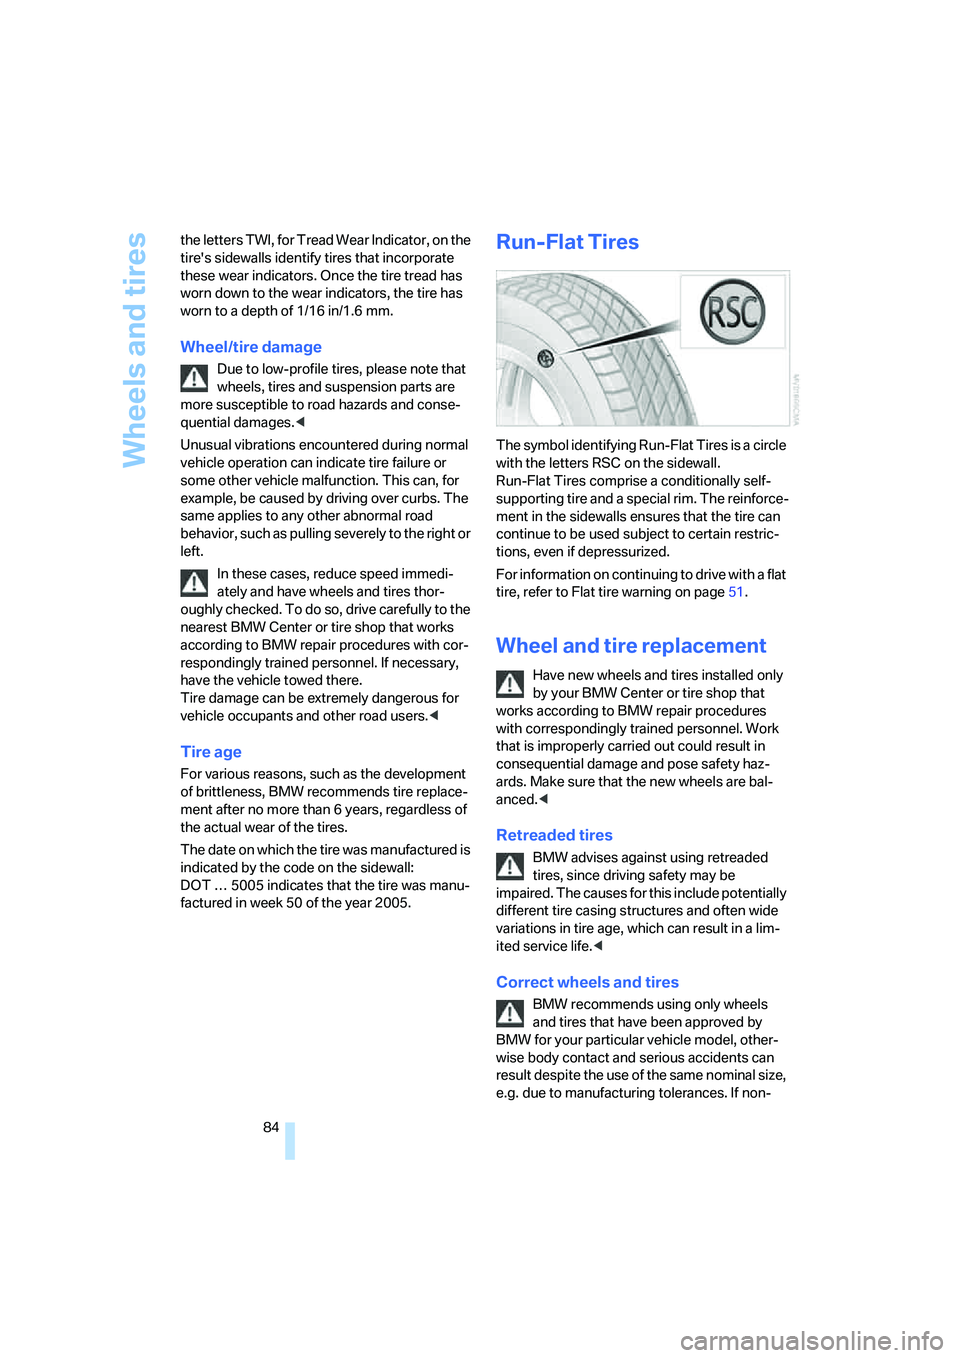
The symbol identifying Run-Flat Tires is a circle
with the letters RSC on the sidewall.
Run-Flat Tires comprise a conditionally self-
supporting tire and a special rim. The reinforce-
ment in the sidewalls ensures that the tire can
continue to be used subject to certain restric-
tions, even if depressurized.
For information on continuing to drive with a flat
tire, refer to Flat tire warning on page51.
Wheel and tire replacement
Have new wheels and tires installed only
by your BMW Center or tire shop that
works according to BMW repair procedures
with correspondingly trained personnel. Work
that is improperly carried out could result in
consequential damage and pose safety haz-
ards. Make sure that the new wheels are bal-
anced.<
Retreaded tires
BMW advises against using retreaded
tires, since driving safety may be
impaired. The causes for this include potentially
different tire casing structures and often wide
variations in tire age, which can result in a lim-
ited service life.<
Correct wheels and tires
BMW recommends using only wheels
and tires that have been approved by
BMW for your particular vehicle model, other-
wise body contact and serious accidents can
result despite the use of the same nominal size,
e.g. due to manufacturing tolerances. If non-
Page 89 of 128

Reference
At a glance
Controls
Driving tips
Mobility
87
Important parts in the engine compartment
1Washer fluid reservoir for headlamp clean-
ing system and window washer system,
refer to page44
2Filler neck for engine oil, refer to Adding
engine oil3Jump-starting connection, refer to page99
4Reservoir for brake fluid, refer to page90
5Body ground, negative terminal, refer to
page100
6Expansion tank for coolant, refer to page89
Engine oil
Oil consumption is directly influenced by your
driving style and vehicle operating conditions.
Warning lamp
Engine oil pressure
The warning lamp lights up in red:
The engine oil pressure is too low.
Stop the vehicle immediately and
switch off the engine. Check the engine oil level
and top up if necessary. If the oil level is correct,
please contact your nearest BMW Center or a
workshop that works according to BMW repair
procedures with correspondingly trained per-
sonnel.Do not continue driving, otherwise the
engine could sustain serious damage
from inadequate lubrication.<
Engine oil level
The warning lamp lights up in yellow
while you are driving. In addition, a sig-
nal sounds and "+1.0" appears in the
instrument cluster, refer to page88.
The oil level is at the absolute minimum; refill as
soon as possible. Do not drive more than
125 miles/200 km before refilling.
The warning lamp comes on in yellow
after the engine is switched off. A signal
also sounds.
Add engine oil at the earliest opportunity, e.g.
when you stop to refuel.
Page 90 of 128
Under the hood
88 The warning lamp lights up in yellow
within 30 seconds after the engine is
started: The oil level sensor is defec-
tive:
It is not possible to issue a current or accurate
measurement. Have the system checked as
soon as possible.
Checking the oil level
Your car is equipped with an electronic oil-level
monitor.
For a precise measurement and display of the
oil level, it is necessary that the engine be at
operating temperature, i.e. after uninterrupted
driving for at least approx. 6.5 miles/10 km. You
can have the oil level displayed while you are
driving, or while the vehicle is at a standstill on a
level surface and the engine is running.
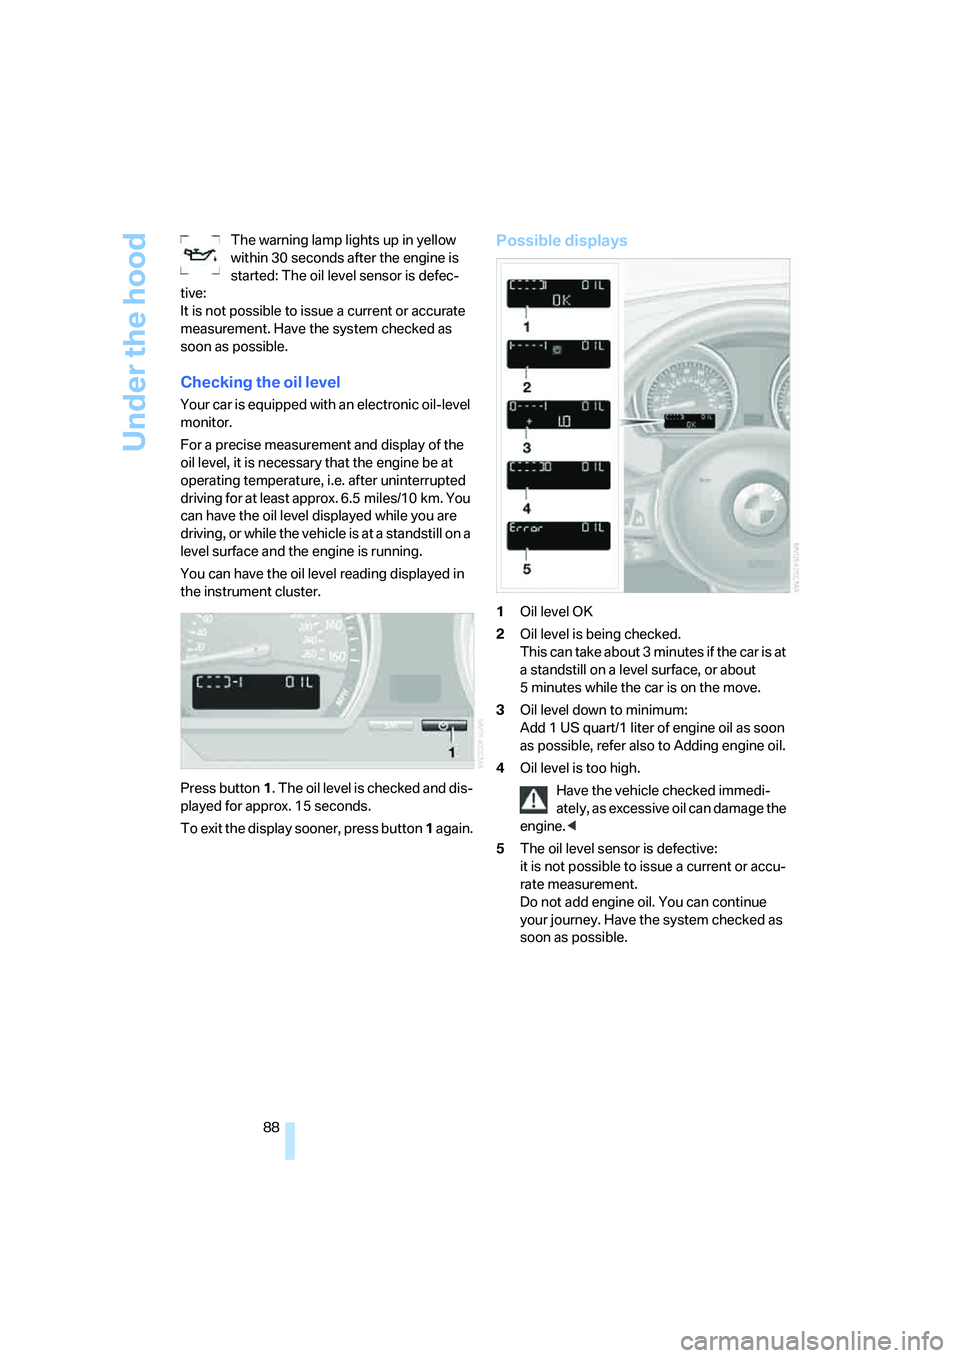
You can have the oil level reading displayed in
the instrument cluster.
Press button1. The oil level is checked and dis-
played for approx. 15 seconds.
To exit the display sooner, press button 1 again.
Possible displays
1Oil level OK
2Oil level is being checked.
This can take about 3 minutes if the car is at
a standstill on a level surface, or about
5 minutes while the car is on the move.
3Oil level down to minimum:
Add 1US quart/1liter of engine oil as soon
as possible, refer also to Adding engine oil.
4Oil level is too high.
Have the vehicle checked immedi-
ately, as excessive oil can damage the
engine.<
5The oil level sensor is defective:
it is not possible to issue a current or accu-
rate measurement.
Do not add engine oil. You can continue
your journey. Have the system checked as
soon as possible.
Page 91 of 128
Reference
At a glance
Controls
Driving tips
Mobility
89
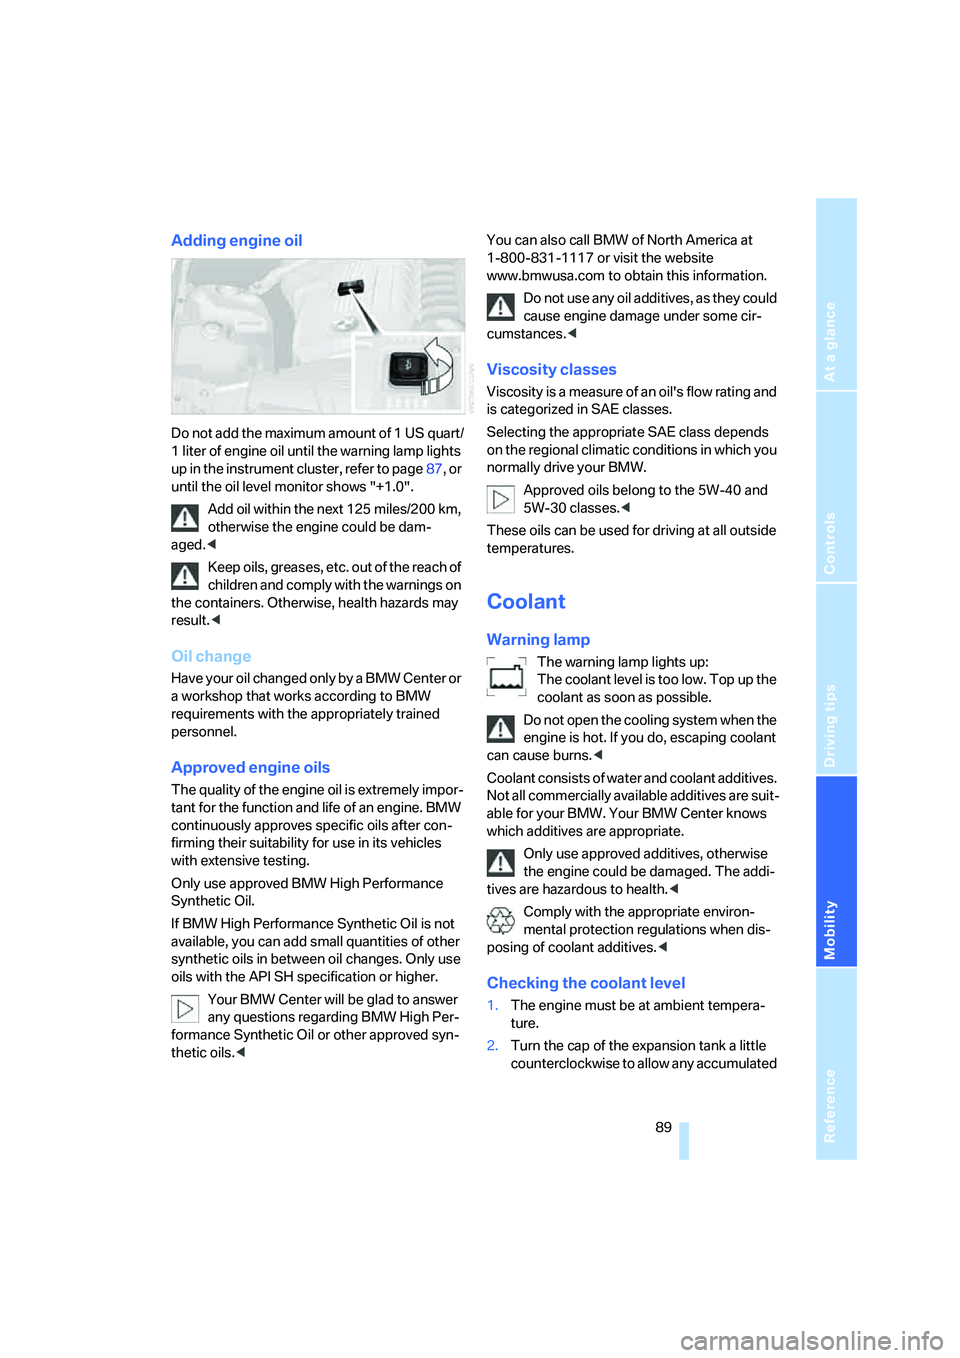
Adding engine oil
Do not add the maximum amount of 1 US quart/
1 liter of engine oil until the warning lamp lights
up in the instrument cluster, refer to page87, or
until the oil level monitor shows "+1.0".
Add oil within the next 125 miles/200 km,
otherwise the engine could be dam-
aged.<
Keep oils, greases, etc. out of the reach of
children and comply with the warnings on
the containers. Otherwise, health hazards may
result.<
Oil change
Have your oil changed only by a BMW Center or
a workshop that works according to BMW
requirements with the appropriately trained
personnel.
Approved engine oils
The quality of the engine oil is extremely impor-
tant for the function and life of an engine. BMW
continuously approves specific oils after con-
firming their suitability for use in its vehicles
with extensive testing.
Only use approved BMW High Performance
Synthetic Oil.
If BMW High Performance Synthetic Oil is not
available, you can add small quantities of other
synthetic oils in between oil changes. Only use
oils with the API SH specification or higher.
Your BMW Center will be glad to answer
any questions regarding BMW High Per-
formance Synthetic Oil or other approved syn-
thetic oils.
www.bmwusa.com to obtain this information.
Do not use any oil additives, as they could
cause engine damage under some cir-
cumstances.<
Viscosity classes
Viscosity is a measure of an oil's flow rating and
is categorized in SAE classes.
Selecting the appropriate SAE class depends
on the regional climatic conditions in which you
normally drive your BMW.
Approved oils belong to the 5W-40 and
5W-30 classes.<
These oils can be used for driving at all outside
temperatures.
Coolant
Warning lamp
The warning lamp lights up:
The coolant level is too low. Top up the
coolant as soon as possible.
Do not open the cooling system when the
engine is hot. If you do, escaping coolant
can cause burns.<
Coolant consists of water and coolant additives.
Not all commercially available additives are suit-
able for your BMW. Your BMW Center knows
which additives are appropriate.
Only use approved additives, otherwise
the engine could be damaged. The addi-
tives are hazardous to health.<
Comply with the appropriate environ-
mental protection regulations when dis-
posing of coolant additives.<
Checking the coolant level
1.The engine must be at ambient tempera-
ture.
2.Turn the cap of the expansion tank a little
counterclockwise to allow any accumulated
Page 92 of 128
Under the hood
90 pressure to escape, then continue turning
to open.
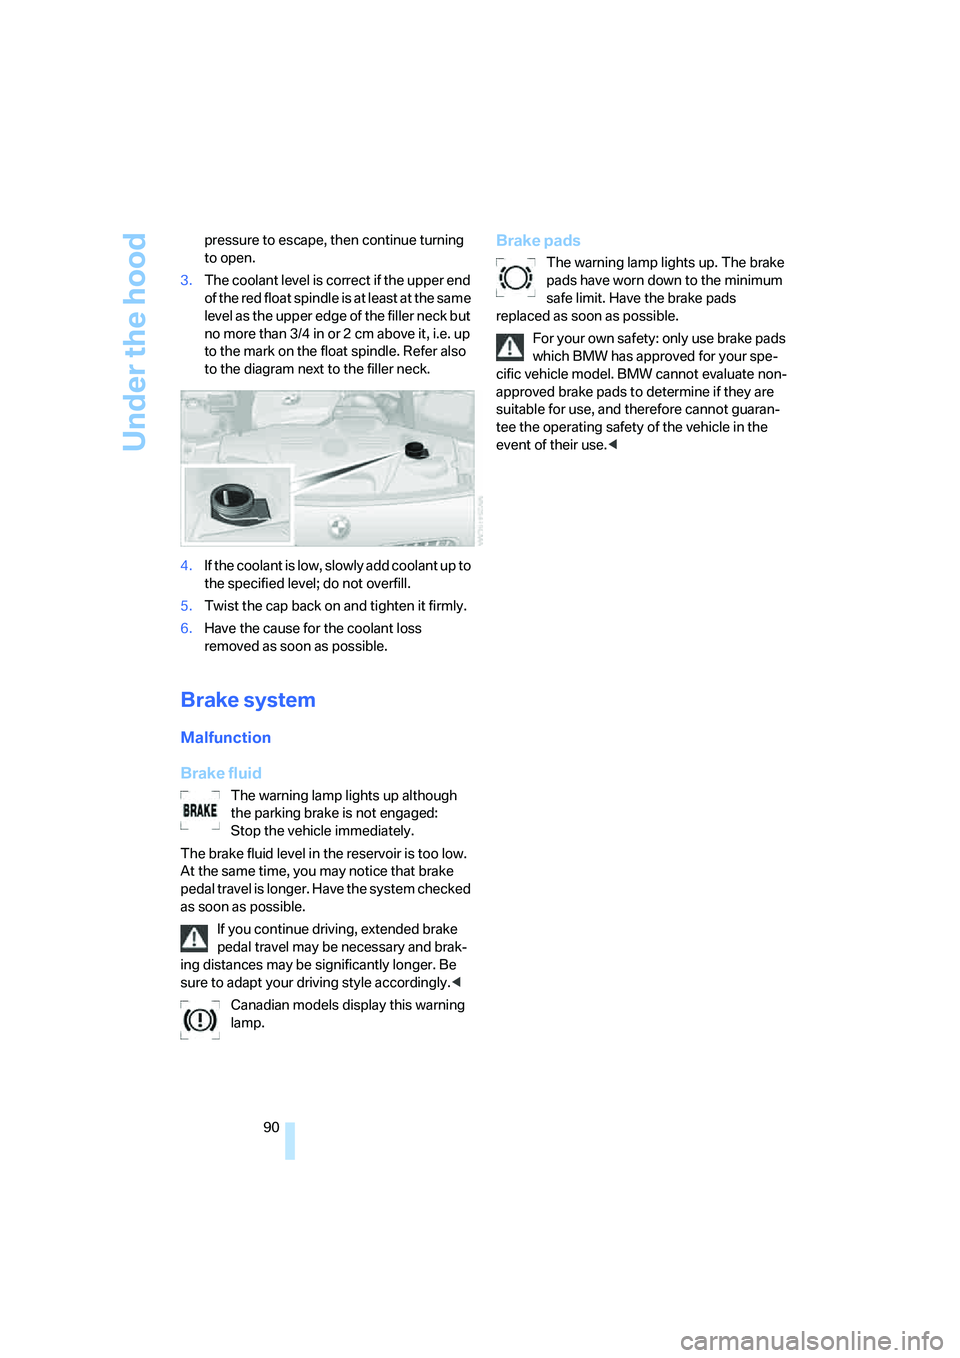
3.The coolant level is correct if the upper end
of the red float spindle is at least at the same
level as the upper edge of the filler neck but
no more than 3/4 in or 2 cm above it, i.e. up
to the mark on the float spindle. Refer also
to the diagram next to the filler neck.
4.If the coolant is low, slowly add coolant up to
the specified level; do not overfill.
5.Twist the cap back on and tighten it firmly.
6.Have the cause for the coolant loss
removed as soon as possible.
Brake system
Malfunction
Brake fluid
The warning lamp lights up although
the parking brake is not engaged:
Stop the vehicle immediately.
The brake fluid level in the reservoir is too low.
At the same time, you may notice that brake
pedal travel is longer. Have the system checked
as soon as possible.
If you continue driving, extended brake
pedal travel may be necessary and brak-
ing distances may be significantly longer. Be
sure to adapt your driving style accordingly.<
Canadian models display this warning
lamp.
Brake pads
The warning lamp lights up. The brake
pads have worn down to the minimum
safe limit. Have the brake pads
replaced as soon as possible.
For your own safety: only use brake pads
which BMW has approved for your spe-
cific vehicle model. BMW cannot evaluate non-
approved brake pads to determine if they are
suitable for use, and therefore cannot guaran-
tee the operating safety of the vehicle in the
event of their use.<