2006 BMW Z4 3.0I ROADSTER center console
[x] Cancel search: center consolePage 16 of 128
Cockpit
14
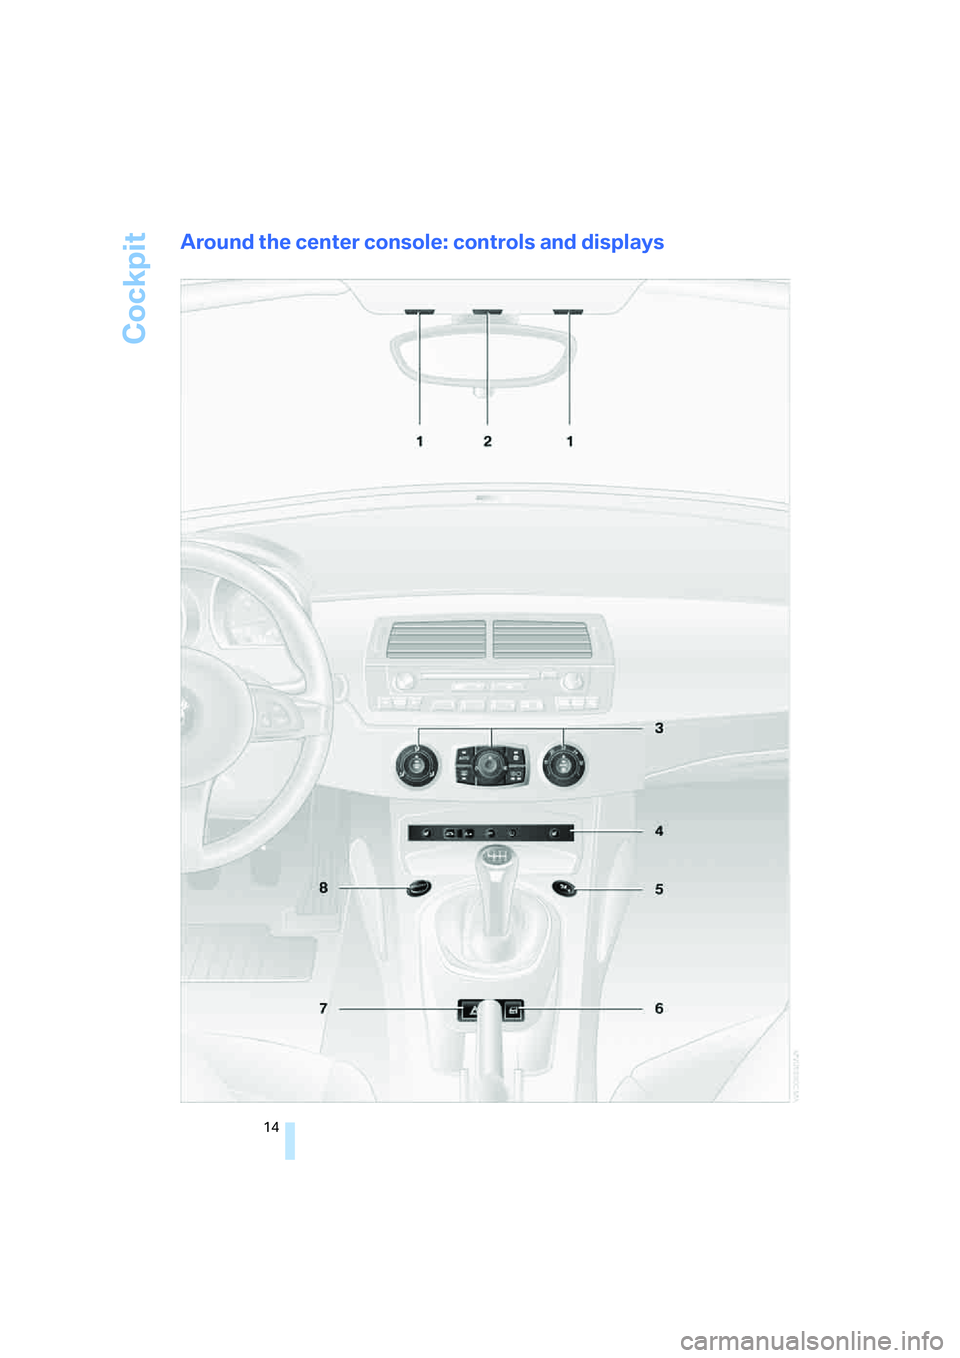
Around the center console: controls and displays
Page 38 of 128
Transporting children safely
36 The passenger airbags can only be deactivated
and reactivated while the vehicle is at a stand-
still and the passenger door is open.
Deactivating
Use the key to turn the key switch to the OFF
position.
The passenger airbags are deactivated in this
position. The airbags for the driver remain
active.
Reactivate the passenger airbags as soon
as a child-restraint system is no longer
installed on the passenger seat; otherwise they
may not deploy as intended in the event of an
accident.<
Reactivating
Use the key to turn the key switch to the ON
position.
The passenger airbags in the vehicle are reacti-
vated and will be triggered in certain situations.
Operational status of the passenger
airbags
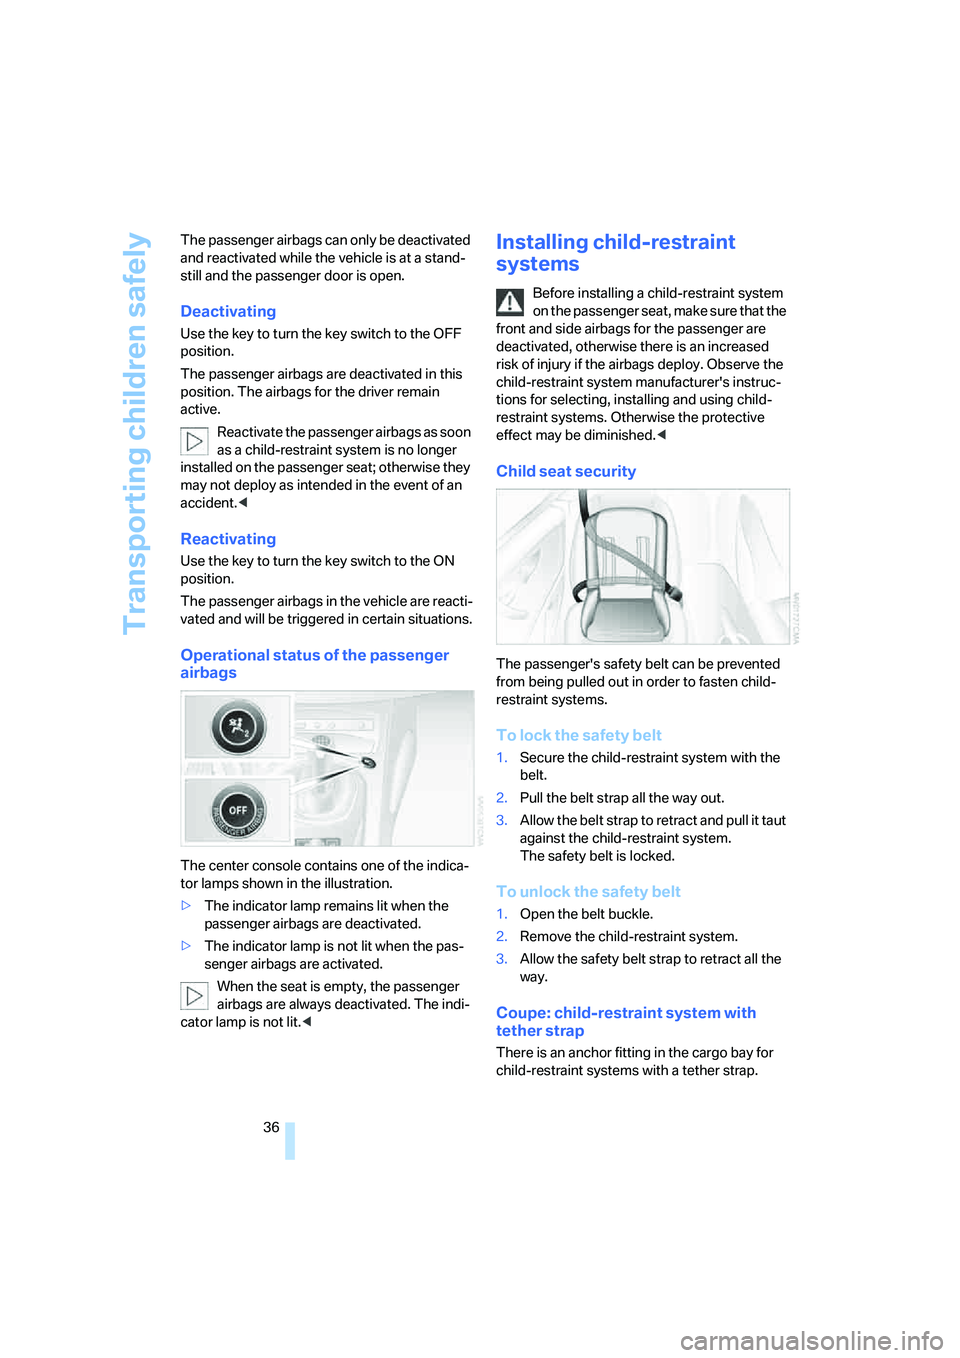
The center console contains one of the indica-
tor lamps shown in the illustration.
>The indicator lamp remains lit when the
passenger airbags are deactivated.
>The indicator lamp is not lit when the pas-
senger airbags are activated.
When the seat is empty, the passenger
airbags are always deactivated. The indi-
cator lamp is not lit.<
Installing child-restraint
systems
Before installing a child-restraint system
on the passenger seat, make sure that the
front and side airbags for the passenger are
deactivated, otherwise there is an increased
risk of injury if the airbags deploy. Observe the
child-restraint system manufacturer's instruc-
tions for selecting, installing and using child-
restraint systems. Otherwise the protective
effect may be diminished.<
Child seat security
The passenger's safety belt can be prevented
from being pulled out in order to fasten child-
restraint systems.
To lock the safety belt
1.Secure the child-restraint system with the
belt.
2.Pull the belt strap all the way out.
3.Allow the belt strap to retract and pull it taut
against the child-restraint system.
The safety belt is locked.
To unlock the safety belt
1.Open the belt buckle.
2.Remove the child-restraint system.
3.Allow the safety belt strap to retract all the
way.
Coupe: child-restraint system with
tether strap
There is an anchor fitting in the cargo bay for
child-restraint systems with a tether strap.
Page 55 of 128
Reference
At a glance
Controls
Driving tips
Mobility
53
help provide protection in the event of side
impact. The relevant side airbag supports the
side upper body area. The respective knee air-
bag protects the legs from hitting the cockpit.
The airbags will purposely not be activated by
every collision, e.g. not by more minor acci-
dents, or rear-end collisions.
Do not apply adhesive materials to the
cover panels of the airbags, cover them or
modify them in any other way. Do not attempt to
dismantle the airbag retention system. Do not
modify the individual components of the sys-
tem or its wiring in any way. This includes the
padding in the steering wheel, the dashboard
and the doors.
Do not attempt to remove or dismantle the
steering wheel. Do not touch the individual
components immediately after the system has
been triggered, because there is a danger of
burns.
In the event of malfunctions, deactivation, or
triggering of the airbag restraint system, have
the testing, repair, removal, and disposal of air-
bag generators executed only by a BMW Cen-
ter or a workshop that works according to BMW
repair procedures with correspondingly trained
personnel and has the required explosives
licenses. Unprofessional attempts to service
the system could lead to failure in an emer-
gency or undesired airbag activation, either of
which could result in personal injury.<
Warning notices and information about the air-
bags can also be found on the sun visors.
Automatic deactivation of the
passenger airbags
An analysis of the impression in the passenger
seat cushion determines whether and how the
seat is occupied. The front and side airbags for
the passenger are activated or deactivated by
the system accordingly.
The indicator lamp in the center console
shows the current status of the passen-
ger airbags, deactivated or activated, refer to
Status of passenger airbags below.<
Before transporting a child on the pas-
senger seat, observe the safety and han-dling instructions under Transporting children
safely, refer to page35.
Adolescents and adults sitting in certain posi-
tions could inadvertently deactivate the front
and side airbags on the passenger side; the
indicator lamp for the passenger airbags comes
on. In such cases, the passenger should change
his or her sitting position so that the passenger
airbags are activated and the indicator lamp
goes out. If the passenger airbags cannot be
restored to the desired status despite the pas-
senger changing his or her seat position, use
the key switch to activate or deactivate the pas-
senger airbags, refer to page35. Do not attach
seat covers, seat cushion padding, ball mats or
other items to the passenger seat unless they
are specifically recommended by BMW. Do not
place any items under the seat which could
press against the seat from below. Otherwise a
correct analysis of the seat cushion is not
ensured.<
Status of passenger airbags
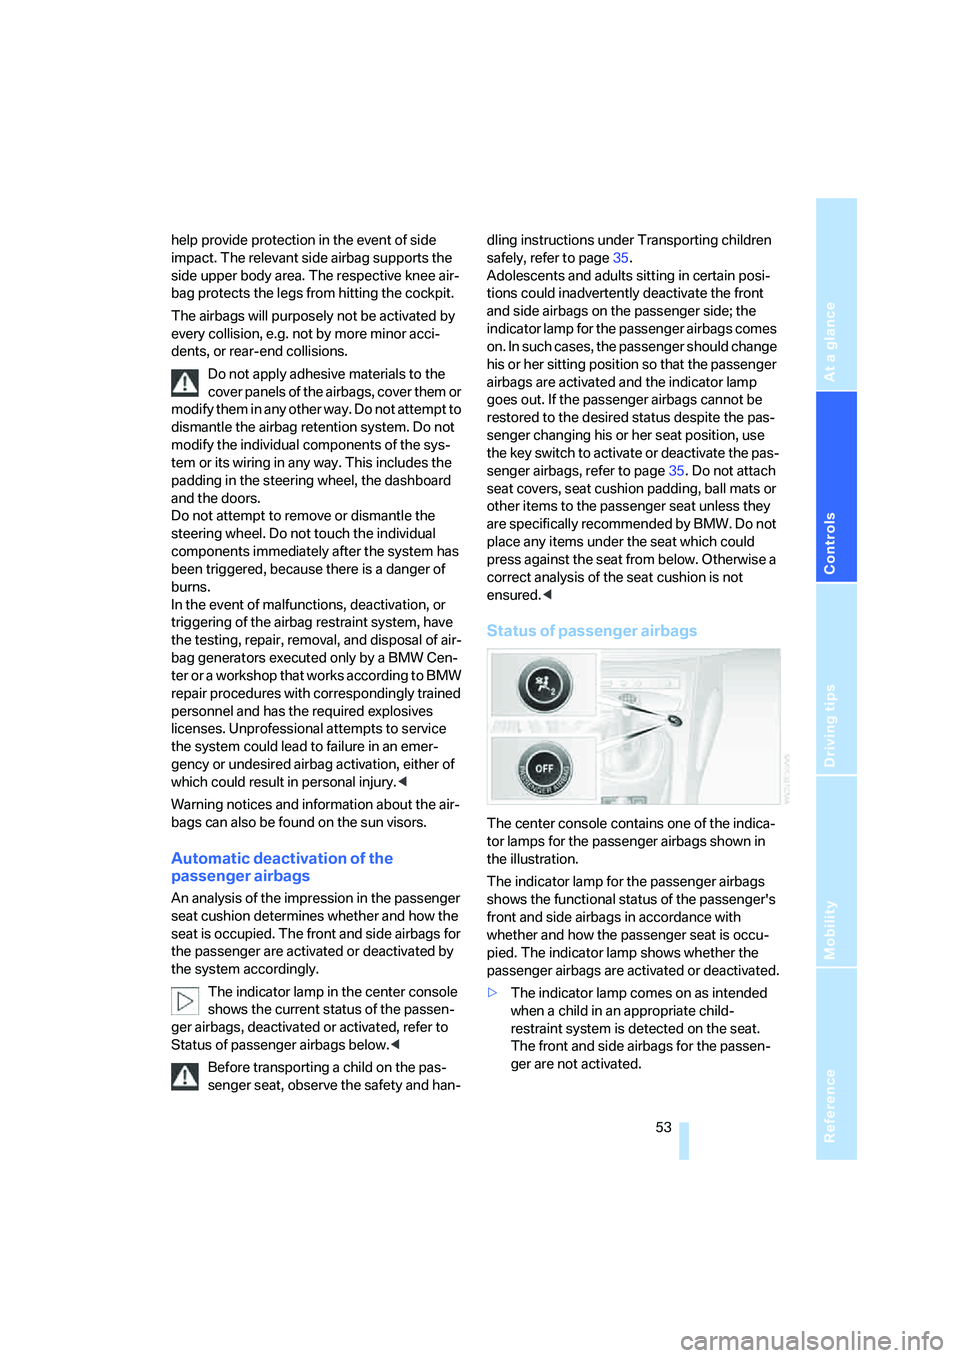
The center console contains one of the indica-
tor lamps for the passenger airbags shown in
the illustration.
The indicator lamp for the passenger airbags
shows the functional status of the passenger's
front and side airbags in accordance with
whether and how the passenger seat is occu-
pied. The indicator lamp shows whether the
passenger airbags are activated or deactivated.
>The indicator lamp comes on as intended
when a child in an appropriate child-
restraint system is detected on the seat.
The front and side airbags for the passen-
ger are not activated.
Page 66 of 128
Practical interior accessories
64
Practical interior accessories
Glove compartment
To open
Press the two push buttons together.
To close
Swing the door up.
To prevent injury in the event of an acci-
dent while the vehicle is being driven,
close the glove compartment immediately after
use.<
Storage compartments
Storage compartment between
backrests
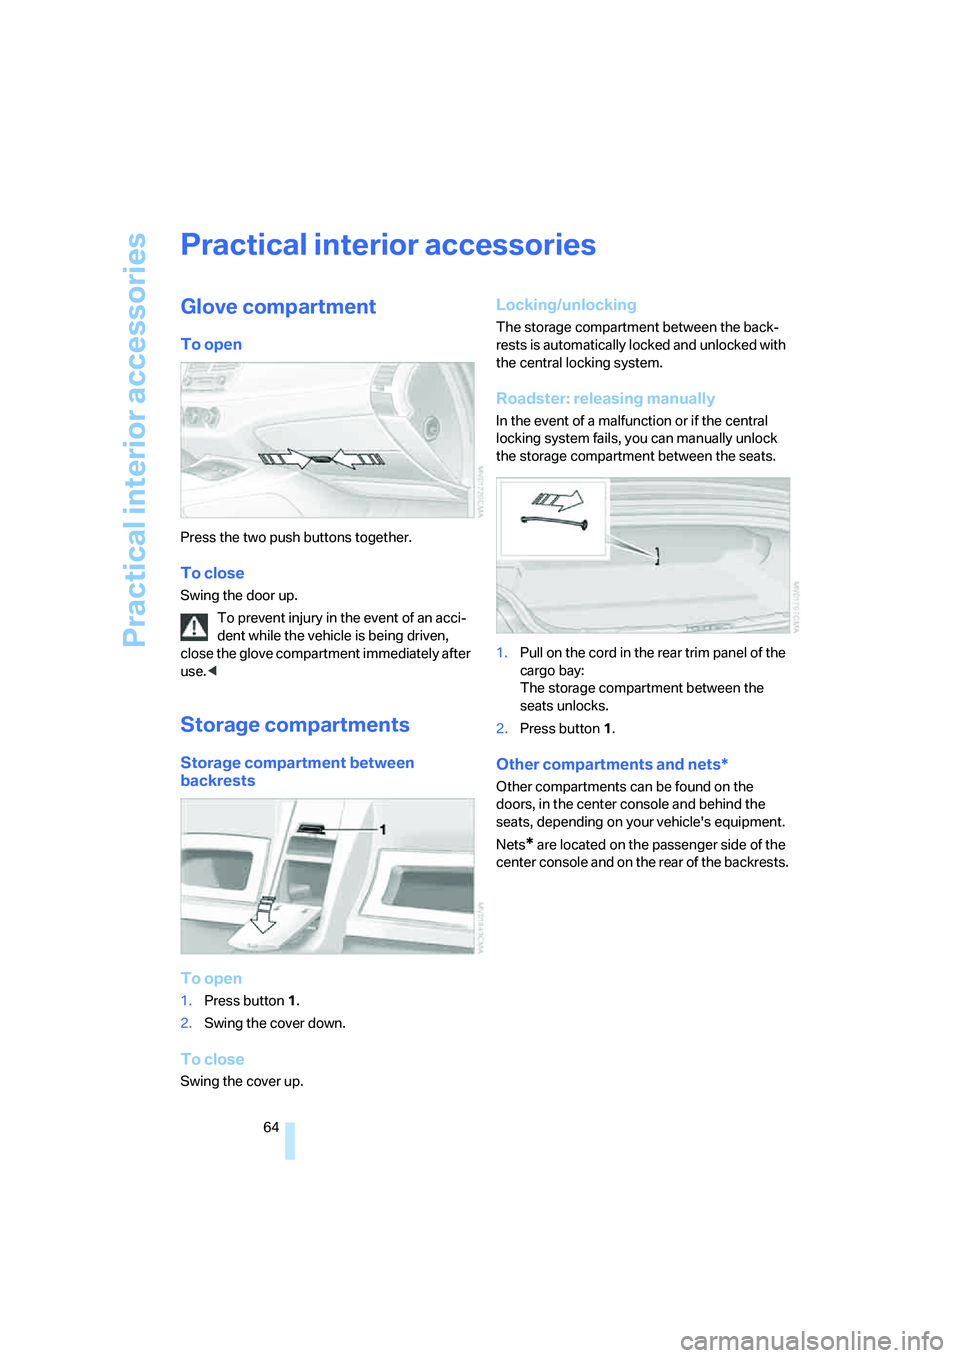
To open
1.Press button1.
2.Swing the cover down.
To close
Swing the cover up.
Locking/unlocking
The storage compartment between the back-
rests is automatically locked and unlocked with
the central locking system.
Roadster: releasing manually
In the event of a malfunction or if the central
locking system fails, you can manually unlock
the storage compartment between the seats.
1.Pull on the cord in the rear trim panel of the
cargo bay:
The storage compartment between the
seats unlocks.
2.Press button1.
Other compartments and nets*
Other compartments can be found on the
doors, in the center console and behind the
seats, depending on your vehicle's equipment.
Nets
* are located on the passenger side of the
center console and on the rear of the backrests.
Page 100 of 128
Giving and receiving assistance
98
Giving and receiving assistance
Receiving assistance
If your vehicle has the necessary equipment,
you can use buttons in the center console to
contact Roadside Assistance or issue an emer-
gency call.
Requirements for initiating an emergency call or
contacting Roadside Assistance:
>The key must be in position 1 or higher.
>The car phone must be logged on to a
mobile telephone network.
>The emergency call system must be opera-
ble.
Access to the buttons
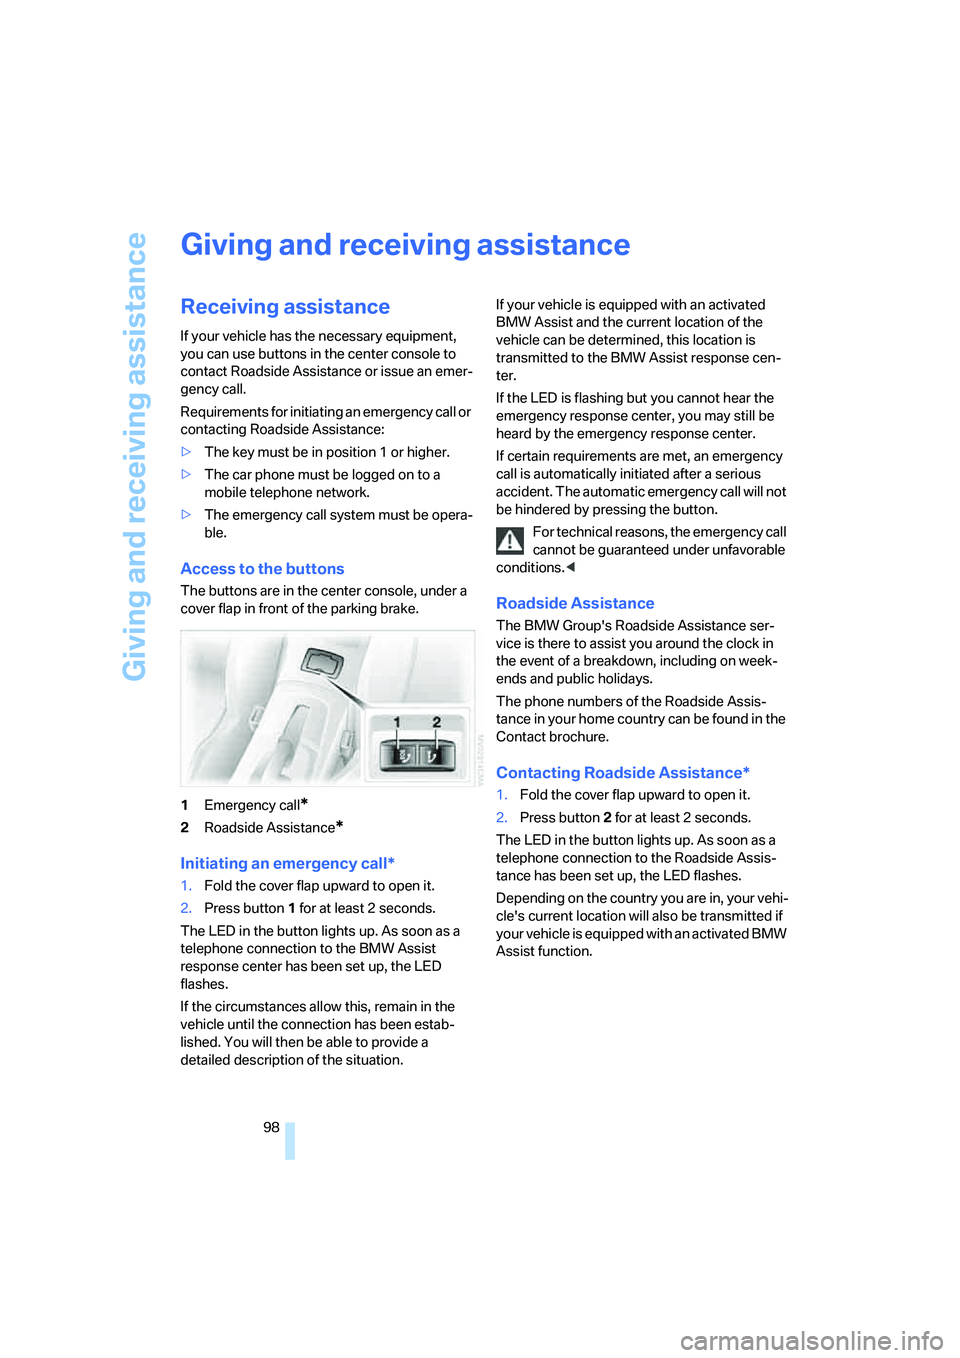
The buttons are in the center console, under a
cover flap in front of the parking brake.
1Emergency call
*
2Roadside Assistance*
Initiating an emergency call*
1.Fold the cover flap upward to open it.
2.Press button1 for at least 2 seconds.
The LED in the button lights up. As soon as a
telephone connection to the BMW Assist
response center has been set up, the LED
flashes.
If the circumstances allow this, remain in the
vehicle until the connection has been estab-
lished. You will then be able to provide a
detailed description of the situation.If your vehicle is equipped with an activated
BMW Assist and the current location of the
vehicle can be determined, this location is
transmitted to the BMW Assist response cen-
ter.
If the LED is flashing but you cannot hear the
emergency response center, you may still be
heard by the emergency response center.
If certain requirements are met, an emergency
call is automatically initiated after a serious
accident. The automatic emergency call will not
be hindered by pressing the button.
For technical reasons, the emergency call
cannot be guaranteed under unfavorable
conditions.<
Roadside Assistance
The BMW Group's Roadside Assistance ser-
vice is there to assist you around the clock in
the event of a breakdown, including on week-
ends and public holidays.
The phone numbers of the Roadside Assis-
tance in your home country can be found in the
Contact brochure.
Contacting Roadside Assistance*
1.Fold the cover flap upward to open it.
2.Press button2 for at least 2 seconds.
The LED in the button lights up. As soon as a
telephone connection to the Roadside Assis-
tance has been set up, the LED flashes.
Depending on the country you are in, your vehi-
cle's current location will also be transmitted if
your vehicle is equipped with an activated BMW
Assist function.
Page 115 of 128
Reference
At a glance
Controls
Driving tips
Mobility
113
Backup lamps
– bulb replacement96
Bandages, refer to First-aid
kit99
Bar, refer to Towing
methods101
Battery97
– charging97
– disposal97
– indicator/warning
lamp12,97
– jump-starting99
– power supply interruption97
– remote control18
Being towed101
Belts, refer to Safety belts33
Belt tensioner, refer to Safety
belts33
Beverage holders65
Blower, refer to Air flow
rate59,62
BMW Homepage4
BMW Maintenance
System91
Bottle holders, refer to
Beverage holders65
Brake assist, refer to Dynamic
Brake Control DBC49
Brake fluid90
– indicator/warning lamp13
– level90
– warning lamp90
Brake Force Display52
Brake hydraulics, refer to
Brake system90
Brake hydraulic system
– indicator/warning lamp13
Brake lamps
– brake force display52
– bulb replacement96
– indicator lamp, defective
lamp13
Brake pads90
– break-in procedures70
– warning lamp90
Brake pad wear indicator
– brake pads90
– indicator/warning lamp13Brake rotors72
– brake system72
– break-in procedures70
Brakes
– ABS49
– brake fluid90
– brake pads90
– braking safely71
– break-in procedures
70
– indicator/warning
lamps13,50
– parking brake39
Brake system90
– brake fluid90
– brake pads90
– break-in procedures70
– disc brakes72
– indicator/warning lamp13
Brake wear warning90
Breakdown
– Flat Tire Monitor51
Breaking in the clutch70
Breaking in the differential,
refer to Engine and
differential70
Break-in procedures70
Bridging, refer to Jump-
starting99
Bulb changing, refer to Lamps
and bulbs93
Bulb replacement, refer to
Lamps and bulbs93
Burned fuel, refer to
Fuel specifications79
Buttons on the steering
wheel11
C
California laws
– Event Data Recorders92
– Proposition 65 warning5
Can holders, refer to Beverage
holders65
Capacity
– cargo bay, refer to
Weights109
Car battery, refer to Vehicle
battery97Car care, refer to the Caring
for your vehicle brochure
Care, refer to the Caring for
your vehicle brochure
Care products, refer to the
Caring for your vehicle
brochure
Cargo bay23
– capacity109
– floor panel93
– increasing capacity23
– opening and closing21,22
– opening from inside the
vehicle21,22
– opening from the outside21
– roller-blind cover65
Cargo loading
– stowing cargo73
– vehicle72
Car jack
– jacking points97
Car keys, refer to The key
set18
Carpet care, refer to the
Caring for your vehicle
brochure
Car phone, refer to the
separate Owner's Manual
Car radio, refer to the separate
Owner's Manual
Car wash, refer to the Caring
for your vehicle brochure
Catalytic converter, refer to
Hot exhaust system70
CD changer, refer to Owner's
Manual for Radio/Onboard
Computer
CD operation, refer to Owner's
Manual for Radio/Onboard
Computer
Center console, refer to
Around the center
console14
Center high-mount brake
lamp, bulb replacement96
Central locking
– from inside21
Central locking system19
Page 116 of 128
Everything from A to Z
114 Changes, technical, refer to
For your own safety5
Changing a wheel96
– Run-Flat Tires96
Charge indicator lamp12,97
Check gas cap, indicator
lamp13
Child-restraint mounting
system, LATCH37
Child-restraint systems36
Child seat, refer to Installing
child-restraint systems36
Chrome parts, refer to the
Caring for your vehicle
brochure
Cigarette lighter65
Cleaning the rear window,
refer to the Caring for your
vehicle brochure
Cleaning the vehicle, refer to
the Caring for your vehicle
brochure
Cleaning the windows
– automatically, refer to Rain
sensor43
– reservoir capacity110
– spray nozzles44
– washer/wiper system43
– washer fluid44
– washer fluid reservoir44
Clock47
– 12h/24h mode48
– onboard computer48
– setting48
– setting, refer also to Owner's
Manual for Radio/Onboard
Computer
Clothes hooks66
Cockpit10
Cold start, refer to Starting the
engine38
Comfort area, refer to Around
the center console14
Compact disc operation, refer
to Owner's Manual for
Radio/Onboard ComputerComputer48
– button BC48
– clock, 12h/24h mode48
– refer to Owner's Manual for
Onboard Computer
Computer, refer to the
separate Owner's Manual
Condensation, refer to When
the vehicle is parked72
Condensation, removing from
windows
– air conditioning59
– automatic climate control62
Configuring settings, refer to
Vehicle Memory, Key
Memory18
Connecting vacuum cleaner,
refer to Connecting
electrical appliances67
Consumption, refer to
Average fuel
consumption48
Consumption display, refer to
Fuel gauge46
Controls, refer to Cockpit10
Convenience operation
– convertible top20
– from outside20
– windows20
Convertible top26,27
– care, refer to the Caring for
your vehicle brochure
– convenience operation20
– electrical fault28
– emergency closing28
– fully automatic27
– malfunction28
– manual26
– mechanical26
Convertible top compartment
panel23
Coolant89
– checking level89
– indicator lamp13
– thermometer47
Coolant water, refer to
Coolant89Cooling
– maximum62
– refer to Switching cooling
function on/off59,62
Cooling fluid, refer to
Coolant89
Cooling function
– air conditioning59
– automatic climate control62
Cooling system, refer to
Capacities110
Copyright2
Correct tires84
Cruise control44
Cruising range48
Cup holders, refer to
Beverage holders65
Curb weight, refer to
Weights109
Cylinders, refer to Engine
data106D
Dashboard, refer to
Cockpit10
Dashboard lighting, refer to
Instrument lighting56
Data, technical
– capacities110
– dimensions107,108
– engine106
– measurements107,108
– weights109
Daytime running light55
DBC Dynamic Brake
Control49
– indicator/warning lamp13
Deadlocking, refer to
Locking19
Defective bulb55
Defrosting, windows59,62
Defrosting the windshield,
refer to Defrosting
windows59,62
Defrosting windows and
removing condensation
– air conditioning59
– automatic climate control62