2006 BMW Z4 3.0I ROADSTER display
[x] Cancel search: displayPage 43 of 128
Reference
At a glance
Controls
Driving tips
Mobility
41
R Reverse
Select only when the vehicle is stationary.
N Neutral, idle
You can select this in a car wash, for example.
The vehicle can roll.
D Drive, automatic position
This position is designed for driving under all
normal operating conditions. All forward gears
are selected automatically.
Under normal operating conditions, fuel con-
sumption is lowest when you are driving in posi-
tion D.
Kickdown
Kick-down enables you to achieve maximum
performance.
Press the accelerator pedal beyond the full-
throttle resistance point.
Manual operation and Sport program
M/S
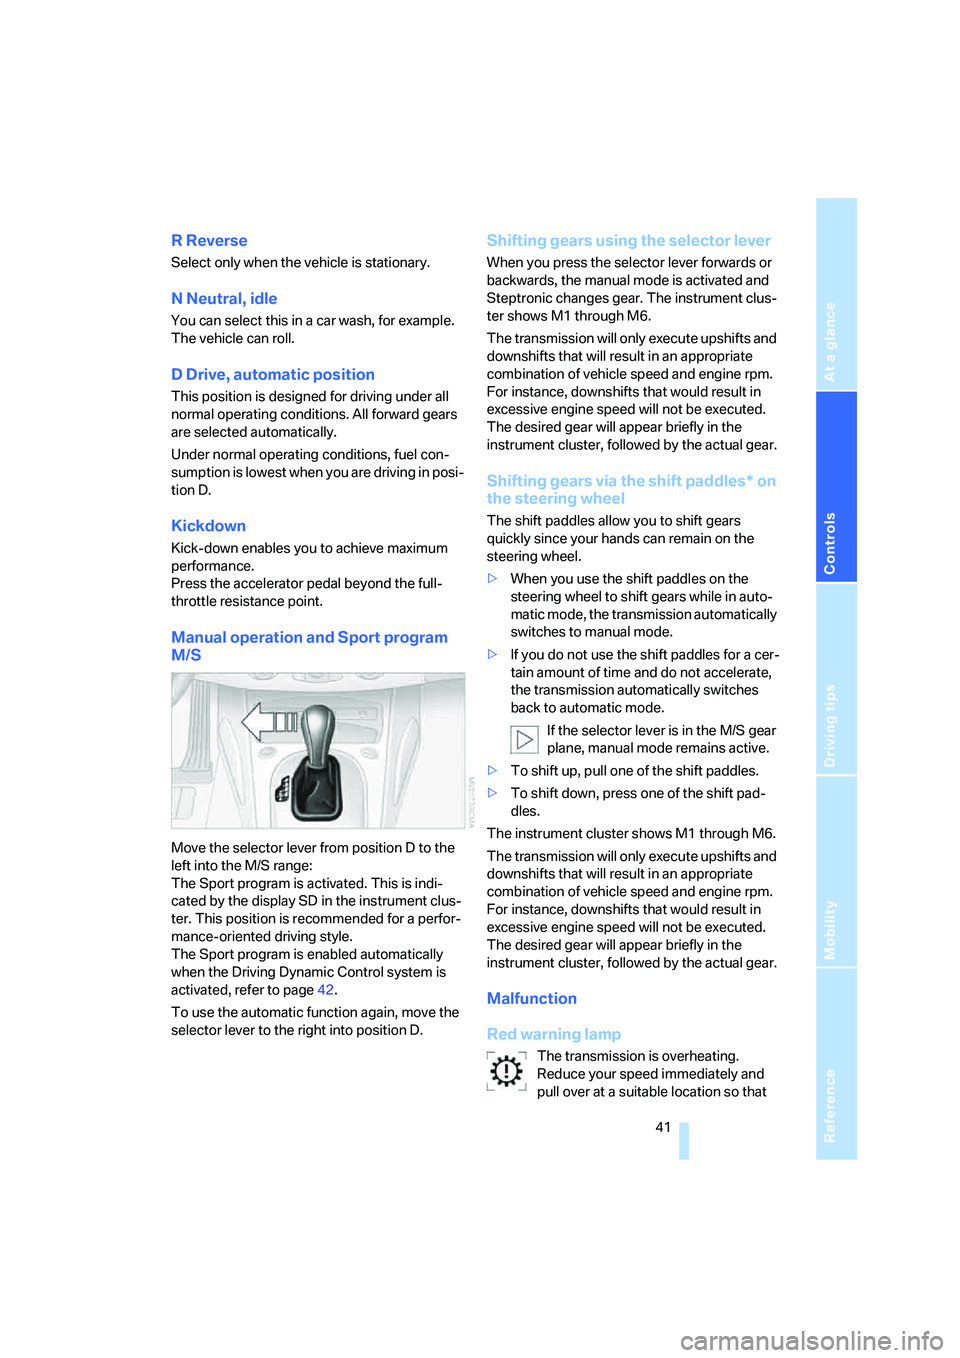
Move the selector lever from position D to the
left into the M/S range:
The Sport program is activated. This is indi-
cated by the display SD in the instrument clus-
ter. This position is recommended for a perfor-
mance-oriented driving style.
The Sport program is enabled automatically
when the Driving Dynamic Control system is
activated, refer to page42.
To use the automatic function again, move the
selector lever to the right into position D.
Shifting gears using the selector lever
When you press the selector lever forwards or
backwards, the manual mode is activated and
Steptronic changes gear. The instrument clus-
ter shows M1 through M6.
The transmission will only execute upshifts and
downshifts that will result in an appropriate
combination of vehicle speed and engine rpm.
For instance, downshifts that would result in
excessive engine speed will not be executed.
The desired gear will appear briefly in the
instrument cluster, followed by the actual gear.
Shifting gears via the shift paddles* on
the steering wheel
The shift paddles allow you to shift gears
quickly since your hands can remain on the
steering wheel.
>When you use the shift paddles on the
steering wheel to shift gears while in auto-
matic mode, the transmission automatically
switches to manual mode.
>If you do not use the shift paddles for a cer-
tain amount of time and do not accelerate,
the transmission automatically switches
back to automatic mode.
If the selector lever is in the M/S gear
plane, manual mode remains active.
>To shift up, pull one of the shift paddles.
>To shift down, press one of the shift pad-
dles.
The instrument cluster shows M1 through M6.
The transmission will only execute upshifts and
downshifts that will result in an appropriate
combination of vehicle speed and engine rpm.
For instance, downshifts that would result in
excessive engine speed will not be executed.
The desired gear will appear briefly in the
instrument cluster, followed by the actual gear.
Malfunction
Red warning lamp
The transmission is overheating.
Reduce your speed immediately and
pull over at a suitable location so that
Page 48 of 128
Everything under control
46
Everything under control
Odometer
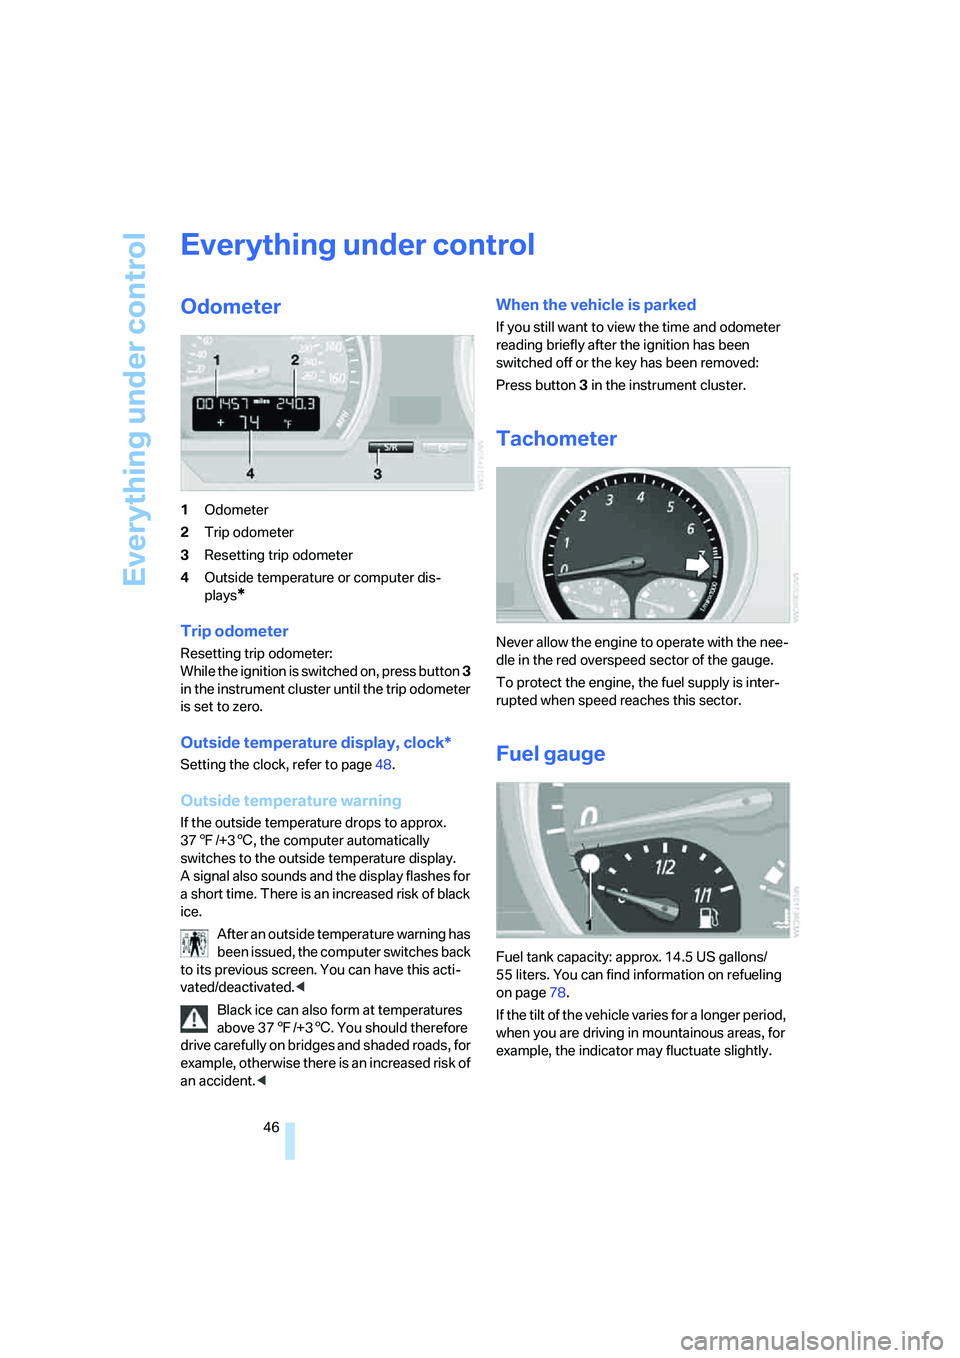
1Odometer
2Trip odometer
3Resetting trip odometer
4Outside temperature or computer dis-
plays
*
Trip odometer
Resetting trip odometer:
While the ignition is switched on, press button 3
in the instrument cluster until the trip odometer
is set to zero.
Outside temperature display, clock*
Setting the clock, refer to page48.
Outside temperature warning
If the outside temperature drops to approx.
377/+36, the computer automatically
switches to the outside temperature display.
A signal also sounds and the display flashes for
a short time. There is an increased risk of black
ice.
After an outside temperature warning has
been issued, the computer switches back
to its previous screen. You can have this acti-
vated/deactivated.<
Black ice can also form at temperatures
above 377/+36. You should therefore
drive carefully on bridges and shaded roads, for
example, otherwise there is an increased risk of
an accident.<
When the vehicle is parked
If you still want to view the time and odometer
reading briefly after the ignition has been
switched off or the key has been removed:
Press button 3 in the instrument cluster.
Tachometer
Never allow the engine to operate with the nee-
dle in the red overspeed sector of the gauge.
To protect the engine, the fuel supply is inter-
rupted when speed reaches this sector.
Fuel gauge
Fuel tank capacity: approx. 14.5 US gallons/
55 liters. You can find information on refueling
on page78.
If the tilt of the vehicle varies for a longer period,
when you are driving in mountainous areas, for
example, the indicator may fluctuate slightly.
Page 49 of 128

Reference
At a glance
Controls
Driving tips
Mobility
47
Reserve
Once the fuel level has fallen to the reserve
zone of approx. 2.1 US gallons/8 liters, indicator
lamp 1 lights up continuously.
Do not drive until the fuel tank is empty
and refill it well in advance. Otherwise the
engine may not operate properly and damage
could result.<
When you switch on the ignition, the indicator
lamp comes on briefly to indicate an operational
check.
Engine coolant temperature
gauge
Blue
The engine is still cold. Drive at moderate
engine and vehicle speeds.
Between the blue and red zones
Normal operating range. The needle may rise as
far as the edge of the red sector during normal
operation.
Red
When you switch on the ignition, warning
lamp1 comes on briefly to indicate an opera-
tional check.
Comes on while driving:
The engine has overheated. Stop and switch
the engine off immediately and allow it to cool
down.
For checking the coolant level, refer to page89.
Service interval display
The remaining driving distance in miles/km until
the next scheduled service is displayed briefly
immediately after you start the engine or switch
on the ignition.
The words OILSERVICE or INSPECTION indi-
cate the type of service due next. The computer
bases its calculations of the remaining driving
distance on the preceding driving style.
A flashing message and a minus sign in front of
the number mean that the service interval has
already been exceeded by the number of miles/
kilometers shown on the display. Please sched-
ule an appointment with your BMW Center or a
workshop that works according to BMW repair
procedures with correspondingly trained per-
sonnel.
The extent of service work required can
be read out from the remote control by
your BMW Service Advisor.<
Clock
If you wish to have a permanent time display,
you can have it appear in the car radio display,
refer to the Owner's Manual for Radio.
You can set the time and the time display in the
car radio as follows.
Page 50 of 128
Everything under control
48
Setting the clock
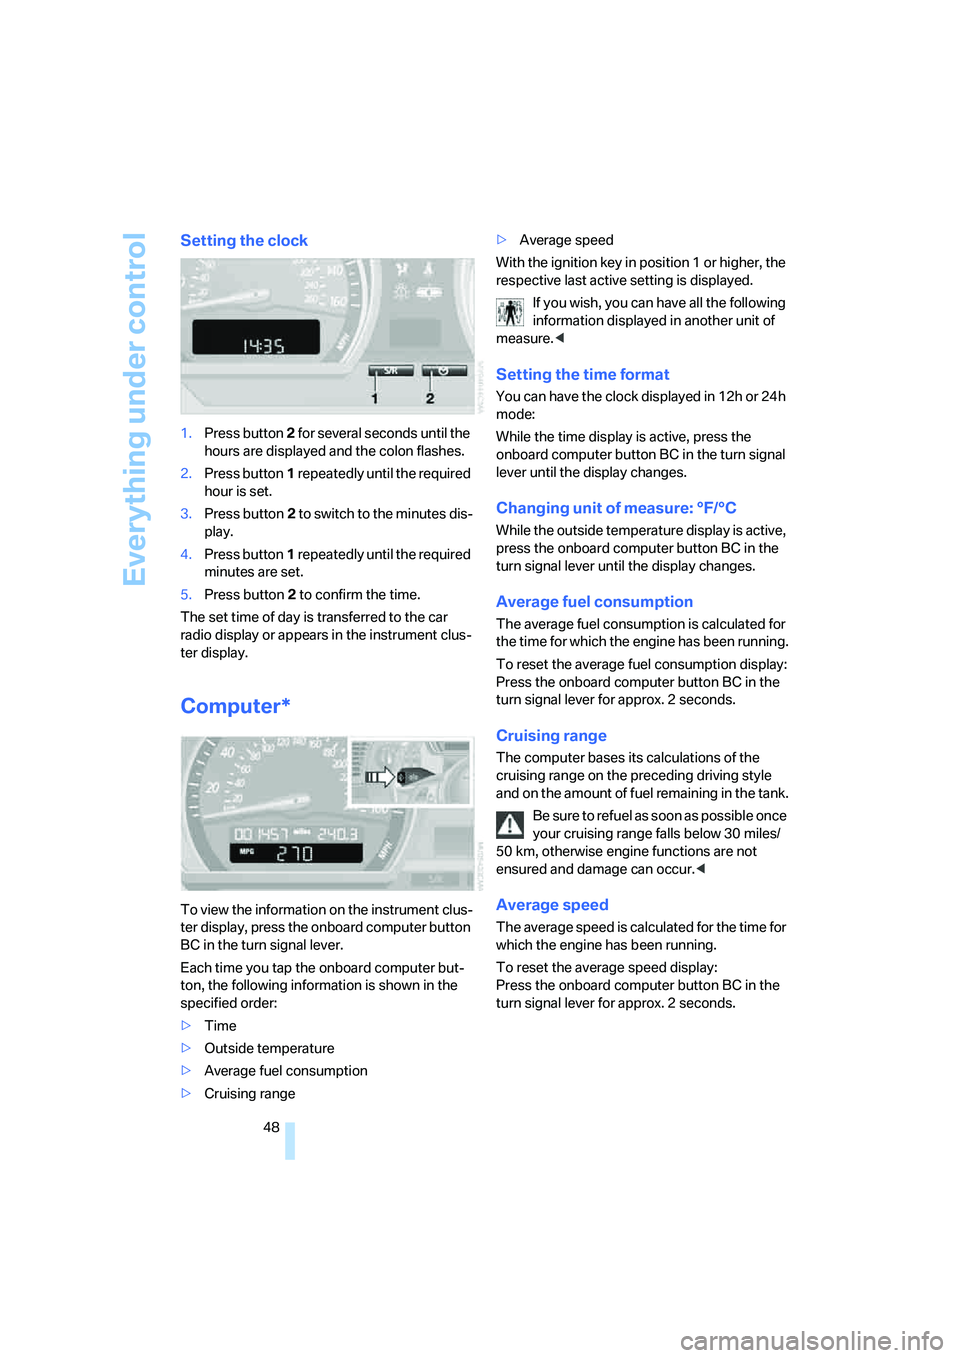
1.Press button 2 for several seconds until the
hours are displayed and the colon flashes.
2.Press button1 repeatedly until the required
hour is set.
3.Press button2 to switch to the minutes dis-
play.
4.Press button1 repeatedly until the required
minutes are set.
5.Press button2 to confirm the time.
The set time of day is transferred to the car
radio display or appears in the instrument clus-
ter display.
Computer*
To view the information on the instrument clus-
ter display, press the onboard computer button
BC in the turn signal lever.
Each time you tap the onboard computer but-
ton, the following information is shown in the
specified order:
>Time
>Outside temperature
>Average fuel consumption
>Cruising range>Average speed
With the ignition key in position 1 or higher, the
respective last active setting is displayed.
If you wish, you can have all the following
information displayed in another unit of
measure.<
Setting the time format
You can have the clock displayed in 12h or 24h
mode:
While the time display is active, press the
onboard computer button BC in the turn signal
lever until the display changes.
Changing unit of measure: °F/°C
While the outside temperature display is active,
press the onboard computer button BC in the
turn signal lever until the display changes.
Average fuel consumption
The average fuel consumption is calculated for
the time for which the engine has been running.
To reset the average fuel consumption display:
Press the onboard computer button BC in the
turn signal lever for approx. 2 seconds.
Cruising range
The computer bases its calculations of the
cruising range on the preceding driving style
and on the amount of fuel remaining in the tank.
Be sure to refuel as soon as possible once
your cruising range falls below 30 miles/
50 km, otherwise engine functions are not
ensured and damage can occur.<
Average speed
The average speed is calculated for the time for
which the engine has been running.
To reset the average speed display:
Press the onboard computer button BC in the
turn signal lever for approx. 2 seconds.
Page 52 of 128
Technology for driving comfort and safety
50 In the following exceptional circumstances, it
may be effective to activate the DTC for a short
period:
>When driving on snow-covered grades, in
slush or on uncleared, snow-covered roads
>When rocking the vehicle or starting off in
deep snow or on loose surfaces
>When driving with snow chains
Activating DTC
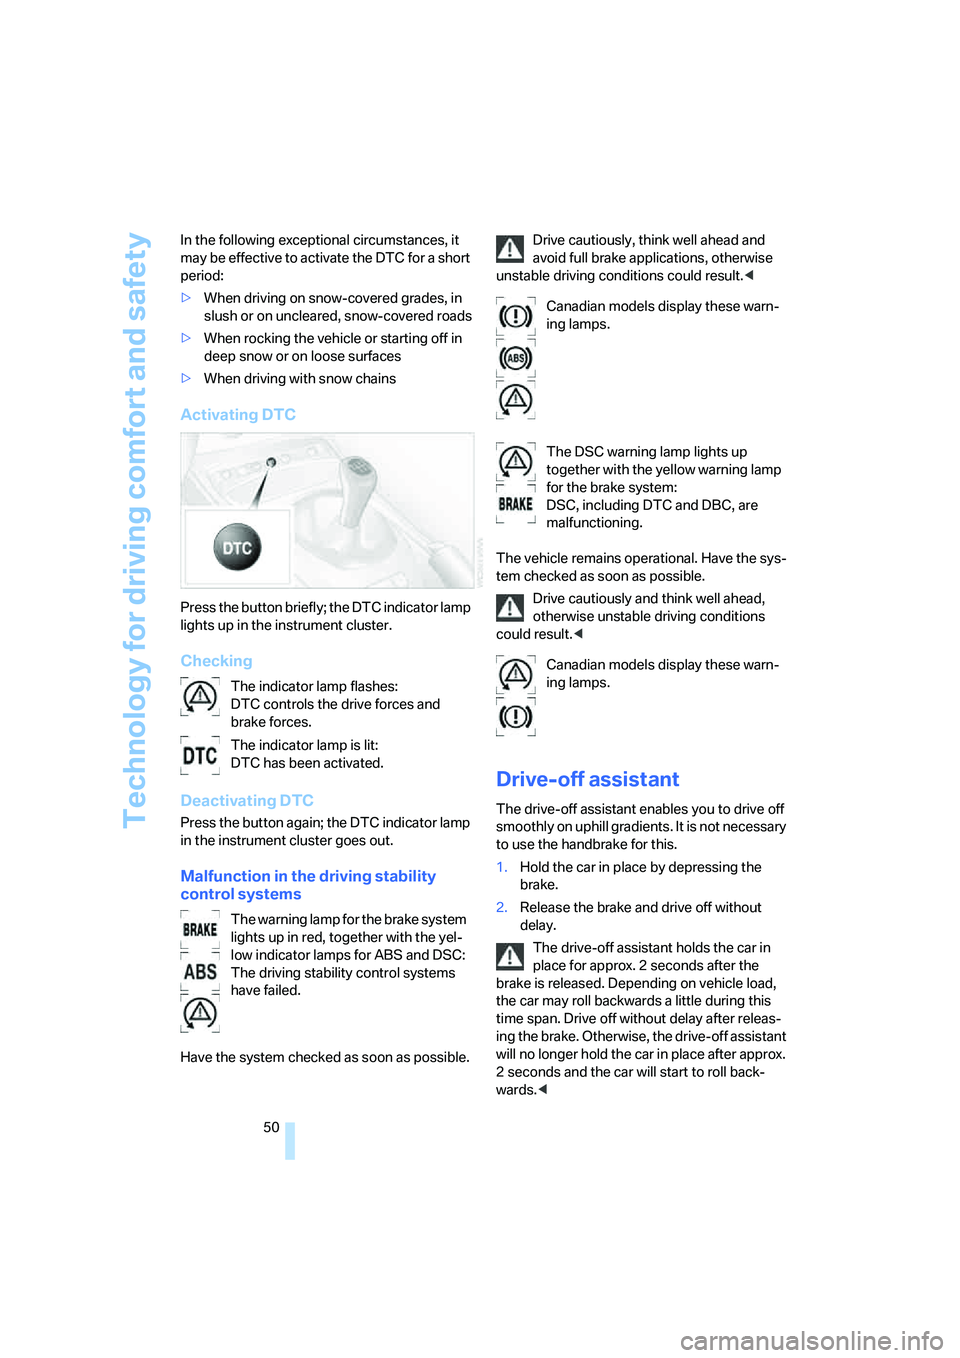
Press the button briefly; the DTC indicator lamp
lights up in the instrument cluster.
Checking
Deactivating DTC
Press the button again; the DTC indicator lamp
in the instrument cluster goes out.
Malfunction in the driving stability
control systems
Have the system checked as soon as possible.Drive cautiously, think well ahead and
avoid full brake applications, otherwise
unstable driving conditions could result.<
The vehicle remains operational. Have the sys-
tem checked as soon as possible.
Drive cautiously and think well ahead,
otherwise unstable driving conditions
could result.<
Drive-off assistant
The drive-off assistant enables you to drive off
smoothly on uphill gradients. It is not necessary
to use the handbrake for this.
1.Hold the car in place by depressing the
brake.
2.Release the brake and drive off without
delay.
The drive-off assistant holds the car in
place for approx. 2 seconds after the
brake is released. Depending on vehicle load,
the car may roll backwards a little during this
time span. Drive off without delay after releas-
ing the brake. Otherwise, the drive-off assistant
will no longer hold the car in place after approx.
2 seconds and the car will start to roll back-
wards.< The indicator lamp flashes:
DTC controls the drive forces and
brake forces.
The indicator lamp is lit:
DTC has been activated.
The warning lamp for the brake system
lights up in red, together with the yel-
low indicator lamps for ABS and DSC:
The driving stability control systems
have failed.
Canadian models display these warn-
ing lamps.
The DSC warning lamp lights up
together with the yellow warning lamp
for the brake system:
DSC, including DTC and DBC, are
malfunctioning.
Canadian models display these warn-
ing lamps.
Page 54 of 128
Technology for driving comfort and safety
52 3.In the event of complete tire pressure loss,
0 psi/0 kilopascal, you can estimate the
possible distance for continued driving on
the basis of the following guidelines:
>With a light load:
1 person without luggage:
approx. 155 miles/250 km
>With a medium load:
1 person, cargo bay full,
or
2 persons without luggage:
approx. 90 miles/150 km
>With a full load:
2 persons, cargo bay full:
approx.30miles/50km.
Drive cautiously. Do not exceed a speed
of 50 mph/80 km/h. Driving characteris-
tics change if there is a loss of tire pressure.
This includes reduced tracking stability in brak-
ing, extended braking distance and altered nat-
ural steering characteristics.
If unusual vibration or loud noises occur during
the journey, this may be an indication that the
damaged tire has finally failed. Reduce your
speed and pull over to the side of the road at the
earliest opportunity. Otherwise, parts of the tire
could come loose and cause an accident. Do
not continue driving. Contact a BMW Center.<
Electric Power Steering EPS
The concept
The electric power steering is a direct, sporting
steering system. A special combination of elec-
tric motor and transmission helps you steer
more easily. As your speed increases, steering
power assistance is reduced.
Malfunction
The indicator lamp stays lit:
The system is malfunctioning or defec-
tive.
Steering remains operational.
Have the system checked as soon as possible.
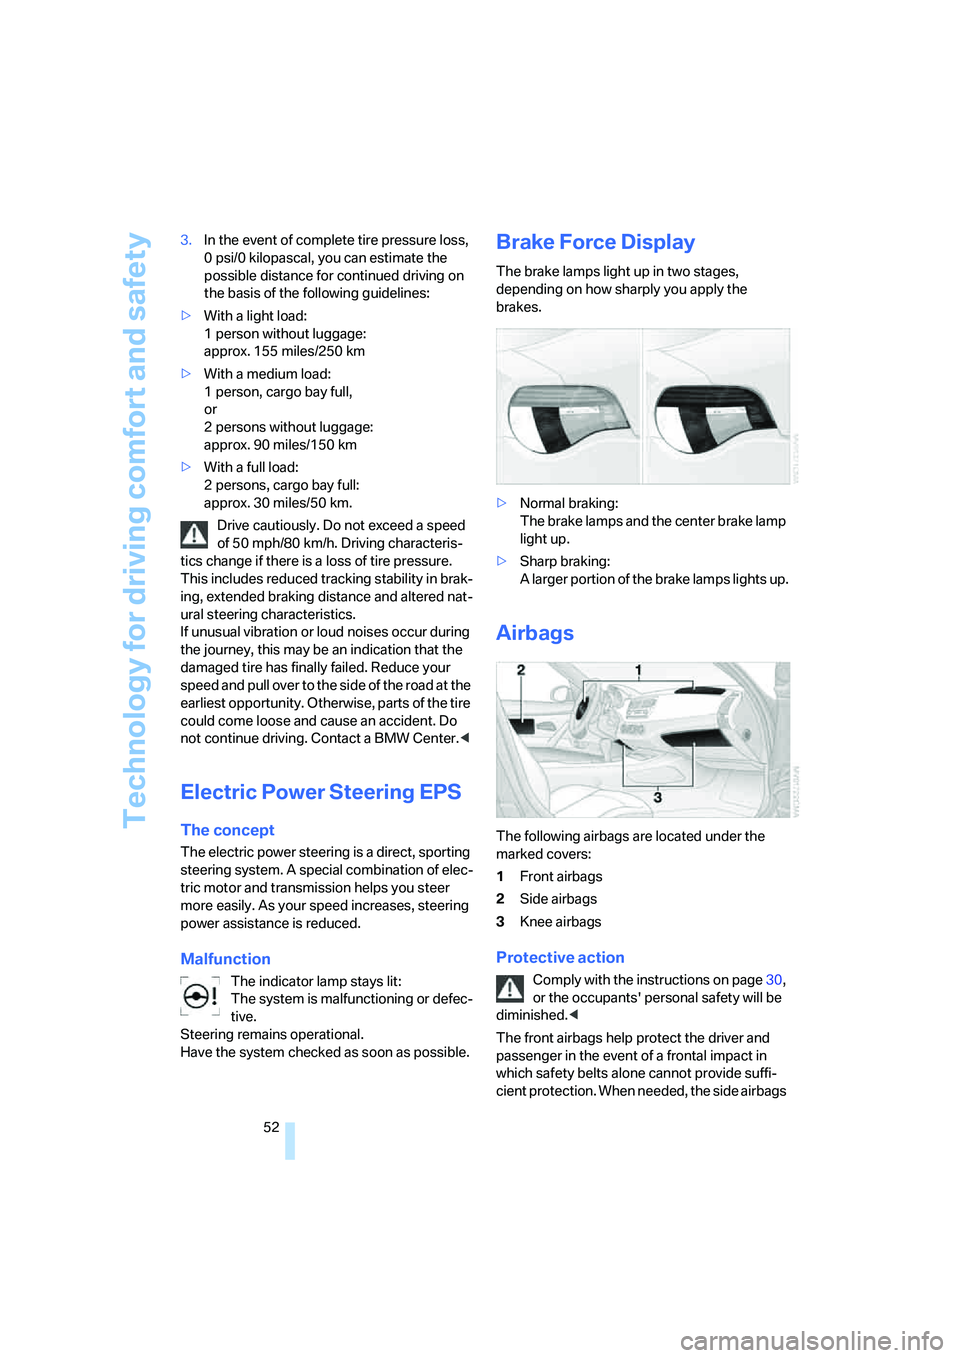
Brake Force Display
The brake lamps light up in two stages,
depending on how sharply you apply the
brakes.
>Normal braking:
The brake lamps and the center brake lamp
light up.
>Sharp braking:
A larger portion of the brake lamps lights up.
Airbags
The following airbags are located under the
marked covers:
1Front airbags
2Side airbags
3Knee airbags
Protective action
Comply with the instructions on page30,
or the occupants' personal safety will be
diminished.<
The front airbags help protect the driver and
passenger in the event of a frontal impact in
which safety belts alone cannot provide suffi-
cient protection. When needed, the side airbags
Page 87 of 128
Reference
At a glance
Controls
Driving tips
Mobility
85
approved wheels and tires are used, BMW can-
not evaluate their suitability, and therefore can-
not be held liable for driving safety.<
You can inquire about the correct wheel/tire
combination at your BMW Center.
The correct combination of wheels and tires is
also necessary to ensure reliable operation of
various vehicle systems such as ABS and DSC.
To maintain good handling and vehicle
response, only use tires of a single brand and
tread configuration. After a tire has been dam-
aged, for instance, mount the original wheel and
tire combination again as soon as possible.
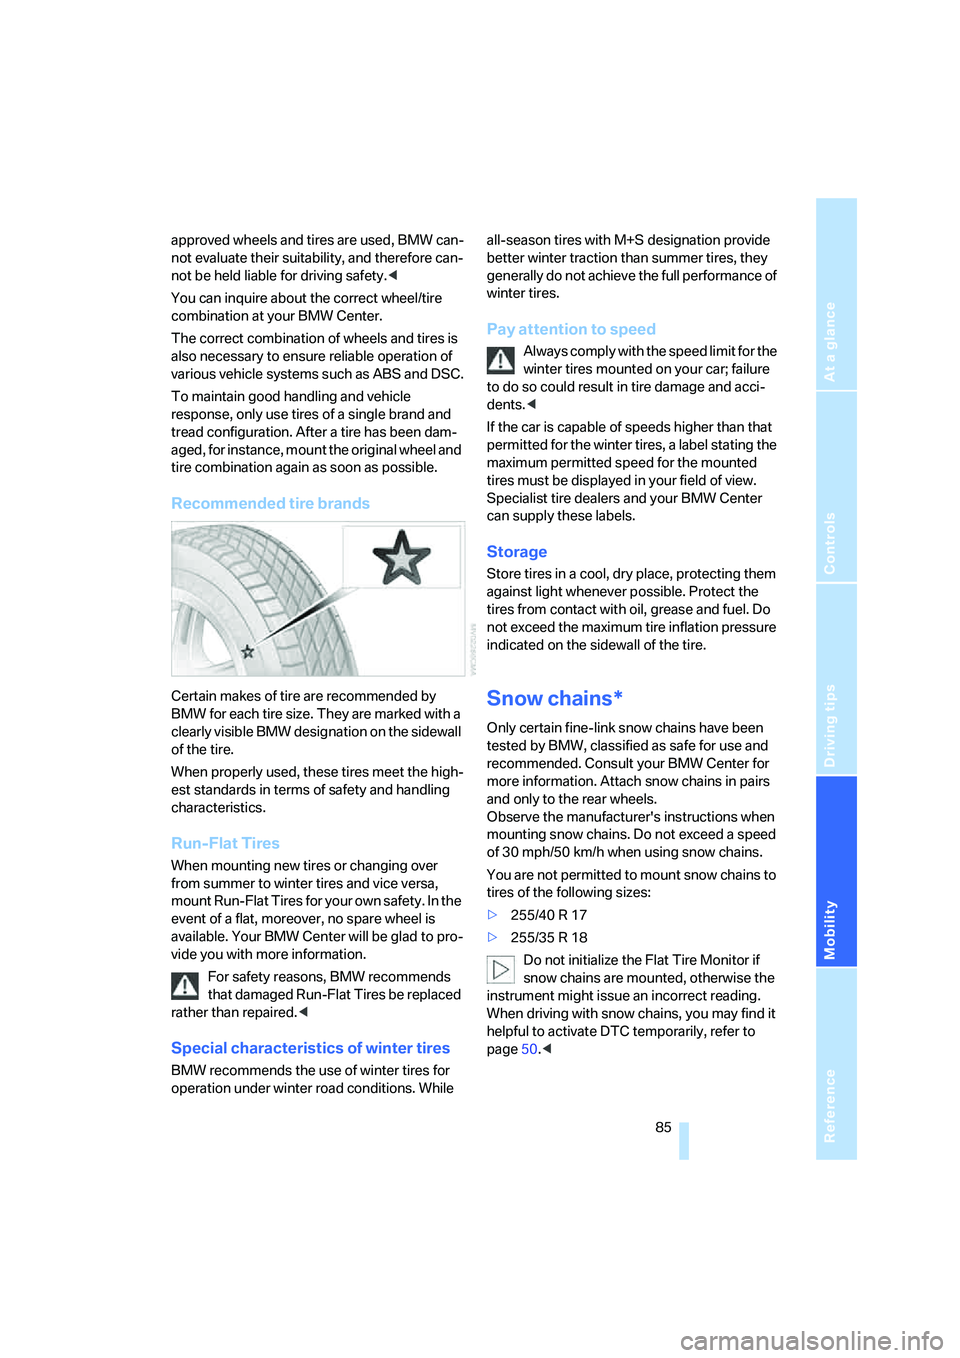
Recommended tire brands
Certain makes of tire are recommended by
BMW for each tire size. They are marked with a
clearly visible BMW designation on the sidewall
of the tire.
When properly used, these tires meet the high-
est standards in terms of safety and handling
characteristics.
Run-Flat Tires
When mounting new tires or changing over
from summer to winter tires and vice versa,
mount Run-Flat Tires for your own safety. In the
event of a flat, moreover, no spare wheel is
available. Your BMW Center will be glad to pro-
vide you with more information.
For safety reasons, BMW recommends
that damaged Run-Flat Tires be replaced
rather than repaired.<
Special characteristics of winter tires
BMW recommends the use of winter tires for
operation under winter road conditions. While all-season tires with M+S designation provide
better winter traction than summer tires, they
generally do not achieve the full performance of
winter tires.
Pay attention to speed
Always comply with the speed limit for the
winter tires mounted on your car; failure
to do so could result in tire damage and acci-
dents.<
If the car is capable of speeds higher than that
permitted for the winter tires, a label stating the
maximum permitted speed for the mounted
tires must be displayed in your field of view.
Specialist tire dealers and your BMW Center
can supply these labels.
Storage
Store tires in a cool, dry place, protecting them
against light whenever possible. Protect the
tires from contact with oil, grease and fuel. Do
not exceed the maximum tire inflation pressure
indicated on the sidewall of the tire.
Snow chains*
Only certain fine-link snow chains have been
tested by BMW, classified as safe for use and
recommended. Consult your BMW Center for
more information. Attach snow chains in pairs
and only to the rear wheels.
Observe the manufacturer's instructions when
mounting snow chains. Do not exceed a speed
of 30 mph/50 km/h when using snow chains.
You are not permitted to mount snow chains to
tires of the following sizes:
>255/40 R 17
>255/35 R 18
Do not initialize the Flat Tire Monitor if
snow chains are mounted, otherwise the
instrument might issue an incorrect reading.
When driving with snow chains, you may find it
helpful to activate DTC temporarily, refer to
page50.<
Page 90 of 128

Under the hood
88 The warning lamp lights up in yellow
within 30 seconds after the engine is
started: The oil level sensor is defec-
tive:
It is not possible to issue a current or accurate
measurement. Have the system checked as
soon as possible.
Checking the oil level
Your car is equipped with an electronic oil-level
monitor.
For a precise measurement and display of the
oil level, it is necessary that the engine be at
operating temperature, i.e. after uninterrupted
driving for at least approx. 6.5 miles/10 km. You
can have the oil level displayed while you are
driving, or while the vehicle is at a standstill on a
level surface and the engine is running.
You can have the oil level reading displayed in
the instrument cluster.
Press button1. The oil level is checked and dis-
played for approx. 15 seconds.
To exit the display sooner, press button 1 again.
Possible displays
1Oil level OK
2Oil level is being checked.
This can take about 3 minutes if the car is at
a standstill on a level surface, or about
5 minutes while the car is on the move.
3Oil level down to minimum:
Add 1US quart/1liter of engine oil as soon
as possible, refer also to Adding engine oil.
4Oil level is too high.
Have the vehicle checked immedi-
ately, as excessive oil can damage the
engine.<
5The oil level sensor is defective:
it is not possible to issue a current or accu-
rate measurement.
Do not add engine oil. You can continue
your journey. Have the system checked as
soon as possible.