2006 BMW X3 3.0I window
[x] Cancel search: windowPage 21 of 133

Reference
At a glance
Controls
Driving tips
Mobility
19
Opening and closing: from
outside
Using the remote control
Protect the remote control against unau-
thorized use by handing over only the
spare key, for example when using hotel valet
parking.<
Because any persons or animals left unat-
tended in a parked vehicle could lock the
doors from the inside, you should always keep
the remote control with you; this precaution
ensures that you will remain able to unlock the
vehicle from the outside at all times.<
Unlocking
1.Press the button.
The driver's door and fuel filler door are
unlocked.
2.Press the button again.
All remaining doors and the liftgate are
unlocked.
Convenience opening mode
Press and hold the button. The windows and
the panorama glass sunroof
* are opened.
If you wish, you can have this special fea-
ture activated/deactivated.<
Engaging locks
Press the button.
If you wish, the vehicle locks automati-
cally if no door or lid is opened after
unlocking. You can have your vehicle set to do
this if you wish.<
As confirmation of the fact that the vehicle is
properly locked, the hazard warning flashers
light up.
If you wish, you can have this special fea-
ture deactivated on vehicles without an
alarm system.<
Switching off tilt alarm sensor* and
interior motion sensor*
Press the button again directly after
locking.
For details, refer to page25.
Switching on interior lamps
Press the button if the vehicle is
locked.
You can also use this function to locate your
vehicle in parking garages etc.
Panic mode*
You can also trigger the alarm system in case of
danger:
Press the button for at least three seconds.
Deactivating alarm: press any button.
Unlocking liftgate
Press the button.
The liftgate will open slightly, regardless of
whether it was previously locked or unlocked.
To avoid damage, make sure there is suf-
ficient space when opening the liftgate.
A previously locked liftgate is also locked again
after closing.
Before and after a drive, make sure that the lift-
gate has not been inadvertently released.<
If so desired, you can have the remote
control system open the liftgate only
when the vehicle is unlocked. You can have
your vehicle set to do this if you wish.<
Malfunction
The remote control may malfunction due to
local radio waves.
Should this occur, use the master key to unlock
and relock the vehicle via the door lock.
If it is no longer possible to lock the vehicle
using the remote control, its battery is dis-
charged. Use this remote control during an
extended drive; this will recharge the battery,
refer to page18.
Page 22 of 133

Opening and closing
20
For US owners only
The transmitter and receiver units comply with
part 15 of the FCC/Federal Communications
Commission regulations. Operation is gov-
erned by the following:
FCC ID:
LX8EWS
LX8FZVS
LX8FZVE
Compliance statement:
This device complies with part 15 of the FCC
Rules. Operation is subject to the following two
conditions:
>This device must not cause harmful inter-
ference, and
>this device must accept any interference
received, including interference that may
cause undesired operation.
Any unauthorized modifications or
changes to these devices could void the
user's authority to operate this equipment.<
Using door lock
1.Turn key.
The driver's door and fuel filler door are
unlocked.
2.Turn key again.
All remaining doors and the liftgate are
unlocked.
As confirmation of the fact that the vehicle is
properly locked, the hazard warning flashers
light up.
If you wish, you can have this special fea-
ture deactivated on vehicles without an
alarm system.<
Convenience operation
You also have the option of using the door lock
to operate the windows and the panorama glass
sunroof
*.
Hold the key in the positions for unlocking or
locking.
Watch during the closing process to be
sure that no one is injured. Releasing the
key stops the operation.<
Manual operation
If an electrical malfunction occurs, you can
unlock or lock the driver's door with the key in
the end positions of the door lock.
Opening and closing: from
inside
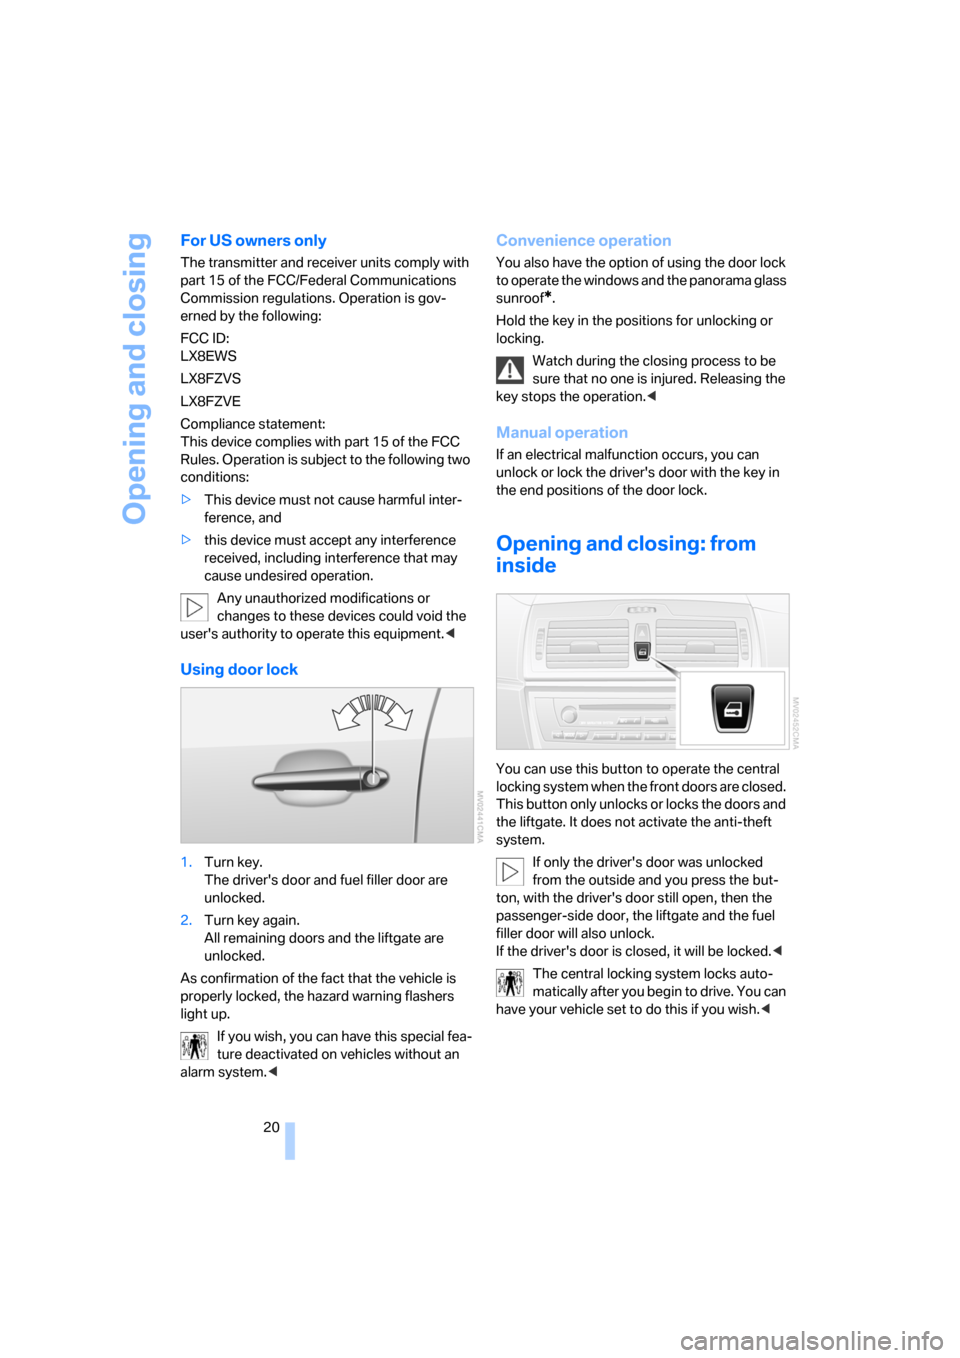
You can use this button to operate the central
locking system when the front doors are closed.
This button only unlocks or locks the doors and
the liftgate. It does not activate the anti-theft
system.
If only the driver's door was unlocked
from the outside and you press the but-
ton, with the driver's door still open, then the
passenger-side door, the liftgate and the fuel
filler door will also unlock.
If the driver's door is closed, it will be locked.<
The central locking system locks auto-
matically after you begin to drive. You can
have your vehicle set to do this if you wish.<
Page 24 of 133

Opening and closing
22
Windows
Keep windows in your line of sight while
closing. Failure to do so can result in
bodily injury.
Always remove the key when leaving the vehi-
cle; otherwise, children could operate the win-
dows and injure themselves.<
Opening, closing
As of ignition key position 1:
>Press the switch to the resistance point:
The window continues to open as long as
you press the switch.
>Press the switch past the resistance point:
The window opens automatically. Pressing
again stops the opening motion.
You can close the windows in the same manner
by pulling the switch.
In the back, separate switches are provided in
the armrests.
For convenience operation using the remote
control or the door lock, refer to pages19, 20.
After switching off ignition
You can operate the windows for up to 1 minute
as long as no door has been opened.
Pinch protection system
If the closing force rises beyond a predefined
threshold during closing, the system will imme-
diately stop moving the window prior to lower-
ing it slightly.
Despite the presence of the pinch protec-
tion system, inspect the window's travel
path prior to closing it, as the safety system
might fail to detect certain kinds of obstruc-tions, such as very thin objects, and the window
would continue closing.
You can disable the pinch protection system by
pressing the switch past the resistance point
and holding it.
Do not install any accessories in the movement
range of the window as this could impair the
function of the pinch protection system.<
Following interruptions in electrical
power supply
After disconnecting the battery, the pinch pro-
tection system must be reinitialized. To do this,
open and close the windows once and continue
pull the switch for longer than 2 seconds after
closing.
Safety switch
With the safety switch, you can prevent the rear
windows from being opened or closed via the
switches in the rear passenger area, by chil-
dren, for example. The LED lights up when this
safety function is activated.
Press the safety switch when children
ride in the rear; otherwise, unsupervised
closing of the windows could lead to injuries.<
Page 27 of 133

Reference
At a glance
Controls
Driving tips
Mobility
25
Indicator lamp displays
>The indicator lamp below the interior rear-
view mirror flashes continuously: the sys-
tem is armed.
>The indicator lamp flashes after the vehicle
is locked: doors, hood, or liftgate are not
properly closed. Even if you do not close the
alerted area, the system begins to monitor
the remaining areas, and the indicator lamp
flashes continuously after approx. 10 sec-
onds. However, the interior motion sensor
is not activated.
>The indicator lamp goes out after unlocking:
no manipulation or attempted intrusions
have been detected in the period since the
system was armed.
>The indicator lamp flashes for 10 seconds
after the vehicle is unlocked: an attempted
entry has been detected in the period since
the system was armed.
Following triggering of an alarm, the indicator
lamp will flash continuously.
Tilt alarm sensor
The tilt of the vehicle is monitored. The alarm
system reacts, e.g. in case of an attempted
wheel theft or towing.
Interior motion sensor
In order for the interior motion sensor to func-
tion properly, the windows and panorama glass
sunroof must be completely closed.
Avoiding unintentional alarms
The tilt alarm sensor and interior motion sensor
may be switched off at the same time. This pre-
vents unintentional alarms, e.g. in the following
situations:
>In duplex garages
>When transporting on car-carrying trains
>When animals are to remain in the vehicle
Switching off tilt alarm sensor and
interior motion sensor
Press the button on the remote con-
trol again as soon as the vehicle is locked.
The indicator lamp lights up briefly and then
flashes continuously. The tilt alarm sensor and
the interior motion sensor are switched off until
the next time the vehicle is unlocked and subse-
quently locked again.
If you wish, you can have the tilt alarm
sensor and interior motion sensor perma-
nently switched off. You can have this setting
made at your BMW Sports Activity Vehicle
Center.<
Page 37 of 133

Reference
At a glance
Controls
Driving tips
Mobility
35
Access to anchorage points
The picture shows the right rear seat as an
example. The anchorage points for the LATCH
child-restraint fixing system are located behind
the cover caps.
Remove the cover caps toward the front.
Press into place to reinstall.
Before attachment of the LATCH child-restraint
fixing system, remove the cover caps and pull
the belt out of the region of the child-restraint
fixing system.
For driving
With rear side airbags, make sure that
children do not lean out of the child's seat
toward the door panel; otherwise, injuries can
result if the side airbags are triggered.<
Child-safety lock of rear doors
Slide down the safety levers on the rear doors:
The door can now be opened from the outside
only.
Safety switch for power windows
Press the safety switch for the power windows,
refer to page22, when children are in the rear of
the vehicle.
Page 43 of 133

Reference
At a glance
Controls
Driving tips
Mobility
41
Cleaning windshield, rear window and
headlamps*
0Wipers retracted
1Cleaning windshield and headlamps
2Rear window wiper intermittent mode
3Cleaning rear window
Do not activate the washer if there is
any danger of the fluid freezing on the
windshield. If you do so, your vision could be
obscured. To avoid freezing, use a washer fluid
antifreeze, refer to Washer fluid. Do not activate
the washer when the washer fluid is empty as
this will damage the washer pump.<
Cleaning windshield
The system sprays washer fluid against the
windshield and activates the wipers for a brief
period.
The washer jets are automatically heated
whenever the engine is running or the ignition is
switched on.
Cleaning headlamps*
When the vehicle lighting system is switched
on, the headlamps are cleaned at regular and
appropriate intervals.
Rear window wiper
Rear window wiper in intermittent mode. When
reverse gear is engaged, the wiper operates
continuously.
You can also program the interval:
1.Briefly move the wiper lever from position 0
to position 2.
2.Wait for desired interval; maximum of
30 seconds.3.Move the wiper lever from position 0 to
position 2 again.
Washer fluid
Washer fluid antifreeze is flammable. For
this reason, keep it away from sources of
flame and store it only in its original containers.
Store it so that it is inaccessible to children.
Always follow the instructions for use provided
on the containers.<
Reservoir for washer fluid
Fill with water and, if required, with an antifreeze
additive according to manufacturer's recom-
mendations.
To maintain the mixing ratio, mix the
washer fluid before adding it to the reser-
voir.<
Capacity
Approx. 3.2 US quarts/3 liters.
With headlamp washer system
* approx.
6.9 quarts/6.5 liters.
Cruise control*
The vehicle maintains and stores the speed
that you set as of a speed of approx. 20 mph/
30 km/h.
You can use cruise control whenever the sys-
tem is active while the engine is running.
On the sports steering wheel
* and M sports
steering wheel
*, the +/– buttons for the cruise
control are on the right side of the steering
wheel.
Page 61 of 133

Reference
At a glance
Controls
Driving tips
Mobility
59
Air conditioner
Air conditioner
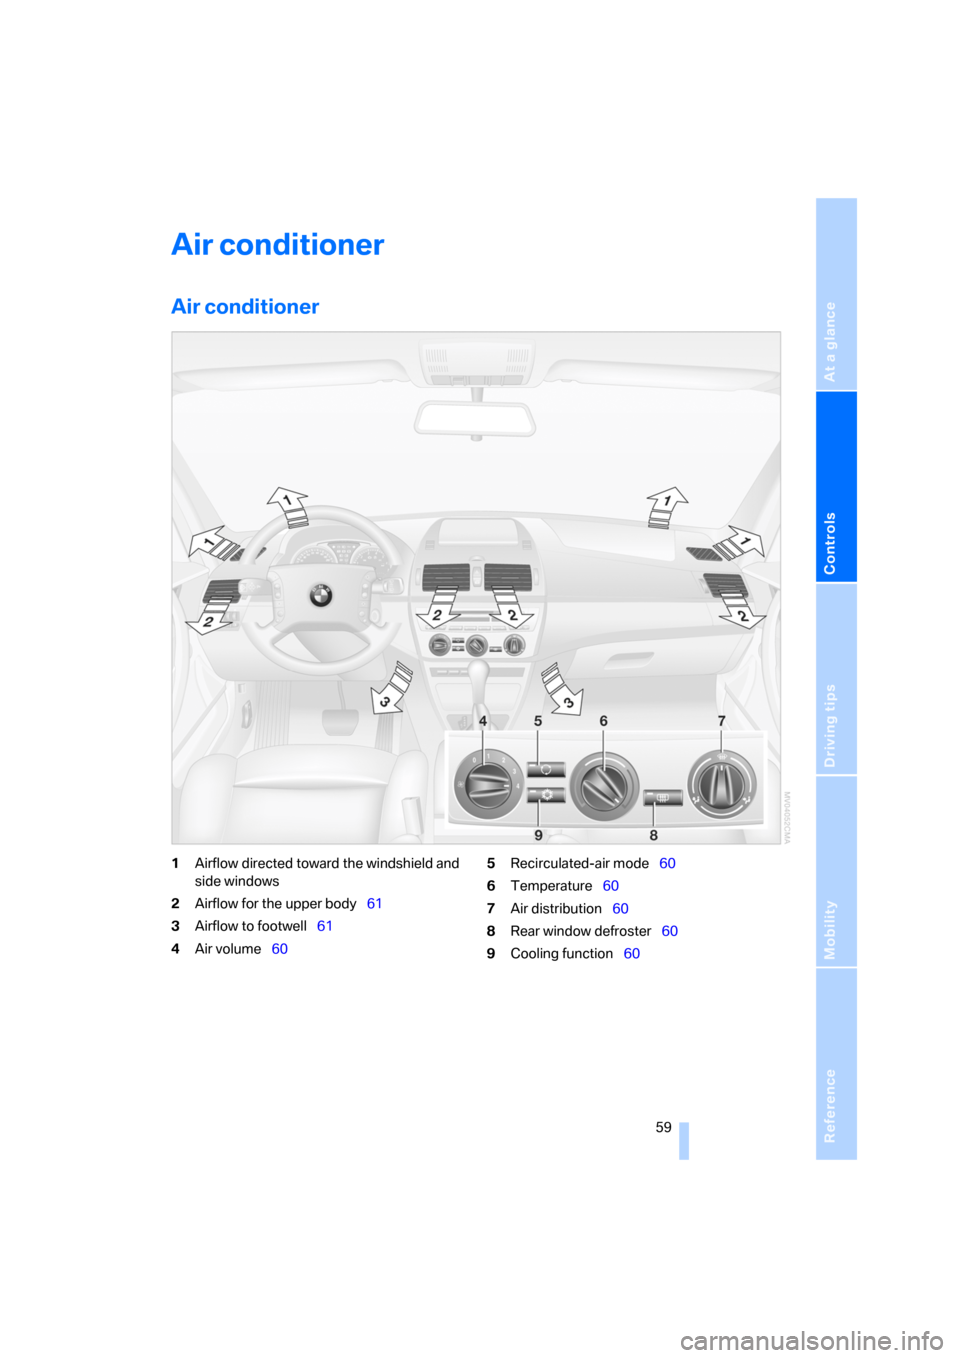
1Airflow directed toward the windshield and
side windows
2Airflow for the upper body61
3Airflow to footwell61
4Air volume605Recirculated-air mode60
6Temperature60
7Air distribution60
8Rear window defroster60
9Cooling function60
Page 62 of 133

Air conditioner
60
Air volume
You can vary the air volume in
steps 1 through 4. The heating or
cooling output is more effective
with a higher air volume.
Switching system on/off
Turn air volume rotary switch to 0. The blower
and air conditioning system are completely
switched off, the air flow is shut off.
To switch on the air conditioning system, set an
arbitrary air volume.
Temperature
To increase the temperature, turn
to the right, toward red.
For a lower temperature, turn the
rotary switch counterclockwise
toward blue.
Air distribution
You can direct air to flow onto the
windows , toward the upper
body and into the footwell .
Intermediate settings are possible.
Rear window defroster
The rear window heating switches
off automatically after a certain
amount of time.
Switching cooling function on/off
When the air conditioning is on, the
air is cooled, dehumidified, and
then reheated depending on the
temperature setting.
Depending on the weather, the windshield may
fog over briefly when the engine is started.
Recirculated-air mode
You can respond to unpleasant
odors outside the vehicle by tem-
porarily suspending the supply of
outside air. The system then recirculates the air
currently within the vehicle.
If condensation starts to form on the
inside window surfaces during operation
in the recirculated-air mode, you should switch
it off and increase the air supply as needed.
The recirculated-air mode should not be used
over a sustained period of time; otherwise, the
air quality inside the vehicle will steadily deteri-
orate.<
Defrosting windows and removing
condensation
1.Air volume 1 at level 4.
2.Temperature 2 toward right, red.
3.Air distribution 3 in position .
4.Deactivate recirculated-air mode 5.
5.Switch on the rear window heating 4 to
defrost the rear window.