Page 5 of 163

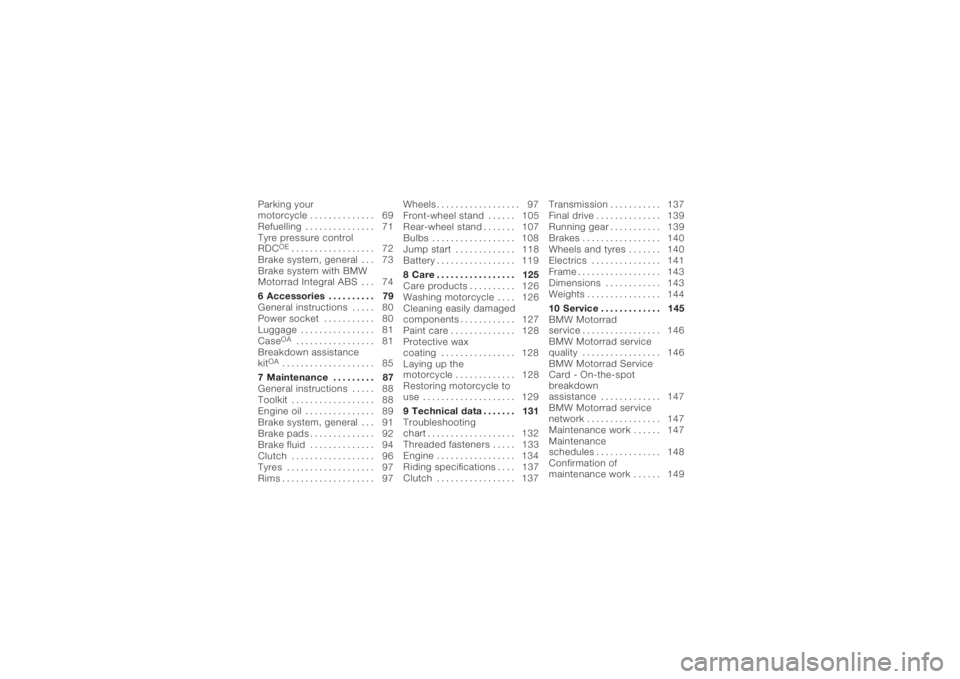
Parking your
motorcycle . . . ........... 69
Refuelling . . . . . .......... 71
Tyre pressure control
RDC
OE
.................. 72
Brake system, general . . . 73
Brake system with BMW
Motorrad Integral ABS . . . 74
6 Accessories .......... 79
General instructions . . . . . 80
Power socket . .......... 80
Luggage . . . . . . .......... 81
CaseOA
................. 81
Breakdown assistance
kit
OA
.................... 85
7 Maintenance . . . . . . . . . 87
General instructions . . . . . 88
Toolkit . ................. 88
Engine oil . . . . . .......... 89
Brake system, general . . . 91
Brake pads . . . . .......... 92
Brake fluid . . . . .......... 94
Clutch . ................. 96
Tyres . . ................. 97
Rims . . . ................. 97 Wheels .
................. 97
Front-wheel stand . ..... 105
Rear-wheel stand . . ..... 107
Bulbs . . ................ 108
Jump start . . . . ......... 118
Battery . ................ 119
8 Care . ................ 125
Care products . ......... 126
Washing motorcycle . . . . 126
Cleaning easily damaged
components . . . ......... 127
Paint care . . . . . ......... 128
Protective wax
coating ................ 128
Laying up the
motorcycle . . . . ......... 128
Restoring motorcycle to
use .................... 129
9 Technical data . . ..... 131
Troubleshooting
chart . . . ................ 132
Threaded fasteners ..... 133
Engine . ................ 134
Riding specifications . . . . 137
Clutch . ................ 137 Transmission . .
......... 137
Final drive . . . . . ......... 139
Running gear . . ......... 139
Brakes . ................ 140
Wheels and tyres . . ..... 140
Electrics . . . . . . ......... 141
Frame . . ................ 143
Dimensions . . . ......... 143
Weights ................ 144
10 Service . . . . ......... 145
BMW Motorrad
service . ................ 146
BMW Motorrad service
quality . ................ 146
BMW Motorrad Service
Card - On-the-spot
breakdown
assistance . . . . ......... 147
BMW Motorrad service
network ................ 147
Maintenance work . ..... 147
Maintenance
schedules . . . . . ......... 148
Confirmation of
maintenance work . ..... 149
Page 24 of 163
Warnings, overview
Mode of presentation Meaning
Lights up yellowThe
EWS!
warn-
ing appears on
the display. Electronic immobiliser active ( 24)
Lights up yellow The
FUEL!
warning flashes. Fuel down to reserve ( 24)
Lights up red Temperature reading flashesCoolant temperature too high
( 24)
Lights up yellow Appears on the displayEngine electronics ( 25)
Flashes red Appears on the displayInsufficient engine oil pressure
( 25)
Shows accom-
panied by theCHECK OILwarning Engine-oil level too low ( 26)
Lights up red Appears on the displayInsufficient battery charge current
( 26)
Lights up yellow The
LAMPR!
warning appears
on the display. Rear light bulb defective ( 27)
322zStatus indicators
Page 25 of 163
Mode of presentationMeaning
The
LAMPF!
warning appears
on the display.Front light bulb defective ( 27)
Lights up yellow The
LAMPS!
warning appears
on the display. Bulbs defective ( 27)
Appears on the
display Ice warning ( 27)
The
DWALO!
warning appears
on the display. Battery of anti-theft alarm (OE) weak
( 28)
Lights up yellow The
DWA!
warn-
ing appears on
the display. Anti-theft alarm battery flat (OE)
( 28)
323zStatus indicators
Page 29 of 163

Rear light bulb defectiveGeneral warning light
lights up yellow.
The
LAMPR!
warning ap-
pears on the display.
A defective bulb places
your safety at risk be-
cause it is easier for other
users to oversee you and
your motorcycle.
Replace defective bulbs as
soon as possible; always
carry a complete set of spare
bulbs if possible.
Rear light or brake light bulb
defective.
Replacing brake light and
rear light bulb ( 113)
Front light bulb defective
The
LAMPF!
warning ap-
pears on the display. A defective bulb places
your safety at risk be-
cause it is easier for other
users to oversee you and
your motorcycle.
Replace defective bulbs as
soon as possible; always
carry a complete set of spare
bulbs if possible.
Low-beam headlight, high-
beam headlight, side-light or
turn-indicator bulb defective.
Replacing low-beam head-
light bulb ( 109)
Replacing high-beam head-
light bulb ( 111)
Replacing parking-light bulb
( 113)
Replacing front turn indicat-
or bulbs ( 115)
Replacing rear turn indicator
bulbs ( 117) Bulbs defective
General warning light
lights up yellow.
The
LAMPS!
warning ap-
pears on the display.
A defective bulb places
your safety at risk be-
cause it is easier for other
users to oversee you and
your motorcycle.
Replace defective bulbs as
soon as possible; always
carry a complete set of spare
bulbs if possible.
A combination of the bulb de-
fects described above has
occurred.
See the fault descriptions
above.
Ice warning Ice warning symbol ap-
pears on the display.
327zStatus indicators
Page 89 of 163
Maintenance
General instructions . . . . . . . . . . . 88
Toolkit . . . . . . . . . . . . . . . . . . . . . . . . 88
Engine oil . . . . . . . . . . . . . . . . . . . . . 89
Brake system, general . . . . . . . . . 91
Brake pads . . . . . . . . . . . . . . . . . . . . 92
Brake fluid . . . . . . . . . . . . . . . . . . . . 94
Clutch . . . . . . . . . . . . . . . . . . . . . . . . 96
Tyres . . . . . . . . . . . . . . . . . . . . . . . . . 97
Rims . . . . . . . . . . . . . . . . . . . . . . . . . . 97
Wheels . . . . . . . . . . . . . . . . . . . . . . . 97
Front-wheel stand . . . . . . . . . . . . 105
Rear-wheel stand . . . . . . . . . . . . 107
Bulbs . . . . . . . . . . . . . . . . . . . . . . . . 108
Jump start . . . . . . . . . . . . . . . . . . . 118
Battery . . . . . . . . . . . . . . . . . . . . . . . 119
787zMaintenance
Page 91 of 163

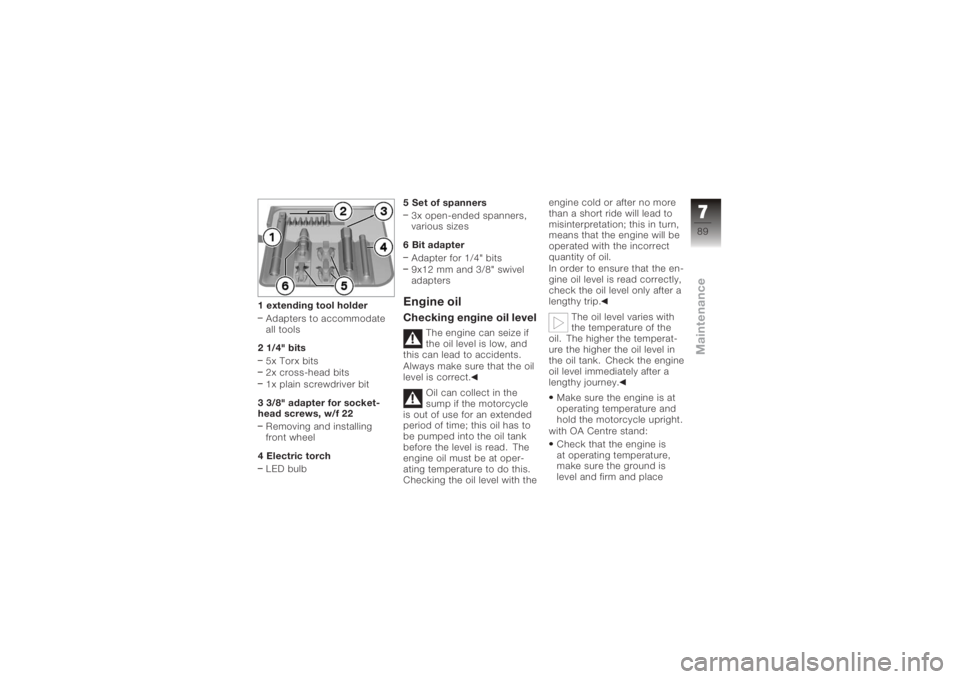
1 extending tool holderAdapters to accommodate
all tools
2 1/4" bits 5x Torx bits
2x cross-head bits
1x plain screwdriver bit
3 3/8" adapter for socket-
head screws, w/f 22 Removing and installing
front wheel
4 Electric torch LED bulb 5 Set of spanners
3x open-ended spanners,
various sizes
6 Bit adapter Adapter for 1/4" bits
9x12 mm and 3/8" swivel
adapters
Engine oilChecking engine oil level
The engine can seize if
the oil level is low, and
this can lead to accidents.
Always make sure that the oil
level is correct.
Oil can collect in the
sump if the motorcycle
is out of use for an extended
period of time; this oil has to
be pumped into the oil tank
before the level is read. The
engine oil must be at oper-
ating temperature to do this.
Checking the oil level with the engine cold or after no more
than a short ride will lead to
misinterpretation; this in turn,
means that the engine will be
operated with the incorrect
quantity of oil.
In order to ensure that the en-
gine oil level is read correctly,
check the oil level only after a
lengthy trip.
The oil level varies with
the temperature of the
oil. The higher the temperat-
ure the higher the oil level in
the oil tank. Check the engine
oil level immediately after a
lengthy journey.
Make sure the engine is at
operating temperature and
hold the motorcycle upright.
with OA Centre stand:
Check that the engine is
at operating temperature,
make sure the ground is
level and firm and place
789zMaintenance
Page 110 of 163
Push the rear wheel stand
from the left into the rear
axle.
Install the retaining disc
from the right; to do so,
press the unlock button.
Place your left hand on the
left grab handle of the mo-
torcycle4, and your right
hand on the lever of the rear
wheel stand 5. Lift the motorcycle upright,
simultaneously pressing the
lever down until the stand
supports the motorcycle in
the upright position.
Press the lever down to the
ground.
BulbsGeneral instructionsThe 'bulb defect' symbol ap-
pears in the display if a bulb
is defective. If the brake or
rear light fails, the symbol is
accompanied by the general
warning light, which lights up
yellow. If the rear light fails
the second filament of the
brake light shines at reduced
brightness to double as a rear
light. Even though you have
7108zMaintenance
Page 111 of 163

this substitute rear light, the
indicators in the display tell
you that a bulb defect has oc-
curred.A defective bulb places
your safety at risk be-
cause it is easier for other
users to oversee you and
your motorcycle.
Replace defective bulbs as
soon as possible; always
carry a complete set of spare
bulbs if possible.
The bulb is pressurised
and can cause injury if
damaged.
Wear protective goggles
and gloves when changing
bulbs.
The types of bulb fitted
to your motorcycle are
listed in the section entitled
"Technical data". Do not touch the glass
of new bulbs with your
fingers. Use a clean, dry cloth
to hold the bulbs when hand-
ling them. Dirt deposits, in
particular oil and grease, in-
terfere with heat radiation
from the bulb. This leads to
overheating and shortens the
bulb's operating life.
Replacing low-beam
headlight bulb
If it is not standing firmly,
the motorcycle could
topple in the course of the
operations described below.
Always make sure that the
motorcycle is stable and
firmly supported.
Turn the handlebars
to the left to facilitate
access. Make sure the ground is
level and firm and place the
motorcycle on its stand.
Switch off the ignition.
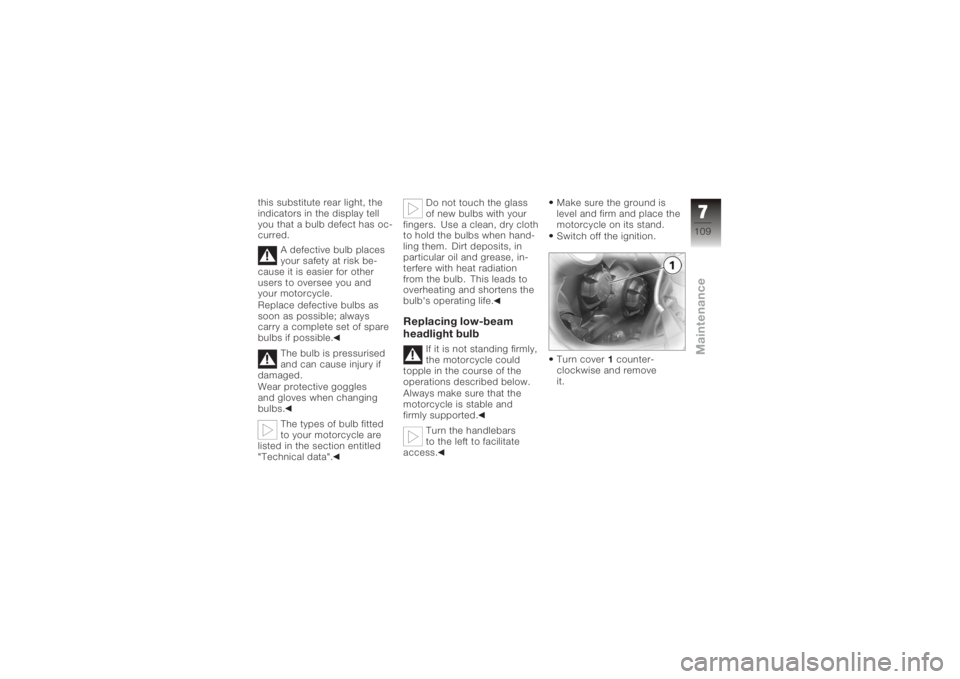
Turn cover
1counter-
clockwise and remove
it.
7109zMaintenance