2006 BMW M5 SEDAN power
[x] Cancel search: powerPage 17 of 231

At a glance
15Reference
Controls
Driving tips
Communications
Navigation
Entertainment
Mobility
1Microphone for handsfree mode for
telephone
*
and for voice command system*22
2Reading lamps86
3Initiating
an emergency call196
4Glass sunroof
*, electric38
5Interior lamps86
6Passenger airbag status lamp79
7Control Display16
8Hazard warning flashers
9Central locking system32
10Automatic climate control87
11Changing
>radio station132
>track132
12Ejecting
>navigation DVD
*132
>audio CD13213Drive for navigation system DVD with
Professional navigation system
*112
14Drive for audio CDs132
15Switching Entertainment sound output on/
off and adjusting volume132
17Controller16
Turn, press or move horizontally in four
directions
18Activating voice command system
*22
19Opening start menu on Control Display17
20Drivelogic of Sequential Manual
Transmission57
21EDC Electronic Damping Control76
22DSC Dynamic Stability Control75
23M Engine Dynamic Control POWER58 Temperature setting, left/right88
Automatic air distribution and
volume88
Cooling function89
AUC Automatic recirculated-air
control90
Recirculated-air mode90
Maximum cooling89
Residual heat mode90
Switching off automatic climate
control90
Air volume89
Defrosting windows and removing
condensation89
Rear window defroster87
16
Heated seats45
Active seat ventilation
*45
Adjusting active backrest
width
*41
Flat Tire Monitor76
PDC Park Distance Control
*73
Page 41 of 231

Controls
39Reference
At a glance
Driving tips
Communications
Navigation
Entertainment
Mobility
In a similar manner, the glass sunroof closes
when you slide the switch forward. The sliding
visor remains open and can be closed by hand.
For information on using the convenience oper-
ation at the door lock or with the remote control,
refer to page30 or32.
For information on comfort closing with comfort
access, refer to page36.
Automatic opening and closing
Press the switch past the resistance point.
The following movements are also automatic:
>When the sunroof is open, press the switch
in the lifting direction: the sunroof is raised
all the way.
>When the sunroof is raised, press the
switch in the opening direction: the sunroof
is opened all the way.
Pressing the switch again stops the motion.
Pinch protection system
If the glass sunroof encounters resistance when
closing from roughly the center of the roof
opening or when closing from the raised posi-
tion, the closing action is interrupted and the
glass sunroof reopens a short way.
Despite the pinch protection system,
inspect the sunroof's travel path prior to
closing it, as the safety system might fail to
detect certain kinds of obstructions, such as
very thin objects, and the sunroof would con-
tinue closing.
Pressing the switch beyond the resistance
point and holding it there deactivates the pinch
protection system.<
Following interruptions in electrical
power supply
After a power loss, the sunroof may only
respond to the lift command. The system must
be initialized. BMW recommends having this
work done by your BMW center.
Moving manually
In the event of an electrical malfunction, you can
move the glass sunroof manually:
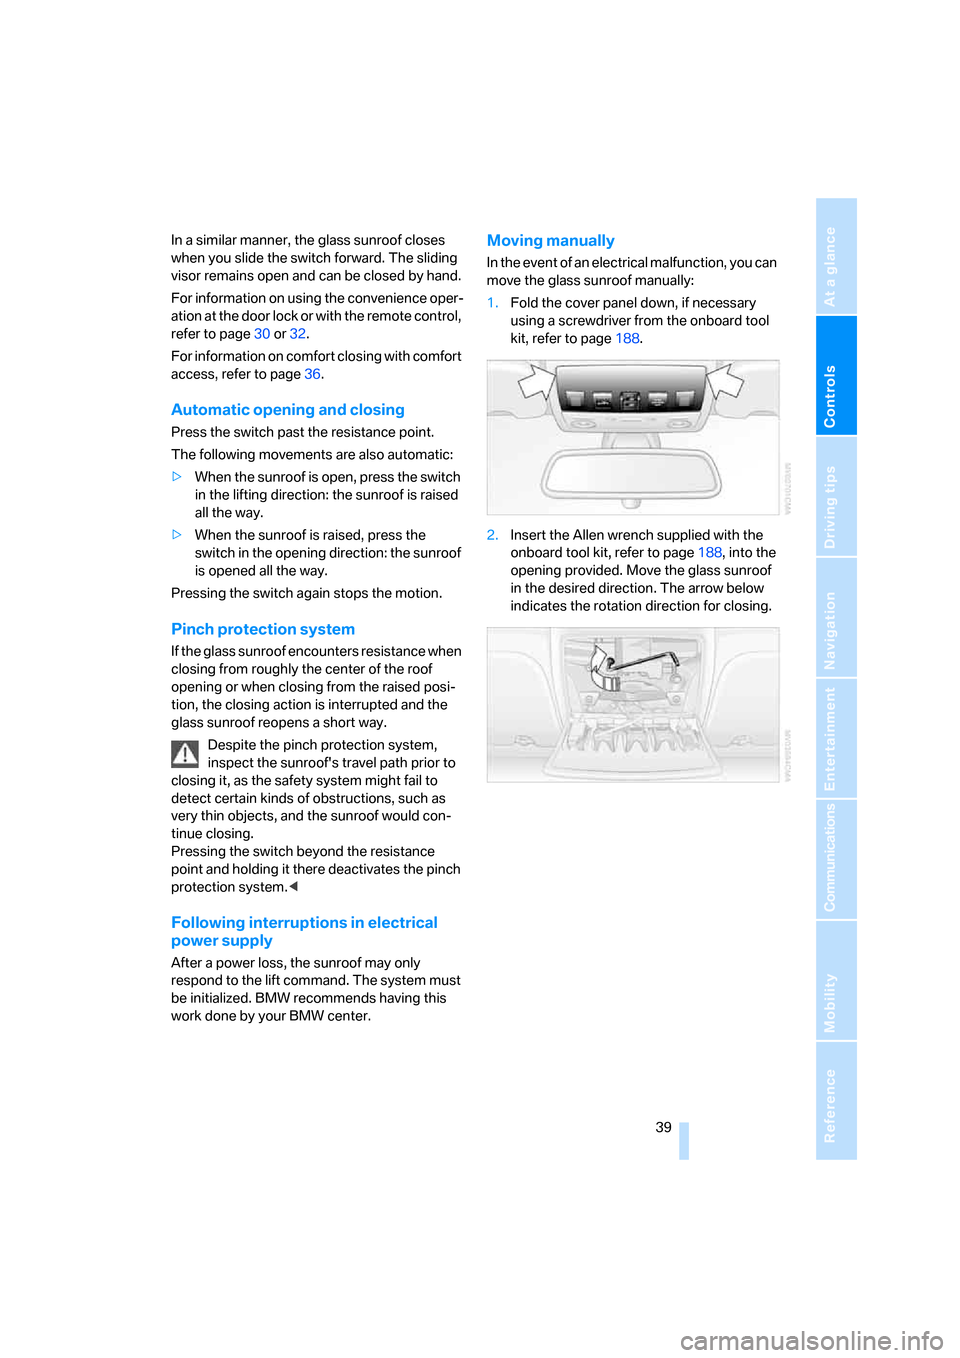
1.Fold the cover panel down, if necessary
using a screwdriver from the onboard tool
kit, refer to page188.
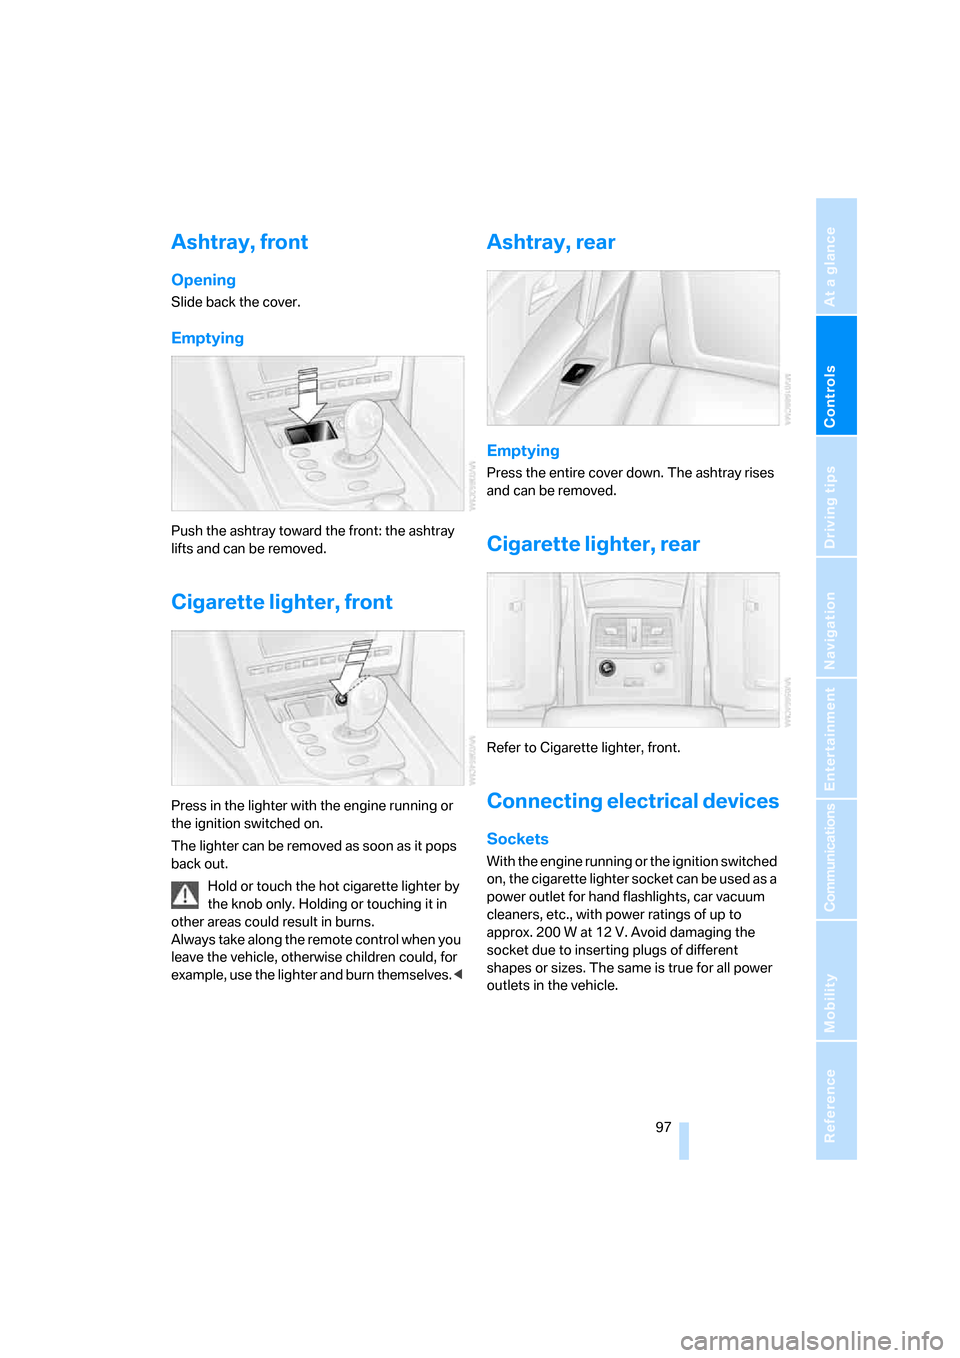
2.Insert the Allen wrench supplied with the
onboard tool kit, refer to page188, into the
opening provided. Move the glass sunroof
in the desired direction. The arrow below
indicates the rotation direction for closing.
Page 50 of 231

Adjustments
48 >To repeat the last voice instruction:
Press the button.
MDrive
With MDrive you can configure several individ-
ual settings for your vehicle on the Control Dis-
play and activate them simultaneously with the
button on the steering wheel.
Configuring settings
With the ignition switched on you can change
the settings of MDrive on the Control Display.
iDrive, for explanation of principle, refer to
page16.
1.Press the button.
This opens the start menu.
2.Press the controller to open the menu.
3.Select "Vehicle settings" and press the
controller.
4.Move the controller forward if necessary so
that the marking is located in the upper
field. Turn the controller until "MDrive" is
selected and press the controller.The functions contained in MDrive are dis-
played:
>"SMG Drivelogic"
Sequential Manual Transmission with
Drivelogic: shifting modes and Drive-
logic driving programs, refer to page57
>"EDC"
Programs of the Electronic Damping
Control, refer to page76
>"DSC"
Dynamic Stability Control and
M Dynamic Mode, refer to page75
>"POWER"
Programs of the M Engine Dynamic
Control, refer to page58
>"Active seat backrest"
*
Programs of the active backrest width
adjustment, refer to page41
>"Head-Up Display"
*
Views of the Head-Up Display, refer to
page80
You can reset all settings for MDrive to their
default values:
>"Reset to default"
5.Select the desired function.
6.Press the controller.
Page 54 of 231

Transporting children safely
52
Rear seats with through-loading
system*
The anchorage points for the LATCH child-
restraint fixing system are located behind the
indicated protective caps. Before attaching the
child's seat, remove the protective caps and
pull the belt out of the area of the child-restraint
fixing system.
On trips
If the vehicle is equipped with rear side
airbags, make sure that children do not
lean out of the child's seat towards the door
panels. Otherwise injuries can be caused if the
side airbags are triggered.<
Child-safety locks for rear doors
Slide down the safety lever on the rear doors:
the door can now be opened from the outside
only.
Safety switch for power windows
Always press the safety switch for the power
windows, refer to page38, when children are
riding in the rear of the vehicle.
Page 60 of 231

Driving
58 7.Press controller to select driving programs.
8.Turn controller to set driving program.
9.Press the controller.
Shift lights
To achieve the best vehicle acceleration with a
sporty driving style in the Sequential mode,
shift lights in the Head-Up Display
* indicate the
optimum shifting point briefly before reaching
the maximum rpm.
1.Switch on Head-Up Display, refer to Head-
Up Display on page80.
2.Select display "M View" on Head-Up Dis-
play, refer to Selecting displays on page80.
The current engine speed is highlighted on
the tachometer.
3.When approaching the maximum rpm, yel-
low illuminated fields1 of the tachometer
consecutively indicate the approaching
upshift point.
4.Shift at the latest when the red indicator
field lights up2.
When the permissible maximum rpm is
reached, the entire tachometer beings to flash.
When the maximum rpm is exceeded, the fuel
supply is cut off to protect the engine. Always
avoid engine speeds in this range.
M Engine Dynamic Control
With M Engine Dynamic Control you can influ-
ence how sporty the reaction of your vehicle to
accelerator pedal movements is to be. Three
programs are available for engine control.
"P 400" program
In the "P 400" program the engine reacts gently
to the movement of the accelerator pedal. This
is, for example, ideal for city driving or driving on
snow. In the process, the fuel consumption is
minimal and the engine output is reduced.
"P 500" program
The "P 500" program provides maximum per-
formance and more spontaneous reaction of
the engine to accelerator pedal movements.
"P 500 Sport" program
In the "P 500 Sport" program the engine reacts
especially spontaneously and uncompromis-
ingly sporty with maximum performance to
accelerator pedal movements.
Selecting program
Each time the engine is started, the "P 400"
program is activated.
Press the POWER button to activate the
"P 500" program. Pressing the POWER button
repeatedly switches between the programs
"P 400" and "P 500".
You can also activate your preferred program
with the button on the steering wheel, refer
to MDrive on page48. You can only activate the
"P 500 Sport" program with MDrive.
For the programs "P 500" and "P 500 Sport"
the LED in the POWER button lights up.
Page 99 of 231

Controls
97Reference
At a glance
Driving tips
Communications
Navigation
Entertainment
Mobility
Ashtray, front
Opening
Slide back the cover.
Emptying
Push the ashtray toward the front: the ashtray
lifts and can be removed.
Cigarette lighter, front
Press in the lighter with the engine running or
the ignition switched on.
The lighter can be removed as soon as it pops
back out.
Hold or touch the hot cigarette lighter by
the knob only. Holding or touching it in
other areas could result in burns.
Always take along the remote control when you
leave the vehicle, otherwise children could, for
example, use the lighter and burn themselves.<
Ashtray, rear
Emptying
Press the entire cover down. The ashtray rises
and can be removed.
Cigarette lighter, rear
Refer to Cigarette lighter, front.
Connecting electrical devices
Sockets
With the engine running or the ignition switched
on, the cigarette lighter socket can be used as a
power outlet for hand flashlights, car vacuum
cleaners, etc., with power ratings of up to
approx. 200 W at 12 V. Avoid damaging the
socket due to inserting plugs of different
shapes or sizes. The same is true for all power
outlets in the vehicle.
Page 153 of 231

Navigation
Entertainment
Driving tips
151Reference
At a glance
Controls
Communications
Mobility
External audio device
You can connect an external audio device, e.g.
an MP3 player, and play the sound via the vehi-
cle loudspeakers. The sound can be adjusted
with iDrive.
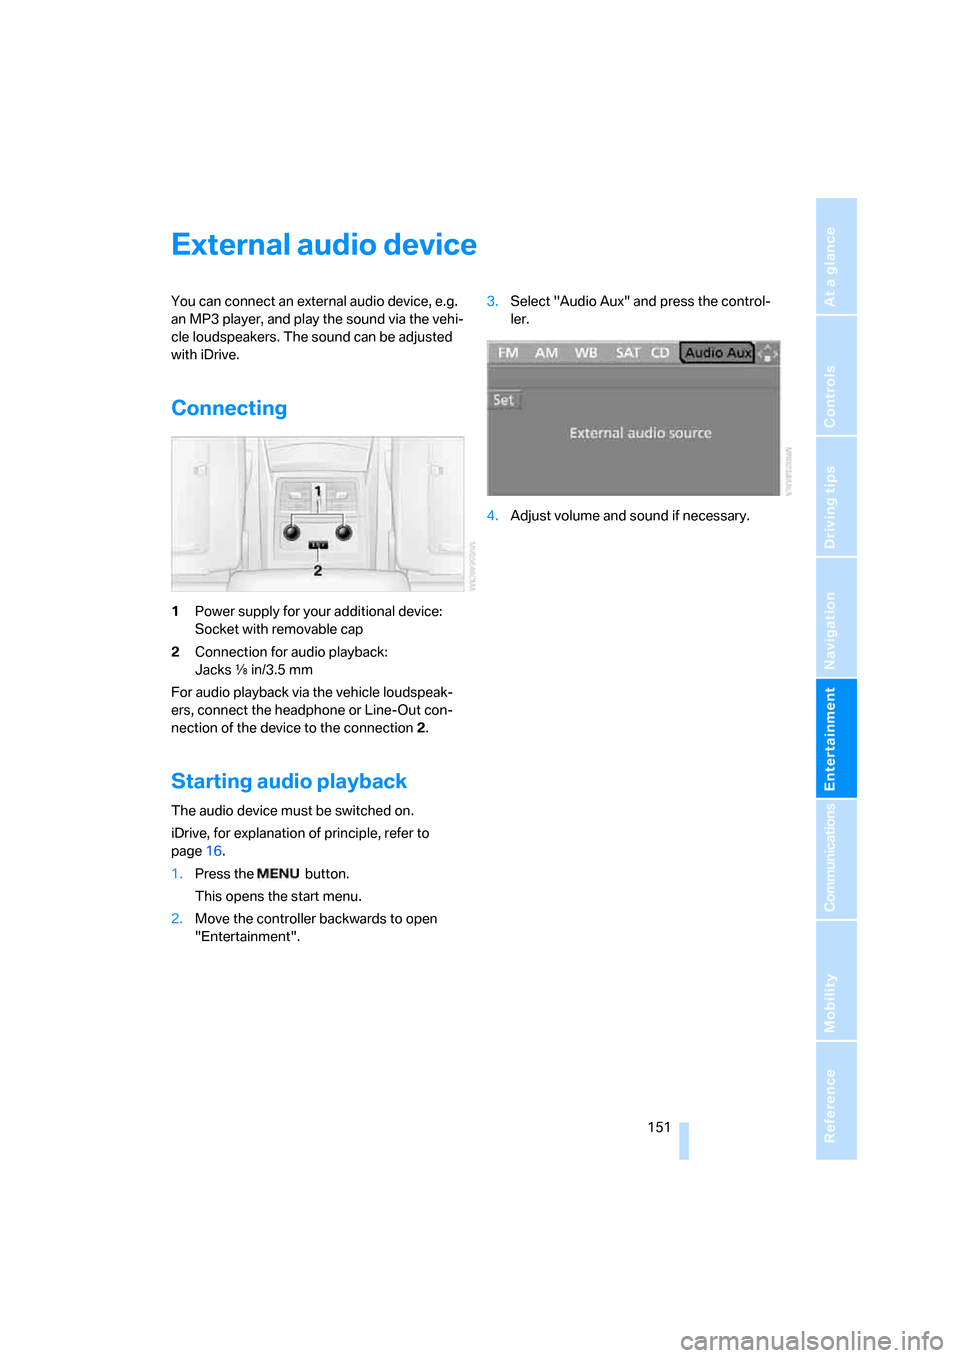
Connecting
1Power supply for your additional device:
Socket with removable cap
2Connection for audio playback:
Jacks εin/3.5 mm
For audio playback via the vehicle loudspeak-
ers, connect the headphone or Line-Out con-
nection of the device to the connection 2.
Starting audio playback
The audio device must be switched on.
iDrive, for explanation of principle, refer to
page16.
1.Press the button.
This opens the start menu.
2.Move the controller backwards to open
"Entertainment".3.Select "Audio Aux" and press the control-
ler.
4.Adjust volume and sound if necessary.
Page 197 of 231

Mobility
195Reference
At a glance
Controls
Driving tips
Communications
Navigation
Entertainment
Vehicle battery
Battery care
The battery is 100 % maintenance-free, i.e., the
electrolyte will last for the life of the battery
when the vehicle is operated in a temperate cli-
mate. Your BMW center will be glad to advise in
all matters concerning the battery.
Charging battery
Only charge the battery in the vehicle via the
terminals in the engine compartment with the
engine off. Connections, refer to Jump starting
on page197.
Disposal
Have old batteries disposed of by your
BMW center or hand them in to a recy-
cling center. Maintain the battery in an upright
position for transport and storage. Always
restrain the battery to prevent it from tipping
over during transport.<
Power failure
After a temporary power loss, the functioning of
some equipment may be limited and require
reinitialization. Individual settings are also lost
and must be updated:
>Seat, mirror and steering wheel memory
The positions must be stored again, refer to
page42.
>Time and Date
The values must be updated, refer to
page71.
>Radio
Stations must be stored again if necessary,
refer to page138.
>Navigation system
Wait until the system starts, refer to
page129.
Fuses
Never attempt to repair a blown fuse and
do not replace a defective fuse with a sub-
stitute of another color or amperage rating, as
this could lead to a circuit overload, ultimately
resulting in a fire in the vehicle.<
Spare fuses, plastic tweezers and fuse alloca-
tion diagram are located in the compartment for
the onboard tool kit, refer to page188.
In glove compartment
1.Release both quick-release fasteners.
2.Fold the cover forward or remove.
In luggage compartment
1.Lift up floor mat.
2.Release the quick-release fastener of the
right side panel and pull out the panel.