2006 BMW M5 SEDAN steering
[x] Cancel search: steeringPage 156 of 231

Telephoning
154
Telephoning
The concept
Your BMW is equipped with a full mobile phone
preparation package. After logging on a suitable
mobile phone on the vehicle once, you can
operate the mobile phone via iDrive, with the
buttons on the steering wheel and by voice.
A mobile phone that has been logged on once is
automatically detected again with the engine
running or the ignition switched on as soon as
it is in the vehicle interior. The logon data of up
to four mobile phones can be stored simulta-
neously. If several mobile phones are detected
simultaneously, the respective last mobile
phone logged on can be operated via the vehi-
cle.
Using a phone in your vehicle
Using snap-in adapter*
The so-called snap-in adapter, a mobile phone
cradle, enables the battery to be charged and
the mobile phone to be connected to the exter-
nal antenna of your vehicle. This ensures
improved network reception and a consistent
voice reproduction quality. Ask your BMW cen-
ter which mobile phones snap-in adapters are
offered for.
BMW discourages the use of mobile
phones or other mobile communications
devices inside the vehicle without a direct con-
nection to an outside antenna. Otherwise, the
vehicle electronics and mobile communication
device can influence one another. In addition,
there is no assurance that the radiation which
results from transmission will be dissipated
from the vehicle interior.<
Avoid operating a mobile phone detected by
the vehicle with the keypad of the mobile
phone, otherwise malfunctions can occur.
For your safety
A car phone makes life more convenient in
many ways, and can even save lives in an emer-
gency. While you should consult your mobile
phone's separate operating instructions for a
detailed description of safety precautions and
information, we request that you direct your
particular attention to the following:
Only make entries when the traffic situa-
tion allows you to do so. Do not hold the
mobile phone in your hand while you are driving;
use the hands-free system instead. If you do
not observe this precaution, your being dis-
tracted can endanger vehicle occupants and
other road users.<
Suitable mobile phones
Ask your BMW center which mobile phones
with a Bluetooth interface are supported by the
mobile phone preparation package or which
mobile phones snap-in adapters are available
for. These mobile phones support the functions
described in this Owner's Manual with a certain
software version. Malfunctions can occur with
other mobile phones.
Care instructions
You can find what you need to know about car-
ing for your mobile phone in the separate Caring
for your vehicle brochure and in the mobile
phone operating instructions.
Operating options
You can operate the mobile phone* using:
>The steering wheel, refer to page11
>iDrive, refer to page16
>Voice commands, refer to page163
*
Page 160 of 231

Telephoning
158 3.Select the menu and press the controller.
4.Select "Communication settings" and
press the controller.
5.Select "Bluetooth" and press the controller.
6.Select "Settings" and press the controller.
The Bluetooth link is activated.
7.Select "Bluetooth communication active"
and press the controller to activate or deac-
tivate the link.
Adjusting volume
Turn the knob during a call to select the desired
volume.
This volume for the hands-free system is main-
tained, even if the other audio sources are set to
minimum volume.
You can also adjust the volume with buttons on
the steering wheel, refer to page11.The setting is stored for the remote control cur-
rently in use.
Operation via iDrive
You can operate the following functions via
iDrive:
>Dial phone numbers.
>Dial phone numbers from the phone book.
>Dial stored phone numbers, e.g. from the
list of accepted calls.
>Hang up.
With the ignition switched off and radio readi-
ness, e.g. after removing the remote control,
you can continue an ongoing call for a maximum
of 25 minutes via the handsfree system.
Requirements
The logon data of the mobile phone are stored
in the vehicle and the mobile phone is ready to
operate.
The engine is running or the ignition is switched
on.
The mobile phone is detected by the vehicle.
iDrive, for explanation of principle, refer to
page16.
1.Press the button.
This opens the start menu.
2.Move the controller forward to open "Com-
munication".
Receiving calls
If you have the phone number of the caller
stored in the phone book and the phone num-
Page 165 of 231

163
Entertainment
Reference
At a glance
Controls
Driving tips Communications
Navigation
Mobility
Act according to what is shown on the
mobile phone display, refer to the operating
instructions of your mobile phone.
>Press the button above the storage
compartment. Switching over may take
several seconds.
From handsfree system to mobile
phone
When you telephone via the handsfree system,
you can also continue the call via the mobile
phone if necessary, depending on the mobile
phone model. Act according to what is shown
on the mobile phone display, refer to the oper-
ating instructions of your mobile phone.
Operation by voice*
The concept
You can operate your mobile phone without
having to remove your hands from the steering
wheel. When making your entries, you will be
supported by announcements and questions in
many cases.
The same prerequisites as for operation via
iDrive apply, refer to page158.
Symbols in Owner's Manual
Voice commands
Activating system
1.Press the button on the steering wheel.
An acoustic signal indicates that you can
say commands.
2.Say the command.
The text or numbers that the voice com-
mand system has registered will appear on
the Control Display.
Ending/canceling operation by voice
Press the button on the steering wheel
or
In dialogs where text is spoken, not a command,
e.g. a name, canceling is only possible using the
button on the steering wheel.
Having possible commands read aloud
The system understands default commands
that must be spoken word for word.
You can have the possible commands spoken
by the system at any point:
Using alternative commands
There are often a number of commands to run a
function, e.g.:
The system recognizes digits from zero to nine.
You can say each digit individually or group
them into a sequence to accelerate the input.
{...}Say the specified commands word for
word.
{{...}} Indicates responses of the system.
{Cancel}.
{Help}
{Dial name} or {Name}.
Page 166 of 231

Telephoning
164
Example: dialing phone numbers
Start the dialog:
Press the button on the steering wheel.
Adjusting volume
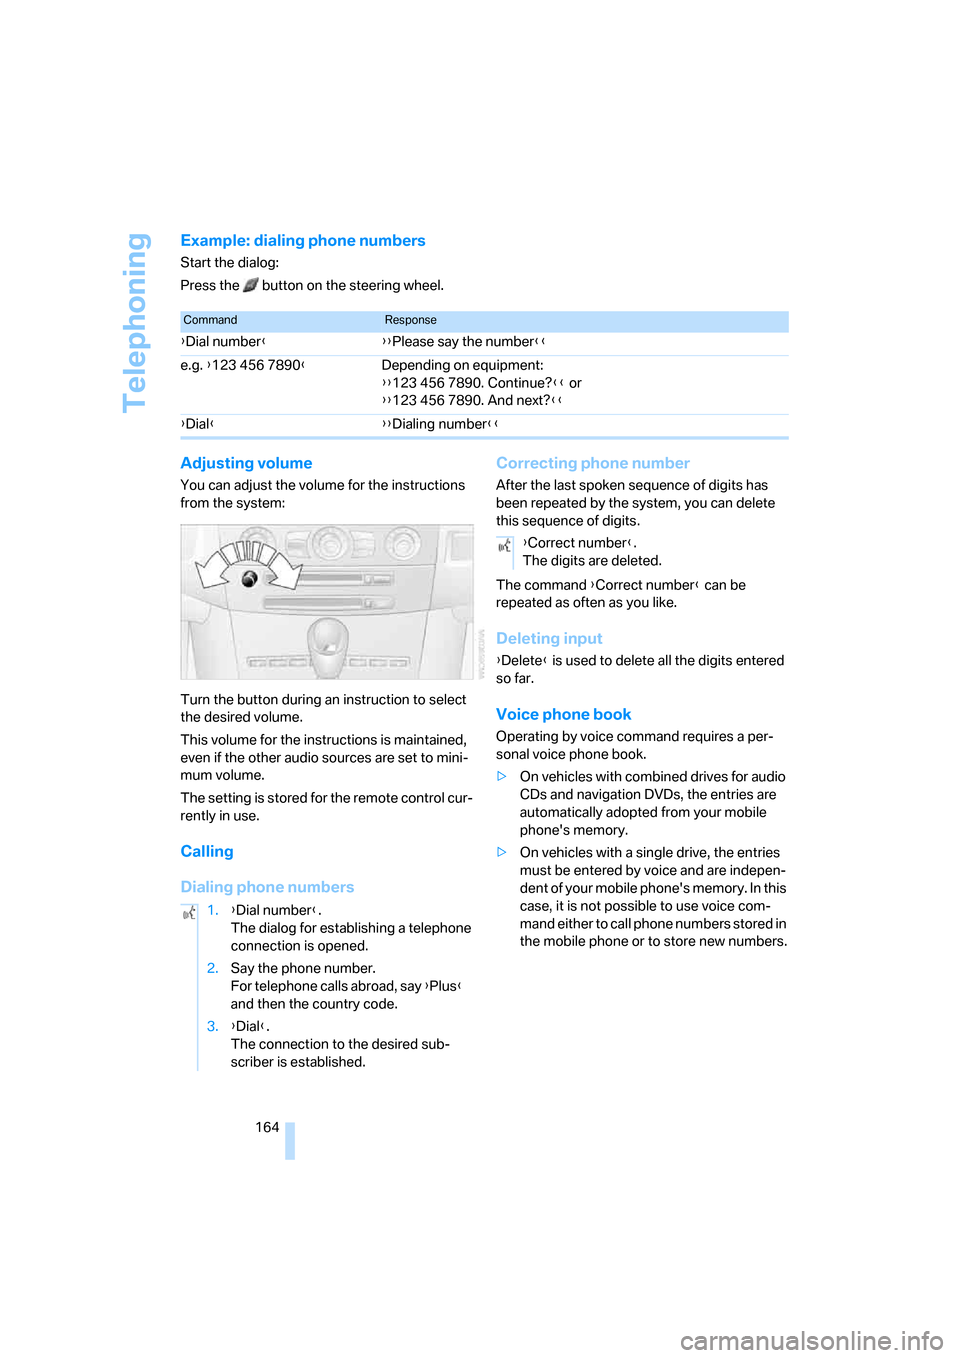
You can adjust the volume for the instructions
from the system:
Turn the button during an instruction to select
the desired volume.
This volume for the instructions is maintained,
even if the other audio sources are set to mini-
mum volume.
The setting is stored for the remote control cur-
rently in use.
Calling
Dialing phone numbersCorrecting phone number
After the last spoken sequence of digits has
been repeated by the system, you can delete
this sequence of digits.
The command {Correct number} can be
repeated as often as you like.
Deleting input
{Delete} is used to delete all the digits entered
so far.
Voice phone book
Operating by voice command requires a per-
sonal voice phone book.
>On vehicles with combined drives for audio
CDs and navigation DVDs, the entries are
automatically adopted from your mobile
phone's memory.
>On vehicles with a single drive, the entries
must be entered by voice and are indepen-
dent of your mobile phone's memory. In this
case, it is not possible to use voice com-
mand either to call phone numbers stored in
the mobile phone or to store new numbers.
CommandResponse
{Dial number}{{Please say the number}}
e.g. {123 456 7890}Depending on equipment:
{{123 456 7890. Continue?}} or
{{123 456 7890. And next?}}
{Dial}{{Dialing number}}
1.{Dial number}.
The dialog for establishing a telephone
connection is opened.
2.Say the phone number.
For telephone calls abroad, say {Plus}
and then the country code.
3.{Dial}.
The connection to the desired sub-
scriber is established.
{Correct number}.
The digits are deleted.
Page 168 of 231

Telephoning
166
Mounting/removing snap-in
adapter
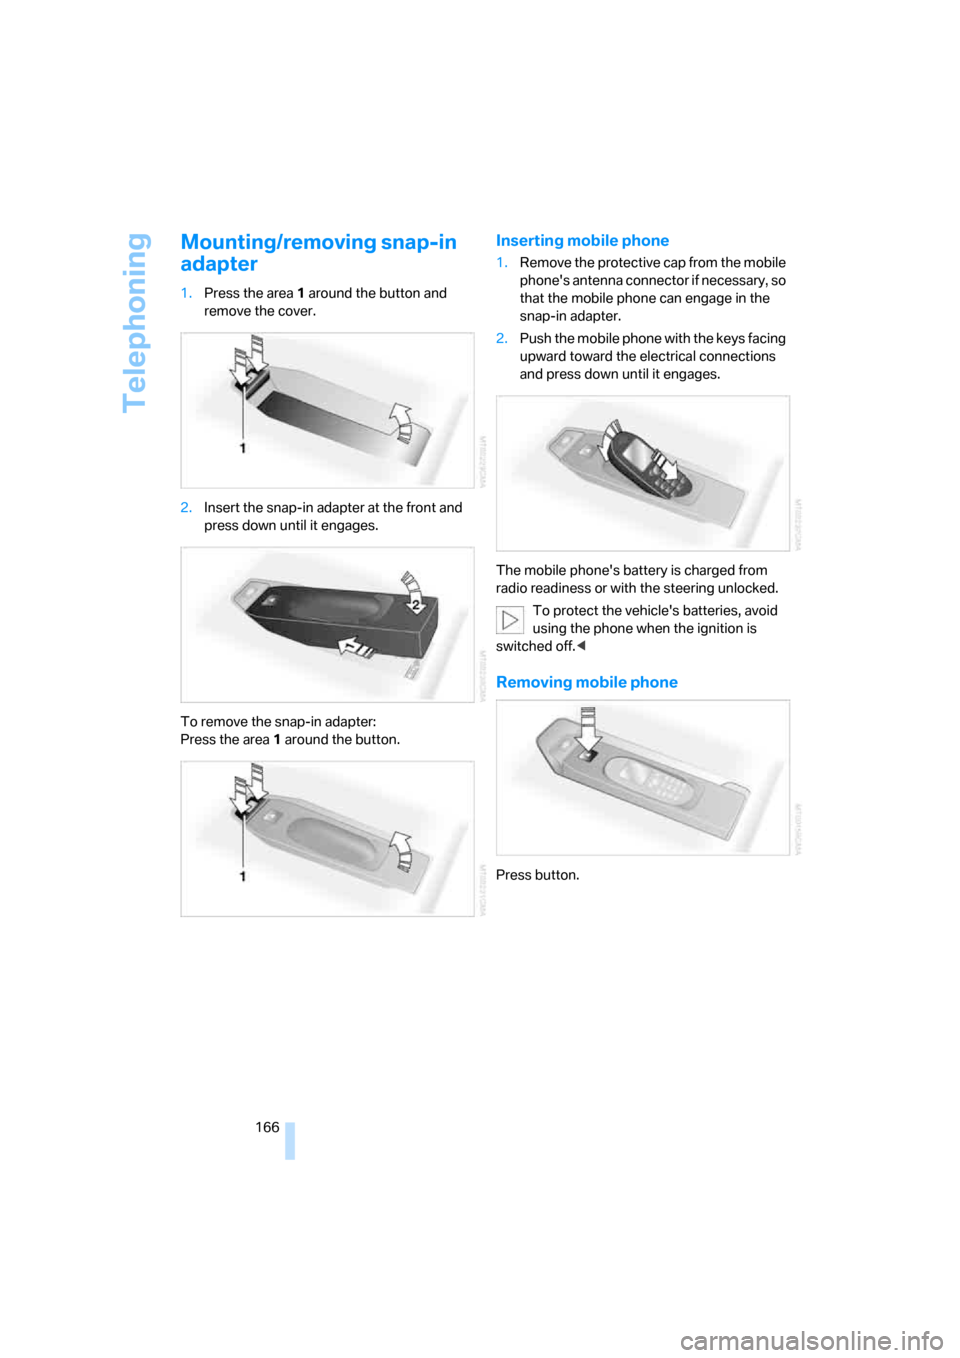
1.Press the area 1 around the button and
remove the cover.
2.Insert the snap-in adapter at the front and
press down until it engages.
To remove the snap-in adapter:
Press the area 1 around the button.
Inserting mobile phone
1.Remove the protective cap from the mobile
phone's antenna connector if necessary, so
that the mobile phone can engage in the
snap-in adapter.
2.Push the mobile phone with the keys facing
upward toward the electrical connections
and press down until it engages.
The mobile phone's battery is charged from
radio readiness or with the steering unlocked.
To protect the vehicle's batteries, avoid
using the phone when the ignition is
switched off.<
Removing mobile phone
Press button.
Page 192 of 231

Replacing components
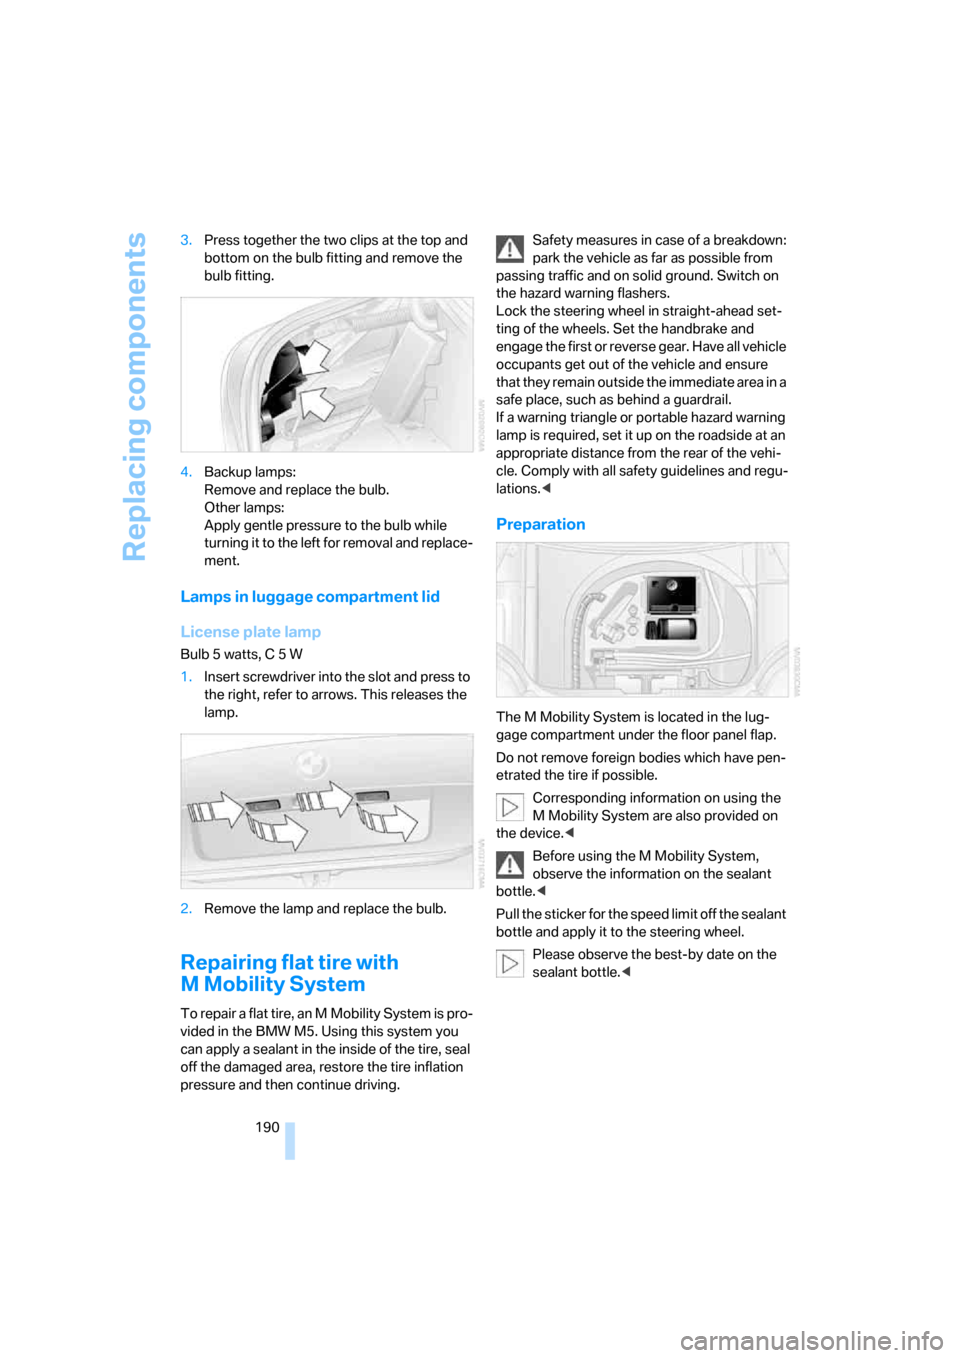
190 3.Press together the two clips at the top and
bottom on the bulb fitting and remove the
bulb fitting.
4.Backup lamps:
Remove and replace the bulb.
Other lamps:
Apply gentle pressure to the bulb while
turning it to the left for removal and replace-
ment.
Lamps in luggage compartment lid
License plate lamp
Bulb 5 watts, C 5 W
1.Insert screwdriver into the slot and press to
the right, refer to arrows. This releases the
lamp.
2.Remove the lamp and replace the bulb.
Repairing flat tire with
M Mobility System
To repair a flat tire, an M Mobility System is pro-
vided in the BMW M5. Using this system you
can apply a sealant in the inside of the tire, seal
off the damaged area, restore the tire inflation
pressure and then continue driving.Safety measures in case of a breakdown:
park the vehicle as far as possible from
passing traffic and on solid ground. Switch on
the hazard warning flashers.
Lock the steering wheel in straight-ahead set-
ting of the wheels. Set the handbrake and
engage the first or reverse gear. Have all vehicle
occupants get out of the vehicle and ensure
that they remain outside the immediate area in a
safe place, such as behind a guardrail.
If a warning triangle or portable hazard warning
lamp is required, set it up on the roadside at an
appropriate distance from the rear of the vehi-
cle. Comply with all safety guidelines and regu-
lations.<
Preparation
The M Mobility System is located in the lug-
gage compartment under the floor panel flap.
Do not remove foreign bodies which have pen-
etrated the tire if possible.
Corresponding information on using the
M Mobility System are also provided on
the device.<
Before using the M Mobility System,
observe the information on the sealant
bottle.<
Pull the sticker for the speed limit off the sealant
bottle and apply it to the steering wheel.
Please observe the best-by date on the
sealant bottle.<
Page 194 of 231

Replacing components
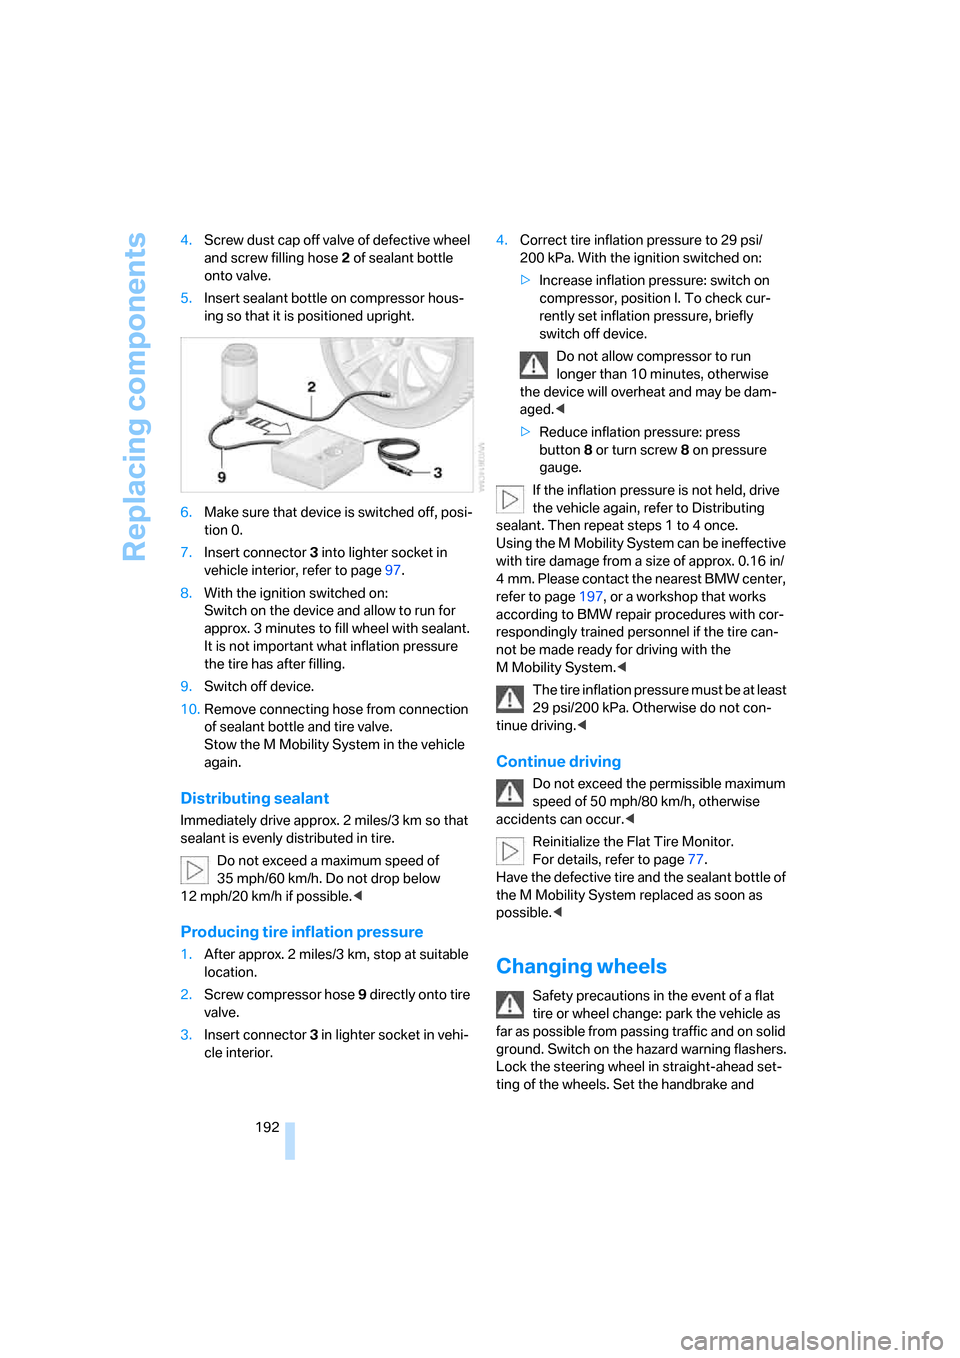
192 4.Screw dust cap off valve of defective wheel
and screw filling hose2 of sealant bottle
onto valve.
5.Insert sealant bottle on compressor hous-
ing so that it is positioned upright.
6.Make sure that device is switched off, posi-
tion 0.
7.Insert connector3 into lighter socket in
vehicle interior, refer to page97.
8.With the ignition switched on:
Switch on the device and allow to run for
approx. 3 minutes to fill wheel with sealant.
It is not important what inflation pressure
the tire has after filling.
9.Switch off device.
10.Remove connecting hose from connection
of sealant bottle and tire valve.
Stow the M Mobility System in the vehicle
again.
Distributing sealant
Immediately drive approx. 2 miles/3 km so that
sealant is evenly distributed in tire.
Do not exceed a maximum speed of
35 mph/60 km/h. Do not drop below
12 mph/20 km/h if possible.<
Producing tire inflation pressure
1.After approx. 2 miles/3 km, stop at suitable
location.
2.Screw compressor hose9 directly onto tire
valve.
3.Insert connector 3 in lighter socket in vehi-
cle interior.4.Correct tire inflation pressure to 29 psi/
200 kPa. With the ignition switched on:
>Increase inflation pressure: switch on
compressor, position I. To check cur-
rently set inflation pressure, briefly
switch off device.
Do not allow compressor to run
longer than 10 minutes, otherwise
the device will overheat and may be dam-
aged.<
>Reduce inflation pressure: press
button8 or turn screw8 on pressure
gauge.
If the inflation pressure is not held, drive
the vehicle again, refer to Distributing
sealant. Then repeat steps 1 to 4 once.
Using the M Mobility System can be ineffective
with tire damage from a size of approx. 0.16 in/
4 mm. Please contact the nearest BMW center,
refer to page197, or a workshop that works
according to BMW repair procedures with cor-
respondingly trained personnel if the tire can-
not be made ready for driving with the
M Mobility System.<
The tire inflation pressure must be at least
29 psi/200 kPa. Otherwise do not con-
tinue driving.<
Continue driving
Do not exceed the permissible maximum
speed of 50 mph/80 km/h, otherwise
accidents can occur.<
Reinitialize the Flat Tire Monitor.
For details, refer to page77.
Have the defective tire and the sealant bottle of
the M Mobility System replaced as soon as
possible.<
Changing wheels
Safety precautions in the event of a flat
tire or wheel change: park the vehicle as
far as possible from passing traffic and on solid
ground. Switch on the hazard warning flashers.
Lock the steering wheel in straight-ahead set-
ting of the wheels. Set the handbrake and
Page 197 of 231

Mobility
195Reference
At a glance
Controls
Driving tips
Communications
Navigation
Entertainment
Vehicle battery
Battery care
The battery is 100 % maintenance-free, i.e., the
electrolyte will last for the life of the battery
when the vehicle is operated in a temperate cli-
mate. Your BMW center will be glad to advise in
all matters concerning the battery.
Charging battery
Only charge the battery in the vehicle via the
terminals in the engine compartment with the
engine off. Connections, refer to Jump starting
on page197.
Disposal
Have old batteries disposed of by your
BMW center or hand them in to a recy-
cling center. Maintain the battery in an upright
position for transport and storage. Always
restrain the battery to prevent it from tipping
over during transport.<
Power failure
After a temporary power loss, the functioning of
some equipment may be limited and require
reinitialization. Individual settings are also lost
and must be updated:
>Seat, mirror and steering wheel memory
The positions must be stored again, refer to
page42.
>Time and Date
The values must be updated, refer to
page71.
>Radio
Stations must be stored again if necessary,
refer to page138.
>Navigation system
Wait until the system starts, refer to
page129.
Fuses
Never attempt to repair a blown fuse and
do not replace a defective fuse with a sub-
stitute of another color or amperage rating, as
this could lead to a circuit overload, ultimately
resulting in a fire in the vehicle.<
Spare fuses, plastic tweezers and fuse alloca-
tion diagram are located in the compartment for
the onboard tool kit, refer to page188.
In glove compartment
1.Release both quick-release fasteners.
2.Fold the cover forward or remove.
In luggage compartment
1.Lift up floor mat.
2.Release the quick-release fastener of the
right side panel and pull out the panel.