Page 185 of 231

Mobility
183Reference
At a glance
Controls
Driving tips
Communications
Navigation
Entertainment
value indicates the current oil level in liters
above Minimum.
After starting the engine, the last determined
value is displayed.
The oil level must be between the two marks.
Exact measurement
The oil level is measured continuously while
driving or when stopped with the engine run-
ning.
The determination of a new value can take
30 minutes or longer.
If only dashes are shown in the display, it
was not possible to determine a new
value. This can, for example, be the case when
driving short distances or with a sporty driving
style.<
Fast measurement
In addition to the continuous measurement, you
can also quickly determine the current oil level,
e.g. after adding engine oil, however with a low
measuring accuracy.
1.With the engine at operating temperature,
i.e. after at least 6 miles/10 km of uninter-
rupted driving, park the vehicle in a horizon-
tal position.
2.Allow the engine to run at idle.
3.Press the BC button in the turn signal lever
repeatedly until the oil level display is
shown in the instrument cluster.
4.Press the BC button in the turn signal lever
for at least 2 seconds.
The oil level is determined. A clock symbol
is displayed during the measurement.
5.After approx. 1 minute the current oil level is
displayed.
If not all measuring conditions are met,
e.g. with the engine cold, "-.-" is dis-
played. The requested measurement is carried
out as soon as possible.<
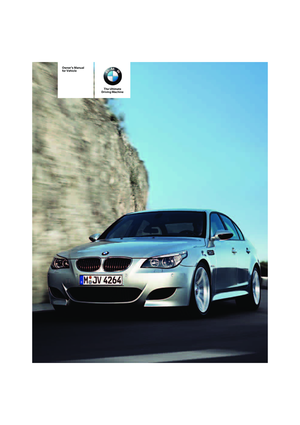
Possible displays
1Oil level OK
2Oil level at minimum:
Add a maximum of 1 US quart/1 liter of
engine oil at the next opportunity, refer to
Adding engine oil below
3Oil level too high
Have the vehicle checked immedi-
ately, otherwise engine damage may
result if too much oil has been added.<
4Oil level at maximum
5Quick measurement running: oil level is
being determined
6No value can be determined at this time
Adding engine oil
Do not add oil until a value slightly above the
Minimum of 0.0 quarts/liters is displayed by the
oil level measurement. In this area a message is
also shown on the Control Display.
Add oil within the next 125 miles/200 km,
otherwise the engine could be damaged.
Add a maximum of 1 US quart/1 liter of oil, oth-
erwise the engine may be damaged by adding
too much oil.
Page 186 of 231

Under the hood
184 Add at least 0.5 US quart/0.5 liter of oil, other-
wise the oil level check cannot reliably display
the current oil level.<
Continuous exposure to used oil has
caused cancer in laboratory testing.
For this reason, any skin areas that come into
contact with oil should be thoroughly washed
with soap and water.
Keep oil, grease etc. out of reach of children and
observe the warnings on the containers to pre-
vent health risks.<
For immediate updating of the oil level
display, carry out a quick measurement
directly afterward.<
Oil change
Have oil changed only at your BMW center or
at a workshop that works according to BMW
repair procedures with correspondingly trained
personnel.
Approved engine oils
The quality of the engine oil selected has critical
significance for the operation and service life of
an engine. BMW continuously approves spe-
cific oils after confirming their suitability for use
in its vehicles with extensive testing.
Do not use oil additives, as these may
result in engine damage.<
Your BMW center will be happy to answer
detailed questions on BMW High Perfor-
mance Synthetic Oil or approved synthetic
oils.<
You can also call BMW of North America at
1-800-831-1117 or visit the website at
www.bmwusa.com to obtain this information.
Viscosity grades
Viscosity is a measure of an oil's flow rating and
is specified in SAE grades.
Approved oils belong to the SAE grade
10W-60.<
Alternative oil types
If BMW High Performance Synthetic Oil is
unavailable, you can add small quantities of
other synthetic oils between oil changes.
Only use oils with the following specifications:
>Viscosity
preferred: SAE 10W-60;
alternative: SAE 10W-40, SAE 5W-50 or
SAE 10W-50
>Specification
API SJ/CF, API SK/CF or higher
Low ambient temperatures
The oils used by BMW from the factory for your
vehicle model can be used at virtually all ambi-
ent temperatures. However, if the vehicle is
operated for a longer period at temperatures
below –47/–206, your BMW center will be
happy to recommend a suitable oil.
Coolant
Do not add coolant to the cooling system
when the engine is hot. Escaping coolant
can cause burns.<
Coolant is comprised of water and coolant addi-
tive. Not all commercially available additives are
suitable for your BMW. Ask your BMW center
for suitable additives.
Only use suitable additives, otherwise
engine damage may result. The additives
present a health hazard; observe the instruc-
tions on the containers.<
Comply with the appropriate environ-
mental protection regulations when dis-
posing of coolant additives.<
Checking coolant level
1.The engine must be at ambient tempera-
ture.
2.Turn the cap of the expansion tank counter-
clockwise to allow any accumulated pres-
sure to escape, then continue turning to
open.
Page 187 of 231

Mobility
185Reference
At a glance
Controls
Driving tips
Communications
Navigation
Entertainment
3.The coolant level is correct when the upper
end of the float rod is at the same height as
the upper edge of the filler neck, also refer
to the drawing next to the filler neck.
4.If the coolant is low, slowly add coolant up to
the specified level – do not overfill.
5.Turn the cap until there is an audible click.
6.Have the reason for the coolant loss elimi-
nated as soon as possible.
Brake system
Malfunctions
Brake fluid
The warning lamp lights red up in spite
of the handbrake being released; a
message is shown on the Control Dis-
play: stop immediately.
The brake fluid in the reservoir has fallen to
below the minimum level. At the same time, a
considerably longer brake pedal travel may be
noticeable. Have the system thoroughly
checked.
Display of the previously described
malfunction on Canadian models.
When you continue driving, an increased
brake pedal path can be necessary, and
significantly longer braking distances might be
required. Please adapt your driving style
accordingly.<
Brake pads
The warning lamp lights red up in spite
of the handbrake being released; a
message is shown on the Control Dis-
play. The brake pads have reached their mini-
mum pad thickness. Have brake pads replaced
immediately.
Display of the previously described
malfunction on Canadian models.
For your own safety: use only brake pads
that BMW has approved for the corre-
sponding vehicle model. As BMW cannot
assess the suitability of other brake pads for
use on your vehicle, we are unable to assume
continued responsibility for the vehicle's oper-
ating safety if non-approved pads are
installed.<
Page 188 of 231

Maintenance
186
Maintenance
BMW maintenance system
The BMW maintenance system supports the
preservation of the traffic and operating safety
of your BMW. The service schedule also
includes operations related to the vehicle's
comfort and convenience features, such as
replacement of the filters for the inside air.
The ultimate objective is to ensure economical
maintenance by providing the ideal service for
your vehicle.
Should the day come when you decide to sell
your BMW, a complete dealer service history
will prove to be an asset of inestimable value.
CBS Condition Based Service
Sensors and special algorithms take the differ-
ent driving conditions of your BMW into
account. Condition Based Service uses this to
determine the current and future service
requirements. By letting you define a service
and maintenance regimen that reflects your
own individual requirements, the system builds
the basis for trouble-free driving.
You can set the Control Display to show
remaining distances and times of selected
maintenance intervals and legally mandated
deadlines, refer to page66:
>Engine oil
>Brake pads, front and rear separately
>Microfilter/activated-charcoal filter
>Brake fluid
>Spark plugs>Vehicle check
>Legally mandated inspections depending
on local regulations
Service data in remote control
Your vehicle stores the information required
maintenance continuously in the remote con-
trol during driving. After accessing the data
stored in the remote control, your BMW Service
Advisor can suggest precisely the right array of
service procedures for your own individual vehi-
cle. You should therefore hand over the remote
control you last used to drive to the BMW Ser-
vice Advisor when you take your vehicle in for
service.
Make sure the date is always set cor-
rectly, refer to page71, as otherwise the
effectiveness of CBS Condition Based Service
is not ensured.<
Service and Warranty Information
Booklet for US models and Warranty
and Service Guide Booklet for
Canadian models
Please consult your Service and Warranty Infor-
mation Booklet for US models and Warranty
and Service Guide Booklet for Canadian models
for additional information on service require-
ments.
BMW recommends that you have service
and repair operations performed at your
BMW center.
Take the time to ensure that these service pro-
cedures are confirmed by entries in your vehi-
cle's Service and Warranty Information Booklet
for US models and Warranty and Service Guide
Booklet for Canadian models. These entries
verify that your vehicle has received the speci-
fied regular maintenance.<
Page 189 of 231

Mobility
187Reference
At a glance
Controls
Driving tips
Communications
Navigation
Entertainment
Socket for OBD Onboard
Diagnostics interface
Components which are decisive for the
exhaust-gas composition can be checked via
the OBD socket with a device.
This socket is located to the left on the driver's
side, on the underside of the instrument panel
under a cover.
Exhaust-gas values
The warning lamp lights up. The
exhaust-gas values worsen. Have the
vehicle checked as soon as possible.
Display of the previously described
malfunction in Canadian models.
The lamp flashes under certain conditions. This
is a sign of excessive misfiring of the engine. In
this case you should reduce speed and drive to
the nearest BMW center as soon as possible.
Heavy engine misfiring led to serious damage
to the emission-relevant components, espe-
cially the catalytic converter, within a short time.
If the fuel filler cap is not properly tight-
ened, the OBD system can close when
fuel vapor escapes. Then a display light up. If
the cap is then tightened, the display will go out
within a few days.<
Event Data Recorders
Your vehicle may be equipped with one or sev-
eral measuring and diagnosis modules, or with
a device for recording or transmitting certain
vehicle data or information. If you have also
signed a contract of participation for
BMW Assist, certain vehicle data can be trans-
mitted or recorded to enable corresponding
services.
Care
Important information on the care and mainte-
nance of your BMW is contained in the Caring
for your vehicle brochure.
Page 190 of 231

Replacing components
188
Replacing components
Onboard toolkit
The onboard toolkit is located in the luggage
compartment lid.
Loosen the wing nut to open.
Wiper blade replacement
1.Fold the wiper arm out and grasp firmly.
2.Press the safety tabs together while sliding
the wiper blade toward the front to disen-
gage it.
3.Mount the new wiper blade and slide in until
it is heard to engage.
Lamps and bulbs
Lamps and bulbs make an essential contribu-
tion to vehicle safety. You must be duly diligent
in replacing them. BMW recommends having
your BMW center perform any work that you do
not feel competent to perform yourself or that is
not described here.Never touch the glass of new bulbs with
your bare fingers, as even minute
amounts of contamination will burn into the
bulb's surface and reduce its service life. Use a
clean cloth, napkin, etc., or hold the bulb by its
metal socket.<
A selection of replacement bulbs is available at
your BMW center.
Whenever you perform any work on the
electrical system, turn off the consumers
involved to prevent short circuits from occur-
ring. To avoid possible injury or equipment
damage when replacing bulbs, observe any
instructions provided by the bulb manufac-
turer.<
For care and maintenance of the headlamps,
please follow the instructions in the separate
Caring for your vehicle brochure.
For bulbs for which changing is not
described, and for checking and adjusting
headlamp aim, please contact your BMW cen-
ter.<
Light-emitting diodes LEDs
Light-emitting diodes installed behind translu-
cent lenses serve as the light source for many of
the controls and displays in your vehicle. These
light-emitting diodes, which operate using a
concept similar to that applied in conventional
lasers, are officially designated as Class 1 light-
emitting diodes.
Do not remove the covers, and never
stare into the unfiltered light for several
hours, as irritation of the retina could result.<
Xenon lamps
The service life of these bulbs is very long and
the probability of a failure is very low, provided
that they are not switched on and off an unusual
number of times.
Have work on the Xenon lighting system
performed only by your BMW center or a
workshop that works according to BMW repair
Page 191 of 231

Mobility
189Reference
At a glance
Controls
Driving tips
Communications
Navigation
Entertainment
procedures with correspondingly trained per-
sonnel. Due to the high voltage present in the
system, there is a danger of fatal injuries when
work is carried out improperly.<
Parking and roadside parking lamps
In the event of a malfunction, please go to your
BMW center or a workshop that works accord-
ing to BMW repair procedures with correspond-
ingly trained personnel.
Turn signals, front
Bulb 21 watts, PY 21 W
1.Turn the bulb holder to the left and remove.
2.Apply gentle pressure to the bulb while
turning it to the left for removal and replace-
ment.
Side-mounted turn signals
Bulb 5 watts, W 5 W
1.Press back against the front edge of the
light with the tip of your finger, then pivot it
out.
2.Turn the bulb holder to the left and remove.
3.Remove the bulb for replacement.
Side marker lamps, front and rear
To replace, please go to your BMW center or a
workshop that works according to BMW repair
procedures with correspondingly trained per-
sonnel.
Tail lamps
>Turn signals: bulb 21 watts, PY 21 W
>Backup lamps: bulb 16 watts, W 16 W
>Other lamps: bulb 21 watts, P 21 W
1Turn signal
2Tail lamp and brake lamp
3Tail lamp and brake lamp
4Backup lamp
5Reflector
6Roadside parking lamp, tail lamp and
brake lamp
Center brake lamp
This lamp uses LED technology for operation.
In the event of a malfunction, please go to your
BMW center or a workshop that works accord-
ing to BMW repair procedures with correspond-
ingly trained personnel.
Fender-mounted lamps
The illustration shows the left-hand side of the
luggage compartment.
All the bulbs are integrated into a central bulb
fitting.
1.Lift up floor mat.
2.Undo the quick-release fasteners of the
side panel and pull out the panel.
Page 192 of 231

Replacing components
190 3.Press together the two clips at the top and
bottom on the bulb fitting and remove the
bulb fitting.
4.Backup lamps:
Remove and replace the bulb.
Other lamps:
Apply gentle pressure to the bulb while
turning it to the left for removal and replace-
ment.
Lamps in luggage compartment lid
License plate lamp
Bulb 5 watts, C 5 W
1.Insert screwdriver into the slot and press to
the right, refer to arrows. This releases the
lamp.
2.Remove the lamp and replace the bulb.
Repairing flat tire with
M Mobility System
To repair a flat tire, an M Mobility System is pro-
vided in the BMW M5. Using this system you
can apply a sealant in the inside of the tire, seal
off the damaged area, restore the tire inflation
pressure and then continue driving.Safety measures in case of a breakdown:
park the vehicle as far as possible from
passing traffic and on solid ground. Switch on
the hazard warning flashers.
Lock the steering wheel in straight-ahead set-
ting of the wheels. Set the handbrake and
engage the first or reverse gear. Have all vehicle
occupants get out of the vehicle and ensure
that they remain outside the immediate area in a
safe place, such as behind a guardrail.
If a warning triangle or portable hazard warning
lamp is required, set it up on the roadside at an
appropriate distance from the rear of the vehi-
cle. Comply with all safety guidelines and regu-
lations.<
Preparation
The M Mobility System is located in the lug-
gage compartment under the floor panel flap.
Do not remove foreign bodies which have pen-
etrated the tire if possible.
Corresponding information on using the
M Mobility System are also provided on
the device.<
Before using the M Mobility System,
observe the information on the sealant
bottle.<
Pull the sticker for the speed limit off the sealant
bottle and apply it to the steering wheel.
Please observe the best-by date on the
sealant bottle.<
 1
1 2
2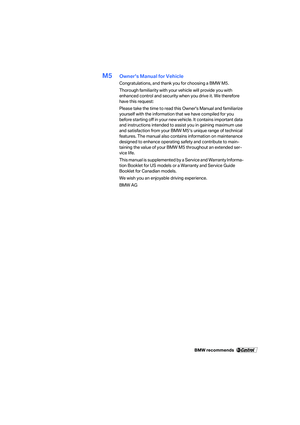 3
3 4
4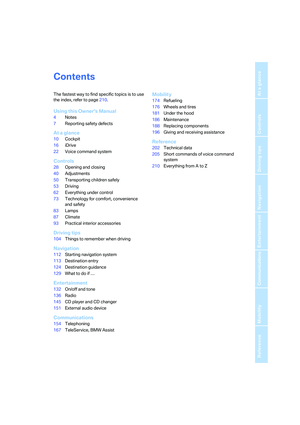 5
5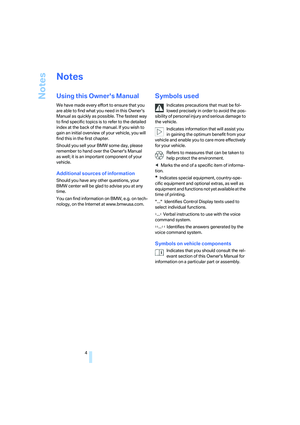 6
6 7
7 8
8 9
9 10
10 11
11 12
12 13
13 14
14 15
15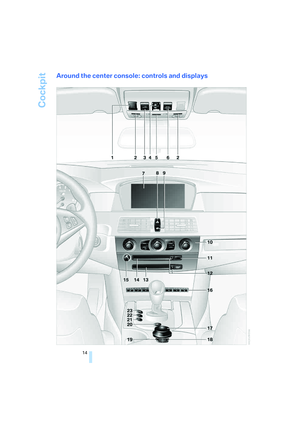 16
16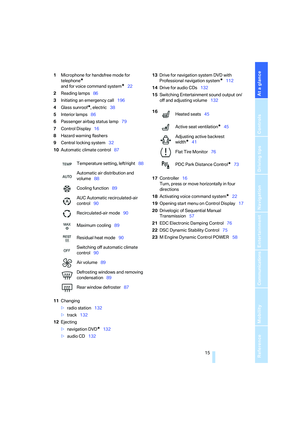 17
17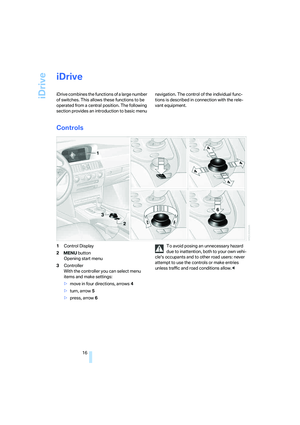 18
18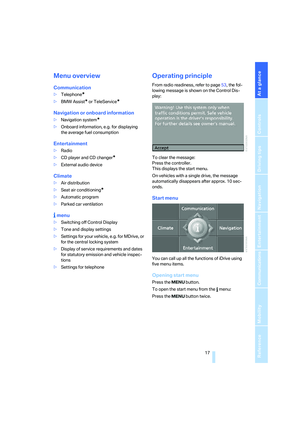 19
19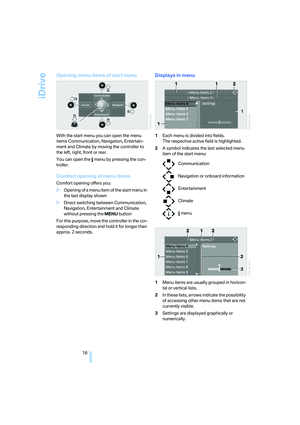 20
20 21
21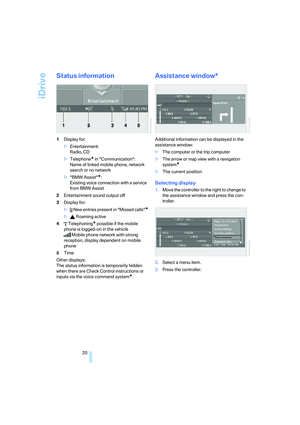 22
22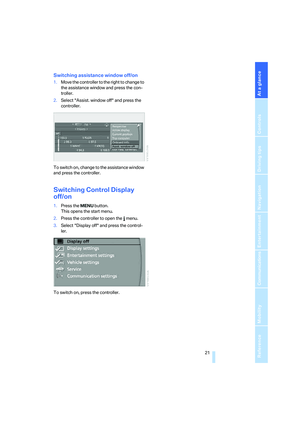 23
23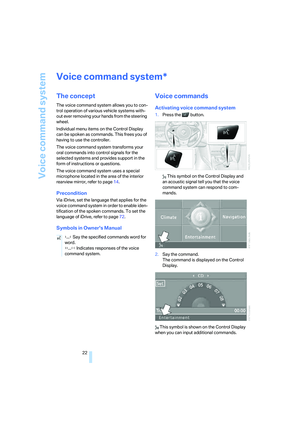 24
24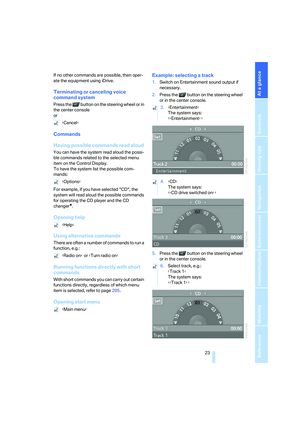 25
25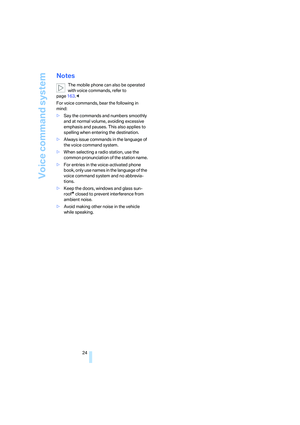 26
26 27
27 28
28 29
29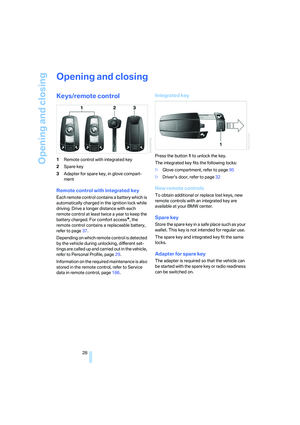 30
30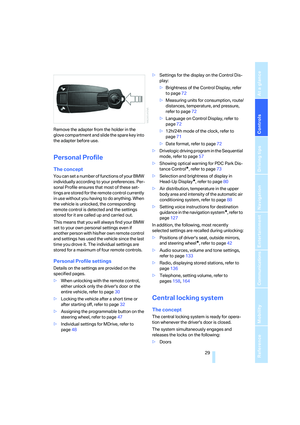 31
31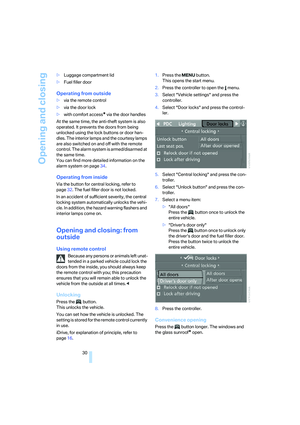 32
32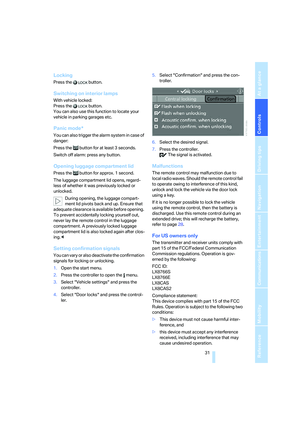 33
33 34
34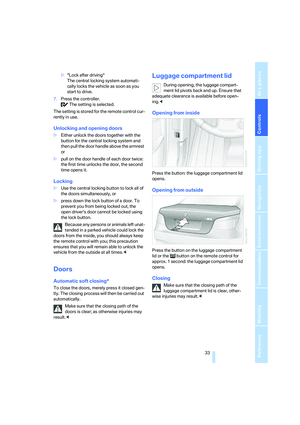 35
35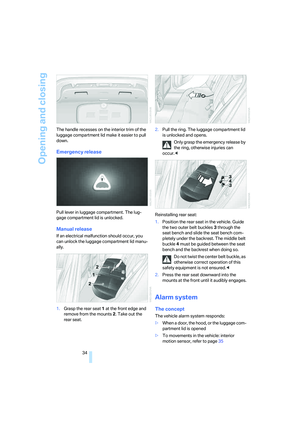 36
36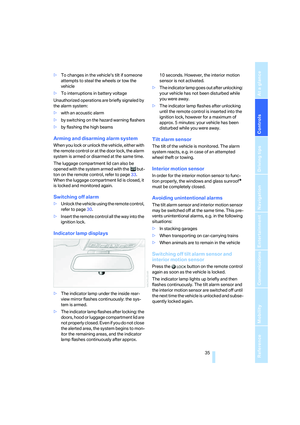 37
37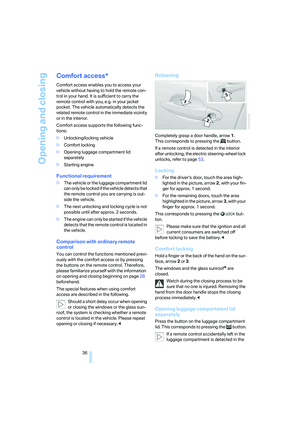 38
38 39
39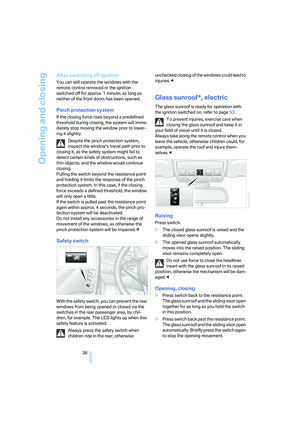 40
40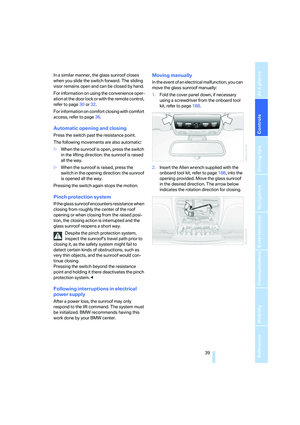 41
41 42
42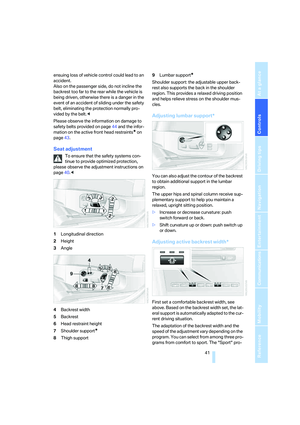 43
43 44
44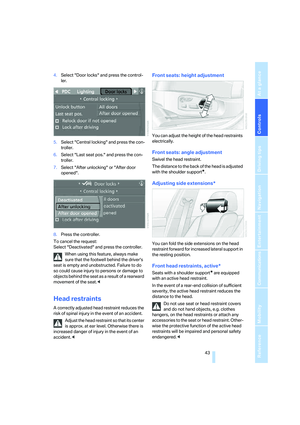 45
45 46
46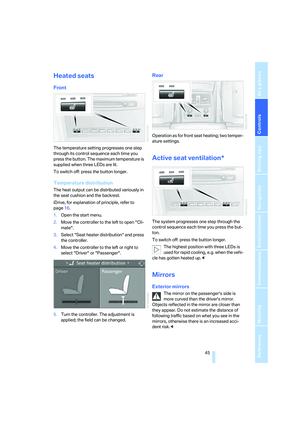 47
47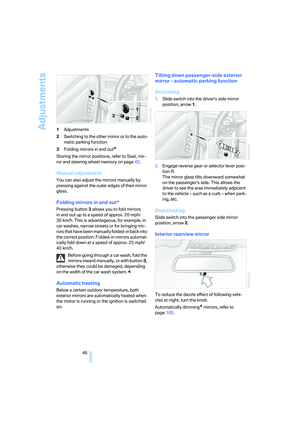 48
48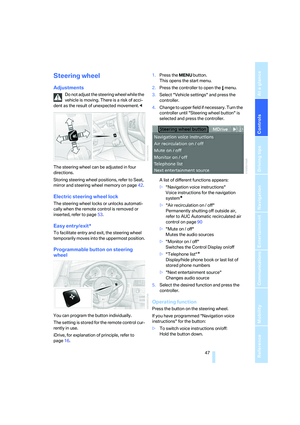 49
49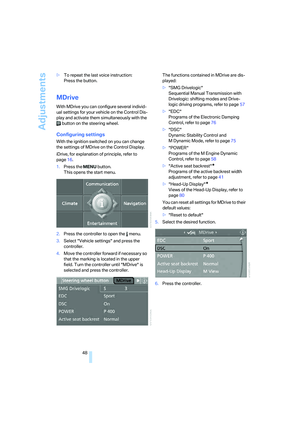 50
50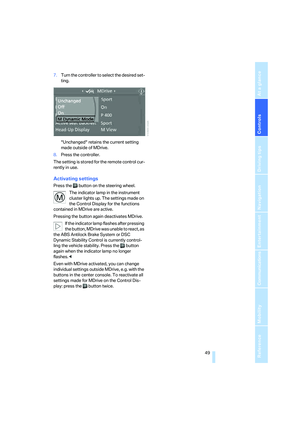 51
51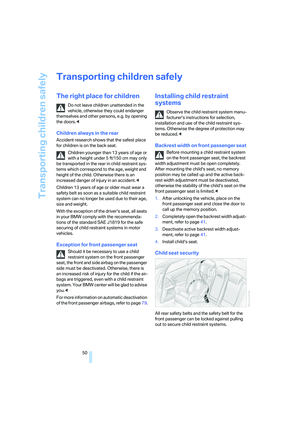 52
52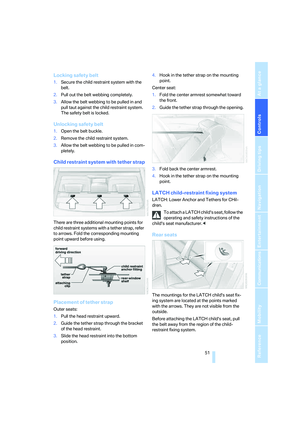 53
53 54
54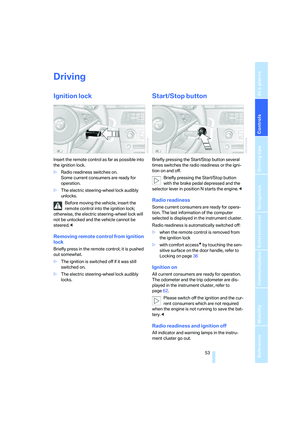 55
55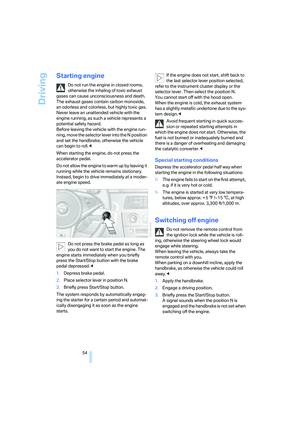 56
56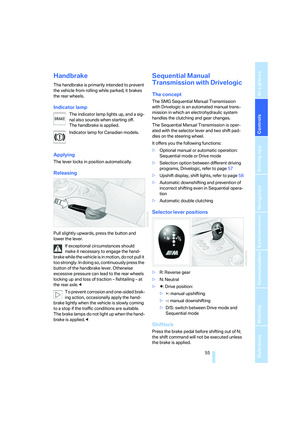 57
57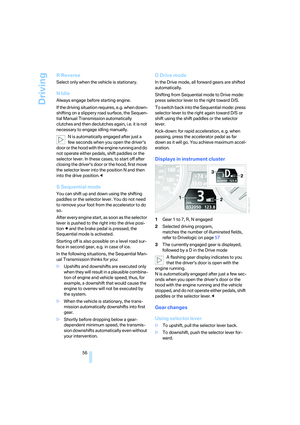 58
58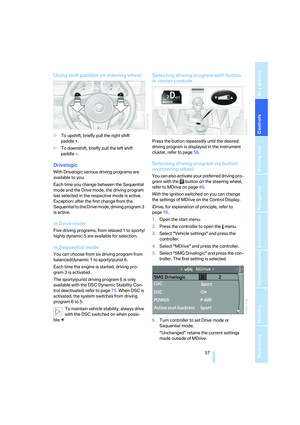 59
59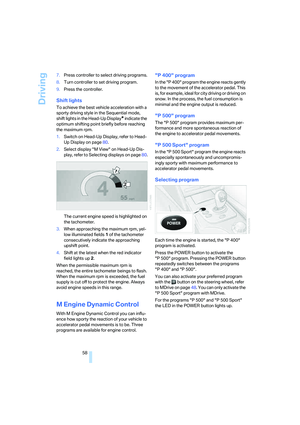 60
60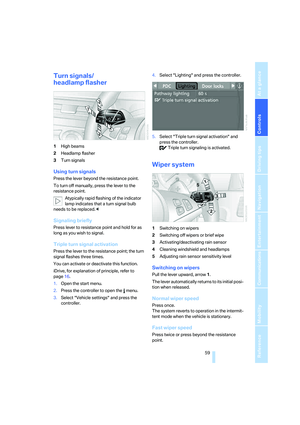 61
61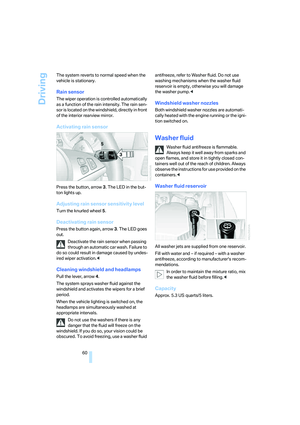 62
62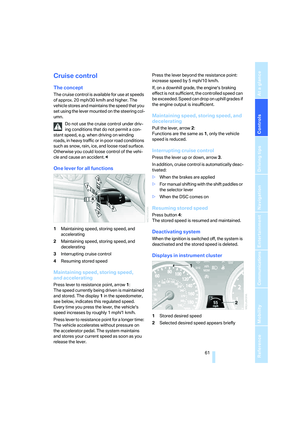 63
63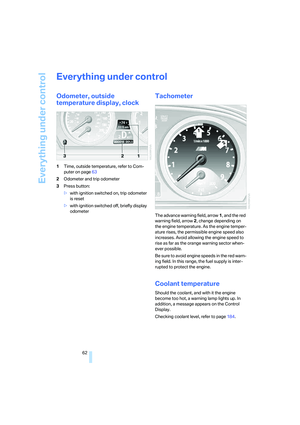 64
64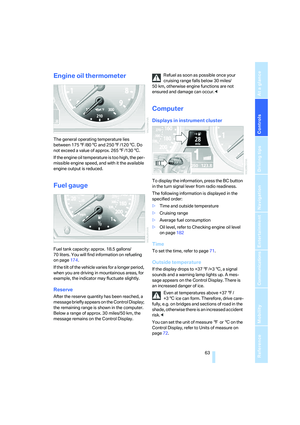 65
65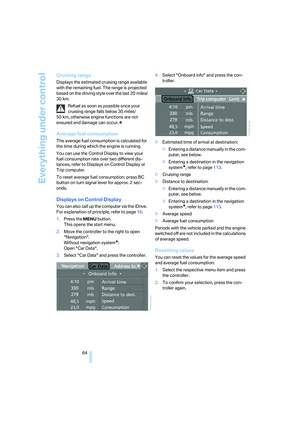 66
66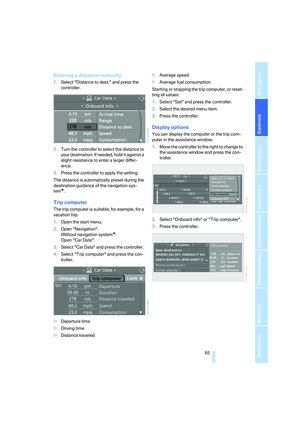 67
67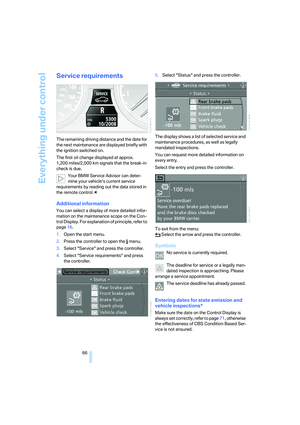 68
68 69
69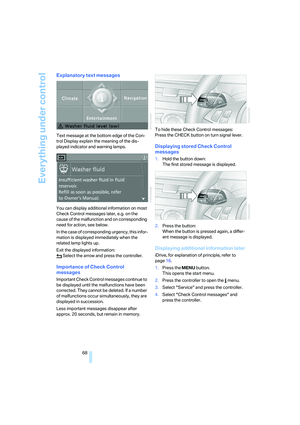 70
70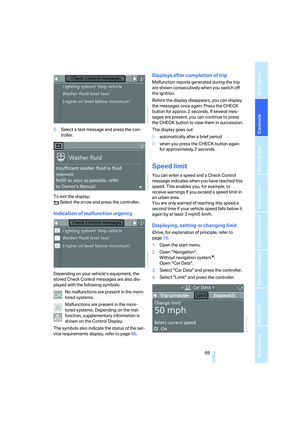 71
71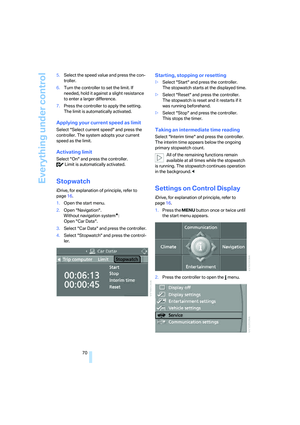 72
72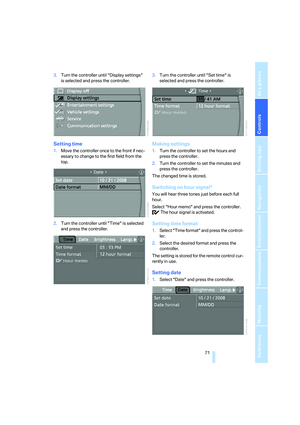 73
73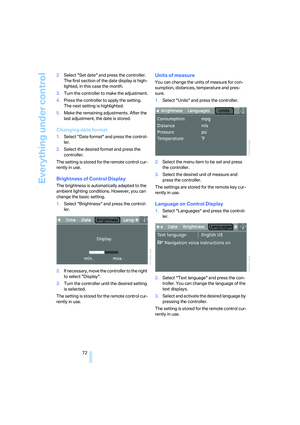 74
74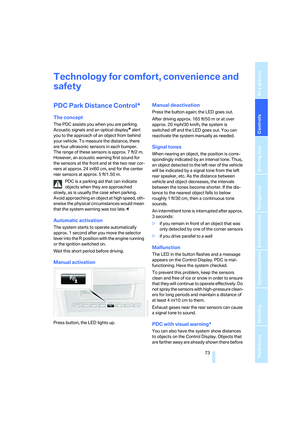 75
75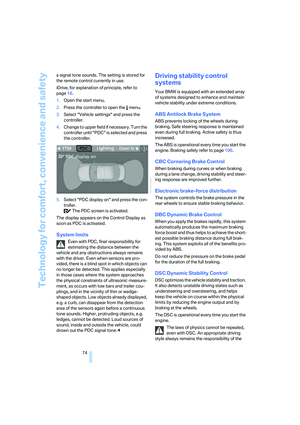 76
76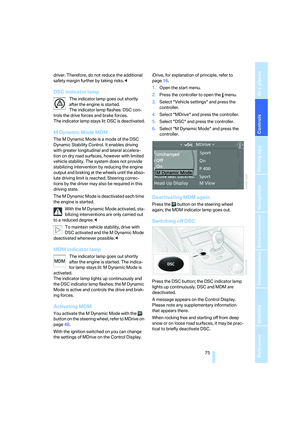 77
77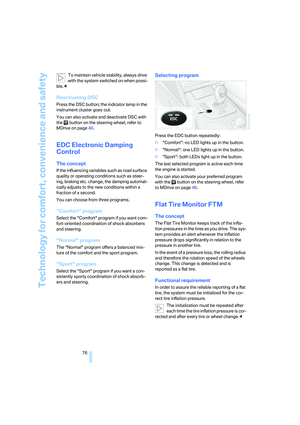 78
78 79
79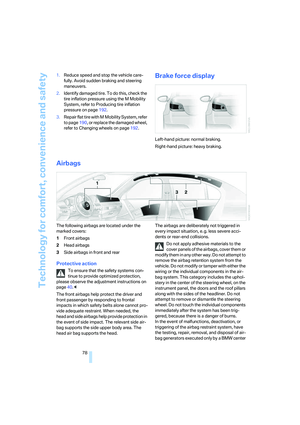 80
80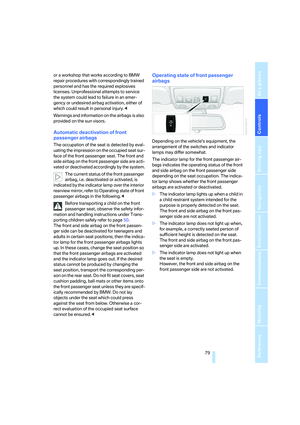 81
81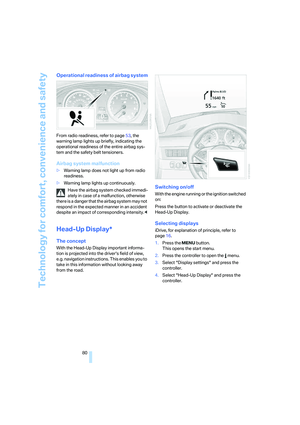 82
82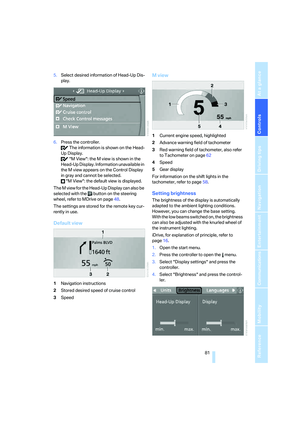 83
83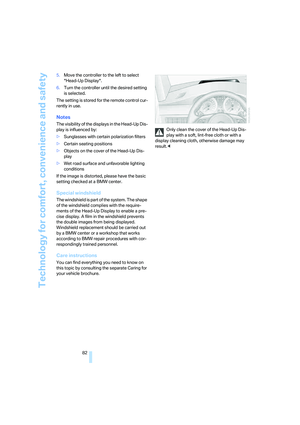 84
84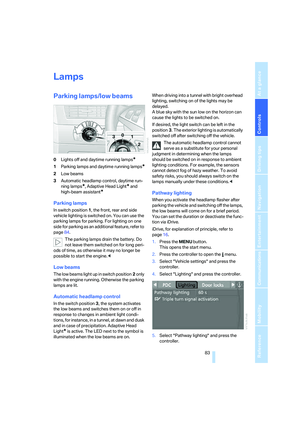 85
85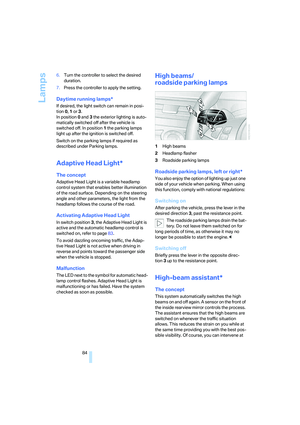 86
86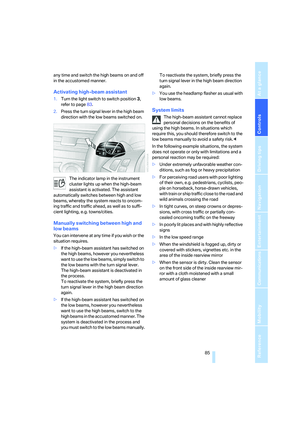 87
87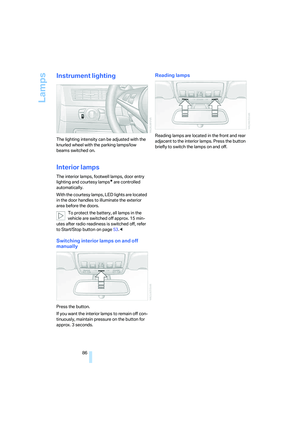 88
88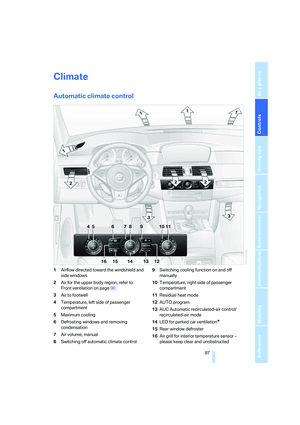 89
89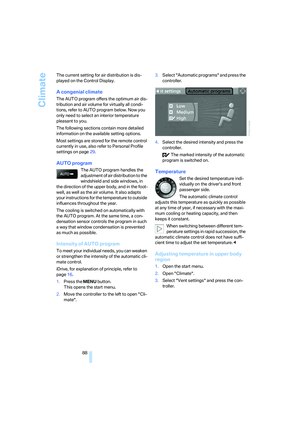 90
90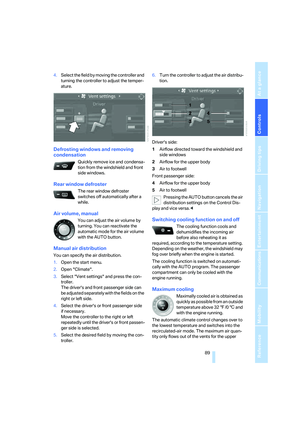 91
91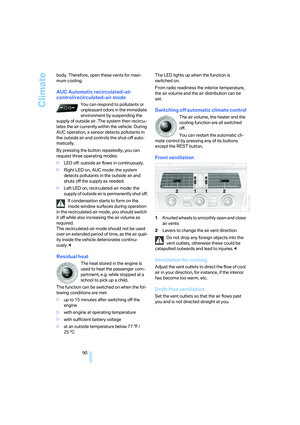 92
92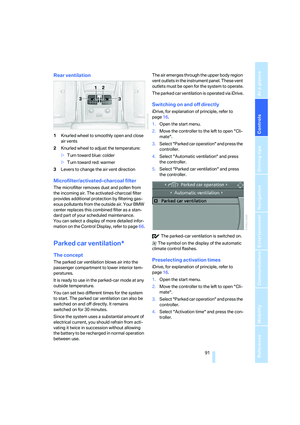 93
93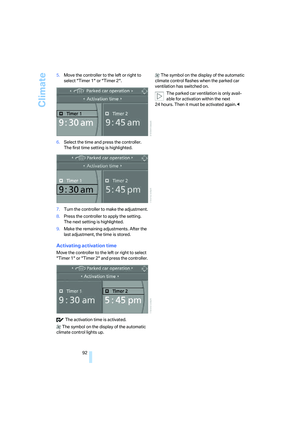 94
94 95
95 96
96 97
97 98
98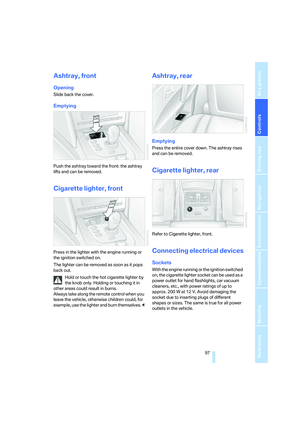 99
99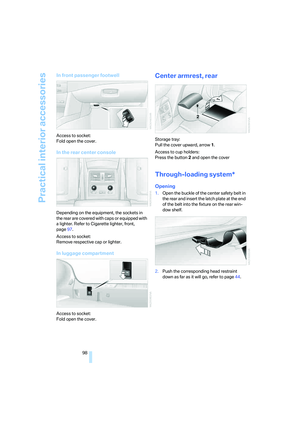 100
100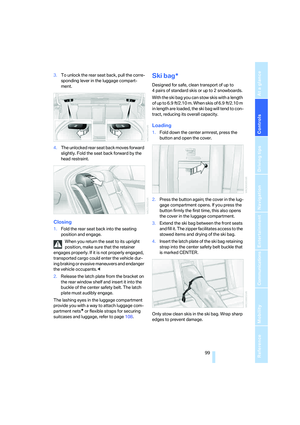 101
101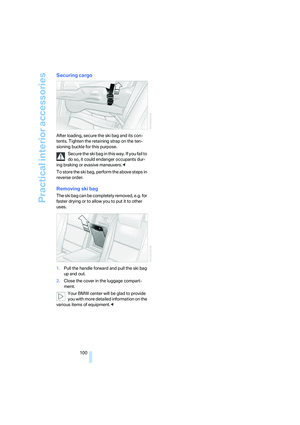 102
102 103
103 104
104 105
105 106
106 107
107 108
108 109
109 110
110 111
111 112
112 113
113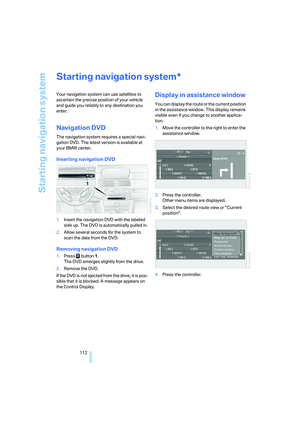 114
114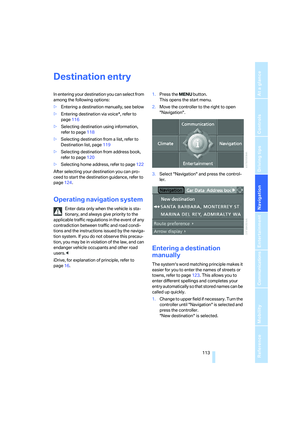 115
115 116
116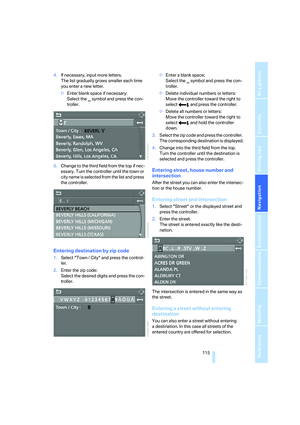 117
117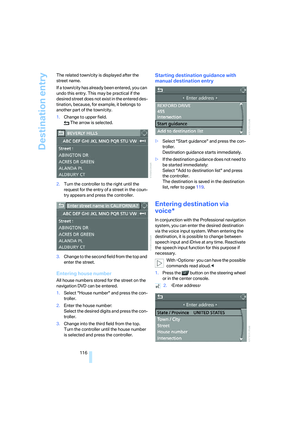 118
118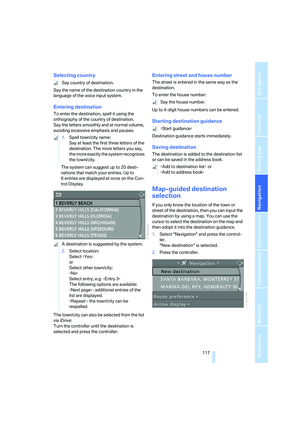 119
119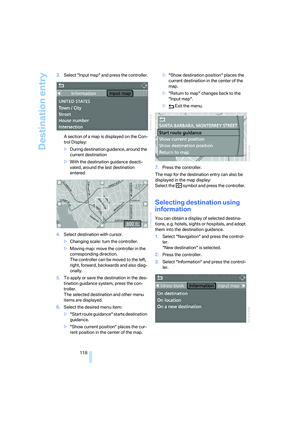 120
120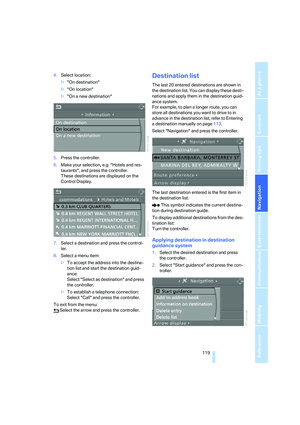 121
121 122
122 123
123 124
124 125
125 126
126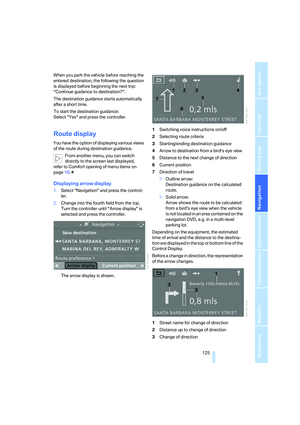 127
127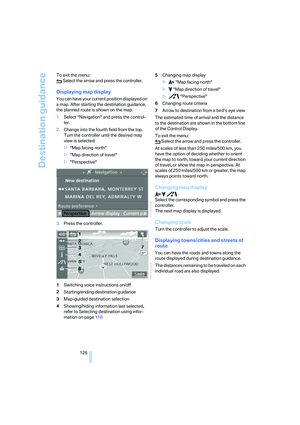 128
128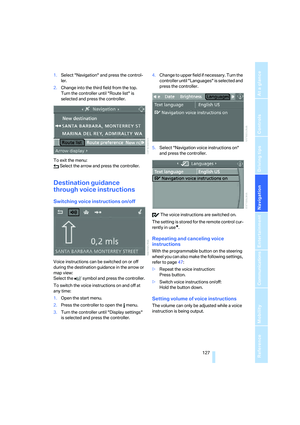 129
129 130
130 131
131 132
132 133
133 134
134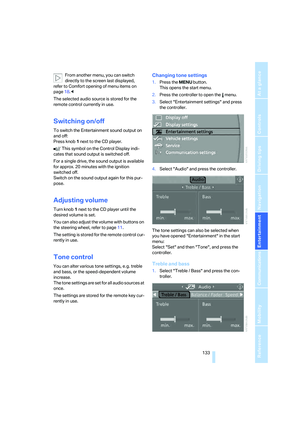 135
135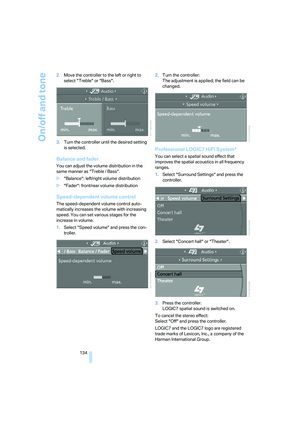 136
136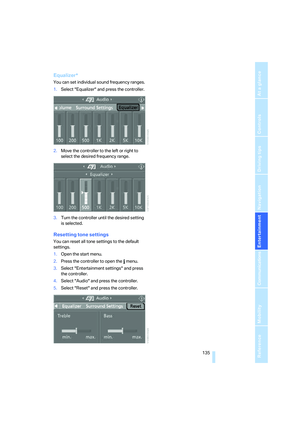 137
137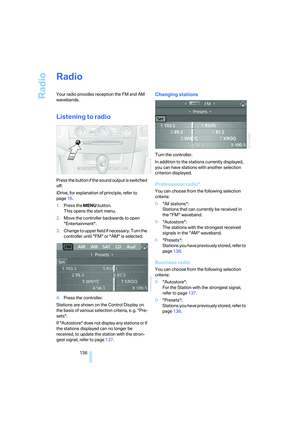 138
138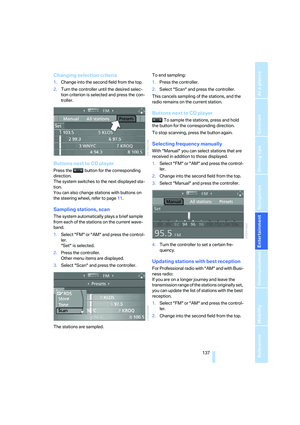 139
139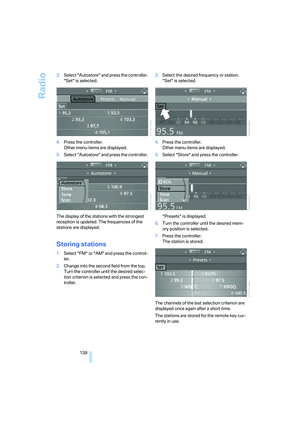 140
140 141
141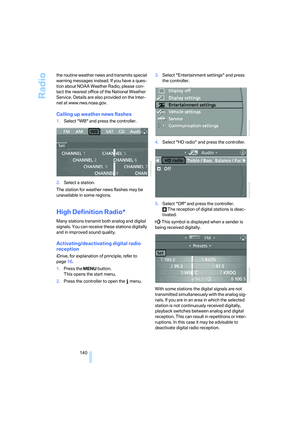 142
142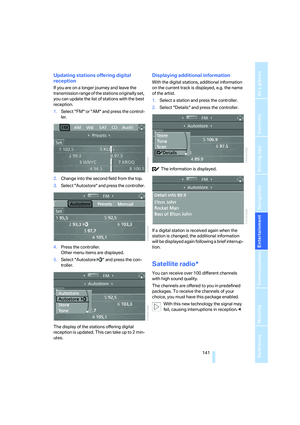 143
143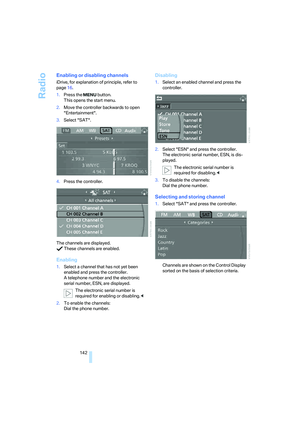 144
144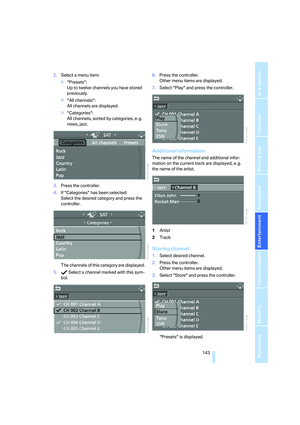 145
145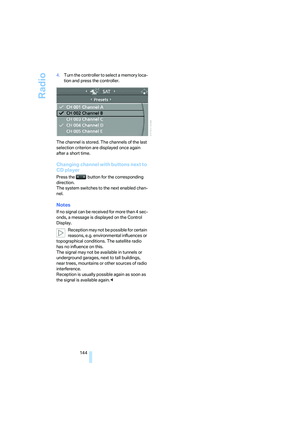 146
146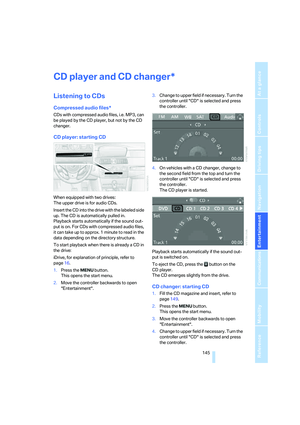 147
147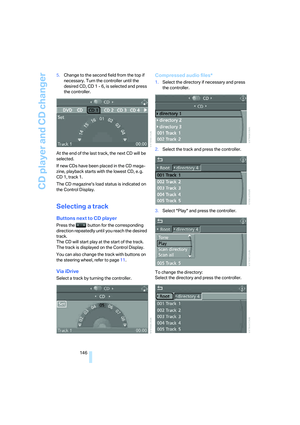 148
148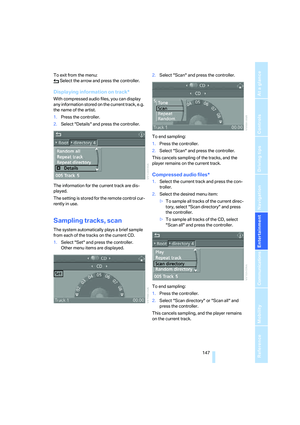 149
149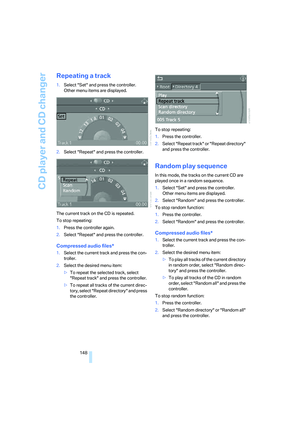 150
150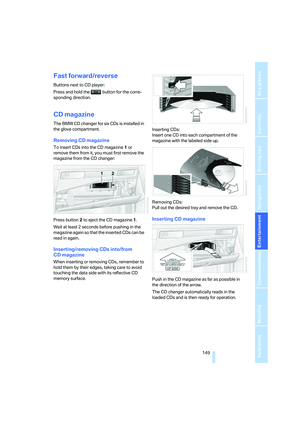 151
151 152
152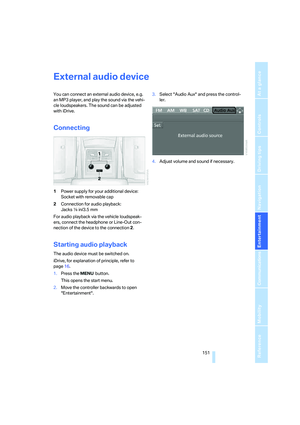 153
153 154
154 155
155 156
156 157
157 158
158 159
159 160
160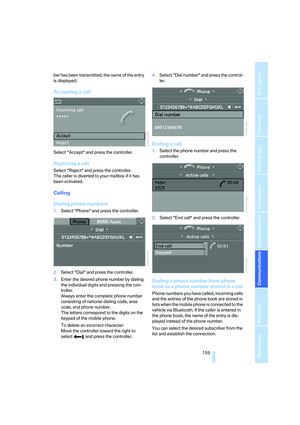 161
161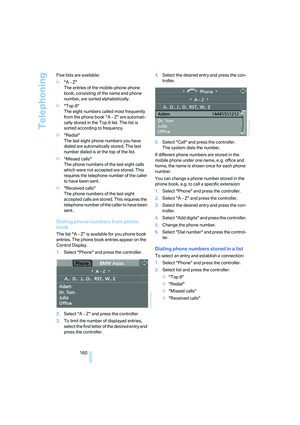 162
162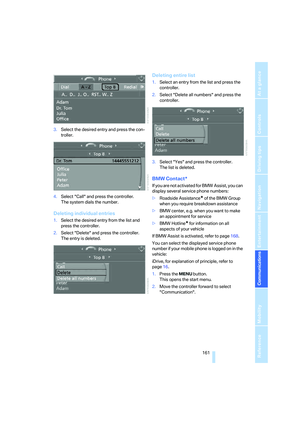 163
163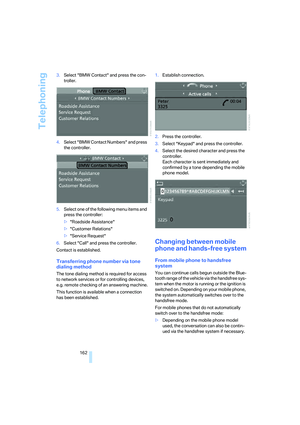 164
164 165
165 166
166 167
167 168
168 169
169 170
170 171
171 172
172 173
173 174
174 175
175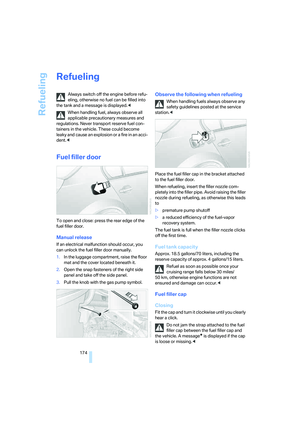 176
176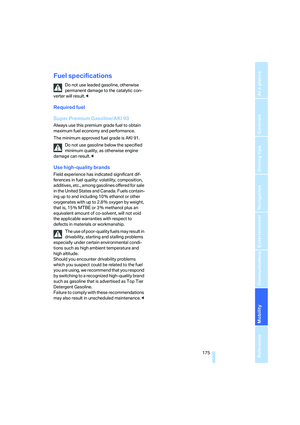 177
177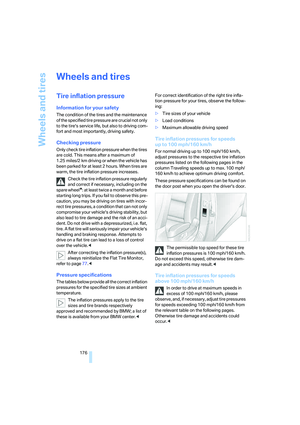 178
178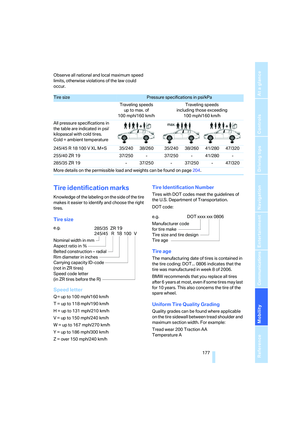 179
179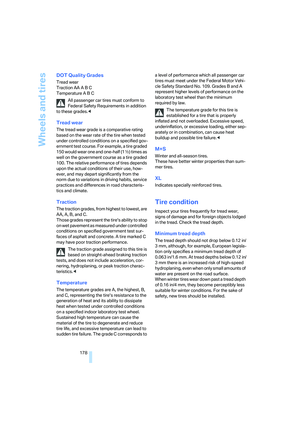 180
180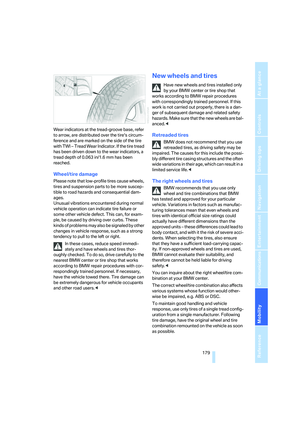 181
181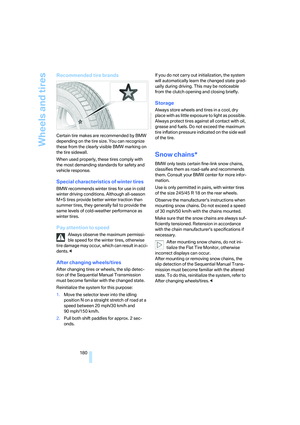 182
182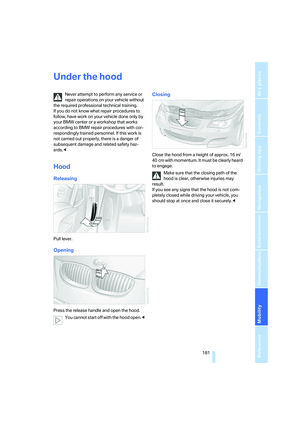 183
183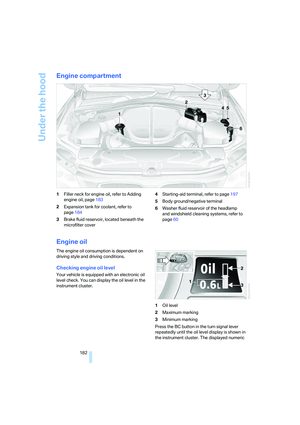 184
184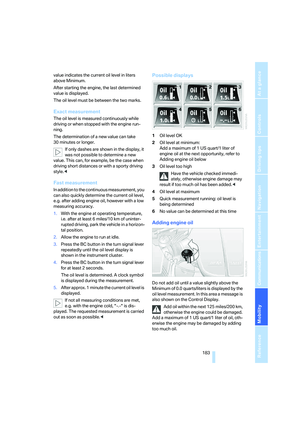 185
185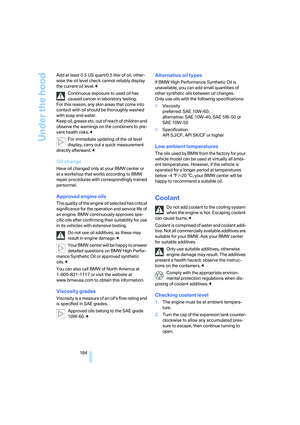 186
186 187
187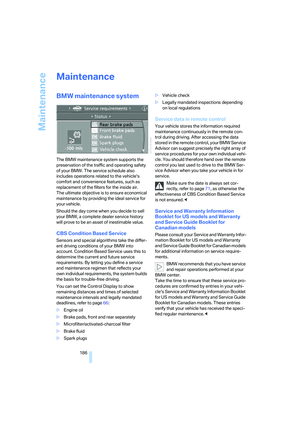 188
188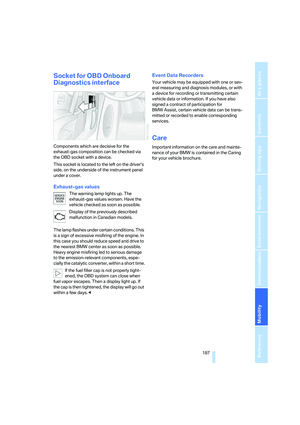 189
189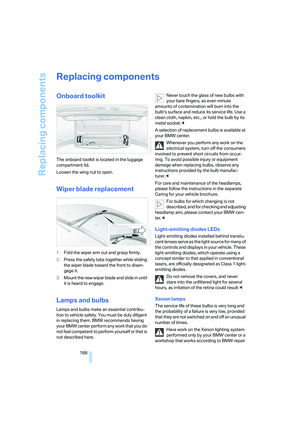 190
190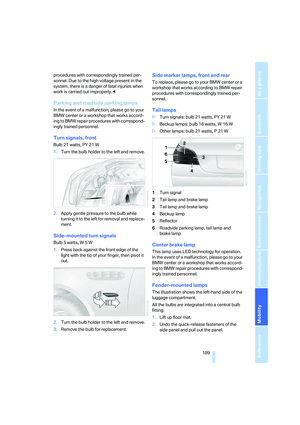 191
191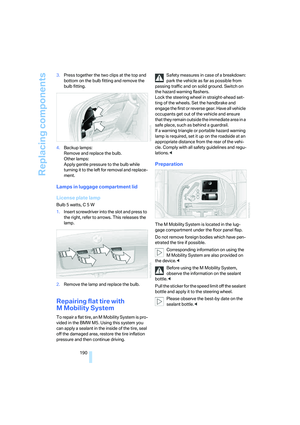 192
192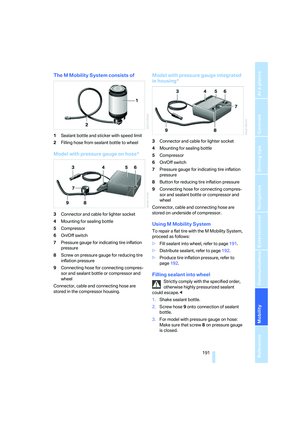 193
193 194
194 195
195 196
196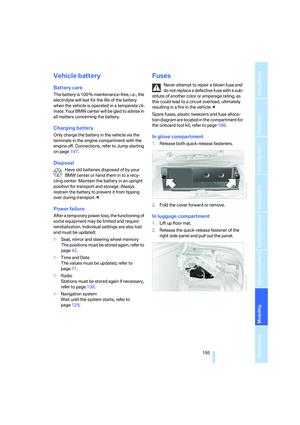 197
197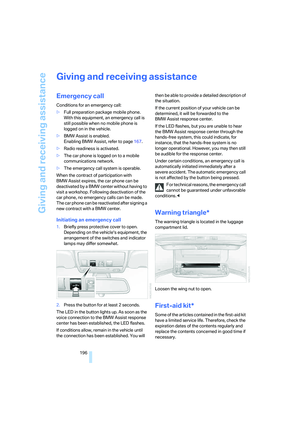 198
198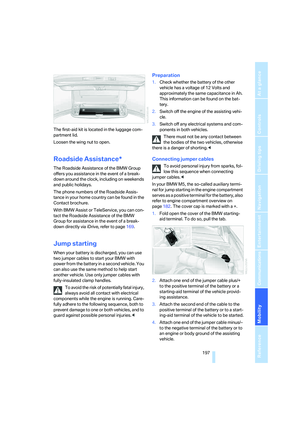 199
199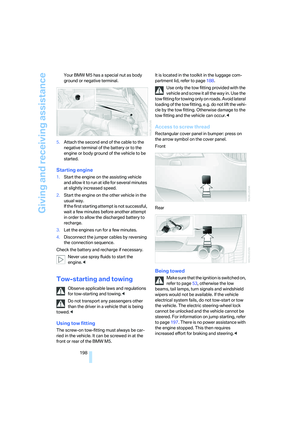 200
200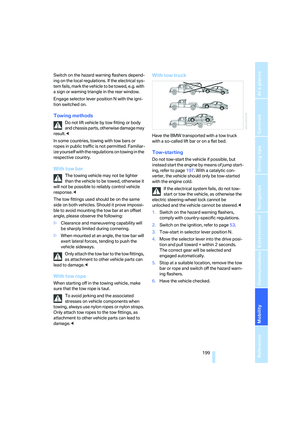 201
201 202
202 203
203 204
204 205
205 206
206 207
207 208
208 209
209 210
210 211
211 212
212 213
213 214
214 215
215 216
216 217
217 218
218 219
219 220
220 221
221 222
222 223
223 224
224 225
225 226
226 227
227 228
228 229
229 230
230