2006 BMW M3 COUPE window
[x] Cancel search: windowPage 91 of 170

91
1Air onto the windshield and the side
windows
2Air for the upper body area93
3Air to the footwell
4Interior temperature sensor – please
keep clear and unobstructed
5Outside air/Automatic recirculated-
air control (AUC)/Recirculated
air93
6Automatic air distribution and
supply92
7Individual air distribution92
8Temperature92
9Display for temperature and air
supply92
10 Air supply/Blower92
11 To defrost windows and remove
condensation92
12 Air conditioning92
13 Rear window defroster93Automatic climate control
OverviewControlsMaintenanceRepairsDataIndex
Page 92 of 170

92
Tips for pleasant drivingUse the automatic mode – switch on
with AUTO button 6. Select the desired
interior temperature.
Detailed setting options are described
for you in the following sections.
You can make the settings of your
vehicle in such a manner that,
when you unlock the vehicle with the
remote control of your personal key,
your own personalized setting for the
automatic climate control is initiated.
air supply and the air distribu-
tion to the windshield and the side win-
dows, towards the upper body and to
the footwells, and in addition adapts
the temperature to external influences:
summer, winter.
The cooling function is automatically
switched on when you are using the
AUTO program.
Individual air distribution
You can cancel the AUTO pro-
gram by selecting specific dis-
tribution patterns to suit your
own individual requirements.
While the AUTO program is then deacti-
vated, the automatic airflow control
remains in operation. Air flows onto
the windows , toward the upper
body , and into the footwell . You
can reactivate the automatic air supply
by pressing the AUTO button.Temperature
The interior temperature that
appears in the display panel is a
general figure intended for refer-
ence purposes. We recommend 727/
+226 as a comfortable setting, even if
the air conditioning is on. When you
start the vehicle, the system ensures
that the selected temperature is
reached as quickly as possible. It then
maintains this temperature, regardless
of the season.
To select the units of measure 7/6 of
the display, refer to page 79.
Air supply/Blower
By pressing the upper or lower
button, you can vary the air sup-
ply. This deactivates the auto-
matic air supply – the AUTO display dis-
appears from the panel. Nevertheless,
the automatic air distribution remains
unchanged. You can reactivate the
automatic air supply by pressing the
AUTO button.
When the lowest blower speed is set
and you press the lower button, all of
the displays are canceled: the blower,
heating and air conditioner are
switched off, and the air supply is
stopped. You can reactivate the system
by pressing any button for the auto-
matic climate control.To defrost windows and remove
condensation
This program quickly removes
ice and condensation from the
windshield and the side windows.
Air conditioning
The air is cooled and dehumidi-
fied and – depending on the
temperature setting – rewarmed.
Depending on the weather, the wind-
shield may fog over briefly when the
engine is started. Air conditioning helps
prevent the windows from fogging up.
The cooling function is automatically
switched on when you are using the
AUTO program.
Automatic climate control
Page 93 of 170

93
Condensation forms during opera-
tion of the air conditioning system,
which then exits under the vehicle.
Traces of condensed water of this kind
are thus normal.<
Outside air/Automatic
recirculated-air control (AUC)/
Recirculated air
You can respond to unpleasant
external odors or pollutants by
temporarily stopping the flow of outside
air. The system then recirculates the air
currently within the vehicle.
By repeatedly pressing the button, you
can select one of three different operat-
ing modes.
>Indicator lamps off: outside air always
flowing into the vehicle
>Left-hand indicator lamp on – auto-
matic mode: the system detects pol-
lutants in the outside air and
responds by deactivating the outside
airflow as required. The system then
recirculates the air currently within
the vehicle.
Depending on air quality require-
ments, the system automatically
switches between outside air supply
and recirculation of the air already
within the vehicle
>Right-hand indicator lamp on: the
flow of outside air is permanently
blocked. The system recirculates the
air already within the vehicle.
If the windows fog over in the
recirculated-air mode, switch the
recirculated-air mode off and increase
the air supply as required.
is activated, the indicator lamp
comes on. The rear window defroster
switches off automatically after a short
while.
You can have your vehicle pro-
grammed in such a way that the
rear window defroster switches on
automatically. This occurs within 5 min-
utes after starting the engine when out-
side temperatures are below approx.
397/+46.<
Draft-free ventilationYou can adjust the blower controls for
the upper body area to obtain the opti-
mum airflow rates and directions for
your personal requirements:
1Rotary dials for infinitely variable
opening and closing of the vents
2Lever for adjusting airflow direction
3With the rotary dial, you can add
more or less cool air to the air coming
from the outlets for the upper body
area:
>Turn toward blue – colder
>Turn toward red – warmer.
Automatic climate control
OverviewControlsMaintenanceRepairsDataIndex
Page 100 of 170

100Loading and transporting
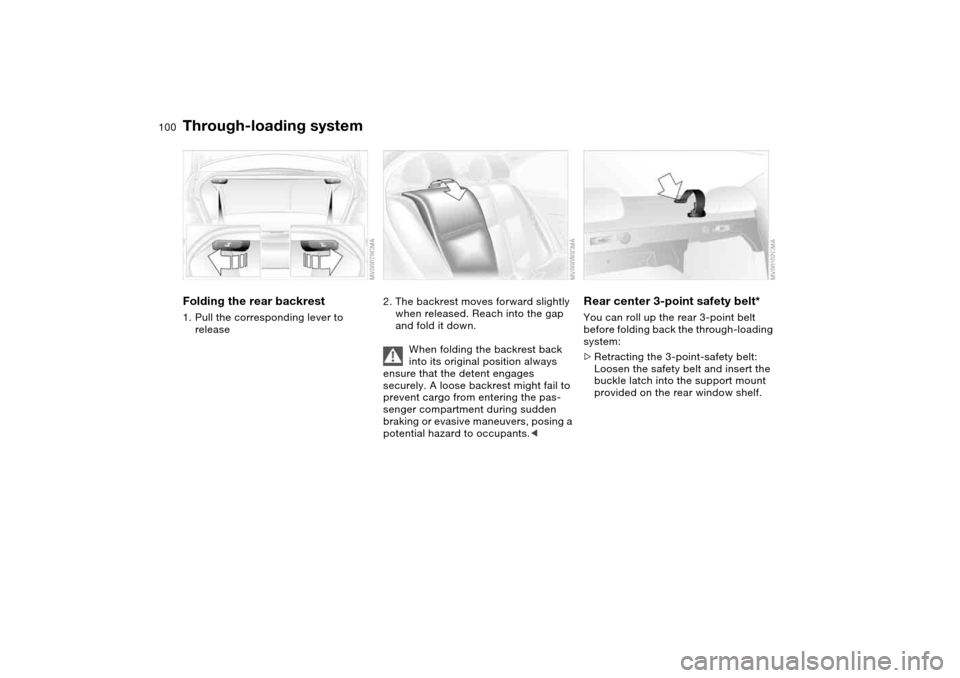
Through-loading systemFolding the rear backrest1. Pull the corresponding lever to
release
2. The backrest moves forward slightly
when released. Reach into the gap
and fold it down.
When folding the backrest back
into its original position always
ensure that the detent engages
securely. A loose backrest might fail to
prevent cargo from entering the pas-
senger compartment during sudden
braking or evasive maneuvers, posing a
potential hazard to occupants.<
Rear center 3-point safety belt*You can roll up the rear 3-point belt
before folding back the through-loading
system:
>Retracting the 3-point-safety belt:
Loosen the safety belt and insert the
buckle latch into the support mount
provided on the rear window shelf.
Page 136 of 170

136
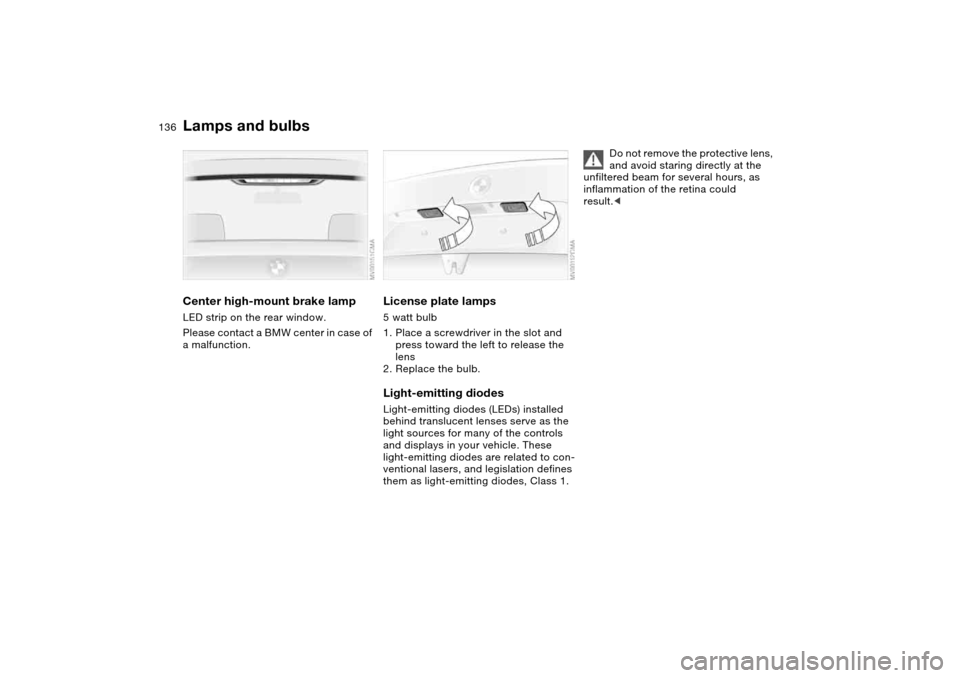
Center high-mount brake lampLED strip on the rear window.
Please contact a BMW center in case of
a malfunction.
License plate lamps5 watt bulb
1. Place a screwdriver in the slot and
press toward the left to release the
lens
2. Replace the bulb.Light-emitting diodesLight-emitting diodes (LEDs) installed
behind translucent lenses serve as the
light sources for many of the controls
and displays in your vehicle. These
light-emitting diodes are related to con-
ventional lasers, and legislation defines
them as light-emitting diodes, Class 1.
Do not remove the protective lens,
and avoid staring directly at the
unfiltered beam for several hours, as
inflammation of the retina could
result.<
Lamps and bulbs
Page 145 of 170

145
Towing and tow-starting the vehicle
Always observe all applicable
towing laws and regulations.<
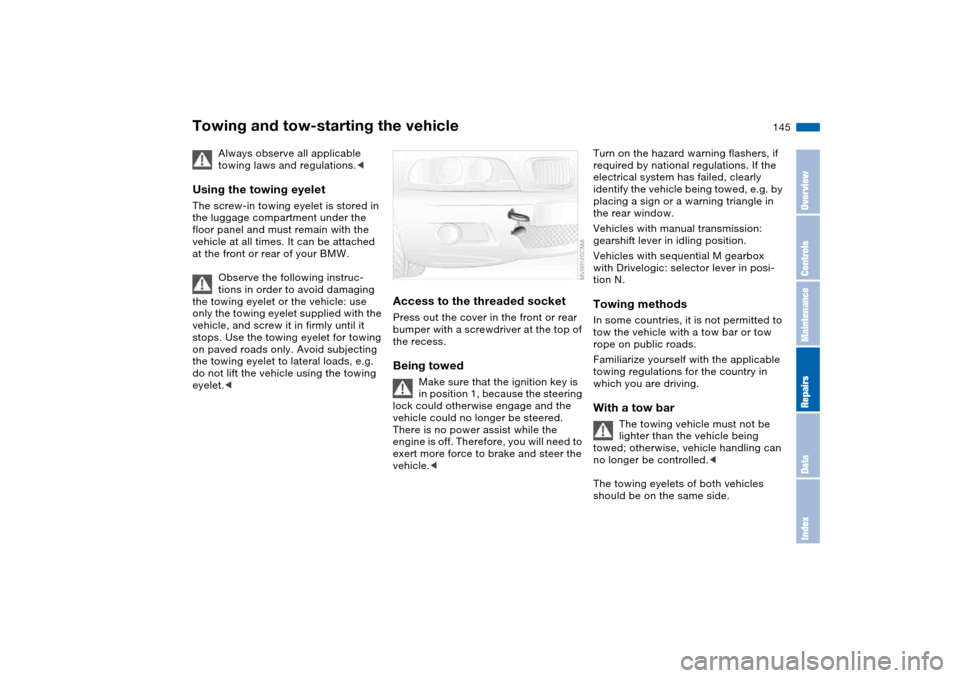
Using the towing eyeletThe screw-in towing eyelet is stored in
the luggage compartment under the
floor panel and must remain with the
vehicle at all times. It can be attached
at the front or rear of your BMW.
Observe the following instruc-
tions in order to avoid damaging
the towing eyelet or the vehicle: use
only the towing eyelet supplied with the
vehicle, and screw it in firmly until it
stops. Use the towing eyelet for towing
on paved roads only. Avoid subjecting
the towing eyelet to lateral loads, e.g.
do not lift the vehicle using the towing
eyelet.<
Access to the threaded socketPress out the cover in the front or rear
bumper with a screwdriver at the top of
the recess.Being towed
Make sure that the ignition key is
in position 1, because the steering
lock could otherwise engage and the
vehicle could no longer be steered.
There is no power assist while the
engine is off. Therefore, you will need to
exert more force to brake and steer the
vehicle.<
Turn on the hazard warning flashers, if
required by national regulations. If the
electrical system has failed, clearly
identify the vehicle being towed, e.g. by
placing a sign or a warning triangle in
the rear window.
Vehicles with manual transmission:
gearshift lever in idling position.
Vehicles with sequential M gearbox
with Drivelogic: selector lever in posi-
tion N.Towing methodsIn some countries, it is not permitted to
tow the vehicle with a tow bar or tow
rope on public roads.
Familiarize yourself with the applicable
towing regulations for the country in
which you are driving.With a tow bar
The towing vehicle must not be
lighter than the vehicle being
towed; otherwise, vehicle handling can
no longer be controlled.<
The towing eyelets of both vehicles
should be on the same side.
OverviewControlsMaintenanceRepairsDataIndex
Page 158 of 170

Everything from A to ZCoin box 96
Cold start, refer to Starting
the engine 62
Compact disc operation,
refer to the Owner's Man-
ual for Radio/Onboard
Computer
Compartments 96
Compression ratio, refer to
Engine data 150
Computer 79
Condensation, refer to Air
conditioning mode 92
Configuring settings, refer to
Vehicle Memory, Key
Memory 59
Connecting a vacuum
cleaner, refer to Power
socket 98
Consumption, refer to Aver-
age fuel consumption 80
Control elements, refer to
Cockpit 14
Convenience operation
from outside 32
glass sunroof 30
windows 30
Coolant 124
indicator lamp 19, 76
level 124
temperature gauge 76Coolant water, refer to Cool-
ant 124
Cooling, refer to Tempera-
ture 92
Copyright 4
Cornering Brake Control
(CBC) 111
warning lamp 19
Cruise control 73
indicator lamp 20
Cup holders, see Beverage
holders 96, 97
Curb weight, refer to
Weights 152
Cylinders, refer to Engine
data 150
D
Dashboard, refer to
Cockpit 14
Data
capacities 153
dimensions 151
engine 150
weights 152
Daytime driving lamps 87
DBC Dynamic Brake
Control 111
warning lamp 19
Deep water, refer to Driving
through water 109Defrost position, refer to
Defrosting windows 92
Defrosting and demisting
windows
automatic climate
control 92
Defrosting windows 92
Defrosting windshield, refer
to Defrosting windows 92
Demisting windows
automatic climate
control 92
Differential
breaking in 108
Digital clock 78
Dimensions 151
Dipstick, engine oil 122
Displacement, refer to
Engine data 150
Display lighting, refer to
Instrument lighting 88
Displays, refer to Instrument
cluster 16
Disposal
oil 123
vehicle battery 141
Distance warning, refer to
Park Distance Control
(PDC) 81
Divided rear backrest 100
Door key 28
Door lock 32Doors
emergency operation 32
Draft-free ventilation 93
Drivelogic 69
Driving light, refer to Parking
lamps/Low beams 87
Driving notes 109
Driving through water, deep
water 109
Dry air, refer to Air condi-
tioning mode 92
DSC Dynamic Stability Con-
trol 82
indicator lamp 19, 82
Dynamic Brake Control
(DBC) 111
warning lamp 19
Dynamic Stability Control
(DSC) 19, 82
Dynamic Stability Control
DSC
M Track mode 82
E
Easy entry, refer to Entering
the rear 46
Electric glass sunroof 40
Electric power windows 39
Electrical accessories, fail-
ure 141
Page 160 of 170

Everything from A to ZGearbox
manual transmission 65
Gearbox malfunction
sequential M gearbox with
Drivelogic 70
Gearbox, sequential 66
Gearshift lever
manual transmission 65
sequential M gearbox with
Drivelogic 66
General driving notes 109
Glass sunroof
closing following an elec-
trical malfunction 41
convenience operation
30, 32
remote control 29, 30
Glass sunroof, electric 40
Glove compartment 95
Gradient assistance 69
Grills, refer to Ventilation 90
Gross weight, refer to
Weights 152
H
Handbrake, refer to Parking
brake 64
Hands-free system 97
Harman Kardon premium
sound system 95
Hazard warning flashers 14
Hazard warning triangle 23Head airbags 52
Head restraints 45
Headlamp cleaning system
cleaning headlamps 73
washer fluid 122, 153
Headlamp control 87
Headlamp flasher 88
indicator lamp 21
Headlamps
bulb replacement 133
care, refer to the Caring
for your vehicle brochure
Heated mirror 50
Heated rear window
automatic climate
control 93
Heated seats 49
Heating
exterior mirrors 50
rear window 93
seats 49
Heating and ventilation 90
Heavy loads, refer to Cargo
loading 103
Height adjustment
seats 44
steering wheel 51
Height, refer to
Dimensions 151High beams 71, 88
bulb replacement 133
headlamp flasher 88
indicator lamp 21
Holder for
beverages 96, 97
litter bag 97
Hood release 119
Horn 14
Hydraulic brake assistant,
refer to DBC 111
Hydroplaning 109
I
Ice warning 79
Ignition 61
Ignition key 28
positions 61
Ignition lock 61
Imprint 4
Indicator lamps 18Indicator/warning lamp
airbags 18
alarm system 38
brakes 18, 19
Check Gas Cap 19
coolant 19, 76
DSC 19
Flat Tire Monitor
18, 19, 85
fog lamps 20
Please fasten safety
belts 18
reserve 76
Service Engine Soon 19
Individual air distribution 92
Individual settings, refer to
Vehicle Memory, Key
Memory 59
Inflation pressure monitor-
ing, refer to Flat Tire Moni-
tor 83
Inflation pressure, tires 112
INSPECTION 77
Instrument cluster 16
Instrument lighting 88
Instrument panel 14
Interface socket for onboard
diagnostics (OBD) 128
event data recorders 128
Interior lamps 89
remote control 30