2006 BMW M3 COUPE gearbox
[x] Cancel search: gearboxPage 68 of 170

68
Shifting gears with shift paddles on
steering wheel:
>To upshift, briefly pull the right pad-
dle +
>To downshift, briefly pull the left pad-
dle –.
Shift paddles with various widths
matched to the shape of your
hand are available from your BMW cen-
ter.<
Shifting gears with selector lever:
>To upshift, pull the selector lever
backward in the + direction
>To downshift, push the selector lever
in the – direction.
No automatic upshifting is carried out in
the sequential mode.
You accelerate from higher gears, e.g.
during passing, by manually downshift-
ing.
In the following situations the
SMG Drivelogic in the sequential mode
assists you:
>Upshifts and downshifts are only exe-
cuted at appropriate combinations of
engine rpm and vehicle speed. For
instance, downshifts that would
result in excessive engine speed are
not executed
>During a stop the gearbox is auto-
matically downshifted into the first
gear so that, e.g. before a traffic light,
it is only necessary to accelerate to
continue driving
>As speed diminishes, the gearbox
downshifts automatically, without you
taking any action, just before the
vehicle slows to below each gear's
minimum speed.D – Automated modeEach time the engine is started, the
automated mode is activated as soon
as you move the selector lever into the
forward driving position.
In the automated mode all forward
gears are shifted automatically.To switch from sequential to automated
mode: tap the selector lever to the right
toward D. Watch the display in the
instrument cluster, refer to page 67.
For rapid acceleration, e.g. during
passing, depress the accelerator pedal
completely – kickdown. The gearbox
now downshifts depending on the
selected driving program.
Even in the automated mode, you can
help specify the shifting point: if a gear-
dependent minimum speed is
exceeded, you can upshift by slowly
reducing pressure on the accelerator
pedal. In the process, the respective
driving situation is detected by sensors
and taken into account.
Sequential M gearbox with Drivelogic*
Page 69 of 170

69
DrivelogicDrivelogic makes various driving pro-
grams available to you.
Press the Drivelogic repeatedly until the
desired driving program is shown in the
SMG display of the instrument cluster,
refer to page 67.
In the automated mode you can select
from five driving programs ranging from
convenience mode/winter operation to
sporty and highly dynamic.
In the first automated driving program,
starting off takes place in second gear,
which is advisable under winter road
conditions with ice and snow.
In the sequential mode you can choose
from six driving programs ranging from
balanced, dynamic driving – 1 – to
sporty, puristic driving – 6. The sporty,
puristic driving program can only be
activated when Dynamic Stability Con-
trol DSC is switched off, refer to
page 82.
To maintain vehicle stability,
always drive with the DSC acti-
vated on whenever possible.<
Following each change between the
sequential and the automated mode,
the last driving program selected in the
respective mode is active. Exception: if
program 6 had been the last selected
sequential driving program, program 5
is activated instead.
Your vehicle is set so that when
the engine is started, the last
selected driving program saved in your
key is activated for each shifting
mode.<
Gradient assistanceThe gradient assistance enables start-
ing off on grades with virtually no roll-
back. It can be activated in the sequen-
tial and automated mode with the vehi-
cle stopped and can be used for both
forward and reverse driving.
The vehicle may roll slightly before
it is held by the gradient assis-
tance after releasing the footbrake.
Two seconds after the footbrake is
released, the vehicle begins to roll, as it
is no longer held with the gradient
assistance.<
1. Depress footbrake with vehicle
stopped
2. Activate the gradient assistance by
pulling the left paddle for at least
0.5 seconds. An increase in the
engine speed indicates that the gra-
dient assistance is activated
Briefly pulling the left paddle again
deactivates the gradient assis-
tance again.<
3. Release the footbrake and start off
within 2 seconds.
The gradient assistance must be reacti-
vated before each use.
Sequential M gearbox with Drivelogic*
OverviewControlsMaintenanceRepairsDataIndex
Page 70 of 170

70
Indicator lamp
The gearbox indicator lamp in
the instrument cluster goes out
after the engine is started.
>If it does not go out, or if it lights up
during driving, a malfunction has
occurred. The available functions
may be limited under certain circum-
stances.
Drive carefully and with the Dynamic
Stability Control (DSC) activated.
Have the system checked by the
nearest BMW center
>If the indicator lamp flashes while
driving, the system is overloaded.
Avoid high loads until the indicator
lamp goes out again permanently.
Shift lightsTo achieve the best possible vehicle
acceleration with a sporty driving style
in the sequential mode, shift lights in
the instrument cluster indicate the opti-
mum shifting point shortly before the
maximum engine speed is reached.
1. When the maximum engine speed is
approached, yellow indicator fields –
shift lights – in the tachometer light
up consecutively to indicate the
approaching upshift time
2. Shift at the latest when the last indi-
cator field lights up red.
Tire replacement, snow chainsFollowing a tire or wheel change and
after mounting or removing snow
chains, the slip recognition of the
SMG Drivelogic must become familiar
with the changed condition.
Reinitialize the system afterwards.
1. Move the selector lever into
position N on a straight stretch of
road at a speed of over 20 mph /
30 km/h
2. Pull both shift paddles for approx.
2 seconds.
If you do not carry out the initialization,
the system automatically learns the
changed condition gradually during
driving. This can become apparent due
to brief opening and closing of the
clutch.
Sequential M gearbox with Drivelogic*
Page 74 of 170

74
The speed stored in memory is deleted.To store and maintain speed or to
acceleratePress button + briefly:
The system stores and maintains the
current vehicle speed. Every time you
tap the button, the speed increases by
approx. 0.6 mph / 1 km/h.
Press and hold button +:
The vehicle accelerates without pres-
sure on the accelerator pedal. When
you release the button, the system
stores and maintains the current speed.
If on a downhill gradient the
engine braking effect is not suffi-
cient, the controlled speed can be
exceeded. Speed can drop on uphill
grades if the engine output is insuffi-
cient.
of the button reduces the speed by
approx. 0.6 mph / 1 km/h.
Press and hold button –:
With the cruise control active, the sys-
tem automatically reduces the throttle
opening to slow the vehicle. When you
release the button, the system stores
and maintains the current speed.To interrupt the cruise controlWhen the system is activated, press the
button. The indicator lamp stays on.
You can use the cruise control again
whenever you want by calling up the
speed that was stored last.
In addition, cruise control is interrupted
automatically:
>When the brakes are applied
>When pressing down the clutch pedal
>If you exceed or fall below the pro-
grammed speed for an extended
period – by depressing the accelera-
tor, for example
>Sequential M gearbox with Drivel-
ogic, refer to page 66: when shifting
in the sequential mode.
To recall the stored settingPress button:
The vehicle accelerates to and main-
tains the last speed stored.
Cruise control*
Page 118 of 170

118
Snow chains*Only certain snow chains have been
tested by BMW and determined and
approved as roadworthy. Consult your
BMW center for more information.
BMW recommends using only these
approved fine-link snow chains. Use
them in pairs on winter tires, but only on
both rear wheels.
Comply with all manufacturer's safety
precautions when mounting the chains.
Do not exceed a maximum speed of
30 mph / 50 km/h when using snow
chains.
After mounting or removing snow
chains, always reinitialize the sequential
M gearbox with Drivelogic, refer to
page 70.
It is not possible to mount snow
chains on tires with 18-inch and
19-inch wheels.
Deactivate the Flat Tire Monitor when
using snow chains. Malfunction warn-
ings and undetected losses in pressure
are a possibility when driving with snow
chains.
When driving with snow chains, it may
be useful to deactivate DSC, refer to
page 83.<
Page 145 of 170

145
Towing and tow-starting the vehicle
Always observe all applicable
towing laws and regulations.<
Using the towing eyeletThe screw-in towing eyelet is stored in
the luggage compartment under the
floor panel and must remain with the
vehicle at all times. It can be attached
at the front or rear of your BMW.
Observe the following instruc-
tions in order to avoid damaging
the towing eyelet or the vehicle: use
only the towing eyelet supplied with the
vehicle, and screw it in firmly until it
stops. Use the towing eyelet for towing
on paved roads only. Avoid subjecting
the towing eyelet to lateral loads, e.g.
do not lift the vehicle using the towing
eyelet.<
Access to the threaded socketPress out the cover in the front or rear
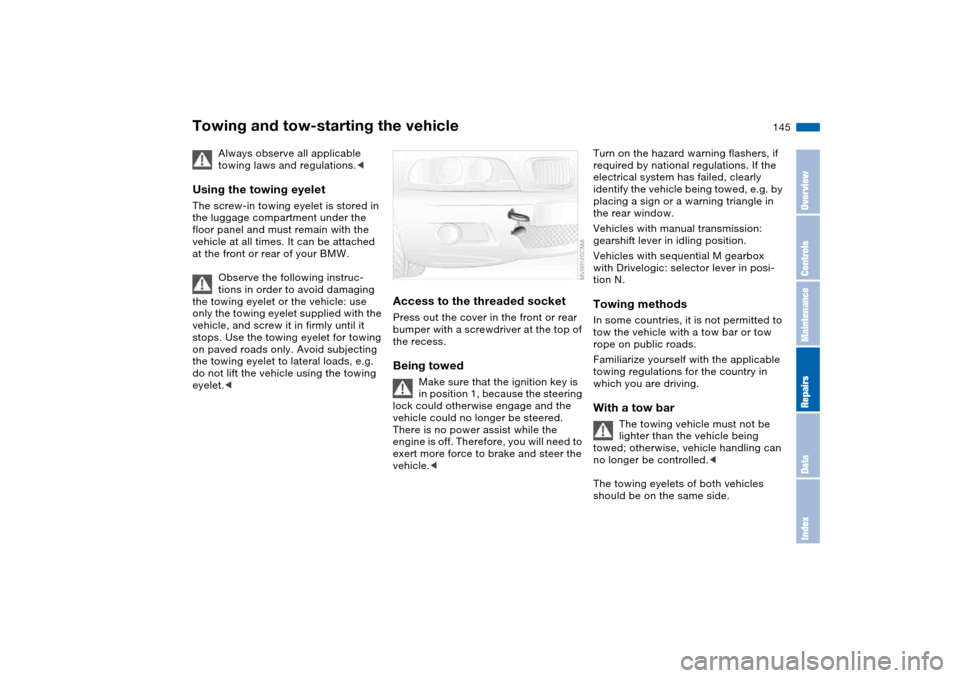
bumper with a screwdriver at the top of
the recess.Being towed
Make sure that the ignition key is
in position 1, because the steering
lock could otherwise engage and the
vehicle could no longer be steered.
There is no power assist while the
engine is off. Therefore, you will need to
exert more force to brake and steer the
vehicle.<
Turn on the hazard warning flashers, if
required by national regulations. If the
electrical system has failed, clearly
identify the vehicle being towed, e.g. by
placing a sign or a warning triangle in
the rear window.
Vehicles with manual transmission:
gearshift lever in idling position.
Vehicles with sequential M gearbox
with Drivelogic: selector lever in posi-
tion N.Towing methodsIn some countries, it is not permitted to
tow the vehicle with a tow bar or tow
rope on public roads.
Familiarize yourself with the applicable
towing regulations for the country in
which you are driving.With a tow bar
The towing vehicle must not be
lighter than the vehicle being
towed; otherwise, vehicle handling can
no longer be controlled.<
The towing eyelets of both vehicles
should be on the same side.
OverviewControlsMaintenanceRepairsDataIndex
Page 146 of 170

146
If the tow bar can only be used in a
diagonal position, please note the fol-
lowing:
>Clearance is restricted while you are
driving around corners
>The inclination of the tow bar pro-
duces lateral force.
Only attach the tow bar to the
towing eyelets. Other parts of the
vehicles could otherwise be dam-
aged.
Use nylon ropes or straps for tow-
ing because they prevent sudden
jerking movements. Attach the tow rope
only to the towing eyelets. Other parts
of the vehicles could otherwise be
damaged.<
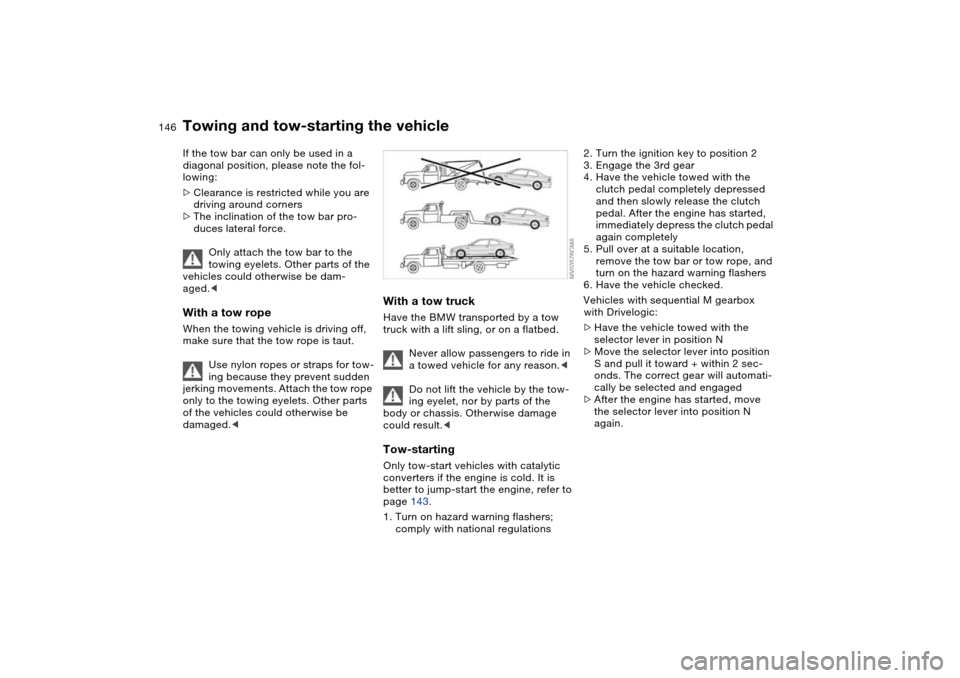
With a tow truckHave the BMW transported by a tow
truck with a lift sling, or on a flatbed.
Never allow passengers to ride in
a towed vehicle for any reason.<
Do not lift the vehicle by the tow-
ing eyelet, nor by parts of the
body or chassis. Otherwise damage
could result.
better to jump-start the engine, refer to
page 143.
1. Turn on hazard warning flashers;
comply with national regulations
2. Turn the ignition key to position 2
3. Engage the 3rd gear
4. Have the vehicle towed with the
clutch pedal completely depressed
and then slowly release the clutch
pedal. After the engine has started,
immediately depress the clutch pedal
again completely
5. Pull over at a suitable location,
remove the tow bar or tow rope, and
turn on the hazard warning flashers
6. Have the vehicle checked.
Vehicles with sequential M gearbox
with Drivelogic:
>Have the vehicle towed with the
selector lever in position N
>Move the selector lever into position
S and pull it toward + within 2 sec-
onds. The correct gear will automati-
cally be selected and engaged
>After the engine has started, move
the selector lever into position N
again.
Towing and tow-starting the vehicle
Page 160 of 170

Everything from A to ZGearbox
manual transmission 65
Gearbox malfunction
sequential M gearbox with
Drivelogic 70
Gearbox, sequential 66
Gearshift lever
manual transmission 65
sequential M gearbox with
Drivelogic 66
General driving notes 109
Glass sunroof
closing following an elec-
trical malfunction 41
convenience operation
30, 32
remote control 29, 30
Glass sunroof, electric 40
Glove compartment 95
Gradient assistance 69
Grills, refer to Ventilation 90
Gross weight, refer to
Weights 152
H
Handbrake, refer to Parking
brake 64
Hands-free system 97
Harman Kardon premium
sound system 95
Hazard warning flashers 14
Hazard warning triangle 23Head airbags 52
Head restraints 45
Headlamp cleaning system
cleaning headlamps 73
washer fluid 122, 153
Headlamp control 87
Headlamp flasher 88
indicator lamp 21
Headlamps
bulb replacement 133
care, refer to the Caring
for your vehicle brochure
Heated mirror 50
Heated rear window
automatic climate
control 93
Heated seats 49
Heating
exterior mirrors 50
rear window 93
seats 49
Heating and ventilation 90
Heavy loads, refer to Cargo
loading 103
Height adjustment
seats 44
steering wheel 51
Height, refer to
Dimensions 151High beams 71, 88
bulb replacement 133
headlamp flasher 88
indicator lamp 21
Holder for
beverages 96, 97
litter bag 97
Hood release 119
Horn 14
Hydraulic brake assistant,
refer to DBC 111
Hydroplaning 109
I
Ice warning 79
Ignition 61
Ignition key 28
positions 61
Ignition lock 61
Imprint 4
Indicator lamps 18Indicator/warning lamp
airbags 18
alarm system 38
brakes 18, 19
Check Gas Cap 19
coolant 19, 76
DSC 19
Flat Tire Monitor
18, 19, 85
fog lamps 20
Please fasten safety
belts 18
reserve 76
Service Engine Soon 19
Individual air distribution 92
Individual settings, refer to
Vehicle Memory, Key
Memory 59
Inflation pressure monitor-
ing, refer to Flat Tire Moni-
tor 83
Inflation pressure, tires 112
INSPECTION 77
Instrument cluster 16
Instrument lighting 88
Instrument panel 14
Interface socket for onboard
diagnostics (OBD) 128
event data recorders 128
Interior lamps 89
remote control 30