2006 BMW M3 COUPE seat memory
[x] Cancel search: seat memoryPage 8 of 170

Contents
Notes
About this Owner's Manual4
Additional sources of
information4
Symbols used4
Your individual vehicle5
Status at time of printing5
For your own safety6
Service and warranty7
Reporting safety defects7
Overview
Cockpit14
Instrument cluster16
Indicator and warning lamps18
Buttons* in steering wheel22
Hazard warning triangle*23
First-aid kit*23
Refueling24
Fuel specifications25
Controls and features
Opening and closing:
Keys28
Central locking system28
Opening and closing – via the
remote control29
Opening and closing – via the
door lock32
Opening and closing – from the
inside33
Luggage compartment lid34
Luggage compartment36
Alarm system*37
Electric power windows39
Glass sunroof, electric*40
To adjust:
Safe seating position42
Seats43
Manual seat adjustment43
Power seat adjustment*44
Head restraints45
Entering the rear46
Safety belts46
Seat and mirror memory*48
Seat heating*49
Mirrors50
Steering wheel51
Passenger safety systems:
Airbags52
Transporting children safely55
Vehicle Memory, Key
Memory59
Page 48 of 170
48
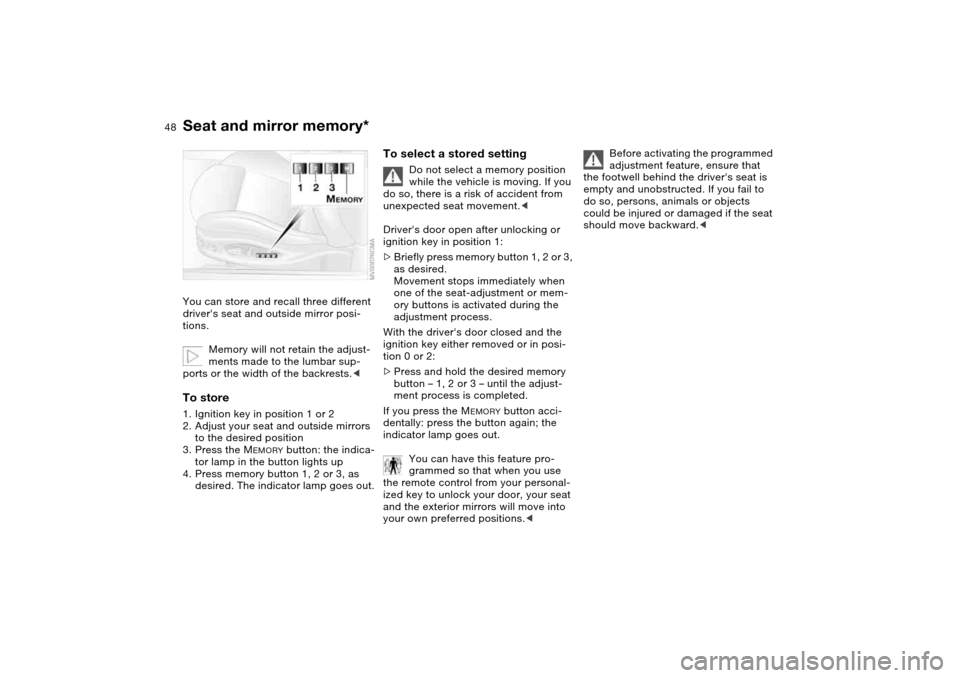
Seat and mirror memory*You can store and recall three different
driver's seat and outside mirror posi-
tions.
Memory will not retain the adjust-
ments made to the lumbar sup-
ports or the width of the backrests.
to the desired position
3. Press the M
EMORY
button: the indica-
tor lamp in the button lights up
4. Press memory button 1, 2 or 3, as
desired. The indicator lamp goes out.
To select a stored setting
Do not select a memory position
while the vehicle is moving. If you
do so, there is a risk of accident from
unexpected seat movement.<
Driver's door open after unlocking or
ignition key in position 1:
>Briefly press memory button 1, 2 or 3,
as desired.
Movement stops immediately when
one of the seat-adjustment or mem-
ory buttons is activated during the
adjustment process.
With the driver's door closed and the
ignition key either removed or in posi-
tion 0 or 2:
>Press and hold the desired memory
button – 1, 2 or 3 – until the adjust-
ment process is completed.
If you press the M
EMORY
button acci-
dentally: press the button again; the
indicator lamp goes out.
You can have this feature pro-
grammed so that when you use
the remote control from your personal-
ized key to unlock your door, your seat
and the exterior mirrors will move into
your own preferred positions.<
Before activating the programmed
adjustment feature, ensure that
the footwell behind the driver's seat is
empty and unobstructed. If you fail to
do so, persons, animals or objects
could be injured or damaged if the seat
should move backward.<
Page 49 of 170
49
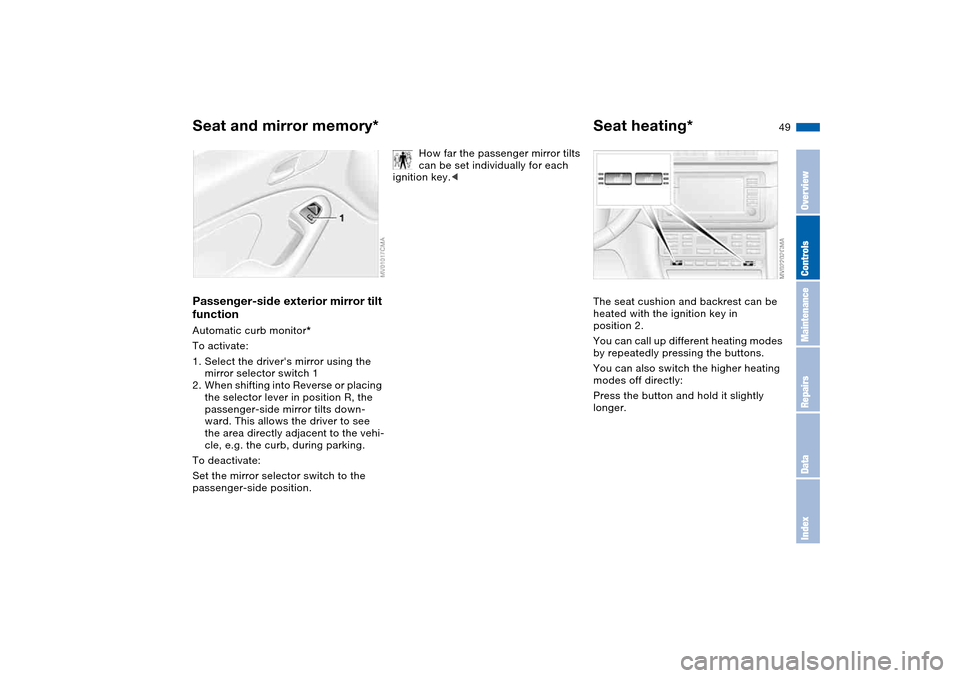
Passenger-side exterior mirror tilt
functionAutomatic curb monitor*
To activate:
1. Select the driver's mirror using the
mirror selector switch 1
2. When shifting into Reverse or placing
the selector lever in position R, the
passenger-side mirror tilts down-
ward. This allows the driver to see
the area directly adjacent to the vehi-
cle, e.g. the curb, during parking.
To deactivate:
Set the mirror selector switch to the
passenger-side position.
How far the passenger mirror tilts
can be set individually for each
ignition key.<
Seat heating*The seat cushion and backrest can be
heated with the ignition key in
position 2.
You can call up different heating modes
by repeatedly pressing the buttons.
You can also switch the higher heating
modes off directly:
Press the button and hold it slightly
longer.
Seat and mirror memory*
OverviewControlsMaintenanceRepairsDataIndex
Page 50 of 170
50
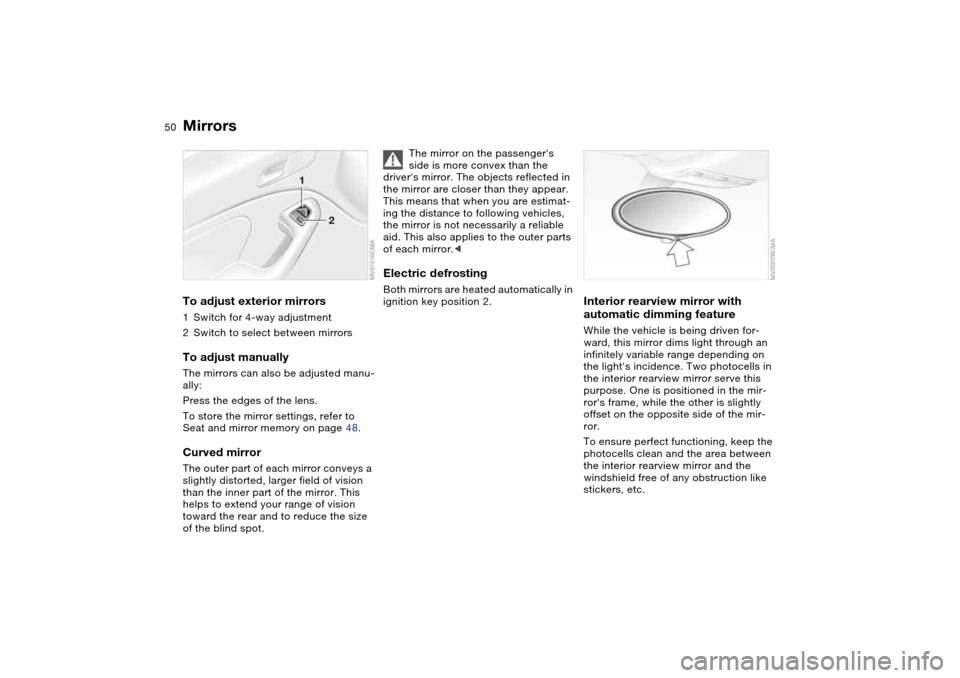
MirrorsTo adjust exterior mirrors1Switch for 4-way adjustment
2Switch to select between mirrorsTo adjust manuallyThe mirrors can also be adjusted manu-
ally:
Press the edges of the lens.
To store the mirror settings, refer to
Seat and mirror memory on page 48.Curved mirrorThe outer part of each mirror conveys a
slightly distorted, larger field of vision
than the inner part of the mirror. This
helps to extend your range of vision
toward the rear and to reduce the size
of the blind spot.
The mirror on the passenger's
side is more convex than the
driver's mirror. The objects reflected in
the mirror are closer than they appear.
This means that when you are estimat-
ing the distance to following vehicles,
the mirror is not necessarily a reliable
aid. This also applies to the outer parts
of each mirror.<
Electric defrostingBoth mirrors are heated automatically in
ignition key position 2.
Interior rearview mirror with
automatic dimming featureWhile the vehicle is being driven for-
ward, this mirror dims light through an
infinitely variable range depending on
the light's incidence. Two photocells in
the interior rearview mirror serve this
purpose. One is positioned in the mir-
ror's frame, while the other is slightly
offset on the opposite side of the mir-
ror.
To ensure perfect functioning, keep the
photocells clean and the area between
the interior rearview mirror and the
windshield free of any obstruction like
stickers, etc.
Page 55 of 170
55
Transporting children safelyCommercially available child-restraint
systems are designed to be secured
with a lap belt or with the lap belt por-
tion of a combination lap/shoulder belt.
Improperly or inadequately installed
restraint systems can increase the risk
of injury to children. Always read and
follow the instructions that come with
the system.Correct location for installingIn your BMW, all seats equipped with a
three-point safety belt – except for the
driver's seat – are suitable for installing
universal child-restraint systems of all
age classes and which have been
approved for the age group in question. Before installing any child-
restraint device or child seat,
please read the following:
Never install a rearward-facing child-
restraint system in the front passenger
seat of this vehicle.
Your vehicle is equipped with an airbag
supplemental restraint system for the
front passenger. Because the backrest
on any rearward-facing child-restraint
system – of the kind designed for
infants under 1 year and 20 lbs/9 kg –
would be within the airbag's deploy-
ment range, you should never mount
such a device in the front passenger
seat, since the impact of the airbag
against the child restraint's backrest
could lead to serious or fatal injuries.
If it is necessary for a child – not an
infant – to ride in the front seat, certain
precautions should be taken. First,
move the passenger seat as far away
from the instrument panel as possible.
This important precaution is intended to
maximize the distance between the air-
bag and the child. Older children
should be tightly secured with the
safety belt after they have outgrown a
booster seat that is appropriate for their
age, height, and weight.
Younger children should be secured in
an appropriate forward-facing child-
restraint system that has first been
properly secured with a safety belt.
Never install a rearward-facing child-
restraint system in the front passenger
seat.
We strongly urge you to carefully read
and comply with the instructions for
installation and use provided by the
child restraint's manufacturer when-
ever you use such a device.
The width adjustment of the front pas-
senger seat must be set at full width.
Do not call up any seat memory posi-
tions after the child seat has been
installed; there is otherwise a risk of
injury.
Do not attempt to modify child-restraint
systems. If you do this, the protection
provided by these systems could be
impaired.
Be sure that all occupants – of all ages –
remain properly and securely restrained
at all times.<
OverviewControlsMaintenanceRepairsDataIndex
Page 59 of 170

59
Vehicle Memory, Key MemoryHow the system functionsYou have probably frequently wished
that you could configure individual
functions of your vehicles to reflect your
own personal requirements. In engi-
neering your vehicle, BMW has pro-
vided for a number of options for per-
sonal adjustment that can be
programmed into your vehicle at your
BMW center.
The available configuration data fall into
two categories, according to whether
their primary orientation is the vehicle –
Vehicle Memory – or the individual –
Key Memory. You can have up to four
different basic settings adjusted for four
different persons. The only require-
ment is that each person uses his or her
own remote control key.
When your vehicle is unlocked with the
remote control, the vehicle recognizes
the individual user by means of a data
exchange with the key, and makes
adjustments accordingly.
Distinguishing between keysIn order for you to distinguish between
different keys, colored decals are sup-
plied together with the keys.What the system can doYour BMW center can provide you with
details on the possibilities that the Vehi-
cle and Key Memory systems offer:
You will see this symbol through-
out the Owner's Manual. It is to
remind you at appropriate places of the
settings that are available to you.<
Examples for Vehicle Memory:
>Various signals that can serve as
acknowledgment for locking and
unlocking the vehicle, refer to
page 29
>Activates/deactivates the 'Follow me
home' lamps function, refer to
page 87
>Activates/deactivates daytime driv-
ing lamps, refer to page 87
>Sets the units of measure for display-
ing time, outside temperature, dis-
tance traveled and fuel consumption
in the instrument cluster
>When you shift into Reverse, an
acoustic signal indicates that PDC
has been activated, refer to page 81
>Switches on rear window defroster
automatically, refer to page 93
>Activates/deactivates various alarm
system functions, refer to page 38
>After giving an ice warning, the
onboard computer display returns to
the previous setting, refer to page 79.
Examples for Key Memory:
>Locks the vehicle automatically after
you start off, refer to page 33
>Automatically moves the seat and
outside mirror into position for the
programmed driver when unlocking
the vehicle, refer to page 48
>Automatic tilting of the passenger-
side mirror, refer to Automatic curb
monitor, page 49
OverviewControlsMaintenanceRepairsDataIndex
Page 141 of 170
141
Disposal
After changing the battery, have
the old battery disposed of by
your BMW center or bring it to a recy-
cling point. Maintain the battery in an
upright position for transport and stor-
age. Secure the battery against tilting in
transit.<
Power lossAfter a temporary power loss, e.g. due
to a discharged battery, some equip-
ment will be limited in its use and will
have to be reinitialized. Individual set-
tings are also lost and must be reset:
>Seat and mirror memory
The position settings must be stored
again, refer to page 48
>Clock
must be reset, refer to page 78
>Radio
Stations must be reset, refer to the
Owner's Manual for Radio/Onboard
Computer
>Navigation system
The system will not be operable
immediately, refer to the Owner's
Manual for Radio/Onboard Com-
puter.
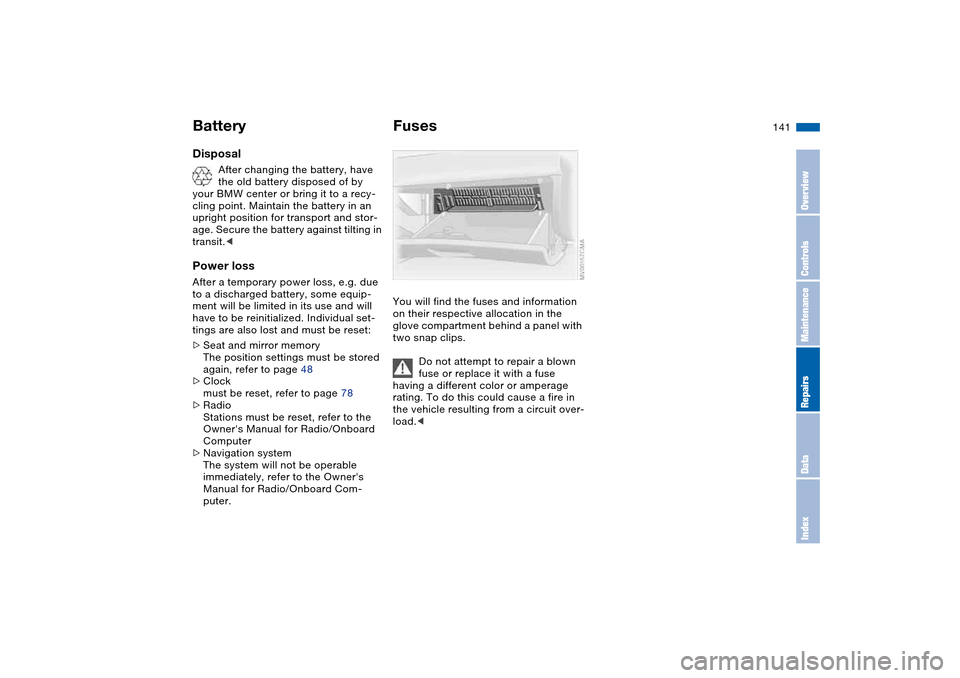
FusesYou will find the fuses and information
on their respective allocation in the
glove compartment behind a panel with
two snap clips.
Do not attempt to repair a blown
fuse or replace it with a fuse
having a different color or amperage
rating. To do this could cause a fire in
the vehicle resulting from a circuit over-
load.<
Battery
OverviewControlsMaintenanceRepairsDataIndex
Page 160 of 170

Everything from A to ZGearbox
manual transmission 65
Gearbox malfunction
sequential M gearbox with
Drivelogic 70
Gearbox, sequential 66
Gearshift lever
manual transmission 65
sequential M gearbox with
Drivelogic 66
General driving notes 109
Glass sunroof
closing following an elec-
trical malfunction 41
convenience operation
30, 32
remote control 29, 30
Glass sunroof, electric 40
Glove compartment 95
Gradient assistance 69
Grills, refer to Ventilation 90
Gross weight, refer to
Weights 152
H
Handbrake, refer to Parking
brake 64
Hands-free system 97
Harman Kardon premium
sound system 95
Hazard warning flashers 14
Hazard warning triangle 23Head airbags 52
Head restraints 45
Headlamp cleaning system
cleaning headlamps 73
washer fluid 122, 153
Headlamp control 87
Headlamp flasher 88
indicator lamp 21
Headlamps
bulb replacement 133
care, refer to the Caring
for your vehicle brochure
Heated mirror 50
Heated rear window
automatic climate
control 93
Heated seats 49
Heating
exterior mirrors 50
rear window 93
seats 49
Heating and ventilation 90
Heavy loads, refer to Cargo
loading 103
Height adjustment
seats 44
steering wheel 51
Height, refer to
Dimensions 151High beams 71, 88
bulb replacement 133
headlamp flasher 88
indicator lamp 21
Holder for
beverages 96, 97
litter bag 97
Hood release 119
Horn 14
Hydraulic brake assistant,
refer to DBC 111
Hydroplaning 109
I
Ice warning 79
Ignition 61
Ignition key 28
positions 61
Ignition lock 61
Imprint 4
Indicator lamps 18Indicator/warning lamp
airbags 18
alarm system 38
brakes 18, 19
Check Gas Cap 19
coolant 19, 76
DSC 19
Flat Tire Monitor
18, 19, 85
fog lamps 20
Please fasten safety
belts 18
reserve 76
Service Engine Soon 19
Individual air distribution 92
Individual settings, refer to
Vehicle Memory, Key
Memory 59
Inflation pressure monitor-
ing, refer to Flat Tire Moni-
tor 83
Inflation pressure, tires 112
INSPECTION 77
Instrument cluster 16
Instrument lighting 88
Instrument panel 14
Interface socket for onboard
diagnostics (OBD) 128
event data recorders 128
Interior lamps 89
remote control 30