2006 BMW M3 COUPE ignition
[x] Cancel search: ignitionPage 9 of 170

Contents
9
Driving:
Ignition lock61
Starting the engine and driving
off62
Switching off the engine64
Parking brake64
Manual transmission65
Sequential M gearbox with
Drivelogic*66
Turn signal indicator/Headlamp
flasher71
Washer/wiper system/Rain
sensor*72
Cruise control*73
Everything under control:
Odometer75
Tachometer75
Engine oil temperature75
Fuel gauge76
Engine coolant temperature
gauge76
Service interval display77
Check Control77
Clock78
Computer79
Technology for safety and
driving convenience:
Park Distance Control (PDC)*81
Dynamic Stability Control
(DSC)82
Flat Tire Monitor83
M Engine dynamics control85
Brake force display86
Lamps:
Parking lamps/Low beams87
Instrument lighting88
High beams/Standing lamps88
Front fog lamps89
Interior lamps89
Controlling the climate for
pleasant driving:
Automatic climate control90
Roller sun blind*94
Interior conveniences:
Premium sound system*95
Glove compartment95
Storage compartments96
Microphone*97
Ashtray, front*98
Ashtray, rear*98
Clothes hooks99
Loading and transporting:
Through-loading system100
Ski bag*101
Cargo loading102
Roof-mounted luggage
rack*105
Controls and features
Page 18 of 170

18
Indicator and warning lamps
Technology that monitors itself
Indicator and warning lamps that are
identified by
●
are tested for proper
functioning whenever the ignition key is
turned. They each light up once for dif-
ferent periods of time.
If a fault should occur in one of these
systems, the corresponding lamp does
not go out after the engine is started, or
it lights up while the vehicle is moving.
You will see how to react to this below.
Red: stop immediately
Battery charge current
●
The battery is no longer being
charged. There is a malfunction
of the alternator drive belt or in the
charging circuit of the alternator. Please
contact the nearest BMW center.
If the drive belt is defective, stop
and switch off the engine immedi-
ately to prevent overheating and seri-
ous engine damage. If the drive belt is
defective, increased steering effort is
also required.
<
Engine oil pressure
●
An alarm sounds at the same
time. The engine oil pressure is
too low. Stop the vehicle immediately
and switch off the engine. It is not pos-
sible to continue driving. Please contact
the nearest BMW center.
Do not continue driving, as the
engine could sustain serious dam-
age from inadequate lubrication.
<
Flat Tire Monitor
●
In addition, an acoustic signal is
sounded: there is a flat tire.
Reduce speed and carefully come to a
stop. Avoid sudden braking and steer-
ing maneuvers.
For additional information, refer to
page 85.
Brake warning lamp
●
If the lamp comes on when the
parking brake is not engaged:
check the brake fluid level. It is very
important that you follow the instruc-
tions on page 125 before driving on.
Have the system checked immediately.
Brake warning lamp for Cana-
dian models.
Red: an important reminder
Brake warning lamp
●
Comes on when the parking
brake is engaged – an additional
acoustic signal sounds when starting
off.
For additional information, refer to
page 64.
Brake warning lamp for Cana-
dian models.
Please fasten safety belt
●
Comes on together with an
acoustic signal until driver fas-
tens safety belt.
For additional information on safety
belts, refer to page 46.
Airbags
●
Have the system checked as
soon as possible.
For additional information, refer to
page 54.
Page 28 of 170

28Opening and closing
KeysThe key set1Each master key with remote control
is powered by an extended-life bat-
tery that is charged automatically in
the ignition lock as you drive. For this
reason, user every master key at
least twice a year to keep its battery
charged. Depending on which master
key is recognized when the vehicle is
unlocked, different settings are called
up and carried out in the vehicle,
refer to Vehicle Memory, Key Memory
on page 59.
2Replacement key for storage in a safe
place, e.g. your wallet.
This key cannot be used to open the
locks for the luggage compartment
lid or the glove compartment. This
can be advantageous for valet park-
ing, for example. The key is not
intended for constant use.
Central locking systemThe conceptThe central locking system engages
and releases the locks on the:
>doors
>luggage compartment lid
>fuel filler door.
The central locking system is ready for
operation whenever the driver's door is
closed.
The central locking system can be
operated
>from outside via the door lock and
using the remote control
>from inside via the central locking
system button.
If it is operated from inside, the fuel
filler door will not be locked, refer to
page 33.
When the system is actuated from the
outside, the anti-theft system is also
activated. This prevents the doors from
being unlocked via the lock buttons or
the release handle. The alarm system is
also activated or deactivated.
In the event of a sufficiently severe
accident, the central locking system
unlocks automatically. In addition, the
hazard warning flashers and interior
lamps come on.
Page 39 of 170

39
Electric power windowsTo open and close windowsWith the ignition key in position 1 or
higher
>Press the switch until you feel resis-
tance: the window retracts, or
respectively the tilt-out window
moves outward; it remains in motion
for as long as you maintain pressure
on the switch
>Press the switch briefly past the pres-
sure point: the window moves auto-
matically. Pressing the switch again
stops the opening cycle.
You can close the window in the same
manner by pulling the switch. The tilt-
out window does not close automati-
cally.
You can still operate the power win-
dows for up to 15 minutes as long as
no one has opened and again closed
one of the doors.
When leaving the vehicle, always
remove the ignition key from the
lock and remember to close the doors
to prevent children from operating the
power windows and injuring them-
selves, etc.<
For convenience operation via the
remote control or the door lock, refer to
page 32 or 30.Trap protectionThe front windows are each equipped
with a contact strip located on the
upper inside of the window frame. If
pressure is exerted against this contact
strip while the window is being raised,
the system will respond by stopping the
window and then retracting it a small
distance.
Despite trap protection, always be
careful to ensure that the closing
path of the window is not obstructed.
Some types of objects, for instance
very thin objects, might fail to trigger
the contact strip in some situations.
If the switch is pulled and held beyond
the resistance point, this trap protection
is overridden.<
OverviewControlsMaintenanceRepairsDataIndex
Page 40 of 170

40
Glass sunroof, electric*
Watch the glass sunroof while it is
closing, to avoid any injuries.
When leaving the vehicle, always take
the ignition key with you and close the
doors, since children could otherwise
operate the sunroof and injure them-
selves.<
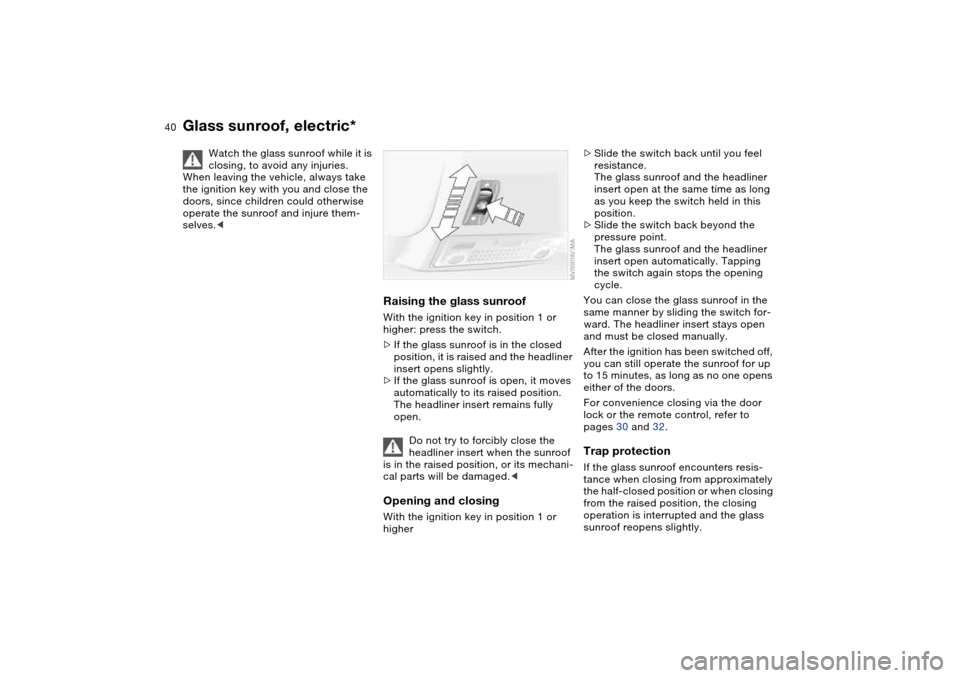
Raising the glass sunroofWith the ignition key in position 1 or
higher: press the switch.
>If the glass sunroof is in the closed
position, it is raised and the headliner
insert opens slightly.
>If the glass sunroof is open, it moves
automatically to its raised position.
The headliner insert remains fully
open.
Do not try to forcibly close the
headliner insert when the sunroof
is in the raised position, or its mechani-
cal parts will be damaged.
>Slide the switch back until you feel
resistance.
The glass sunroof and the headliner
insert open at the same time as long
as you keep the switch held in this
position.
>Slide the switch back beyond the
pressure point.
The glass sunroof and the headliner
insert open automatically. Tapping
the switch again stops the opening
cycle.
You can close the glass sunroof in the
same manner by sliding the switch for-
ward. The headliner insert stays open
and must be closed manually.
After the ignition has been switched off,
you can still operate the sunroof for up
to 15 minutes, as long as no one opens
either of the doors.
For convenience closing via the door
lock or the remote control, refer to
pages 30 and 32.Trap protectionIf the glass sunroof encounters resis-
tance when closing from approximately
the half-closed position or when closing
from the raised position, the closing
operation is interrupted and the glass
sunroof reopens slightly.
Page 41 of 170

41
Despite trap protection, always
make sure that the sunroof can
close without obstruction, otherwise in
some cases, e.g. with thin objects, it is
not guaranteed that the closing opera-
tion will be interrupted.
Trap protection is restricted when the
switch is pressed and held beyond the
pressure point. The sunroof opens only
slightly. If the switch is pressed and
held beyond the pressure point again
within approx. 2 seconds, trap protec-
tion is overridden.<
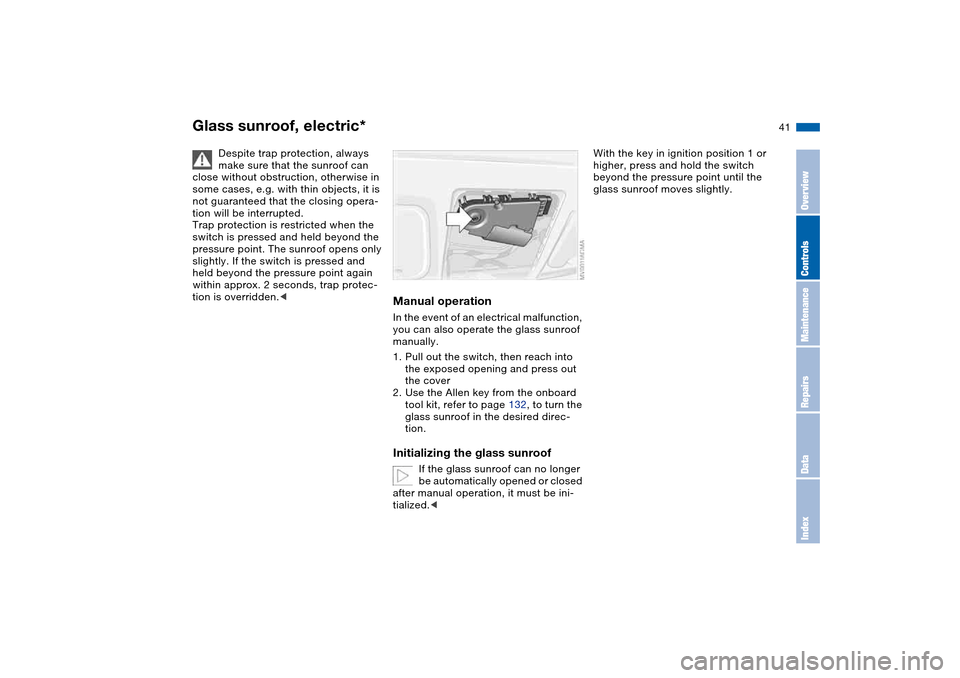
Manual operationIn the event of an electrical malfunction,
you can also operate the glass sunroof
manually.
1. Pull out the switch, then reach into
the exposed opening and press out
the cover
2. Use the Allen key from the onboard
tool kit, refer to page 132, to turn the
glass sunroof in the desired direc-
tion.Initializing the glass sunroof
If the glass sunroof can no longer
be automatically opened or closed
after manual operation, it must be ini-
tialized.<
With the key in ignition position 1 or
higher, press and hold the switch
beyond the pressure point until the
glass sunroof moves slightly.
Glass sunroof, electric*
OverviewControlsMaintenanceRepairsDataIndex
Page 48 of 170

48
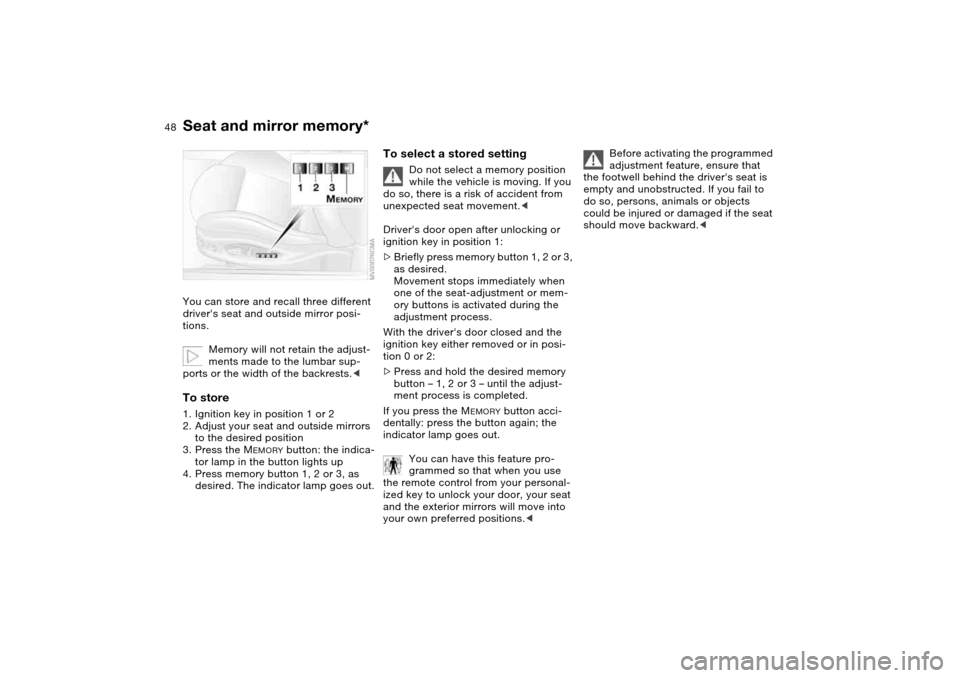
Seat and mirror memory*You can store and recall three different
driver's seat and outside mirror posi-
tions.
Memory will not retain the adjust-
ments made to the lumbar sup-
ports or the width of the backrests.
to the desired position
3. Press the M
EMORY
button: the indica-
tor lamp in the button lights up
4. Press memory button 1, 2 or 3, as
desired. The indicator lamp goes out.
To select a stored setting
Do not select a memory position
while the vehicle is moving. If you
do so, there is a risk of accident from
unexpected seat movement.<
Driver's door open after unlocking or
ignition key in position 1:
>Briefly press memory button 1, 2 or 3,
as desired.
Movement stops immediately when
one of the seat-adjustment or mem-
ory buttons is activated during the
adjustment process.
With the driver's door closed and the
ignition key either removed or in posi-
tion 0 or 2:
>Press and hold the desired memory
button – 1, 2 or 3 – until the adjust-
ment process is completed.
If you press the M
EMORY
button acci-
dentally: press the button again; the
indicator lamp goes out.
You can have this feature pro-
grammed so that when you use
the remote control from your personal-
ized key to unlock your door, your seat
and the exterior mirrors will move into
your own preferred positions.<
Before activating the programmed
adjustment feature, ensure that
the footwell behind the driver's seat is
empty and unobstructed. If you fail to
do so, persons, animals or objects
could be injured or damaged if the seat
should move backward.<
Page 49 of 170

49
Passenger-side exterior mirror tilt
functionAutomatic curb monitor*
To activate:
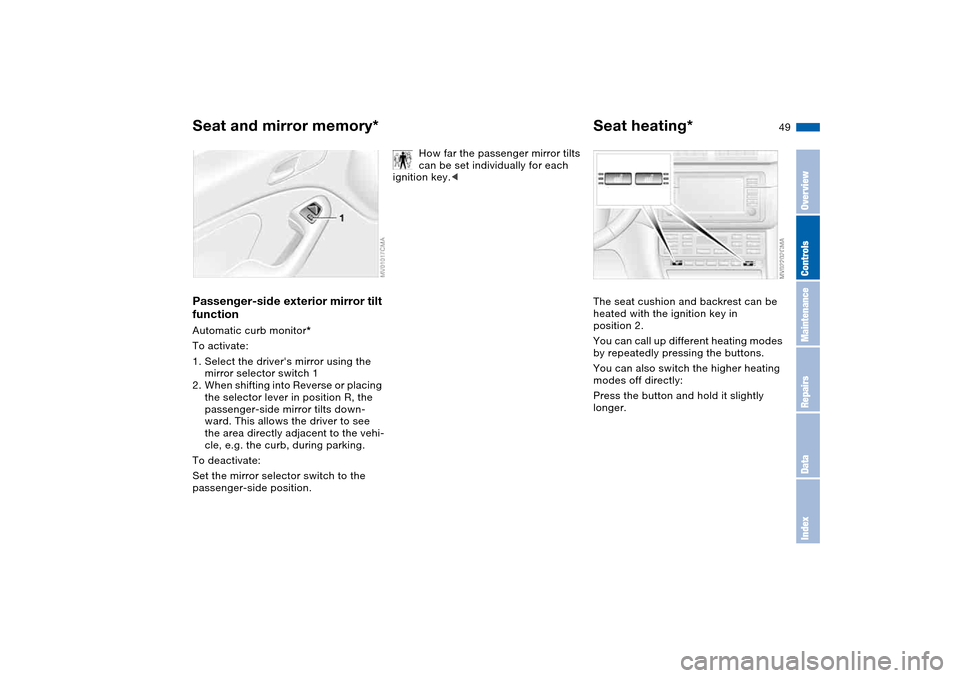
1. Select the driver's mirror using the
mirror selector switch 1
2. When shifting into Reverse or placing
the selector lever in position R, the
passenger-side mirror tilts down-
ward. This allows the driver to see
the area directly adjacent to the vehi-
cle, e.g. the curb, during parking.
To deactivate:
Set the mirror selector switch to the
passenger-side position.
How far the passenger mirror tilts
can be set individually for each
ignition key.<
Seat heating*The seat cushion and backrest can be
heated with the ignition key in
position 2.
You can call up different heating modes
by repeatedly pressing the buttons.
You can also switch the higher heating
modes off directly:
Press the button and hold it slightly
longer.
Seat and mirror memory*
OverviewControlsMaintenanceRepairsDataIndex