2006 BMW 760LI SEDAN rear entertainment
[x] Cancel search: rear entertainmentPage 17 of 247
At a glance
15Reference
Controls
Driving tips
Communications
Navigation
Entertainment
Mobility
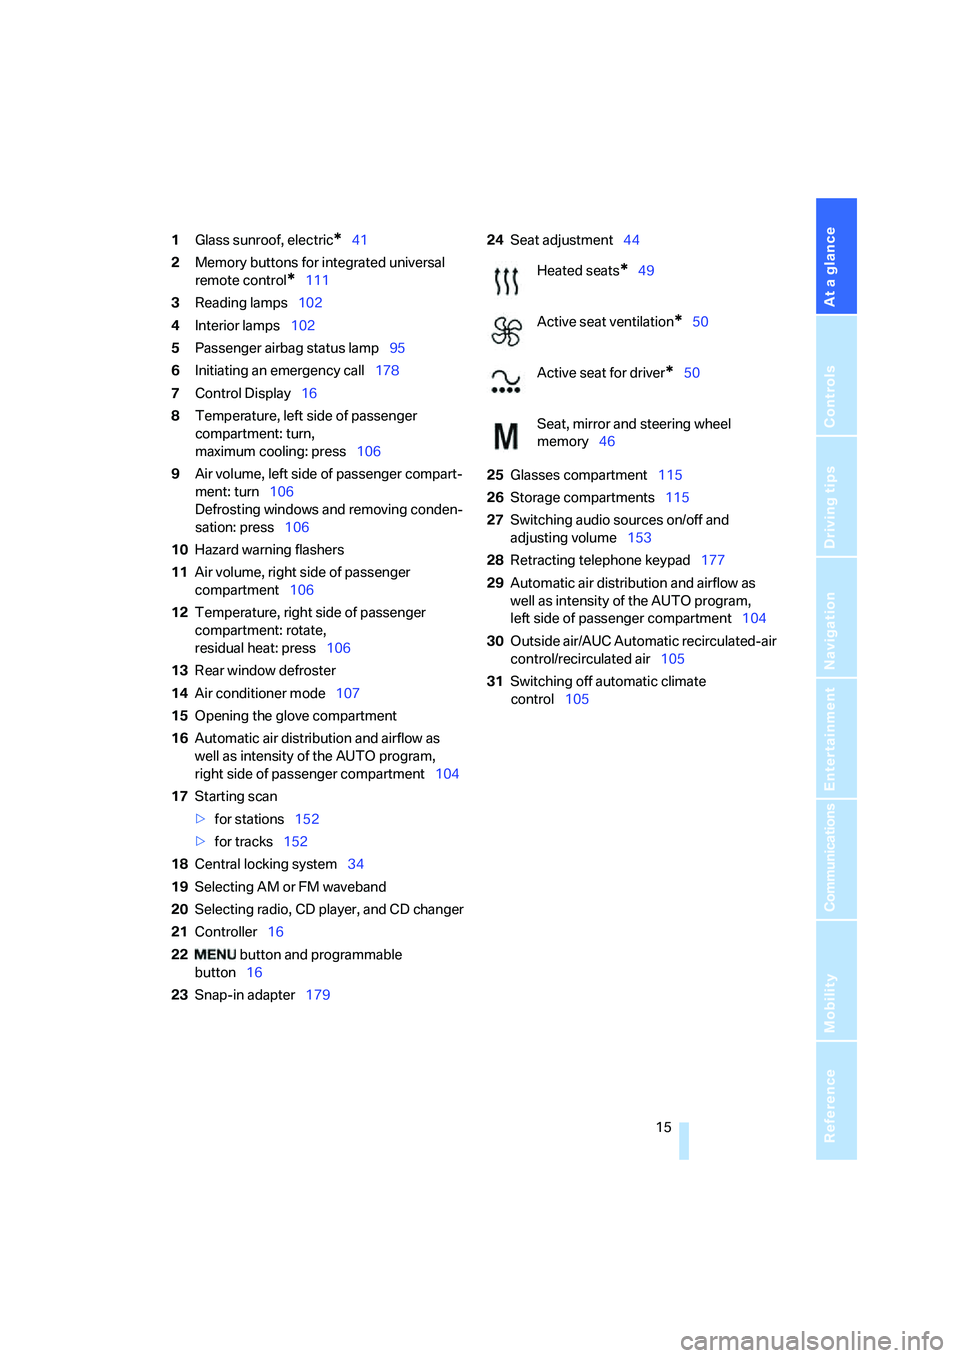
1Glass sunroof, electric*41
2Memory buttons for integrated universal
remote control
*111
3Reading lamps102
4Interior lamps102
5Passenger airbag status lamp95
6Initiating an emergency call178
7Control Display16
8Temperature, left side of passenger
compartment: turn,
maximum cooling: press106
9Air volume, left side of passenger compart-
ment: turn106
Defrosting windows and removing conden-
sation: press106
10Hazard warning flashers
11Air volume, right side of passenger
compartment106
12Temperature, right side of passenger
compartment: rotate,
residual heat: press106
13Rear window defroster
14Air conditioner mode107
15Opening the glove compartment
16Automatic air distribution and airflow as
well as intensity of the AUTO program,
right side of passenger compartment104
17Starting scan
>for stations152
>for tracks152
18Central locking system34
19Selecting AM or FM waveband
20Selecting radio, CD player, and CD changer
21Controller16
22 button and programmable
button16
23Snap-in adapter17924Seat adjustment44
25Glasses compartment115
26Storage compartments115
27Switching audio sources on/off and
adjusting volume153
28Retracting telephone keypad177
29Automatic air distribution and airflow as
well as intensity of the AUTO program,
left side of passenger compartment104
30Outside air/AUC Automatic recirculated-air
control/recirculated air105
31Switching off automatic climate
control105
Heated seats*49
Active seat ventilation
*50
Active seat for driver
*50
Seat, mirror and steering wheel
memory46
Page 20 of 247
iDrive
18 5Help
>Brief help text displays20
>Menu name for menu change19
6Entertainment
>Radio155
>CD player
*162
>CD changer
*164
>DVD changer
*168
It is only possible to play a DVD on the
rear seat screen, refer to Rear seat
screen
* on page21.<
7Settings
>Parking brake58
>PDC Park Distance Control86
>EDC Electronic Damping Control89
>Programmable buttons52
>FTM Flat Tire Monitor
*90
>TPM Tire Pressure Monitor
*91
>Time and date84
>Language84
>Units of measure and display format84
>Brightness85
>Rear seat screen
*21
8Climate
>Intensity of AUTO program104
>Air volume106
>Heated seats
*49
>Parked car ventilation109
>Extra, e.g. rear air conditioner108
Basic operation
Once the radio ready position is reached, the
following message appears on the Control Dis-
play:
To clear the message:
Press the controller.
This displays the start menu.
The message automatically disappears after
approx. 25 seconds.
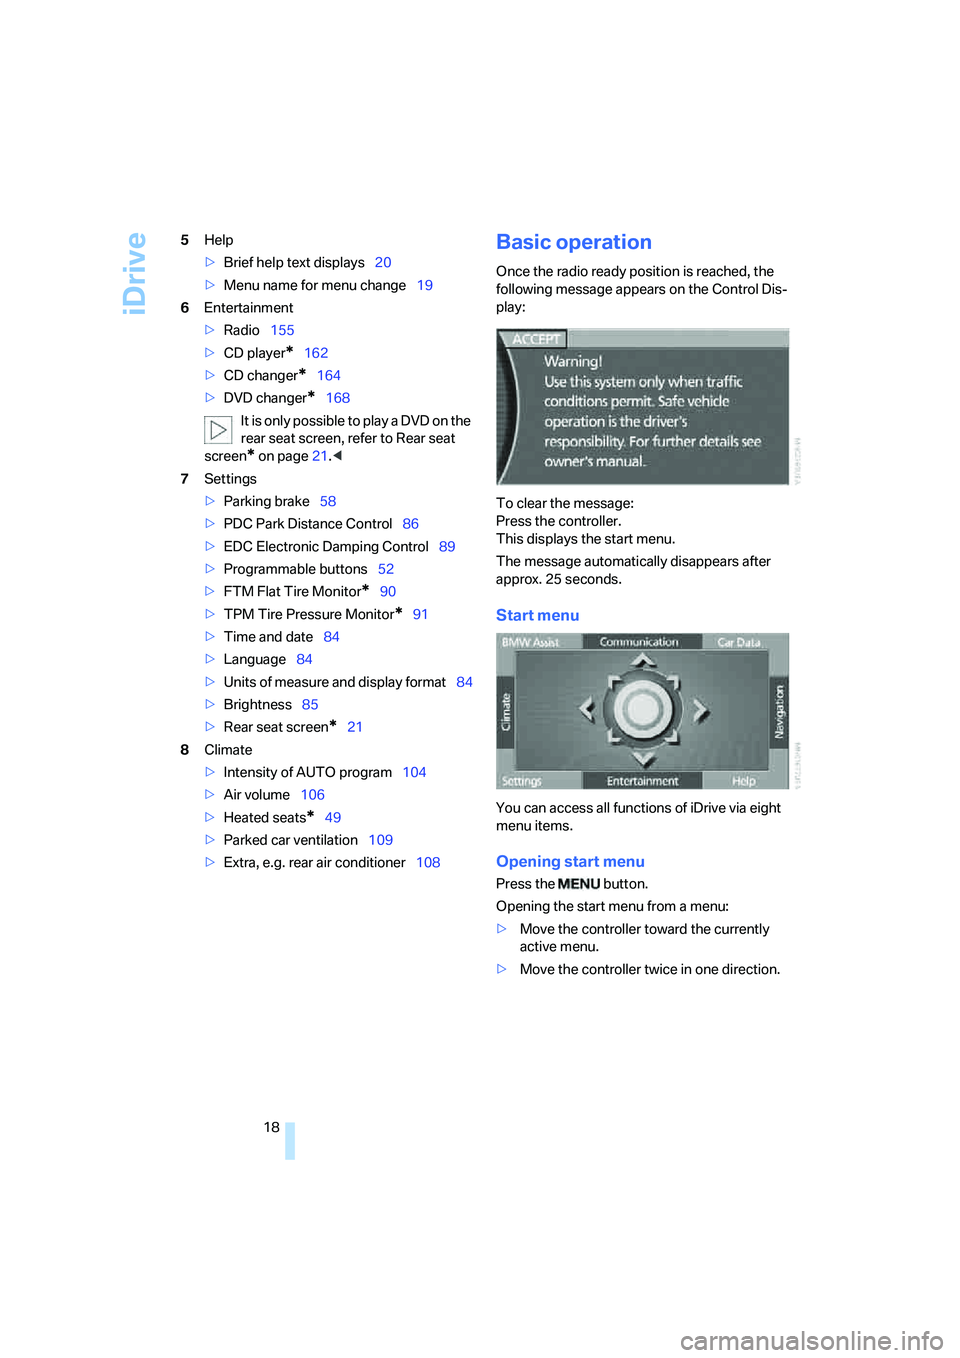
Start menu
You can access all functions of iDrive via eight
menu items.
Opening start menu
Press the button.
Opening the start menu from a menu:
>Move the controller toward the currently
active menu.
>Move the controller twice in one direction.
Page 23 of 247
At a glance
21Reference
Controls
Driving tips
Communications
Navigation
Entertainment
Mobility
5Telephone status
>Green, yellow and red flashing:
Linking of a mobile phone.
>Green:
Incoming or outgoing call.
>Red:
No network available.
>Yellow:
The network of another provider is being
used, partner network.
>Flashing yellow:
The network of another provider is being
used, external network.
Roaming in a partner or external net-
work incurs higher call charges than
in your home network.<
6Display of Check Control81
>You can use the "Car Data" menu to dis-
play the message on the Control Dis-
play.
Status service requirement display78
>Red:
At least one service interval has been
exceeded.
7Display of temperature selection and inten-
sity of the AUTO program, right side of pas-
senger compartment
8Air volume, right side of passenger com-
partment
9Entertainment
Display for radio, CD, and DVD
With compressed audio files, the informa-
tion about the track is displayed166
10Air volume, left side of passenger compart-
ment
11Display of temperature selection and inten-
sity of the AUTO program, left side of pas-
senger compartment
Assistance window*
The status lines in the assistance window show
the following:
>Outside temperature
>Navigation system destination>Time
>Date
Rear seat screen*
Some of the functions of iDrive can also be
operated via the rear seat screen. Certain func-
tions are only available via iDrive. These func-
tions can only be operated to a limited degree
on the rear screen, e.g. the speed limit can only
be displayed. The settings are made via iDrive.
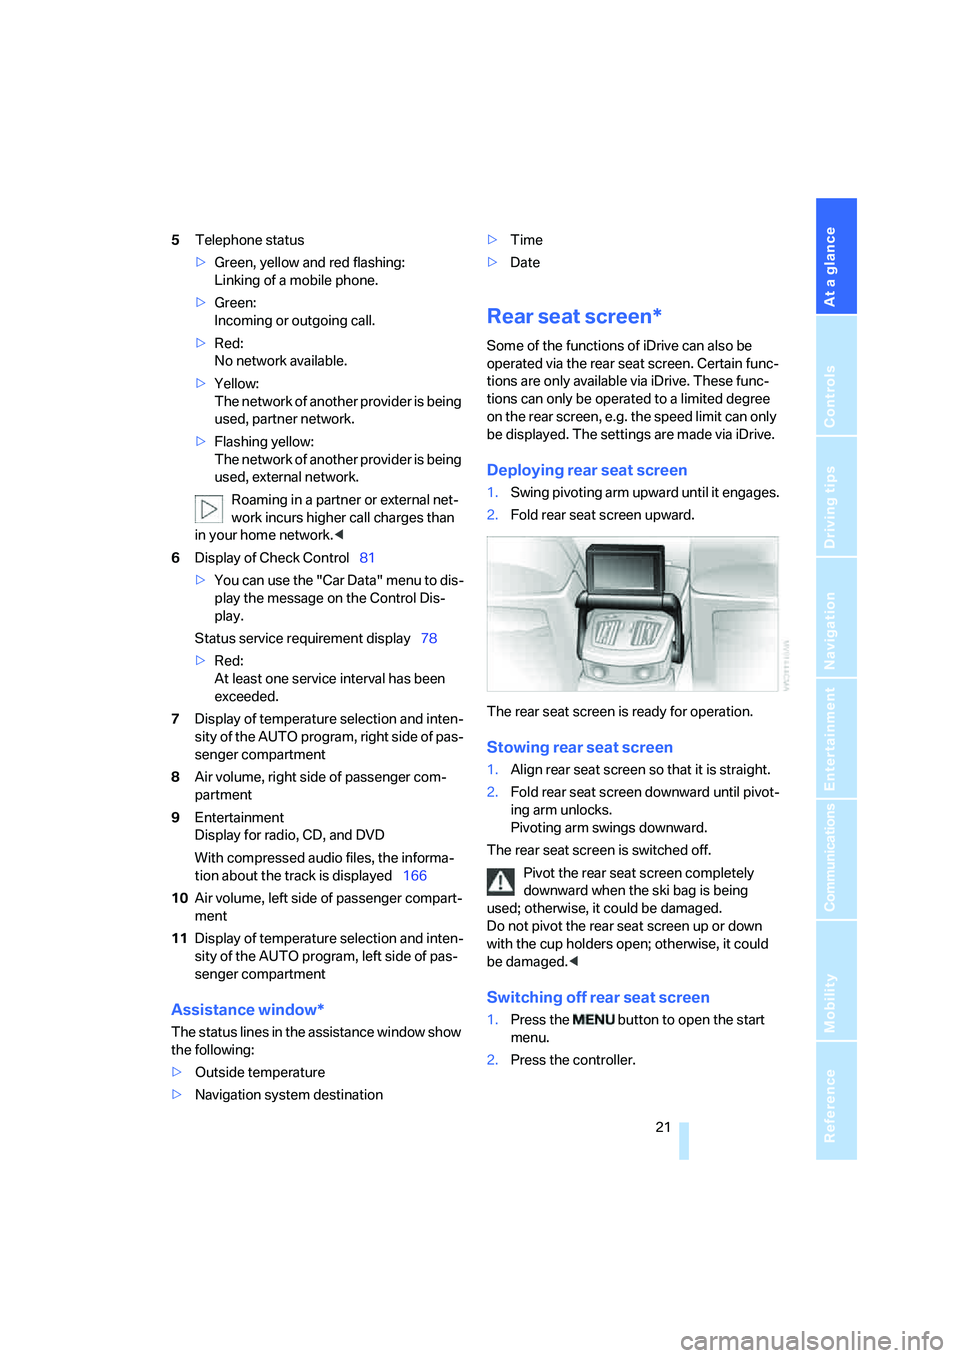
Deploying rear seat screen
1.Swing pivoting arm upward until it engages.
2.Fold rear seat screen upward.
The rear seat screen is ready for operation.
Stowing rear seat screen
1.Align rear seat screen so that it is straight.
2.Fold rear seat screen downward until pivot-
ing arm unlocks.
Pivoting arm swings downward.
The rear seat screen is switched off.
Pivot the rear seat screen completely
downward when the ski bag is being
used; otherwise, it could be damaged.
Do not pivot the rear seat screen up or down
with the cup holders open; otherwise, it could
be damaged.<
Switching off rear seat screen
1.Press the button to open the start
menu.
2.Press the controller.
Page 27 of 247
At a glance
25Reference
Controls
Driving tips
Communications
Navigation
Entertainment
Mobility
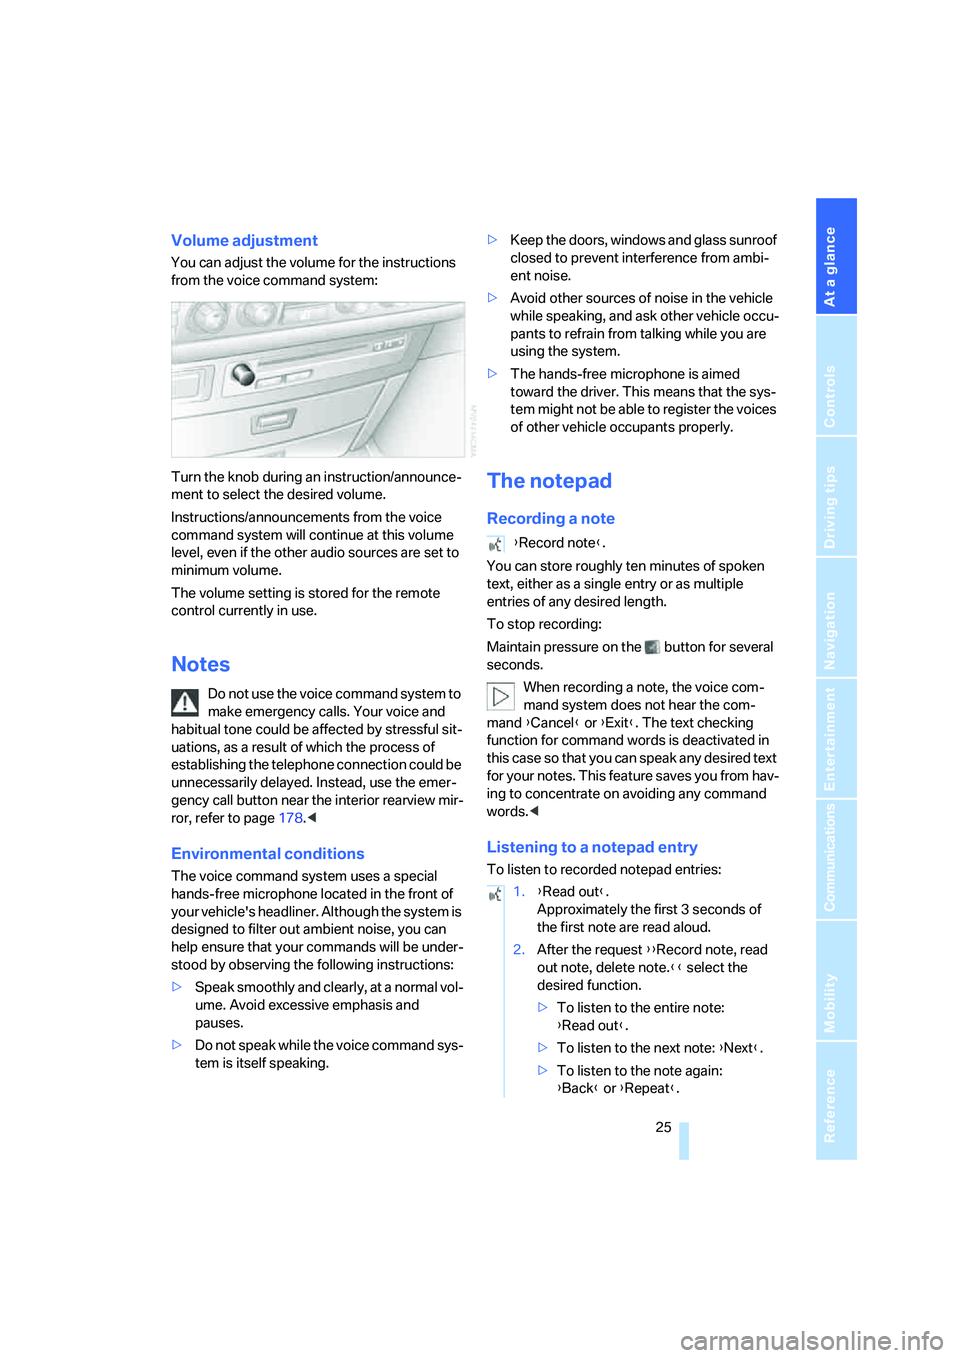
Volume adjustment
You can adjust the volume for the instructions
from the voice command system:
Turn the knob during an instruction/announce-
ment to select the desired volume.
Instructions/announcements from the voice
command system will continue at this volume
level, even if the other audio sources are set to
minimum volume.
The volume setting is stored for the remote
control currently in use.
Notes
Do not use the voice command system to
make emergency calls. Your voice and
habitual tone could be affected by stressful sit-
uations, as a result of which the process of
establishing the telephone connection could be
unnecessarily delayed. Instead, use the emer-
gency call button near the interior rearview mir-
ror, refer to page178.<
Environmental conditions
The voice command system uses a special
hands-free microphone located in the front of
your vehicle's headliner. Although the system is
designed to filter out ambient noise, you can
help ensure that your commands will be under-
stood by observing the following instructions:
>Speak smoothly and clearly, at a normal vol-
ume. Avoid excessive emphasis and
pauses.
>Do not speak while the voice command sys-
tem is itself speaking.>Keep the doors, windows and glass sunroof
closed to prevent interference from ambi-
ent noise.
>Avoid other sources of noise in the vehicle
while speaking, and ask other vehicle occu-
pants to refrain from talking while you are
using the system.
>The hands-free microphone is aimed
toward the driver. This means that the sys-
tem might not be able to register the voices
of other vehicle occupants properly.
The notepad
Recording a note
You can store roughly ten minutes of spoken
text, either as a single entry or as multiple
entries of any desired length.
To stop recording:
Maintain pressure on the button for several
seconds.
When recording a note, the voice com-
mand system does not hear the com-
mand {Cancel} or {Exit}. The text checking
function for command words is deactivated in
this case so that you can speak any desired text
for your notes. This feature saves you from hav-
ing to concentrate on avoiding any command
words.<
Listening to a notepad entry
To listen to recorded notepad entries:
{Record note}.
1.{Read out}.
Approximately the first 3 seconds of
the first note are read aloud.
2.After the request {{Record note, read
out note, delete note.}} select the
desired function.
>To listen to the entire note:
{Read out}.
>To listen to the next note: {Next}.
>To listen to the note again:
{Back} or {Repeat}.
Page 33 of 247
Controls
31Reference
At a glance
Driving tips
Communications
Navigation
Entertainment
Mobility
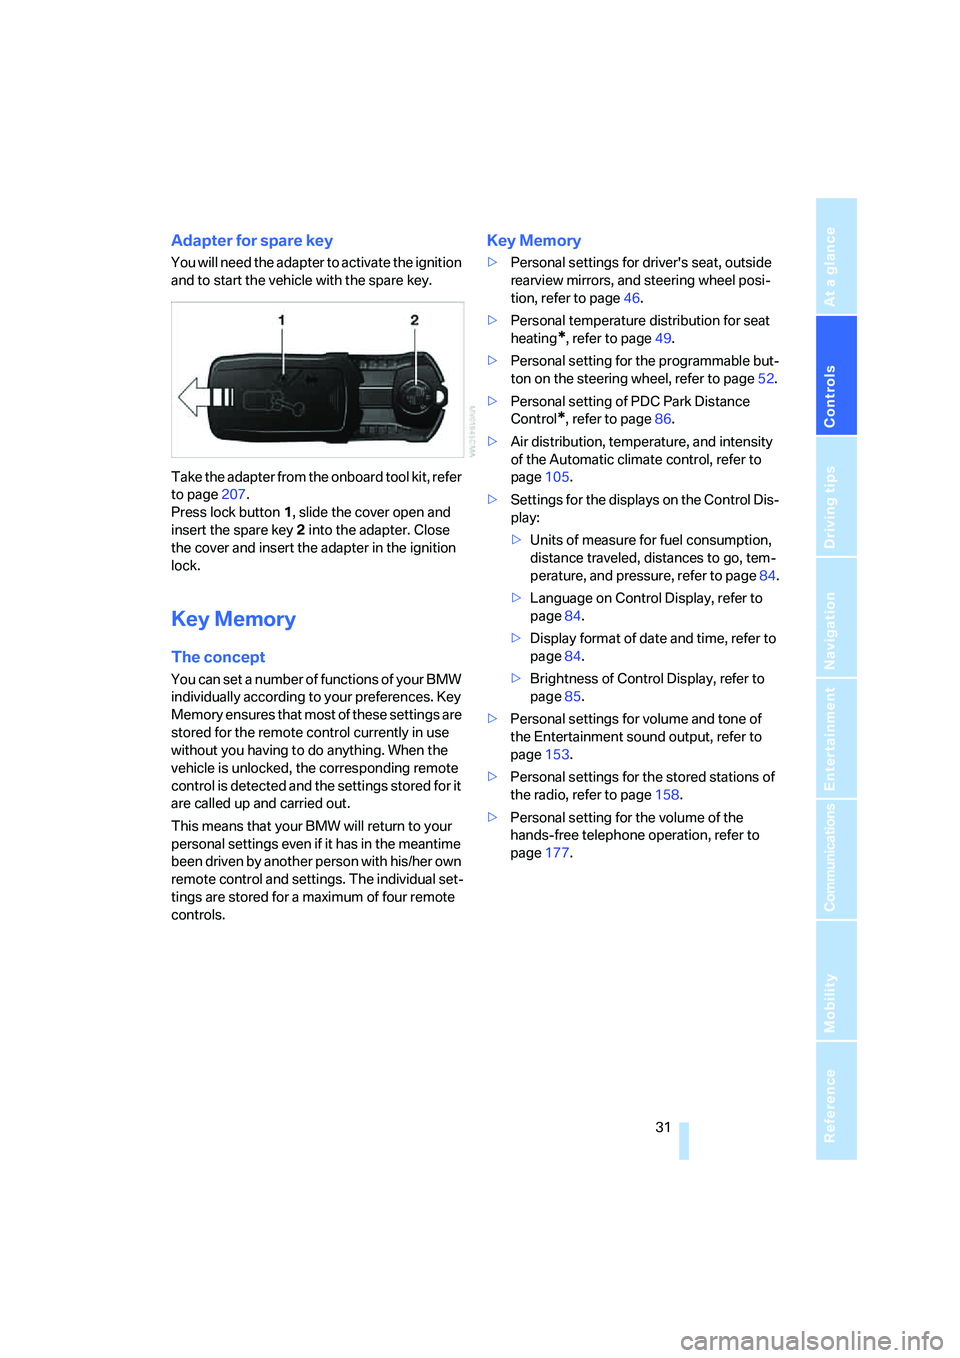
Adapter for spare key
You will need the adapter to activate the ignition
and to start the vehicle with the spare key.
Take the adapter from the onboard tool kit, refer
to page207.
Press lock button1, slide the cover open and
insert the spare key2 into the adapter. Close
the cover and insert the adapter in the ignition
lock.
Key Memory
The concept
You can set a number of functions of your BMW
individually according to your preferences. Key
Memory ensures that most of these settings are
stored for the remote control currently in use
without you having to do anything. When the
vehicle is unlocked, the corresponding remote
control is detected and the settings stored for it
are called up and carried out.
This means that your BMW will return to your
personal settings even if it has in the meantime
been driven by another person with his/her own
remote control and settings. The individual set-
tings are stored for a maximum of four remote
controls.
Key Memory
>Personal settings for driver's seat, outside
rearview mirrors, and steering wheel posi-
tion, refer to page46.
>Personal temperature distribution for seat
heating
*, refer to page49.
>Personal setting for the programmable but-
ton on the steering wheel, refer to page52.
>Personal setting of PDC Park Distance
Control
*, refer to page86.
>Air distribution, temperature, and intensity
of the Automatic climate control, refer to
page105.
>Settings for the displays on the Control Dis-
play:
>Units of measure for fuel consumption,
distance traveled, distances to go, tem-
perature, and pressure, refer to page84.
>Language on Control Display, refer to
page84.
>Display format of date and time, refer to
page84.
>Brightness of Control Display, refer to
page85.
>Personal settings for volume and tone of
the Entertainment sound output, refer to
page153.
>Personal settings for the stored stations of
the radio, refer to page158.
>Personal setting for the volume of the
hands-free telephone operation, refer to
page177.
Page 39 of 247
Controls
37Reference
At a glance
Driving tips
Communications
Navigation
Entertainment
Mobility
Manual operation
In the case of an electrical malfunction, you can
unlock the luggage compartment lid with the
key, refer to page35, and slowly open and close
it without sudden movements.
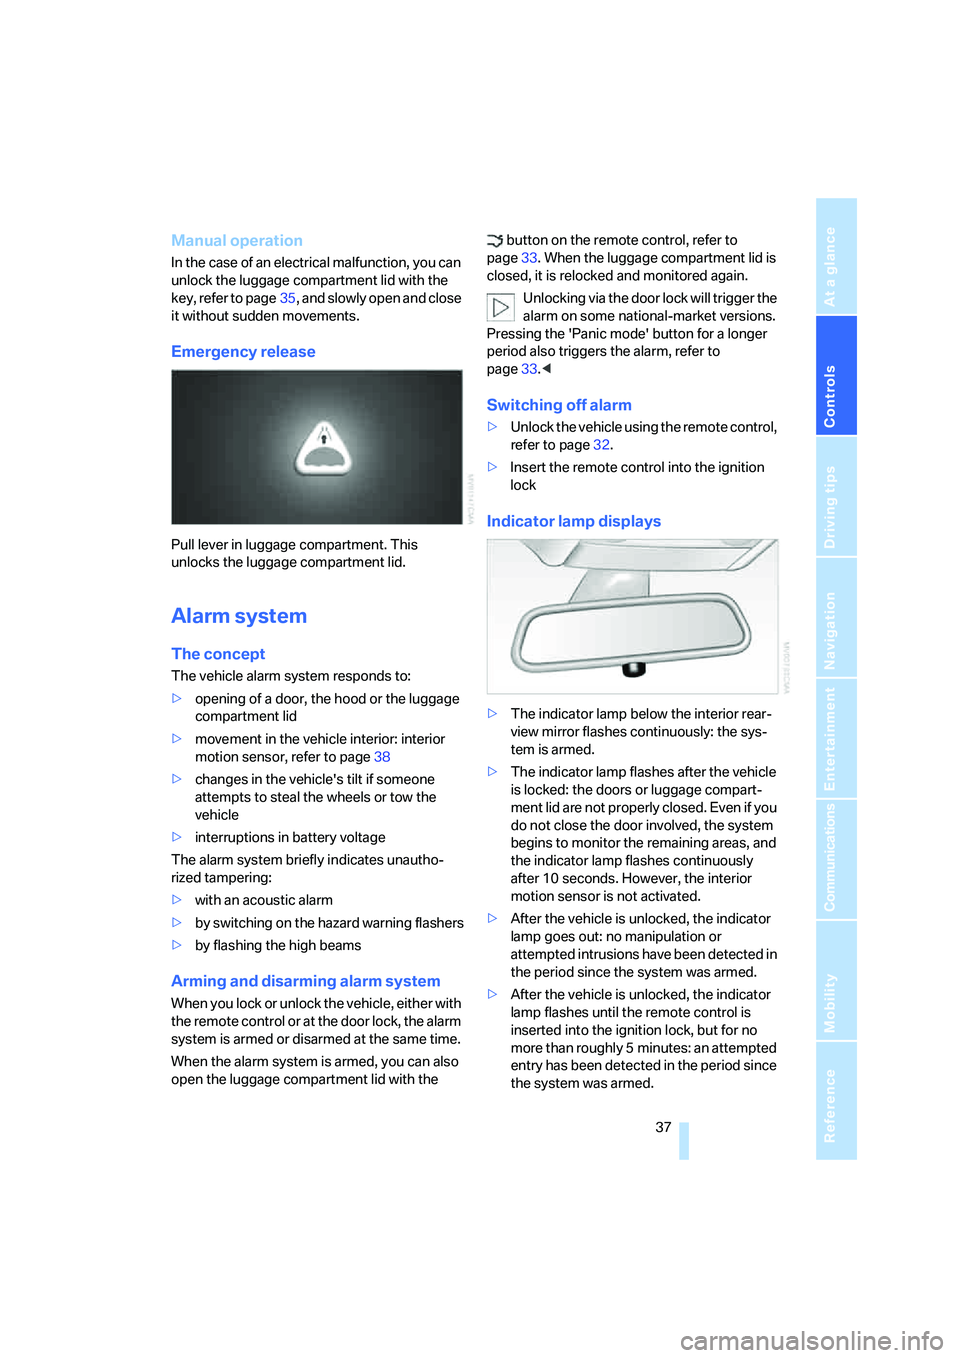
Emergency release
Pull lever in luggage compartment. This
unlocks the luggage compartment lid.
Alarm system
The concept
The vehicle alarm system responds to:
>opening of a door, the hood or the luggage
compartment lid
>movement in the vehicle interior: interior
motion sensor, refer to page38
>changes in the vehicle's tilt if someone
attempts to steal the wheels or tow the
vehicle
>interruptions in battery voltage
The alarm system briefly indicates unautho-
rized tampering:
>with an acoustic alarm
>by switching on
the hazard warning flashers
>by flashing the high beams
Arming and disarming alarm system
When you lock or unlock the vehicle, either with
the remote control or at the door lock, the alarm
system is armed or disarmed at the same time.
When the alarm system is armed, you can also
open the luggage compartment lid with the button on the remote control, refer to
page33. When the luggage compartment lid is
closed, it is relocked and monitored again.
Unlocking via the door lock will trigger the
alarm on some national-market versions.
Pressing the 'Panic mode' button for a longer
period also triggers the alarm, refer to
page33.<
Switching off alarm
>Unlock the vehicle using the remote control,
refer to page32.
>Insert the remote control into the ignition
lock
Indicator lamp displays
>The indicator lamp below the interior rear-
view mirror flashes continuously: the sys-
tem is armed.
>The indicator lamp flashes after the vehicle
is locked: the doors or luggage compart-
ment lid are not properly closed. Even if you
do not close the door involved, the system
begins to monitor the remaining areas, and
the indicator lamp flashes continuously
after 10 seconds. However, the interior
motion sensor is not activated.
>After the vehicle is unlocked, the indicator
lamp goes out: no manipulation or
attempted intrusions have been detected in
the period since the system was armed.
>After the vehicle is unlocked, the indicator
lamp flashes until the remote control is
inserted into the ignition lock, but for no
more than roughly 5 minutes: an attempted
entry has been detected in the period since
the system was armed.
Page 47 of 247
Controls
45Reference
At a glance
Driving tips
Communications
Navigation
Entertainment
Mobility
front passenger's seat, by the safety belt
buckle.
Lumbar support adjustment
5Lumbar support
You can also adjust the contour of the backrest
to obtain additional support in the lumbar
region.
The upper hips and spinal column receive sup-
plementary support to help you maintain a
relaxed, upright sitting position.
>Increase or decrease curvature
>Shift curvature up or down
Shoulder support adjustment
6Adjustment of the tilt angle of the shoulder
support:
You can use the adjustable upper backrest for
supplementary support in the shoulder region.
This provides a relaxed driving position and
helps relieve stress on the shoulder muscles.
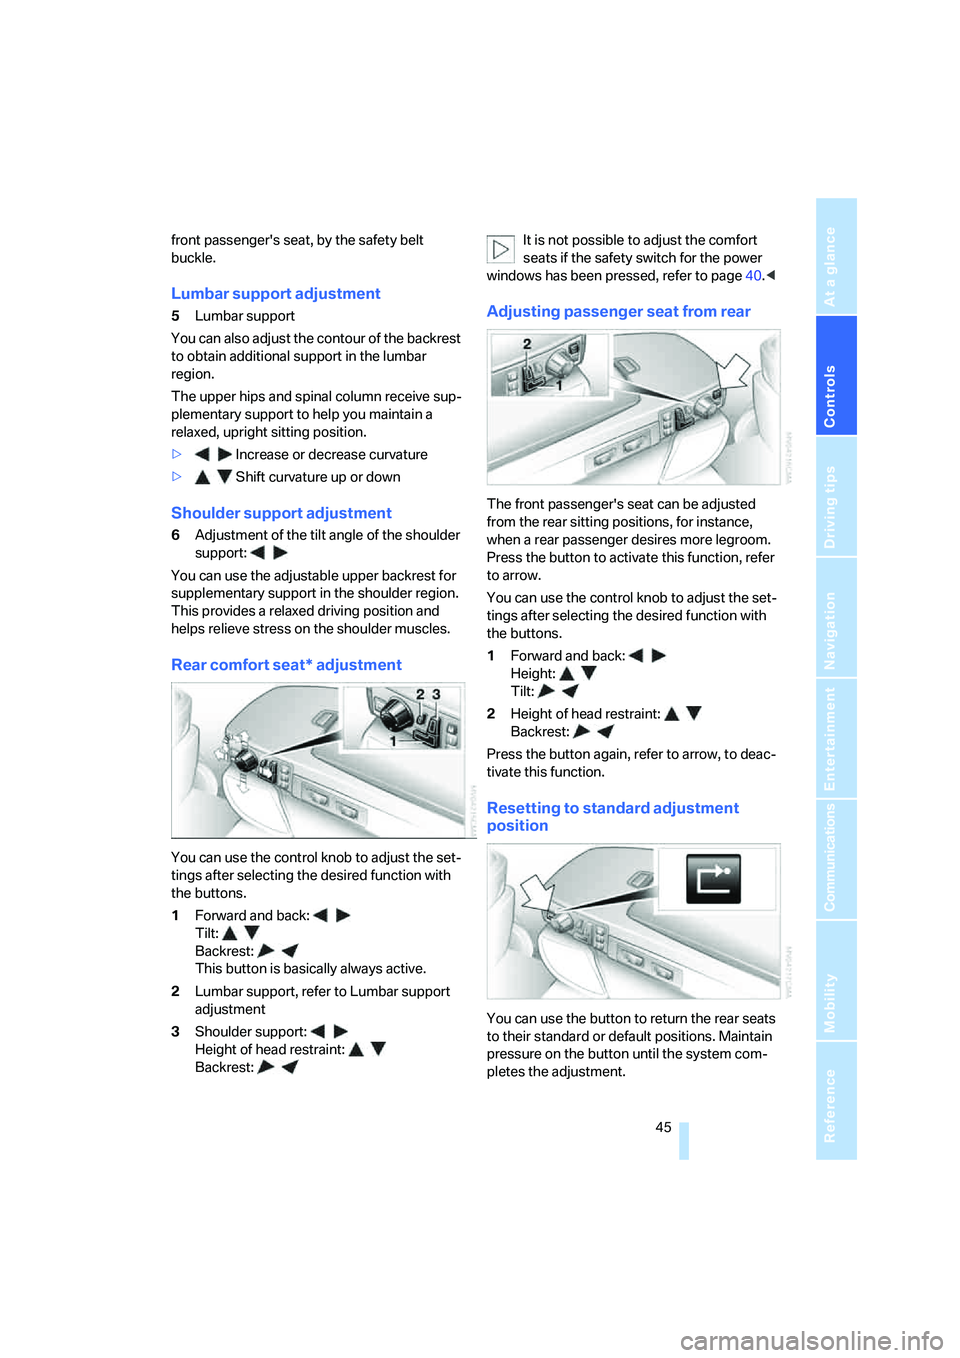
Rear comfort seat* adjustment
You can use the control knob to adjust the set-
tings after selecting the desired function with
the buttons.
1Forward and back:
Tilt:
Backrest:
This button is basically always active.
2Lumbar support, refer to Lumbar support
adjustment
3Shoulder support:
Height of head restraint:
Backrest:It is not possible to adjust the comfort
seats if the safety switch for the power
windows has been pressed, refer to page40.<
Adjusting passenger seat from rear
The front passenger's seat can be adjusted
from the rear sitting positions, for instance,
when a rear passenger desires more legroom.
Press the button to activate this function, refer
to arrow.
You can use the control knob to adjust the set-
tings after selecting the desired function with
the buttons.
1Forward and back:
Height:
Tilt:
2Height of head restraint:
Backrest:
Press the button again, refer to arrow, to deac-
tivate this function.
Resetting to standard adjustment
position
You can use the button to return the rear seats
to their standard or default positions. Maintain
pressure on the button until the system com-
pletes the adjustment.
Page 49 of 247
Controls
47Reference
At a glance
Driving tips
Communications
Navigation
Entertainment
Mobility
Tilt angle adjustment
Tilt the head restraint.
With the comfort seat, adjust the distance
to the back of the head via the shoulder
support, refer to page45.<
Side extensions adjustment
You can fold the side extensions on the head
restraint forward for increased lateral support in
the resting position.
Front head restraints, active*
The comfort seats are equipped with an active
head restraint.
In the event of a rear-end collision of corre-
sponding severity, the active head restraint
reduces the distance from the head.
Do not use seat or head restraint covers
and do not hang objects, e.g. clothes
hangers, on the head restraints or attach any
accessories to the seat or head restraint. Other-
wise, the protective function of the active head
restraint will be impaired and personal safety
endangered.<
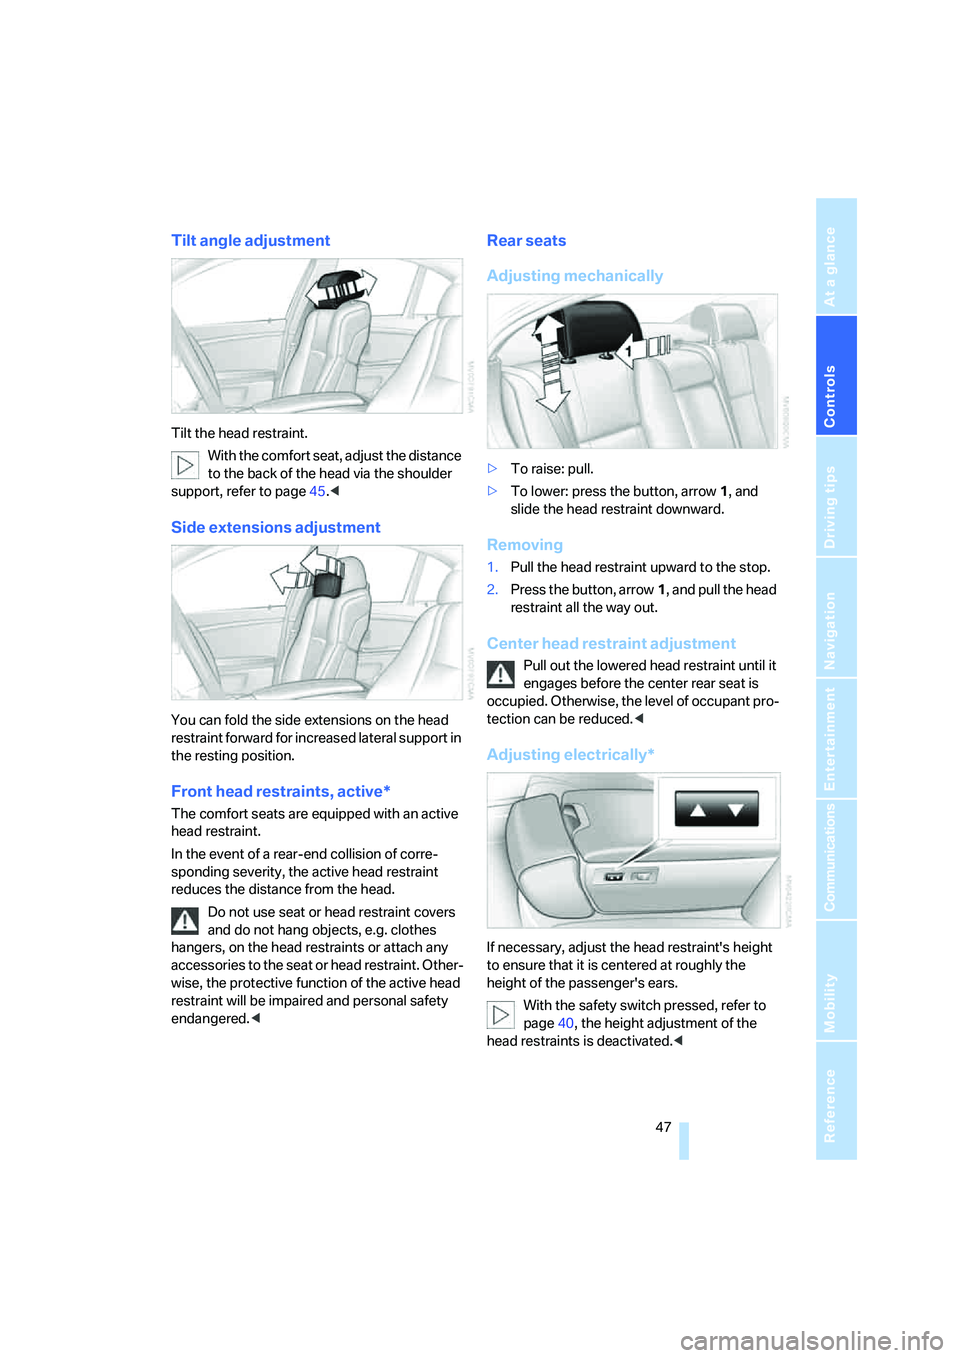
Rear seats
Adjusting mechanically
>To raise: pull.
>To lower: press the button, arrow1, and
slide the head restraint downward.
Removing
1.Pull the head restraint upward to the stop.
2.Press the button, arrow1, and pull the head
restraint all the way out.
Center head restraint adjustment
Pull out the lowered head restraint until it
engages before the center rear seat is
occupied. Otherwise, the level of occupant pro-
tection can be reduced.<
Adjusting electrically*
If necessary, adjust the head restraint's height
to ensure that it is centered at roughly the
height of the passenger's ears.
With the safety switch pressed, refer to
page40, the height adjustment of the
head restraints is deactivated.<