2006 BMW 760i remote control
[x] Cancel search: remote controlPage 80 of 247

Everything under control
78
Resetting values
You can reset values for the average speed and
average fuel consumption:
1.Activate the relevant menu item and press
the controller.
2.To reset the values, press the controller
again.
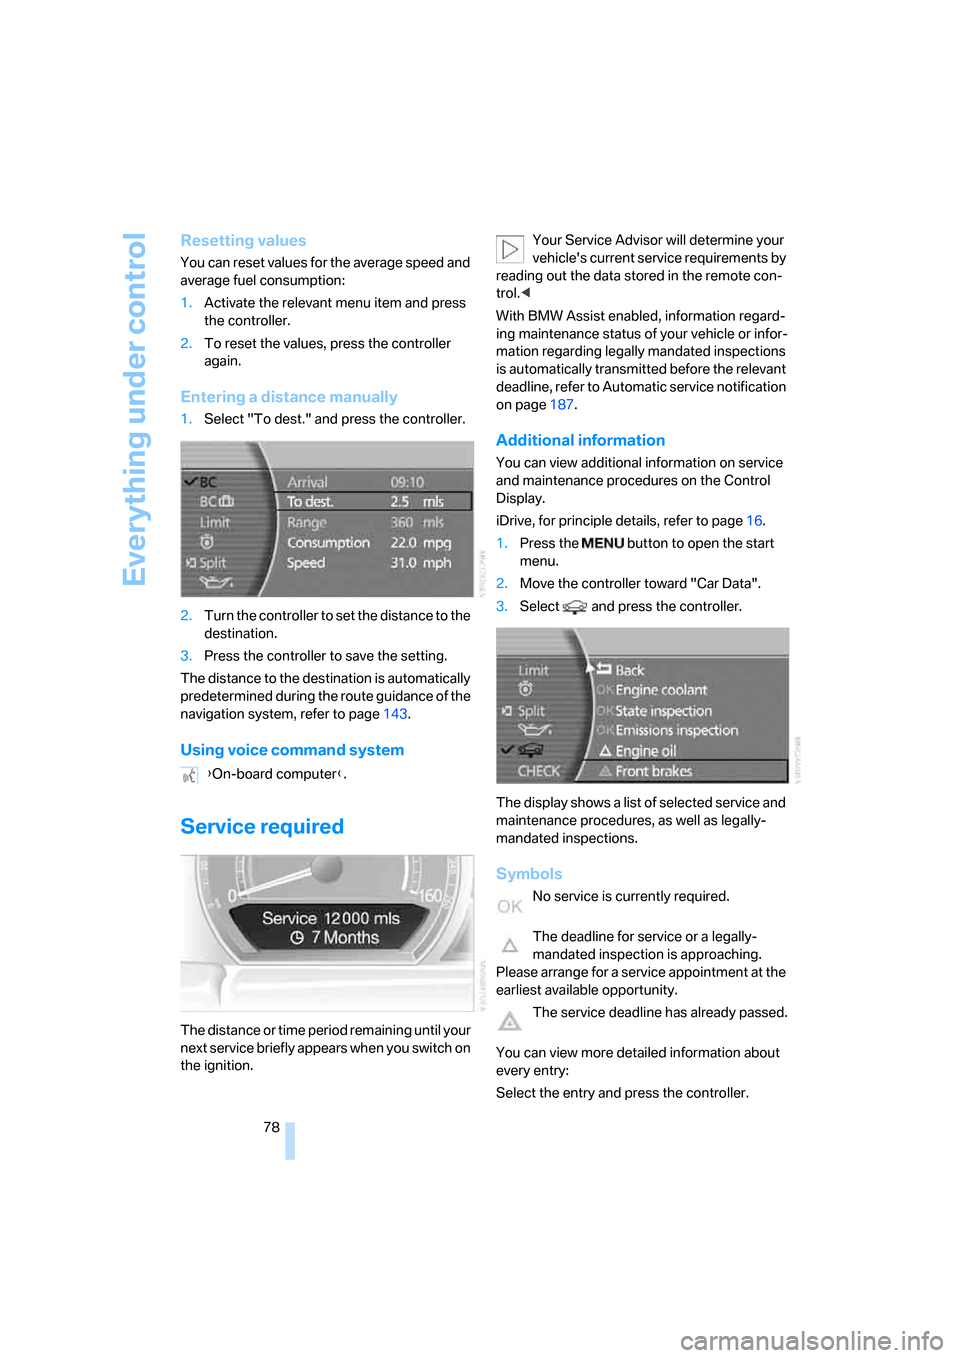
Entering a distance manually
1.Select "To dest." and press the controller.
2.Turn the controller to set the distance to the
destination.
3.Press the controller to save the setting.
The distance to the destination is automatically
predetermined during the route guidance of the
navigation system, refer to page143.
Using voice command system
Service required
The distance or time period remaining until your
next service briefly appears when you switch on
the ignition.Your Service Advisor will determine your
vehicle's current service requirements by
reading out the data stored in the remote con-
trol.<
With BMW Assist enabled, information regard-
ing maintenance status of your vehicle or infor-
mation regarding legally mandated inspections
is automatically transmitted before the relevant
deadline, refer to Automatic service notification
on page187.
Additional information
You can view additional information on service
and maintenance procedures on the Control
Display.
iDrive, for principle details, refer to page16.
1.Press the button to open the start
menu.
2.Move the controller toward "Car Data".
3.Select and press the controller.
The display shows a list of selected service and
maintenance procedures, as well as legally-
mandated inspections.
Symbols
No service is currently required.
The deadline for service or a legally-
mandated inspection is approaching.
Please arrange for a service appointment at the
earliest available opportunity.
The service deadline has already passed.
You can view more detailed information about
every entry:
Select the entry and press the controller. {On-board computer}.
Page 81 of 247

Controls
79Reference
At a glance
Driving tips
Communications
Navigation
Entertainment
Mobility
To exit the menu:
The arrow is selected. Press the controller.
Condition Based Service does not con-
tinue counting down to the next service
during periods when the vehicle is stored with
the battery disconnected or the battery switch
in the OFF position.
Therefore, make sure to have the brake fluid
changed at least every 2 years, regardless of
w h a t i s s h o w n o n t h e d is p la y, r e f e r t o p a g e204.
The same is true for other time-dependent ser-
vice requirements.<
Displaying and entering dates for
legally-mandated emissions and
vehicle inspections
Make sure the date and time are always set cor-
rectly via iDrive, refer to page84; otherwise,
CBS Condition Based Service cannot function
correctly.
iDrive, for principle details, refer to page16.
1.Press the button to open the start
menu.
2.Move the controller toward "Car Data".
3.Select and press the controller.
4.Select "Emissions inspection" or "State
inspection" and press the controller.5.Turn the controller to select appointment
input.
6.Press the controller. The month is high-
lighted.
7.Turn the controller to adjust the setting.
8.Press the controller to save the setting.
The year is highlighted.
9.Turn the controller to adjust the setting.
10.Press the controller to save the setting.
11."STORE DATE" is selected. Press the con-
troller to save the setting. The date entry is
saved.
The list of entries is resorted by date.Display on Info Display
If the deadline for your next emissions or state
vehicle inspection is approaching, the remain-
ing distance and time will appear briefly when
you switch on the ignition.
Your Service Advisor will determine your
vehicle's current service requirements by
reading out the data stored in the remote con-
trol.<
Page 86 of 247

Everything under control
84
Settings on Control Display
Setting units of measure and display
format
You can change the units of measure used in
the displays of fuel consumption, distances and
temperatures as well as the display format for
the time and date.
iDrive, for principle details, refer to page16.
1.Press the button to open the start
menu.
2.Move the controller toward "Settings".
3.Select "Units" and press the controller.
4.Select the menu item that you wish to
adjust. Press repeatedly to view a listing of
your selection options.
The setting is stored for the remote control cur-
rently in use.
Setting language
You can select a different language for the text
displays.
iDrive, for principle details, refer to page16.
1.Press the button to open the start
menu.
2.Move the controller toward "Settings".3.Select "Language" and press the controller.
4.Select and activate the desired language.
The setting is stored for the remote control cur-
rently in use.
Time and date
iDrive, for principle details, refer to page16.
1.Press the button to open the start
menu.
2.Move the controller toward "Settings".
3.Select "Clock" and press the controller.
Setting time
1.Select "Time" and press the controller.
The first time setting is activated.
2.Turn to adjust the setting.
3.Press the controller to adopt the setting.
The next setting is selected.
4.Adjust the remaining settings. After the last
adjustment, the time is stored.
Page 87 of 247

Controls
85Reference
At a glance
Driving tips
Communications
Navigation
Entertainment
Mobility
Hour signal activation
You will hear four tones just before the top of
each hour.
Select "Memo" and press the controller.
The symbol indicates the menu that is cur-
rently activated.
Setting date
1.Select "Date" and press the controller.
The first date display setting is activated.
2.Turn to change the setting.
3.Press the controller to adopt the setting.
The next setting is selected.
4.Make the remaining settings. After the last
adjustment, the date is stored.
The setting is stored for the remote control cur-
rently in use.
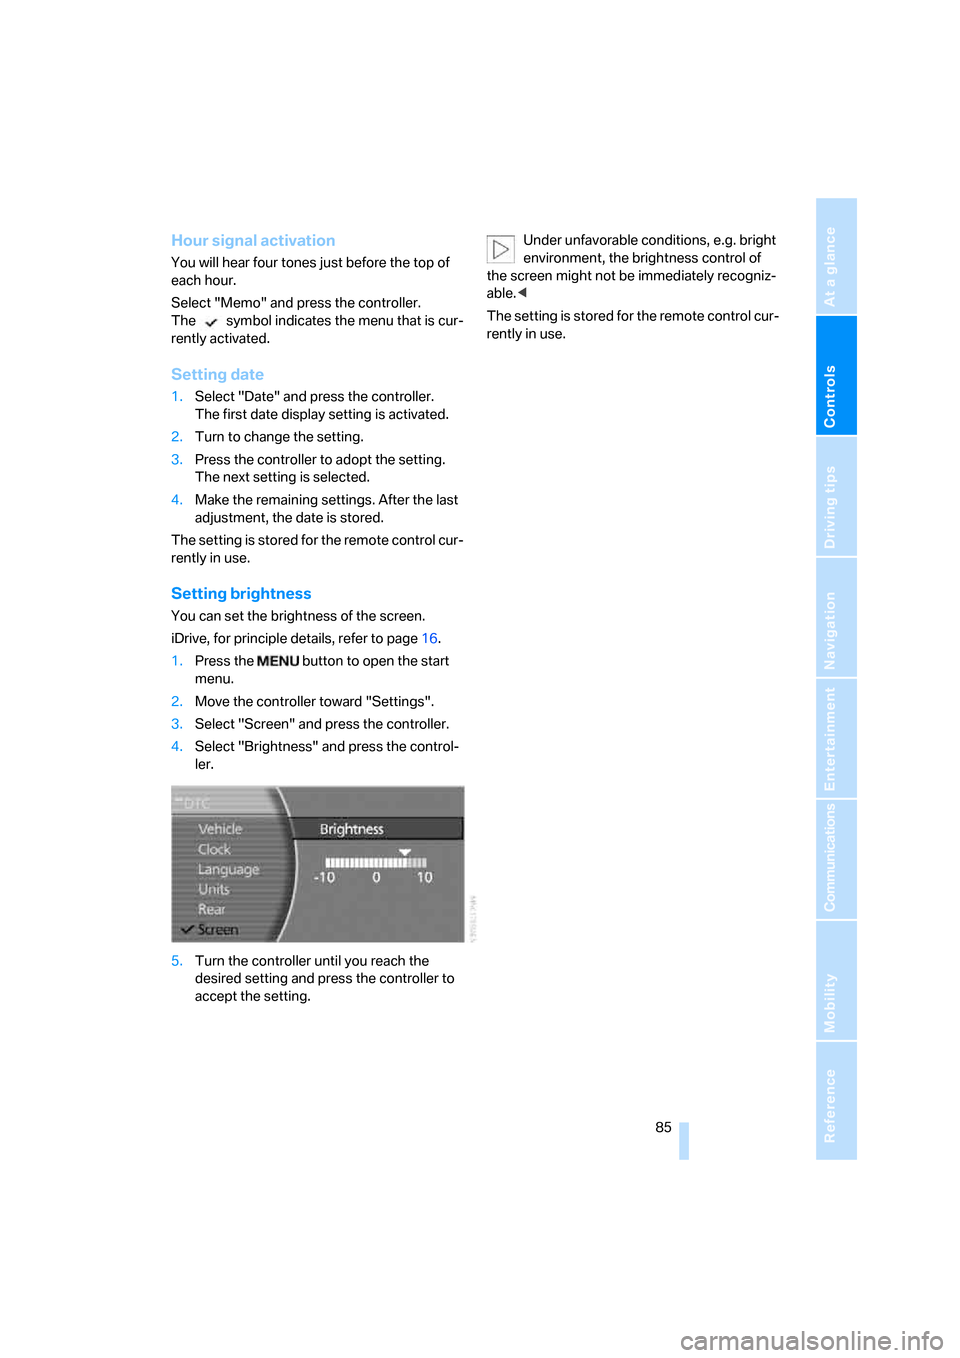
Setting brightness
You can set the brightness of the screen.
iDrive, for principle details, refer to page16.
1.Press the button to open the start
menu.
2.Move the controller toward "Settings".
3.Select "Screen" and press the controller.
4.Select "Brightness" and press the control-
ler.
5.Turn the controller until you reach the
desired setting and press the controller to
accept the setting.Under unfavorable conditions, e.g. bright
environment, the brightness control of
the screen might not be immediately recogniz-
able.<
The setting is stored for the remote control cur-
rently in use.
Page 89 of 247

Controls
87Reference
At a glance
Driving tips
Communications
Navigation
Entertainment
Mobility
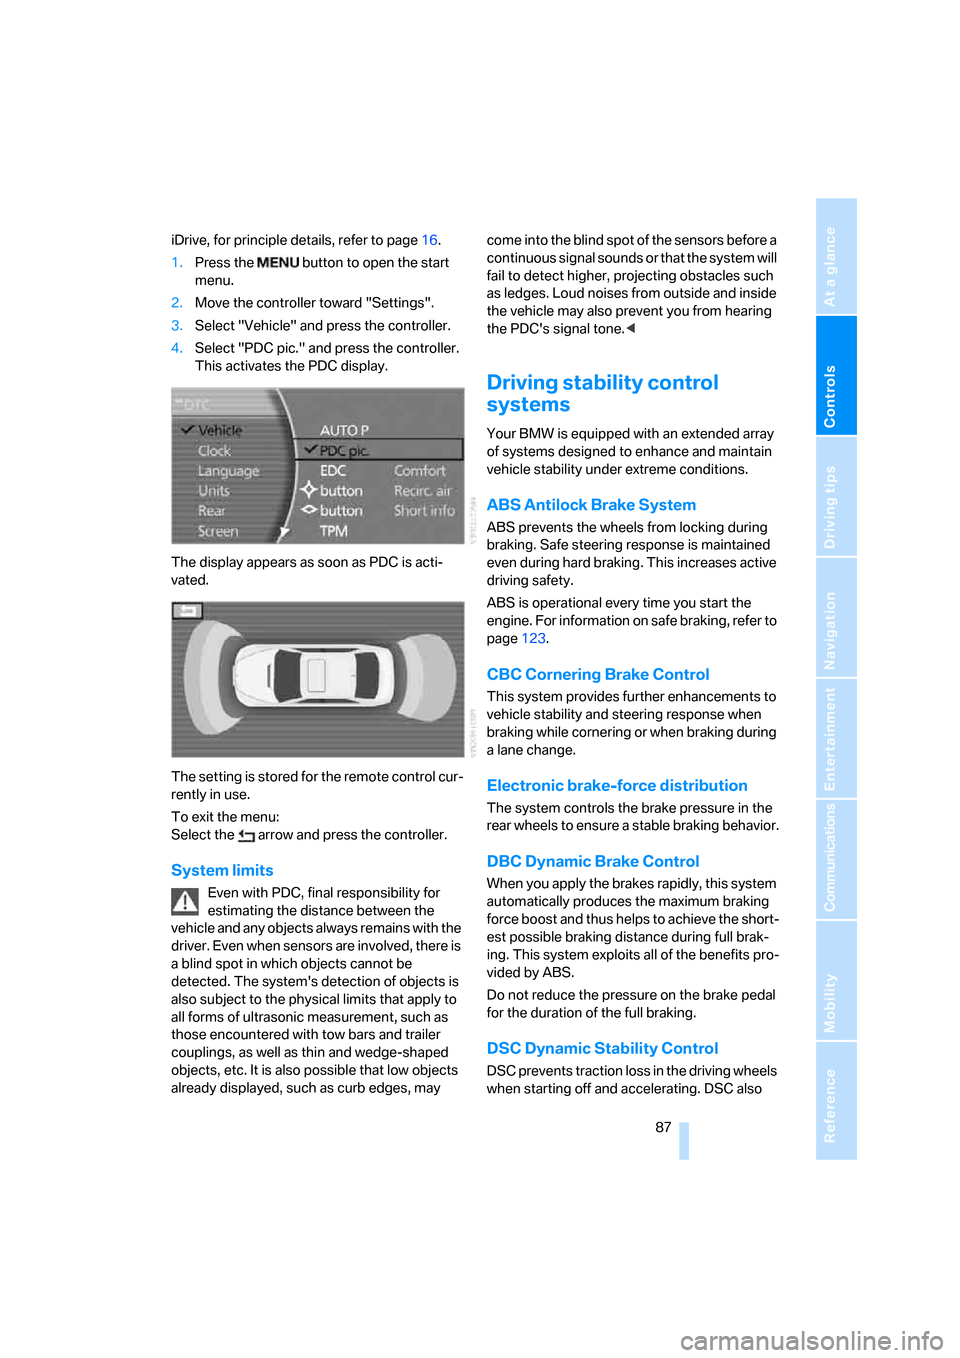
iDrive, for principle details, refer to page16.
1.Press the button to open the start
menu.
2.Move the controller toward "Settings".
3.Select "Vehicle" and press the controller.
4.Select "PDC pic." and press the controller.
This activates the PDC display.
The display appears as soon as PDC is acti-
vated.
The setting is stored for the remote control cur-
rently in use.
To exit the menu:
Select the arrow and press the controller.
System limits
Even with PDC, final responsibility for
estimating the distance between the
vehicle and any objects always remains with the
driver. Even when sensors are involved, there is
a blind spot in which objects cannot be
detected. The system's detection of objects is
also subject to the physical limits that apply to
all forms of ultrasonic measurement, such as
those encountered with tow bars and trailer
couplings, as well as thin and wedge-shaped
objects, etc. It is also possible that low objects
already displayed, such as curb edges, may come into the blind spot of the sensors before a
continuous signal sounds or that the system will
fail to detect higher, projecting obstacles such
as ledges. Loud noises from outside and inside
the vehicle may also prevent you from hearing
the PDC's signal tone.<
Driving stability control
systems
Your BMW is equipped with an extended array
of systems designed to enhance and maintain
vehicle stability under extreme conditions.
ABS Antilock Brake System
ABS prevents the wheels from locking during
braking. Safe steering response is maintained
even during hard braking. This increases active
driving safety.
ABS is operational every time you start the
engine. For information on safe braking, refer to
page123.
CBC Cornering Brake Control
This system provides further enhancements to
vehicle stability and steering response when
braking while cornering or when braking during
a lane change.
Electronic brake-force distribution
The system controls the brake pressure in the
rear wheels to ensure a stable braking behavior.
DBC Dynamic Brake Control
When you apply the brakes rapidly, this system
automatically produces the maximum braking
force boost and thus helps to achieve the short-
est possible braking distance during full brak-
ing. This system exploits all of the benefits pro-
vided by ABS.
Do not reduce the pressure on the brake pedal
for the duration of the full braking.
DSC Dynamic Stability Control
DSC prevents traction loss in the driving wheels
when starting off and accelerating. DSC also
Page 100 of 247

Technology for comfort, convenience and safety
98 3.Select the menu item and press the control-
ler:
>"Zoom":
At higher speeds, the image is zoomed
in.
>"Curve mode":
Depending on the steering angle and
other parameters, the image section fol-
lows the course of the road to some
degree.
>"Full screen":
The image is shown on the entire Con-
trol Display.
>"Contrast":
The contrast of the screen can be
adjusted, refer to page170.
>"Brightness":
The brightness of the screen can be
adjusted, refer to page170.
The "Curve mode" can only be activated
with the "Zoom" function switched on.
With "Full screen" activated, "Curve mode" and
"Zoom" cannot be selected.<
The settings are stored for the remote control
currently in use.
To exit the menu:
The image will automatically disappear after
approx. 5 seconds, or select the return arrow
and press the controller to exit sooner.
Cleaning camera
The function of the camera may be affected by
heavy rain and fog, dirt, snow or ice on the lens.
When this occurs, the displayed image on the
Control Display may become gray.To minimize icing the camera lens is automati-
cally heated. However, it may be necessary to
clean the camera lens manually under severe
weather conditions. When doing so, cautiously
remove any debris, ice or snow. To avoid dam-
age to the lens, do not use sharp or abrasive
instruments to clean ice, snow, or dirt off the
lens.
When the windshield is cleaned with the head-
lamps on, the camera lens area is automatically
sprayed as well. Refer to page65.
Page 101 of 247

Controls
99Reference
At a glance
Driving tips
Communications
Navigation
Entertainment
Mobility
Lamps
Parking lamps/low beams
1Parking lamps
2Low beams and daytime running lamps
*
3Automatic headlamp control, daytime run-
ning lamps
*, Adaptive Head Light*, and
High-beam assistant
*
Parking lamps
In switch position1, the front, rear and side
vehicle lighting is switched on. You can use the
parking lamps for parking. For lighting on one
side for parking as an additional feature, refer to
page100.
The parking lamps drain the battery. Do
not leave them switched on for long peri-
ods of time; otherwise, it may no longer be pos-
sible to start the engine.<
Low beams
The low beams light up in switch position2 only
with the engine running. Otherwise, the parking
lamps are lit.
Automatic headlamp control
In the switch position3, the system activates
the low beams and switches them on or off in
response to changes in ambient light condi-
tions, for example in a tunnel, at dawn and dusk,
and in case of precipitation. The LED next to the
symbol is illuminated when the low beams are
on.When driving into a tunnel with bright overhead
lighting, switching on of the lights may be
delayed.
A blue sky with the sun low on the horizon can
cause the lights to be switched on.
The low beams remain switched on
regardless of the ambient light when you
switch on the front fog lamps.
When daytime running lamps are activated, the
low beams are always switched into switch
position3 whenever the ignition is switched
on.<
If so desired, the light switch can be left in the
position3. The exterior lighting is automatically
switched off after switching off the vehicle.
The automatic headlamp control cannot
serve as a substitute for your personal
judgment in determining when the lamps
should be switched on in response to ambient
lighting conditions. For example, the sensors
cannot detect fog of hazy weather. To avoid
safety risks, you should always switch on the
lamps manually under these conditions.<
Pathway lighting
After parking the vehicle and switching off the
headlamps, you can use the headlamp flasher
control to activate the low beams for a period of
roughly 40 seconds.
Pressing the button on the remote control,
refer to page33, also switches on the low
beams for approx. 40 seconds. In addition, the
door handle and interior lamps are switched on
for approx. 10 seconds.
Daytime running lamps*
If so desired, the light switch can remain in
position2 or 3.
The exterior lighting is automatically switched
off after switching off the vehicle.
Switch on the parking lamps if required as
described under Parking lamps.
Page 106 of 247

Climate
104
Automatic climate control
1AUTO program, left side of passenger
compartment, refer to section below
2Outside air/AUC Automatic recirculated-air
control/recirculated air105
3Switching off automatic climate
control105
4Temperature, left side of passenger
compartment105
5Maximum cooling106
6Air volume, left side of passenger
compartment106
7Defrosting windows and removing
condensation106
8Air volume, right side of passenger
compartment106
9Temperature, right side of passenger
compartment10510Residual heat mode106
11Rear window defroster107
12Switching cooling function on and off
manually107
13AUTO program, right side of passenger
compartment, refer to section below
14Air grille for interior temperature sensor –
please keep clear and unobstructed
15Parked car ventilation109
> lights up: activation time activated
> flashes: parked car ventilation
switched on
The current setting for air distribution is dis-
played on the Control Display, refer to
page106.
A congenial climate
For almost all conditions, the AUTO program1
offers the optimal air distribution and air vol-
ume. Select an interior temperature you find
pleasant.
The following section contains more detailed
information on the available setting options.
The settings are stored for the remote key cur-
rently in use.
AUTO program
The AUTO program handles the
adjustment of air distribution to the
windshield and side windows, in
the direction of the upper body, and in the foot-
well, as well as the adjustment of the air volume. It also adapts your instructions for the tempera-
ture to outside influences throughout the year.
The cooling is switched on automatically with
the AUTO program. At the same time, a con-
densation sensor controls the program so as to
prevent window condensation as much as pos-
sible.
Intensity of AUTO program
You can adjust the intensity of the AUTO pro-
gram by repeatedly pressing the AUTO button.
If you briefly press the button, the current set-
ting is displayed in the lower status line of the
Control Display.