2006 BMW 760i ignition
[x] Cancel search: ignitionPage 76 of 247

Driving
74 Active cruise control may brake when you
reduce the stored desired speed; however, the
driver must constantly monitor traffic and inter-
vene if necessary.
When you switch off the engine or ignition,
active cruise control is fully switched off, too,
and any settings you have selected are can-
celed.
Swerving vehicles
When a vehicle moves from an adjacent lane
into your lane, active cruise control will not
detect this vehicle until it is fully in your lane
ahead of your vehicle.
Behavior in curves
Because of the limited range of the system, it is
possible that in curves or on the peaks and val-
leys of hilly roads, a vehicle ahead may be rec-
ognized late, or not at all. Therefore, it is up to
the driver to select a speed that is prudent in
view of the curves and terrain of the roadway.In approaching a curve, it is possible that active
cruise control might react briefly to a vehicle in
the adjacent lane. In addition, the system can
sense if your vehicle is in a curve and may not
accelerate. If your vehicle decelerates in either
case, you can choose to overcome the deceler-
ation by briefly pressing the accelerator pedal.
Driver interventions
Anytime the driver presses down on the
accelerator pedal, any automatic braking
action by the system is interrupted until the
pedal is fully released. After doing this, release
the accelerator and the system again controls
your cruising speed and distance setting. While
driving with the system activated, resting your
foot on the accelerator pedal will cause the sys-
tem not to brake even if necessary. Be certain
that floormats or other objects on the vehicle
floor do not interfere with movement of the
accelerator pedal.<
While active cruise control is capable of
braking your vehicle automatically when
you approach a slower vehicle ahead, it is
important to be aware that the ability of the sys-
tem to apply the brakes is also limited, e. g.
when you reduce your desired speed sharply.
The system cannot stop your vehicle. It uses
only a portion of braking system capacity and
does not utilize the full capacity of the vehicle
braking system. Therefore, the system cannot
decrease your speed for large differences in
speed between your vehicle and the vehicle
ahead. Examples: when you approach a vehicle
traveling at a much lower speed than your own
speed such as approaching a toll booth or when
a much slower vehicle cuts in front of you at
close range.<
Page 77 of 247

Controls
75Reference
At a glance
Driving tips
Communications
Navigation
Entertainment
Mobility
Everything under control
Odometer, outside temperature display, clock
1Outside temperature display, clock
2Odometer
3Trip odometer
4Press button:
>with ignition switched on to reset trip
odometer
>with ignition switched off to briefly dis-
play odometer, outside temperature,
and time
Outside temperature display, clock
The outside temperature and the time displays
are active with the ignition lock in radio ready
state or higher.
You can change the units of measure, 7/6,
in the "Settings" menu, refer to page84.
Setting the clock, refer to page84.
Outside temperature warning
If the display drops to +377/+36, a signal
sounds and a message is shown on the Info Dis-
play. There is an increased danger of ice.
Even at temperatures above +377/
+36, ice can form. Therefore, drive care-
fully, e.g. on bridges and shaded roadways; oth-
erwise, there is an increased accident risk.<
Odometer and trip odometer
The display area is also used for the computer
and the Check Control.
Regardless of the current display, you can
briefly display the odometer by pressing the
button4.
You also reset the displayed trip odometer to
zero by pressing the button.
Check Control, refer to page80.
Computer, refer to page76.
Tachometer
The orange advance warning field, arrow, is dis-
played as a function of the engine temperature.
The segments disappear in sequence as the
engine temperature increases.
Avoid allowing the engine speed to rise as far as
the orange warning sector whenever possible.
Page 78 of 247

Everything under control
76
Coolant temperature
Should the coolant, and with it the engine
become too hot, a warning lamp lights up. In
addition, a message appears on the Control
Display.
Checking coolant level, refer to page203.
Computer
Requesting functions
With the ignition lock in radio ready state or
higher, you can use the buttons in the turn sig-
nal lever to display the computer information on
the Info Display.
1Info Display on left
2Info Display on right
A new function appears each time you briefly
press the button.
Displays on Info Display
The display sequence:
>Fuel gauge
>Range and distance to destinationThe display sequence:
>Odometer
>Energy Control/current fuel consumption
>Average fuel consumption
>Average speed
>Time of arrival
Hiding messages
Maintain pressure on button1 to hide the com-
puter display. Briefly press the button again to
return to the last display.
It is not possible, though, to hide a Check
Control message.<
Fuel gauge
The fuel gauge mode appears automatically
once the fuel level falls into the reserve range.
The tanks still contains the following quantities
of fuel:
>750i/Li: approx. 2.6 gallons/10 liters.
>760i/Li: approx. 3.1 gallons/12 liters.
If the tilt of the vehicle varies, when you are driv-
ing in mountainous areas, for example, the indi-
cator may fluctuate slightly.
After reaching the reserve quantity, the
Info Display can no longer be hidden.
However, you can still display the remaining
range.<
Fuel tank capacity: approx. 23.2 gallons/
88 liters. You can find information on refueling
on page192.
Refuel well before the tank is empty. If
you drive down to the last drop, engine
functions are no longer assured and damage
can occur.<
Page 80 of 247

Everything under control
78
Resetting values
You can reset values for the average speed and
average fuel consumption:
1.Activate the relevant menu item and press
the controller.
2.To reset the values, press the controller
again.
Entering a distance manually
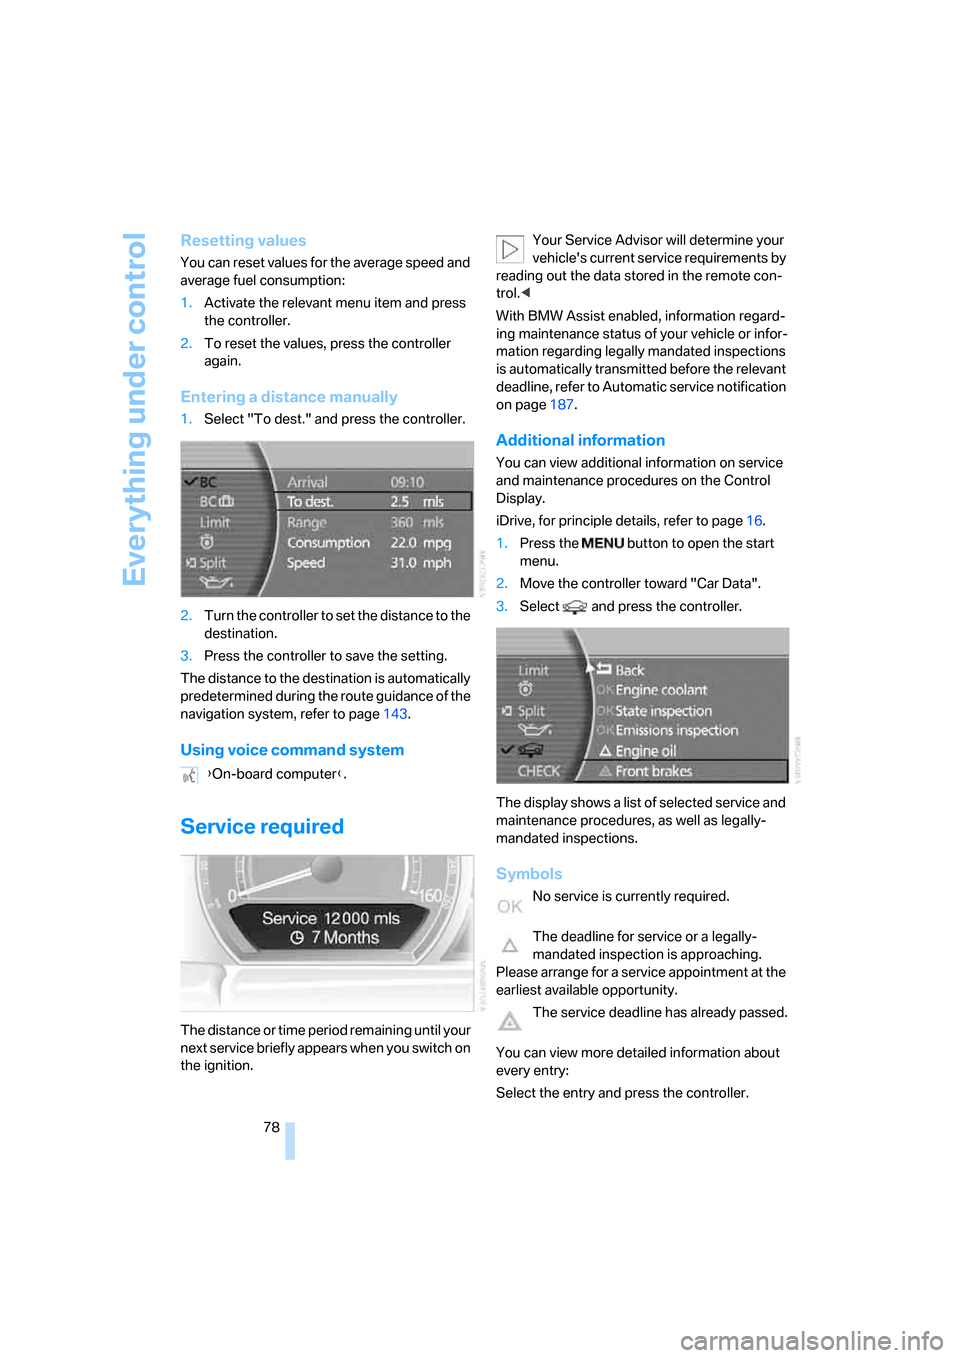
1.Select "To dest." and press the controller.
2.Turn the controller to set the distance to the
destination.
3.Press the controller to save the setting.
The distance to the destination is automatically
predetermined during the route guidance of the
navigation system, refer to page143.
Using voice command system
Service required
The distance or time period remaining until your
next service briefly appears when you switch on
the ignition.Your Service Advisor will determine your
vehicle's current service requirements by
reading out the data stored in the remote con-
trol.<
With BMW Assist enabled, information regard-
ing maintenance status of your vehicle or infor-
mation regarding legally mandated inspections
is automatically transmitted before the relevant
deadline, refer to Automatic service notification
on page187.
Additional information
You can view additional information on service
and maintenance procedures on the Control
Display.
iDrive, for principle details, refer to page16.
1.Press the button to open the start
menu.
2.Move the controller toward "Car Data".
3.Select and press the controller.
The display shows a list of selected service and
maintenance procedures, as well as legally-
mandated inspections.
Symbols
No service is currently required.
The deadline for service or a legally-
mandated inspection is approaching.
Please arrange for a service appointment at the
earliest available opportunity.
The service deadline has already passed.
You can view more detailed information about
every entry:
Select the entry and press the controller. {On-board computer}.
Page 81 of 247

Controls
79Reference
At a glance
Driving tips
Communications
Navigation
Entertainment
Mobility
To exit the menu:
The arrow is selected. Press the controller.
Condition Based Service does not con-
tinue counting down to the next service
during periods when the vehicle is stored with
the battery disconnected or the battery switch
in the OFF position.
Therefore, make sure to have the brake fluid
changed at least every 2 years, regardless of
w h a t i s s h o w n o n t h e d is p la y, r e f e r t o p a g e204.
The same is true for other time-dependent ser-
vice requirements.<
Displaying and entering dates for
legally-mandated emissions and
vehicle inspections
Make sure the date and time are always set cor-
rectly via iDrive, refer to page84; otherwise,
CBS Condition Based Service cannot function
correctly.
iDrive, for principle details, refer to page16.
1.Press the button to open the start
menu.
2.Move the controller toward "Car Data".
3.Select and press the controller.
4.Select "Emissions inspection" or "State
inspection" and press the controller.5.Turn the controller to select appointment
input.
6.Press the controller. The month is high-
lighted.
7.Turn the controller to adjust the setting.
8.Press the controller to save the setting.
The year is highlighted.
9.Turn the controller to adjust the setting.
10.Press the controller to save the setting.
11."STORE DATE" is selected. Press the con-
troller to save the setting. The date entry is
saved.
The list of entries is resorted by date.Display on Info Display
If the deadline for your next emissions or state
vehicle inspection is approaching, the remain-
ing distance and time will appear briefly when
you switch on the ignition.
Your Service Advisor will determine your
vehicle's current service requirements by
reading out the data stored in the remote con-
trol.<
Page 83 of 247

Controls
81Reference
At a glance
Driving tips
Communications
Navigation
Entertainment
Mobility
occur simultaneously, then the Check Control
messages are displayed in sequence.
Other Check Control messages are hidden after
roughly 20 seconds, but remain stored in mem-
ory.
Viewing stored Check Control
messages
Using CHECK button
1.Press and hold:
The first stored message is displayed.
2.Briefly press the button:
A new message appears each time you
press the button.
Viewing additional information
iDrive, for principle details, refer to page16.
1.Press the button to open the start
menu.
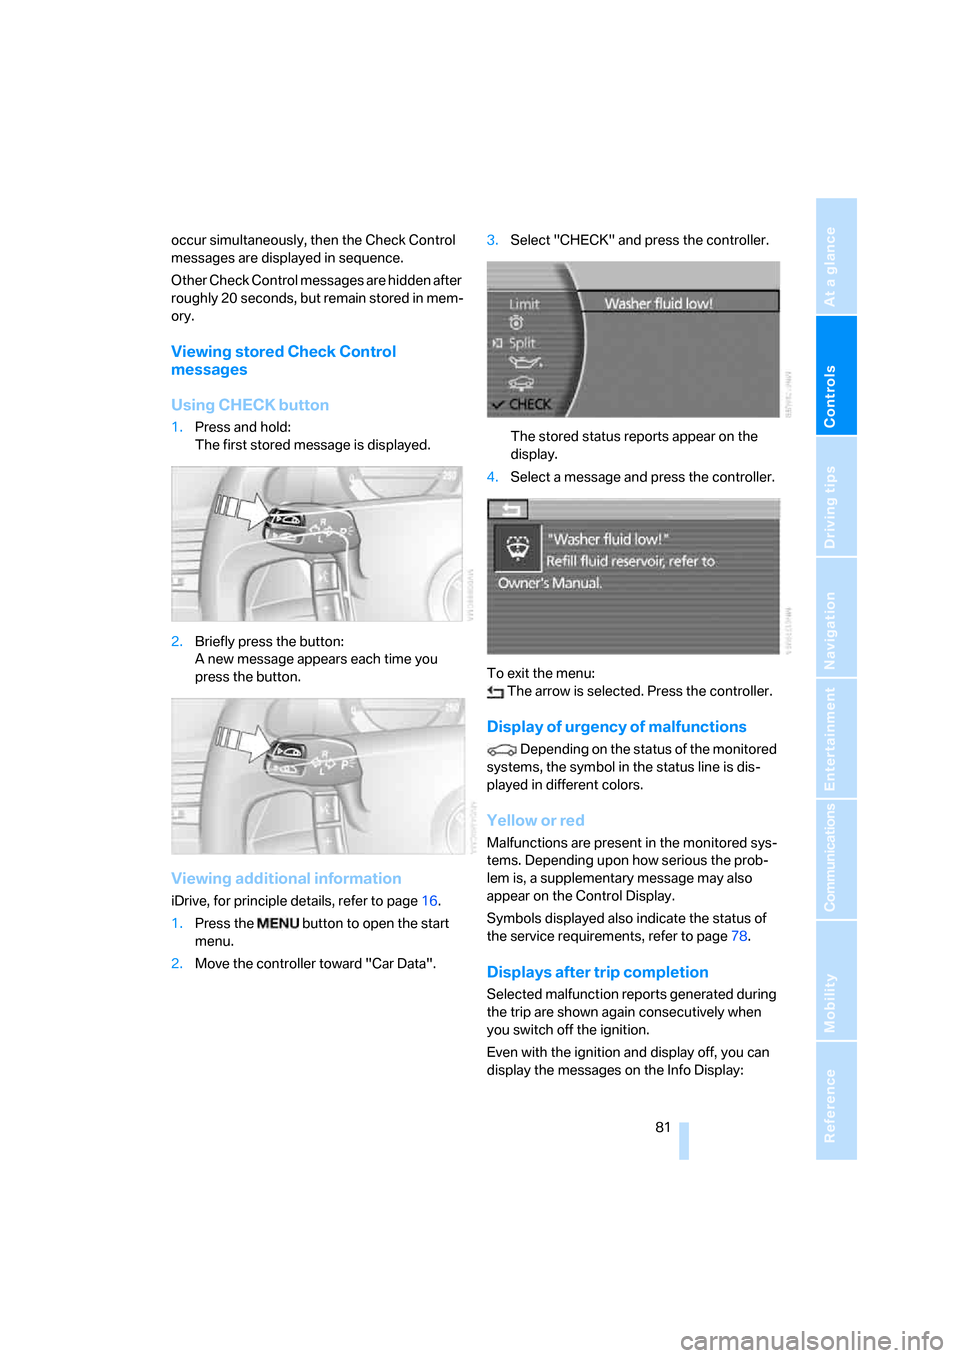
2.Move the controller toward "Car Data".3.Select "CHECK" and press the controller.
The stored status reports appear on the
display.
4.Select a message and press the controller.
To exit the menu:
The arrow is selected. Press the controller.
Display of urgency of malfunctions
Depending on the status of the monitored
systems, the symbol in the status line is dis-
played in different colors.
Yellow or red
Malfunctions are present in the monitored sys-
tems. Depending upon how serious the prob-
lem is, a supplementary message may also
appear on the Control Display.
Symbols displayed also indicate the status of
the service requirements, refer to page78.
Displays after trip completion
Selected malfunction reports generated during
the trip are shown again consecutively when
you switch off the ignition.
Even with the ignition and display off, you can
display the messages on the Info Display:
Page 88 of 247

Technology for comfort, convenience and safety
86
Technology for comfort, convenience and
safety
PDC Park Distance Control*
The concept
The PDC assists you when you are parking.
Audible signals and an optical display indicate
that you are approaching an object in front of or
behind your vehicle. To measure the distance,
four ultrasonic sensors are provided in each
bumper. The range of these sensors is approx.
6 ft/2 m. However, an acoustic warning begins
to sound for the sensors at the front and at the
two rear corners at approx. 24 in/60 cm, and for
the center rear sensors at approx. 5 ft/1.50 m.
PDC is a parking aid that can indicate
objects when they are approached
slowly, as is usually the case when parking.
Avoid approaching an object at high speed; oth-
erwise, the system may sound the warning of
physical obstacles too late.<
Automatically activating
The system starts to operate automatically
approx. 1 second after you engage the trans-
mission position R with the engine running or
the ignition switched on.
Wait this short period before driving.
Manual activation
Press the button, the LED lights up.
Manual deactivation
Press the button again; the LED goes out.
After driving approx. 165 ft/50 m or at over
approx. 20 mph/30 km/h, the system switches
off and the LED goes out. You can reactivate the
system manually as needed.
Signal tones
An intermittent signal indicates the distance of
the vehicle from an object being approached.
Thus, an object detected to the left rear of the
vehicle will be indicated by a signal tone from
the left rear speaker, etc. As the distance
between vehicle and object decreases, the
intervals between the tones become shorter.
The signal tone becomes continuous once the
distance to the nearest object falls below
roughly 1 ft/30 cm.
An intermittent tone is interrupted after approx.
3seconds:
>if you remain in front of an object that was
only detected by one of the corner sensors
>if you drive parallel to a wall
Malfunction
The LED in the button flashes and a message
appears on the Info Display. PDC has failed.
Have the system checked.
To prevent this problem, keep the sensors
clean and free of ice or snow in order to ensure
that they will continue to operate effectively.
When using high-pressure washers, do not
spray sensors for long periods and keep the
sprayer at least 4 in/10 cm away from the sen-
sors.
PDC with visual warning
You can also have the system show distances
to objects on the Control Display. Objects that
are farther away are displayed there before a
signal tone begins to sound.
Page 92 of 247

Technology for comfort, convenience and safety
90 There are two programs.
With each press of the controller, you can
switch back and forth between "Comfort" and
"Sport".
Comfort program
The Comfort program is suitable for use
throughout the vehicle's entire speed range and
regardless of load.
Sport program
You should select the Sport program for consis-
tently performance-oriented response from
shock absorbers and steering.
FTM Flat Tire Monitor*
The concept
The Flat Tire Monitor keeps track of the infla-
tion pressures in the four mounted tires as you
drive. The system triggers an alert whenever
the inflation pressure drops significantly in rela-
tion to the pressure in another tire.
When a loss of pressure occurs, the rolling
radius changes and with it, the rotational speed
of the wheels. This change is detected and sig-
naled as a flat tire.
Functional requirements
To ensure the reliable signaling of a flat tire, the
system must be initialized at the correct tire
inflation pressure.
The initialization must be repeated after
every correction of the tire inflation pres-
sure and after every tire or wheel change.<
System limits
The Flat Tire Monitor cannot indicate
sudden severe tire damage caused by
outside factors and does not detect a natural,
even pressure drop in all four tires.<
In the following situations, the system could be
delayed or malfunction:
>When the system has not been initialized.>When driving on snow-covered or slippery
road surfaces.
>Sporty driving style: slip in the drive wheels,
high lateral acceleration.
>When driving with snow chains
*.
Initializing system
The initialization is completed during driv-
ing, which can be interrupted at any time.
The initialization automatically continues when
driving resumes. Do not initialize the system
when driving with snow chains
*.<
iDrive, for principle details, refer to page16.
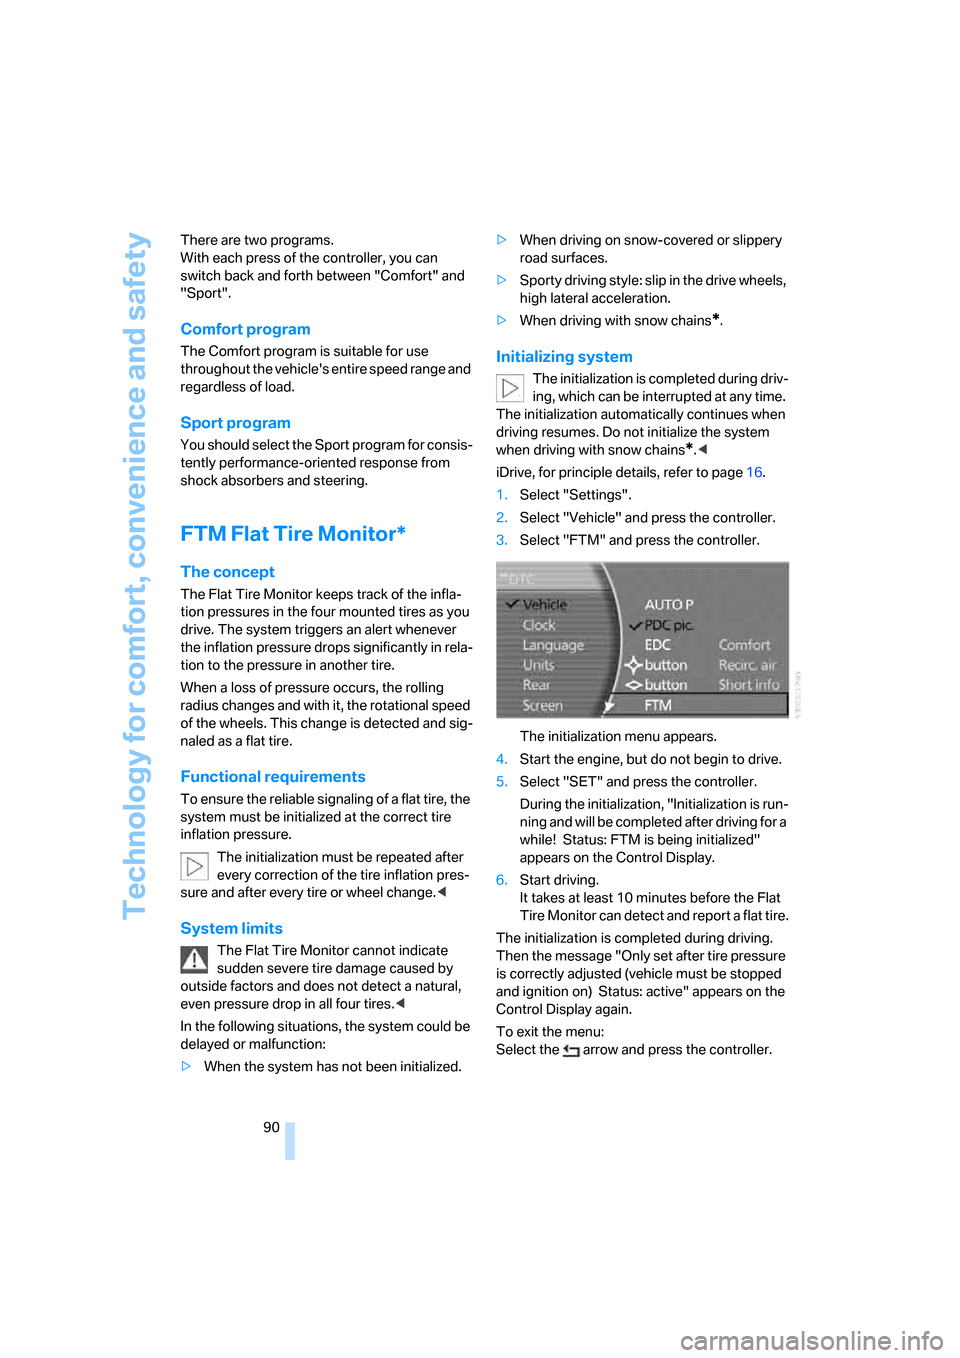
1.Select "Settings".
2.Select "Vehicle" and press the controller.
3.Select "FTM" and press the controller.
The initialization menu appears.
4.Start the engine, but do not begin to drive.
5.Select "SET" and press the controller.
During the initialization, "Initialization is run-
ning and will be completed after driving for a
while! Status: FTM is being initialized"
appears on the Control Display.
6.Start driving.
It takes at least 10 minutes before the Flat
Tire Monitor can detect and report a flat tire.
The initialization is completed during driving.
Then the message "Only set after tire pressure
is correctly adjusted (vehicle must be stopped
and ignition on) Status: active" appears on the
Control Display again.
To exit the menu:
Select the arrow and press the controller.