2006 BMW 760i radio
[x] Cancel search: radioPage 33 of 247

Controls
31Reference
At a glance
Driving tips
Communications
Navigation
Entertainment
Mobility
Adapter for spare key
You will need the adapter to activate the ignition
and to start the vehicle with the spare key.
Take the adapter from the onboard tool kit, refer
to page207.
Press lock button1, slide the cover open and
insert the spare key2 into the adapter. Close
the cover and insert the adapter in the ignition
lock.
Key Memory
The concept
You can set a number of functions of your BMW
individually according to your preferences. Key
Memory ensures that most of these settings are
stored for the remote control currently in use
without you having to do anything. When the
vehicle is unlocked, the corresponding remote
control is detected and the settings stored for it
are called up and carried out.
This means that your BMW will return to your
personal settings even if it has in the meantime
been driven by another person with his/her own
remote control and settings. The individual set-
tings are stored for a maximum of four remote
controls.
Key Memory
>Personal settings for driver's seat, outside
rearview mirrors, and steering wheel posi-
tion, refer to page46.
>Personal temperature distribution for seat
heating
*, refer to page49.
>Personal setting for the programmable but-
ton on the steering wheel, refer to page52.
>Personal setting of PDC Park Distance
Control
*, refer to page86.
>Air distribution, temperature, and intensity
of the Automatic climate control, refer to
page105.
>Settings for the displays on the Control Dis-
play:
>Units of measure for fuel consumption,
distance traveled, distances to go, tem-
perature, and pressure, refer to page84.
>Language on Control Display, refer to
page84.
>Display format of date and time, refer to
page84.
>Brightness of Control Display, refer to
page85.
>Personal settings for volume and tone of
the Entertainment sound output, refer to
page153.
>Personal settings for the stored stations of
the radio, refer to page158.
>Personal setting for the volume of the
hands-free telephone operation, refer to
page177.
Page 35 of 247

Controls
33Reference
At a glance
Driving tips
Communications
Navigation
Entertainment
Mobility
Engaging locks
Press the button. The hazard warning
flashers blink once.
Switching on interior lamps and
perimeter lighting
Press the button if the vehicle is
locked.
Switching on interior lamps
Press the button.
You can also use this function to locate your
vehicle in parking garages etc.
Panic mode*
You can also trigger the alarm system in case of
danger:
Press the button for at least 3 seconds.
To deactivate the alarm: press any button
Opening luggage compartment lid
Press the button for approx. one second.
The luggage compartment lid opens, regard-
less of whether it was previously locked or
unlocked.
During opening, the luggage compart-
ment lid pivots back and up. Ensure that
adequate clearance is available before opening.
To avoid being inadvertently locked out, never
set the remote control down in the luggage
compartment. A previously locked luggage
compartment lid is also locked again after clos-
ing.<
Automatic luggage compartment lid
operation*
Opening luggage compartment lid
Press the button for approx. one second.
The luggage compartment lid opens all the way,
regardless of whether it was previously locked
or unlocked.
To interrupt the opening process:
Press the button again while opening is in
progress.During opening, the luggage compart-
ment lid pivots back and up. Ensure that
adequate clearance is available before opening.
To avoid being inadvertently locked out, never
set the remote control down in the luggage
compartment. A previously locked luggage
compartment lid is also locked again after clos-
ing.<
Malfunction
Local radio waves can cause the remote control
to malfunction.
Should the remote control fail to operate owing
to interference of this kind, the vehicle can be
opened and closed via the door lock with a key.
If it is no longer possible to lock the vehicle with
a remote control, then its battery is discharged.
Use this remote control during an extended
drive; this will recharge the battery, refer to
page30.
For US owners only
The transmitter and receiver units comply with
part 15 of the FCC/Federal Communication
Commission regulations. Operation is gov-
erned by the following:
FCC ID:
>LX8766S
>LX8766E
>LX8CAS
>LX8CAS2
Compliance statement:
This device complies with part 15 of the FCC
Rules. Operation is subject to the following two
conditions:
>This device may not cause harmful interfer-
ence, and
>this device must accept any interference
received, including interference that may
cause undesired operation.
Any unauthorized modifications or
changes to these devices could void the
user's authority to operate this equipment.<
Page 41 of 247

Controls
39Reference
At a glance
Driving tips
Communications
Navigation
Entertainment
Mobility
Unlocking luggage compartment lid
separately
Press the button on the outside of the trunk lid,
refer to page35. This corresponds to pressing
the button.
If a remote control accidentally left in the
luggage compartment is detected in the
locked vehicle, the luggage compartment lid
opens again.<
Radio ready state
By briefly pressing the Start/Stop button, you
switch on the radio ready state, refer to
page57.
When doing so, do not depress the brake
pedal; otherwise, the engine will start.<
Starting engine
You can start the engine or switch on the igni-
tion, as long as a remote control is in the pas-
senger compartment. The remote does not
have to be inserted into the ignition lock, refer to
page57.
Before driving into a car wash
1.Insert remote control into ignition lock.
2.Shift transmission into position N.
3.Switch engine off.
4.Leave the remote control in the ignition
lock.
The vehicle can roll.
Malfunction
Local radio waves can disrupt the function of
Comfort Access. Should the remote control fail
to operate owing to interference of this kind,
you can respond by using the buttons on the
remote control or by using a key to unlock or
lock your vehicle at one of the doors. To start
the engine after this, insert the remote control
into the ignition lock.
Changing battery
The remote control for Comfort Access con-
tains a battery that must be replaced when it
becomes discharged.
1.Remove the integrated key from the remote
control, refer to page30.
2.Press in the detent catch, refer to arrow1,
e.g. with the key.
3.Remove the cover of the battery compart-
ment, refer to arrow2.
4.Insert a battery of the same type with the
positive side facing upwards.
5.Press the cover to close it.
Return used battery to a recycling collec-
tion point or to your BMW center.<
Windows
To prevent bodily injuries, watch the win-
dow as it closes. Always take along the
remote control when you leave the vehicle; oth-
erwise, children could, for example, operate the
windows and injure themselves.<
Page 42 of 247

Opening and closing
40
Opening and closing windows
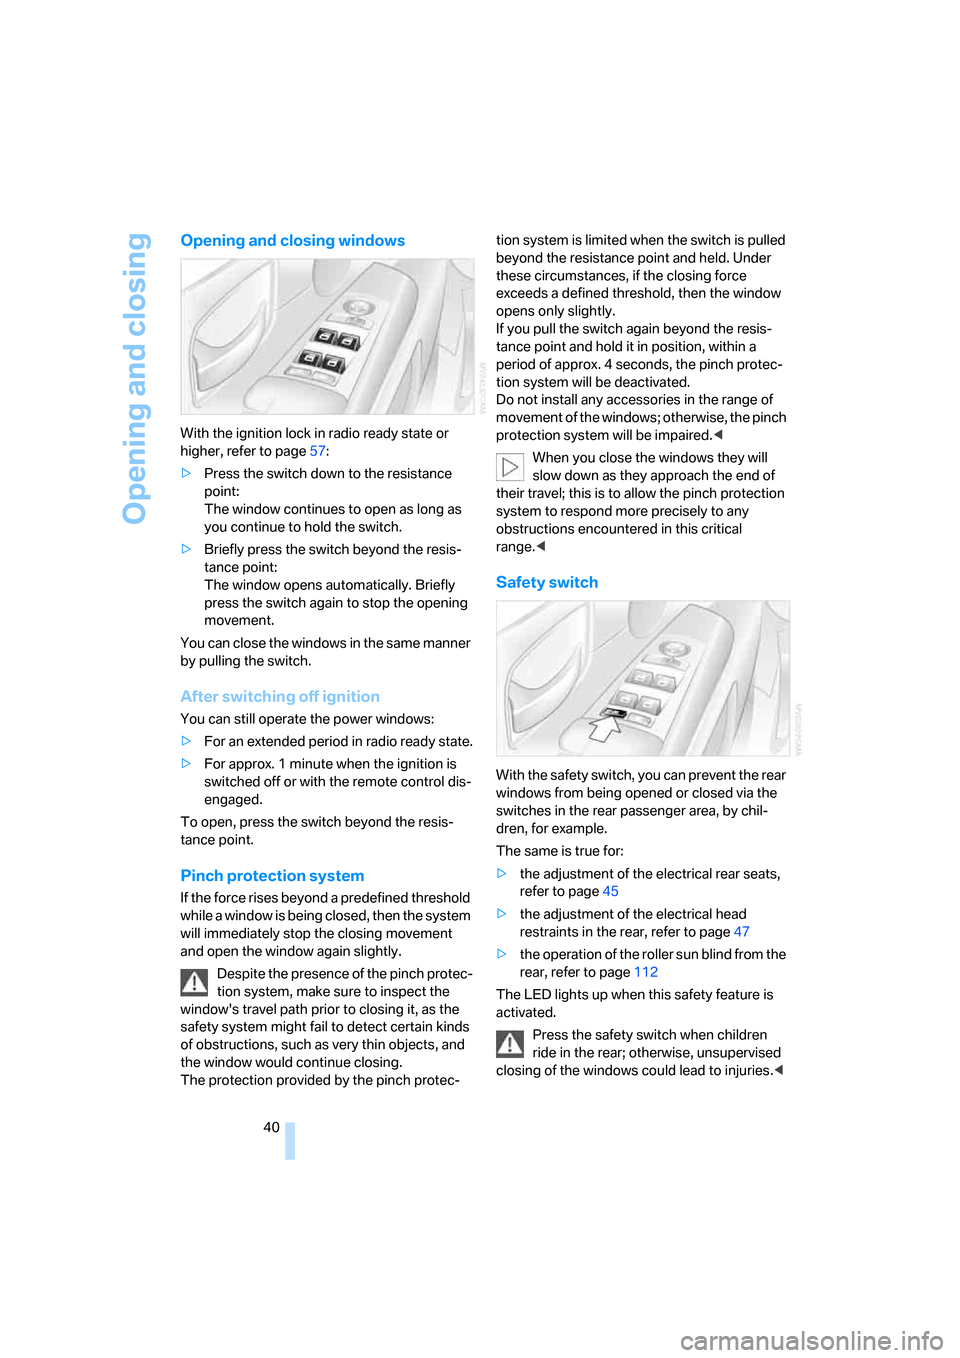
With the ignition lock in radio ready state or
higher, refer to page57:
>Press the switch down to the resistance
point:
The window continues to open as long as
you continue to hold the switch.
>Briefly press the switch beyond the resis-
tance point:
The window opens automatically. Briefly
press the switch again to stop the opening
movement.
You can close the windows in the same manner
by pulling the switch.
After switching off ignition
You can still operate the power windows:
>For an extended period in radio ready state.
>For approx. 1 minute when the ignition is
switched off or with the remote control dis-
engaged.
To open, press the switch beyond the resis-
tance point.
Pinch protection system
If the force rises beyond a predefined threshold
while a window is being closed, then the system
will immediately stop the closing movement
and open the window again slightly.
Despite the presence of the pinch protec-
tion system, make sure to inspect the
window's travel path prior to closing it, as the
safety system might fail to detect certain kinds
of obstructions, such as very thin objects, and
the window would continue closing.
The protection provided by the pinch protec-tion system is limited when the switch is pulled
beyond the resistance point and held. Under
these circumstances, if the closing force
exceeds a defined threshold, then the window
opens only slightly.
If you pull the switch again beyond the resis-
tance point and hold it in position, within a
period of approx. 4 seconds, the pinch protec-
tion system will be deactivated.
Do not install any accessories in the range of
movement of the windows; otherwise, the pinch
protection system will be impaired.<
When you close the windows they will
slow down as they approach the end of
their travel; this is to allow the pinch protection
system to respond more precisely to any
obstructions encountered in this critical
range.<
Safety switch
With the safety switch, you can prevent the rear
windows from being opened or closed via the
switches in the rear passenger area, by chil-
dren, for example.
The same is true for:
>the adjustment of the electrical rear seats,
refer to page45
>the adjustment of the electrical head
restraints in the rear, refer to page47
>the operation of the roller sun blind from the
rear, refer to page112
The LED lights up when this safety feature is
activated.
Press the safety switch when children
ride in the rear; otherwise, unsupervised
closing of the windows could lead to injuries.<
Page 43 of 247

Controls
41Reference
At a glance
Driving tips
Communications
Navigation
Entertainment
Mobility
In order to deactivate the function again,
you must insert the remote control into
the ignition lock or, with Comfort Access, you
must switch into radio ready state.<
Glass sunroof, electric*
The glass sunroof is ready for operation with
the ignition switched on, refer to page57.
To prevent bodily injuries, watch the
glass sunroof as it closes.
Always take along the remote control when you
leave the vehicle; otherwise, children could, for
example, operate the roof and injure them-
selves.<
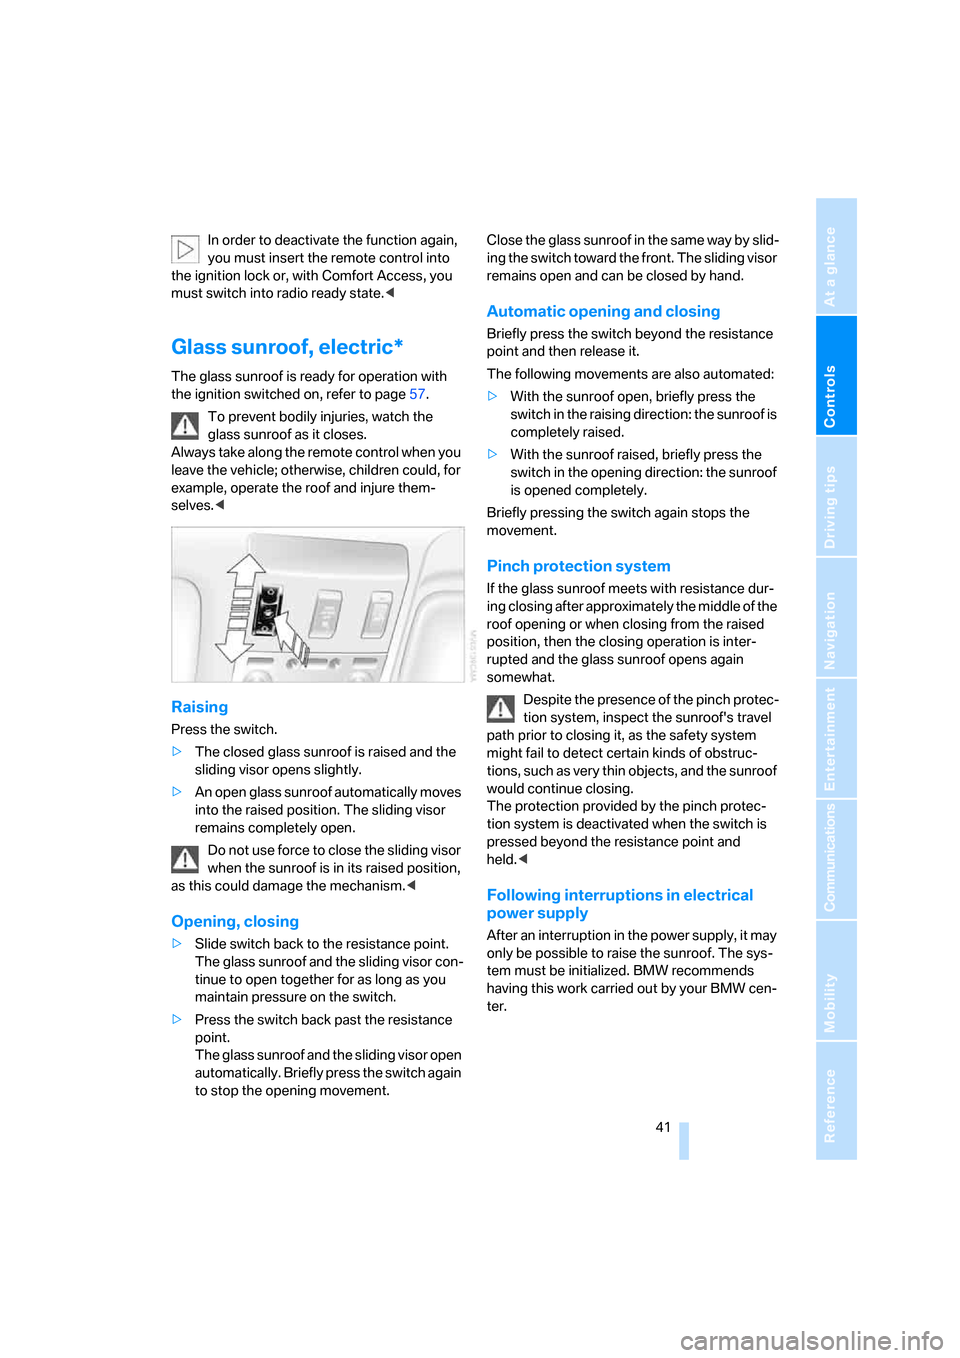
Raising
Press the switch.
>The closed glass sunroof is raised and the
sliding visor opens slightly.
>An open glass sunroof automatically moves
into the raised position. The sliding visor
remains completely open.
Do not use force to close the sliding visor
when the sunroof is in its raised position,
as this could damage the mechanism.<
Opening, closing
>Slide switch back to the resistance point.
The glass sunroof and the sliding visor con-
tinue to open together for as long as you
maintain pressure on the switch.
>Press the switch back past the resistance
point.
The glass sunroof and the sliding visor open
automatically. Briefly press the switch again
to stop the opening movement.Close the glass sunroof in the same way by slid-
ing the switch toward the front. The sliding visor
remains open and can be closed by hand.
Automatic opening and closing
Briefly press the switch beyond the resistance
point and then release it.
The following movements are also automated:
>With the sunroof open, briefly press the
switch in the raising direction: the sunroof is
completely raised.
>With the sunroof raised, briefly press the
switch in the opening direction: the sunroof
is opened completely.
Briefly pressing the switch again stops the
movement.
Pinch protection system
If the glass sunroof meets with resistance dur-
ing closing after approximately the middle of the
roof opening or when closing from the raised
position, then the closing operation is inter-
rupted and the glass sunroof opens again
somewhat.
Despite the presence of the pinch protec-
tion system, inspect the sunroof's travel
path prior to closing it, as the safety system
might fail to detect certain kinds of obstruc-
tions, such as very thin objects, and the sunroof
would continue closing.
The protection provided by the pinch protec-
tion system is deactivated when the switch is
pressed beyond the resistance point and
held.<
Following interruptions in electrical
power supply
After an interruption in the power supply, it may
only be possible to raise the sunroof. The sys-
tem must be initialized. BMW recommends
having this work carried out by your BMW cen-
ter.
Page 48 of 247

Adjusting
46 It will be necessary to return the rear seats
to their standard position before using a
child restraint system, for instance, refer to
page54.<
Seat, mirror and steering
wheel memory
You can store and select two different adjust-
ment settings for the driver's seat, exterior mir-
rors and steering wheel.
With comfort seats, you can also use the mem-
ory to store and recall two seat positions for
each additional seat.
The adjustment of the lumbar support is not
stored in the memory.
The setting is stored for the remote control cur-
rently in use.
Storing
1.Switch on radio ready state or ignition, refer
to page57.
2.Set desired seat position; for driver's seat
also set the exterior mirror and steering
wheel position.
3.Press
MEMORY button:
The LED in the button lights up.
4.Press the desired memory button1 or2:
The LED goes out.
Requesting manually
Do not request a position from the mem-
ory while the vehicle is moving. There is a
risk of accident from unexpected movement of
the seat or steering wheel.<
Comfort mode
1.With driver's door open after unlocking or
with radio ready state switched on.
2.Briefly press the desired memory button 1
or2.
The system immediately cancels the adjust-
ment procedure when you briefly press one of
the seat adjustment buttons or one of the mem-
ory buttons.
Safety mode
1.With driver's door closed and ignition
switched either on or off.
2.Press the desired memory button 1or2
and maintain pressure until the adjustment
process has been completed.
If you press the
MEMORY button accidentally:
Press the button again; the LED goes out.
Head restraints
A correctly adjusted head restraint reduces the
risk of injury to cervical vertebrae in the event of
an accident.
Adjust the head restraint so that its center
is approx. at ear level. Otherwise, there is
increased danger of injury in the event of an
accident.<
Height adjustment
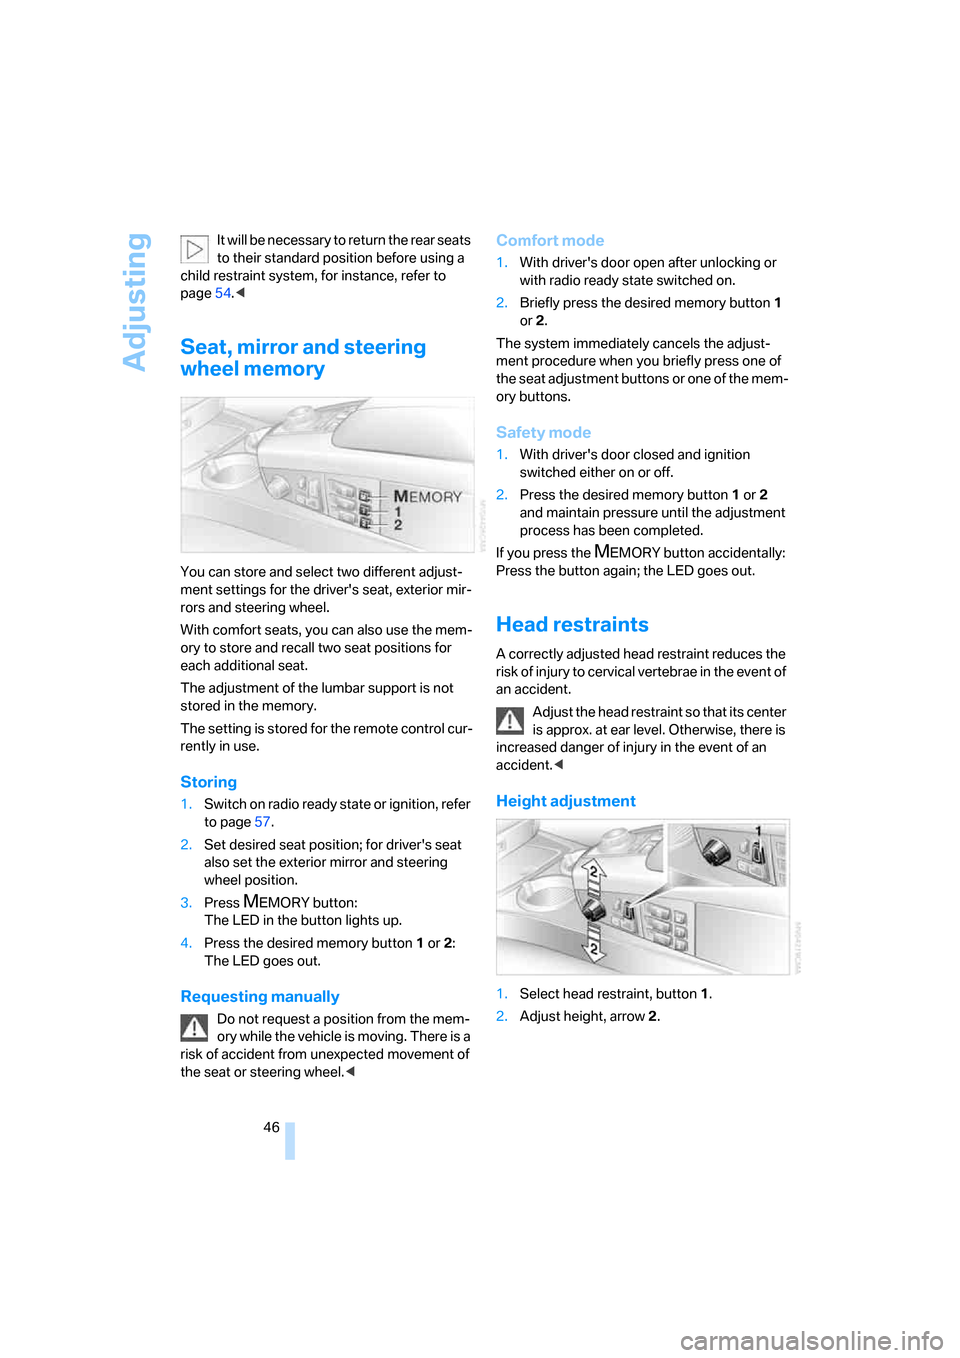
1.Select head restraint, button1.
2.Adjust height, arrow2.
Page 54 of 247

Adjusting
52
Steering wheel adjustment
In order to prevent the risk of accident
due to an unexpected movement, do not
adjust the steering wheel while the vehicle is
moving.<
The steering wheel can be adjusted in four
directions.
To save steering wheel positions, refer to Seat,
mirror and steering wheel memory on page46.
Assistance getting in and out
To make it easier to enter and exit the vehicle,
the steering wheel temporarily moves into the
top and front position.
This automatic feature is governed by the
driver's door and the ignition switch.
Steering wheel heater*
The steering wheel heater operates when the
ignition is on.
Press the button to activate or deactivate this
system.
When the steering wheel heater is operating,
the LED in the button lights up.
Programmable buttons
You can individually program the button on the
steering wheel and the button next to the con-
troller.
iDrive, for principle details, refer to page16.
1.Press the button to open the start
menu.
2.Move the controller toward "Settings".
3.Select "Vehicle" and press the controller.
4.Select " button" or " button". Con-
tinue to press the controller until the
desired function appears.
>"Recirc. air"
The supply of outside air is shut off contin-
uously, refer to Automatic recirculated air
control/recirculated air mode on page105.
>"Navi info"
To repeat the most recent navigation sys-
tem instruction, refer to Route guidance by
voice instructions on page145.
>"Short info"
Display of the help and supplementary texts
of the active menu for approx. 10 seconds,
refer to page20.
" button" can additionally be programmed
with the following function.
>"AUTO P"
Activation/deactivation, refer to page59.
Rear seat screen
*:
>"Mode"
You can choose between the output
sources radio, CD player, and CD changer.
It is necessary for one of these sources to
have been activated.
Page 59 of 247

Controls
57Reference
At a glance
Driving tips
Communications
Navigation
Entertainment
Mobility
Driving
Ignition lock
Insert the remote control all the way into the
ignition lock. Radio ready state is switched on.
Individual electrical devices are ready for use.
Start/Stop button
Briefly pressing the Start/Stop button several
times switches the radio ready state or the igni-
tion on and off.
Briefly pressing the Start/Stop button
with the brake pedal depressed starts the
engine.<
Radio ready state
Individual electrical devices are ready for use.
The time and outside temperature appear on
the Info Display.
Ignition switched on
All vehicle systems are ready for operation.
When the engine is not running, please
switch off the ignition and nonessential current-consuming devices in order to mini-
mize the drain on the battery.<
Ignition off
All of the indicator lamps on the Info Display go
out. Only the selector lever indicator of the
automatic transmission is still briefly displayed.
Starting engine
Do not run the engine in closed rooms;
otherwise, the inhaling of toxic exhaust
gases can cause unconsciousness and death.
The exhaust gases contain carbon monoxide,
an odorless and colorless, but highly toxic gas.
Never leave an unattended vehicle with the
engine running, as such a vehicle represents a
potential safety hazard.
To prevent the vehicle from rolling, always
select position P on the selector lever and
engage the parking brake before leaving the
vehicle with the engine running. Note the infor-
mation provided on the Info Display.<
1.Depress brake pedal.
2.Briefly press the Start/Stop button.
When starting the engine, do not press the
accelerator pedal.
Do not allow the engine to warm up by leaving it
running while the vehicle remains stationary.
Instead, begin to drive immediately at a moder-
ate engine speed.