2006 BMW 750I Checking
[x] Cancel search: CheckingPage 27 of 247
At a glance
25Reference
Controls
Driving tips
Communications
Navigation
Entertainment
Mobility
Volume adjustment
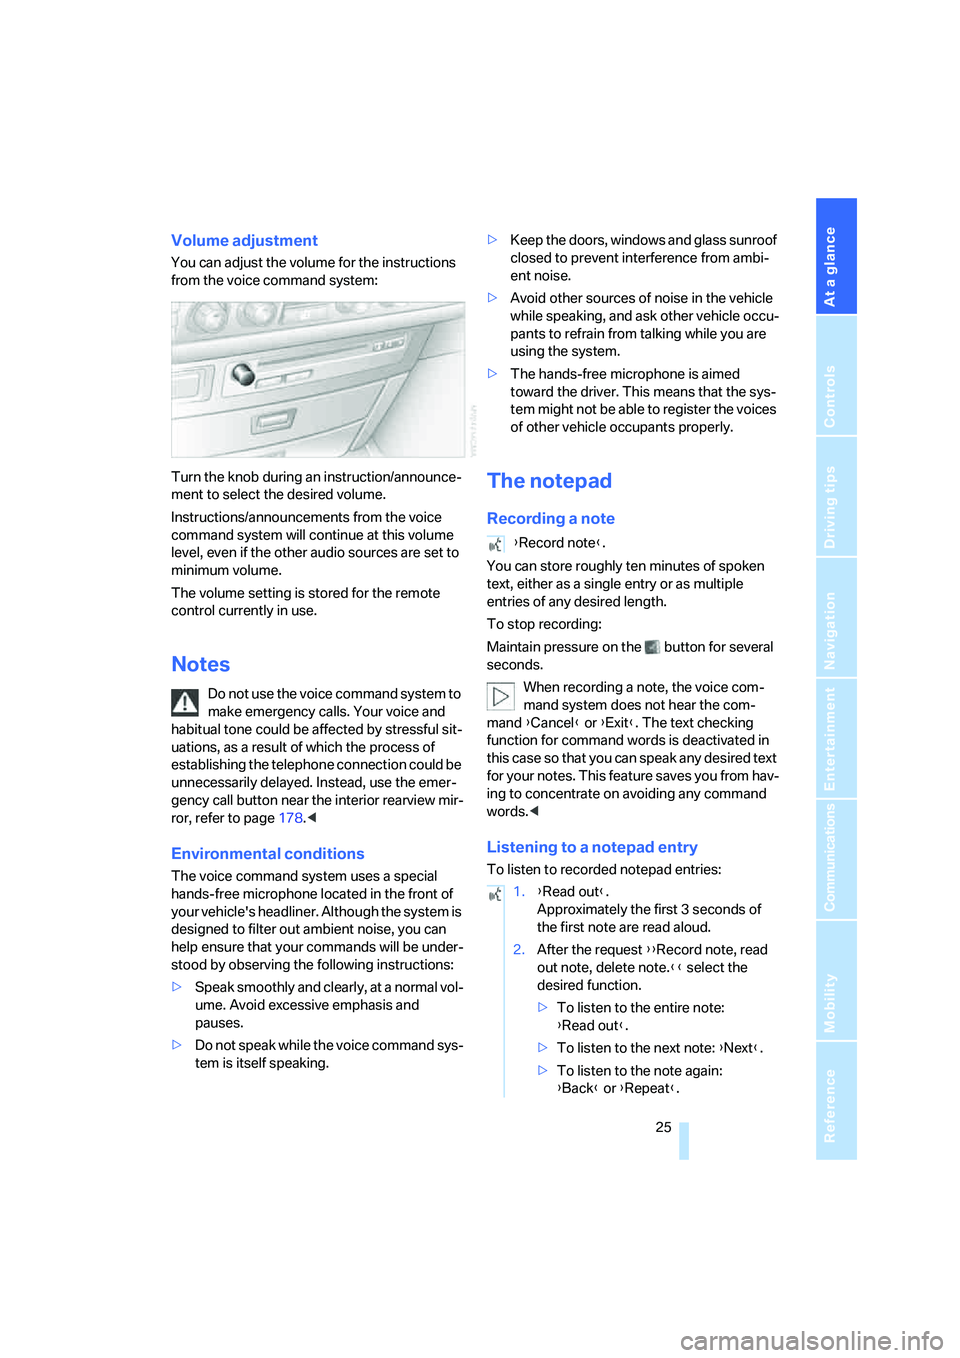
You can adjust the volume for the instructions
from the voice command system:
Turn the knob during an instruction/announce-
ment to select the desired volume.
Instructions/announcements from the voice
command system will continue at this volume
level, even if the other audio sources are set to
minimum volume.
The volume setting is stored for the remote
control currently in use.
Notes
Do not use the voice command system to
make emergency calls. Your voice and
habitual tone could be affected by stressful sit-
uations, as a result of which the process of
establishing the telephone connection could be
unnecessarily delayed. Instead, use the emer-
gency call button near the interior rearview mir-
ror, refer to page178.<
Environmental conditions
The voice command system uses a special
hands-free microphone located in the front of
your vehicle's headliner. Although the system is
designed to filter out ambient noise, you can
help ensure that your commands will be under-
stood by observing the following instructions:
>Speak smoothly and clearly, at a normal vol-
ume. Avoid excessive emphasis and
pauses.
>Do not speak while the voice command sys-
tem is itself speaking.>Keep the doors, windows and glass sunroof
closed to prevent interference from ambi-
ent noise.
>Avoid other sources of noise in the vehicle
while speaking, and ask other vehicle occu-
pants to refrain from talking while you are
using the system.
>The hands-free microphone is aimed
toward the driver. This means that the sys-
tem might not be able to register the voices
of other vehicle occupants properly.
The notepad
Recording a note
You can store roughly ten minutes of spoken
text, either as a single entry or as multiple
entries of any desired length.
To stop recording:
Maintain pressure on the button for several
seconds.
When recording a note, the voice com-
mand system does not hear the com-
mand {Cancel} or {Exit}. The text checking
function for command words is deactivated in
this case so that you can speak any desired text
for your notes. This feature saves you from hav-
ing to concentrate on avoiding any command
words.<
Listening to a notepad entry
To listen to recorded notepad entries:
{Record note}.
1.{Read out}.
Approximately the first 3 seconds of
the first note are read aloud.
2.After the request {{Record note, read
out note, delete note.}} select the
desired function.
>To listen to the entire note:
{Read out}.
>To listen to the next note: {Next}.
>To listen to the note again:
{Back} or {Repeat}.
Page 40 of 247

Opening and closing
38
Tilt alarm sensor
The tilt of the vehicle is monitored. The alarm
system reacts, e.g. in case of an attempted
wheel theft or towing.
Interior motion sensor
In order for the interior motion sensor to func-
tion properly, the windows and glass sunroof
must be completely closed.
Avoiding unintentional alarms
The tilt alarm sensor and interior motion sensor
may be switched off at the same time. This pre-
vents unintentional alarms, e.g. in the following
situations:
>In duplex garages
>When transporting on car-carrying trains
>When animals are to remain in the vehicle
Switching off tilt alarm sensor and
interior motion sensor
Press the button on the remote control
again as soon as the vehicle is locked.
The indicator lamp lights up briefly and then
flashes continuously. The tilt alarm sensor and
the interior motion sensor are switched off until
the next time the vehicle is unlocked and subse-
quently locked again.
Comfort Access*
With Comfort Access, you can have access to
your vehicle without having to hold the remote
control in your hand. It is sufficient to carry the
remote control on your person, e.g. in a jacket
pocket. The vehicle automatically detects the
associated remote control in the immediate
vicinity or in the passenger compartment.
Comfort Access supports the following func-
tions:
>Locking/unlocking the vehicle
>Unlocking the luggage compartment lid
separately
>Starting the engine
Functional requirements
>The vehicle can only be locked if the remote
control is outside the vehicle.
>The next unlocking and locking cycle is not
possible until after approx. 2 seconds.
>The engine can only be started if the remote
control is inside the vehicle.
Comparison to conventional remote
control
You can control the functions mentioned previ-
ously with the Comfort Access or by pressing
the buttons on the remote control. Therefore
please first familiarize yourself with the instruc-
tions for opening and closing, starting on
page32.
The specific features involved in the use of
Comfort Access are described below.
If a short delay occurs when opening or
closing the windows and the glass sun-
roof, then this indicates that the system is
checking whether a remote control is located in
the vehicle. Please repeat opening or closing if
necessary.<
Unlocking
Pull a door handle. This corresponds to press-
ing the button.
Only the door of the door handle you have
pulled is unlocked.
You unlock the other doors from the inside,
using the central locking system button, refer to
page34.<
Engaging locks
Push a door handle. This corresponds to press-
ing the button.
Before locking, make sure that the igni-
tion and all current-consuming devices
are switched off in order to minimized the drain
on the battery.<
If a remote control is detected in the inte-
rior, the vehicle is unlocked again or not
locked in the first place.<
Page 78 of 247

Everything under control
76
Coolant temperature
Should the coolant, and with it the engine
become too hot, a warning lamp lights up. In
addition, a message appears on the Control
Display.
Checking coolant level, refer to page203.
Computer
Requesting functions
With the ignition lock in radio ready state or
higher, you can use the buttons in the turn sig-
nal lever to display the computer information on
the Info Display.
1Info Display on left
2Info Display on right
A new function appears each time you briefly
press the button.
Displays on Info Display
The display sequence:
>Fuel gauge
>Range and distance to destinationThe display sequence:
>Odometer
>Energy Control/current fuel consumption
>Average fuel consumption
>Average speed
>Time of arrival
Hiding messages
Maintain pressure on button1 to hide the com-
puter display. Briefly press the button again to
return to the last display.
It is not possible, though, to hide a Check
Control message.<
Fuel gauge
The fuel gauge mode appears automatically
once the fuel level falls into the reserve range.
The tanks still contains the following quantities
of fuel:
>750i/Li: approx. 2.6 gallons/10 liters.
>760i/Li: approx. 3.1 gallons/12 liters.
If the tilt of the vehicle varies, when you are driv-
ing in mountainous areas, for example, the indi-
cator may fluctuate slightly.
After reaching the reserve quantity, the
Info Display can no longer be hidden.
However, you can still display the remaining
range.<
Fuel tank capacity: approx. 23.2 gallons/
88 liters. You can find information on refueling
on page192.
Refuel well before the tank is empty. If
you drive down to the last drop, engine
functions are no longer assured and damage
can occur.<
Page 113 of 247
Controls
111Reference
At a glance
Driving tips
Communications
Navigation
Entertainment
Mobility
Practical interior accessories
Integrated universal remote
control*
The concept
The integrated universal remote control can
replace as many as three hand-held transmit-
ters for various remote-controlled accessories,
such as door openers and house alarm sys-
tems. The integrated universal remote control
registers and stores signals from the original
hand-held transmitters.
The signal of an original hand-held transmitter
can be programmed into one of the three mem-
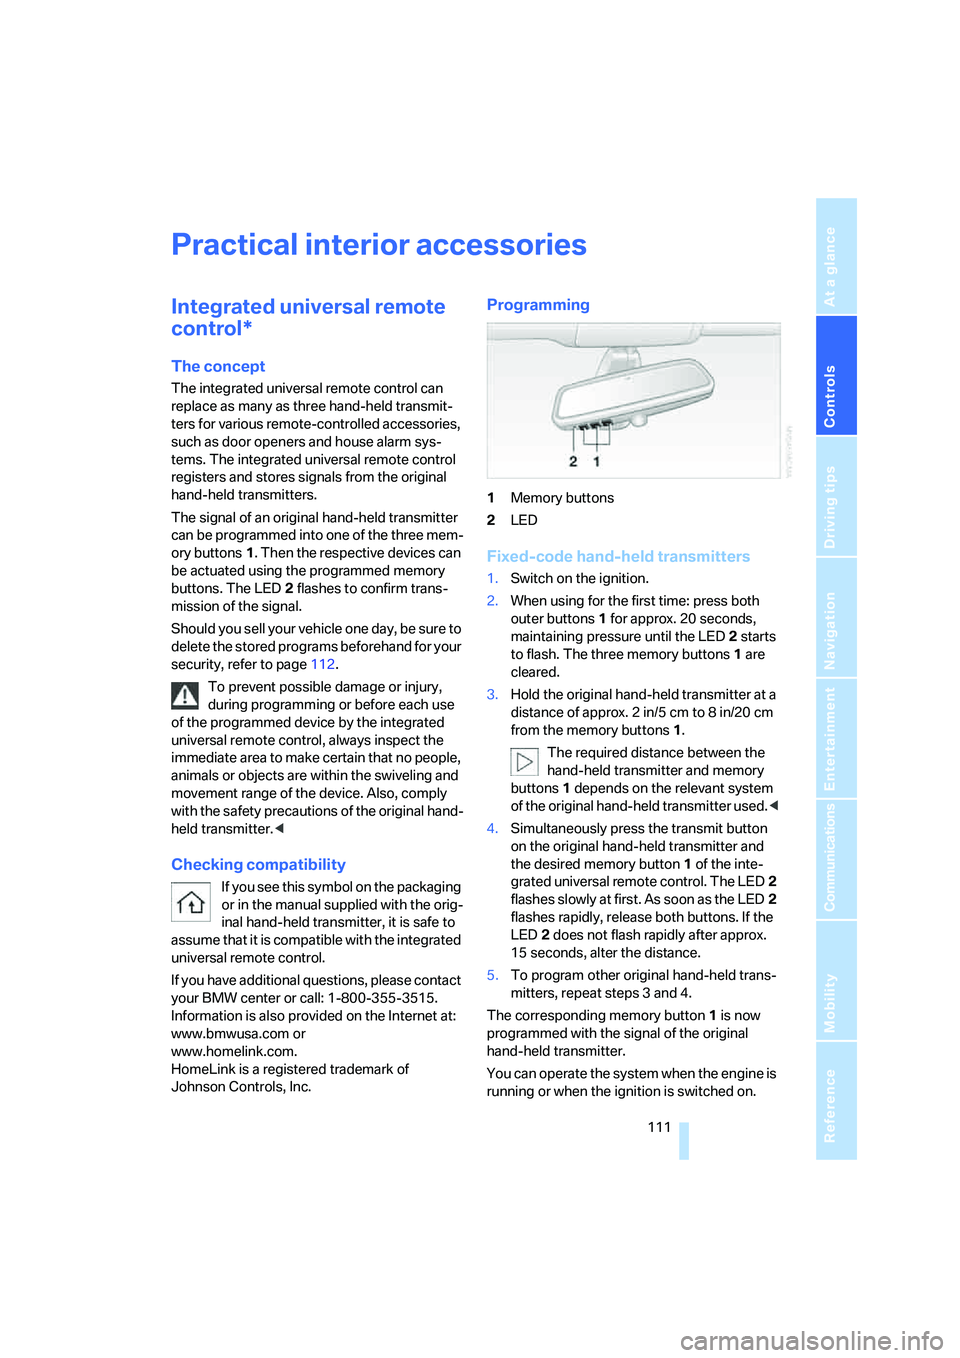
ory buttons1. Then the respective devices can
be actuated using the programmed memory
buttons. The LED2 flashes to confirm trans-
mission of the signal.
Should you sell your vehicle one day, be sure to
delete the stored programs beforehand for your
security, refer to page112.
To prevent possible damage or injury,
during programming or before each use
of the programmed device by the integrated
universal remote control, always inspect the
immediate area to make certain that no people,
animals or objects are within the swiveling and
movement range of the device. Also, comply
with the safety precautions of the original hand-
held transmitter.<
Checking compatibility
If you see this symbol on the packaging
or in the manual supplied with the orig-
inal hand-held transmitter, it is safe to
assume that it is compatible with the integrated
universal remote control.
If you have additional questions, please contact
your BMW center or call: 1-800-355-3515.
Information is also provided on the Internet at:
www.bmwusa.com or
www.homelink.com.
HomeLink is a registered trademark of
Johnson Controls, Inc.
Programming
1Memory buttons
2LED
Fixed-code hand-held transmitters
1.Switch on the ignition.
2.When using for the first time: press both
outer buttons1 for approx. 20 seconds,
maintaining pressure until the LED2 starts
to flash. The three memory buttons1 are
cleared.
3.Hold the original hand-held transmitter at a
distance of approx. 2in/5cm to 8in/20cm
from the memory buttons1.
The required distance between the
hand-held transmitter and memory
buttons1 depends on the relevant system
of the original hand-held transmitter used.<
4.Simultaneously press the transmit button
on the original hand-held transmitter and
the desired memory button1 of the inte-
grated universal remote control. The LED2
flashes slowly at first. As soon as the LED2
flashes rapidly, release both buttons. If the
LED2 does not flash rapidly after approx.
15 seconds, alter the distance.
5.To program other original hand-held trans-
mitters, repeat steps 3 and 4.
The corresponding memory button1 is now
programmed with the signal of the original
hand-held transmitter.
You can operate the system when the engine is
running or when the ignition is switched on.
Page 180 of 247
Telephone overview
178
Touch tone dialing
The touch tone code is required for access to
network services or for controlling devices, e.g.
remote checking of an answering machine.
This function is available when a connection
has been established.
Emergency call with
emergency call button*
When the vehicle is equipped with the full
mobile phone preparation package, you can
trigger an emergency call via the emergency
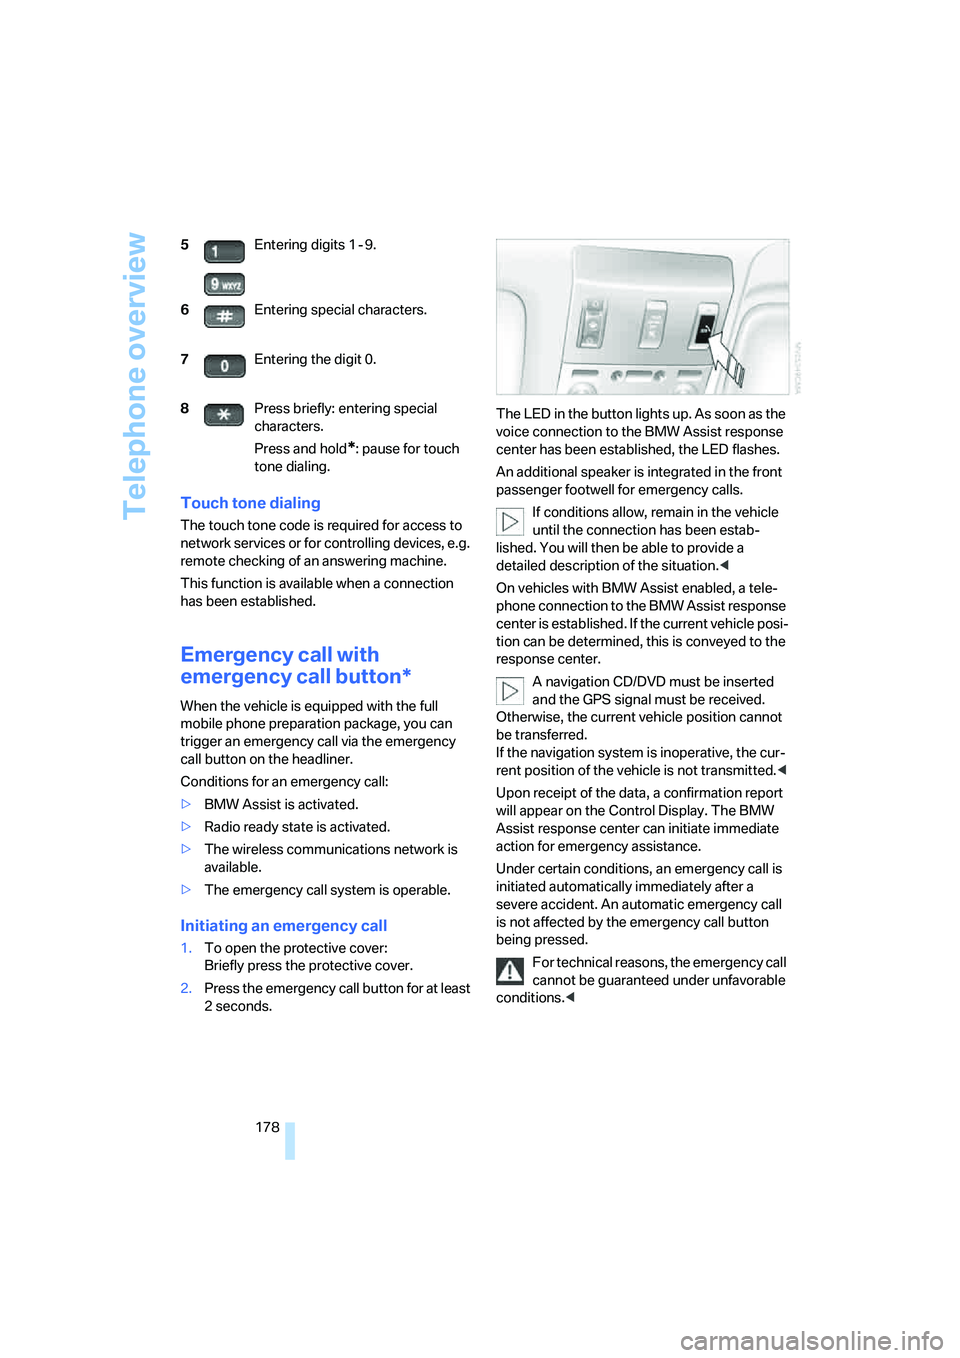
call button on the headliner.
Conditions for an emergency call:
>BMW Assist is activated.
>Radio ready state is activated.
>The wireless communications network is
available.
>The emergency call system is operable.
Initiating an emergency call
1.To open the protective cover:
Briefly press the protective cover.
2.Press the emergency call button for at least
2seconds.The LED in the button lights up. As soon as the
voice connection to the BMW Assist response
center has been established, the LED flashes.
An additional speaker is integrated in the front
passenger footwell for emergency calls.
If conditions allow, remain in the vehicle
until the connection has been estab-
lished. You will then be able to provide a
detailed description of the situation.<
On vehicles with BMW Assist enabled, a tele-
phone connection to the BMW Assist response
center is established. If the current vehicle posi-
tion can be determined, this is conveyed to the
response center.
A navigation CD/DVD must be inserted
and the GPS signal must be received.
Otherwise, the current vehicle position cannot
be transferred.
If the navigation system is inoperative, the cur-
rent position of the vehicle is not transmitted.<
Upon receipt of the data, a confirmation report
will appear on the Control Display. The BMW
Assist response center can initiate immediate
action for emergency assistance.
Under certain conditions, an emergency call is
initiated automatically immediately after a
severe accident. An automatic emergency call
is not affected by the emergency call button
being pressed.
For technical reasons, the emergency call
cannot be guaranteed under unfavorable
conditions.< 5Entering digits 1 - 9.
6Entering special characters.
7Entering the digit 0.
8Press briefly: entering special
characters.
Press and hold
*: pause for touch
tone dialing.
Page 196 of 247
Wheels and tires
194
Wheels and tires
Tire inflation pressure
Information for your safety
The condition of the tires and the maintenance
of the specified tire pressure are crucial not only
to the tire's service life, but also to driving com-
fort and most importantly, driving safety.
Checking pressure
Only check tire inflation pressure when the tires
are cold. This means after a maximum of
1,25 miles/2 km driving or when the vehicle has
been parked for at least 2 hours. When tires are
warm, the tire inflation pressure increases.
Check the tire inflation pressure regularly
and correct it as needed, including the
spare wheel: at least twice a month and before
starting long trips. If you fail to observe this pre-
caution, you may be driving on tires with incor-
rect tire pressures, a condition that can not only
compromise your vehicle's driving stability, but
also lead to tire damage and the risk of an acci-
dent. Do not drive with deflated, i.e. flat tires,
except run-flat tires. A flat tire will seriously
impair your vehicle's handling and braking
response. Attempts to drive on a flat tire can
lead to loss of control over the vehicle.<
After correcting the tire inflation pressure,
reinitialize the Flat Tire Monitor, refer to
page90, or reset the Tire Pressure Monitor,
refer to page92.<
Pressure specifications
The tables below provide all the correct inflation
pressures for the specified tire sizes at ambient
temperature.
The inflation pressures apply to the tire
sizes and tire brands respectively
approved and recommended by BMW; a list of
these is available from your BMW center.
>Tire sizes for your vehicle
>Load conditions
>Maximum allowable driving speed
Tire inflation pressures for driving
up to 100 mph/160 km/h
For normal driving up to 100 mph/160 km/h
adjust pressures to the respective tire inflation
pressures listed on the following pages in the
column for traveling speeds up to a max. of
100 mph/160 km/h to achieve optimum driving
comfort.
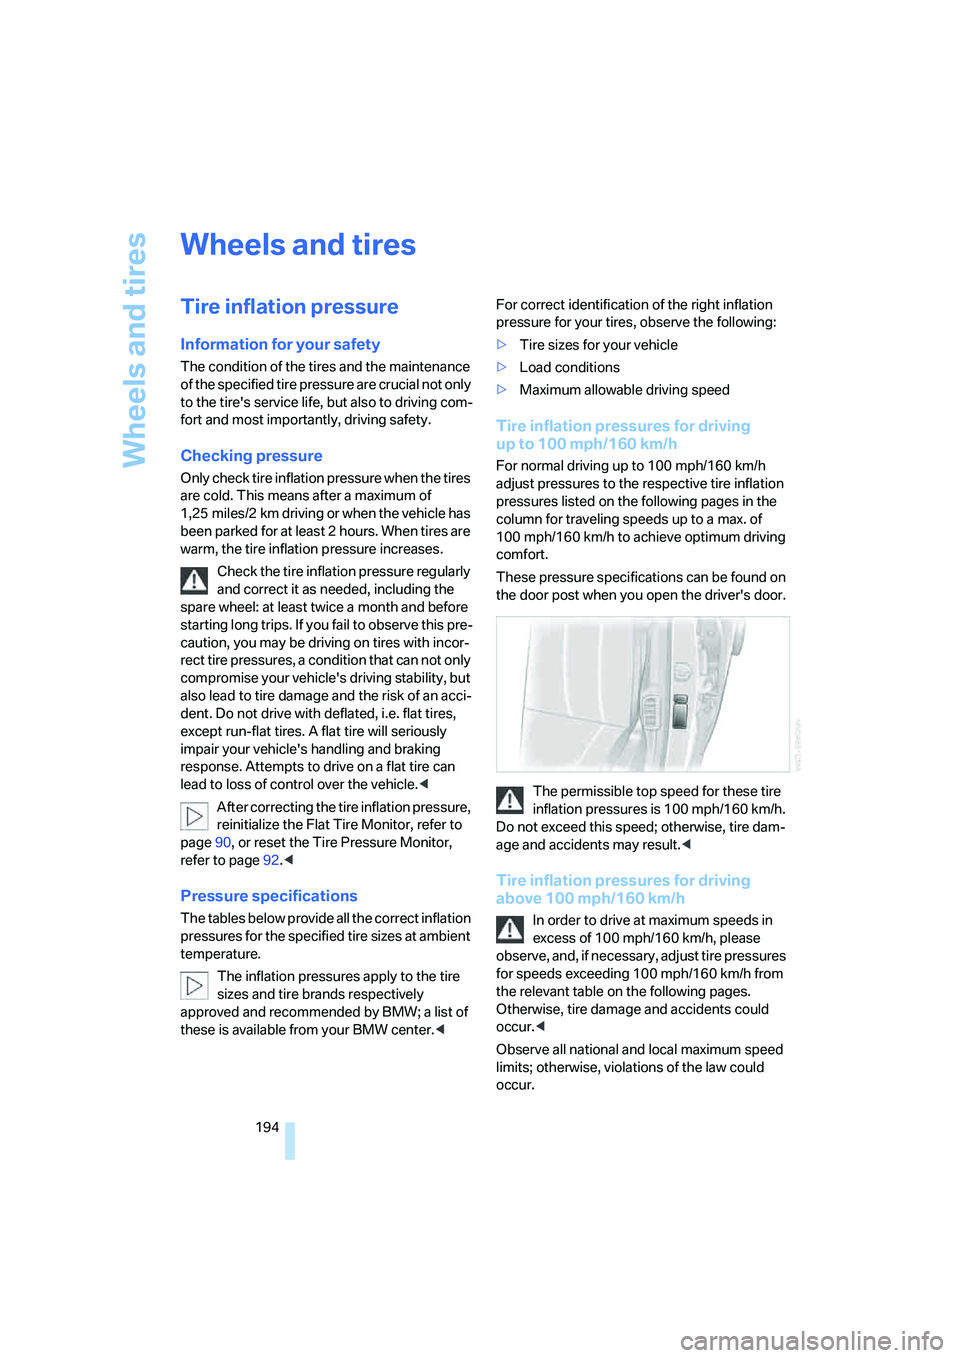
These pressure specifications can be found on
the door post when you open the driver's door.
The permissible top speed for these tire
inflation pressures is 100 mph/160 km/h.
Do not exceed this speed; otherwise, tire dam-
age and accidents may result.<
Tire inflation pressures for driving
above 100 mph/160 km/h
In order to drive at maximum speeds in
excess of 100 mph/160 km/h, please
observe, and, if necessary, adjust tire pressures
for speeds exceeding 100 mph/160 km/h from
the relevant table on the following pages.
Otherwise, tire damage and accidents could
occur.<
Observe all national and local maximum speed
limits; otherwise, violations of the law could
occur.
Page 204 of 247
Under the hood
202
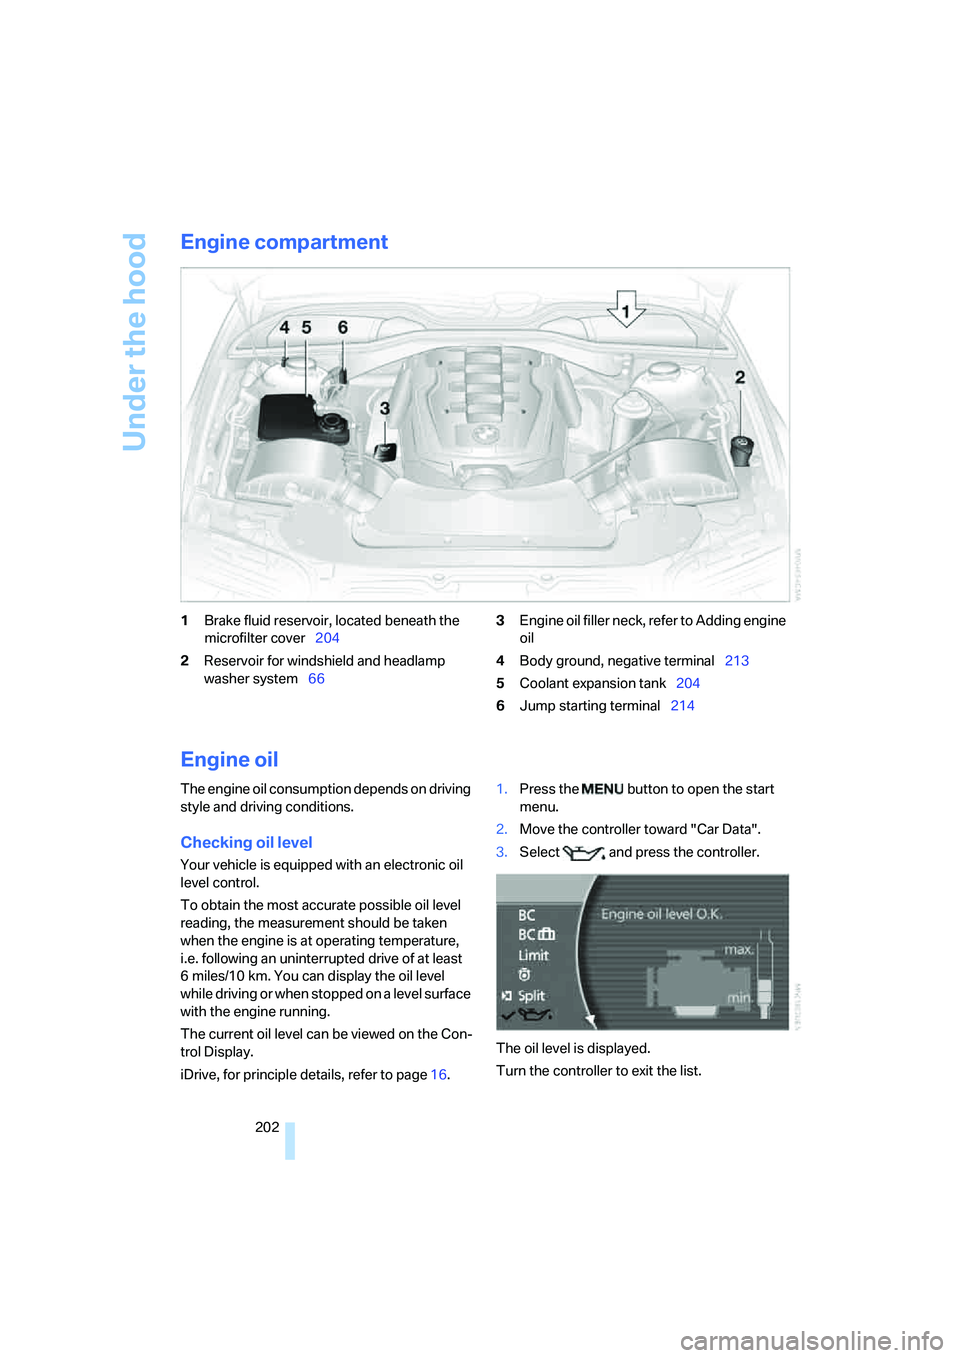
Engine compartment
1Brake fluid reservoir, located beneath the
microfilter cover204
2Reservoir for windshield and headlamp
washer system663Engine oil filler neck, refer to Adding engine
oil
4Body ground, negative terminal213
5Coolant expansion tank204
6Jump starting terminal214
Engine oil
The engine oil consumption depends on driving
style and driving conditions.
Checking oil level
Your vehicle is equipped with an electronic oil
level control.
To obtain the most accurate possible oil level
reading, the measurement should be taken
when the engine is at operating temperature,
i.e. following an uninterrupted drive of at least
6 miles/10 km. You can display the oil level
while driving or when stopped on a level surface
with the engine running.
The current oil level can be viewed on the Con-
trol Display.
iDrive, for principle details, refer to page16.1.Press the button to open the start
menu.
2.Move the controller toward "Car Data".
3.Select and press the controller.
The oil level is displayed.
Turn the controller to exit the list.
Page 206 of 247
Under the hood
204 Always observe all applicable environ-
mental laws and regulations when dis-
posing of used coolant additives.<
Checking coolant level
1.The engine must be at ambient tempera-
ture.
2.Turn the cap of the expansion tank counter-
clockwise to allow any accumulated pres-
sure to escape, then continue turning to
open.
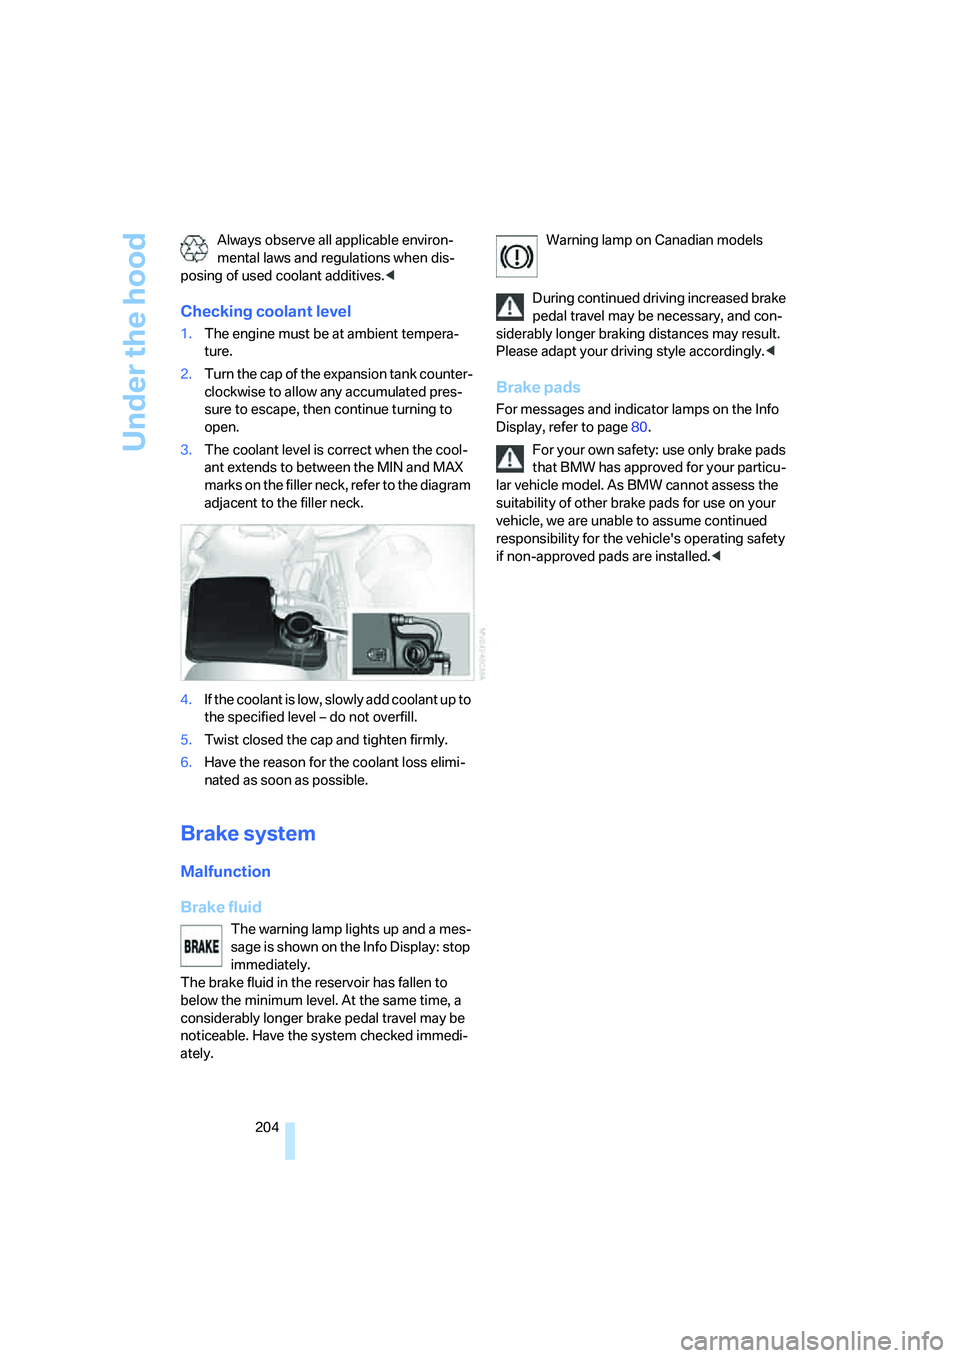
3.The coolant level is correct when the cool-
ant extends to between the MIN and MAX
marks on the filler neck, refer to the diagram
adjacent to the filler neck.
4.If the coolant is low, slowly add coolant up to
the specified level – do not overfill.
5.Twist closed the cap and tighten firmly.
6.Have the reason for the coolant loss elimi-
nated as soon as possible.
Brake system
Malfunction
Brake fluid
The warning lamp lights up and a mes-
sage is shown on the Info Display: stop
immediately.
The brake fluid in the reservoir has fallen to
below the minimum level. At the same time, a
considerably longer brake pedal travel may be
noticeable. Have the system checked immedi-
ately.Warning lamp on Canadian models
During continued driving increased brake
pedal travel may be necessary, and con-
siderably longer braking distances may result.
Please adapt your driving style accordingly.<
Brake pads
For messages and indicator lamps on the Info
Display, refer to page80.
For your own safety: use only brake pads
that BMW has approved for your particu-
lar vehicle model. As BMW cannot assess the
suitability of other brake pads for use on your
vehicle, we are unable to assume continued
responsibility for the vehicle's operating safety
if non-approved pads are installed.<