2006 BMW 745Li lights
[x] Cancel search: lightsPage 112 of 247

Climate
110
Activating timer
iDrive, for principle details, refer to page16.
1.Press the button to open the start
menu.
2.Move the controller toward "Climate".
3.Select "Parked car" and press the control-
ler.
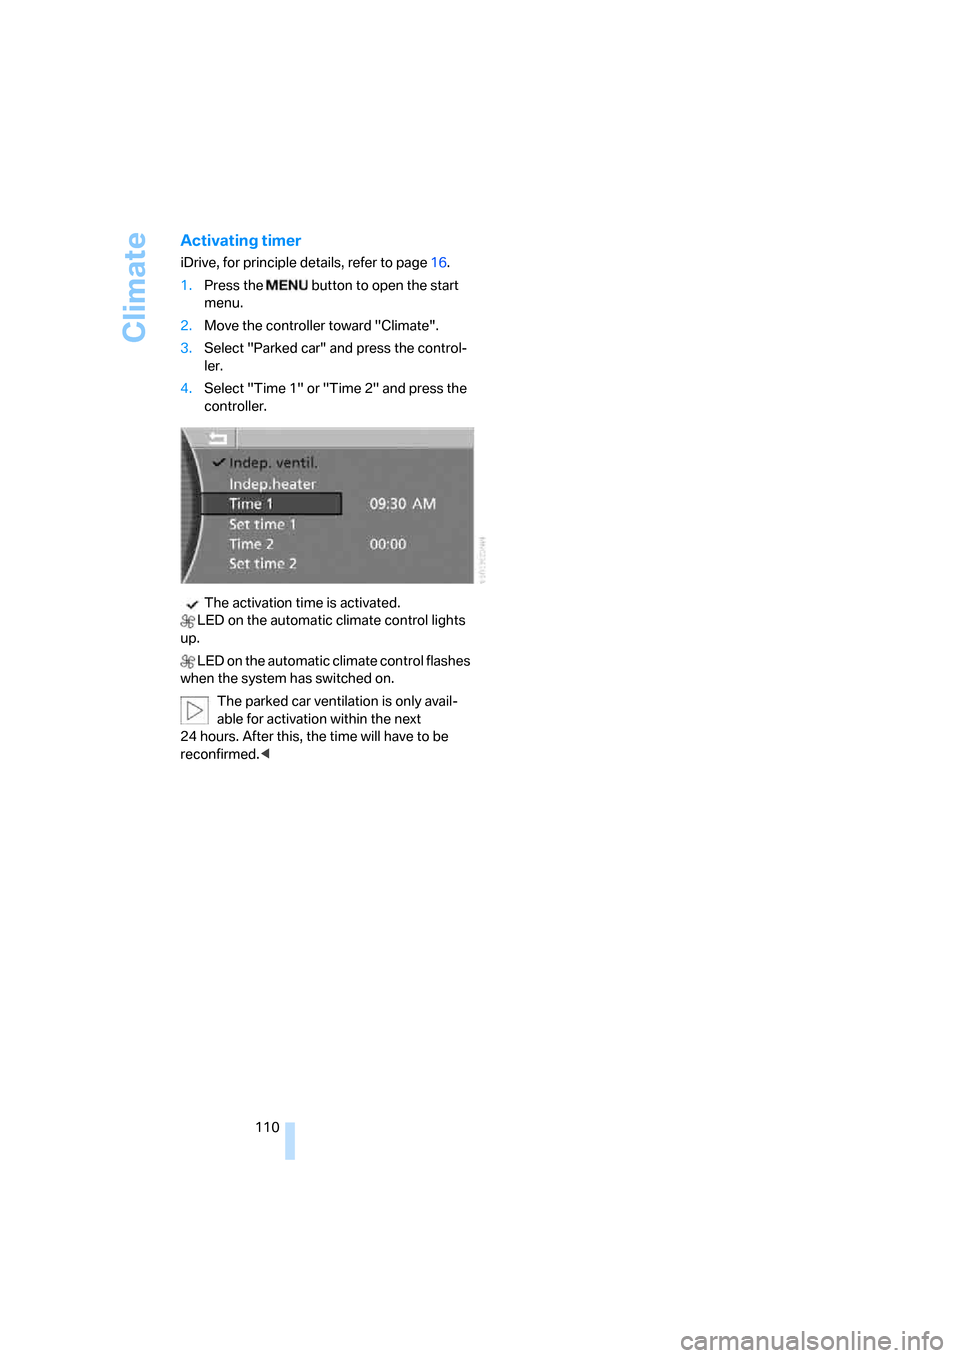
4.Select "Time 1" or "Time 2" and press the
controller.
The activation time is activated.
LED on the automatic climate control lights
up.
LED on the automatic climate control flashes
when the system has switched on.
The parked car ventilation is only avail-
able for activation within the next
24 hours. After this, the time will have to be
reconfirmed.<
Page 118 of 247

Practical interior accessories
116 To extinguish a cigarette, tap off the ash and
gently press the tip into the funnel.
Emptying
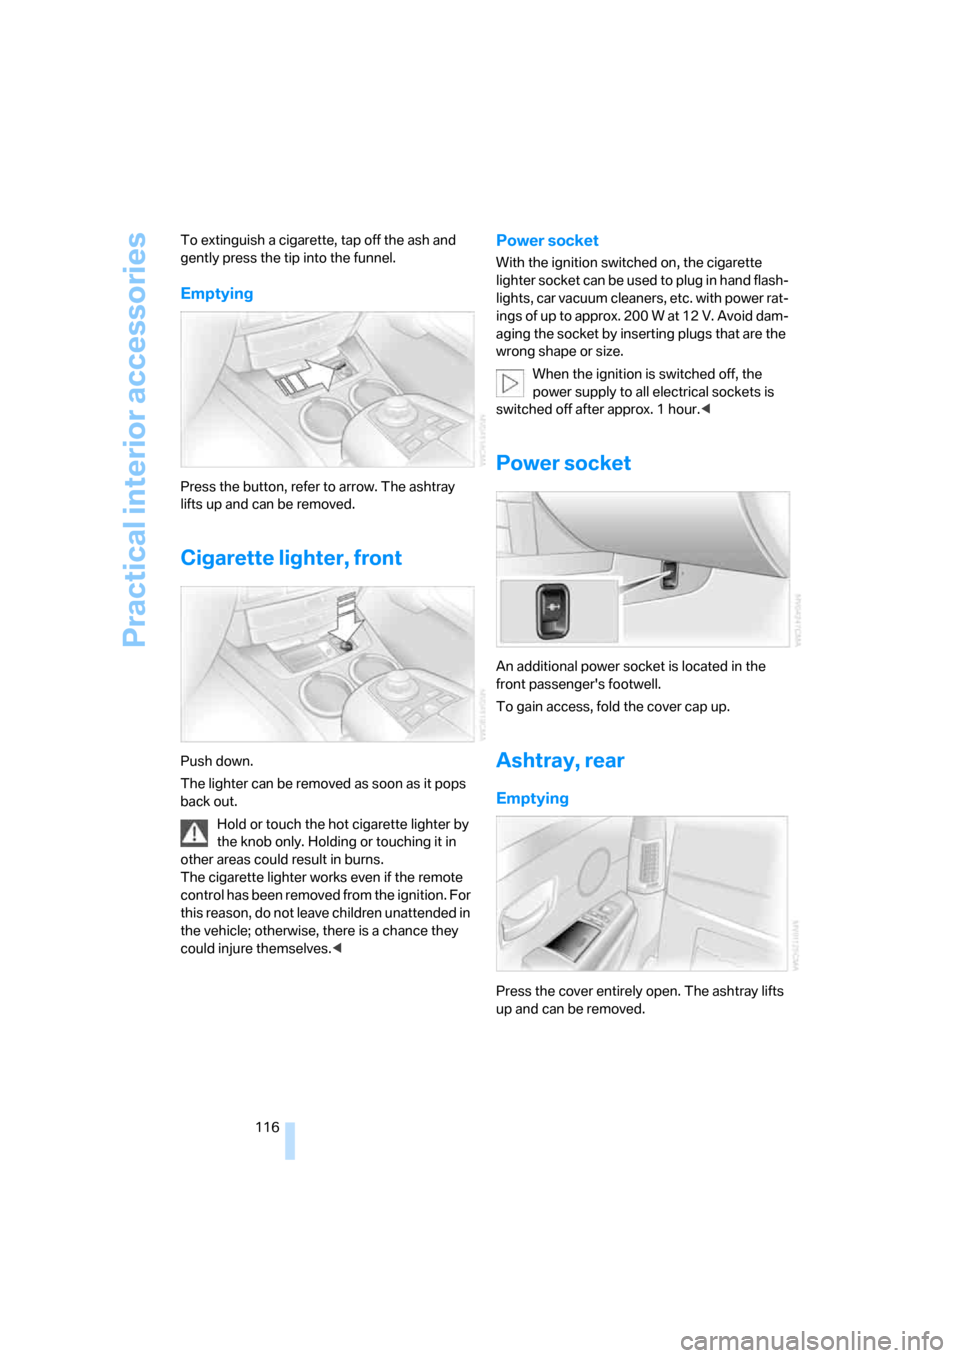
Press the button, refer to arrow. The ashtray
lifts up and can be removed.
Cigarette lighter, front
Push down.
The lighter can be removed as soon as it pops
back out.
Hold or touch the hot cigarette lighter by
the knob only. Holding or touching it in
other areas could result in burns.
The cigarette lighter works even if the remote
control has been removed from the ignition. For
this reason, do not leave children unattended in
the vehicle; otherwise, there is a chance they
could injure themselves.<
Power socket
With the ignition switched on, the cigarette
lighter socket can be used to plug in hand flash-
lights, car vacuum cleaners, etc. with power rat-
ings of up to approx. 200 W at 12 V. Avoid dam-
aging the socket by inserting plugs that are the
wrong shape or size.
When the ignition is switched off, the
power supply to all electrical sockets is
switched off after approx. 1 hour.<
Power socket
An additional power socket is located in the
front passenger's footwell.
To gain access, fold the cover cap up.
Ashtray, rear
Emptying
Press the cover entirely open. The ashtray lifts
up and can be removed.
Page 119 of 247

Controls
117Reference
At a glance
Driving tips
Communications
Navigation
Entertainment
Mobility
Cigarette lighter, rear
Refer to Cigarette lighter, front.
Rear refrigerator*
The rear refrigerator is located behind the rear
seats' center armrest.
Switching on/off
1.Switch on the ignition
2.Press button.
The LED in the button lights up.
3.Press the button again to switch off the rear
refrigerator.
When the ignition is switched off, this also
switches off the rear refrigerator.
When a low voltage is reached, it is automati-
cally switched off to protect the vehicle battery.
The LED in the button flashes.
High temperatures in the luggage com-
partment can affect the temperature in
the rear refrigerator.<
With rear air conditioner
When switched on, the rear refrigerator is con-
trolled by the rear air conditioner.
To adjust the cooling capacity and increase the
airflow volume, refer to page108.
Without rear air conditioner
When switched on, the rear refrigerator is con-
trolled by the automatic air conditioning sys-
tem.
To adjust the temperature and increase the air-
flow volume, refer to pages105, 106.
Releasing
Pull on the opener and fold the cooler forward.
Switching on/off via iDrive*
iDrive, for principle details, refer to page16.
1.Press the button to open the start
menu.
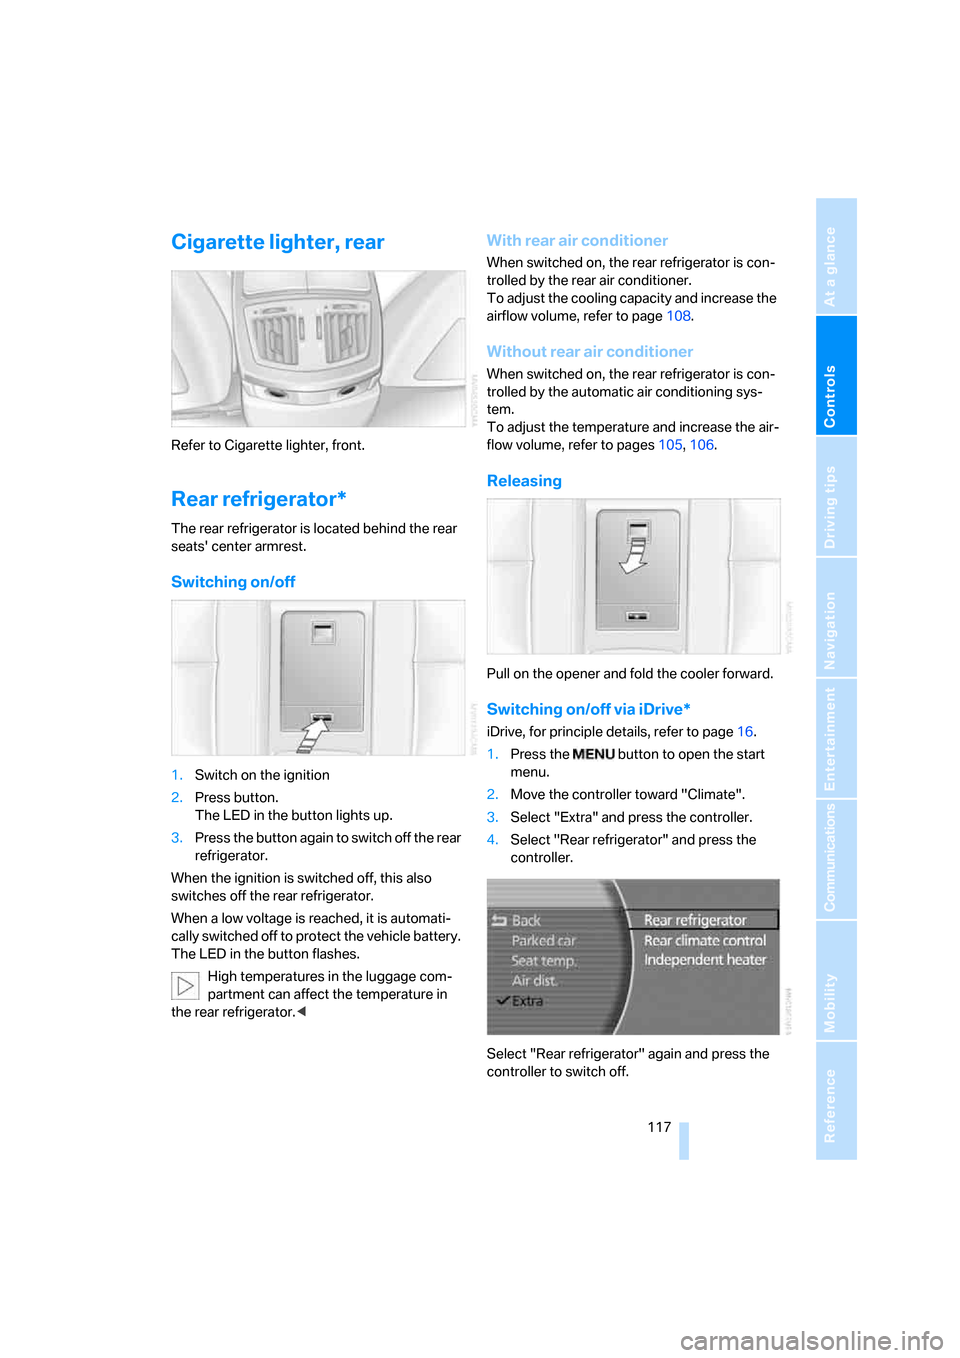
2.Move the controller toward "Climate".
3.Select "Extra" and press the controller.
4.Select "Rear refrigerator" and press the
controller.
Select "Rear refrigerator" again and press the
controller to switch off.
Page 180 of 247

Telephone overview
178
Touch tone dialing
The touch tone code is required for access to
network services or for controlling devices, e.g.
remote checking of an answering machine.
This function is available when a connection
has been established.
Emergency call with
emergency call button*
When the vehicle is equipped with the full
mobile phone preparation package, you can
trigger an emergency call via the emergency
call button on the headliner.
Conditions for an emergency call:
>BMW Assist is activated.
>Radio ready state is activated.
>The wireless communications network is
available.
>The emergency call system is operable.
Initiating an emergency call
1.To open the protective cover:
Briefly press the protective cover.
2.Press the emergency call button for at least
2seconds.The LED in the button lights up. As soon as the
voice connection to the BMW Assist response
center has been established, the LED flashes.
An additional speaker is integrated in the front
passenger footwell for emergency calls.
If conditions allow, remain in the vehicle
until the connection has been estab-
lished. You will then be able to provide a
detailed description of the situation.<
On vehicles with BMW Assist enabled, a tele-
phone connection to the BMW Assist response
center is established. If the current vehicle posi-
tion can be determined, this is conveyed to the
response center.
A navigation CD/DVD must be inserted
and the GPS signal must be received.
Otherwise, the current vehicle position cannot
be transferred.
If the navigation system is inoperative, the cur-
rent position of the vehicle is not transmitted.<
Upon receipt of the data, a confirmation report
will appear on the Control Display. The BMW
Assist response center can initiate immediate
action for emergency assistance.
Under certain conditions, an emergency call is
initiated automatically immediately after a
severe accident. An automatic emergency call
is not affected by the emergency call button
being pressed.
For technical reasons, the emergency call
cannot be guaranteed under unfavorable
conditions.< 5Entering digits 1 - 9.
6Entering special characters.
7Entering the digit 0.
8Press briefly: entering special
characters.
Press and hold
*: pause for touch
tone dialing.
Page 183 of 247

181
Entertainment
Reference
At a glance
Controls
Driving tips Communications
Navigation
Mobility
4.Select "Phone" and press the controller.
5.Select "BLUETOOTH" and press the con-
troller.
>The LED next to "BLUETOOTH" lights up
in green:
The Bluetooth connection is activated.
>The LED next to "BLUETOOTH" does not
light up:
The Bluetooth connection is deactivated.
Snap-in adapter*
The snap-in adapter is inserted into the rear
inside of the center armrest.
Inserting
1.Press buttons to open cover of center arm-
rest.2.Press area around button, arrows1, and
take out the cover, arrow2.
3.Insert top of snap-in adapter, arrow3, and
press lower region forward, arrow4.
Removing
Press area around button, arrows1, and take
out snap-in adapter, arrow2.
Page 206 of 247

Under the hood
204 Always observe all applicable environ-
mental laws and regulations when dis-
posing of used coolant additives.<
Checking coolant level
1.The engine must be at ambient tempera-
ture.
2.Turn the cap of the expansion tank counter-
clockwise to allow any accumulated pres-
sure to escape, then continue turning to
open.
3.The coolant level is correct when the cool-
ant extends to between the MIN and MAX
marks on the filler neck, refer to the diagram
adjacent to the filler neck.
4.If the coolant is low, slowly add coolant up to
the specified level – do not overfill.
5.Twist closed the cap and tighten firmly.
6.Have the reason for the coolant loss elimi-
nated as soon as possible.
Brake system
Malfunction
Brake fluid
The warning lamp lights up and a mes-
sage is shown on the Info Display: stop
immediately.
The brake fluid in the reservoir has fallen to
below the minimum level. At the same time, a
considerably longer brake pedal travel may be
noticeable. Have the system checked immedi-
ately.Warning lamp on Canadian models
During continued driving increased brake
pedal travel may be necessary, and con-
siderably longer braking distances may result.
Please adapt your driving style accordingly.<
Brake pads
For messages and indicator lamps on the Info
Display, refer to page80.
For your own safety: use only brake pads
that BMW has approved for your particu-
lar vehicle model. As BMW cannot assess the
suitability of other brake pads for use on your
vehicle, we are unable to assume continued
responsibility for the vehicle's operating safety
if non-approved pads are installed.<
Page 208 of 247

Maintenance
206
Socket for OBD Onboard
Diagnostics
Components which are decisive for the
exhaust-gas composition can be checked via
the OBD socket with a device.
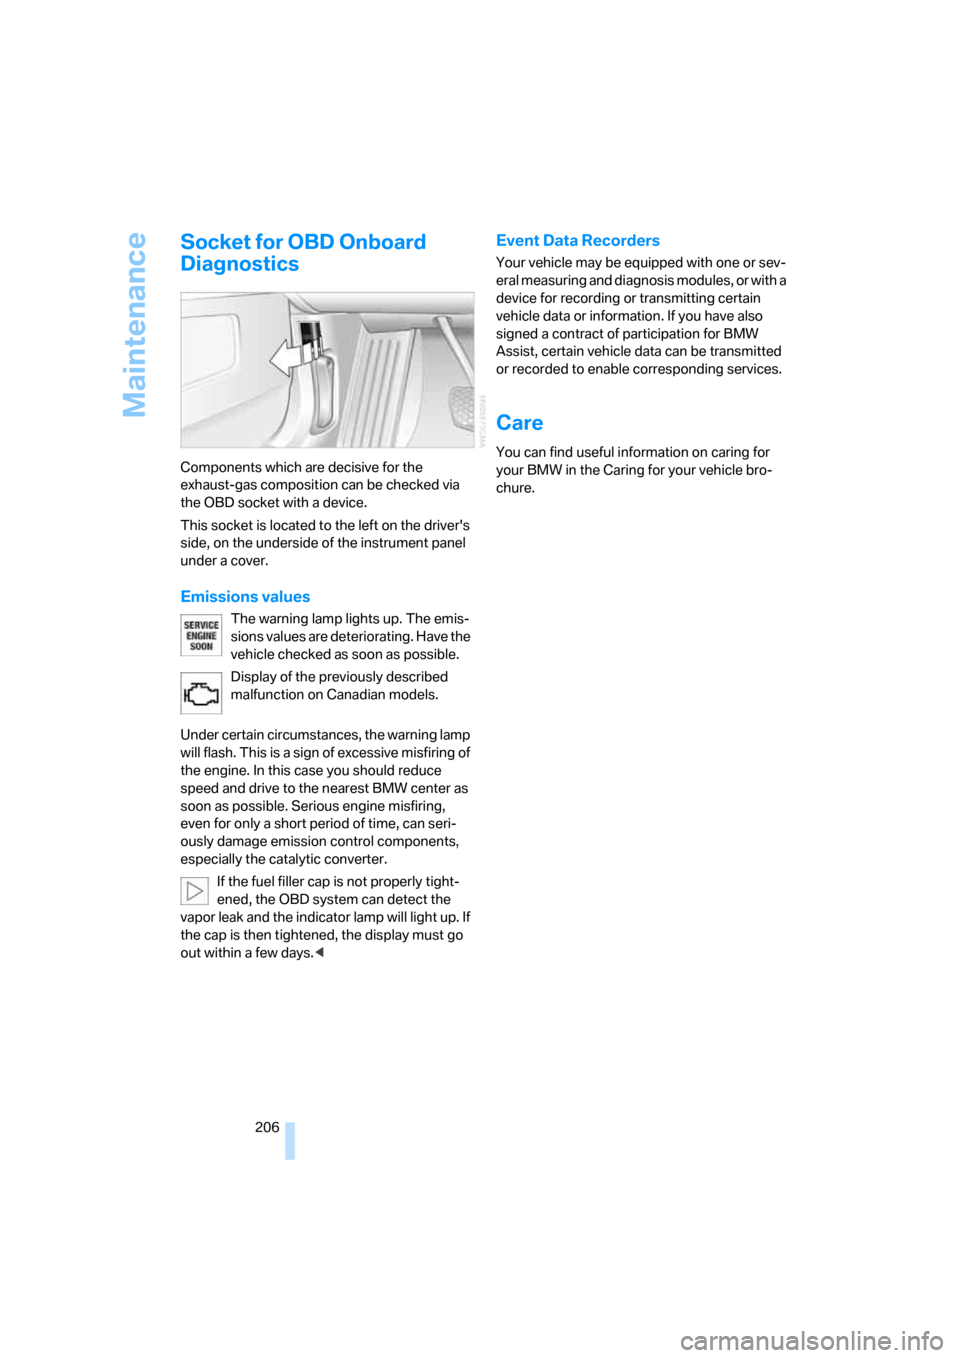
This socket is located to the left on the driver's
side, on the underside of the instrument panel
under a cover.
Emissions values
The warning lamp lights up. The emis-
sions values are deteriorating. Have the
vehicle checked as soon as possible.
Display of the previously described
malfunction on Canadian models.
Under certain circumstances, the warning lamp
will flash. This is a sign of excessive misfiring of
the engine. In this case you should reduce
speed and drive to the nearest BMW center as
soon as possible. Serious engine misfiring,
even for only a short period of time, can seri-
ously damage emission control components,
especially the catalytic converter.
If the fuel filler cap is not properly tight-
ened, the OBD system can detect the
vapor leak and the indicator lamp will light up. If
the cap is then tightened, the display must go
out within a few days.<
Event Data Recorders
Your vehicle may be equipped with one or sev-
eral measuring and diagnosis modules, or with a
device for recording or transmitting certain
vehicle data or information. If you have also
signed a contract of participation for BMW
Assist, certain vehicle data can be transmitted
or recorded to enable corresponding services.
Care
You can find useful information on caring for
your BMW in the Caring for your vehicle bro-
chure.
Page 209 of 247

Mobility
207Reference
At a glance
Controls
Driving tips
Communications
Navigation
Entertainment
Replacing components
Onboard tool kit
The onboard toolkit is located in the luggage
compartment lid.
Loosen the wingnut to open.
The adapter for the spare key can be stored
beneath the open-ended wrenches.
Windshield wiper blades
To replace the blades, start by folding the wip-
ers out and away from the windshield, refer to
page66.
Lamps and bulbs
Lamps and lights contribute significantly to
road safety. Therefore, comply fully with the fol-
lowing instructions during bulb replacement.
BMW recommends that you entrust corre-
sponding procedures to your BMW center if
you are unfamiliar with them or they are not
described here.
Never touch the glass of new bulbs with
your bare fingers, as even minute
amounts of contamination will burn into the
bulb's surface and reduce its service life. Use a
clean cloth, napkin, etc., or hold the bulb by its
metal socket.<
You can obtain a selection of replacement bulbs
at your BMW center.
When working on the lighting system, you
should always switch off the lights affected to prevent short circuits.
To avoid possible injury or equipment damage
when replacing bulbs, follow any instructions
provided by the bulb manufacturer.<
When maintaining the headlamps, please follow
the instructions in the separate Caring for your
vehicle brochure.
Light-emitting diodes LEDs
Light-emitting diodes installed behind translu-
cent lenses serve as the light source for many of
the controls and displays in your vehicle. These
light-emitting diodes, which operate using a
concept similar to that applied in conventional
lasers, are officially designated as Class 1 light-
emitting diodes.
Do not remove the covers, and never
stare into the unfiltered light for several
hours, as irritation of the retina could result.<
Xenon lamp*
The service life of these bulbs is very long and
the probability of a failure is very low, provided
that they are not switched on and off an unusual
number of times. In the unlikely event that one
of these lamps should fail, you can respond by
switching on your fog lamps and proceeding
carefully, where allowed by law.
Only have work on the xenon lighting sys-
tem including bulb changes carried out by
a BMW center or a repair shop that works in
accordance with BMW guidelines and uses
appropriately trained personnel. Due to the high
voltage involved, there is a danger to life and
limb when work is carried out improperly.<
For checking and adjusting headlamp
aim, please contact your BMW center.<
Turn signals, front
The illustration shows the left side of the engine
compartment.
Two bulbs, 21 Watt: P 21 W or PY 21 W
*