2006 BMW 745Li reset
[x] Cancel search: resetPage 93 of 247
Controls
91Reference
At a glance
Driving tips
Communications
Navigation
Entertainment
Mobility
Indication of a flat tire
The warning lamp lights up red and a
message is shown on the Info Display.
In addition, a signal sounds. A flat tire or
a major air loss has occurred.
1.Reduce speed and stop the vehicle care-
fully. Avoid sudden braking and steering
maneuvers.
2.Identify the damaged tire.
If identification is not possible, con-
tact your BMW center.<
3.Replace the damaged tire, refer to Chang-
ing wheels on page209.
Run-flat tires*
1.Cautiously reduce the vehicle speed to
below 50 mph/80 km/h. Avoid sudden brak-
ing and steering maneuvers. Do not exceed
a vehicle speed of 50 mph/80 km/h.
If the vehicle is not equipped with run-
flat tires, refer to page199, do not
continue to drive. Continued driving after a
flat tire can result in serious accidents.<
2.Check the air pressure in all four tires at the
next opportunity.
If the tire inflation pressure in all four
tires is correct, the Flat Tire Monitor
may not have been initialized. The system
must then be initialized.<
3.In the event of a total loss of inflation pres-
sure, 0 psi/kPa, or obvious tire damage, you
can estimate the possible distance for con-
tinued driving on the basis of the following
guide values:
>With low load:
1 to 2 persons without luggage:
approx. 155 miles/250 km.
>With medium load:
2 persons, luggage compartment full, or
4 persons without luggage:
approx. 95 miles/150 km.
>With full load:
More than 4 persons, luggage compart-
ment full:
approx. 30 miles/50 km.Drive reservedly and do not exceed a
speed of 50 mph/80 km/h. In the event of
pressure loss, vehicle handling changes. This
includes reduced tracking stability in braking,
extended braking distances, and altered natural
steering characteristics.
If unusual vibrations or loud noises occur while
the vehicle is being driven, this can indicate final
failure of the damaged tire. Reduce speed and
stop at a suitable location as soon as possible;
otherwise, pieces of the tire could come off and
cause an accident. Do not continue driving,
contact your BMW center.<
Malfunction
The warning lamp lights up yellow and
a message is shown on the Info Display.
The Flat Tire Monitor has failed. Have
the system checked as soon as possible.
TPM Tire Pressure Monitor*
The concept
TPM checks the tire inflation pressure in the
four mounted tires. The system indicates if the
tire inflation pressure has dropped considerably
in one or several tires.
Functional requirement
In order to assure the reliable reporting of a flat
tire, the system must have been reset with the
correct tire inflation pressure.
Always use wheels with TPM electronics; oth-
erwise, fault-free operation of the system is not
ensured.
Reset the system again after each correc-
tion of the tire inflation pressure and after
every tire or wheel change.<
System limits
TPM cannot warn you of sudden serious
tire damage caused by external influ-
ences.<
The system does not function properly if it has
not been reset, e.g. a flat tire is reported despite
correct tire inflation pressures.
Page 94 of 247
Technology for comfort, convenience and safety
92 The system is inactive and cannot display a flat
tire if a wheel has been mounted without TPM
electronics or if TPM experiences temporary
interference from other systems or devices that
use the same radio frequency.
Status display on Control Display
The tire and system status is indicated by the
color of the tires.
TPM takes the fact that the tire pressure
changes during driving into account. A correc-
tion is only required if the color of the TPM dis-
play indicates that it is necessary.
Green
The tire pressure matches the learned set state.
"Status: TPM active" is displayed on the Con-
trol Display.
A wheel is yellow
There is a flat tire or a major drop in inflation
pressure in the indicated tire. A message
appears on the Control Display.
All wheels are yellow
There is a flat tire or a major drop in inflation
pressure in several tires. A message appears on
the Control Display.
Gray
The system cannot detect a flat tire.
Reasons for this can include:
>TPM is being reset
>Temporary interference due to systems or
devices that use the same radio frequency
>Malfunction
Resetting system
Reset the system again after each correc-
tion of the tire inflation pressure and after
every tire or wheel change.<
Resetting finishes during driving and which can
be interrupted at any time. When driving
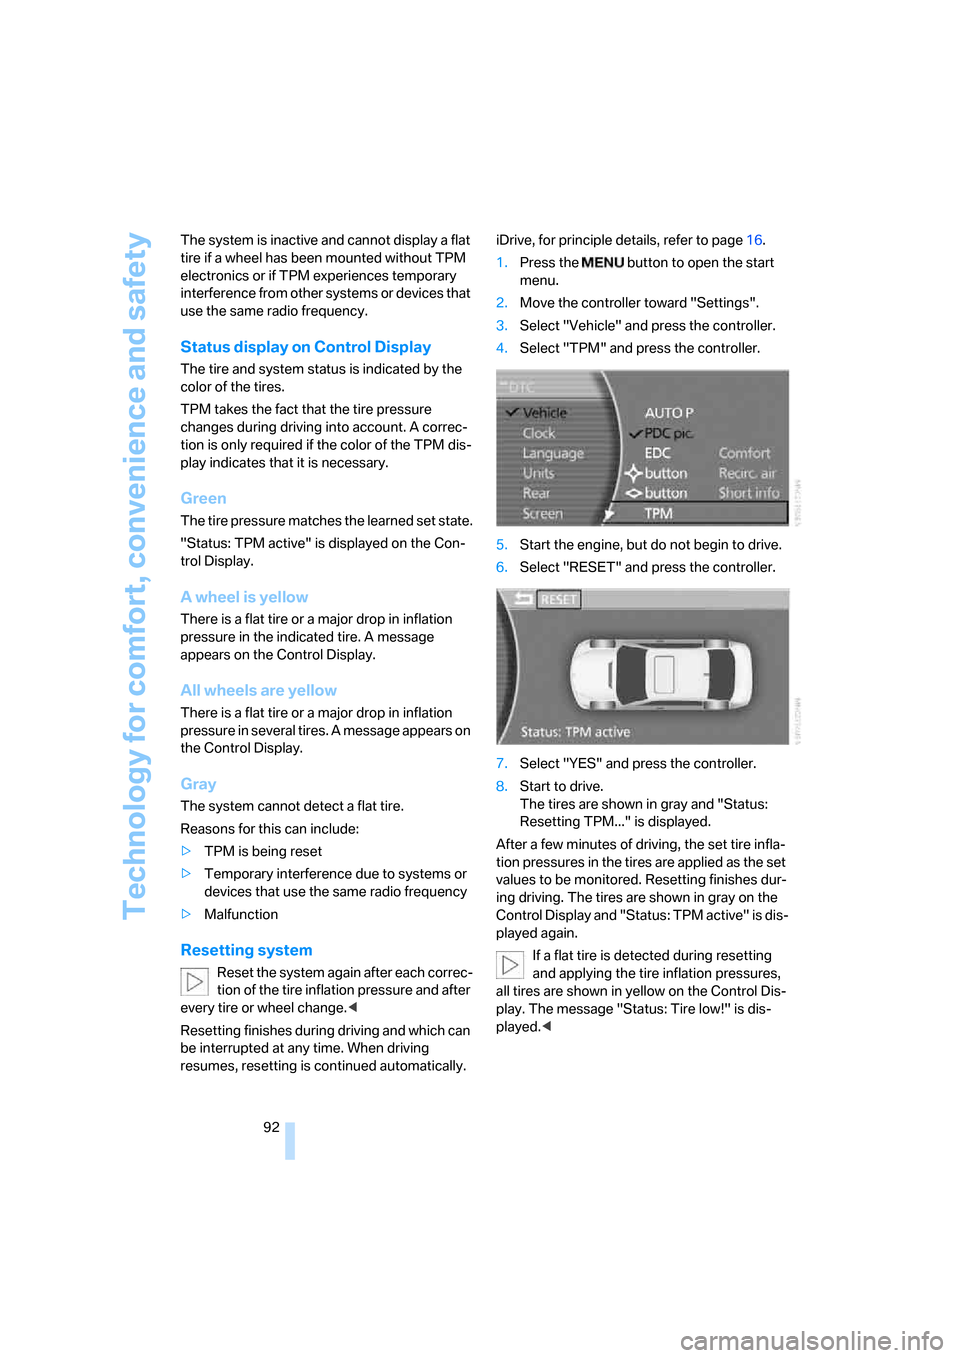
resumes, resetting is continued automatically.iDrive, for principle details, refer to page16.
1.Press the button to open the start
menu.
2.Move the controller toward "Settings".
3.Select "Vehicle" and press the controller.
4.Select "TPM" and press the controller.
5.Start the engine, but do not begin to drive.
6.Select "RESET" and press the controller.
7.Select "YES" and press the controller.
8.Start to drive.
The tires are shown in gray and "Status:
Resetting TPM..." is displayed.
After a few minutes of driving, the set tire infla-
tion pressures in the tires are applied as the set
values to be monitored. Resetting finishes dur-
ing driving. The tires are shown in gray on the
Control Display and "Status: TPM active" is dis-
played again.
If a flat tire is detected during resetting
and applying the tire inflation pressures,
all tires are shown in yellow on the Control Dis-
play. The message "Status: Tire low!" is dis-
played.<
Page 95 of 247
Controls
93Reference
At a glance
Driving tips
Communications
Navigation
Entertainment
Mobility
Low tire pressure message
The warning lamp lights up yellow. A
message appears on the Control Dis-
play. In addition, a signal sounds. A flat
tire or a major air loss has occurred.
1.Reduce speed and stop the vehicle care-
fully. Avoid sudden braking and steering
maneuvers.
2.Check whether your vehicle is equipped
with standard tires or run-flat tires.
You will recognize run-flat tires by a
circular symbol containing the letters
RSC on the side of the tire, refer to
page199.<
Standard tires
1.If all four wheels are shown in yellow, iden-
tify the damaged tire on the vehicle.
2.Replace the damaged wheel or wheels,
refer to Changing wheels on page209.
The spare wheel is equipped with the neces-
sary TPM electronics and when mounted, will
also be monitored once the system has been
reset.
Have the tire replaced by a BMW center or a
workshop that is familiar with handling TPM and
works according to BMW repair procedures
with correspondingly trained personnel.
Run-flat tires*
1.Cautiously reduce speed to below 50 mph/
80 km/h. Avoid sudden braking and steer-
ing maneuvers. Do not exceed a speed of
50 mph/80 km/h.
If the vehicle is not equipped with run-
flat tires, refer to page199, do not
continue to drive. Continued driving after a
flat tire can result in serious accidents.<
2.In the event of complete tire pressure loss,
0 psi/0 kPa, you can estimate the possible
distance for continued driving on the basis
of the following guide values:
>With a light load:
1 to 2 persons without luggage:
approx. 155 miles/250 km>With a medium load:
2 persons, luggage compartment full, or
4 persons without luggage:
approx. 95 miles/150 km
>With a full load:
More than 4 persons, luggage compart-
ment full:
approx. 30 miles/50 km
Drive reservedly and do not exceed a
speed of 50 mph/80 km/h. In the event of
pressure loss, vehicle handling changes. This
includes reduced tracking stability in braking,
extended braking distance and altered natural
steering characteristics.
If unusual vibrations occur while the vehicle is
being driven, this can indicate final failure of the
damaged tire. Reduce speed and stop as soon
as possible; otherwise, pieces of the tire could
come loose and cause an accident. Do not con-
tinue driving, but instead contact your BMW
center.<
Malfunction
The yellow warning light flashes and
then lights up continuously. The tires
are shown in gray on the Control Dis-
play and a message is displayed. No flat tire can
be detected. Have system checked.
A message like this is displayed in the following
situations:
>When a malfunction is occurring.
Have the system checked.
>If a wheel without TPM electronics is
mounted.
>If TPM is temporarily interfered with by
other systems or devices which use the
same radio frequency.
Page 156 of 247
On/off and settings
154 2.Turn the controller until you reach the
desired setting.
3.Press the controller to save the setting.
Balance and fader
1.Select "Balance" or "Fader" and press the
controller.
2.Turn the controller until you reach the
desired setting.
3.Press the controller to save the setting.
Speed-dependent volume control
The speed-dependent volume control auto-
matically increases the volume as the speed
increases. You can set various stages for the
volume increase.
1.Select "Speed Vol." and press the control-
ler.
2.Turn the controller until you reach the
desired setting.
3.Press the controller to save the setting.
LOGIC7*
sets the spatial sound effect between the val-
ues 0 and 10. The best possible spatial sound
lies at the values 5 and 6. At 0, the spatial sound
effect is switched off. This setting is suitable for
radio plays, for example.1.Select "LOGIC7" and press the controller.
2.Turn the controller until you reach the
desired setting.
3.Press the controller to save the setting.
LOGIC7 and the LOGIC7 logo are regis-
tered trade marks of Lexicon, Inc., a com-
pany of the Harman International Group.<
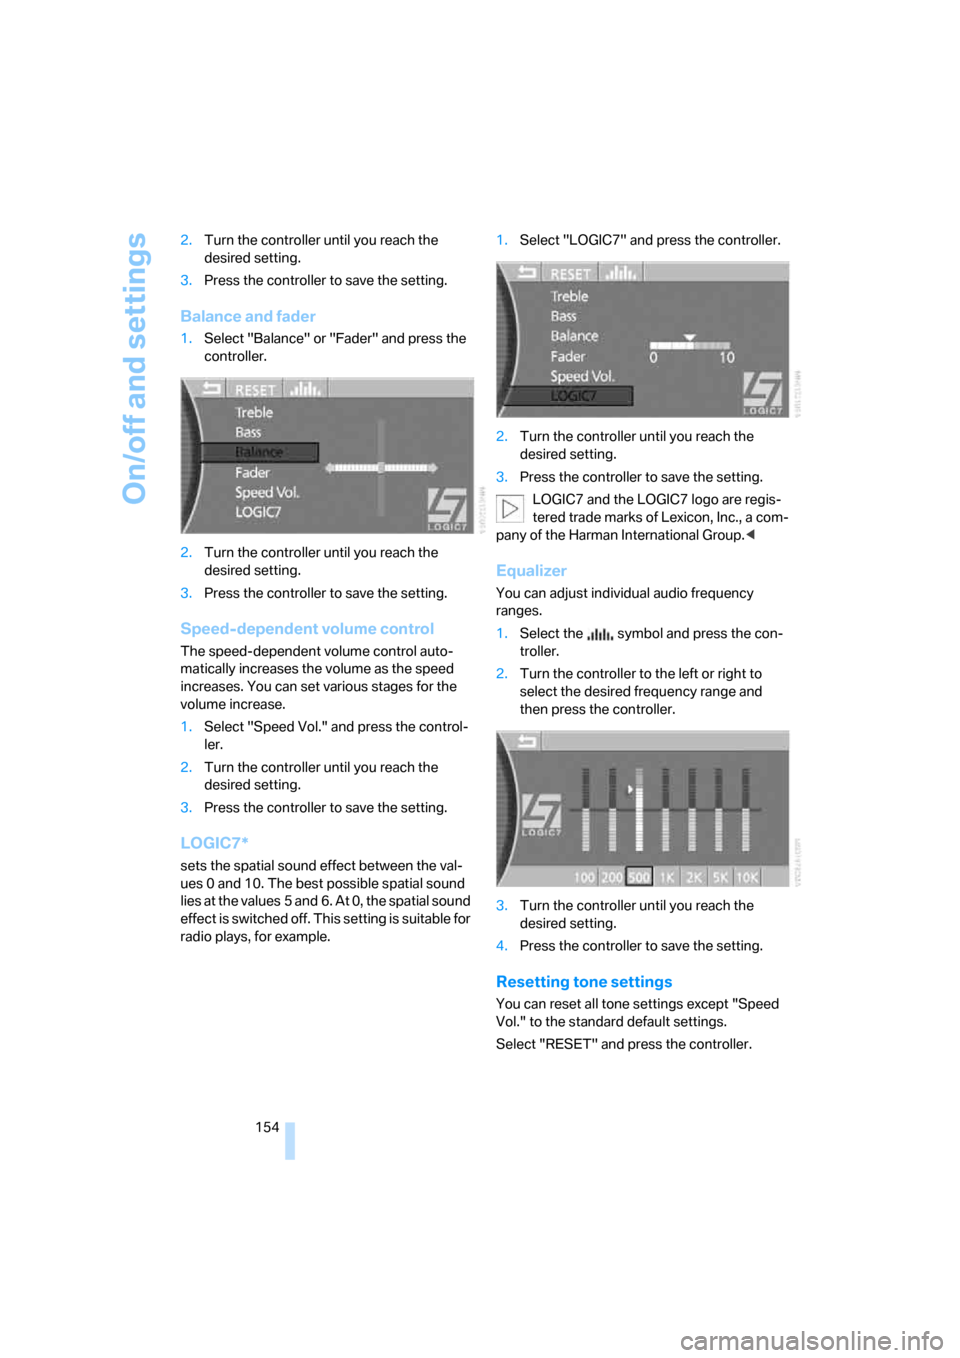
Equalizer
You can adjust individual audio frequency
ranges.
1.Select the symbol and press the con-
troller.
2.Turn the controller to the left or right to
select the desired frequency range and
then press the controller.
3.Turn the controller until you reach the
desired setting.
4.Press the controller to save the setting.
Resetting tone settings
You can reset all tone settings except "Speed
Vol." to the standard default settings.
Select "RESET" and press the controller.
Page 157 of 247
Navigation
Entertainment
Driving tips
155Reference
At a glance
Controls
Communications
Mobility
Radio
Your radio is equipped to receive the FM and
AM wavebands.
Listening to radio
Switch on audio or video sources, refer to
page153.
iDrive, for principle details, refer to page16.
1.Press the button to open the start
menu.
2.Move the controller toward "Entertain-
ment".
3.Select "FM" or "AM" and press the control-
ler.
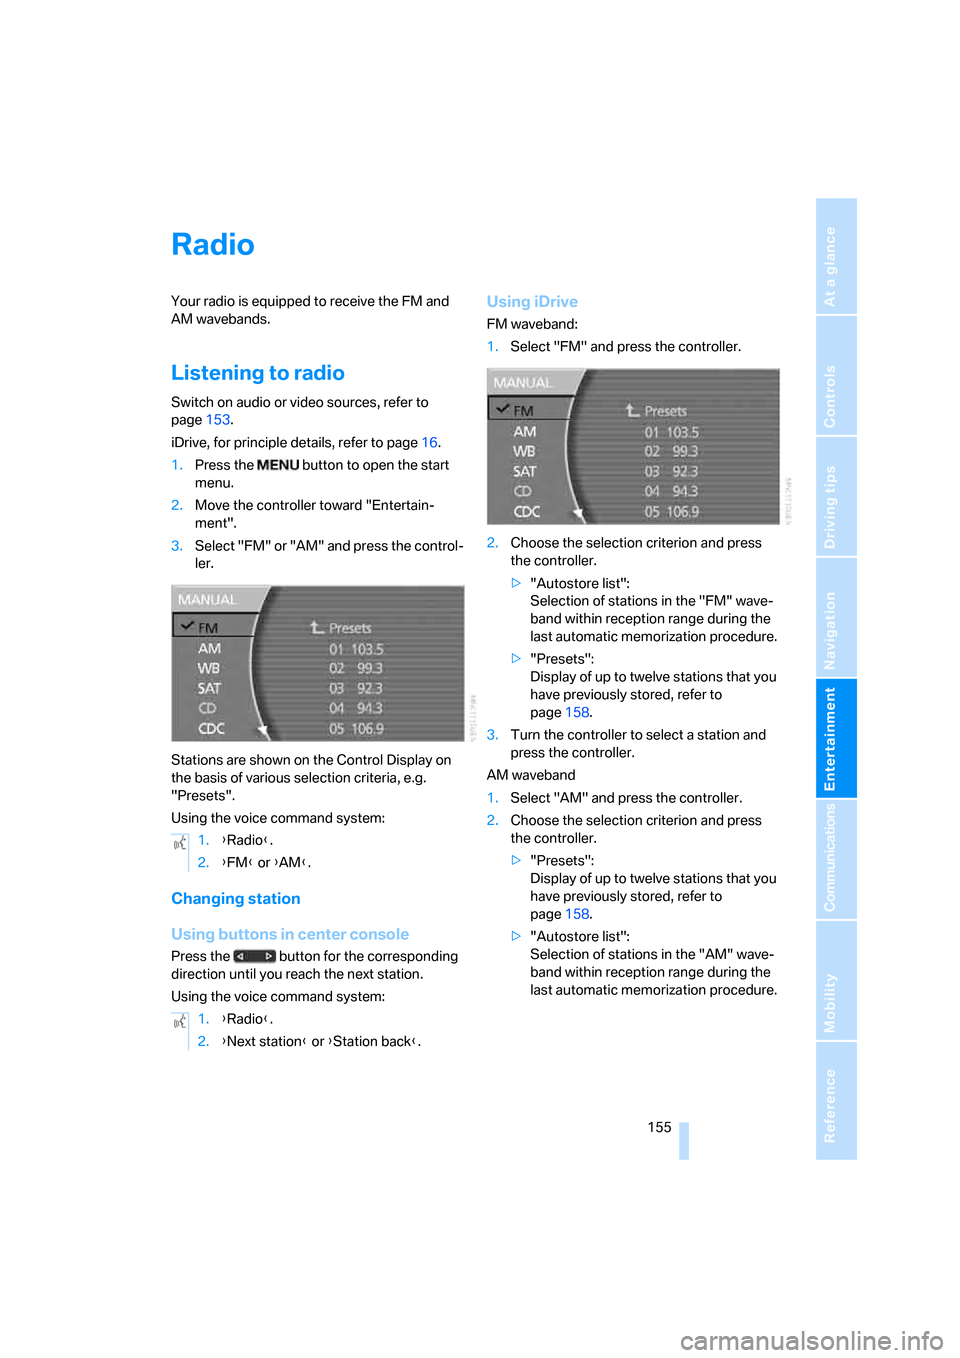
Stations are shown on the Control Display on
the basis of various selection criteria, e.g.
"Presets".
Using the voice command system:
Changing station
Using buttons in center console
Press the button for the corresponding
direction until you reach the next station.
Using the voice command system:
Using iDrive
FM waveband:
1.Select "FM" and press the controller.
2.Choose the selection criterion and press
the controller.
>"Autostore list":
Selection of stations in the "FM" wave-
band within reception range during the
last automatic memorization procedure.
>"Presets":
Display of up to twelve stations that you
have previously stored, refer to
page158.
3.Turn the controller to select a station and
press the controller.
AM waveband
1.Select "AM" and press the controller.
2.Choose the selection criterion and press
the controller.
>"Presets":
Display of up to twelve stations that you
have previously stored, refer to
page158.
>"Autostore list":
Selection of stations in the "AM" wave-
band within reception range during the
last automatic memorization procedure. 1.{Radio}.
2.{FM} or {AM}.
1.{Radio}.
2.{Next station} or {Station back}.
Page 162 of 247
Radio
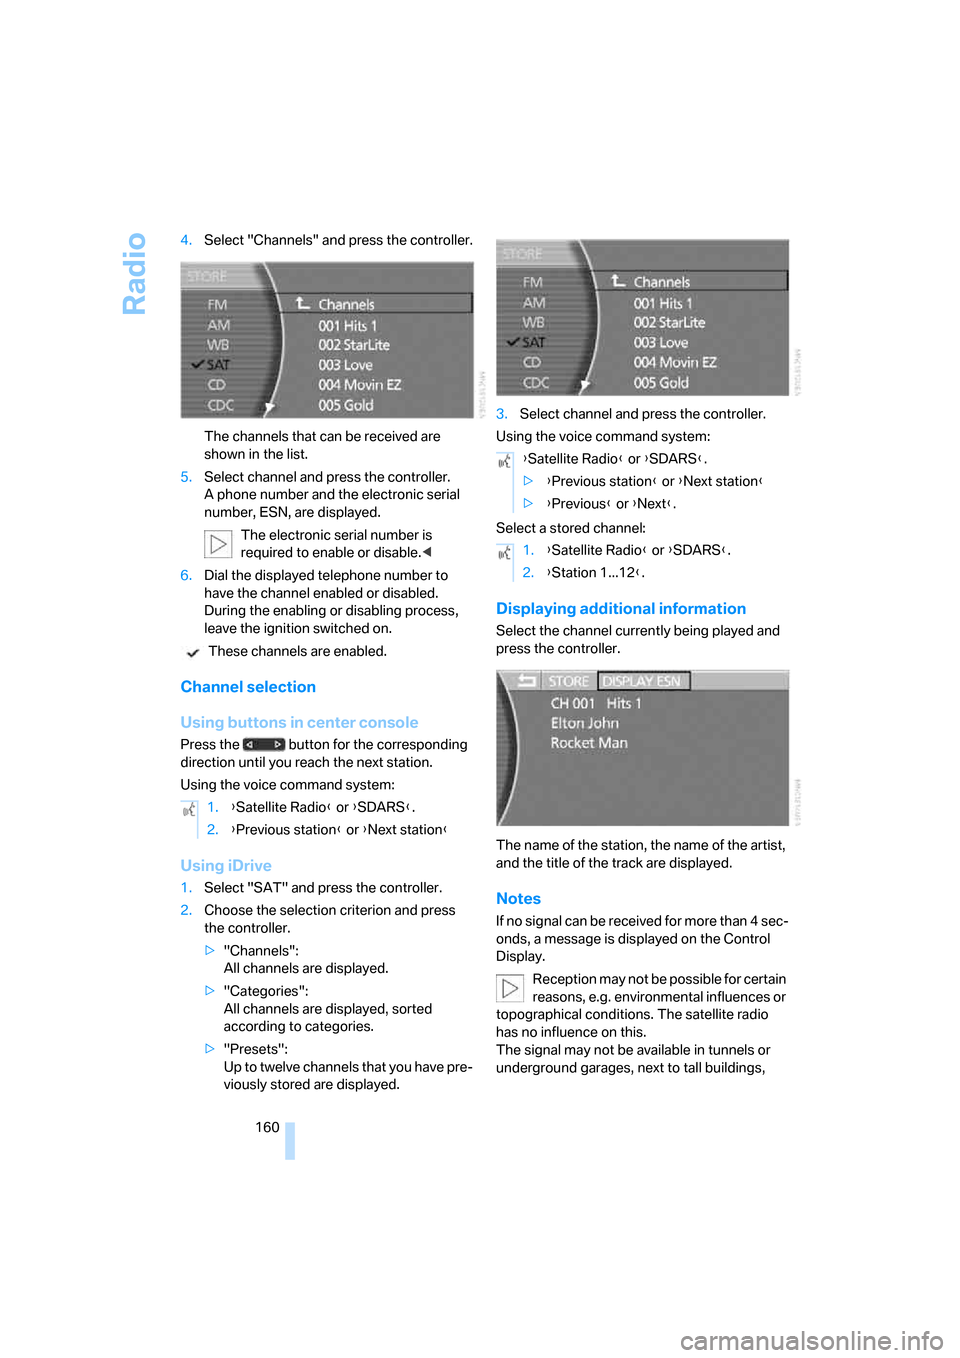
160 4.Select "Channels" and press the controller.
The channels that can be received are
shown in the list.
5.Select channel and press the controller.
A phone number and the electronic serial
number, ESN, are displayed.
The electronic serial number is
required to enable or disable.<
6.Dial the displayed telephone number to
have the channel enabled or disabled.
During the enabling or disabling process,
leave the ignition switched on.
These channels are enabled.
Channel selection
Using buttons in center console
Press the button for the corresponding
direction until you reach the next station.
Using the voice command system:
Using iDrive
1.Select "SAT" and press the controller.
2.Choose the selection criterion and press
the controller.
>"Channels":
All channels are displayed.
>"Categories":
All channels are displayed, sorted
according to categories.
>"Presets":
Up to twelve channels that you have pre-
viously stored are displayed.3.Select channel and press the controller.
Using the voice command system:
Select a stored channel:
Displaying additional information
Select the channel currently being played and
press the controller.
The name of the station, the name of the artist,
and the title of the track are displayed.
Notes
If no signal can be received for more than 4 sec-
onds, a message is displayed on the Control
Display.
Reception may not be possible for certain
reasons, e.g. environmental influences or
topographical conditions. The satellite radio
has no influence on this.
The signal may not be available in tunnels or
underground garages, next to tall buildings, 1.{Satellite Radio} or {SDARS}.
2.{Previous station} or {Next station}
{Satellite Radio} or {SDARS}.
>{Previous station} or {Next station}
>{Previous} or {Next}.
1.{Satellite Radio} or {SDARS}.
2.{Station 1...12}.
Page 181 of 247

179
Entertainment
Reference
At a glance
Controls
Driving tips Communications
Navigation
Mobility
Getting started
Inserting mobile phone
If you insert or remove the mobile phone during
a call, the call may be interrupted depending on
the mobile phone model.
1.Remove the protective cap from the mobile
phone's antenna connector if necessary, so
that the mobile phone can engage in the
snap-in adapter.
2.Push the mobile phone downward toward
the electrical connections, arrow1, and
press forward, arrow2, until it engages.
The battery is charged starting from radio ready
state of the vehicle, refer to charge indicator on
mobile phone.
Removing mobile phone
To remove mobile phone, depending on model:
>Press the button.
>Push the button upward.
Logging on mobile phone in
vehicle
To log your mobile phone onto the vehicle, you
need a special Bluetooth passkey. This is
included in the information kit.
The following prerequisites must be met:
>The ignition is switched on.
>The mobile phone is ready for operation.
>The Bluetooth connections in the vehicle
and the mobile phone are activated.
>Depending on the mobile phone model,
certain presets are required on the mobile
phone, e.g. detecting, connecting or cou-
pling Bluetooth unit, refer to the operating
instructions of your mobile phone.
Only log on the mobile phone with the
vehicle stopped; otherwise, the passen-
gers and other road user can be endangered
due to a lack of attentiveness on the part of the
driver.<
Preparation with iDrive
iDrive, for principle details, refer to page16.
1.Press the button to open the start
menu.
2.Move the controller toward "Settings".
3.Select "Phone" and press the controller.
4.Select "PAIRING" and press the controller.
The three LEDs in the status line flash, refer
to page20.
Page 196 of 247
Wheels and tires
194
Wheels and tires
Tire inflation pressure
Information for your safety
The condition of the tires and the maintenance
of the specified tire pressure are crucial not only
to the tire's service life, but also to driving com-
fort and most importantly, driving safety.
Checking pressure
Only check tire inflation pressure when the tires
are cold. This means after a maximum of
1,25 miles/2 km driving or when the vehicle has
been parked for at least 2 hours. When tires are
warm, the tire inflation pressure increases.
Check the tire inflation pressure regularly
and correct it as needed, including the
spare wheel: at least twice a month and before
starting long trips. If you fail to observe this pre-
caution, you may be driving on tires with incor-
rect tire pressures, a condition that can not only
compromise your vehicle's driving stability, but
also lead to tire damage and the risk of an acci-
dent. Do not drive with deflated, i.e. flat tires,
except run-flat tires. A flat tire will seriously
impair your vehicle's handling and braking
response. Attempts to drive on a flat tire can
lead to loss of control over the vehicle.<
After correcting the tire inflation pressure,
reinitialize the Flat Tire Monitor, refer to
page90, or reset the Tire Pressure Monitor,
refer to page92.<
Pressure specifications
The tables below provide all the correct inflation
pressures for the specified tire sizes at ambient
temperature.
The inflation pressures apply to the tire
sizes and tire brands respectively
approved and recommended by BMW; a list of
these is available from your BMW center.
>Tire sizes for your vehicle
>Load conditions
>Maximum allowable driving speed
Tire inflation pressures for driving
up to 100 mph/160 km/h
For normal driving up to 100 mph/160 km/h
adjust pressures to the respective tire inflation
pressures listed on the following pages in the
column for traveling speeds up to a max. of
100 mph/160 km/h to achieve optimum driving
comfort.
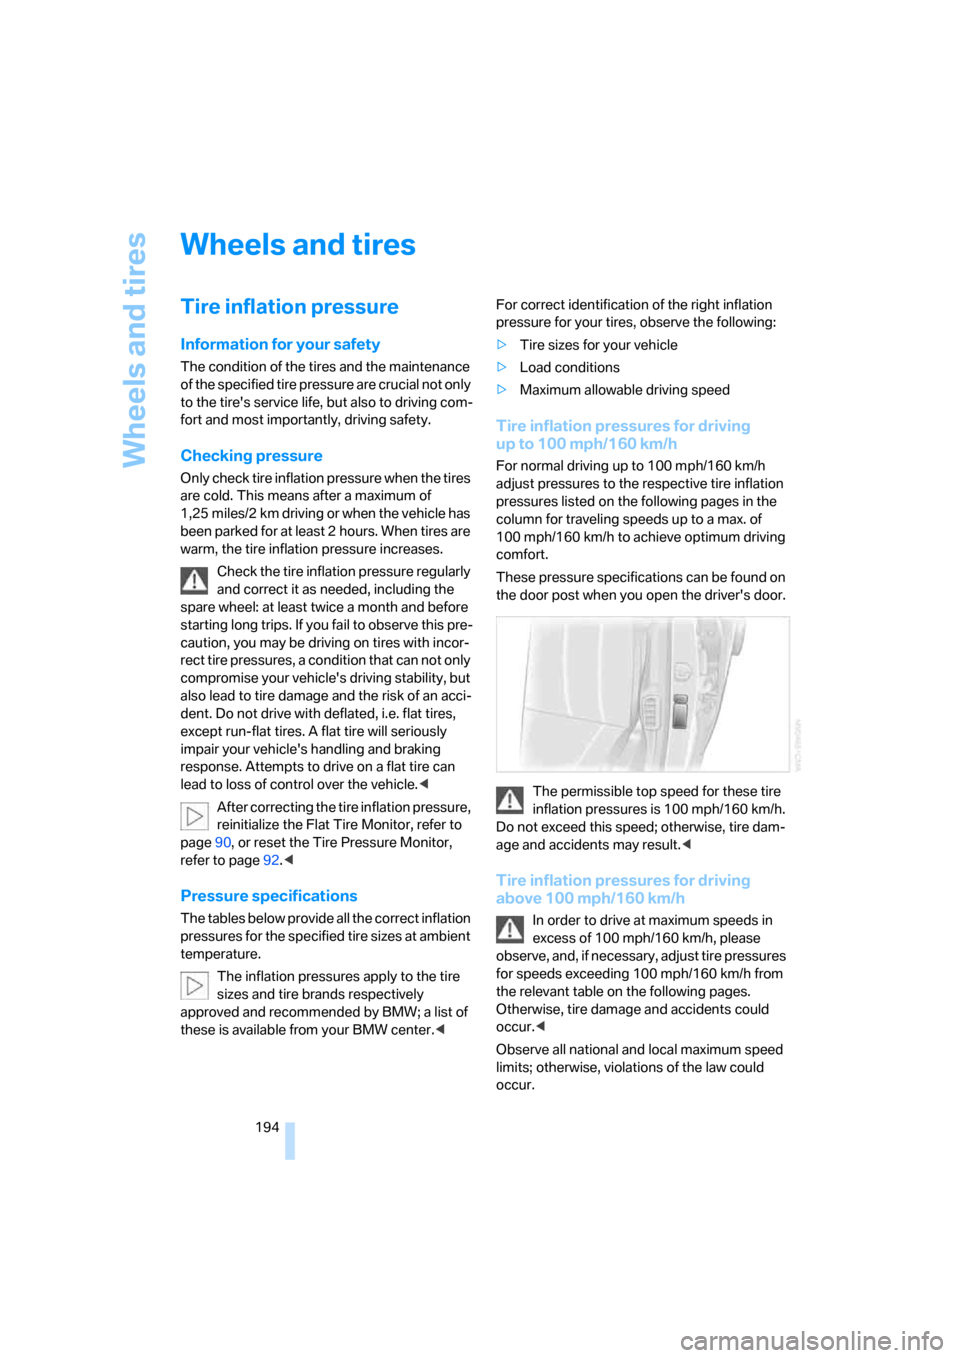
These pressure specifications can be found on
the door post when you open the driver's door.
The permissible top speed for these tire
inflation pressures is 100 mph/160 km/h.
Do not exceed this speed; otherwise, tire dam-
age and accidents may result.<
Tire inflation pressures for driving
above 100 mph/160 km/h
In order to drive at maximum speeds in
excess of 100 mph/160 km/h, please
observe, and, if necessary, adjust tire pressures
for speeds exceeding 100 mph/160 km/h from
the relevant table on the following pages.
Otherwise, tire damage and accidents could
occur.<
Observe all national and local maximum speed
limits; otherwise, violations of the law could
occur.