2006 BMW 745Li battery
[x] Cancel search: batteryPage 66 of 247

Driving
64
Manually releasing transmission lock
In case of a power failure, e.g. when the
battery is drained or disconnected, or in
the event of an electrical malfunction, the trans-
mission lock must be manually released; other-
wise, the drive wheels are locked and the vehi-
cle cannot be towed.<
When manually releasing the transmis-
sion lock, depress the brake pedal; other-
wise, there is a danger of the vehicle rolling
when the transmission lock is manually
released.<
The transmission lock should only be released
for towing. Reengage the transmission lock
after parking the vehicle at its destination.
If it also becomes necessary to manually
release the parking brake, follow this sequence:
1.Start by manually releasing the parking
brake, refer to page60
2.Then proceed to manually release the
transmission lock.
Jump starting and tow starting, refer to
pages213 and214.
Releasing
1.Use the vehicle key to release the cover
panel beneath the instrument panel by turn-
ing the lock counterclockwise, then fold
down the cover.2.Pull out the release lever with the loop1
until it locks into place: the transmission
lock is unlocked.
Reengage the transmission lock after
parking the vehicle at its destination. Oth-
erwise, there is a danger of the vehicle rolling.<
Engaging locks
1.Disengage the release lever by pressing it
together with the red detent lever, refer to
arrow.
2.Guide the release lever all the way back into
its original position – the transmission lock
is engaged once more.
3.Fold up and lock the cover panel again. Now
– and not before – the key may be removed.
Once the transmission lock has been
engaged, the message in the Info Display
should disappear, and the symbol on the Info
Display should change from N to P. Otherwise,
there is a danger of the vehicle rolling.<
Jump starting and tow starting, refer to
pages213 and214.
Page 81 of 247

Controls
79Reference
At a glance
Driving tips
Communications
Navigation
Entertainment
Mobility
To exit the menu:
The arrow is selected. Press the controller.
Condition Based Service does not con-
tinue counting down to the next service
during periods when the vehicle is stored with
the battery disconnected or the battery switch
in the OFF position.
Therefore, make sure to have the brake fluid
changed at least every 2 years, regardless of
w h a t i s s h o w n o n t h e d is p la y, r e f e r t o p a g e204.
The same is true for other time-dependent ser-
vice requirements.<
Displaying and entering dates for
legally-mandated emissions and
vehicle inspections
Make sure the date and time are always set cor-
rectly via iDrive, refer to page84; otherwise,
CBS Condition Based Service cannot function
correctly.
iDrive, for principle details, refer to page16.
1.Press the button to open the start
menu.
2.Move the controller toward "Car Data".
3.Select and press the controller.
4.Select "Emissions inspection" or "State
inspection" and press the controller.5.Turn the controller to select appointment
input.
6.Press the controller. The month is high-
lighted.
7.Turn the controller to adjust the setting.
8.Press the controller to save the setting.
The year is highlighted.
9.Turn the controller to adjust the setting.
10.Press the controller to save the setting.
11."STORE DATE" is selected. Press the con-
troller to save the setting. The date entry is
saved.
The list of entries is resorted by date.Display on Info Display
If the deadline for your next emissions or state
vehicle inspection is approaching, the remain-
ing distance and time will appear briefly when
you switch on the ignition.
Your Service Advisor will determine your
vehicle's current service requirements by
reading out the data stored in the remote con-
trol.<
Page 101 of 247

Controls
99Reference
At a glance
Driving tips
Communications
Navigation
Entertainment
Mobility
Lamps
Parking lamps/low beams
1Parking lamps
2Low beams and daytime running lamps
*
3Automatic headlamp control, daytime run-
ning lamps
*, Adaptive Head Light*, and
High-beam assistant
*
Parking lamps
In switch position1, the front, rear and side
vehicle lighting is switched on. You can use the
parking lamps for parking. For lighting on one
side for parking as an additional feature, refer to
page100.
The parking lamps drain the battery. Do
not leave them switched on for long peri-
ods of time; otherwise, it may no longer be pos-
sible to start the engine.<
Low beams
The low beams light up in switch position2 only
with the engine running. Otherwise, the parking
lamps are lit.
Automatic headlamp control
In the switch position3, the system activates
the low beams and switches them on or off in
response to changes in ambient light condi-
tions, for example in a tunnel, at dawn and dusk,
and in case of precipitation. The LED next to the
symbol is illuminated when the low beams are
on.When driving into a tunnel with bright overhead
lighting, switching on of the lights may be
delayed.
A blue sky with the sun low on the horizon can
cause the lights to be switched on.
The low beams remain switched on
regardless of the ambient light when you
switch on the front fog lamps.
When daytime running lamps are activated, the
low beams are always switched into switch
position3 whenever the ignition is switched
on.<
If so desired, the light switch can be left in the
position3. The exterior lighting is automatically
switched off after switching off the vehicle.
The automatic headlamp control cannot
serve as a substitute for your personal
judgment in determining when the lamps
should be switched on in response to ambient
lighting conditions. For example, the sensors
cannot detect fog of hazy weather. To avoid
safety risks, you should always switch on the
lamps manually under these conditions.<
Pathway lighting
After parking the vehicle and switching off the
headlamps, you can use the headlamp flasher
control to activate the low beams for a period of
roughly 40 seconds.
Pressing the button on the remote control,
refer to page33, also switches on the low
beams for approx. 40 seconds. In addition, the
door handle and interior lamps are switched on
for approx. 10 seconds.
Daytime running lamps*
If so desired, the light switch can remain in
position2 or 3.
The exterior lighting is automatically switched
off after switching off the vehicle.
Switch on the parking lamps if required as
described under Parking lamps.
Page 104 of 247

Lamps
102
Interior lamps
The interior lamps, footwell lamps, door entry
lighting and the perimeter lighting are con-
trolled automatically.
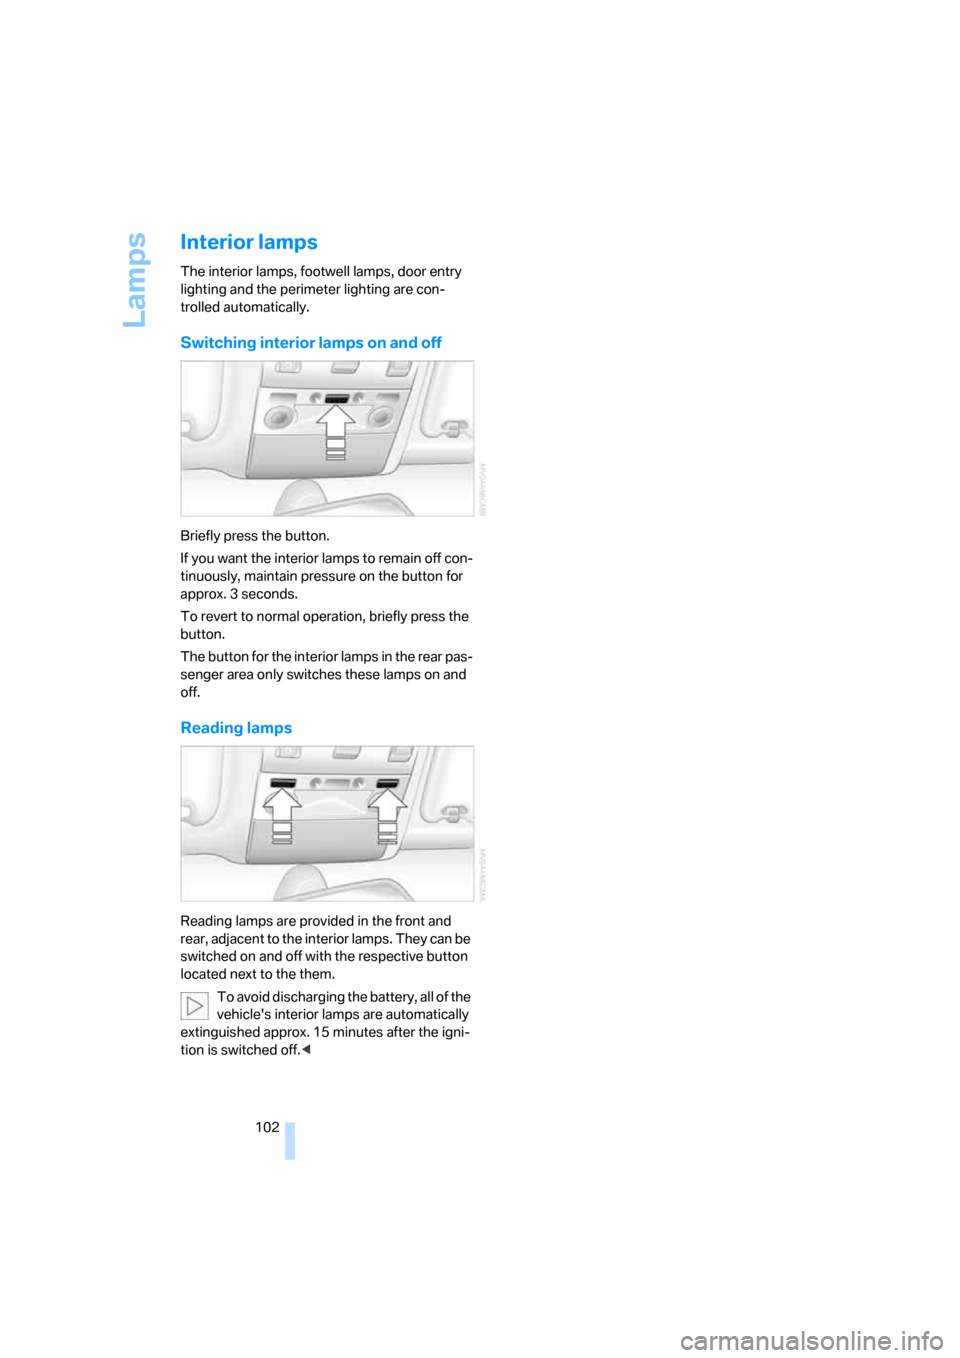
Switching interior lamps on and off
Briefly press the button.
If you want the interior lamps to remain off con-
tinuously, maintain pressure on the button for
approx. 3 seconds.
To revert to normal operation, briefly press the
button.
The button for the interior lamps in the rear pas-
senger area only switches these lamps on and
off.
Reading lamps
Reading lamps are provided in the front and
rear, adjacent to the interior lamps. They can be
switched on and off with the respective button
located next to the them.
To avoid discharging the battery, all of the
vehicle's interior lamps are automatically
extinguished approx. 15 minutes after the igni-
tion is switched off.<
Page 108 of 247

Climate
106 5.Turn the controller to adjust the tempera-
ture:
>Turn toward the left, toward blue: colder
>Turn toward the right, toward red:
warmer
6.Press the controller to save the setting.
Maximum cooling
Maximally cooled air is obtained as
quickly as possible from an outside
temperature above 327/06 and
with the engine running.
The automatic climate control
changes over to the lowest temperature and
switches into the recirculated-air mode. The
maximum air quantity only flows out of the vents
for the upper body, so open these vents for
maximum cooling.
Air volume
You can vary the air volume by
turning. You can reactivate the
automatic air supply mode by
pressing the AUTO button.
Manual air distribution
You can adapt the air distribution to your own
personal preferences:
1.Open the start menu.
2.Open "Climate".
3.Turn the controller to select driver's side or
passenger side.4.Select the desired field and press the con-
troller.
1Airflow directed toward the windshield and
side windows
2Air to the upper body
3Air to footwell
You can only use the condensation sensor in
the AUTO program. Press the AUTO button
when you notice condensation on windows and
want to use the advantages of the condensation
sensor.
Defrosting windows and removing
condensation
Quickly remove ice and condensa-
tion from the windshield and front
side windows.
Residual heat
The system uses the warmth
stored in the engine to heat the
interior when the ignition is off, e.g.
while the vehicle is stopped at a
railroad crossing.
The function can be switched on when the fol-
lowing conditions are met:
>up to 15 minutes after switching off the
engine
>with the engine at operating temperature
>with sufficient battery voltage
>at an outside temperature below 777/
256
The LED lights up when the function is
switched on.
Page 111 of 247

Controls
109Reference
At a glance
Driving tips
Communications
Navigation
Entertainment
Mobility
Ventilation in rear
Use the lever1 to vary the airflow direction.
For additional information on rear ventilation
options, refer to page107.
Parked car ventilation
The parked car ventilation blows air into the
passenger compartment to reduce interior tem-
peratures.
You can set two different times for the system
to start. The system is operated via iDrive.
It remains switched on for 30 minutes.
Since the system uses a substantial amount of
electrical current, you should refrain from acti-
vating it twice in succession without allowing
the battery to be recharged in normal operation
between uses.
With a preselected switch-on time, the parked
car ventilation is switched on at an outside tem-
perature of 597/156 or greater. When oper-
ated manually, it is ready for use at any outside
temperature, but not during driving.
The air enters the passenger compartment
through the air vents for the upper body in the
dashboard, which can be adjusted for both
direction and airflow. These vents must be
open for the system to operate.
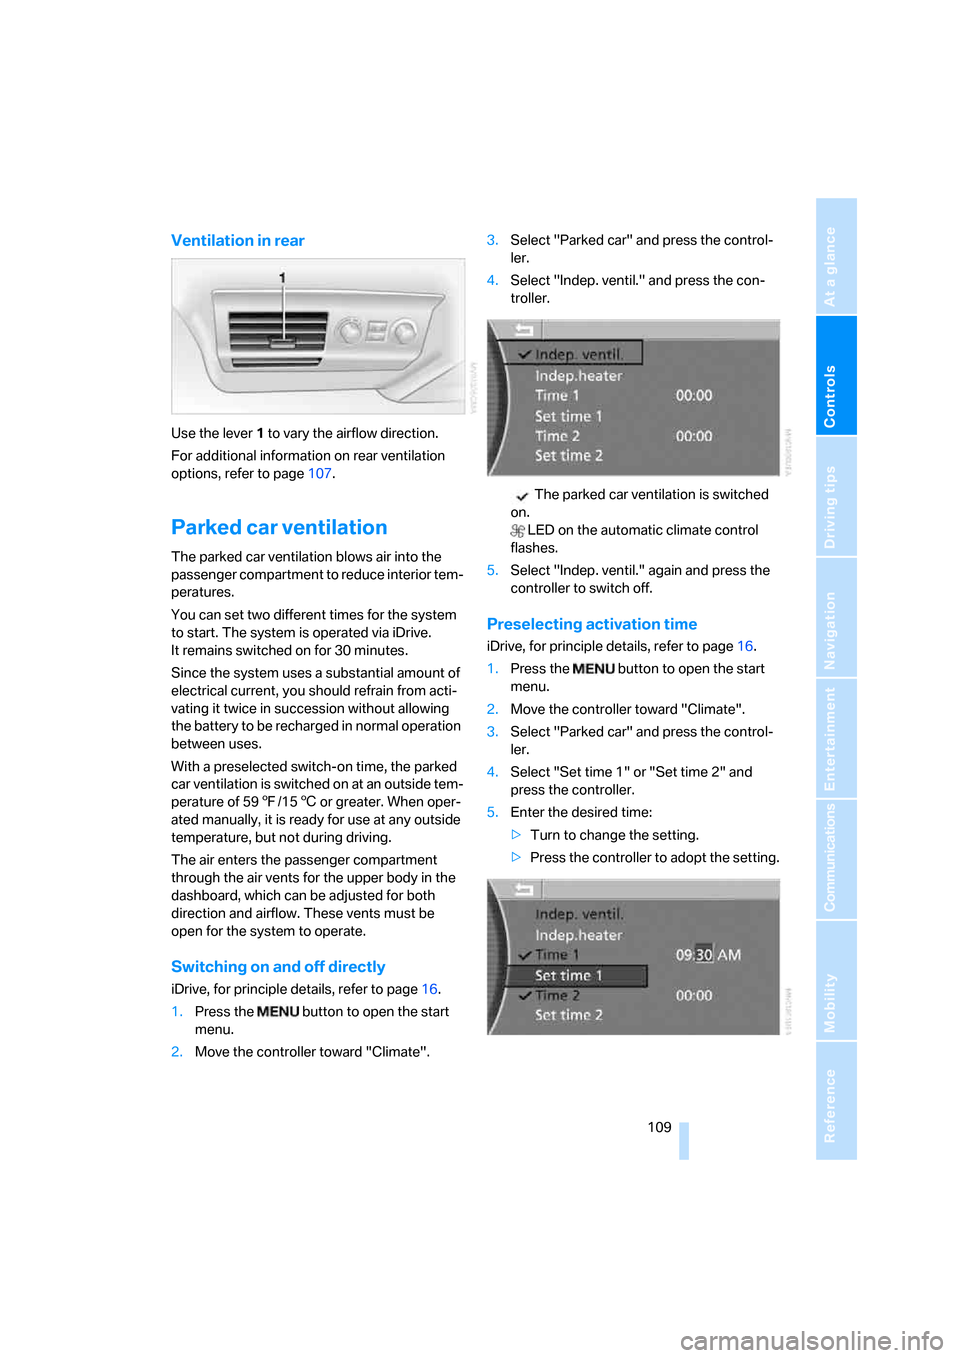
Switching on and off directly
iDrive, for principle details, refer to page16.
1.Press the button to open the start
menu.
2.Move the controller toward "Climate".3.Select "Parked car" and press the control-
ler.
4.Select "Indep. ventil." and press the con-
troller.
The parked car ventilation is switched
on.
LED on the automatic climate control
flashes.
5.Select "Indep. ventil." again and press the
controller to switch off.
Preselecting activation time
iDrive, for principle details, refer to page16.
1.Press the button to open the start
menu.
2.Move the controller toward "Climate".
3.Select "Parked car" and press the control-
ler.
4.Select "Set time 1" or "Set time 2" and
press the controller.
5.Enter the desired time:
>Turn to change the setting.
>Press the controller to adopt the setting.
Page 119 of 247

Controls
117Reference
At a glance
Driving tips
Communications
Navigation
Entertainment
Mobility
Cigarette lighter, rear
Refer to Cigarette lighter, front.
Rear refrigerator*
The rear refrigerator is located behind the rear
seats' center armrest.
Switching on/off
1.Switch on the ignition
2.Press button.
The LED in the button lights up.
3.Press the button again to switch off the rear
refrigerator.
When the ignition is switched off, this also
switches off the rear refrigerator.
When a low voltage is reached, it is automati-
cally switched off to protect the vehicle battery.
The LED in the button flashes.
High temperatures in the luggage com-
partment can affect the temperature in
the rear refrigerator.<
With rear air conditioner
When switched on, the rear refrigerator is con-
trolled by the rear air conditioner.
To adjust the cooling capacity and increase the
airflow volume, refer to page108.
Without rear air conditioner
When switched on, the rear refrigerator is con-
trolled by the automatic air conditioning sys-
tem.
To adjust the temperature and increase the air-
flow volume, refer to pages105, 106.
Releasing
Pull on the opener and fold the cooler forward.
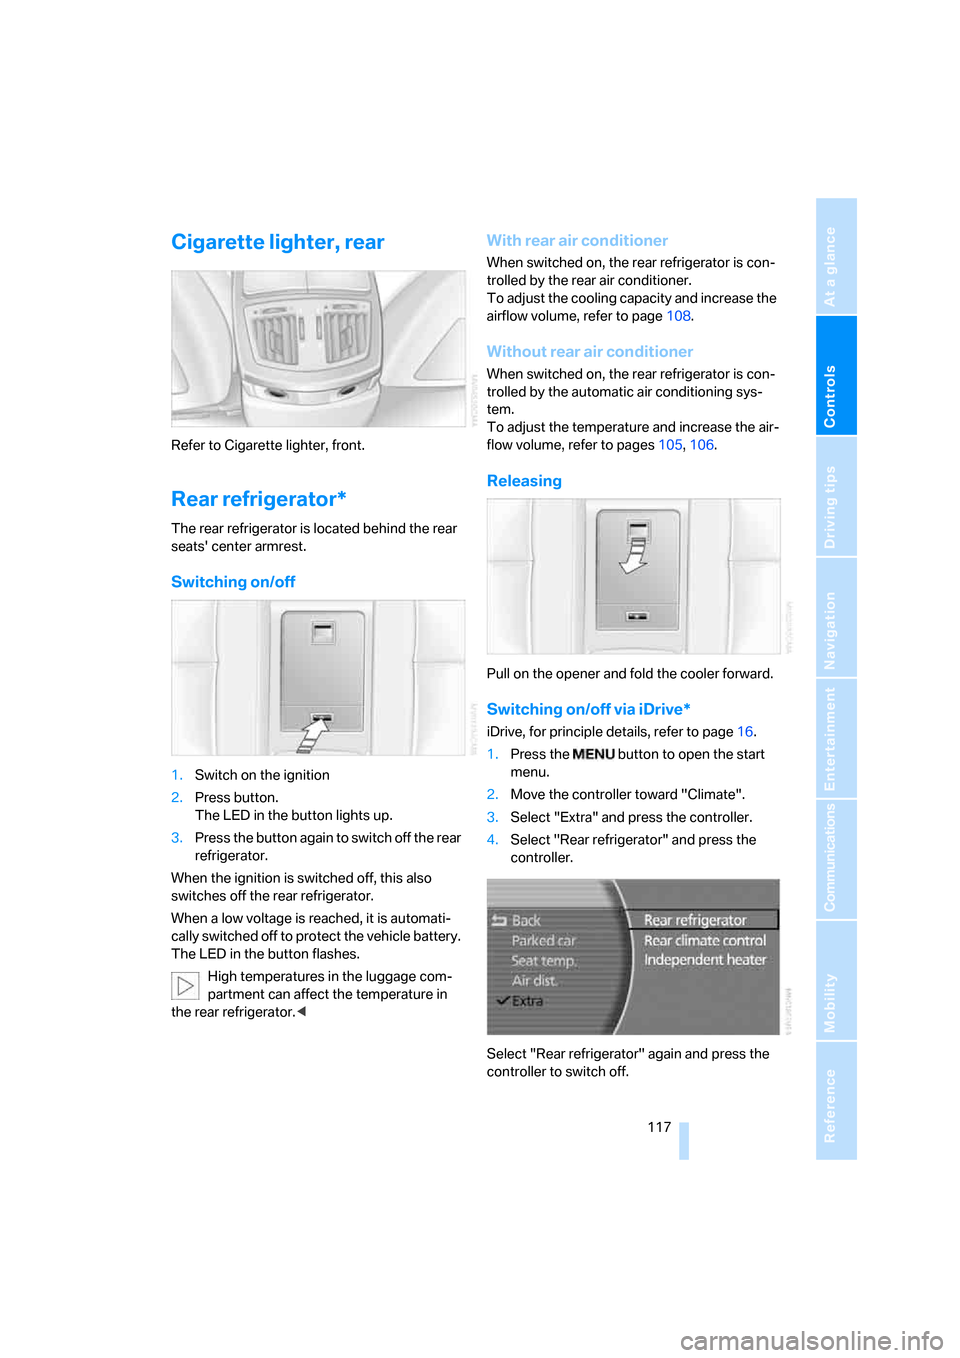
Switching on/off via iDrive*
iDrive, for principle details, refer to page16.
1.Press the button to open the start
menu.
2.Move the controller toward "Climate".
3.Select "Extra" and press the controller.
4.Select "Rear refrigerator" and press the
controller.
Select "Rear refrigerator" again and press the
controller to switch off.
Page 150 of 247

What to do if …
148
What to do if …
What to do if …
>a navigation DVD is inserted, but an instruc-
tion to insert the DVD appears on the Con-
trol Display?
The navigation DVD may not be the right
DVD for the navigation system. The DVD is
labeled accordingly.
>you request the current position of your
vehicle, but do not receive a precise dis-
play?
The system is unable to receive enough
GPS signals at your current position due to
obstructions, your position is not yet avail-
able on your navigation DVD, or the system
is in the process of calculating your posi-
tion. Please wait and then try again a little
later.
>the route guidance does not accept a desti-
nation?
The data of the destination is not stored on
the navigation DVD that is loaded. Select a
destination that is as close as possible to
the original.
>the route guidance does not accept an
address without the street?
On the navigation DVD, no downtown area
can be determined for the city or town
entered. Enter any street, or a destination
such as the railway station etc., then start
the route guidance.
>you want to enter an address for the route
guidance, but it is not possible to select the
letters for your desired entry?
The data of the destination is not stored on
the navigation DVD that is loaded. In this
case, the system will not offer you any let-
ters to choose from. Select a destination
that is as close as possible to the original.>the system stops furnishing directions on
which way to turn as you approach intersec-
tions?
You are driving in an area that has not yet
been completely recorded on the naviga-
tion DVD. Instead of an arrow indicating a
turn, you will see an arrow which indicates
the general direction of your planned route.
Or you have left the recommended route
and the system requires a few seconds to
calculate a new recommended route.
>the navigation system does not react to
entries?
If the battery was disconnected, it then
takes up to 10 minutes before the system is
once again operational.