2006 BMW 745i belt
[x] Cancel search: beltPage 45 of 247

Controls
43Reference
At a glance
Driving tips
Communications
Navigation
Entertainment
Mobility
Adjusting
Sitting safely
The ideal sitting position can make a vital con-
tribution to relaxed driving that is as fatigue-free
as possible. Together with the safety belts and
airbags, the sitting position plays an important
role in the event of an accident. To ensure that
the safety systems operate with optimized effi-
ciency, we strongly urge you to follow the
instructions contained in the section below.
For additional information on transporting chil-
dren safely, refer to page54.
Airbags
Always maintain an adequate distance
between yourself and the airbags. Always
hold the steering wheel by its rim with hands at
the 9 o'clock and 3 o'clock positions, to mini-
mize the risk of injuries to your hands and arms
in the event of airbag deployment. No one and
nothing is to come between the airbags and the
seat occupant.
Do not use the cover of the front airbag on the
front passenger side as a storage area. Make
sure that the front passenger is sitting correctly
and does not rest feet or legs on the instrument
panel; otherwise, leg injuries can occur if the
front airbag is triggered. Make sure that occu-
pants do not rest their head against the side or
head airbag; otherwise, injuries can occur if the
airbags are triggered.<
Even if you adhere to all of the instructions, inju-
ries resulting from contact with airbags cannot
be entirely ruled out, depending on the circum-
stances. The ignition and inflation noise may
provoke a mild – usually temporary – hearing
loss in extremely sensitive individuals.
For airbag locations and additional information
on airbags, refer to page94.
Head restraint
A correctly adjusted head restraint reduces the
risk of injury to cervical vertebrae in the event of
an accident.
Adjust the head restraint so that its center
is approx. at ear level. Otherwise, there is
increased danger of injury in the event of an
accident.<
Adjusting the head restraint, refer to page46.
Safety belt
Fasten safety belts on all occupied seats before
every trip. Although airbags enhance safety by
providing added protection, they are not a sub-
stitute for safety belts.
Your vehicle has five seats that are each
equipped with a safety belt.
Never allow more than one person to
wear a single safety belt. Never allow
infants or small children to ride on a passen-
ger's lap. Make sure that the belt lies low around
the hips in the lap area and does not press on
the abdomen. The safety belt must not lie
across the neck, rub on sharp edges, be routed
over solid or breakable objects or be pinched.
Wear the safety belt without twisting, snugly
across the lap and shoulders, as close to the
body as possible. Otherwise, the belt can slip
over the hips in the lap area in a frontal impact
and injure the abdomen. Avoid wearing clothing
that prevents the belt from fitting properly and
pull the shoulder belt periodically to readjust
the tension across your lap in order to avoid a
reduction in the retention effect of the safety
belt.<
For instructions on operating safety belts, refer
to page48.
Page 46 of 247

Adjusting
44
Seats
Note before adjusting
Never attempt to adjust your seat while
operating the vehicle. The seat could
respond with unexpected movement and the
ensuing loss of vehicle control could lead to an
accident.
Also on the passenger side, do not recline the
backrest too far to the rear while the vehicle is
being driven; otherwise, there is a danger in the
event of an accident of 'sliding under' the safety
belt, eliminating the protection normally pro-
vided by the belt.<
Please note the information on damage to
safety belts provided on page49 and the infor-
mation on the active head restraints on
page47.
The concept
You adjust the seat in two stages:
1Preselect the function: the button lights up
brightly
2Adjustments: control knob
>slide forward or back
>slide up or down
>turn
Seat adjustment
You can use the control knob to adjust the set-
tings after selecting the desired function with
the buttons.
To ensure that the safety systems con-
tinue to provide optimized protection,
please follow the adjustment instructions on
page44.<
3Forward and back:
Height:
Backrest:
This button is basically always active.
4Thigh support:
Height:
Tilt:
5Lumbar support
*, refer to Lumbar support
adjustment
6Height of the head restraint:
Front comfort seat* adjustment
With this seat, you can also adjust:
5Backrest width: increase or decrease lateral
support
6Shoulder support, refer to Shoulder support
adjustment
Backrest:
Automatic backrest width adjustment
The backrest automatically moves to the widest
possible position to make it easier to enter and
exit the vehicle, before then returning to the
standard position or the stored memory setting.
This automatic system is influenced on each of
the two seats by their respective door, as well
as on the driver's seat, by the ignition and on the
Page 47 of 247

Controls
45Reference
At a glance
Driving tips
Communications
Navigation
Entertainment
Mobility
front passenger's seat, by the safety belt
buckle.
Lumbar support adjustment
5Lumbar support
You can also adjust the contour of the backrest
to obtain additional support in the lumbar
region.
The upper hips and spinal column receive sup-
plementary support to help you maintain a
relaxed, upright sitting position.
>Increase or decrease curvature
>Shift curvature up or down
Shoulder support adjustment
6Adjustment of the tilt angle of the shoulder
support:
You can use the adjustable upper backrest for
supplementary support in the shoulder region.
This provides a relaxed driving position and
helps relieve stress on the shoulder muscles.
Rear comfort seat* adjustment
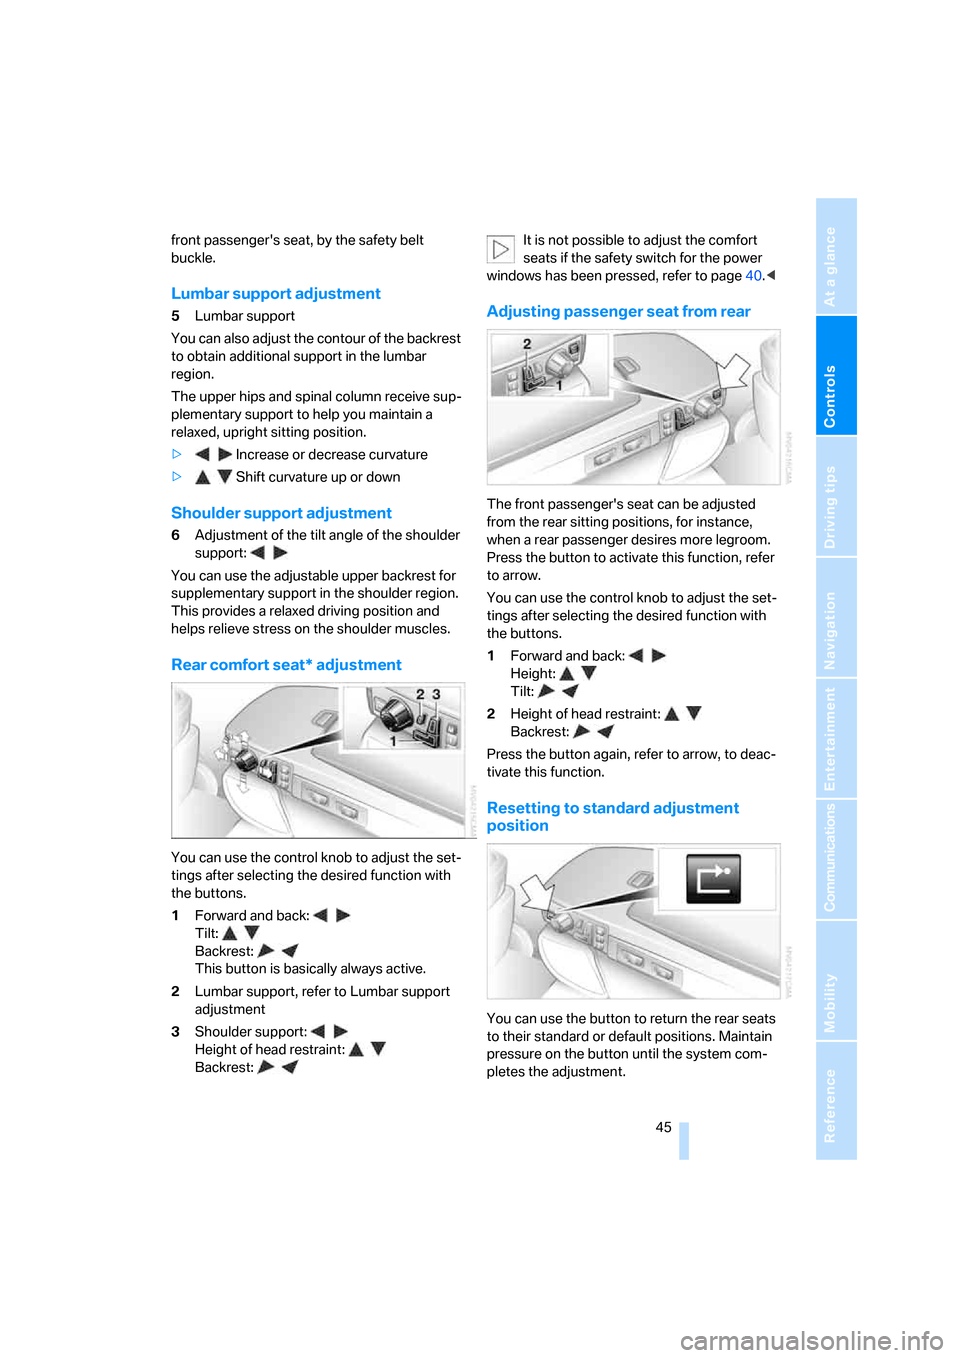
You can use the control knob to adjust the set-
tings after selecting the desired function with
the buttons.
1Forward and back:
Tilt:
Backrest:
This button is basically always active.
2Lumbar support, refer to Lumbar support
adjustment
3Shoulder support:
Height of head restraint:
Backrest:It is not possible to adjust the comfort
seats if the safety switch for the power
windows has been pressed, refer to page40.<
Adjusting passenger seat from rear
The front passenger's seat can be adjusted
from the rear sitting positions, for instance,
when a rear passenger desires more legroom.
Press the button to activate this function, refer
to arrow.
You can use the control knob to adjust the set-
tings after selecting the desired function with
the buttons.
1Forward and back:
Height:
Tilt:
2Height of head restraint:
Backrest:
Press the button again, refer to arrow, to deac-
tivate this function.
Resetting to standard adjustment
position
You can use the button to return the rear seats
to their standard or default positions. Maintain
pressure on the button until the system com-
pletes the adjustment.
Page 50 of 247

Adjusting
48 The head restraints at the outer sitting posi-
tions extend automatically whenever a passen-
ger in the rear seat fastens his safety belt. You
can also adjust the height of the head restraint
electrically.
To prevent possible personal injury and
property damage, always ensure that the
area above the head restraints is clear and
unobstructed before extending them upward.<
Rear comfort seat*
Height adjustment
If necessary, adjust the head restraint's height
to ensure that it is centered at roughly the
height of the passenger's ears.
With the safety switch pressed, refer to
page40, the height adjustment of the
head restraints is deactivated.<
The head restraints at the outer sitting posi-
tions extend automatically whenever a passen-
ger in the rear seat fastens his safety belt. You
can also adjust the height of the head restraint
electrically.
To prevent possible personal injury and
property damage, always ensure that the
area above the head restraints is clear and
unobstructed before extending them upward.<
Side extensions adjustment
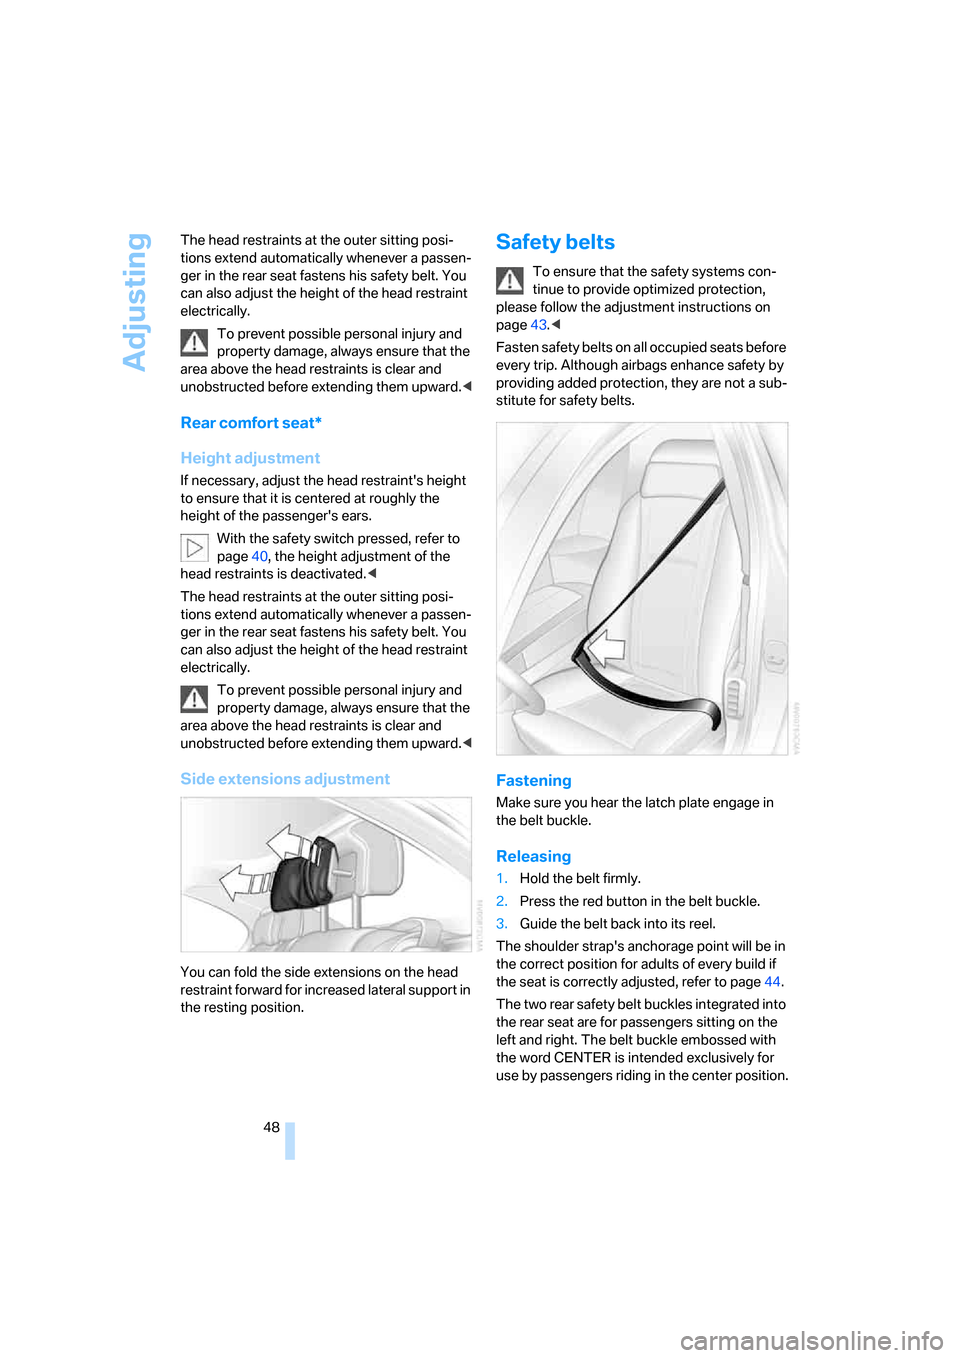
You can fold the side extensions on the head
restraint forward for increased lateral support in
the resting position.
Safety belts
To ensure that the safety systems con-
tinue to provide optimized protection,
please follow the adjustment instructions on
page43.<
Fasten safety belts on all occupied seats before
every trip. Although airbags enhance safety by
providing added protection, they are not a sub-
stitute for safety belts.
Fastening
Make sure you hear the latch plate engage in
the belt buckle.
Releasing
1.Hold the belt firmly.
2.Press the red button in the belt buckle.
3.Guide the belt back into its reel.
The shoulder strap's anchorage point will be in
the correct position for adults of every build if
the seat is correctly adjusted, refer to page44.
The two rear safety belt buckles integrated into
the rear seat are for passengers sitting on the
left and right. The belt buckle embossed with
the word CENTER is intended exclusively for
use by passengers riding in the center position.
Page 51 of 247

Controls
49Reference
At a glance
Driving tips
Communications
Navigation
Entertainment
Mobility
Safety belt reminder for front seats
The indicator lamp flashes or lights up.
In addition, a signal sounds. Please
make sure that the safety belts are
positioned correctly.
The safety belt reminder is active at speeds
above approx. 5 mph/8 km/h. It can also be acti-
vated if objects are placed on the passenger's
seat.
Damage to safety belts
In case of strain due to an accident or
damage, replace the belt system includ-
ing the safety belt tensioners and have the belt
anchor points checked. Only have this work
carried out at a BMW center or at a workshop
that works according to BMW repair proce-
dures with correspondingly trained personnel.
Otherwise, correct operation of this safety
equipment is not guaranteed.<
Heated seats*
Front
The temperature setting progresses one step
through its control sequence each time you
press the button.
The maximum temperature is supplied when
three lights are lit.
To switch off:
Press and hold the button.
Temperature distribution
The heating action in the seat cushion and
backrest can be distributed in different ways.
iDrive, for principle details, refer to page16.
1.Press the button to open the start
menu.
2.Move the controller toward "Climate".
3.If need be, select the symbol and press
the controller to switch to the second page
of the menu.
4.Select "Seat temp." and press the control-
ler.
5.Select "Left" or "Right" and press the con-
troller.
6.Turn to adjust the temperature distribution
in the seat cushion and backrest and press
the controller.
The setting is stored for the remote control cur-
rently in use.
Page 56 of 247

Transporting children safely
54
Transporting children safely
The right place for children
Do not leave children unattended in the
vehicle; otherwise, they could endanger
themselves and other persons, e.g. by opening
the doors.<
Children always in the rear
Accident research shows that the safest place
for children is on the back seat.
Children younger than 13 years of age or
with a height under 5 ft/150 cm may only
be transported in the rear in child restraint sys-
tems which correspond to the age, weight and
height of the child. Otherwise, there is an
increased danger of injury in an accident.<
Children 13 years of age or older must wear a
safety belt as soon as a suitable child restraint
system can no longer be used due to their age,
weight and size.
With the exception of the driver's seat, all seats
in your BMW comply with the recommenda-
tions of the standard SAE J1819 for the safe
securing of child restraint systems in motor
vehicles.
Exception for front passenger seat
Should it be necessary to use a child
restraint system on the front passenger
seat, the front, knee and side airbag on the front
passenger side must be deactivated. Other-
wise, there is an increased risk of injury for the
child if the airbags are triggered, even with a
child restraint system. Your BMW center will be
glad to advise you.<
More information on Automatic deactivation of
front passenger airbags, refer to page95.
Installing child restraint
systems
In order to avoid reducing their protective
action, follow all instructions of the child
restraint system manufacturer for the selection,
installation, and use of child restraint sys-
tems.<
Backrest width* on front passenger's
seat
Before mounting a child restraint system
on the front passengers seat, the back-
rest width adjustment must be open com-
pletely. After installing the child's seat, no
memory position may be called up; otherwise,
the stability of the child's seat on the front pas-
senger seat is reduced.<
1.Open backrest width completely, refer to
Front comfort seat adjustment on page44.
2.Mount child's seat.
Child seat security
All rear safety belts and the safety belt for the
front passenger can be locked against pulling
out to secure child restraint systems.
Locking safety belt
1.Secure the child restraint system with the
belt.
2.Pull out the belt webbing completely.
3.Allow the belt webbing to be pulled in and
pull taut against the child restraint system.
The safety belt is locked.
Page 57 of 247

Controls
55Reference
At a glance
Driving tips
Communications
Navigation
Entertainment
Mobility
Unlocking safety belt
1.Open the belt buckle.
2.Remove the child restraint system.
3.Allow the belt webbing to be pulled in com-
pletely.
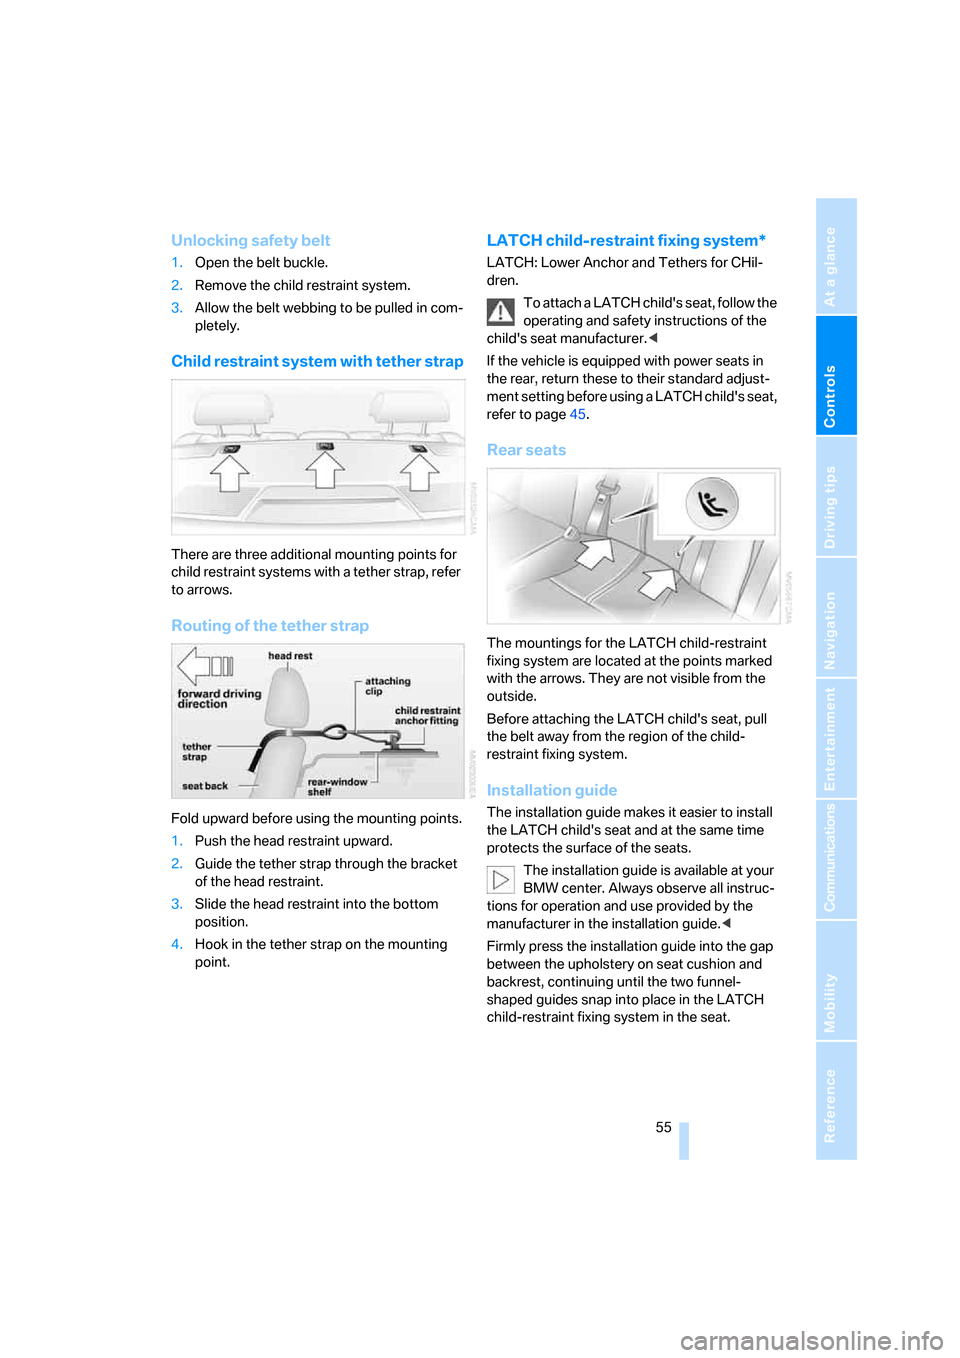
Child restraint system with tether strap
There are three additional mounting points for
child restraint systems with a tether strap, refer
to arrows.
Routing of the tether strap
Fold upward before using the mounting points.
1.Push the head restraint upward.
2.Guide the tether strap through the bracket
of the head restraint.
3.Slide the head restraint into the bottom
position.
4.Hook in the tether strap on the mounting
point.
LATCH child-restraint fixing system*
LATCH: Lower Anchor and Tethers for CHil-
dren.
To attach a LATCH child's seat, follow the
operating and safety instructions of the
child's seat manufacturer.<
If the vehicle is equipped with power seats in
the rear, return these to their standard adjust-
ment setting before using a LATCH child's seat,
refer to page45.
Rear seats
The mountings for the LATCH child-restraint
fixing system are located at the points marked
with the arrows. They are not visible from the
outside.
Before attaching the LATCH child's seat, pull
the belt away from the region of the child-
restraint fixing system.
Installation guide
The installation guide makes it easier to install
the LATCH child's seat and at the same time
protects the surface of the seats.
The installation guide is available at your
BMW center. Always observe all instruc-
tions for operation and use provided by the
manufacturer in the installation guide.<
Firmly press the installation guide into the gap
between the upholstery on seat cushion and
backrest, continuing until the two funnel-
shaped guides snap into place in the LATCH
child-restraint fixing system in the seat.
Page 96 of 247

Technology for comfort, convenience and safety
94
Brake force display
Left-hand picture: normal braking.
Right-hand picture: heavy braking.
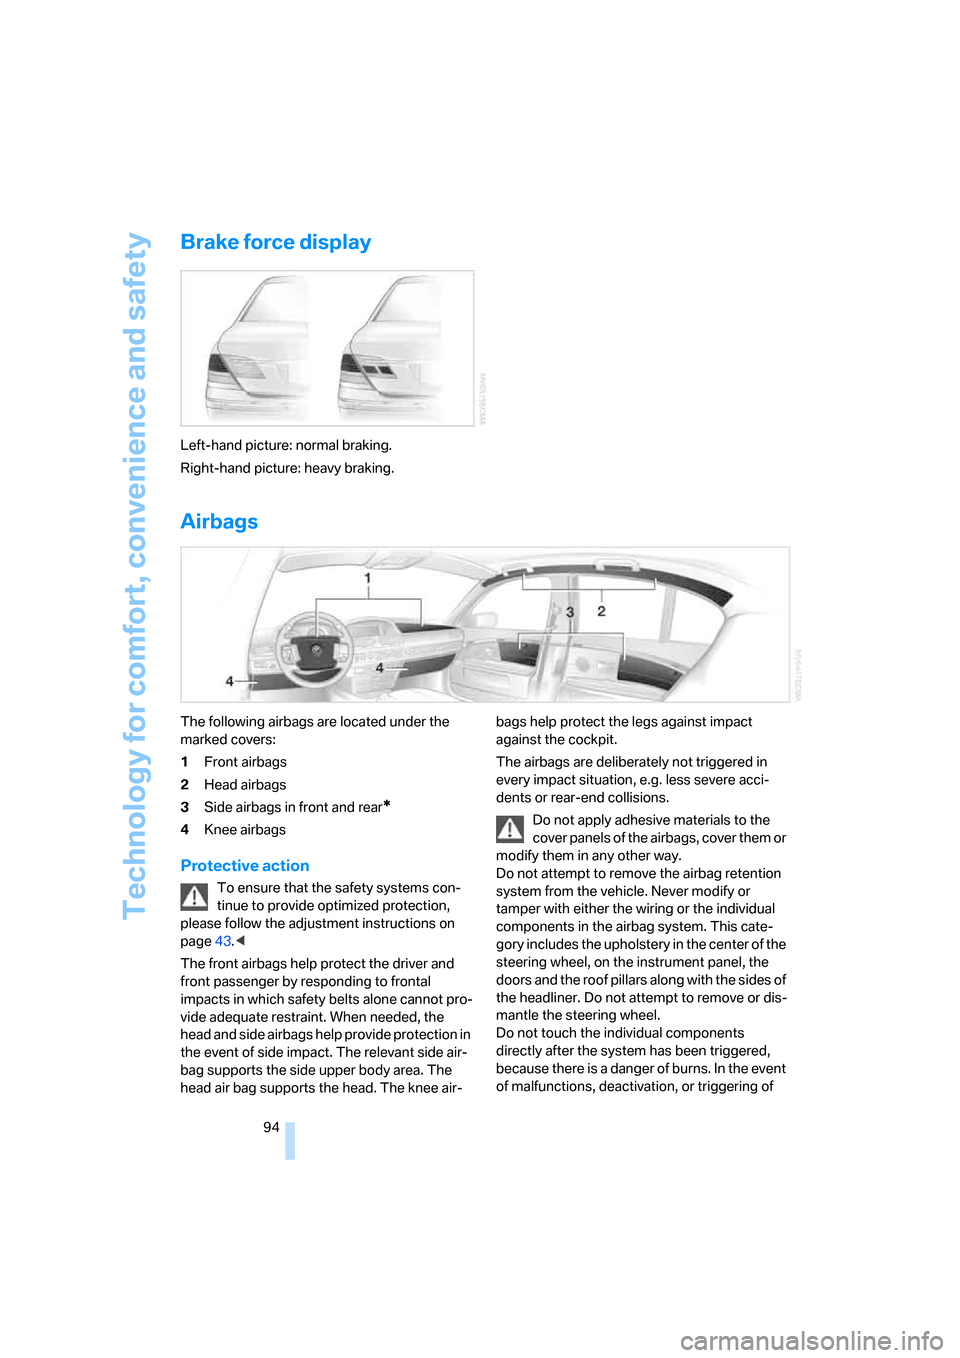
Airbags
The following airbags are located under the
marked covers:
1Front airbags
2Head airbags
3Side airbags in front and rear
*
4Knee airbags
Protective action
To ensure that the safety systems con-
tinue to provide optimized protection,
please follow the adjustment instructions on
page43.<
The front airbags help protect the driver and
front passenger by responding to frontal
impacts in which safety belts alone cannot pro-
vide adequate restraint. When needed, the
head and side airbags help provide protection in
the event of side impact. The relevant side air-
bag supports the side upper body area. The
head air bag supports the head. The knee air-bags help protect the legs against impact
against the cockpit.
The airbags are deliberately not triggered in
every impact situation, e.g. less severe acci-
dents or rear-end collisions.
Do not apply adhesive materials to the
cover panels of the airbags, cover them or
modify them in any other way.
Do not attempt to remove the airbag retention
system from the vehicle. Never modify or
tamper with either the wiring or the individual
components in the airbag system. This cate-
gory includes the upholstery in the center of the
steering wheel, on the instrument panel, the
doors and the roof pillars along with the sides of
the headliner. Do not attempt to remove or dis-
mantle the steering wheel.
Do not touch the individual components
directly after the system has been triggered,
because there is a danger of burns. In the event
of malfunctions, deactivation, or triggering of