2006 BMW 745i Press accept
[x] Cancel search: Press acceptPage 13 of 247

At a glance
11Reference
Controls
Driving tips
Communications
Navigation
Entertainment
Mobility
9Steptronic: upshifting63
10Steptronic: downshifting63
12Buttons on steering wheel13Info Display12
14Automatic transmission62
15Ignition lock57
19Horn: the entire surface
23Fog lamps101
24Unlocking hood201 7Instrument lighting101
8BMW Night Vision
*96
11Turn signals65
High beams,
headlamp flasher100
High-beam assistant
*100
Roadside parking lamps100
Computer76
Check Control80
Computer76
Voice command system
*
activation/deactivation23
Volume
Mobile phone:
Press button.
Make call, accept call, or end call.
Press briefly to proceed through
a selection sequence consisting
of the automatic program, the
Sport program, and the manual
mode63
Selecting radio station
Selecting music track
Skipping chapter
*
Programmable button52
16Switching ignition on/off57
and Starting/stopping engine57
17Windshield wipers65
Rain sensor65
18PDC Park Distance Control
*86
20Steering wheel heater
*52
Steering wheel adjustment52
21Unlocking luggage compartment
lid36
22Programmable cruise control67
Active cruise control
*69
Front fog lamps
Page 35 of 247

Controls
33Reference
At a glance
Driving tips
Communications
Navigation
Entertainment
Mobility
Engaging locks
Press the button. The hazard warning
flashers blink once.
Switching on interior lamps and
perimeter lighting
Press the button if the vehicle is
locked.
Switching on interior lamps
Press the button.
You can also use this function to locate your
vehicle in parking garages etc.
Panic mode*
You can also trigger the alarm system in case of
danger:
Press the button for at least 3 seconds.
To deactivate the alarm: press any button
Opening luggage compartment lid
Press the button for approx. one second.
The luggage compartment lid opens, regard-
less of whether it was previously locked or
unlocked.
During opening, the luggage compart-
ment lid pivots back and up. Ensure that
adequate clearance is available before opening.
To avoid being inadvertently locked out, never
set the remote control down in the luggage
compartment. A previously locked luggage
compartment lid is also locked again after clos-
ing.<
Automatic luggage compartment lid
operation*
Opening luggage compartment lid
Press the button for approx. one second.
The luggage compartment lid opens all the way,
regardless of whether it was previously locked
or unlocked.
To interrupt the opening process:
Press the button again while opening is in
progress.During opening, the luggage compart-
ment lid pivots back and up. Ensure that
adequate clearance is available before opening.
To avoid being inadvertently locked out, never
set the remote control down in the luggage
compartment. A previously locked luggage
compartment lid is also locked again after clos-
ing.<
Malfunction
Local radio waves can cause the remote control
to malfunction.
Should the remote control fail to operate owing
to interference of this kind, the vehicle can be
opened and closed via the door lock with a key.
If it is no longer possible to lock the vehicle with
a remote control, then its battery is discharged.
Use this remote control during an extended
drive; this will recharge the battery, refer to
page30.
For US owners only
The transmitter and receiver units comply with
part 15 of the FCC/Federal Communication
Commission regulations. Operation is gov-
erned by the following:
FCC ID:
>LX8766S
>LX8766E
>LX8CAS
>LX8CAS2
Compliance statement:
This device complies with part 15 of the FCC
Rules. Operation is subject to the following two
conditions:
>This device may not cause harmful interfer-
ence, and
>this device must accept any interference
received, including interference that may
cause undesired operation.
Any unauthorized modifications or
changes to these devices could void the
user's authority to operate this equipment.<
Page 87 of 247
Controls
85Reference
At a glance
Driving tips
Communications
Navigation
Entertainment
Mobility
Hour signal activation
You will hear four tones just before the top of
each hour.
Select "Memo" and press the controller.
The symbol indicates the menu that is cur-
rently activated.
Setting date
1.Select "Date" and press the controller.
The first date display setting is activated.
2.Turn to change the setting.
3.Press the controller to adopt the setting.
The next setting is selected.
4.Make the remaining settings. After the last
adjustment, the date is stored.
The setting is stored for the remote control cur-
rently in use.
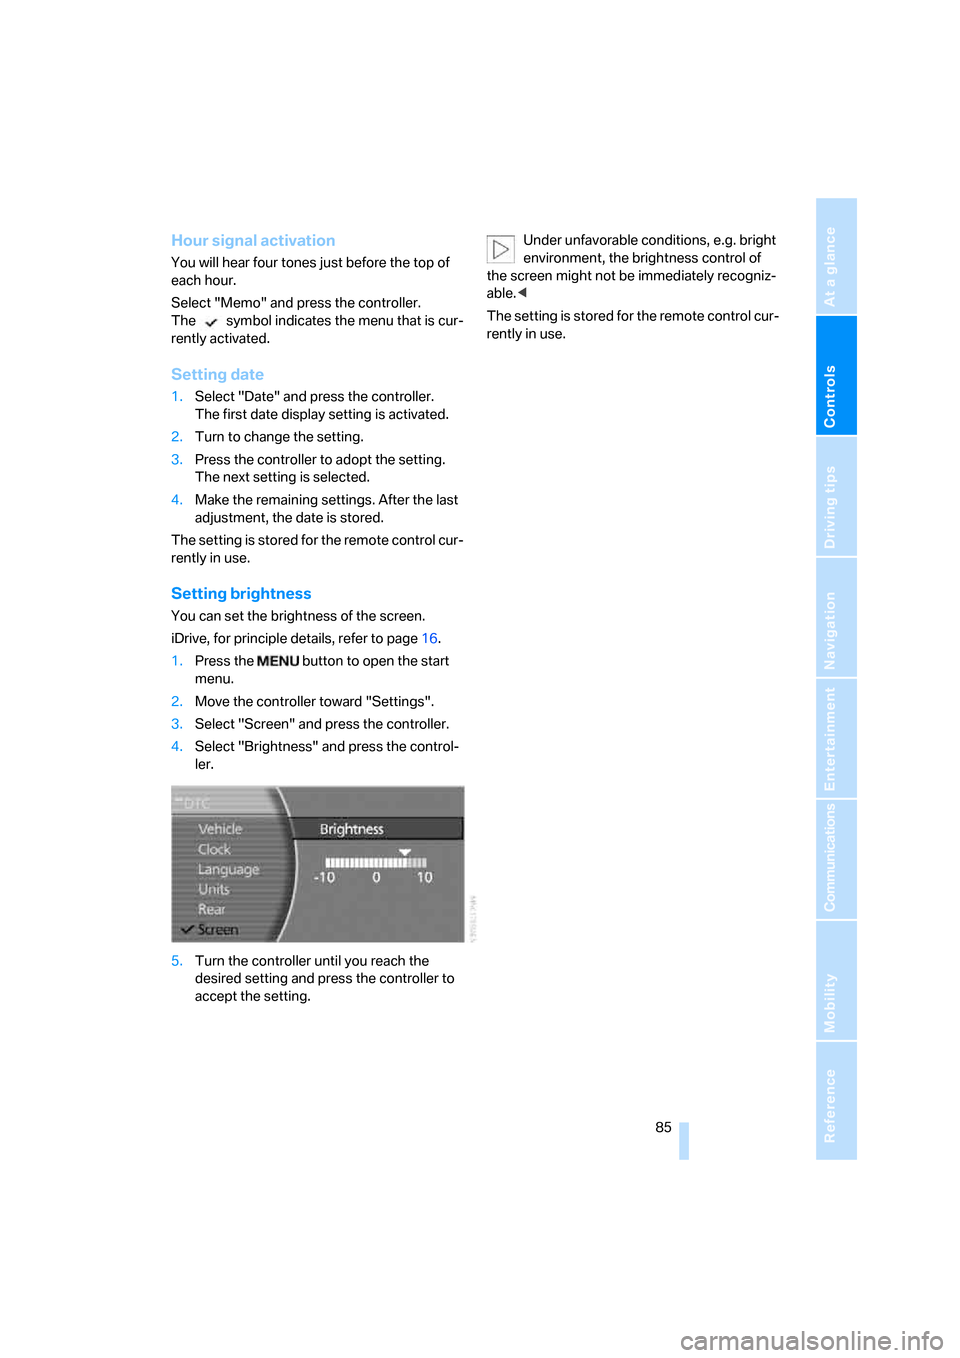
Setting brightness
You can set the brightness of the screen.
iDrive, for principle details, refer to page16.
1.Press the button to open the start
menu.
2.Move the controller toward "Settings".
3.Select "Screen" and press the controller.
4.Select "Brightness" and press the control-
ler.
5.Turn the controller until you reach the
desired setting and press the controller to
accept the setting.Under unfavorable conditions, e.g. bright
environment, the brightness control of
the screen might not be immediately recogniz-
able.<
The setting is stored for the remote control cur-
rently in use.
Page 142 of 247
Destination input
140
Changing destinations in address book
1.Select "Address book" and press the con-
troller.
A list of the stored addresses appears on
the right side of the Control Display.
2.Select the address and press the controller.
Change entry, refer to Entering destination
manually, page131.
When an entry is changed, a copy of the
entry is stored.<
Deleting destinations individually from
address book
1.Select "Address book" and press the con-
troller.
A list of the stored addresses appears on
the right side of the Control Display.
2.Select the address and press the controller.
3.Select "DELETE" and press the controller.
4.Select "YES" and press the controller to
delete the address.
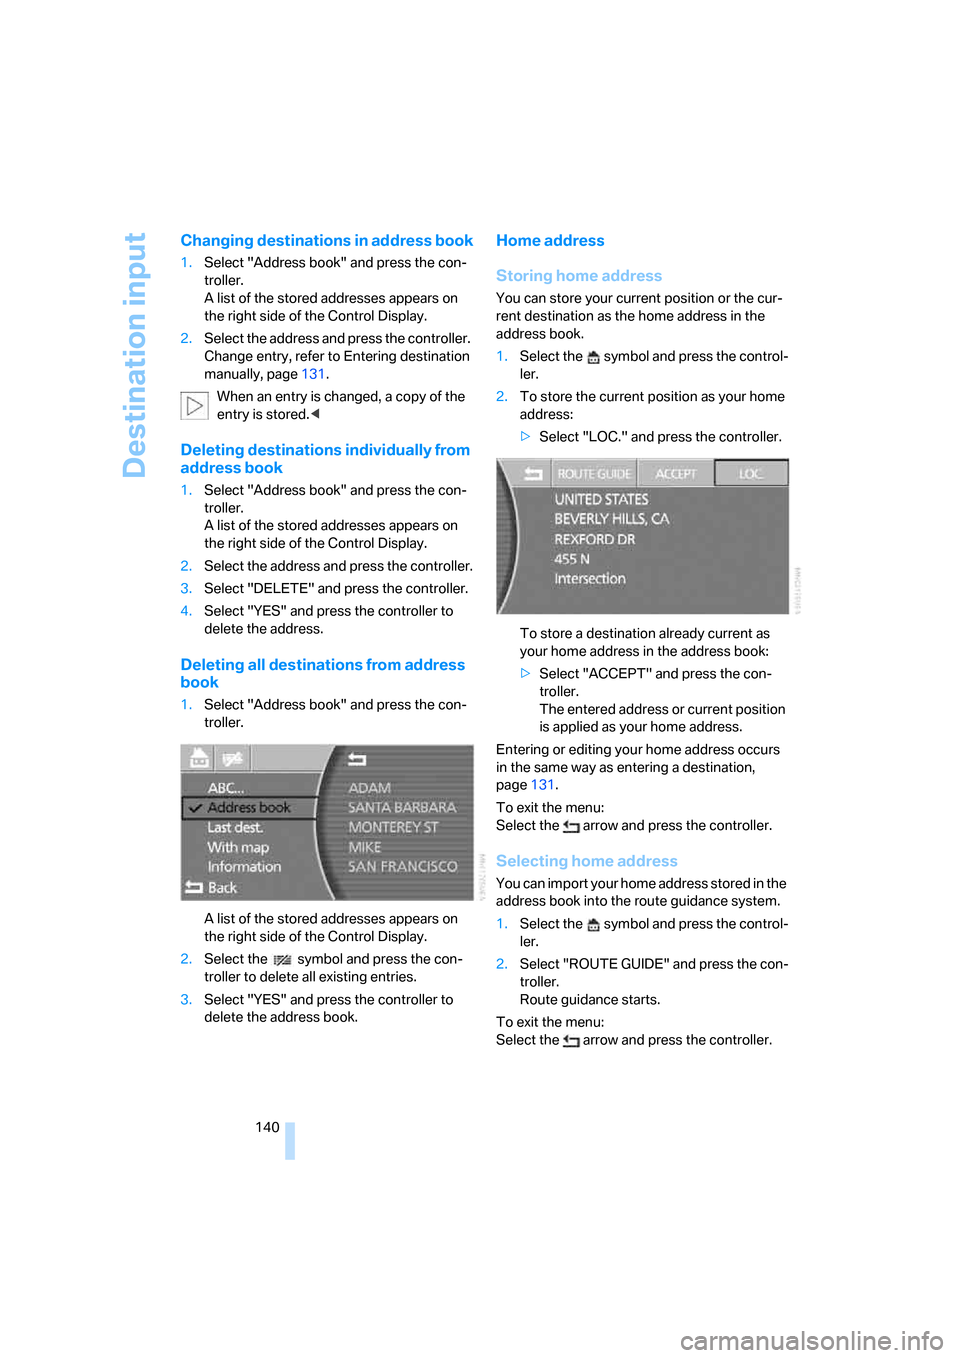
Deleting all destinations from address
book
1.Select "Address book" and press the con-
troller.
A list of the stored addresses appears on
the right side of the Control Display.
2.Select the symbol and press the con-
troller to delete all existing entries.
3.Select "YES" and press the controller to
delete the address book.
Home address
Storing home address
You can store your current position or the cur-
rent destination as the home address in the
address book.
1.Select the symbol and press the control-
ler.
2.To store the current position as your home
address:
>Select "LOC." and press the controller.
To store a destination already current as
your home address in the address book:
>Select "ACCEPT" and press the con-
troller.
The entered address or current position
is applied as your home address.
Entering or editing your home address occurs
in the same way as entering a destination,
page131.
To exit the menu:
Select the arrow and press the controller.
Selecting home address
You can import your home address stored in the
address book into the route guidance system.
1.Select the symbol and press the control-
ler.
2.Select "ROUTE GUIDE" and press the con-
troller.
Route guidance starts.
To exit the menu:
Select the arrow and press the controller.
Page 149 of 247
Navigation
Driving tips
147Reference
At a glance
Controls
Communications
Entertainment
Mobility
Correcting current position
If the navigation system cannot place the cur-
rent position, e.g.if you are currently in a parking
structure, then in addition to the country and
city, only longitude and latitude are displayed.
You can then correct your current position, e.g.
by entering the name of the adjacent street or
intersection.
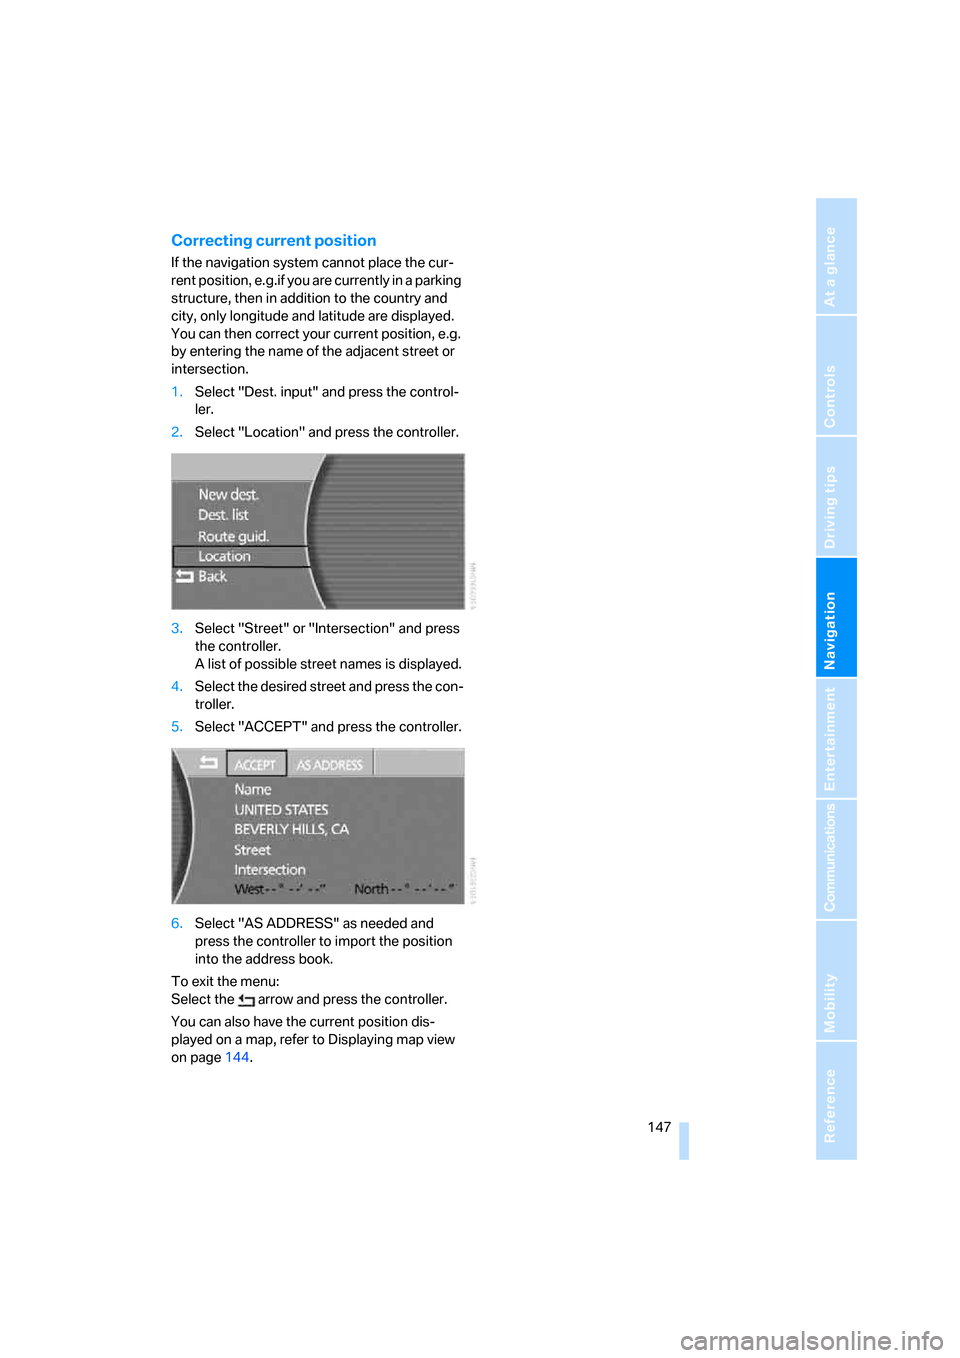
1.Select "Dest. input" and press the control-
ler.
2.Select "Location" and press the controller.
3.Select "Street" or "Intersection" and press
the controller.
A list of possible street names is displayed.
4.Select the desired street and press the con-
troller.
5.Select "ACCEPT" and press the controller.
6.Select "AS ADDRESS" as needed and
press the controller to import the position
into the address book.
To exit the menu:
Select the arrow and press the controller.
You can also have the current position dis-
played on a map, refer to Displaying map view
on page144.
Page 155 of 247
Navigation
Entertainment
Driving tips
153Reference
At a glance
Controls
Communications
Mobility
Switching on/off
In order to switch the Entertainment sound out-
put on/off: press the knob.
The unit will activate the last audio source
selected, radio or CD.
Using the voice command system:
Using with ignition off
The audio and video functions remain available
for use for a period of approx. 30 minutes after
you switch off the ignition.
Switch the sound output back on to enjoy this
function.
Adjusting volume
Turn the knob to the desired volume level.
The sound system automatically reverts
to its mute mode whenever you initiate or
accept a phone call.<
The setting is stored for the remote control cur-
rently in use.
Tone control
You can change various tone settings, e.g. tre-
ble and bass or the speed-dependent volume
control. The tone settings are set globally for all
of the audio sources.
The speakers and headphones in the rear can
be adjusted separately. The sound settings of
the headphones are made on the rear seat
screen with the headphones connected. Only
treble, bass and balance can be adjusted.
The setting is stored for the remote control cur-
rently in use.
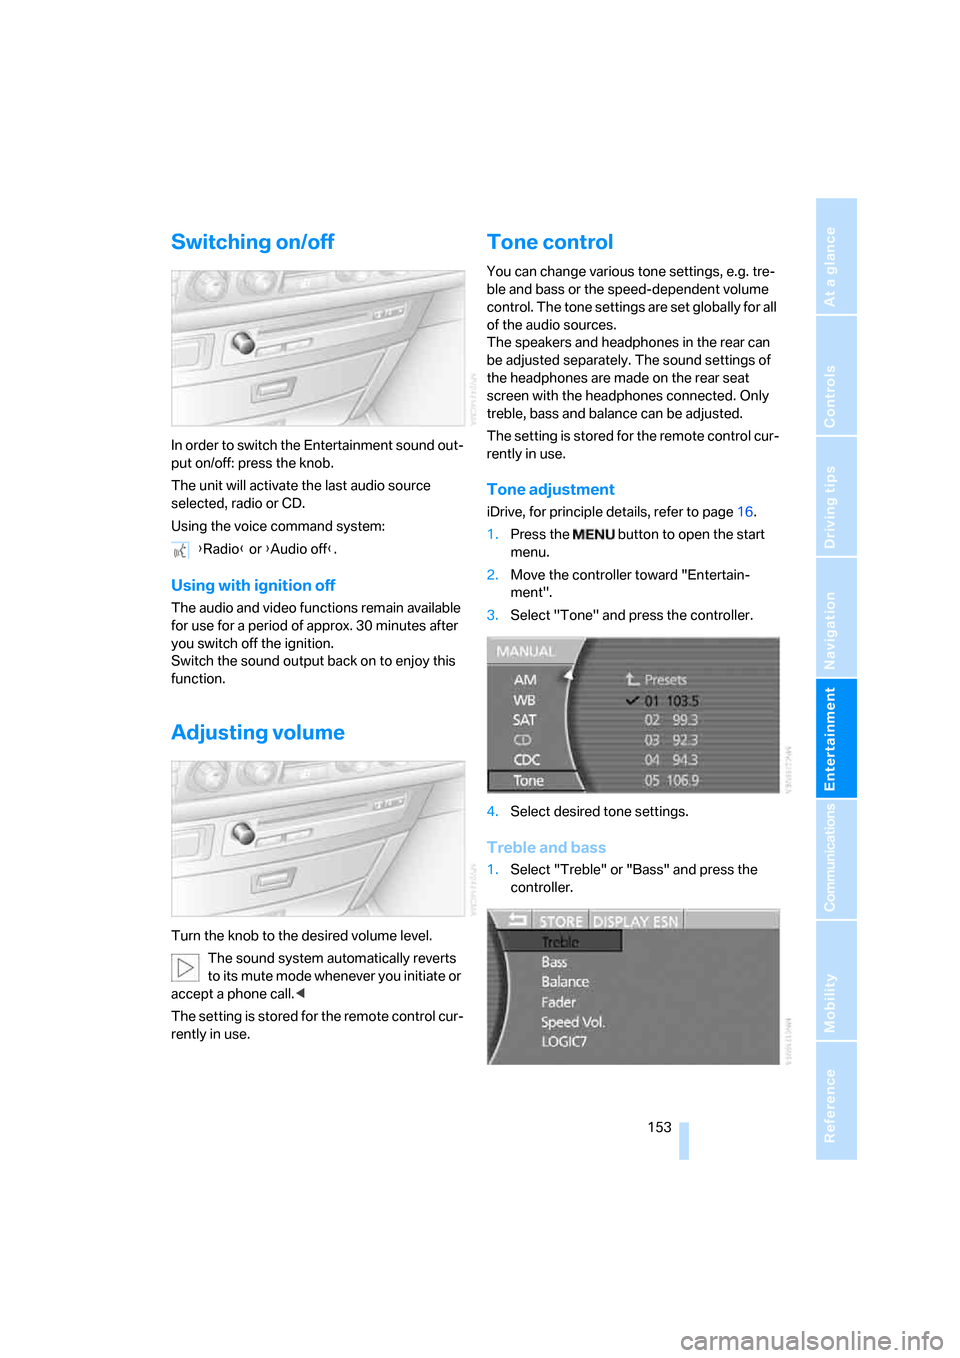
Tone adjustment
iDrive, for principle details, refer to page16.
1.Press the button to open the start
menu.
2.Move the controller toward "Entertain-
ment".
3.Select "Tone" and press the controller.
4.Select desired tone settings.
Treble and bass
1.Select "Treble" or "Bass" and press the
controller. {Radio} or {Audio off}.
Page 179 of 247
177
Entertainment
Reference
At a glance
Controls
Driving tips Communications
Navigation
Mobility
Hands-free system
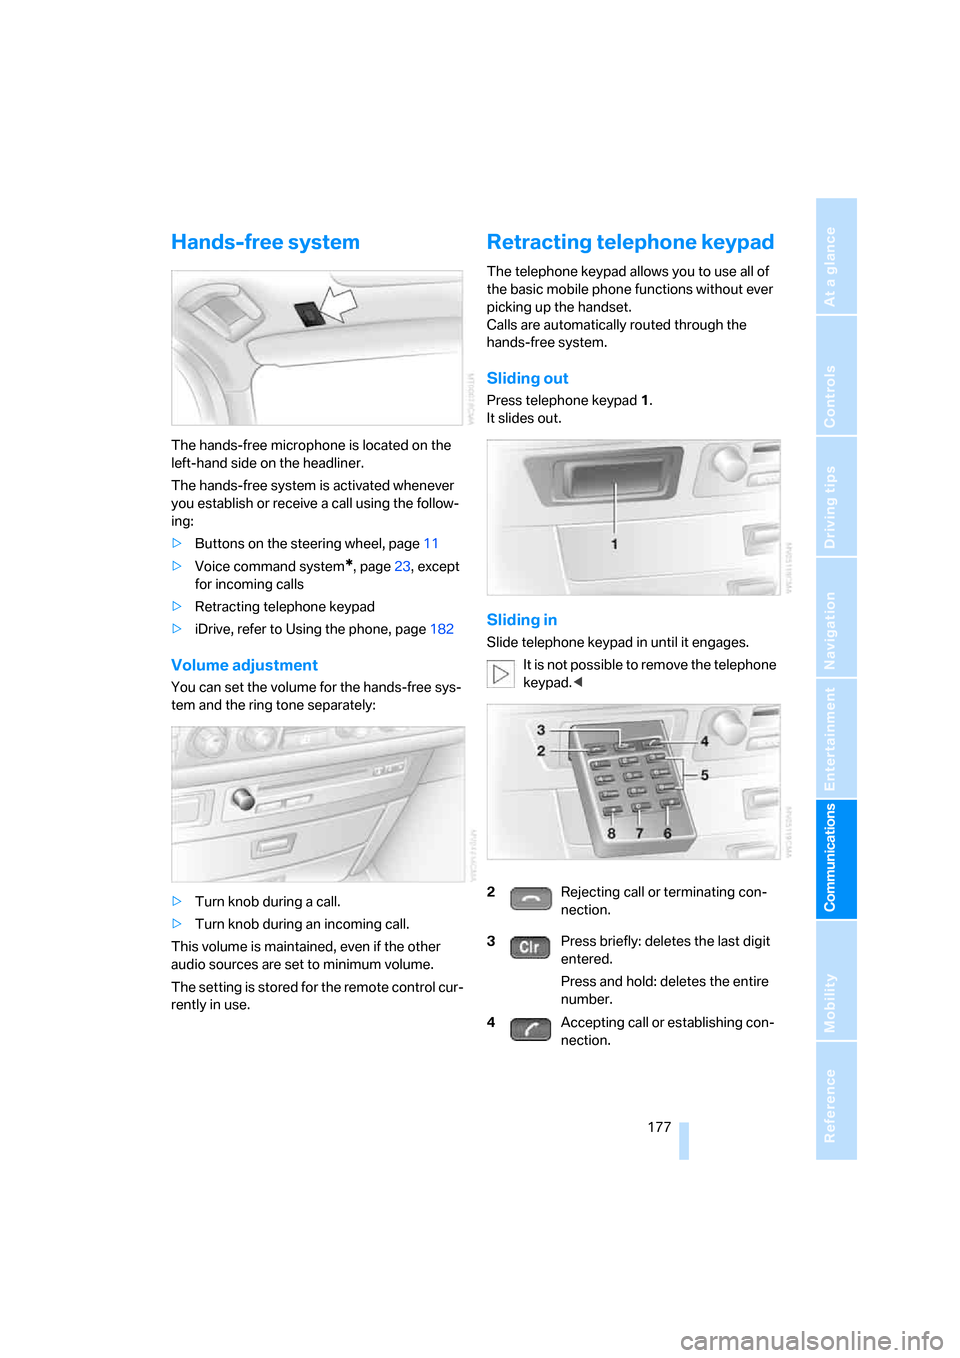
The hands-free microphone is located on the
left-hand side on the headliner.
The hands-free system is activated whenever
you establish or receive a call using the follow-
ing:
>Buttons on the steering wheel, page11
>Voice command system
*, page23, except
for incoming calls
>Retracting telephone keypad
>iDrive, refer to Using the phone, page182
Volume adjustment
You can set the volume for the hands-free sys-
tem and the ring tone separately:
>Turn knob during a call.
>Turn knob during an incoming call.
This volume is maintained, even if the other
audio sources are set to minimum volume.
The setting is stored for the remote control cur-
rently in use.
Retracting telephone keypad
The telephone keypad allows you to use all of
the basic mobile phone functions without ever
picking up the handset.
Calls are automatically routed through the
hands-free system.
Sliding out
Press telephone keypad1.
It slides out.
Sliding in
Slide telephone keypad in until it engages.
It is not possible to remove the telephone
keypad.<
2Rejecting call or terminating con-
nection.
3Press briefly: deletes the last digit
entered.
Press and hold: deletes the entire
number.
4Accepting call or establishing con-
nection.
Page 184 of 247
Using the phone
182
Using the phone
You have the option of controlling the phone
using various parts of the vehicle equipment:
>The button on the steering wheel
>The retracting telephone keypad
>iDrive
>The voice command system
*
The phone number appears in the upper status
line, refer to page20.
With the ignition switched off, you can continue
an ongoing call for a maximum of 16 minutes via
the hands-free system.
Requirements
>The logon data of the mobile phone are
stored in the vehicle and the mobile phone
is ready to operate.
>The ignition is switched on.
>The mobile phone is detected by the vehi-
cle.
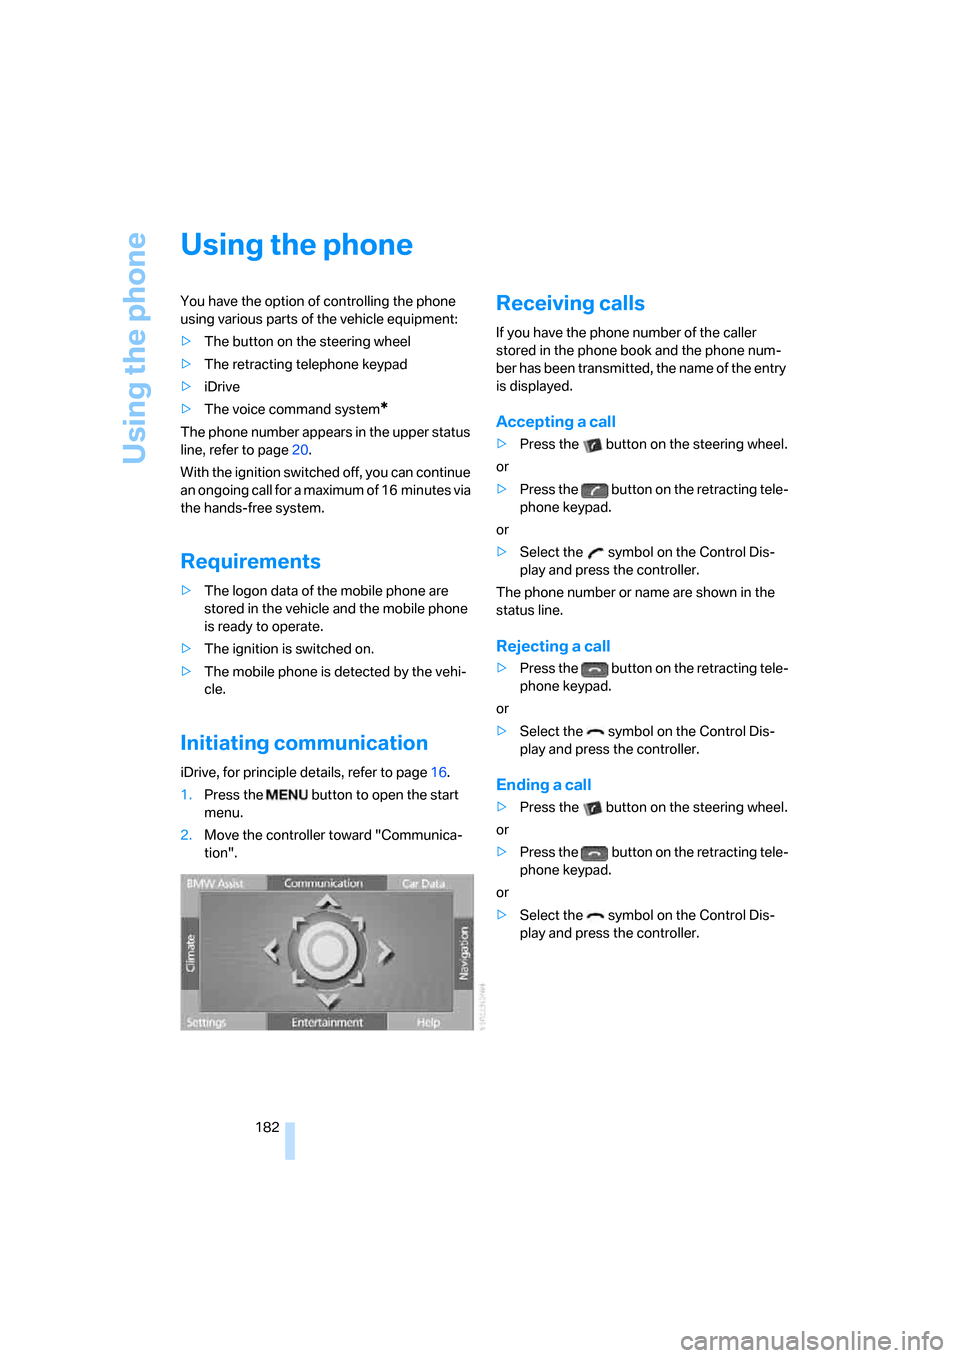
Initiating communication
iDrive, for principle details, refer to page16.
1.Press the button to open the start
menu.
2.Move the controller toward "Communica-
tion".
Receiving calls
If you have the phone number of the caller
stored in the phone book and the phone num-
ber has been transmitted, the name of the entry
is displayed.
Accepting a call
>Press the button on the steering wheel.
or
>Press the button on the retracting tele-
phone keypad.
or
>Select the symbol on the Control Dis-
play and press the controller.
The phone number or name are shown in the
status line.
Rejecting a call
>Press the button on the retracting tele-
phone keypad.
or
>Select the symbol on the Control Dis-
play and press the controller.
Ending a call
>Press the button on the steering wheel.
or
>Press the button on the retracting tele-
phone keypad.
or
>Select the symbol on the Control Dis-
play and press the controller.