2006 BMW 745i Driver
[x] Cancel search: DriverPage 73 of 247

Controls
71Reference
At a glance
Driving tips
Communications
Navigation
Entertainment
Mobility
Selecting distance
>Knurled wheel up:
To increase distance
>Knurled wheel down:
To decrease distance
The selected distance is displayed in the
speedometer.
Distance 1
Distance 2
Distance 3
This distance is always set when
the system is used for the first time
after starting the engine.
Distance 4
Use good judgment to select the appro-
priate following distance given road con-
ditions, traffic, applicable laws and driving rec-
ommendations for safe following distance.
Otherwise, a violation of the law or the danger of
an accident could result.<
Deactivating cruise control
Press the lever up or down. The displays in the
speedometer go out.
In addition, the system is automatically deacti-
vated:
>when the speed is reduced to below 20 mph
or 30 km/h due to a traffic situation
>when DTC is activated or DSC is deacti-
vated
>when the system does not recognize any
objects for an extended period of time, e.g.
on infrequently traveled roads without a
shoulder or guard rails, or if the radar sensor
is covered with dirt, refer to page72
>when you actuate the parking brake during
driving
>when you shift the transmission into the
Nposition
If the system is deactivated, then it is nec-
essary for the driver to actively intervene
by braking and possibly swerving. Otherwise,
there is the danger of an accident.<
Background lighting
You can switch off the backlighting of the
speedometer and tachometer when the system
is deactivated if no other functions are being
displayed, e.g. the pre-warning field in the
tachometer, refer to page75, or the route guid-
ance of the navigation system.
To do so, press the lever up or down for approx.
1second.
Page 75 of 247

Controls
73Reference
At a glance
Driving tips
Communications
Navigation
Entertainment
Mobility
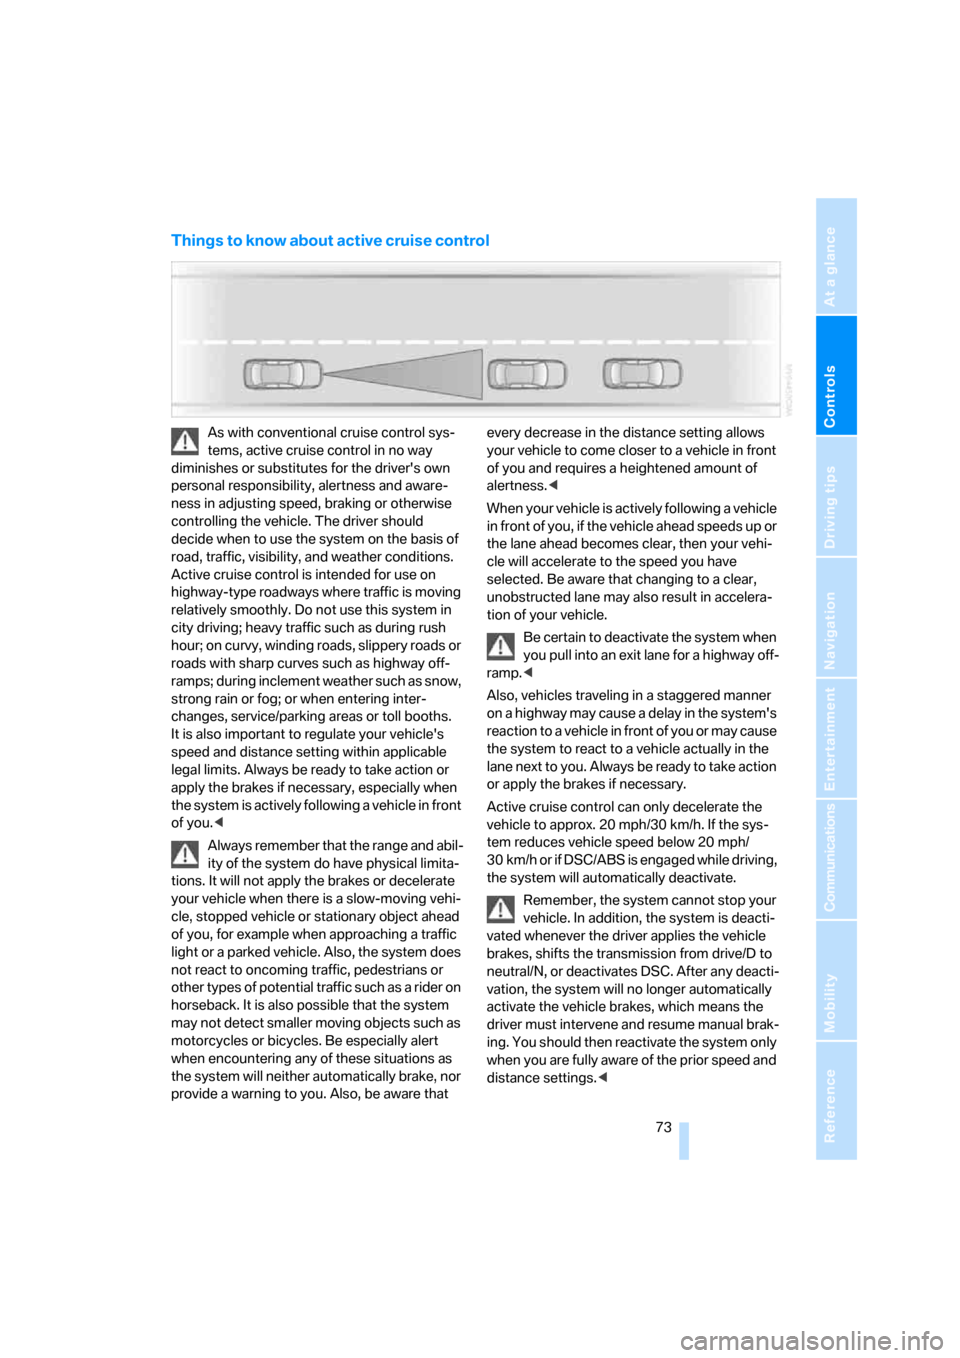
Things to know about active cruise control
As with conventional cruise control sys-
tems, active cruise control in no way
diminishes or substitutes for the driver's own
personal responsibility, alertness and aware-
ness in adjusting speed, braking or otherwise
controlling the vehicle. The driver should
decide when to use the system on the basis of
road, traffic, visibility, and weather conditions.
Active cruise control is intended for use on
highway-type roadways where traffic is moving
relatively smoothly. Do not use this system in
city driving; heavy traffic such as during rush
hour; on curvy, winding roads, slippery roads or
roads with sharp curves such as highway off-
ramps; during inclement weather such as snow,
strong rain or fog; or when entering inter-
changes, service/parking areas or toll booths.
It is also important to regulate your vehicle's
speed and distance setting within applicable
legal limits. Always be ready to take action or
apply the brakes if necessary, especially when
the system is actively following a vehicle in front
of you.<
Always remember that the range and abil-
ity of the system do have physical limita-
tions. It will not apply the brakes or decelerate
your vehicle when there is a slow-moving vehi-
cle, stopped vehicle or stationary object ahead
of you, for example when approaching a traffic
light or a parked vehicle. Also, the system does
not react to oncoming traffic, pedestrians or
other types of potential traffic such as a rider on
horseback. It is also possible that the system
may not detect smaller moving objects such as
motorcycles or bicycles. Be especially alert
when encountering any of these situations as
the system will neither automatically brake, nor
provide a warning to you. Also, be aware that every decrease in the distance setting allows
your vehicle to come closer to a vehicle in front
of you and requires a heightened amount of
alertness.<
When your vehicle is actively following a vehicle
in front of you, if the vehicle ahead speeds up or
the lane ahead becomes clear, then your vehi-
cle will accelerate to the speed you have
selected. Be aware that changing to a clear,
unobstructed lane may also result in accelera-
tion of your vehicle.
Be certain to deactivate the system when
you pull into an exit lane for a highway off-
ramp.<
Also, vehicles traveling in a staggered manner
on a highway may cause a delay in the system's
reaction to a vehicle in front of you or may cause
the system to react to a vehicle actually in the
lane next to you. Always be ready to take action
or apply the brakes if necessary.
Active cruise control can only decelerate the
vehicle to approx. 20 mph/30 km/h. If the sys-
tem reduces vehicle speed below 20 mph/
30 km/h or if DSC/ABS is engaged while driving,
the system will automatically deactivate.
Remember, the system cannot stop your
vehicle. In addition, the system is deacti-
vated whenever the driver applies the vehicle
brakes, shifts the transmission from drive/D to
neutral/N, or deactivates DSC. After any deacti-
vation, the system will no longer automatically
activate the vehicle brakes, which means the
driver must intervene and resume manual brak-
ing. You should then reactivate the system only
when you are fully aware of the prior speed and
distance settings.<
Page 76 of 247

Driving
74 Active cruise control may brake when you
reduce the stored desired speed; however, the
driver must constantly monitor traffic and inter-
vene if necessary.
When you switch off the engine or ignition,
active cruise control is fully switched off, too,
and any settings you have selected are can-
celed.
Swerving vehicles
When a vehicle moves from an adjacent lane
into your lane, active cruise control will not
detect this vehicle until it is fully in your lane
ahead of your vehicle.
Behavior in curves
Because of the limited range of the system, it is
possible that in curves or on the peaks and val-
leys of hilly roads, a vehicle ahead may be rec-
ognized late, or not at all. Therefore, it is up to
the driver to select a speed that is prudent in
view of the curves and terrain of the roadway.In approaching a curve, it is possible that active
cruise control might react briefly to a vehicle in
the adjacent lane. In addition, the system can
sense if your vehicle is in a curve and may not
accelerate. If your vehicle decelerates in either
case, you can choose to overcome the deceler-
ation by briefly pressing the accelerator pedal.
Driver interventions
Anytime the driver presses down on the
accelerator pedal, any automatic braking
action by the system is interrupted until the
pedal is fully released. After doing this, release
the accelerator and the system again controls
your cruising speed and distance setting. While
driving with the system activated, resting your
foot on the accelerator pedal will cause the sys-
tem not to brake even if necessary. Be certain
that floormats or other objects on the vehicle
floor do not interfere with movement of the
accelerator pedal.<
While active cruise control is capable of
braking your vehicle automatically when
you approach a slower vehicle ahead, it is
important to be aware that the ability of the sys-
tem to apply the brakes is also limited, e. g.
when you reduce your desired speed sharply.
The system cannot stop your vehicle. It uses
only a portion of braking system capacity and
does not utilize the full capacity of the vehicle
braking system. Therefore, the system cannot
decrease your speed for large differences in
speed between your vehicle and the vehicle
ahead. Examples: when you approach a vehicle
traveling at a much lower speed than your own
speed such as approaching a toll booth or when
a much slower vehicle cuts in front of you at
close range.<
Page 89 of 247

Controls
87Reference
At a glance
Driving tips
Communications
Navigation
Entertainment
Mobility
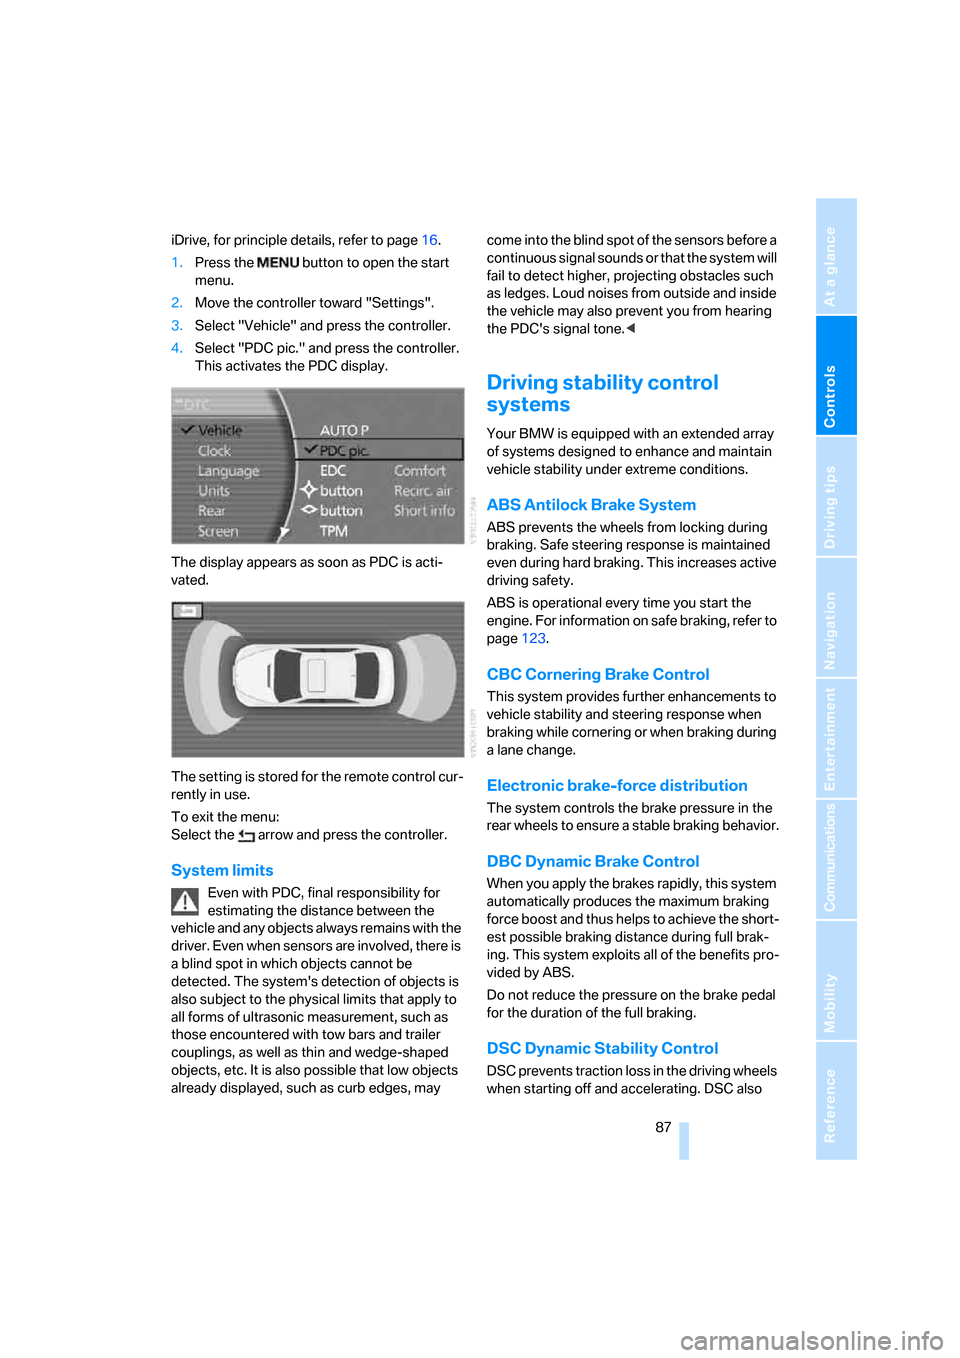
iDrive, for principle details, refer to page16.
1.Press the button to open the start
menu.
2.Move the controller toward "Settings".
3.Select "Vehicle" and press the controller.
4.Select "PDC pic." and press the controller.
This activates the PDC display.
The display appears as soon as PDC is acti-
vated.
The setting is stored for the remote control cur-
rently in use.
To exit the menu:
Select the arrow and press the controller.
System limits
Even with PDC, final responsibility for
estimating the distance between the
vehicle and any objects always remains with the
driver. Even when sensors are involved, there is
a blind spot in which objects cannot be
detected. The system's detection of objects is
also subject to the physical limits that apply to
all forms of ultrasonic measurement, such as
those encountered with tow bars and trailer
couplings, as well as thin and wedge-shaped
objects, etc. It is also possible that low objects
already displayed, such as curb edges, may come into the blind spot of the sensors before a
continuous signal sounds or that the system will
fail to detect higher, projecting obstacles such
as ledges. Loud noises from outside and inside
the vehicle may also prevent you from hearing
the PDC's signal tone.<
Driving stability control
systems
Your BMW is equipped with an extended array
of systems designed to enhance and maintain
vehicle stability under extreme conditions.
ABS Antilock Brake System
ABS prevents the wheels from locking during
braking. Safe steering response is maintained
even during hard braking. This increases active
driving safety.
ABS is operational every time you start the
engine. For information on safe braking, refer to
page123.
CBC Cornering Brake Control
This system provides further enhancements to
vehicle stability and steering response when
braking while cornering or when braking during
a lane change.
Electronic brake-force distribution
The system controls the brake pressure in the
rear wheels to ensure a stable braking behavior.
DBC Dynamic Brake Control
When you apply the brakes rapidly, this system
automatically produces the maximum braking
force boost and thus helps to achieve the short-
est possible braking distance during full brak-
ing. This system exploits all of the benefits pro-
vided by ABS.
Do not reduce the pressure on the brake pedal
for the duration of the full braking.
DSC Dynamic Stability Control
DSC prevents traction loss in the driving wheels
when starting off and accelerating. DSC also
Page 90 of 247

Technology for comfort, convenience and safety
88 detects unstable driving conditions such as
fishtailing or sliding of the vehicle's front
wheels. In these cases, DSC helps the vehicle
safely stay on course within the physical limits
by reducing the engine output and by applying
the brakes in the individual wheels.
The laws of physics cannot be repealed,
even with DSC. An appropriate driving
style always remains the responsibility of the
driver. Do not reduce the additional safety mar-
gin by taking unnecessary risks.<
Deactivating DSC
1.Press the button to open the start
menu.
2.Move the controller toward "Settings".
3.Select "DTC" again and press the controller
for at least 3 seconds.
The LED for "DTC" and the DSC indicator lamp
on the Info Display light up. DTC Dynamic Trac-
tion Control and DSC Dynamic Stability Control
are deactivated together. Interventions promot-
ing stability and forward momentum will no
longer be carried out.
To promote enhanced operating stability, reac-
tivate DSC again as soon as possible.
Activating DSC
Select "DTC" again and press the controller.
The LED on the Control Display and the DSC
indicator lamp on the Info Display go out.
For control purposes
If the indicator lamp flashes:
DSC controls the drive forces and
brake forces. The indicator lamp comes on:
DSC is deactivated.
DTC Dynamic Traction Control
DTC is a version of DSC that is optimized for
forward momentum in special road conditions.
The system ensures maximum forward
momentum, but with limited driving stability.
Therefore, drive with appropriate caution.
You may find it useful to briefly activate DTC
under the following special circumstances:
>When driving on snow-covered uphill
grades, in slushy snow or on uncleared,
snow-covered roads
>When rocking a stuck vehicle free or when
starting off in deep snow or on loose ground
>When driving with snow chains
Activating DTC
iDrive, for principle details, refer to page16.
1.Press the button to open the start
menu.
2.Move the controller toward "Settings".
3.Select "DTC" and press the controller.
The LED for "DTC" and the DTC indicator lamp
on the Info Display light up.
For control purposes
If the indicator lamp flashes:
DTC controls the drive forces and
brake forces.
The indicator lamp comes on:
DTC is activated.
Page 96 of 247

Technology for comfort, convenience and safety
94
Brake force display
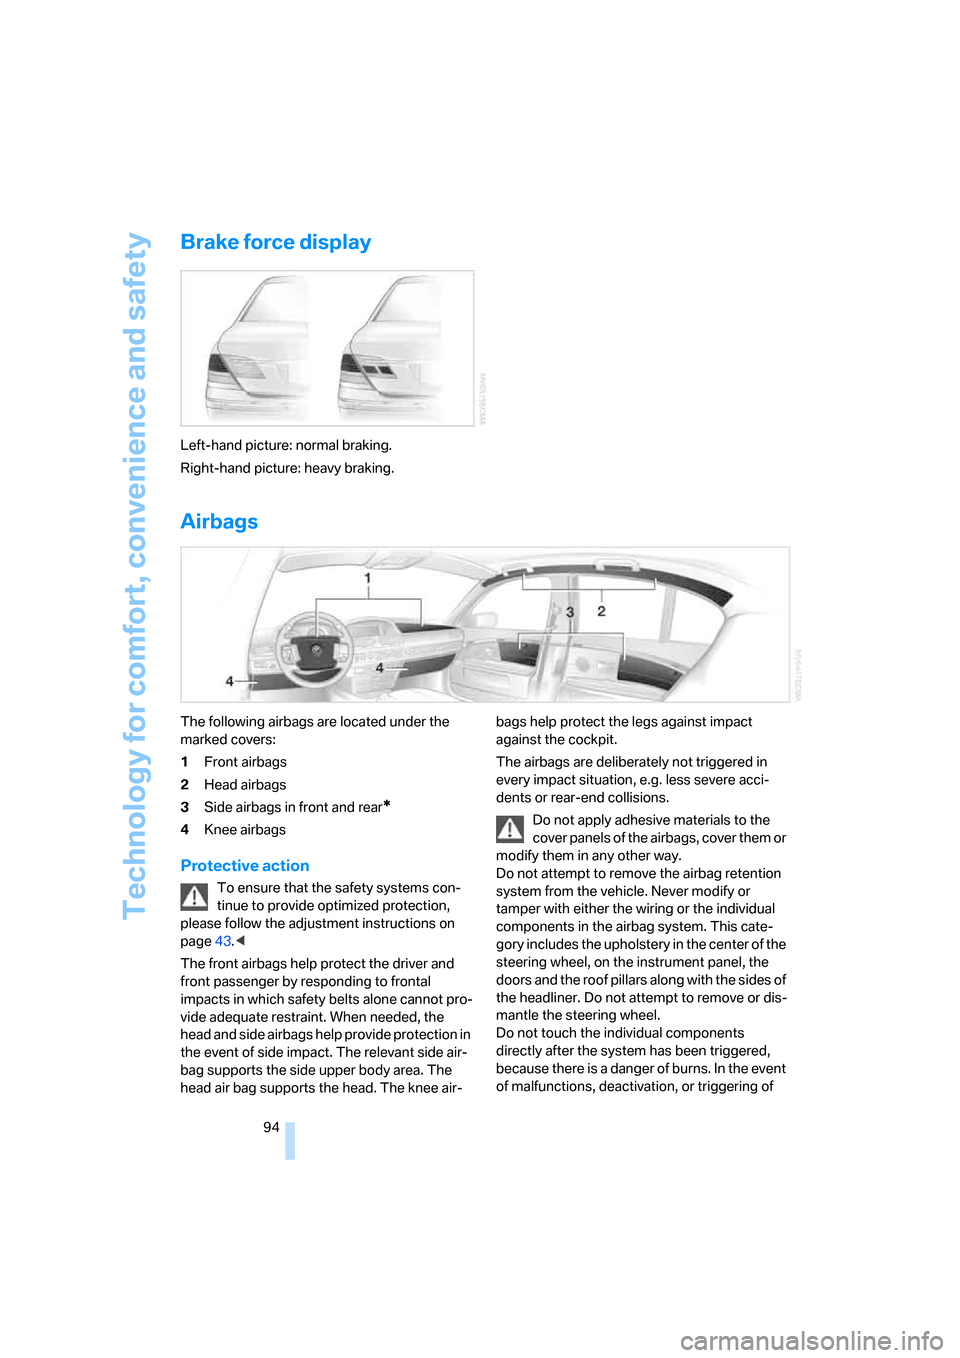
Left-hand picture: normal braking.
Right-hand picture: heavy braking.
Airbags
The following airbags are located under the
marked covers:
1Front airbags
2Head airbags
3Side airbags in front and rear
*
4Knee airbags
Protective action
To ensure that the safety systems con-
tinue to provide optimized protection,
please follow the adjustment instructions on
page43.<
The front airbags help protect the driver and
front passenger by responding to frontal
impacts in which safety belts alone cannot pro-
vide adequate restraint. When needed, the
head and side airbags help provide protection in
the event of side impact. The relevant side air-
bag supports the side upper body area. The
head air bag supports the head. The knee air-bags help protect the legs against impact
against the cockpit.
The airbags are deliberately not triggered in
every impact situation, e.g. less severe acci-
dents or rear-end collisions.
Do not apply adhesive materials to the
cover panels of the airbags, cover them or
modify them in any other way.
Do not attempt to remove the airbag retention
system from the vehicle. Never modify or
tamper with either the wiring or the individual
components in the airbag system. This cate-
gory includes the upholstery in the center of the
steering wheel, on the instrument panel, the
doors and the roof pillars along with the sides of
the headliner. Do not attempt to remove or dis-
mantle the steering wheel.
Do not touch the individual components
directly after the system has been triggered,
because there is a danger of burns. In the event
of malfunctions, deactivation, or triggering of
Page 98 of 247

Technology for comfort, convenience and safety
96 the operational readiness of the entire airbag
system and the safety belt tensioners.
Airbag system malfunction
>Warning lamp does not light up from radio
ready state.
>Warning lamp lights up continuously.
Have the airbag system checked immedi-
ately in case of a malfunction; otherwise,
there is a danger that the airbag system may not
respond in the expected manner in an accident
despite an impact of corresponding intensity.<
BMW Night Vision*
The concept
BMW Night Vision is a driver assistance system
that is designed to provide enhanced vision for
certain objects at night. This can be especially
helpful for detecting people and larger animals.
When objects are detected, the driver may be
able to take appropriate action sooner. For
example, the driver may identify and detect the
presence of persons or animals in the road
ahead or off to the sides and can be more alert,
slow down or stop, blow the horn, etc. The
driver can decide which actions are appropriate
and then react accordingly.
A certain area in front of the vehicle is viewed by
an infrared camera and a generated image is
shown on the Control Display. The resulting
thermal image shows the relative heat radiation
of the objects present in the camera's field of
view. Warmer objects appear brighter and
cooler objects appear darker. Contrast is
dependent on the temperature difference
between the objects and the background and
on the amount of heat radiation of the object
itself. As a result, it is quite possible that a per-
son is not continually recognizable as a person
in shape, since the thermal radiation can be
affected by different clothing which blocks heat
loss. Objects with little temperature difference
to the surrounding area, or little heat radiation
are less noticeable, for example in cold weather.Any improvement in detection depends on
many factors such as the object size and tem-
perature compared to the surroundings, or
other nearby objects, the visual recognition
skills of the driver, weather conditions, and
other factors.
Driving hints
With the system active, periodically but briefly,
glance at the thermal image on the Control Dis-
play to notice objects that could be people or
larger animals. The glance should be similar to
glancing at the rear view mirror. Do not stare at
the image for long periods while driving, as this
will take your attention away from the road. If
you notice an object of interest ahead, be pre-
pared to slow down or stop, blow the horn, or
take other appropriate action.
System limits
The system is designed to supplement but not
replace forward vision through the windshield.
The driver is responsible for safe driving at
night. BMW Night Vision is not designed to be
used as a continuous viewing window for driv-
ing at night.
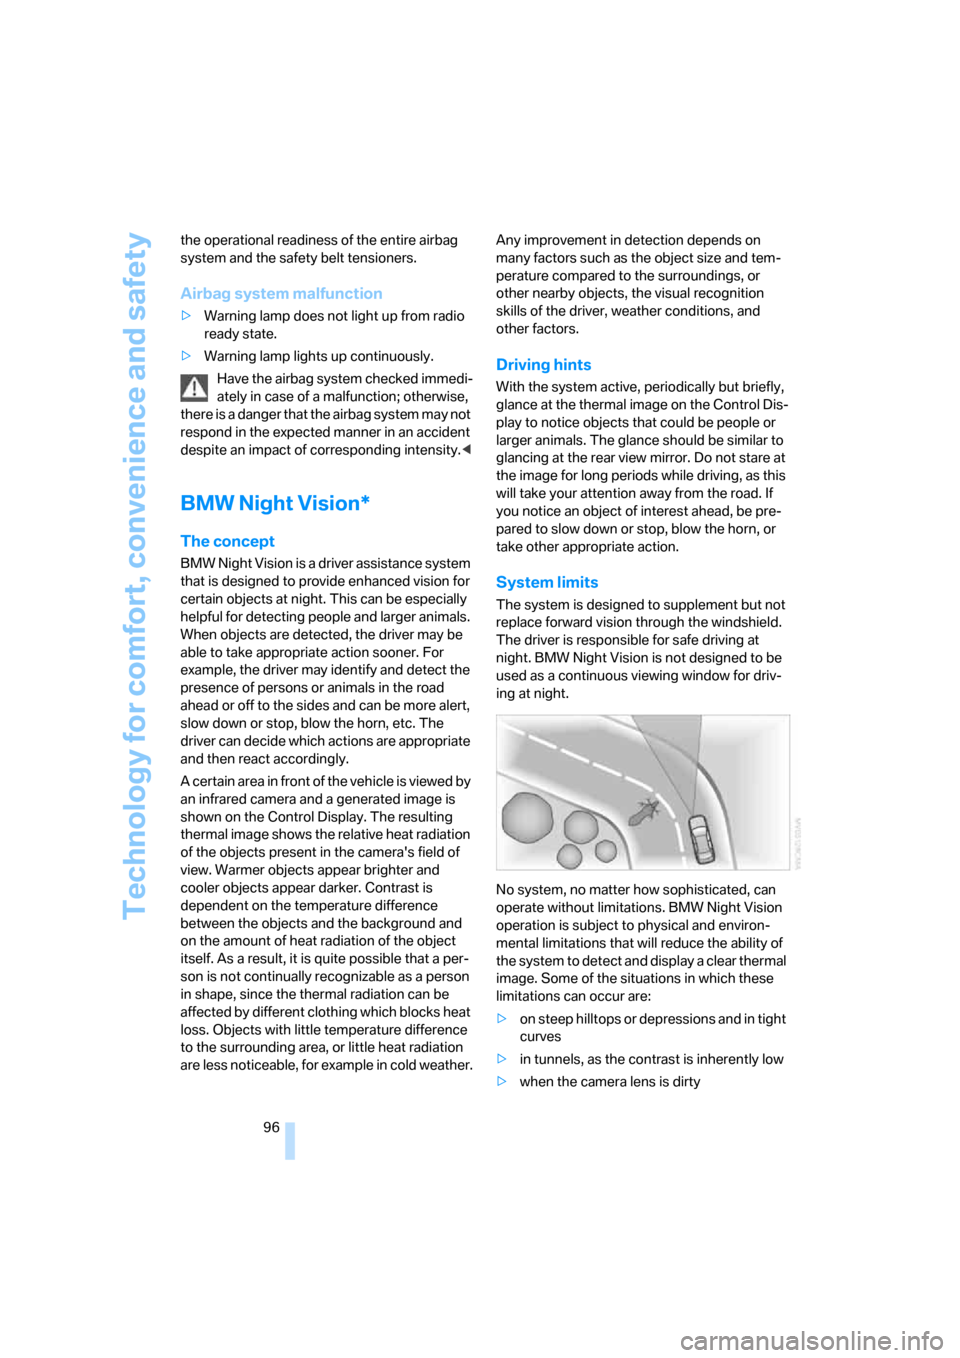
No system, no matter how sophisticated, can
operate without limitations. BMW Night Vision
operation is subject to physical and environ-
mental limitations that will reduce the ability of
the system to detect and display a clear thermal
image. Some of the situations in which these
limitations can occur are:
>on steep hilltops or depressions and in tight
curves
>in tunnels, as the contrast is inherently low
>when the camera lens is dirty
Page 99 of 247

Controls
97Reference
At a glance
Driving tips
Communications
Navigation
Entertainment
Mobility
>in dense fog, heavy rain or snowfall
>when displaying very hot objects such as
transformers, car exhausts etc.
>when the image briefly freezes during nor-
mal system adjustment.
BMW Night Vision's potential benefits
can be limited by the driving style of the
driver, the size and relative temperature of the
detected objects, dirt or contamination on the
camera lens, adverse weather like snow, rain or
fog, and other factors not mentioned here. It will
always be the driver's responsibility to drive at a
speed and in a manner that recognizes potential
hazards and to adjust accordingly.
BMW Night Vision is not a substitute or replace-
ment for driver responsibility or for adapting to
the visibility conditions and the traffic situation.
The forward view illuminated by the headlamps
must always be the basis for making safe driv-
ing decisions; otherwise, a safety risk will
result.<
Activating BMW Night Vision
1.Turn the light switch to position2 or3, refer
to page99.
2.Briefly press the button with the low beams
switched on.
The image will be displayed on the Control Dis-
play after a few seconds. Depending on the last
mode selected, either the normal or full screen
image will be displayed.Due to the system's need to adjust periodically,
a still image is displayed at certain intervals for
fractions of a second. This is normal and not an
indication of a problem.
To prevent driving without headlamps, at a
speed of more than approx. 3 mph/5 km/h and
when dark, the thermal image on the Control
Display is only shown when the low beams are
on.
BMW Night Vision is not available on the
rear screen. When the system is active,
neither the navigation system nor BMW Assist
can be started from the rear screen.
>Press the button.
>Make a selection with the controller, i. e.:
change the radio station or make a phone
call. For iDrive details, refer to page16.
Selecting settings
1.Activate BMW Night Vision.
2.Press the controller to display the menu
items.