2006 BMW 745i stop start
[x] Cancel search: stop startPage 85 of 247

Controls
83Reference
At a glance
Driving tips
Communications
Navigation
Entertainment
Mobility
Limit on Info Display
If, for instance, the warning sector in the
tachometer is visible, refer to page75, the
speed limit will be indicated by a warning sector
in the speedometer, refer to arrow.
Stopwatch
Starting and stopping
iDrive, for principle details, refer to page16.
1.Press the button to open the start
menu.
2.Move the controller toward "Car Data".
3.Select and press the controller.
4.Select and press the controller. The stop-
watch is reset to 0 and starts.
5.Select and press the controller.
This stops the timer.
Press the controller again to reset the stop-
watch to zero.
All of the remaining functions remain
available at all times while the stopwatch
is running. The stopwatch continues to run in
the background.<
Taking an intermediate time reading
Select "INTERM. TIME" and press the control-
ler. This intermediate time appears below the
ongoing primary stopwatch count.
Assistance window for
onboard data
You can select any of the following computer
functions for display in the assistance window:
>Computer
>Trip computer
>Speed limit
>Stopwatch
Applying display
iDrive, for principle details, refer to page16.
1.Press the button to open the start
menu.
2.Move the controller toward "Car Data".
3.Select "BC" and press the controller.
4.Select " Split" and press the controller.
The function appears in the assistance win-
dow.
You can also choose to view brief help texts
explaining selected menu items, refer to
page20, or the travel route with a navigation
system, refer to page130.
Page 91 of 247

Controls
89Reference
At a glance
Driving tips
Communications
Navigation
Entertainment
Mobility
Deactivating DTC
Select "DTC" again and press the controller.
The LED on the Control Display and the DTC
indicator lamp on the Info Display go out.
Dynamic Drive
The concept
Dynamic Drive minimizes body roll and opti-
mizes vehicle stability during cornering and
evasive maneuvers.
Active stabilizers at the front and rear axles form
the basis for Dynamic Drive. Suspension com-
pliance adapts to suit driving conditions, vary-
ing from performance-oriented during corner-
ing to smooth and comfort-oriented when the
vehicle is traveling in a straight line. During vehi-
cle operation, the system continuously runs
through closed-loop control cycles lasting only
fractions of a second.
The system assumes operational status each
time you start the engine.
Malfunction
The warning lamp lights up yellow and
a message is shown on the Info Display.
A malfunction has occurred in the
Dynamic Drive system. Have the system
checked as soon as possible.
If a malfunction occurs, please remember
to adapt your speed accordingly, espe-
cially in curves.
The suspension will be noticeably softer and
the vehicle will display a greater tendency to tilt
during cornering and in crosswinds.
If a Check Control message stating that you
should stop is displayed, stop at a suitable loca-
tion and switch off the engine as soon as possi-
ble. In this case, the oil level in the reservoir may
have dropped below the minimum, possibly
owing to a leak in the hydraulic system.
Do not continue driving, but instead contact
your BMW center.<
Self-leveling suspension*
Malfunction
The warning lamp for self-leveling sus-
pension lights up yellow and a message
is shown on the Info Display.
A malfunction has occurred in the level control
system.
Stop driving and check the vehicle:
>The vehicle is considerably lower at the rear
than at the front, possibly also on one side,
at the rear left compared to the rear right.
>The ground clearance is reduced or the
driving comfort is noticeably reduced.
>The position of the vehicle is normal, but a
malfunction is indicated.
Drive to the nearest BMW center or a workshop
that works in accordance with BMW guidelines
and uses appropriately trained personnel. Drive
with appropriate caution in the meantime.
EDC Electronic Damping
Control*
If the influencing variables such as road surface
quality or operating conditions such as steer-
ing, braking etc. change, the damping automat-
ically adjusts to the new conditions.
iDrive, for principle details, refer to page16.
1.Press the button to open the start
menu.
2.Move the controller toward "Settings".
3.Select "Vehicle" and press the controller.
4.Select "EDC" and press the controller.
Page 92 of 247

Technology for comfort, convenience and safety
90 There are two programs.
With each press of the controller, you can
switch back and forth between "Comfort" and
"Sport".
Comfort program
The Comfort program is suitable for use
throughout the vehicle's entire speed range and
regardless of load.
Sport program
You should select the Sport program for consis-
tently performance-oriented response from
shock absorbers and steering.
FTM Flat Tire Monitor*
The concept
The Flat Tire Monitor keeps track of the infla-
tion pressures in the four mounted tires as you
drive. The system triggers an alert whenever
the inflation pressure drops significantly in rela-
tion to the pressure in another tire.
When a loss of pressure occurs, the rolling
radius changes and with it, the rotational speed
of the wheels. This change is detected and sig-
naled as a flat tire.
Functional requirements
To ensure the reliable signaling of a flat tire, the
system must be initialized at the correct tire
inflation pressure.
The initialization must be repeated after
every correction of the tire inflation pres-
sure and after every tire or wheel change.<
System limits
The Flat Tire Monitor cannot indicate
sudden severe tire damage caused by
outside factors and does not detect a natural,
even pressure drop in all four tires.<
In the following situations, the system could be
delayed or malfunction:
>When the system has not been initialized.>When driving on snow-covered or slippery
road surfaces.
>Sporty driving style: slip in the drive wheels,
high lateral acceleration.
>When driving with snow chains
*.
Initializing system
The initialization is completed during driv-
ing, which can be interrupted at any time.
The initialization automatically continues when
driving resumes. Do not initialize the system
when driving with snow chains
*.<
iDrive, for principle details, refer to page16.
1.Select "Settings".
2.Select "Vehicle" and press the controller.
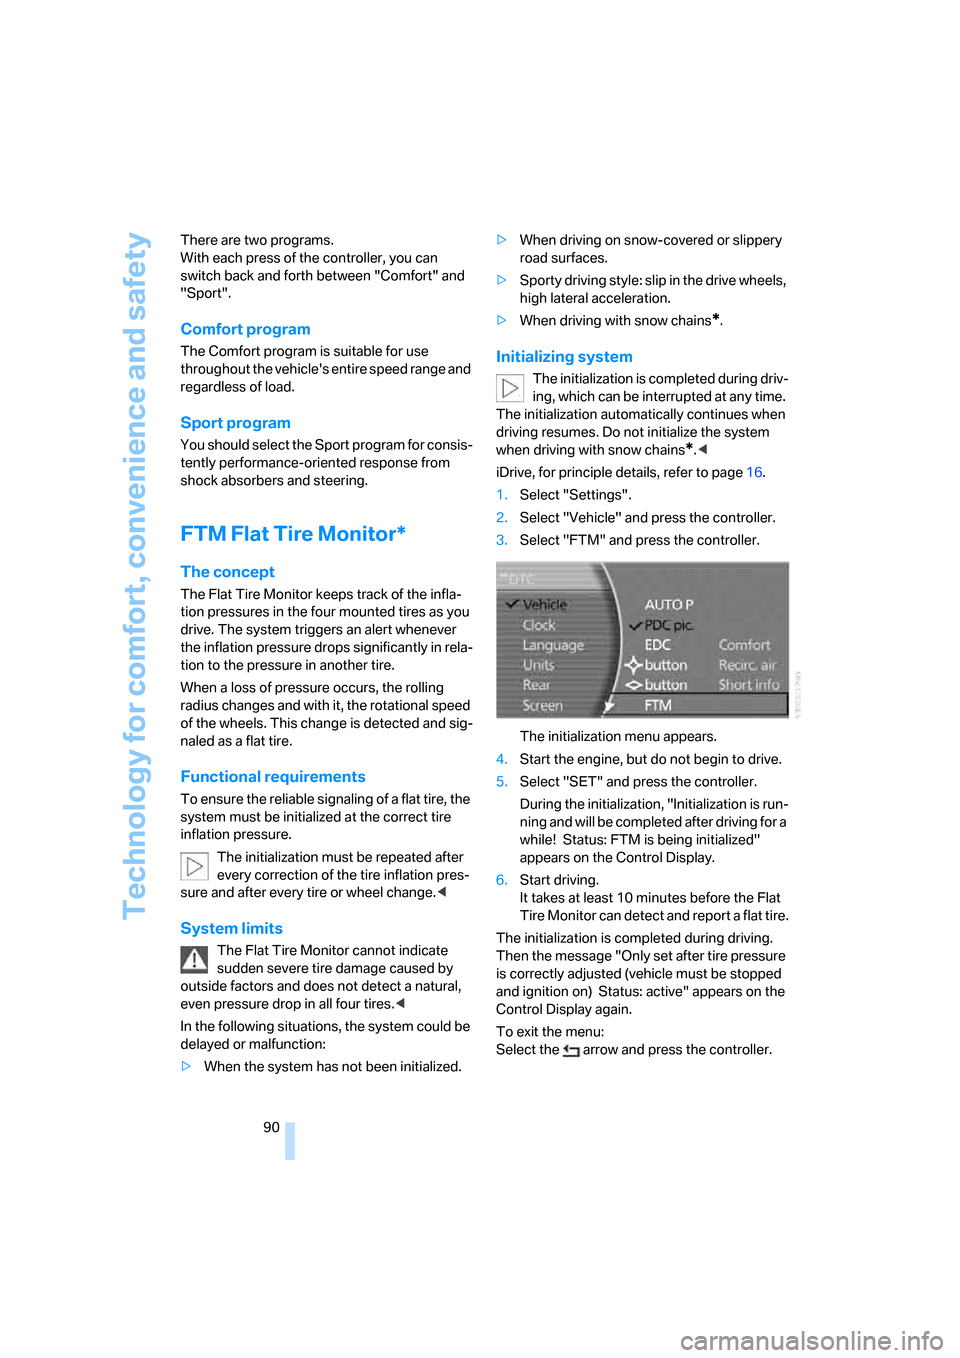
3.Select "FTM" and press the controller.
The initialization menu appears.
4.Start the engine, but do not begin to drive.
5.Select "SET" and press the controller.
During the initialization, "Initialization is run-
ning and will be completed after driving for a
while! Status: FTM is being initialized"
appears on the Control Display.
6.Start driving.
It takes at least 10 minutes before the Flat
Tire Monitor can detect and report a flat tire.
The initialization is completed during driving.
Then the message "Only set after tire pressure
is correctly adjusted (vehicle must be stopped
and ignition on) Status: active" appears on the
Control Display again.
To exit the menu:
Select the arrow and press the controller.
Page 108 of 247

Climate
106 5.Turn the controller to adjust the tempera-
ture:
>Turn toward the left, toward blue: colder
>Turn toward the right, toward red:
warmer
6.Press the controller to save the setting.
Maximum cooling
Maximally cooled air is obtained as
quickly as possible from an outside
temperature above 327/06 and
with the engine running.
The automatic climate control
changes over to the lowest temperature and
switches into the recirculated-air mode. The
maximum air quantity only flows out of the vents
for the upper body, so open these vents for
maximum cooling.
Air volume
You can vary the air volume by
turning. You can reactivate the
automatic air supply mode by
pressing the AUTO button.
Manual air distribution
You can adapt the air distribution to your own
personal preferences:
1.Open the start menu.
2.Open "Climate".
3.Turn the controller to select driver's side or
passenger side.4.Select the desired field and press the con-
troller.
1Airflow directed toward the windshield and
side windows
2Air to the upper body
3Air to footwell
You can only use the condensation sensor in
the AUTO program. Press the AUTO button
when you notice condensation on windows and
want to use the advantages of the condensation
sensor.
Defrosting windows and removing
condensation
Quickly remove ice and condensa-
tion from the windshield and front
side windows.
Residual heat
The system uses the warmth
stored in the engine to heat the
interior when the ignition is off, e.g.
while the vehicle is stopped at a
railroad crossing.
The function can be switched on when the fol-
lowing conditions are met:
>up to 15 minutes after switching off the
engine
>with the engine at operating temperature
>with sufficient battery voltage
>at an outside temperature below 777/
256
The LED lights up when the function is
switched on.
Page 150 of 247

What to do if …
148
What to do if …
What to do if …
>a navigation DVD is inserted, but an instruc-
tion to insert the DVD appears on the Con-
trol Display?
The navigation DVD may not be the right
DVD for the navigation system. The DVD is
labeled accordingly.
>you request the current position of your
vehicle, but do not receive a precise dis-
play?
The system is unable to receive enough
GPS signals at your current position due to
obstructions, your position is not yet avail-
able on your navigation DVD, or the system
is in the process of calculating your posi-
tion. Please wait and then try again a little
later.
>the route guidance does not accept a desti-
nation?
The data of the destination is not stored on
the navigation DVD that is loaded. Select a
destination that is as close as possible to
the original.
>the route guidance does not accept an
address without the street?
On the navigation DVD, no downtown area
can be determined for the city or town
entered. Enter any street, or a destination
such as the railway station etc., then start
the route guidance.
>you want to enter an address for the route
guidance, but it is not possible to select the
letters for your desired entry?
The data of the destination is not stored on
the navigation DVD that is loaded. In this
case, the system will not offer you any let-
ters to choose from. Select a destination
that is as close as possible to the original.>the system stops furnishing directions on
which way to turn as you approach intersec-
tions?
You are driving in an area that has not yet
been completely recorded on the naviga-
tion DVD. Instead of an arrow indicating a
turn, you will see an arrow which indicates
the general direction of your planned route.
Or you have left the recommended route
and the system requires a few seconds to
calculate a new recommended route.
>the navigation system does not react to
entries?
If the battery was disconnected, it then
takes up to 10 minutes before the system is
once again operational.
Page 159 of 247

Navigation
Entertainment
Driving tips
157Reference
At a glance
Controls
Communications
Mobility
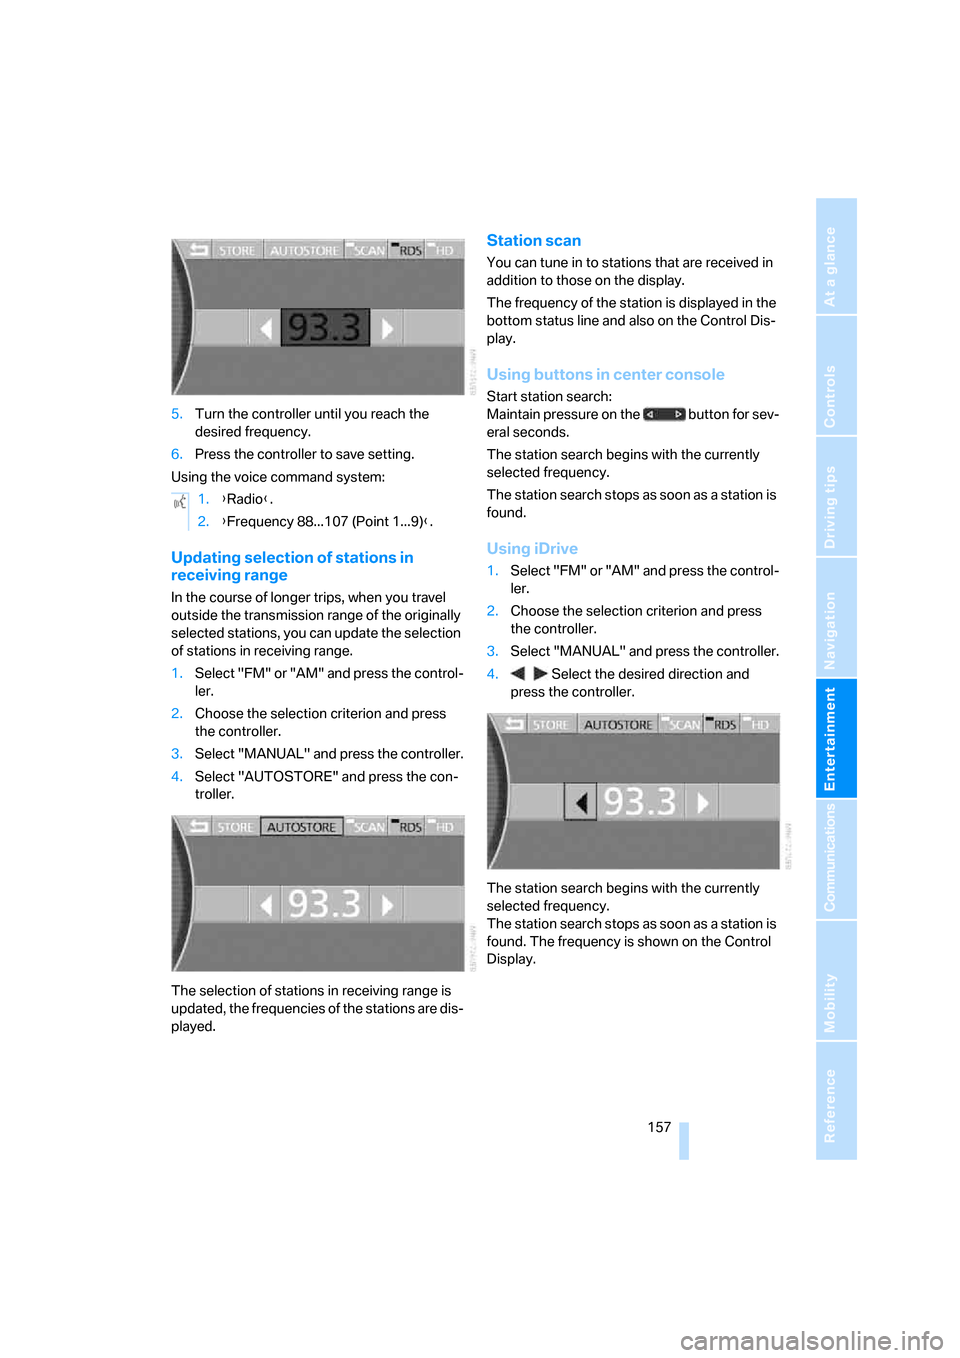
5.Turn the controller until you reach the
desired frequency.
6.Press the controller to save setting.
Using the voice command system:
Updating selection of stations in
receiving range
In the course of longer trips, when you travel
outside the transmission range of the originally
selected stations, you can update the selection
of stations in receiving range.
1.Select "FM" or "AM" and press the control-
ler.
2.Choose the selection criterion and press
the controller.
3.Select "MANUAL" and press the controller.
4.Select "AUTOSTORE" and press the con-
troller.
The selection of stations in receiving range is
updated, the frequencies of the stations are dis-
played.
Station scan
You can tune in to stations that are received in
addition to those on the display.
The frequency of the station is displayed in the
bottom status line and also on the Control Dis-
play.
Using buttons in center console
Start station search:
Maintain pressure on the button for sev-
eral seconds.
The station search begins with the currently
selected frequency.
The station search stops as soon as a station is
found.
Using iDrive
1.Select "FM" or "AM" and press the control-
ler.
2.Choose the selection criterion and press
the controller.
3.Select "MANUAL" and press the controller.
4. Select the desired direction and
press the controller.
The station search begins with the currently
selected frequency.
The station search stops as soon as a station is
found. The frequency is shown on the Control
Display. 1.{Radio}.
2.{Frequency 88...107 (Point 1...9)}.
Page 171 of 247

Navigation
Entertainment
Driving tips
169Reference
At a glance
Controls
Communications
Mobility
3.Press the button to open the start
menu.
4.Move the controller toward "Entertain-
ment".
5.Select "DVD" and press the controller.
After a few seconds, play will resume at the
point where playback was previously inter-
rupted.
The DVD magazine's load status is indicated on
the Control Display.
If the display fails to detect a DVD that you
have loaded into the magazine, check to
ensure that the DVD has been inserted cor-
rectly and inspect it for signs of defects.
If there are audio CDs in the DVD magazine,
these will not be displayed in the DVD menu,
but instead in the CD changer menu.<
Using the voice command system:
DVD control
With the DVD controller, you can select the
track and chapter, open the DVD-specific menu
and operate functions such as Language, Fast
forward and Reverse or Freeze frame.
A DVD can briefly deactivate functions of the
DVD control, under certain circumstances even
during playback of the entire DVD. It is not pos-
sible to operate the DVD control under these
circumstances. In this case, try to make the
selection using the DVD-specific menu.
During playback:
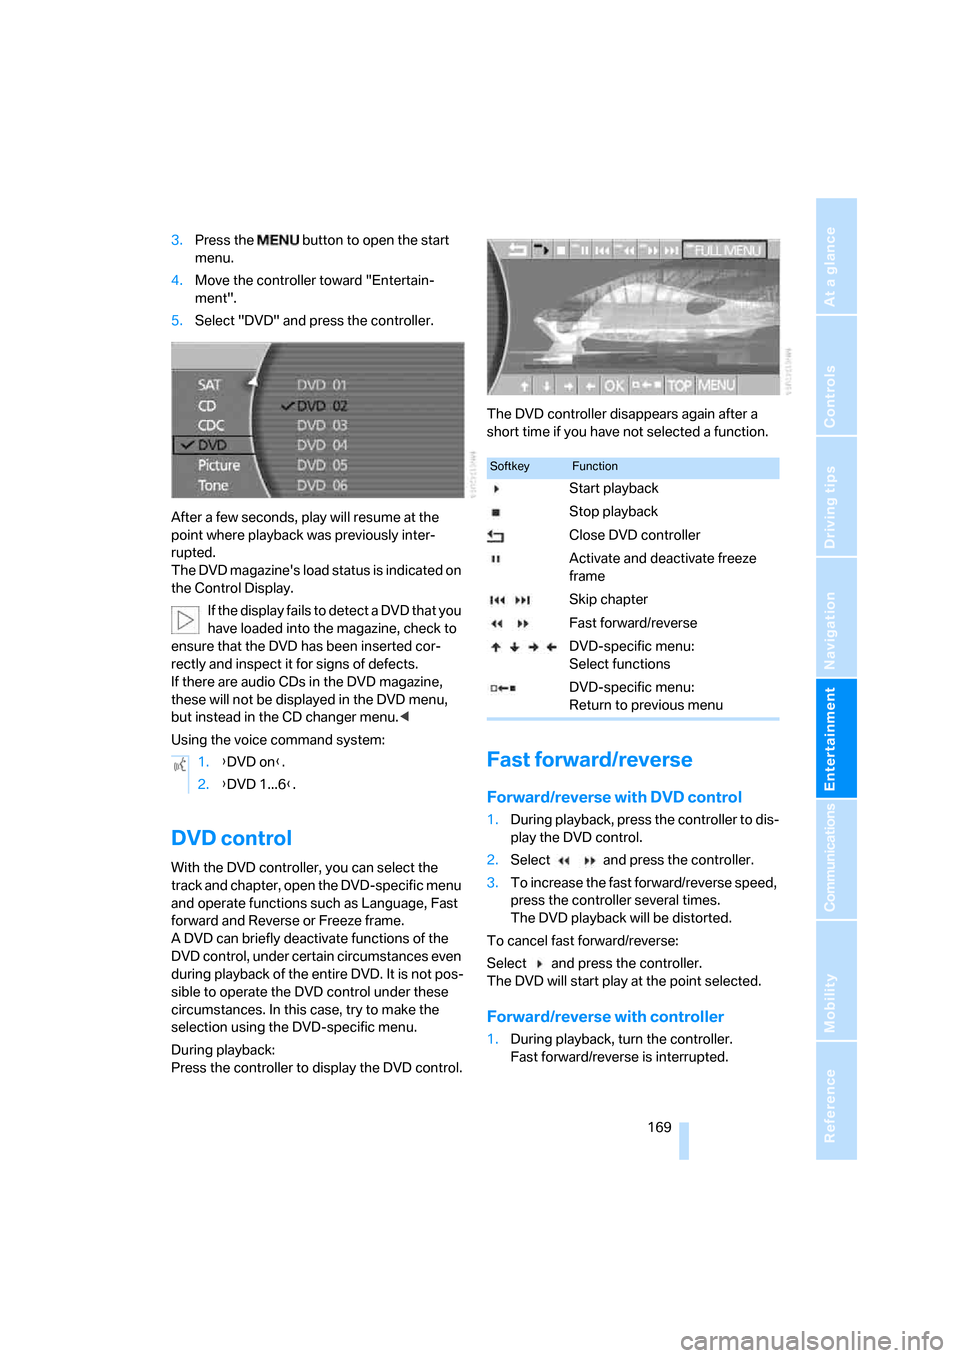
Press the controller to display the DVD control.The DVD controller disappears again after a
short time if you have not selected a function.
Fast forward/reverse
Forward/reverse with DVD control
1.During playback, press the controller to dis-
play the DVD control.
2.Select and press the controller.
3.To increase the fast forward/reverse speed,
press the controller several times.
The DVD playback will be distorted.
To cancel fast forward/reverse:
Select and press the controller.
The DVD will start play at the point selected.
Forward/reverse with controller
1.During playback, turn the controller.
Fast forward/reverse is interrupted. 1.{DVD on}.
2.{DVD 1...6}.
SoftkeyFunction
Start playback
Stop playback
Close DVD controller
Activate and deactivate freeze
frame
Skip chapter
Fast forward/reverse
DVD-specific menu:
Select functions
DVD-specific menu:
Return to previous menu
Page 181 of 247

179
Entertainment
Reference
At a glance
Controls
Driving tips Communications
Navigation
Mobility
Getting started
Inserting mobile phone
If you insert or remove the mobile phone during
a call, the call may be interrupted depending on
the mobile phone model.
1.Remove the protective cap from the mobile
phone's antenna connector if necessary, so
that the mobile phone can engage in the
snap-in adapter.
2.Push the mobile phone downward toward
the electrical connections, arrow1, and
press forward, arrow2, until it engages.
The battery is charged starting from radio ready
state of the vehicle, refer to charge indicator on
mobile phone.
Removing mobile phone
To remove mobile phone, depending on model:
>Press the button.
>Push the button upward.
Logging on mobile phone in
vehicle
To log your mobile phone onto the vehicle, you
need a special Bluetooth passkey. This is
included in the information kit.
The following prerequisites must be met:
>The ignition is switched on.
>The mobile phone is ready for operation.
>The Bluetooth connections in the vehicle
and the mobile phone are activated.
>Depending on the mobile phone model,
certain presets are required on the mobile
phone, e.g. detecting, connecting or cou-
pling Bluetooth unit, refer to the operating
instructions of your mobile phone.
Only log on the mobile phone with the
vehicle stopped; otherwise, the passen-
gers and other road user can be endangered
due to a lack of attentiveness on the part of the
driver.<
Preparation with iDrive
iDrive, for principle details, refer to page16.
1.Press the button to open the start
menu.
2.Move the controller toward "Settings".
3.Select "Phone" and press the controller.
4.Select "PAIRING" and press the controller.
The three LEDs in the status line flash, refer
to page20.