2006 BMW 650I COUPE tow
[x] Cancel search: towPage 111 of 236
Practical interior accessories
110
Cigarette lighter
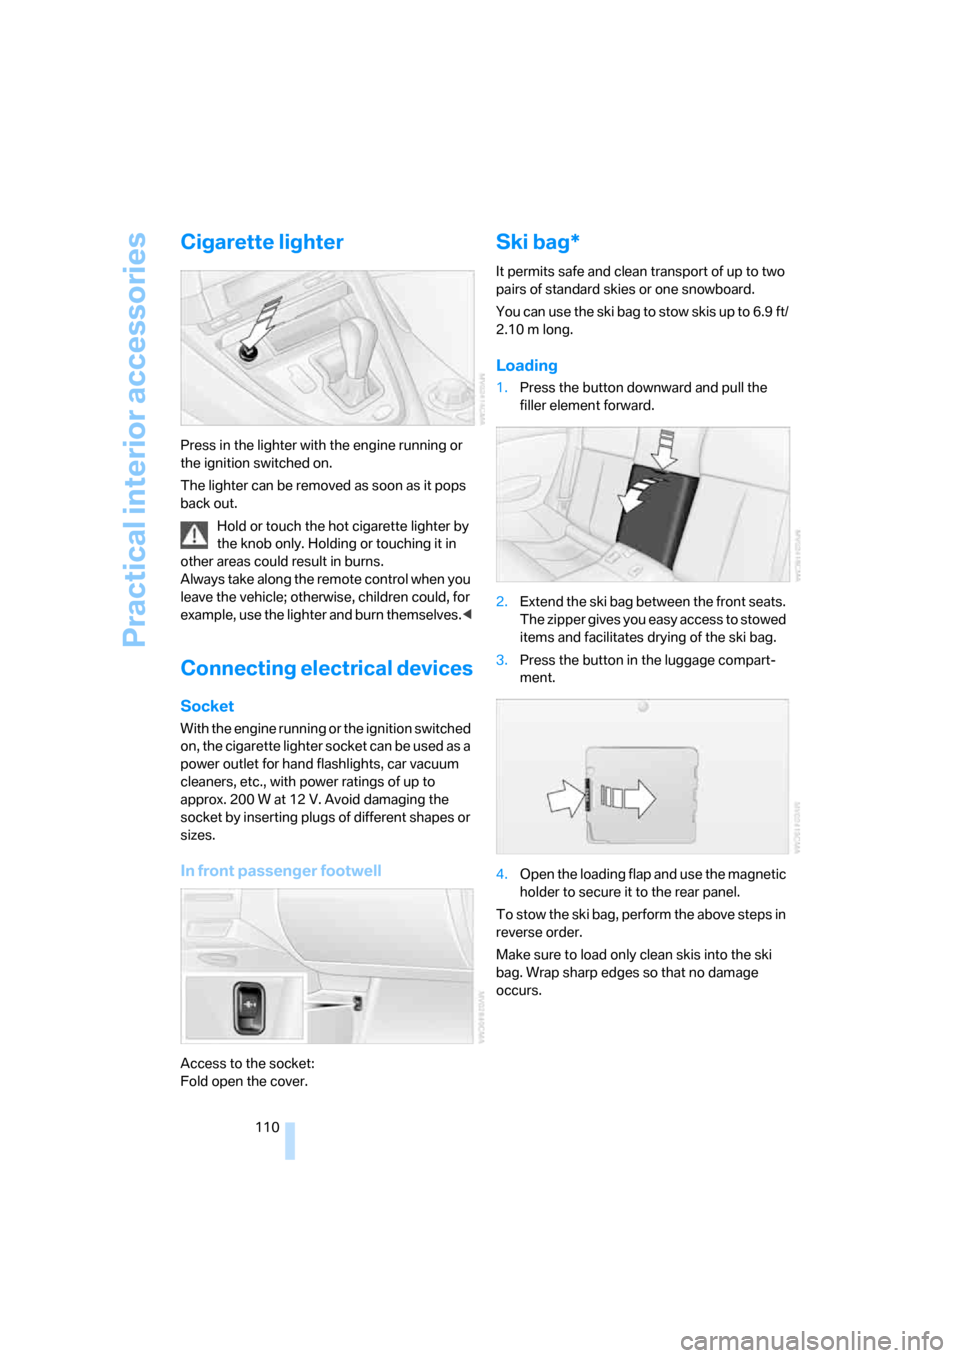
Press in the lighter with the engine running or
the ignition switched on.
The lighter can be removed as soon as it pops
back out.
Hold or touch the hot cigarette lighter by
the knob only. Holding or touching it in
other areas could result in burns.
Always take along the remote control when you
leave the vehicle; otherwise, children could, for
example, use the lighter and burn themselves.<
Connecting electrical devices
Socket
With the engine running or the ignition switched
on, the cigarette lighter socket can be used as a
power outlet for hand flashlights, car vacuum
cleaners, etc., with power ratings of up to
approx. 200 W at 12 V. Avoid damaging the
socket by inserting plugs of different shapes or
sizes.
In front passenger footwell
Access to the socket:
Fold open the cover.
Ski bag*
It permits safe and clean transport of up to two
pairs of standard skies or one snowboard.
You can use the ski bag to stow skis up to 6.9 ft/
2.10 m long.
Loading
1.Press the button downward and pull the
filler element forward.
2.Extend the ski bag between the front seats.
The zipper gives you easy access to stowed
items and facilitates drying of the ski bag.
3.Press the button in the luggage compart-
ment.
4.Open the loading flap and use the magnetic
holder to secure it to the rear panel.
To stow the ski bag, perform the above steps in
reverse order.
Make sure to load only clean skis into the ski
bag. Wrap sharp edges so that no damage
occurs.
Page 118 of 236
Driving tips
117Reference
At a glance
Controls
Communications
Navigation
Entertainment
Mobility
5.Determine the combined weight of luggage
and cargo being loaded on the vehicle. That
weight may not safely exceed the available
cargo and luggage load capacity calculated
in step 4.
6.If your vehicle will be towing a trailer, part of
the load from your trailer will be transferred
to your vehicle. Consult the manual for
transporting a trailer to determine how this
may reduce the available cargo and luggage
load capacity of your vehicle.
Load
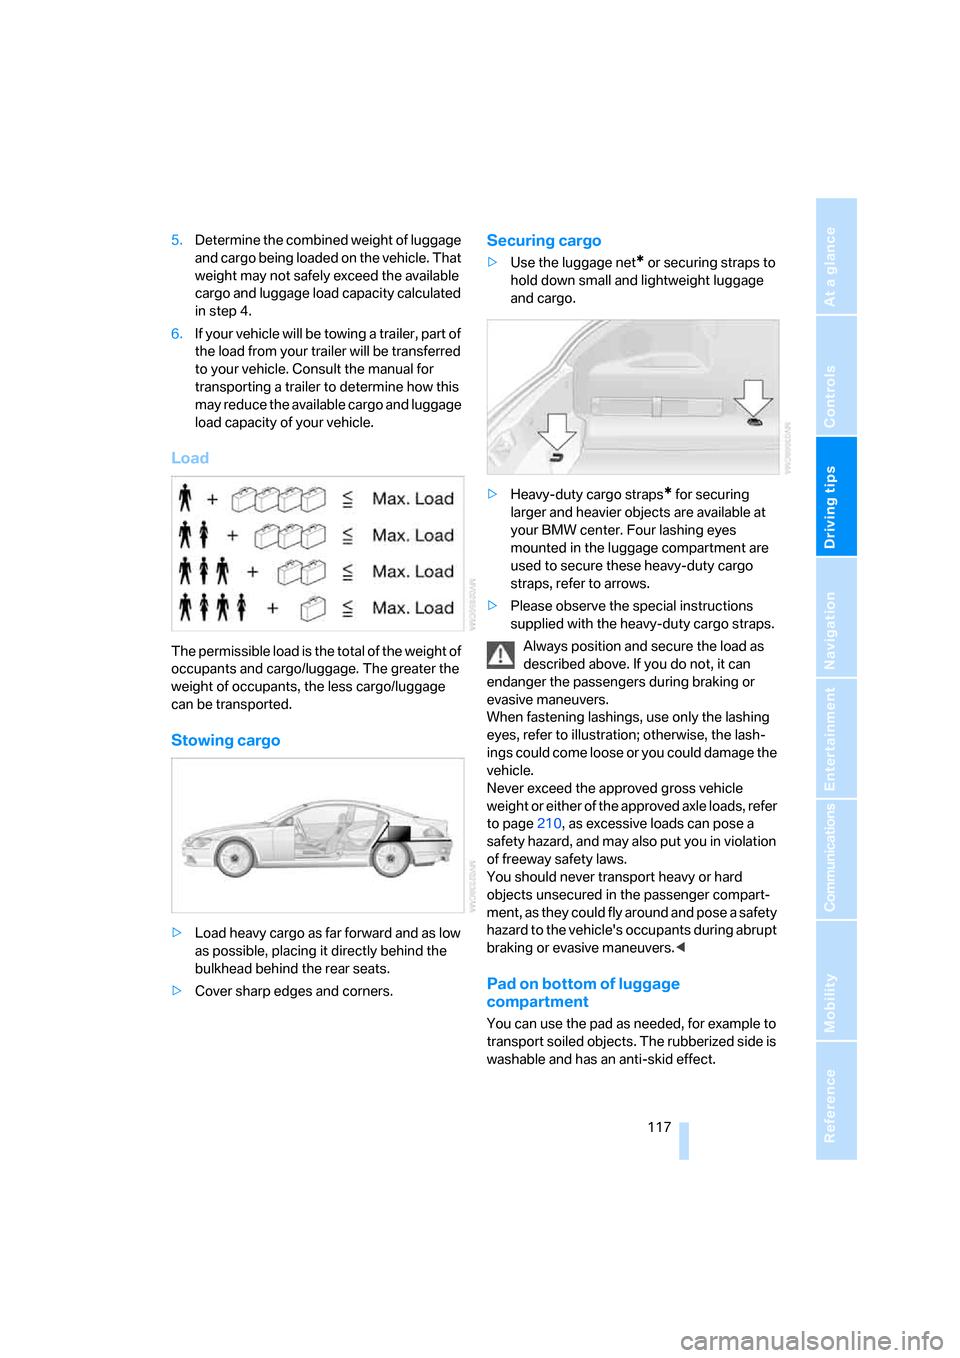
The permissible load is the total of the weight of
occupants and cargo/luggage. The greater the
weight of occupants, the less cargo/luggage
can be transported.
Stowing cargo
>Load heavy cargo as far forward and as low
as possible, placing it directly behind the
bulkhead behind the rear seats.
>Cover sharp edges and corners.
Securing cargo
>Use the luggage net* or securing straps to
hold down small and lightweight luggage
and cargo.
>Heavy-duty cargo straps
* for securing
larger and heavier objects are available at
your BMW center. Four lashing eyes
mounted in the luggage compartment are
used to secure these heavy-duty cargo
straps, refer to arrows.
>Please observe the special instructions
supplied with the heavy-duty cargo straps.
Always position and secure the load as
described above. If you do not, it can
endanger the passengers during braking or
evasive maneuvers.
When fastening lashings, use only the lashing
eyes, refer to illustration; otherwise, the lash-
ings could come loose or you could damage the
vehicle.
Never exceed the approved gross vehicle
weight or either of the approved axle loads, refer
to page210, as excessive loads can pose a
safety hazard, and may also put you in violation
of freeway safety laws.
You should never transport heavy or hard
objects unsecured in the passenger compart-
ment, as they could fly around and pose a safety
hazard to the vehicle's occupants during abrupt
braking or evasive maneuvers.<
Pad on bottom of luggage
compartment
You can use the pad as needed, for example to
transport soiled objects. The rubberized side is
washable and has an anti-skid effect.
Page 122 of 236
Navigation
Driving tips
121Reference
At a glance
Controls
Communications
Entertainment
Mobility
Destination entry
In entering your destination you can select from
among the following options:
>Entering a destination manually, see below
>Entering destination via voice*, refer to
page124
>Selecting destination using information,
refer to page126
>Selecting destination from a list, refer to
Destination list, page127
>Selecting destination from address book,
refer to page128
>Selecting home address, refer to page130
After selecting your destination you can pro-
ceed to start the destination guidance, refer to
page132.
Operating navigation system
Enter data only when the vehicle is sta-
tionary, and always obey the traffic regu-
lations and road signs in the event of any con-
tradiction between traffic and road conditions
and the instructions issued by the navigation
system. If you do not observe this precaution,
you may be in violation of the law, and can
endanger vehicle occupants and other road
users.<
iDrive, for principle details, refer to page16.
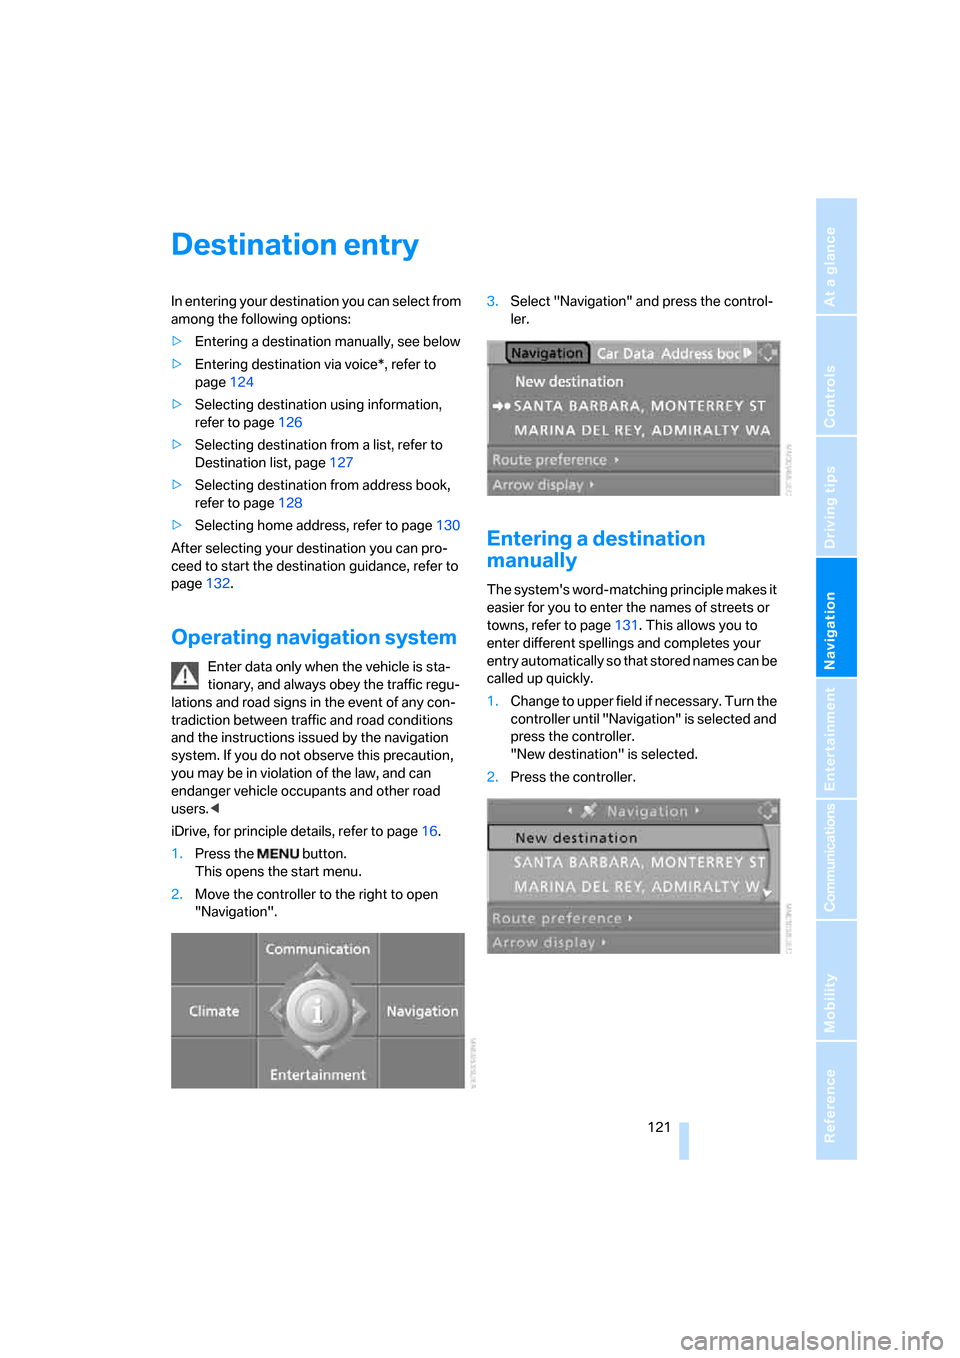
1.Press the button.
This opens the start menu.
2.Move the controller to the right to open
"Navigation".3.Select "Navigation" and press the control-
ler.
Entering a destination
manually
The system's word-matching principle makes it
easier for you to enter the names of streets or
towns, refer to page131. This allows you to
enter different spellings and completes your
entry automatically so that stored names can be
called up quickly.
1.Change to upper field if necessary. Turn the
controller until "Navigation" is selected and
press the controller.
"New destination" is selected.
2.Press the controller.
Page 123 of 236
Destination entry
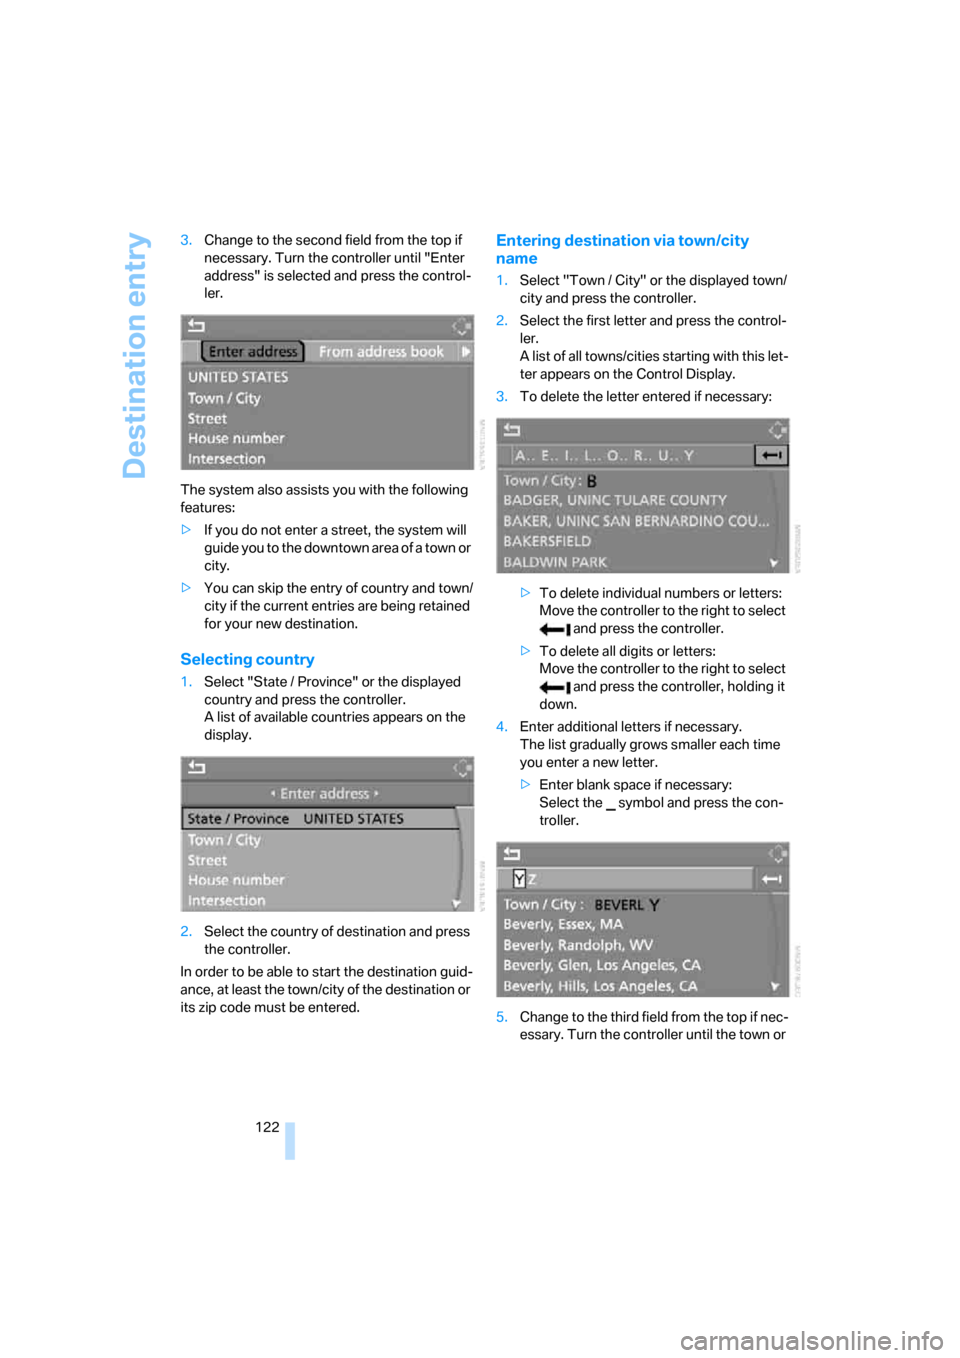
122 3.Change to the second field from the top if
necessary. Turn the controller until "Enter
address" is selected and press the control-
ler.
The system also assists you with the following
features:
>If you do not enter a street, the system will
guide you to the downtown area of a town or
city.
>You can skip the entry of country and town/
city if the current entries are being retained
for your new destination.
Selecting country
1.Select "State / Province" or the displayed
country and press the controller.
A list of available countries appears on the
display.
2.Select the country of destination and press
the controller.
In order to be able to start the destination guid-
ance, at least the town/city of the destination or
its zip code must be entered.
Entering destination via town/city
name
1.Select "Town / City" or the displayed town/
city and press the controller.
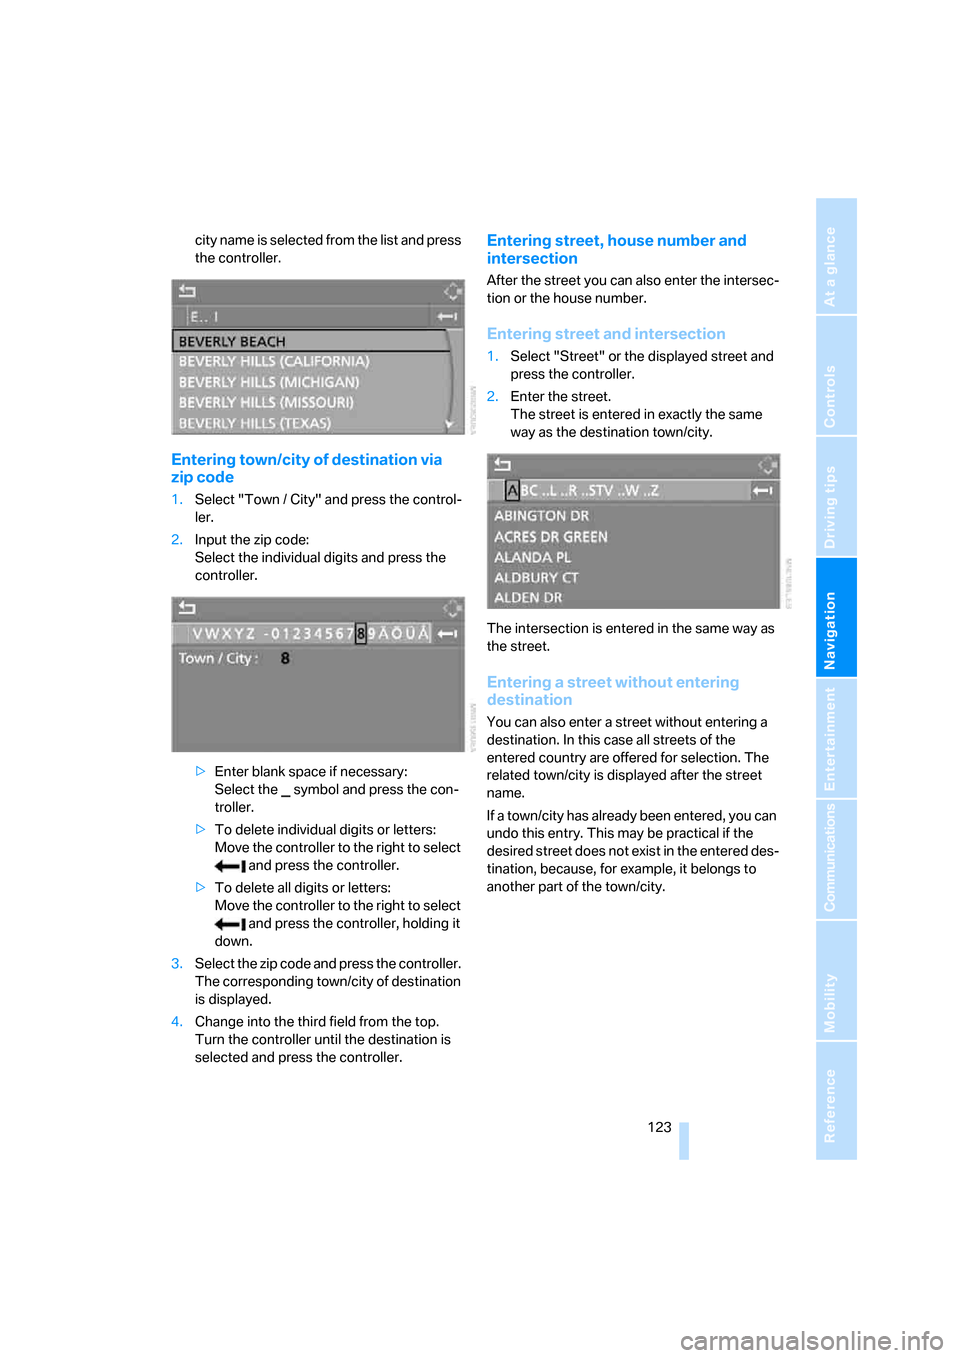
2.Select the first letter and press the control-
ler.
A list of all towns/cities starting with this let-
ter appears on the Control Display.
3.To delete the letter entered if necessary:
>To delete individual numbers or letters:
Move the controller to the right to select
and press the controller.
>To delete all digits or letters:
Move the controller to the right to select
and press the controller, holding it
down.
4.Enter additional letters if necessary.
The list gradually grows smaller each time
you enter a new letter.
>Enter blank space if necessary:
Select the symbol and press the con-
troller.
5.Change to the third field from the top if nec-
essary. Turn the controller until the town or
Page 124 of 236
Navigation
Driving tips
123Reference
At a glance
Controls
Communications
Entertainment
Mobility
city name is selected from the list and press
the controller.
Entering town/city of destination via
zip code
1.Select "Town / City" and press the control-
ler.
2.Input the zip code:
Select the individual digits and press the
controller.
>Enter blank space if necessary:
Select the symbol and press the con-
troller.
>To delete individual digits or letters:
Move the controller to the right to select
and press the controller.
>To delete all digits or letters:
Move the controller to the right to select
and press the controller, holding it
down.
3.Select the zip code and press the controller.
The corresponding town/city of destination
is displayed.
4.Change into the third field from the top.
Turn the controller until the destination is
selected and press the controller.
Entering street, house number and
intersection
After the street you can also enter the intersec-
tion or the house number.
Entering street and intersection
1.Select "Street" or the displayed street and
press the controller.
2.Enter the street.
The street is entered in exactly the same
way as the destination town/city.
The intersection is entered in the same way as
the street.
Entering a street without entering
destination
You can also enter a street without entering a
destination. In this case all streets of the
entered country are offered for selection. The
related town/city is displayed after the street
name.
If a town/city has already been entered, you can
undo this entry. This may be practical if the
desired street does not exist in the entered des-
tination, because, for example, it belongs to
another part of the town/city.
Page 126 of 236
Navigation
Driving tips
125Reference
At a glance
Controls
Communications
Entertainment
Mobility
Selecting country
Say the country of destination in the language
of the voice command system.
Entering destination
To enter the destination, spell it using the cus-
tomary spelling of the destination country.
Say the letters smoothly and at normal volume,
avoiding excessive emphasis and pauses.
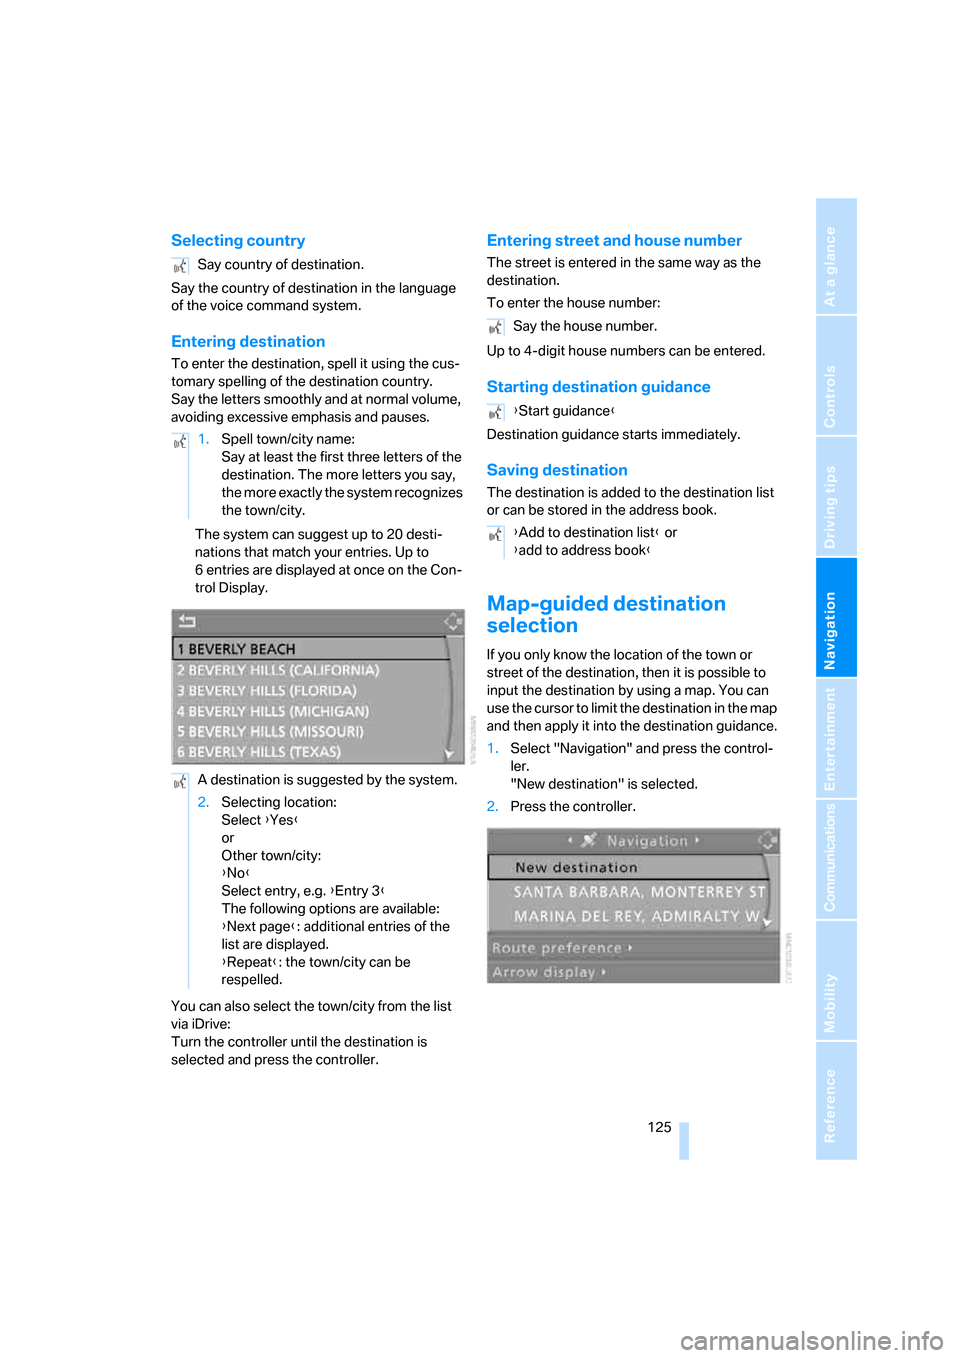
The system can suggest up to 20 desti-
nations that match your entries. Up to
6 entries are displayed at once on the Con-
trol Display.
You can also select the town/city from the list
via iDrive:
Turn the controller until the destination is
selected and press the controller.
Entering street and house number
The street is entered in the same way as the
destination.
To enter the house number:
Up to 4-digit house numbers can be entered.
Starting destination guidance
Destination guidance starts immediately.
Saving destination
The destination is added to the destination list
or can be stored in the address book.
Map-guided destination
selection
If you only know the location of the town or
street of the destination, then it is possible to
input the destination by using a map. You can
use the cursor to limit the destination in the map
and then apply it into the destination guidance.
1.Select "Navigation" and press the control-
ler.
"New destination" is selected.
2.Press the controller. Say country of destination.
1.Spell town/city name:
Say at least the first three letters of the
destination. The more letters you say,
the more exactly the system recognizes
the town/city.
A destination is suggested by the system.
2.Selecting location:
Select {Yes}
or
Other town/city:
{No}
Select entry, e.g. {Entry 3}
The following options are available:
{Next page}: additional entries of the
list are displayed.
{Repeat}: the town/city can be
respelled.
Say the house number.
{Start guidance}
{Add to destination list} or
{add to address book}
Page 127 of 236
Destination entry
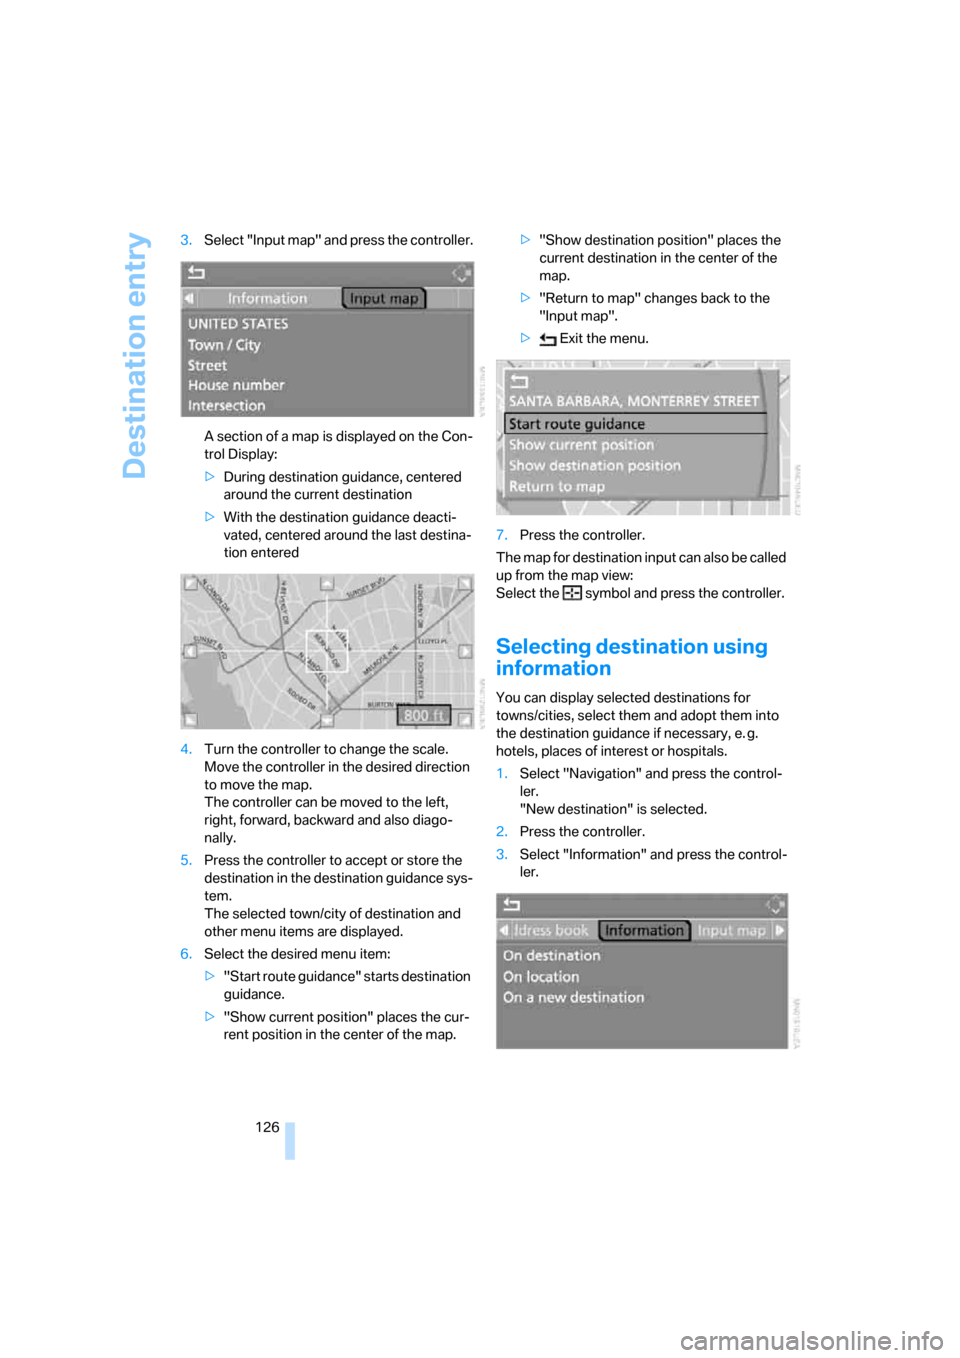
126 3.Select "Input map" and press the controller.
A section of a map is displayed on the Con-
trol Display:
>During destination guidance, centered
around the current destination
>With the destination guidance deacti-
vated, centered around the last destina-
tion entered
4.Turn the controller to change the scale.
Move the controller in the desired direction
to move the map.
The controller can be moved to the left,
right, forward, backward and also diago-
nally.
5.Press the controller to accept or store the
destination in the destination guidance sys-
tem.
The selected town/city of destination and
other menu items are displayed.
6.Select the desired menu item:
>"Start route guidance" starts destination
guidance.
>"Show current position" places the cur-
rent position in the center of the map.>"Show destination position" places the
current destination in the center of the
map.
>"Return to map" changes back to the
"Input map".
> Exit the menu.
7.Press the controller.
The map for destination input can also be called
up from the map view:
Select the symbol and press the controller.
Selecting destination using
information
You can display selected destinations for
towns/cities, select them and adopt them into
the destination guidance if necessary, e. g.
hotels, places of interest or hospitals.
1.Select "Navigation" and press the control-
ler.
"New destination" is selected.
2.Press the controller.
3.Select "Information" and press the control-
ler.
Page 129 of 236
Destination entry
128
Editing the destination list
1.Select the desired destination from the des-
tination list and press the controller.
2.The selected destination can be edited:
>To store the entry:
Select "Add to address book".
>To display information on the destina-
tion:
Select "Information on destination".
>To delete the entry:
Select "Delete entry".
>To delete all entries:
Select "Delete list". Destination guid-
ance is switched off.
>To change the entry:
Select "Edit". For operation, refer to
Entering destination via town/city name,
page122.
3.Press the controller.
Address book
Opening address book
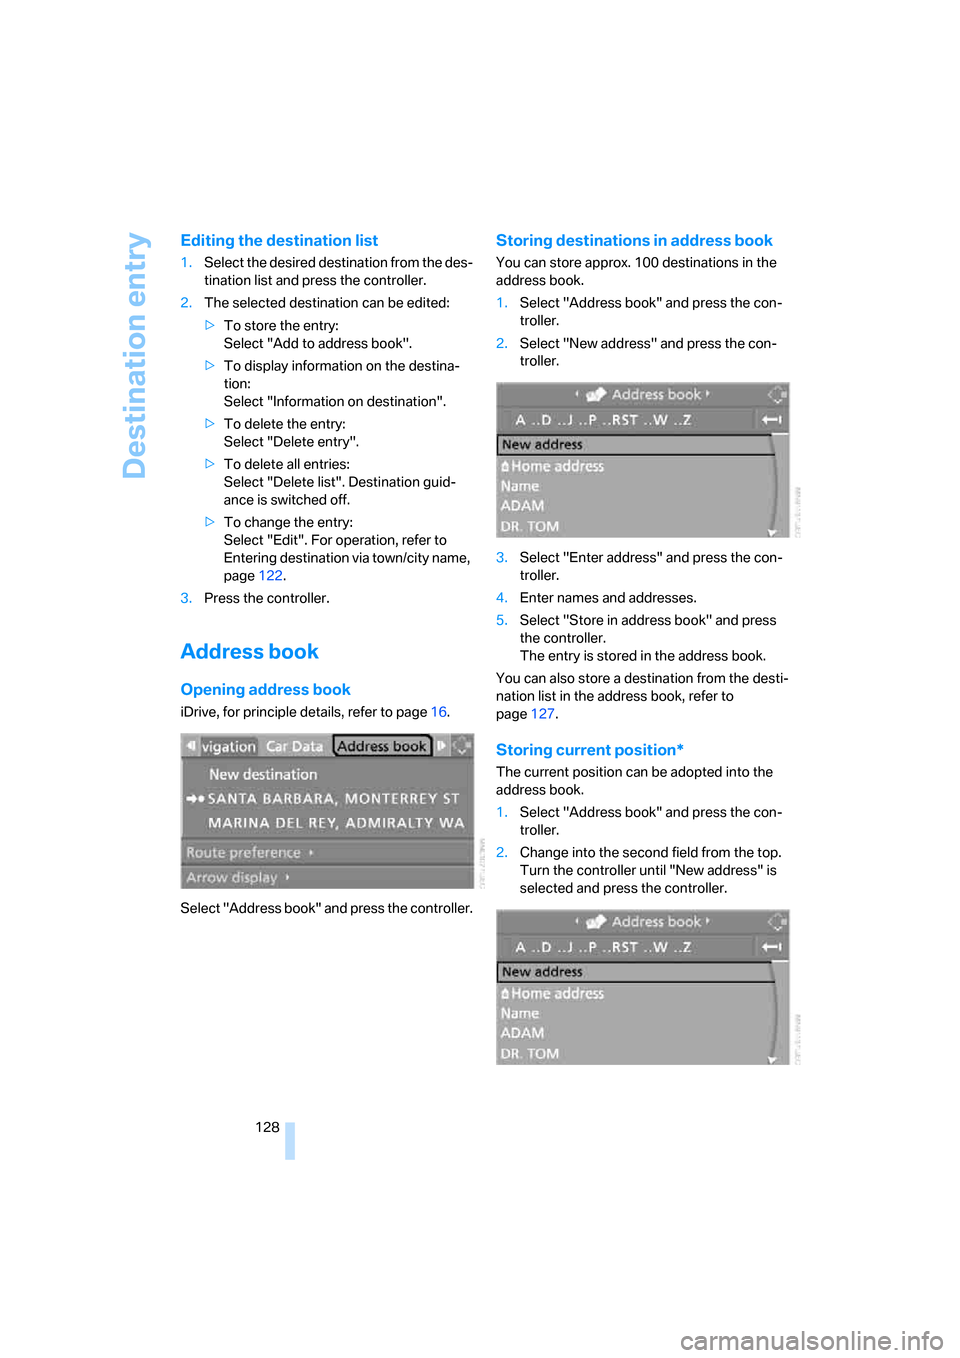
iDrive, for principle details, refer to page16.
Select "Address book" and press the controller.
Storing destinations in address book
You can store approx. 100 destinations in the
address book.
1.Select "Address book" and press the con-
troller.
2.Select "New address" and press the con-
troller.
3.Select "Enter address" and press the con-
troller.
4.Enter names and addresses.
5.Select "Store in address book" and press
the controller.
The entry is stored in the address book.
You can also store a destination from the desti-
nation list in the address book, refer to
page127.
Storing current position*
The current position can be adopted into the
address book.
1.Select "Address book" and press the con-
troller.
2.Change into the second field from the top.
Turn the controller until "New address" is
selected and press the controller.