2006 BMW 650I COUPE clock
[x] Cancel search: clockPage 30 of 236

Controls
29Reference
At a glance
Driving tips
Communications
Navigation
Entertainment
Mobility
Remove the adapter from the holder in the
glove compartment and slide the spare key into
the adapter.
Personal Profile
The concept
You can set a number of functions of your BMW
individually according to your preferences.
Personal Profile ensures that most of these set-
tings are stored for the remote control currently
in use without you having to do anything. When
the vehicle is unlocked, the corresponding
remote control is detected and the settings
stored for it are called up and carried out.
This means that you will always find your BMW
set to your own personal settings even if
another person with his/her own remote control
and settings has used the vehicle since the last
time you drove it. The individual settings are
stored for a maximum of four remote controls.
Personal Profile settings
>When unlocking with the remote control,
either unlock only the driver's door or
unlock the entire vehicle, refer to page30
>Locking the vehicle after a short time or
after starting to drive, refer to page32
>Assigning the programmable buttons on
the steering wheel, refer to page54>Display settings for the Control Display:
>Brightness of the Control Display, refer
to page83
>Units of measure for consumption,
route/distances, temperature and pres-
sure, refer to page83
>Language on the Control Display, refer
to page84
>12h/24h clock mode, refer to page83
>Date format, refer to page83
>Displaying optical warning for the PDC Park
Distance Control
*, refer to page85
>Selection and brightness of the display for
the Head-Up Display
*, refer to page94
>Air distribution, temperature in the upper
body region, and intensity for the automatic
climate control, refer to page101
>Adjusting the voice instructions for the des-
tination guidance of the navigation sys-
tem
*, refer to page135
The most recent settings for the following are
also called up during unlocking:
>Driver's seat, exterior-mirror and steering-
wheel position, refer to page49
>The volume and tone settings for audio
sources, refer to page141
>The display of the stored stations for the
radio, refer to page144
>The volume setting for the telephone, refer
to page166
Central locking system
The concept
The central locking system is ready for opera-
tion whenever the driver's door is closed.
The system either locks or unlocks all of the fol-
lowing:
>Doors
>Compartment in the front center console
>Luggage compartment lid
>Fuel filler door
Page 48 of 236
Controls
47Reference
At a glance
Driving tips
Communications
Navigation
Entertainment
Mobility
Adjustments
Sitting safely
The ideal sitting position can make a vital con-
tribution to relaxed, fatigue-free driving. In the
interaction with the safety belts, the head
restraints and the airbags, the seat position
plays an important role in an accident. To
ensure that the safety systems operate with
optimum efficiency, we strongly urge you to fol-
low the instructions contained in the following
section.
For additional information on transporting chil-
dren safely, refer to page56.
Airbags
Always maintain an adequate distance
between yourself and the airbags. Always
hold the steering wheel by its rim with hands at
the 9 o'clock and 3 o'clock positions to mini-
mize the risk of injuries to your hands and arms
in the event of airbag deployment.
No one and nothing is to come between the air-
bags and the seat occupant.
Do not use the cover of the front airbag on the
front passenger side as a storage area. Make
sure that the front passenger is sitting correctly
and does not rest feet or legs on the instrument
panel, otherwise leg injuries can occur if the
knee and front airbags are triggered.
Make sure that occupants do not rest their head
on the side or head airbag; otherwise, injuries
can occur if the airbags are triggered.<
Even if you adhere to all the instructions, the
occurrence of injuries resulting from contact
with airbags cannot be entirely ruled out,
depending on the circumstances. The ignition
and inflation noise may provoke a mild hearing
loss in extremely sensitive individuals. This
effect is usually only temporary.
For airbag locations and additional information
on airbags, refer to page90.
Head restraints
A correctly adjusted head restraint reduces the
risk of injury to cervical vertebrae in an accident.
Adjust the head restraint so that its center
is approx. at ear level. Otherwise there is
increased danger of injury in the event of an
accident.<
Head restraints, refer to page50.
Safety belt
Before every drive, make sure that safety belts
are being worn at all of the occupied seats.
Airbags complement the safety belt as an addi-
tional safety device, but they do not represent a
substitute.
Your vehicle has four seats that are each
equipped with a safety belt.
Never allow more than one person to
wear a single safety belt. Never allow
infants or small children to ride in a passenger's
lap.
Expectant mothers should always wear their
safety belts, taking care to position the lap belt
against the lower hips, where it will not exert
pressure against the abdominal area.
Do not route the belt across your neck, or run it
across sharp edges. Be sure that the belt does
not become caught or jammed. Make sure that
the safety belt is securely fastened across the
lap and shoulders, as close to the body as pos-
sible without it being twisted or tangled. Be sure
not to route it over solid or breakable objects;
otherwise, the belt can slip over the hips in the
lap area in a frontal impact and injure the abdo-
men. Avoid wearing clothing that prevents the
belt from fitting properly and pull the shoulder
belt upward periodically to readjust the tension
across your lap in order to avoid a reduction in
the retention effect of the safety belt.<
For instructions on operating safety belts, refer
to page51.
Page 75 of 236
Everything under control
74
Everything under control
Odometer, outside
temperature display, clock
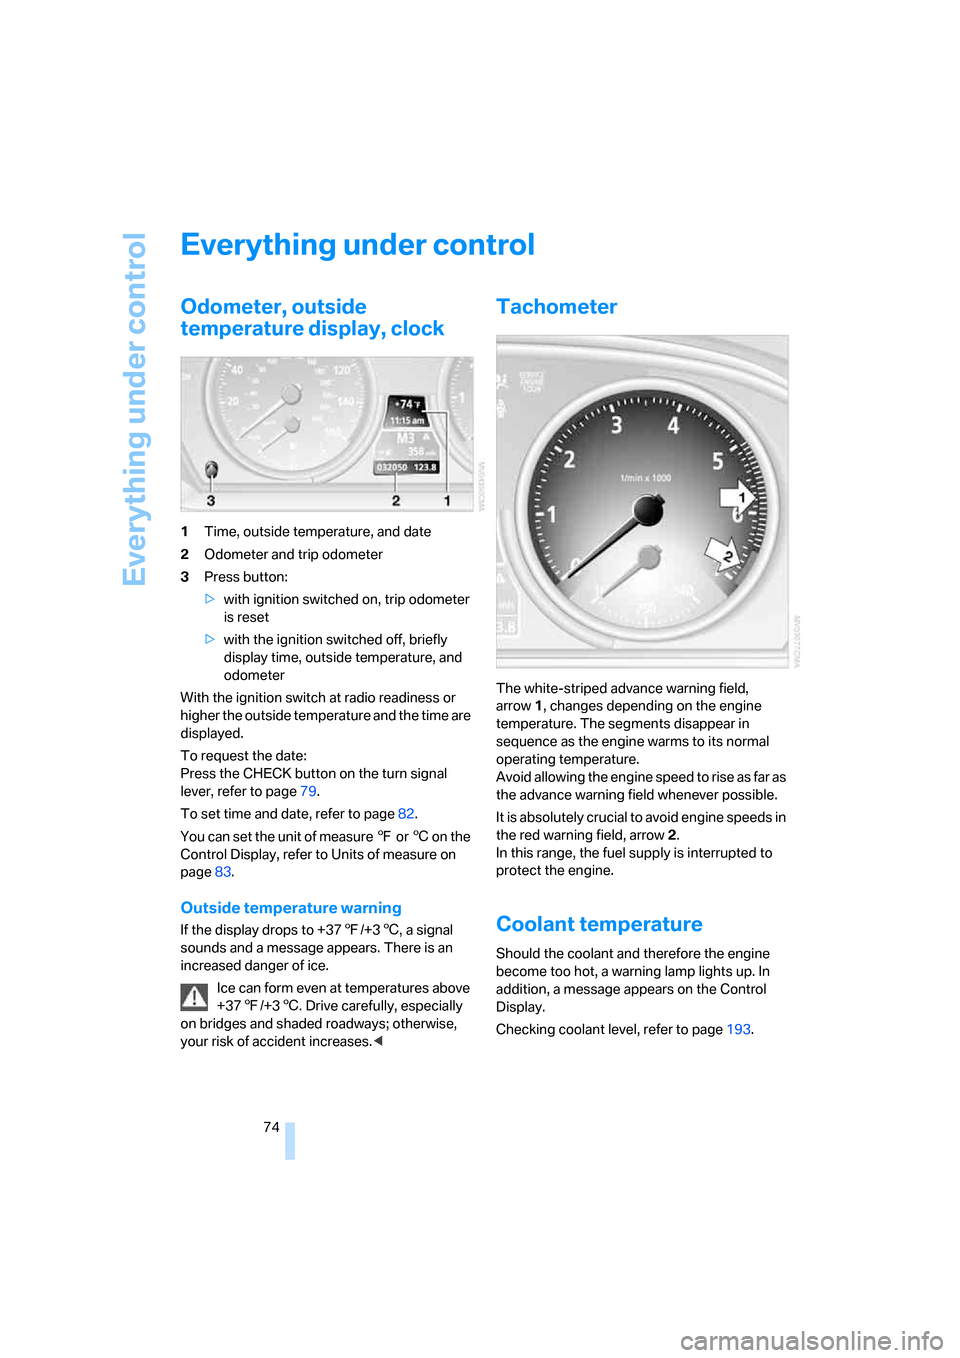
1Time, outside temperature, and date
2Odometer and trip odometer
3Press button:
>with ignition switched on, trip odometer
is reset
>with the ignition switched off, briefly
display time, outside temperature, and
odometer
With the ignition switch at radio readiness or
higher the outside temperature and the time are
displayed.
To request the date:
Press the CHECK button on the turn signal
lever, refer to page79.
To set time and date, refer to page82.
You can set the unit of measure 7 or 6 on the
Control Display, refer to Units of measure on
page83.
Outside temperature warning
If the display drops to +377/+36, a signal
sounds and a message appears. There is an
increased danger of ice.
Ice can form even at temperatures above
+377/+36. Drive carefully, especially
on bridges and shaded roadways; otherwise,
your risk of accident increases.<
Tachometer
The white-striped advance warning field,
arrow1, changes depending on the engine
temperature. The segments disappear in
sequence as the engine warms to its normal
operating temperature.
Avoid allowing the engine speed to rise as far as
the advance warning field whenever possible.
It is absolutely crucial to avoid engine speeds in
the red warning field, arrow2.
In this range, the fuel supply is interrupted to
protect the engine.
Coolant temperature
Should the coolant and therefore the engine
become too hot, a warning lamp lights up. In
addition, a message appears on the Control
Display.
Checking coolant level, refer to page193.
Page 183 of 236
Refueling
182
Refueling
Always switch off the engine before refu-
eling; otherwise, no fuel can be dispensed
into the tank and a message is displayed.<
When handling fuel, always observe all
applicable precautionary measures and
regulations. Never transport reserve fuel con-
tainers in the vehicle. They can leak and cause
an explosion or a fire in an accident.<
Fuel filler door
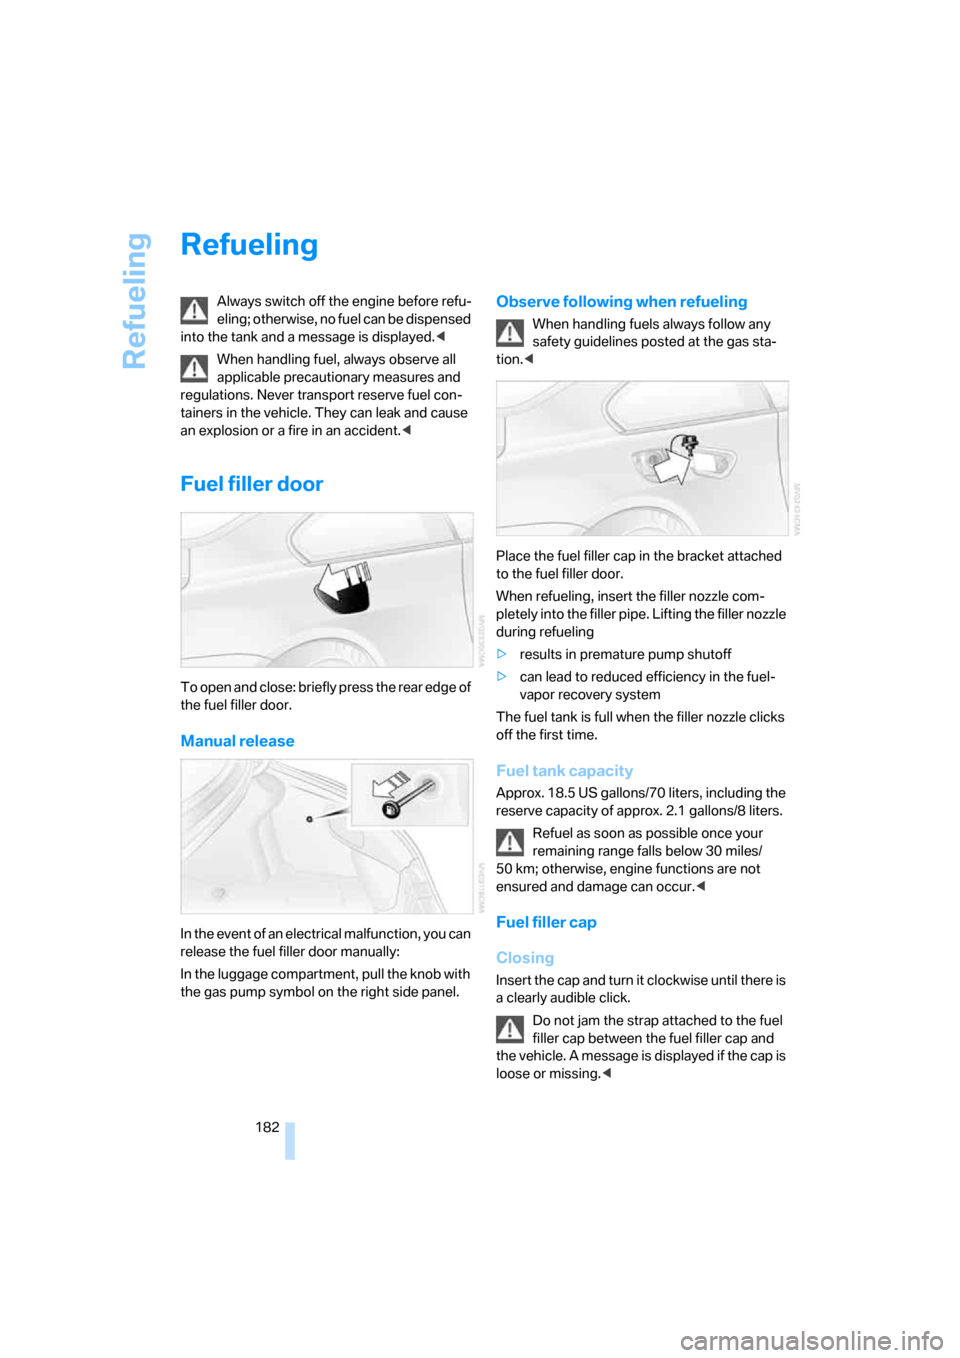
To open and close: briefly press the rear edge of
the fuel filler door.
Manual release
In the event of an electrical malfunction, you can
release the fuel filler door manually:
In the luggage compartment, pull the knob with
the gas pump symbol on the right side panel.
Observe following when refueling
When handling fuels always follow any
safety guidelines posted at the gas sta-
tion.<
Place the fuel filler cap in the bracket attached
to the fuel filler door.
When refueling, insert the filler nozzle com-
pletely into the filler pipe. Lifting the filler nozzle
during refueling
>results in premature pump shutoff
>can lead to reduced efficiency in the fuel-
vapor recovery system
The fuel tank is full when the filler nozzle clicks
off the first time.
Fuel tank capacity
Approx. 18.5 US gallons/70 liters, including the
reserve capacity of approx. 2.1 gallons/8 liters.
Refuel as soon as possible once your
remaining range falls below 30 miles/
50 km; otherwise, engine functions are not
ensured and damage can occur.<
Fuel filler cap
Closing
Insert the cap and turn it clockwise until there is
a clearly audible click.
Do not jam the strap attached to the fuel
filler cap between the fuel filler cap and
the vehicle. A message is displayed if the cap is
loose or missing.<
Page 194 of 236
Mobility
193Reference
At a glance
Controls
Driving tips
Communications
Navigation
Entertainment
You can also call BMW of North America at
1-800-831-1117 or visit the website at
www.bmwusa.com to obtain this information.
Do not use oil additives; under some
circumstances, they can harm your
engine.<
Viscosity grades
The viscosity is a measure of the thickness of
the oil and is specified in SAE grades.
The choice of the right SAE grade is based on
the climatic conditions in the region in which
you normally drive your BMW.
Approved oils belong to the SAE grades
5W-40 and 5W-30.<
These oils can be used for driving at all outside
temperatures.
Coolant
Do not open the cooling system when the
engine is hot. Escaping coolant can cause
burns.<
Coolant consists of water and coolant additive.
Not all commercially available additives are suit-
able for your BMW. Ask your BMW center for
suitable additives.
Only use suitable additives; otherwise,
engine damage may result. The additives
present a health hazard.<
Always observe all applicable environ-
mental laws and regulations when dis-
posing of used coolant additives.<
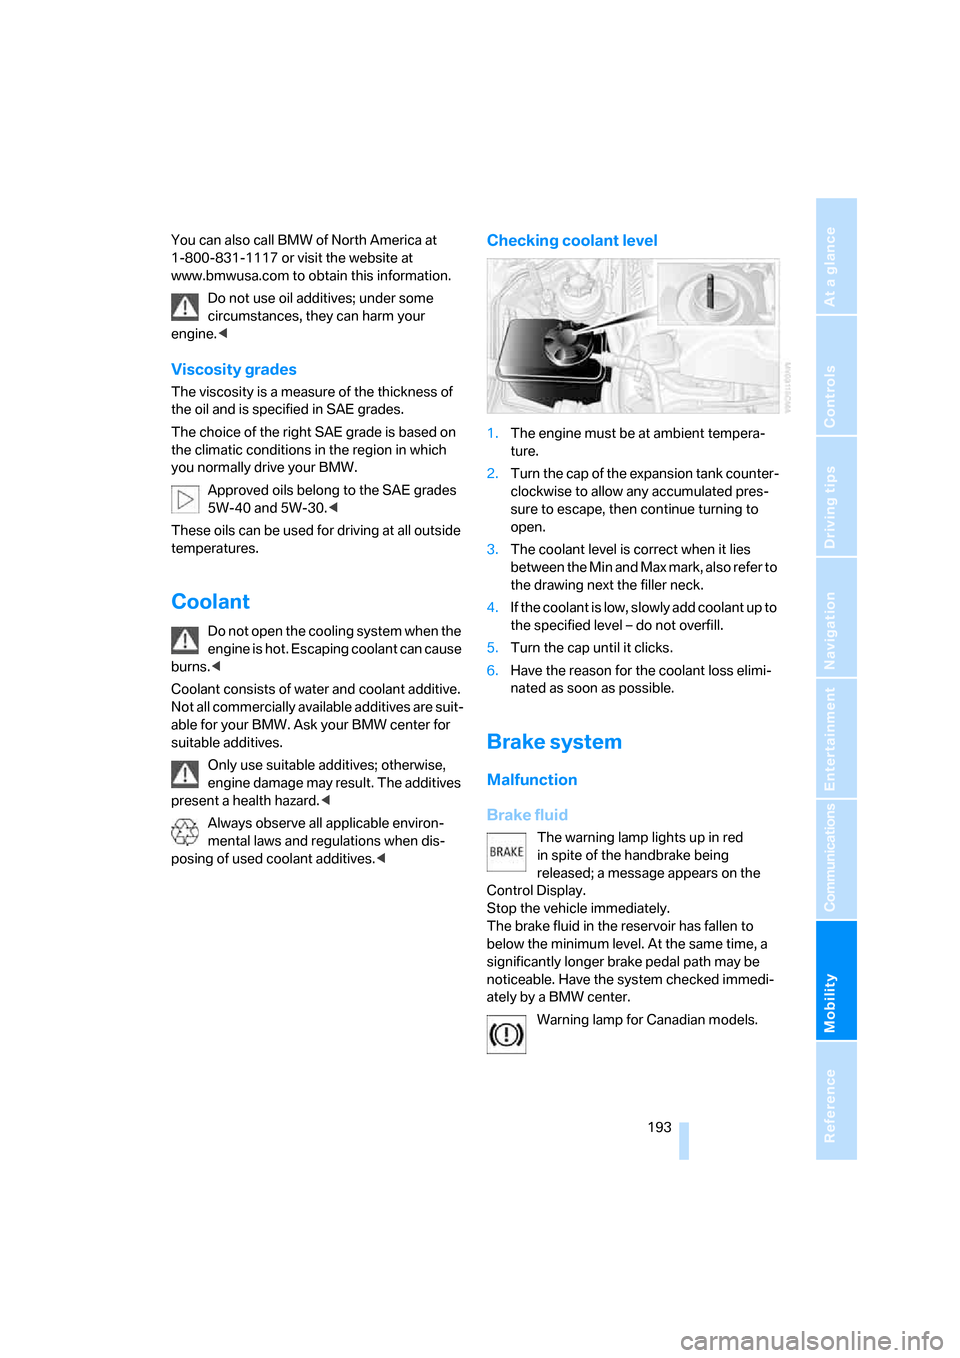
Checking coolant level
1.The engine must be at ambient tempera-
ture.
2.Turn the cap of the expansion tank counter-
clockwise to allow any accumulated pres-
sure to escape, then continue turning to
open.
3.The coolant level is correct when it lies
between the Min and Max mark, also refer to
the drawing next the filler neck.
4.If the coolant is low, slowly add coolant up to
the specified level – do not overfill.
5.Turn the cap until it clicks.
6.Have the reason for the coolant loss elimi-
nated as soon as possible.
Brake system
Malfunction
Brake fluid
The warning lamp lights up in red
in spite of the handbrake being
released; a message appears on the
Control Display.
Stop the vehicle immediately.
The brake fluid in the reservoir has fallen to
below the minimum level. At the same time, a
significantly longer brake pedal path may be
noticeable. Have the system checked immedi-
ately by a BMW center.
Warning lamp for Canadian models.
Page 204 of 236
Mobility
203Reference
At a glance
Controls
Driving tips
Communications
Navigation
Entertainment
First-aid kit*
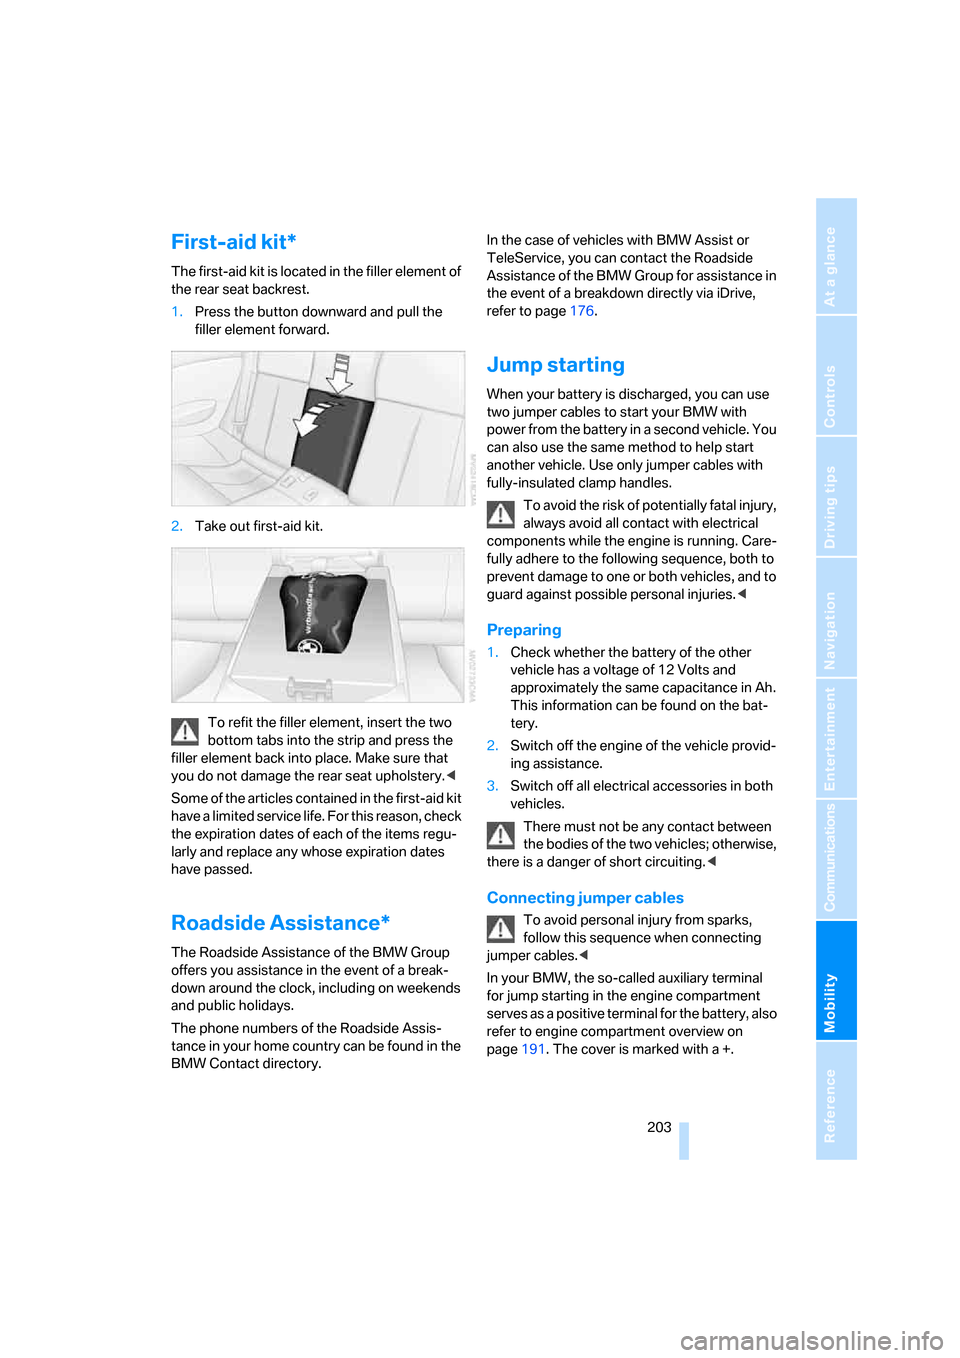
The first-aid kit is located in the filler element of
the rear seat backrest.
1.Press the button downward and pull the
filler element forward.
2.Take out first-aid kit.
To refit the filler element, insert the two
bottom tabs into the strip and press the
filler element back into place. Make sure that
you do not damage the rear seat upholstery.<
Some of the articles contained in the first-aid kit
have a limited service life. For this reason, check
the expiration dates of each of the items regu-
larly and replace any whose expiration dates
have passed.
Roadside Assistance*
The Roadside Assistance of the BMW Group
offers you assistance in the event of a break-
down around the clock, including on weekends
and public holidays.
The phone numbers of the Roadside Assis-
tance in your home country can be found in the
BMW Contact directory.In the case of vehicles with BMW Assist or
TeleService, you can contact the Roadside
Assistance of the BMW Group for assistance in
the event of a breakdown directly via iDrive,
refer to page176.
Jump starting
When your battery is discharged, you can use
two jumper cables to start your BMW with
power from the battery in a second vehicle. You
can also use the same method to help start
another vehicle. Use only jumper cables with
fully-insulated clamp handles.
To avoid the risk of potentially fatal injury,
always avoid all contact with electrical
components while the engine is running. Care-
fully adhere to the following sequence, both to
prevent damage to one or both vehicles, and to
guard against possible personal injuries.<
Preparing
1.Check whether the battery of the other
vehicle has a voltage of 12 Volts and
approximately the same capacitance in Ah.
This information can be found on the bat-
tery.
2.Switch off the engine of the vehicle provid-
ing assistance.
3.Switch off all electrical accessories in both
vehicles.
There must not be any contact between
the bodies of the two vehicles; otherwise,
there is a danger of short circuiting.<
Connecting jumper cables
To avoid personal injury from sparks,
follow this sequence when connecting
jumper cables.<
In your BMW, the so-called auxiliary terminal
for jump starting in the engine compartment
serves as a positive terminal for the battery, also
refer to engine compartment overview on
page191. The cover is marked with a +.
Page 221 of 236
Everything from A to Z
220 Center console14
"Central locking"30
Central locking system29
– comfort access36
– from inside vehicle32
Changes, technical, refer to
For your own safety6
Changing a wheel200
Changing language on
Control Display84
Changing units of measure on
Control Display83
Changing wheels188
CHECK button80
Check Control79
"Check Control
messages"80
Check Gas Cap182
Checking air pressure, refer to
Tire inflation pressure184
Children's seats, refer to
Child-restraint systems56
Child-restraint fixing system
LATCH57
Child-restraint systems56
Chrome parts, care, refer to
the Caring for your vehicle
brochure
Cigarette lighter110
Cigarette lighter socket, refer
to Connecting electrical
devices110
Cleaning, refer to the Caring
for your vehicle brochure
"Climate"101
Clock74
– 12h/24h mode83
– setting time and date82
Closing
– from inside32
– from outside30
Closing fuel filler cap182
Clothes hooks, Coupe109
Cockpit10
Cold start, refer to Starting
engine59Comfort access36
– observing in car wash37
– replacing battery38
Comfort operation
– windows with comfort
access37
– with comfort access37
"Communication"166,176
"Communication
settings"174
Compact disc
– refer to CD changer153
– refer to CD player153
Compartment for remote
control, refer to Ignition
lock58
Compartments, refer to
Storage compartments108
Compressed audio files153
Computer75
– displays on Control
Display76
– hour signal83
"Concert hall", refer to Tone
control142
Condition Based Service
CBS195
"Confirmation"31
Connecting car vacuum
cleaner, refer to Connecting
electrical devices110
Consumption display, refer to
Average fuel
consumption75
Consumption statistics, refer
to Average fuel
consumption75
"Continue guidance to
destination?"132
Control Center, refer to
iDrive16
Control Display, refer to
iDrive16
– setting brightness83
Controller, refer to iDrive16
Controls, refer to Cockpit10Convenience operation
– convertible top31,32
– glass sunroof30,32
– windows30,32
Convertible
– convertible program for
automatic climate
control101
– opening and closing
windows38
– rollover protection
system92
– top41
– wind deflector45
Convertible top
– care, refer to the Caring for
your vehicle brochure
– convenience operation32
– emergency closing43
– manual closing43
– opening and closing42
Coolant193
– checking level193
– temperature74
Cooling, maximum103
Cornering Brake Control
CBC86
Country of destination for
navigation
122
Courtesy lamps, refer to
Interior lamps99
Cruise control66,67
– active cruise control67
Cup holders109
Curb weight, refer to
Weights210
"Current position"136
Current position
– displaying136
– entering128
– storing128
"Customer
Relations"176,178
Cylinders, refer to Engine
data210
Page 222 of 236
Reference 221
At a glance
Controls
Driving tips
Communications
Navigation
Entertainment
Mobility
D
Dashboard, refer to
Cockpit10
Data
– capacities212
– dimensions211
– engine210
– technical data210
– weights210
"Date"83
Date74
– setting83
"Date format"83
Daytime driving lamps96
DBC Dynamic Brake
Control86
"Deactivated"50
Deactivating selector lever
interlock63
Decommissioning the vehicle,
refer to the Caring for your
vehicle brochure
Defrosting windows102
Defrosting windows and
removing condensation102
Defrost position, refer to
Defrosting windows102
"Delete address book" for
navigation130
"Delete all numbers" on the
mobile phone169
"Delete data" for
navigation130
"Delete" for mobile
phone169
Destination address
– deleting129
– entering121,124
Destination for navigation
– destination list127
– entry121
– home address130
– selecting from address
book129
– selecting using
information126
– storing128Destination guidance132
– bypassing route
sections136
– canceling voice
instructions55
– changing specified
route130
– displaying routes133
– distance and arrival132
– interrupting132
– starting132
– terminating/continuing132
– voice instructions135
– volume of voice
instructions
135
Destination list for
navigation127
Destinations recently driven
to127
"Details" in audio mode155
"Dial" for mobile phone167
"Dial number"167
"Diamond button"54
Digital clock74
Digital radio, refer to High
Definition Radio148
Dimensions
– Convertible212
– Coupe211
Directional indicators, refer to
Turn signals64
Direction announcements,
refer to Voice
instructions135
Direction instructions, refer to
Voice instructions135
Directory for navigation, refer
to Address book128
Displacement, refer to Engine
data210
"Display"83
Display, refer to iDrive16
Display lighting, refer to
Instrument lighting99
"Display off"21
Displays, refer to Instrument
cluster12
"Display settings"82Displays on the windshield,
refer to Head-Up Display93
Disposal
– battery of remote control
with comfort access38
– vehicle battery200
Distance, refer to
Computer76
Distance control, refer to
Active cruise control67
"Distance to dest."76
Distance to destination, refer
to Computer76
Distance warning, refer to
PDC Park Distance
Control85
Door entry lighting, refer to
Interior lamps99
Door key, refer to Keys/
remote control28
Door lock32
"Door locks"30
Doors
– manual operation32
– remote control30
DOT Quality Grades186
Draft-free ventilation104
"Driver's door only"30
Driving lamps, refer to Parking
lamps/low beams96
Driving notes114
Driving route, refer to
Displaying the route133
Driving stability control
systems86
Driving through water115
Driving tips, refer to Driving
notes114
Drying the air, refer to Cooling
function102
DSC Dynamic Stability
Control86
– indicator lamp13,87
DTC Dynamic Traction
Control87
– activating87
– indicator lamp13,87
DVD for navigation120