2006 BMW 650I COUPE&CONVERTIBLE display
[x] Cancel search: displayPage 30 of 242
Controls
29Reference
At a glance
Driving tips
Communications
Navigation
Entertainment
Mobility
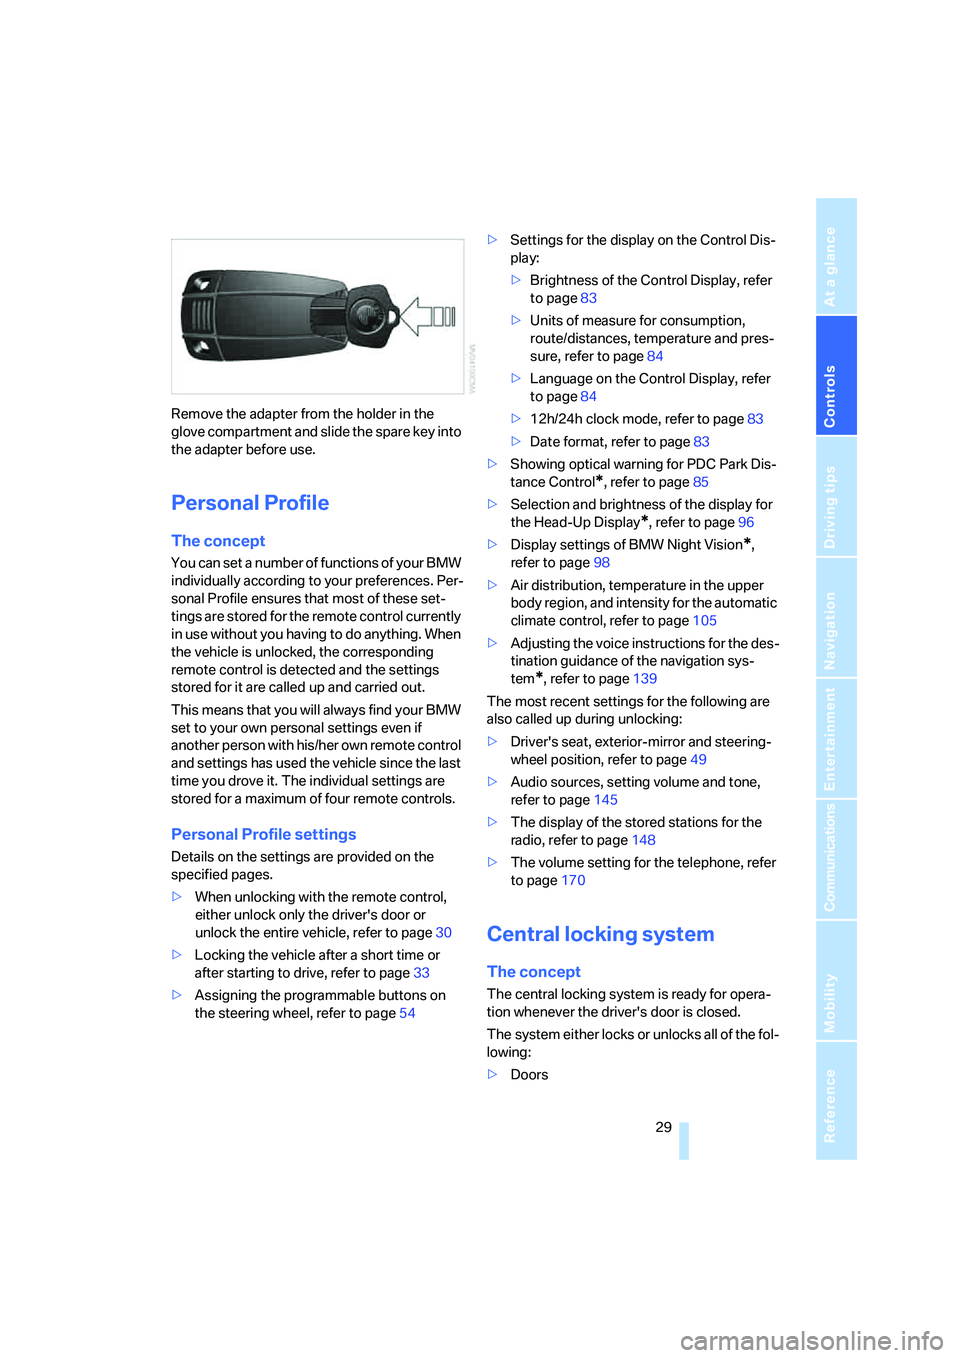
Remove the adapter from the holder in the
glove compartment and slide the spare key into
the adapter before use.
Personal Profile
The concept
You can set a number of functions of your BMW
individually according to your preferences. Per-
sonal Profile ensures that most of these set-
tings are stored for the remote control currently
in use without you having to do anything. When
the vehicle is unlocked, the corresponding
remote control is detected and the settings
stored for it are called up and carried out.
This means that you will always find your BMW
set to your own personal settings even if
another person with his/her own remote control
and settings has used the vehicle since the last
time you drove it. The individual settings are
stored for a maximum of four remote controls.
Personal Profile settings
Details on the settings are provided on the
specified pages.
>When unlocking with the remote control,
either unlock only the driver's door or
unlock the entire vehicle, refer to page30
>Locking the vehicle after a short time or
after starting to drive, refer to page33
>Assigning the programmable buttons on
the steering wheel, refer to page54>Settings for the display on the Control Dis-
play:
>Brightness of the Control Display, refer
to page83
>Units of measure for consumption,
route/distances, temperature and pres-
sure, refer to page84
>Language on the Control Display, refer
to page84
>12h/24h clock mode, refer to page83
>Date format, refer to page83
>Showing optical warning for PDC Park Dis-
tance Control
*, refer to page85
>Selection and brightness of the display for
the Head-Up Display
*, refer to page96
>Display settings of BMW Night Vision
*,
refer to page98
>Air distribution, temperature in the upper
body region, and intensity for the automatic
climate control, refer to page105
>Adjusting the voice instructions for the des-
tination guidance of the navigation sys-
tem
*, refer to page139
The most recent settings for the following are
also called up during unlocking:
>Driver's seat, exterior-mirror and steering-
wheel position, refer to page49
>Audio sources, setting volume and tone,
refer to page145
>The display of the stored stations for the
radio, refer to page148
>The volume setting for the telephone, refer
to page170
Central locking system
The concept
The central locking system is ready for opera-
tion whenever the driver's door is closed.
The system either locks or unlocks all of the fol-
lowing:
>Doors
Page 37 of 242
Opening and closing
36
Indicator lamp displays
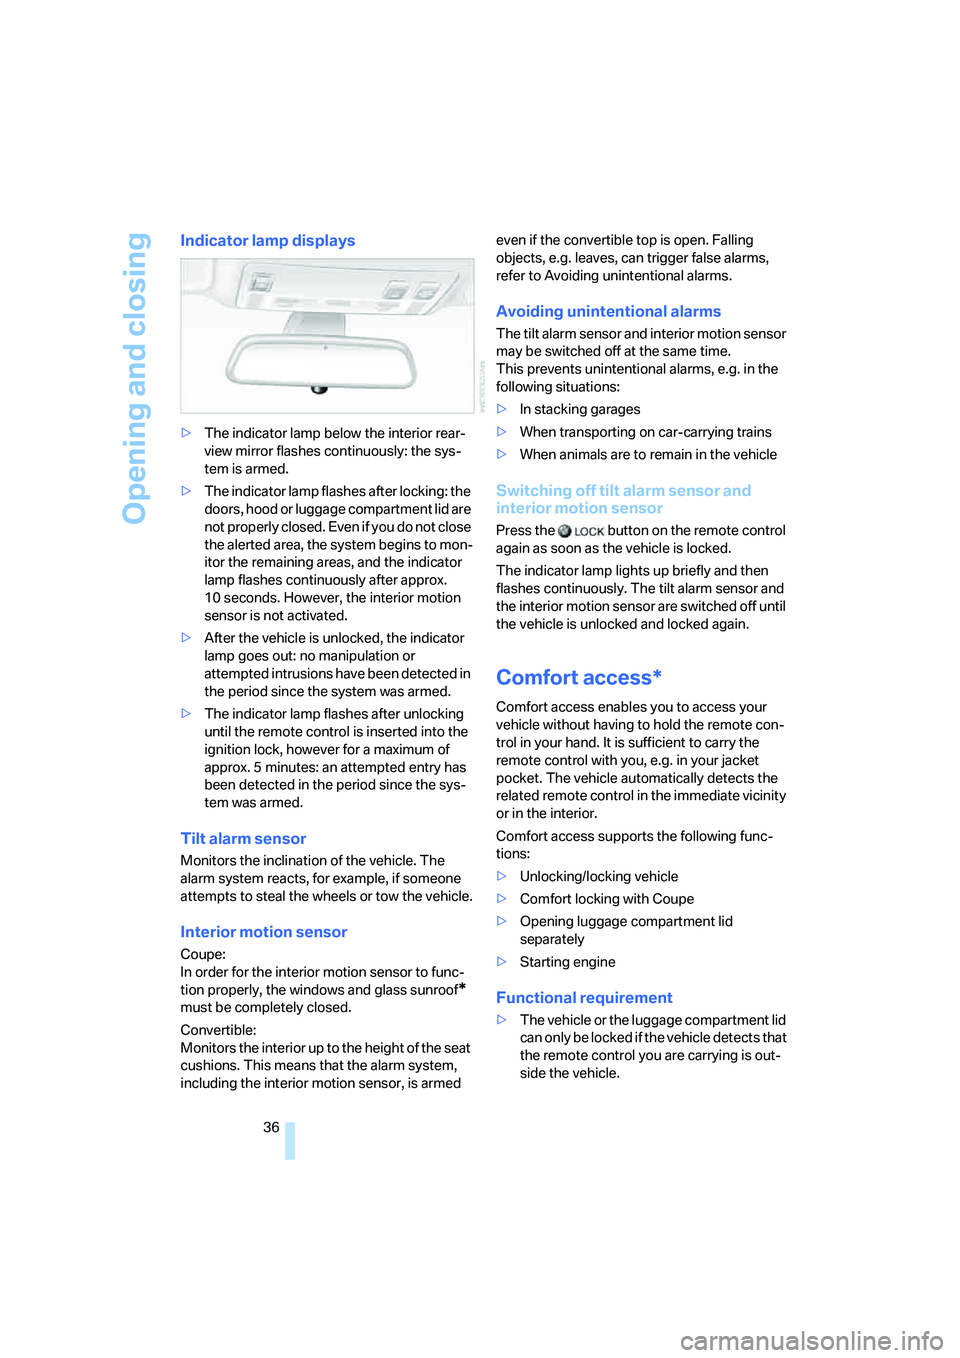
>The indicator lamp below the interior rear-
view mirror flashes continuously: the sys-
tem is armed.
>The indicator lamp flashes after locking: the
doors, hood or luggage compartment lid are
not properly closed. Even if you do not close
the alerted area, the system begins to mon-
itor the remaining areas, and the indicator
lamp flashes continuously after approx.
10 seconds. However, the interior motion
sensor is not activated.
>After the vehicle is unlocked, the indicator
lamp goes out: no manipulation or
attempted intrusions have been detected in
the period since the system was armed.
>The indicator lamp flashes after unlocking
until the remote control is inserted into the
ignition lock, however for a maximum of
approx. 5 minutes: an attempted entry has
been detected in the period since the sys-
tem was armed.
Tilt alarm sensor
Monitors the inclination of the vehicle. The
alarm system reacts, for example, if someone
attempts to steal the wheels or tow the vehicle.
Interior motion sensor
Coupe:
In order for the interior motion sensor to func-
tion properly, the windows and glass sunroof
*
must be completely closed.
Convertible:
Monitors the interior up to the height of the seat
cushions. This means that the alarm system,
including the interior motion sensor, is armed even if the convertible top is open. Falling
objects, e.g. leaves, can trigger false alarms,
refer to Avoiding unintentional alarms.
Avoiding unintentional alarms
The tilt alarm sensor and interior motion sensor
may be switched off at the same time.
This prevents unintentional alarms, e.g. in the
following situations:
>In stacking garages
>When transporting on car-carrying trains
>When animals are to remain in the vehicle
Switching off tilt alarm sensor and
interior motion sensor
Press the button on the remote control
again as soon as the vehicle is locked.
The indicator lamp lights up briefly and then
flashes continuously. The tilt alarm sensor and
the interior motion sensor are switched off until
the vehicle is unlocked and locked again.
Comfort access*
Comfort access enables you to access your
vehicle without having to hold the remote con-
trol in your hand. It is sufficient to carry the
remote control with you, e.g. in your jacket
pocket. The vehicle automatically detects the
related remote control in the immediate vicinity
or in the interior.
Comfort access supports the following func-
tions:
>Unlocking/locking vehicle
>Comfort locking with Coupe
>Opening luggage compartment lid
separately
>Starting engine
Functional requirement
>The vehicle or the luggage compartment lid
can only be locked if the vehicle detects that
the remote control you are carrying is out-
side the vehicle.
Page 39 of 242
Opening and closing
38 If you take the remote control with you when
leaving the vehicle with the engine running, a
warning lamp lights up. In addition, a message
appears on the Control Display. As long as no
remote control is detected in the vehicle, it is
only possible to restart the engine within
approx. 10 seconds after it is switched off.
Switching off engine with automatic
transmission
The engine can only be switched off in the
selector lever position P, refer to page60.
To switch off the engine in the selector lever
position N, the remote control must be inserted
in the ignition lock.
Before driving into a car wash with
automatic transmission
1.Insert remote control into ignition lock.
2.Depress brake pedal.
3.Place selector lever in position N.
4.Switch off the engine.
The vehicle can roll.
Malfunction
The comfort access function may malfunction
due to local radio waves. If this occurs, then
open or close the vehicle with the buttons on
the remote control or with a key. To start the
engine after this, insert the remote control in the
ignition lock.
Replacing battery
The remote control for comfort access contains
a battery which must be replaced occasionally.
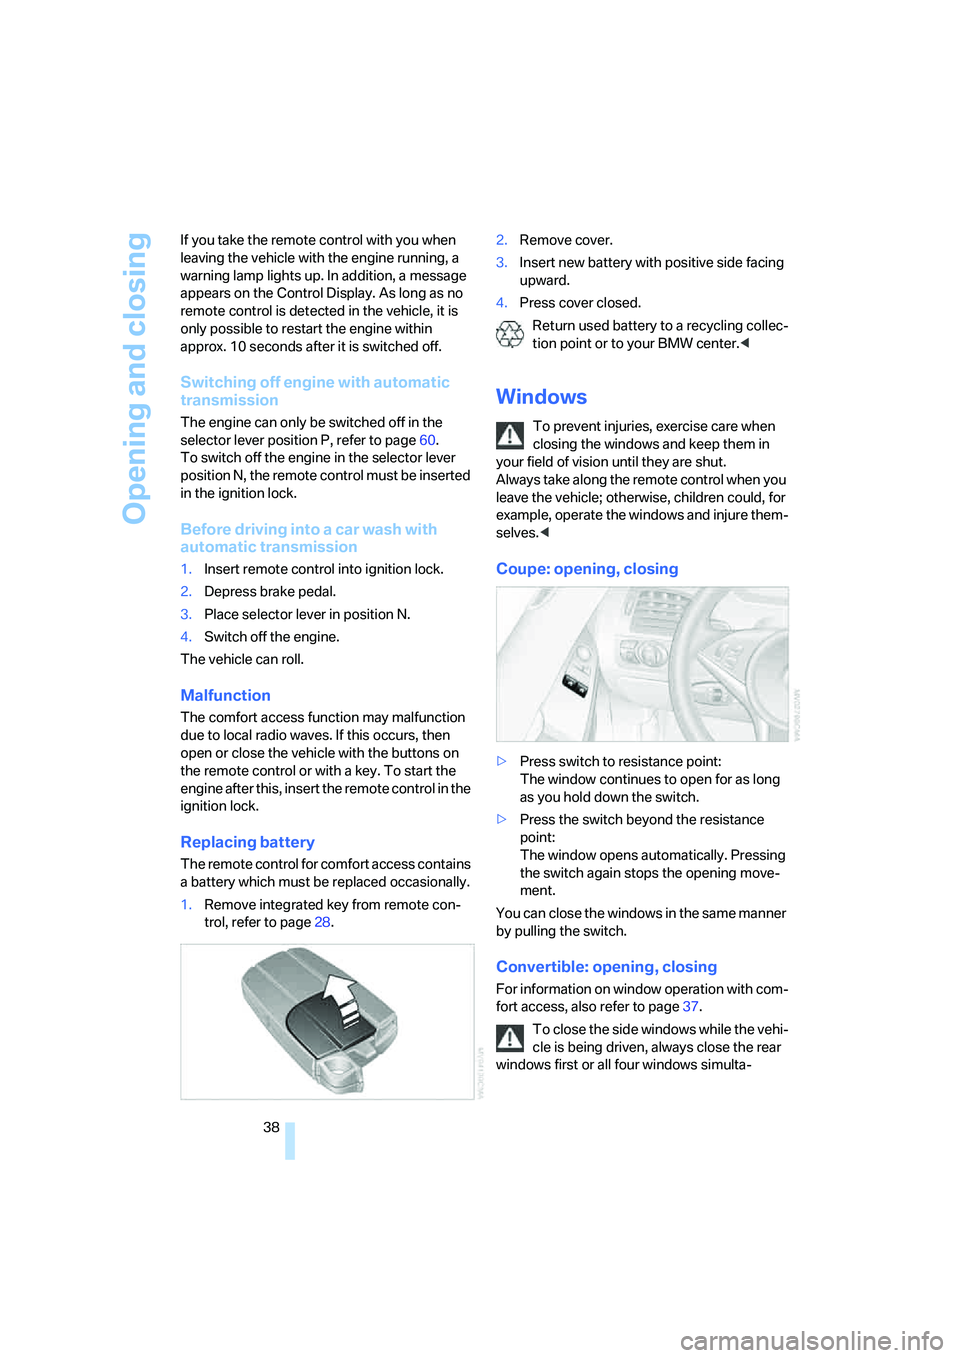
1.Remove integrated key from remote con-
trol, refer to page28.2.Remove cover.
3.Insert new battery with positive side facing
upward.
4.Press cover closed.
Return used battery to a recycling collec-
tion point or to your BMW center.<
Windows
To prevent injuries, exercise care when
closing the windows and keep them in
your field of vision until they are shut.
Always take along the remote control when you
leave the vehicle; otherwise, children could, for
example, operate the windows and injure them-
selves.<
Coupe: opening, closing
>Press switch to resistance point:
The window continues to open for as long
as you hold down the switch.
>Press the switch beyond the resistance
point:
The window opens automatically. Pressing
the switch again stops the opening move-
ment.
You can close the windows in the same manner
by pulling the switch.
Convertible: opening, closing
For information on window operation with com-
fort access, also refer to page37.
To close the side windows while the vehi-
cle is being driven, always close the rear
windows first or all four windows simulta-
Page 44 of 242
Controls
43Reference
At a glance
Driving tips
Communications
Navigation
Entertainment
Mobility
goes out, then the windows travel upward
again.
If the convertible top is not completely open or
closed, then the luggage compartment lid can-
not be opened.<
LED
In the following situations, in addition to the
LED, a message is displayed on the Control
Display and an acoustic signal may sound:
>During convertible top operation, the LED
lights up green. It goes out as soon as the
opening or closing action is finished.
>If the LED flashes red when you release the
button, the opening or closing action has
not yet finished.
>If the LED lights up red when the button is
pressed, either the floor of the convertible
top storage compartment in the luggage
compartment is in the raised position or a
malfunction has occurred. The convertible
top cannot be moved.
Interruption
The automatic sequence of movements is
interrupted immediately if the button for top
operation is released. The sequence can be
continued in the desired direction by pressing
the appropriate button.
If the opening or closing action is interrupted for
a longer period, the convertible top remains in
that position for approx. 15 minutes before it
slowly moves to a stable position.
A convertible top which is not completely
opened or closed presents a danger.
Do not interrupt and continue the closing action
several times in succession; otherwise, the top
mechanism can be damaged.<
If the convertible top is not completely
open or closed, then the luggage com-
partment lid cannot be opened.<
Convenience operation with remote
control and via door lock
Refer to pages31 and32.
Manual closing
Only close the convertible top manually if
absolutely necessary; never open it man-
ually. The convertible top compartment lid can-
not be locked in the event of an electrical mal-
function and would open while the vehicle is
being driven.
Improper handling can lead to damage.<
Before closing
1.Open luggage compartment lid.
2.Take the Allen wrench and the screwdriver
from the onboard tool kit, refer to page201.
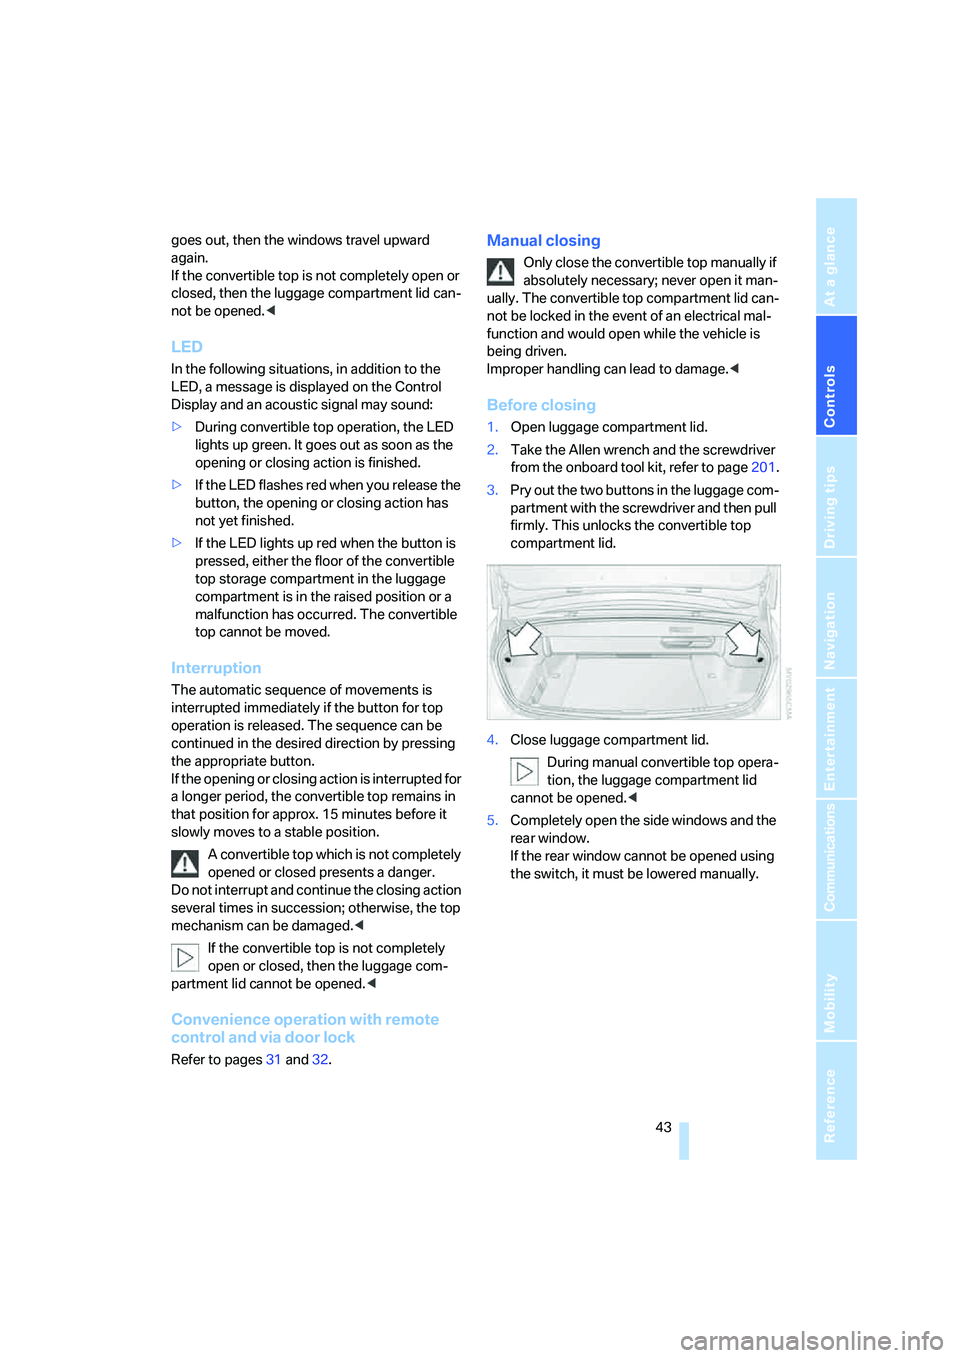
3.Pry out the two buttons in the luggage com-
partment with the screwdriver and then pull
firmly. This unlocks the convertible top
compartment lid.
4.Close luggage compartment lid.
During manual convertible top opera-
tion, the luggage compartment lid
cannot be opened.<
5.Completely open the side windows and the
rear window.
If the rear window cannot be opened using
the switch, it must be lowered manually.
Page 52 of 242
Controls
51Reference
At a glance
Driving tips
Communications
Navigation
Entertainment
Mobility
Getting in back
Before starting to drive, fold backrests
back, otherwise there is the danger of
accident due to an unexpected movement of
the seat.<
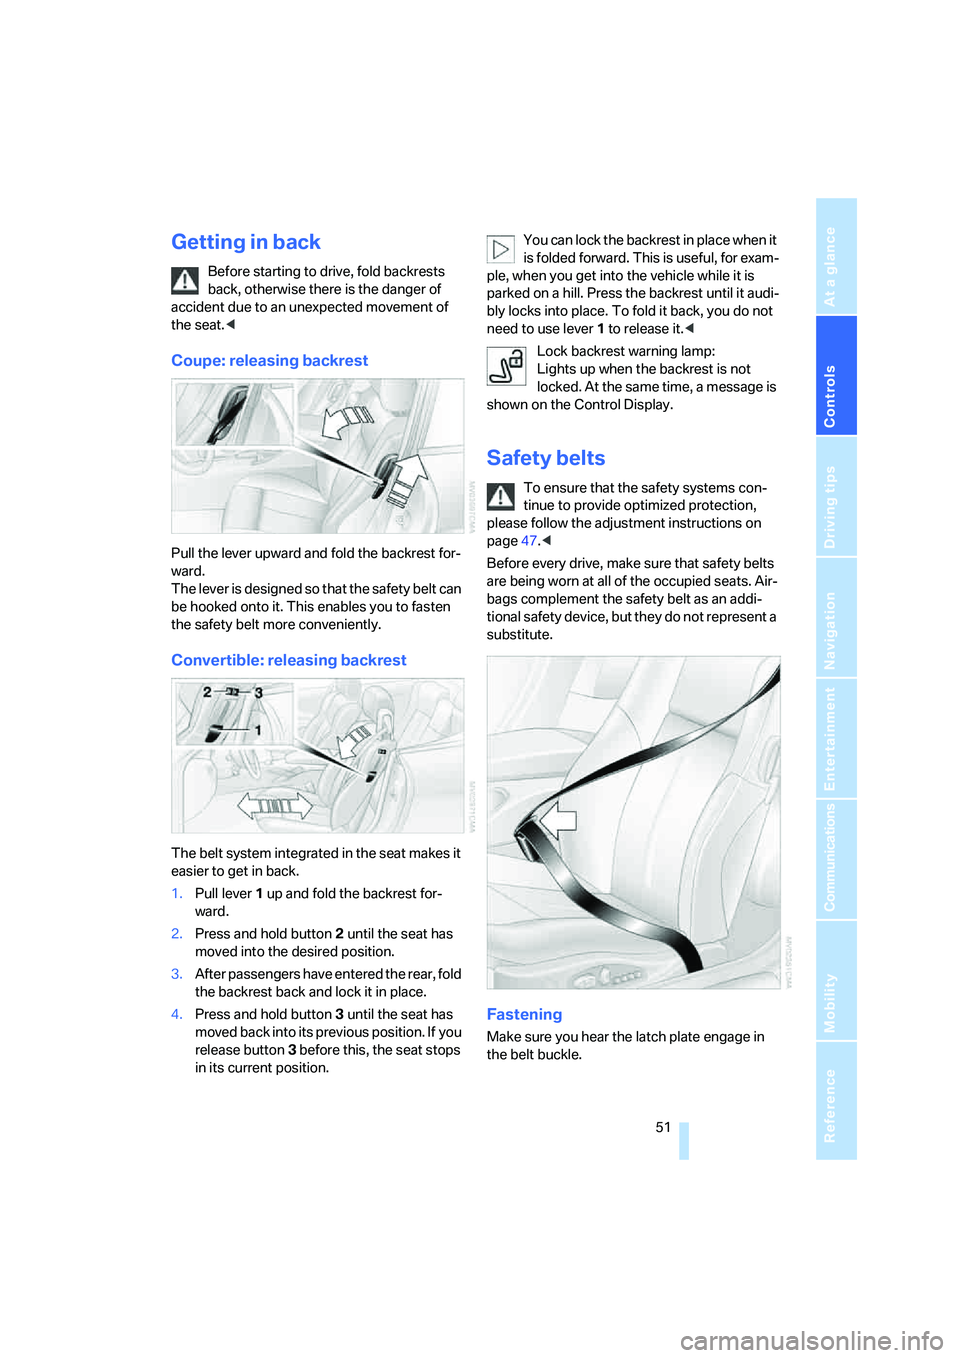
Coupe: releasing backrest
Pull the lever upward and fold the backrest for-
ward.
The lever is designed so that the safety belt can
be hooked onto it. This enables you to fasten
the safety belt more conveniently.
Convertible: releasing backrest
The belt system integrated in the seat makes it
easier to get in back.
1.Pull lever 1 up and fold the backrest for-
ward.
2.Press and hold button 2 until the seat has
moved into the desired position.
3.After passengers have entered the rear, fold
the backrest back and lock it in place.
4.Press and hold button 3 until the seat has
moved back into its previous position. If you
release button 3 before this, the seat stops
in its current position.You can lock the backrest in place when it
is folded forward. This is useful, for exam-
ple, when you get into the vehicle while it is
parked on a hill. Press the backrest until it audi-
bly locks into place. To fold it back, you do not
need to use lever 1 to release it.<
Lock backrest warning lamp:
Lights up when the backrest is not
locked. At the same time, a message is
shown on the Control Display.
Safety belts
To ensure that the safety systems con-
tinue to provide optimized protection,
please follow the adjustment instructions on
page47.<
Before every drive, make sure that safety belts
are being worn at all of the occupied seats. Air-
bags complement the safety belt as an addi-
tional safety device, but they do not represent a
substitute.
Fastening
Make sure you hear the latch plate engage in
the belt buckle.
Page 53 of 242
Adjustments
52
Releasing
1.Hold the belt firmly.
2.Press the red button in the belt buckle.
3.Guide the belt into its reel.
The shoulder strap's anchorage point will be in
the correct position for adults of every build if
the seat is correctly adjusted, refer to page48.
Safety belt reminder for driver's seat
and passenger seat*
The indicator lamp lights up and a sig-
nal sounds. At the same time, an addi-
tional message appears on the Control
Display. Please check whether safety belts are
being worn correctly.
The safety belt memory is operative at speeds
above approx. 5 mph/8 km/h. It can also be acti-
vated if objects are placed on the passenger
seat.
Damage to safety belts
In the event of loads caused by accidents
or other damage: replace the belt system
including the safety belt tensioner and any child
restraint systems, and have the belt anchor
points checked. Have this work carried out only
by a BMW center or a workshop that works
according to BMW repair procedures with
appropriately trained personnel. Otherwise cor-
rect operation of this safety equipment is not
guaranteed.<
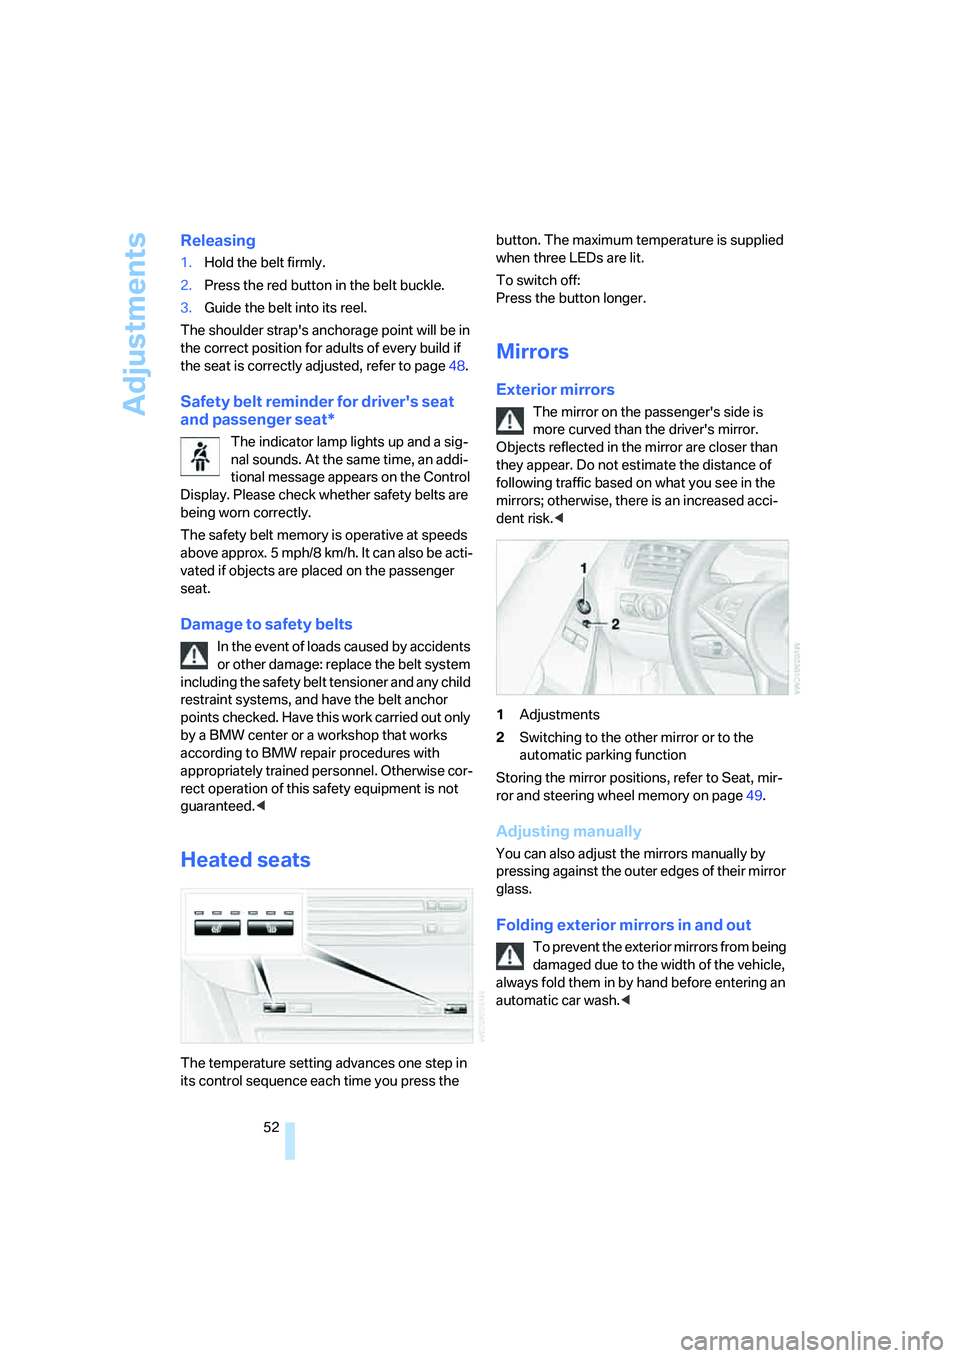
Heated seats
The temperature setting advances one step in
its control sequence each time you press the button. The maximum temperature is supplied
when three LEDs are lit.
To switch off:
Press the button longer.
Mirrors
Exterior mirrors
The mirror on the passenger's side is
more curved than the driver's mirror.
Objects reflected in the mirror are closer than
they appear. Do not estimate the distance of
following traffic based on what you see in the
mirrors; otherwise, there is an increased acci-
dent risk.<
1Adjustments
2Switching to the other mirror or to the
automatic parking function
Storing the mirror positions, refer to Seat, mir-
ror and steering wheel memory on page49.
Adjusting manually
You can also adjust the mirrors manually by
pressing against the outer edges of their mirror
glass.
Folding exterior mirrors in and out
To prevent the exterior mirrors from being
damaged due to the width of the vehicle,
always fold them in by hand before entering an
automatic car wash.<
Page 55 of 242
Adjustments
54
Steering wheel heater*
Press the button with the ignition switched on.
The indicator lamp in the button lights up when
the steering wheel heater is switched on.
Programmable buttons* on steering
wheel
You can program the buttons individually.
The setting is stored for the remote control cur-
rently in use.
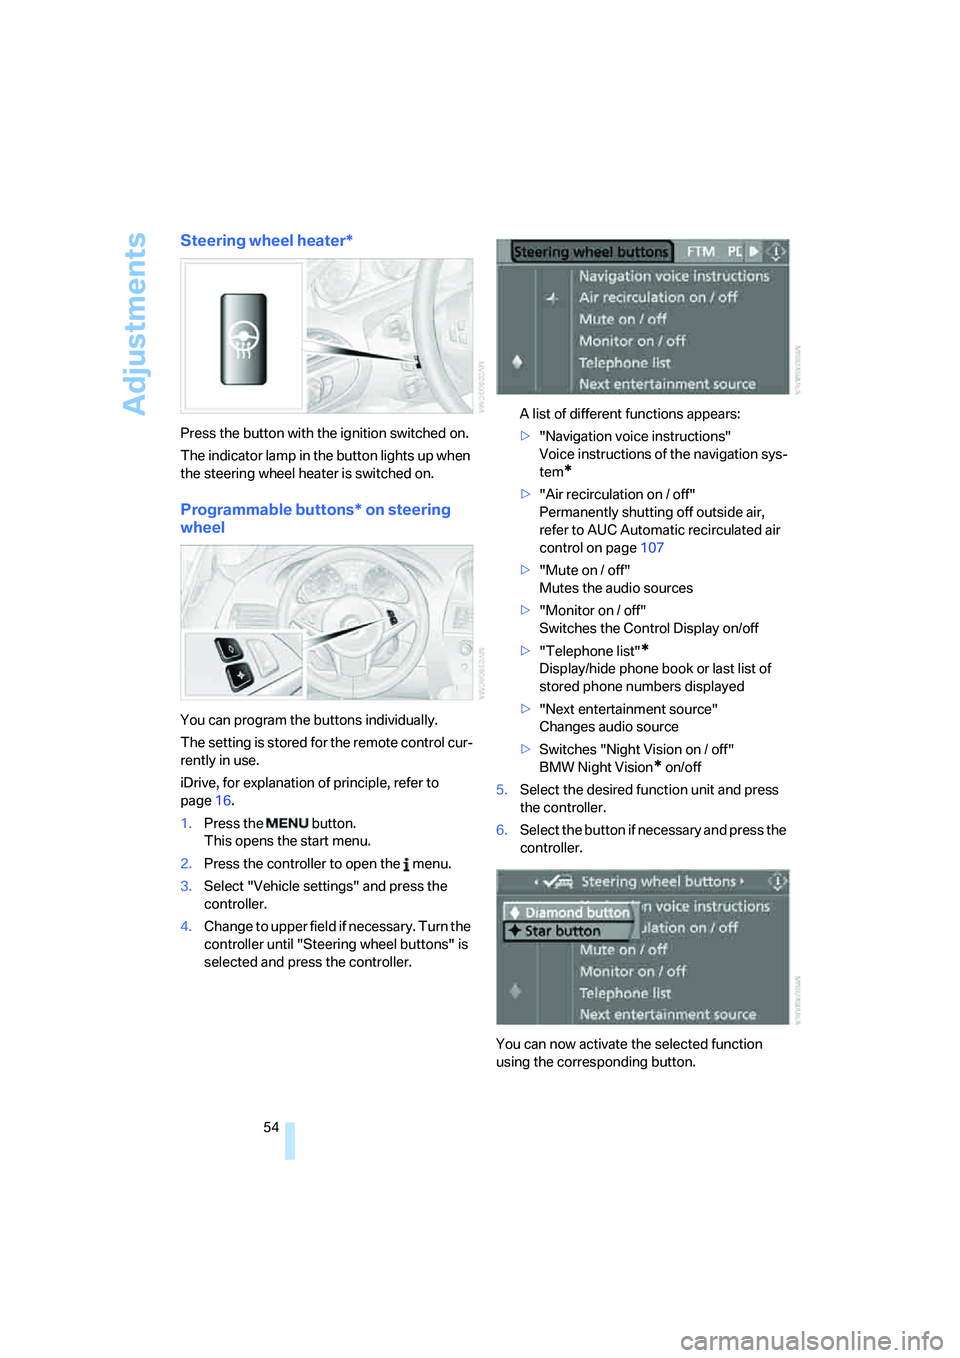
iDrive, for explanation of principle, refer to
page16.
1.Press the button.
This opens the start menu.
2.Press the controller to open the menu.
3.Select "Vehicle settings" and press the
controller.
4.Change to upper field if necessary. Turn the
controller until "Steering wheel buttons" is
selected and press the controller.A list of different functions appears:
>"Navigation voice instructions"
Voice instructions of the navigation sys-
tem
*
>"Air recirculation on / off"
Permanently shutting off outside air,
refer to AUC Automatic recirculated air
control on page107
>"Mute on / off"
Mutes the audio sources
>"Monitor on / off"
Switches the Control Display on/off
>"Telephone list"
*
Display/hide phone book or last list of
stored phone numbers displayed
>"Next entertainment source"
Changes audio source
>Switches "Night Vision on / off"
BMW Night Vision
* on/off
5.Select the desired function unit and press
the controller.
6.Select the button if necessary and press the
controller.
You can now activate the selected function
using the corresponding button.
Page 60 of 242
Controls
59Reference
At a glance
Driving tips
Communications
Navigation
Entertainment
Mobility
Starting engine
Do not run the engine in closed rooms,
otherwise the inhaling of toxic exhaust
gases can cause unconsciousness and death.
The exhaust gases contain carbon monoxide,
an odorless and colorless, but highly toxic gas.
Never leave an unattended vehicle with the
engine running, as such a vehicle represents a
potential safety hazard.
Before leaving the vehicle with the engine run-
ning, set the selector lever to the idling or the
P position and set the handbrake, otherwise the
vehicle can begin to roll.<
When starting the engine, do not press the
accelerator pedal.
Do not allow the engine to warm up by leaving it
running while the vehicle remains stationary.
Instead, begin to drive immediately at a moder-
ate engine speed.
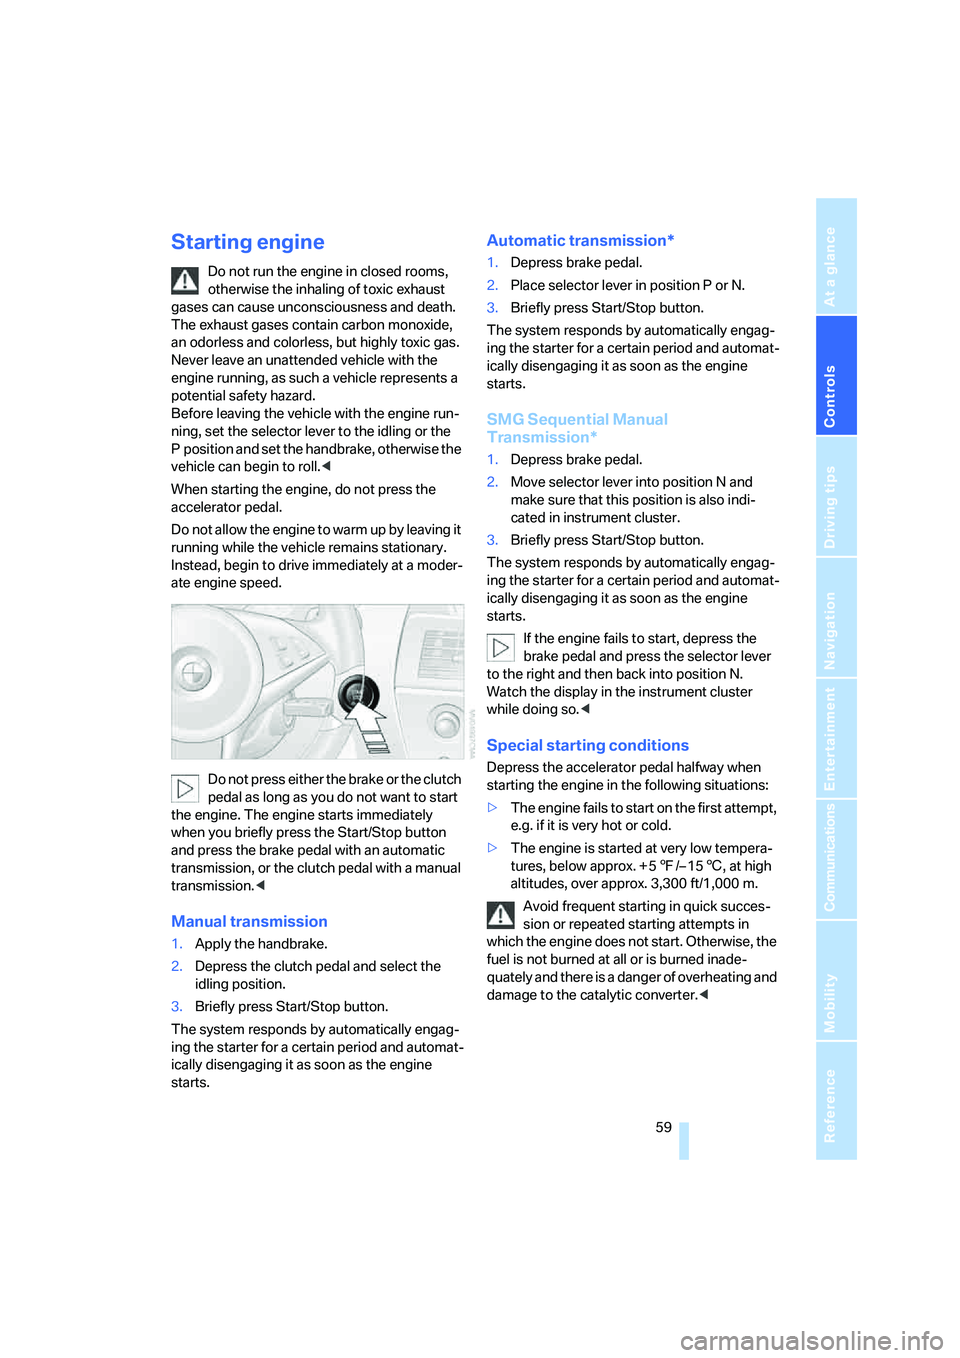
Do not press either the brake or the clutch
pedal as long as you do not want to start
the engine. The engine starts immediately
when you briefly press the Start/Stop button
and press the brake pedal with an automatic
transmission, or the clutch pedal with a manual
transmission.<
Manual transmission
1.Apply the handbrake.
2.Depress the clutch pedal and select the
idling position.
3.Briefly press Start/Stop button.
The system responds by automatically engag-
ing the starter for a certain period and automat-
ically disengaging it as soon as the engine
starts.
Automatic transmission*
1.Depress brake pedal.
2.Place selector lever in position P or N.
3.Briefly press Start/Stop button.
The system responds by automatically engag-
ing the starter for a certain period and automat-
ically disengaging it as soon as the engine
starts.
SMG Sequential Manual
Transmission*
1.Depress brake pedal.
2.Move selector lever into position N and
make sure that this position is also indi-
cated in instrument cluster.
3.Briefly press Start/Stop button.
The system responds by automatically engag-
ing the starter for a certain period and automat-
ically disengaging it as soon as the engine
starts.
If the engine fails to start, depress the
brake pedal and press the selector lever
to the right and then back into position N.
Watch the display in the instrument cluster
while doing so.<
Special starting conditions
Depress the accelerator pedal halfway when
starting the engine in the following situations:
>The engine fails to start on the first attempt,
e.g. if it is very hot or cold.
>The engine is started at very low tempera-
tures, below approx. + 57/– 156, at high
altitudes, over approx. 3,300 ft/1,000 m.
Avoid frequent starting in quick succes-
sion or repeated starting attempts in
which the engine does not start. Otherwise, the
fuel is not burned at all or is burned inade-
quately and there is a danger of overheating and
damage to the catalytic converter.<