2006 BMW 650I CONVERTIBLE handbrake
[x] Cancel search: handbrakePage 14 of 236

At a glance
13Reference
Controls
Driving tips
Communications
Navigation
Entertainment
Mobility
Indicator and warning lamps
The concept
Indicator and warning lamps can light up in dif-
ferent combinations and colors, both in the dis-
play area1 and in the display2
When the engine is started or the ignition is
switched on, some lamps are checked for
proper operation and light up briefly in the pro-
cess.
Explanatory text messages
Text messages at the bottom edge of the Con-
trol Display explain the meaning of the indicator
and warning lamps displayed.
You can consult Check Control for additional
information, e.g. regarding the cause of a mal-function or the appropriate actions to take, refer
to page79.
In cases of corresponding urgency, this infor-
mation is immediately displayed when the
associated lamps light up.
Indicator lamps without text messages
The following indicator lamps in the display
area1 indicate that certain functions are active:
Handbrake set60
Handbrake for Canadian models
Front fog lamps98
DTC Dynamic Traction Control87
High beams/headlamp flasher97
Lamp flashes:
DSC or DTC is controlling the drive
and braking forces to maintain vehicle
stability87
Page 60 of 236
Controls
59Reference
At a glance
Driving tips
Communications
Navigation
Entertainment
Mobility
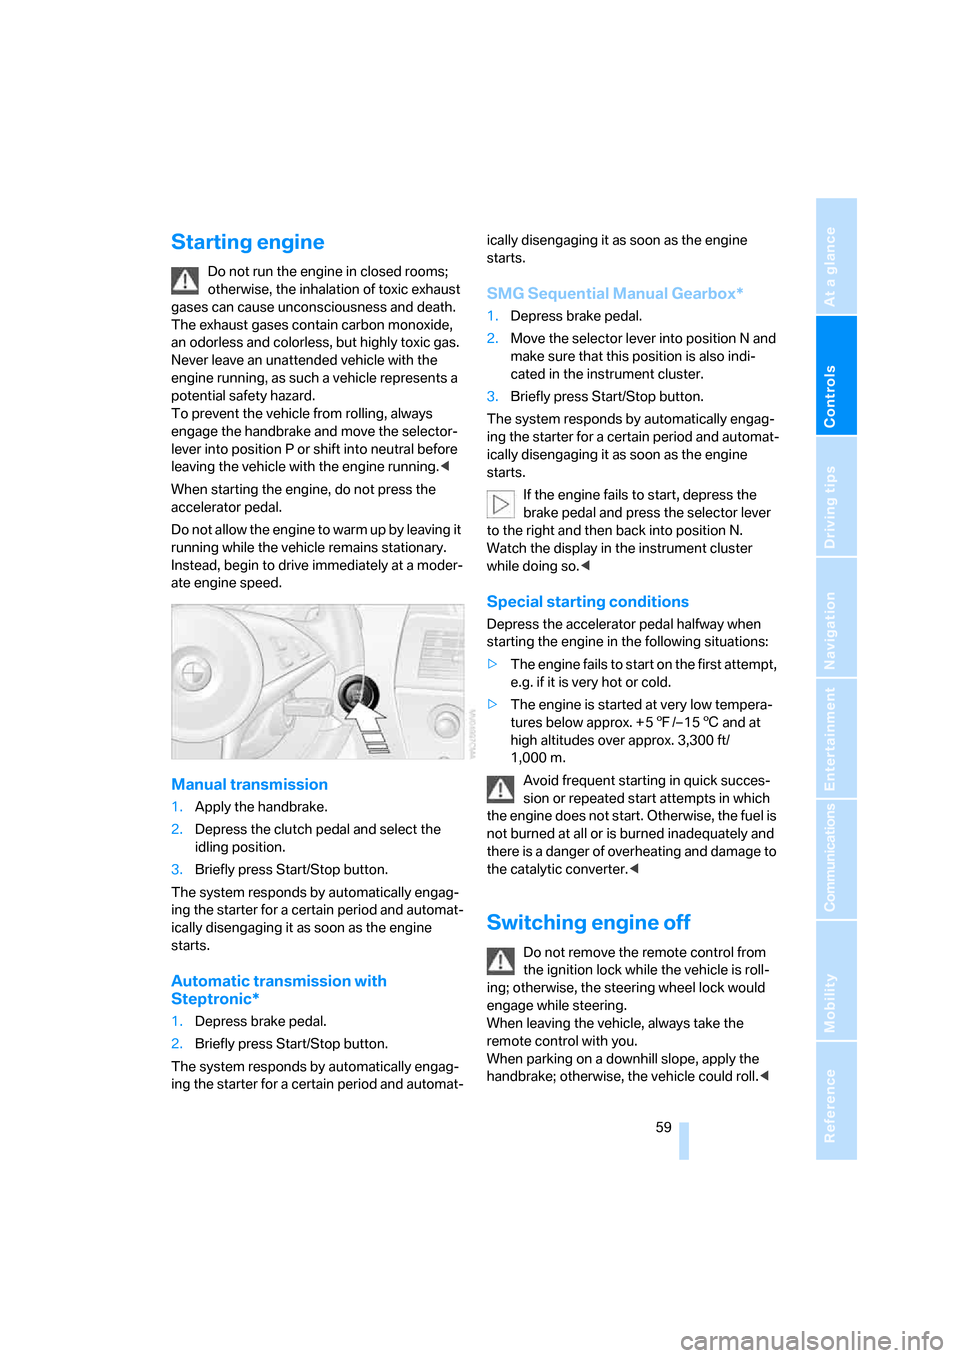
Starting engine
Do not run the engine in closed rooms;
otherwise, the inhalation of toxic exhaust
gases can cause unconsciousness and death.
The exhaust gases contain carbon monoxide,
an odorless and colorless, but highly toxic gas.
Never leave an unattended vehicle with the
engine running, as such a vehicle represents a
potential safety hazard.
To prevent the vehicle from rolling, always
engage the handbrake and move the selector-
lever into position P or shift into neutral before
leaving the vehicle with the engine running.<
When starting the engine, do not press the
accelerator pedal.
Do not allow the engine to warm up by leaving it
running while the vehicle remains stationary.
Instead, begin to drive immediately at a moder-
ate engine speed.
Manual transmission
1.Apply the handbrake.
2.Depress the clutch pedal and select the
idling position.
3.Briefly press Start/Stop button.
The system responds by automatically engag-
ing the starter for a certain period and automat-
ically disengaging it as soon as the engine
starts.
Automatic transmission with
Steptronic*
1.Depress brake pedal.
2.Briefly press Start/Stop button.
The system responds by automatically engag-
ing the starter for a certain period and automat-ically disengaging it as soon as the engine
starts.
SMG Sequential Manual Gearbox*
1.Depress brake pedal.
2.Move the selector lever into position N and
make sure that this position is also indi-
cated in the instrument cluster.
3.Briefly press Start/Stop button.
The system responds by automatically engag-
ing the starter for a certain period and automat-
ically disengaging it as soon as the engine
starts.
If the engine fails to start, depress the
brake pedal and press the selector lever
to the right and then back into position N.
Watch the display in the instrument cluster
while doing so.<
Special starting conditions
Depress the accelerator pedal halfway when
starting the engine in the following situations:
>The engine fails to start on the first attempt,
e.g. if it is very hot or cold.
>The engine is started at very low tempera-
tures below approx. + 57/– 156 and at
high altitudes over approx. 3,300 ft/
1,000 m.
Avoid frequent starting in quick succes-
sion or repeated start attempts in which
the engine does not start. Otherwise, the fuel is
not burned at all or is burned inadequately and
there is a danger of overheating and damage to
the catalytic converter.<
Switching engine off
Do not remove the remote control from
the ignition lock while the vehicle is roll-
ing; otherwise, the steering wheel lock would
engage while steering.
When leaving the vehicle, always take the
remote control with you.
When parking on a downhill slope, apply the
handbrake; otherwise, the vehicle could roll.<
Page 61 of 236
Driving
60
Manual transmission
1.Briefly press the Start/Stop button with the
vehicle stopped.
2.Shift into first gear or reverse.
3.Apply the handbrake.
SMG Sequential Manual Gearbox*
1.Apply the handbrake.
2.Move selector lever into a drive position.
3.Briefly press Start/Stop button.
If the transmission is in N when the engine is
switched off, you will be given an optical and
acoustic reminder.
Automatic transmission*
1.Move the selector lever into position P with
the vehicle stopped.
2.Briefly press Start/Stop button.
Handbrake
The handbrake is primarily intended to prevent
the vehicle from rolling while parked; it brakes
the rear wheels.
Indicator lamp
The indicator lamp lights up, and a sig-
nal also sounds when starting off. The
handbrake is engaged.
Indicator lamp for Canadian models.
Engaging
The lever engages automatically.
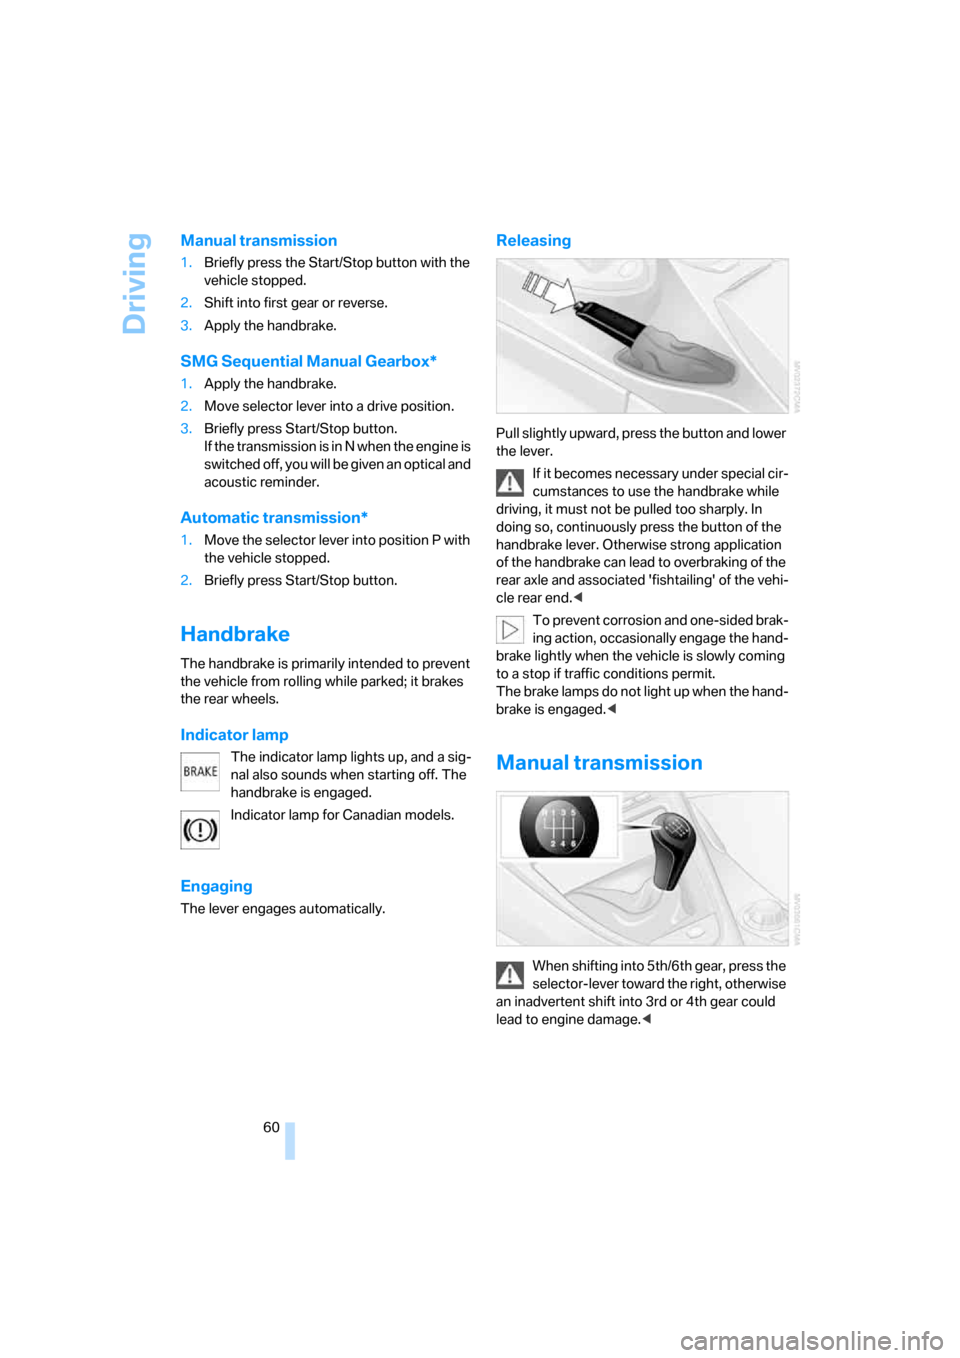
Releasing
Pull slightly upward, press the button and lower
the lever.
If it becomes necessary under special cir-
cumstances to use the handbrake while
driving, it must not be pulled too sharply. In
doing so, continuously press the button of the
handbrake lever. Otherwise strong application
of the handbrake can lead to overbraking of the
rear axle and associated 'fishtailing' of the vehi-
cle rear end.<
To prevent corrosion and one-sided brak-
ing action, occasionally engage the hand-
brake lightly when the vehicle is slowly coming
to a stop if traffic conditions permit.
The brake lamps do not light up when the hand-
brake is engaged.<
Manual transmission
When shifting into 5th/6th gear, press the
selector-lever toward the right, otherwise
an inadvertent shift into 3rd or 4th gear could
lead to engine damage.<
Page 63 of 236
Driving
62 It is also possible to start off in second gear, e. g.
in slippery conditions.
In the following situations, SMG does the think-
ing for you:
>Upshifts and downshifts are executed only
when they will result in a plausible combina-
tion of engine and vehicle speed; thus, for
example, the system will not execute a
downshift that would cause the engine to
overrev.
>When the vehicle is stationary, the trans-
mission automatically downshifts into first
gear.
>Shortly before dropping below a gear-
dependent minimum speed, the transmis-
sion downshifts automatically even without
your intervention.
D Drive mode
In the Drive mode, all forward gears are shifted
automatically.
To switch from Sequential to Drive mode:
Briefly press the selector-lever to the right
toward D.
Kick-down: for rapid acceleration, e.g. passing,
press the accelerator pedal as far down as it will
go. You achieve maximum acceleration.
To switch back to the Sequential mode: press
selector-lever to the right again toward D or
shift using the shifting paddles or the selector-
lever.
Start off quickly on slopes. Do not hold
the vehicle on a hill by applying the throt-
tle, but engage the handbrake instead. Other-
wise, overheating can occur in the region of the
transmission.<
Gear changes
Using selector-lever
>To upshift, pull the selector-lever back.
>To downshift, push the selector-lever for-
ward.
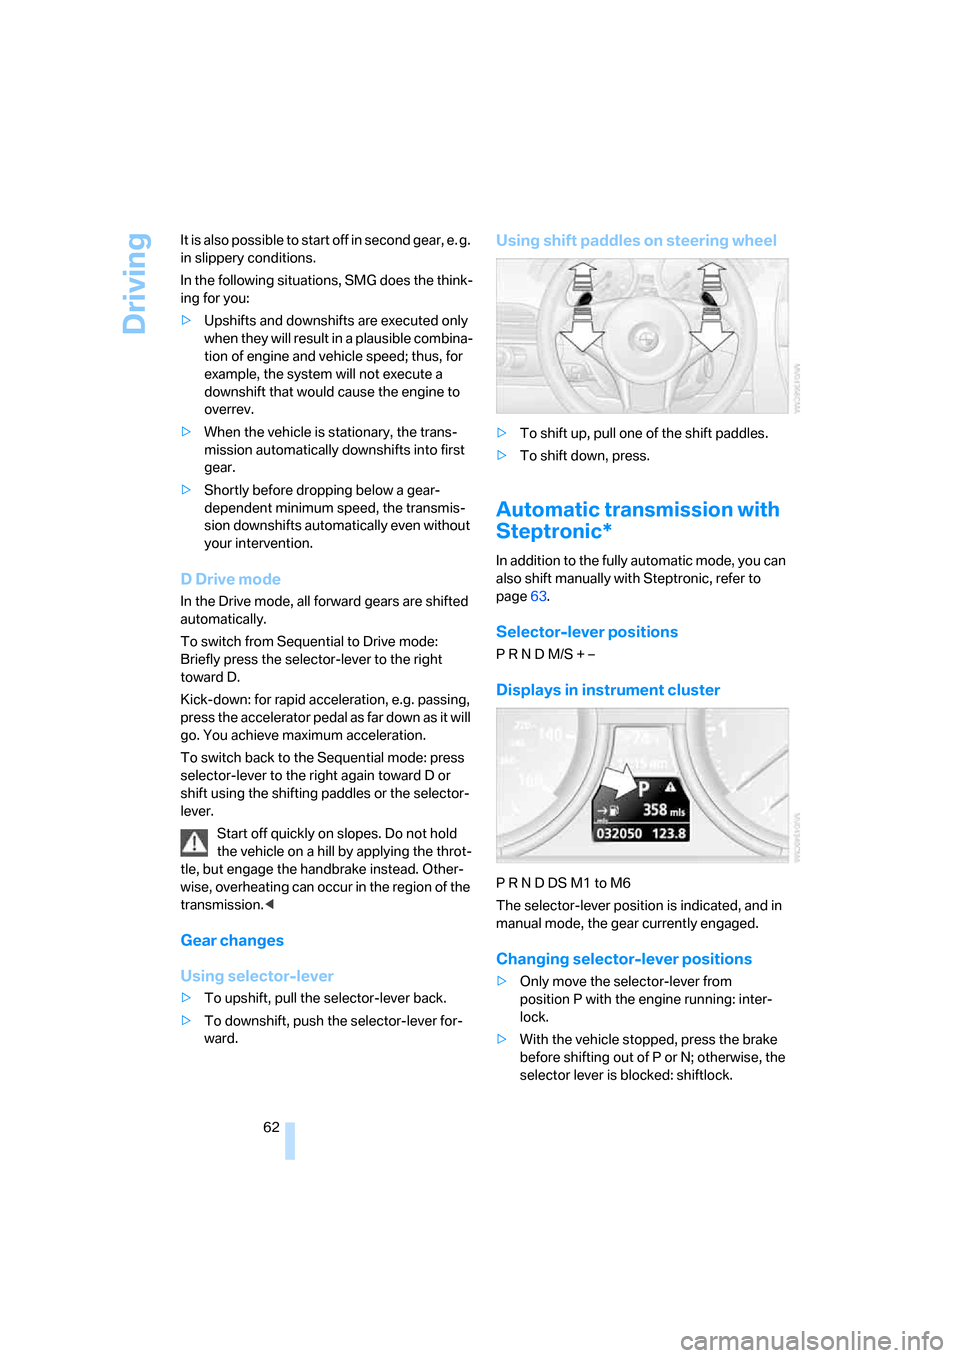
Using shift paddles on steering wheel
>To shift up, pull one of the shift paddles.
>To shift down, press.
Automatic transmission with
Steptronic*
In addition to the fully automatic mode, you can
also shift manually with Steptronic, refer to
page63.
Selector-lever positions
P R N D M/S + –
Displays in instrument cluster
P R N D DS M1 to M6
The selector-lever position is indicated, and in
manual mode, the gear currently engaged.
Changing selector-lever positions
>Only move the selector-lever from
position P with the engine running: inter-
lock.
>With the vehicle stopped, press the brake
before shifting out of P or N; otherwise, the
selector lever is blocked: shiftlock.
Page 116 of 236
Driving tips
115Reference
At a glance
Controls
Communications
Navigation
Entertainment
Mobility
Mobile communications devices in
vehicle
BMW advises against using mobile com-
munications devices, e.g. mobile phones,
inside the vehicle without a direct connection
to an external antenna. Otherwise, the vehicle
electronics and mobile communications device
can interfere with one another. In addition, there
is no assurance that the radiation emitted dur-
ing transmission will be conveyed out of the
vehicle interior.<
Hydroplaning
When driving on wet or slushy roads,
reduce road speed. If you do not, a wedge
of water can form between tires and road sur-
face. This phenomenon is referred to as hydro-
planing, and is characterized by a partial or
complete loss of contact between the tires and
the road surface, ultimately undermining your
ability to steer and brake the vehicle.<
The risk of hydroplaning increases as the tread
depth of the tires decreases, also refer to Mini-
mum tire tread on page187.
Driving through water
Do not drive through water on the road if
it is deeper than 1 ft/30 cm, and then only
at walking speed at the most. Otherwise, the
vehicle's engine, electrical systems and trans-
mission may be damaged.<
Using handbrake on inclines
On inclines, do not hold the vehicle with
the clutch; use the handbrake. Otherwise
greater clutch wear will result.<
SMG Sequential Manual Gearbox
Start off quickly on slopes. Do not hold
the vehicle on a hill by applying the throt-
tle, but engage the handbrake instead. Other-
wise overheating can occur in the transmission
region.<
Starting assistant
The starting assistant enables you to start off
conveniently on slopes. The parking brake is
not required for this purpose.
1.Hold the vehicle with the footbrake.
2.Release the footbrake and immediately
drive off quickly.
The starting assistant holds the vehicle
for approx. 2 seconds after releasing the
footbrake. Depending on the load, the vehicle
may also roll back slightly during this time.
After releasing the footbrake, immediately start
quickly; otherwise, the starting assistant no
longer holds the vehicle after approx. 2 seconds
and it begins to roll back.<
Braking safely
Your BMW is equipped with ABS as a standard
feature. In situations that require it, it is best to
brake with full force. Since the vehicle maintains
steering responsiveness, you can still avoid
possible obstacles with a minimum of steering
effort.
Pulsation at the brake pedal combines with
sounds from the hydraulic circuits to indicate to
the driver that ABS is in its active mode.
Do not drive with your foot resting on the
brake pedal. Even light but consistent
pedal pressure can lead to high temperatures,
brake wear and possibly even brake failure.<
Driving in wet conditions
When driving on wet roads or in heavy rain, it is
a good idea to apply light pressure to the brake
pedal every few miles. Monitor traffic conditions
to ensure that this maneuver does not endan-
ger other road users. The heat generated in this
process helps dry the pads and rotors to ensure
that full braking efficiency will then be available
when you need it.
Hills
To prevent overheating and thus reduced
efficiency of the brake system, downshift
to a gear in which only minimal brake applica-
tions are needed when descending long or
Page 194 of 236
Mobility
193Reference
At a glance
Controls
Driving tips
Communications
Navigation
Entertainment
You can also call BMW of North America at
1-800-831-1117 or visit the website at
www.bmwusa.com to obtain this information.
Do not use oil additives; under some
circumstances, they can harm your
engine.<
Viscosity grades
The viscosity is a measure of the thickness of
the oil and is specified in SAE grades.
The choice of the right SAE grade is based on
the climatic conditions in the region in which
you normally drive your BMW.
Approved oils belong to the SAE grades
5W-40 and 5W-30.<
These oils can be used for driving at all outside
temperatures.
Coolant
Do not open the cooling system when the
engine is hot. Escaping coolant can cause
burns.<
Coolant consists of water and coolant additive.
Not all commercially available additives are suit-
able for your BMW. Ask your BMW center for
suitable additives.
Only use suitable additives; otherwise,
engine damage may result. The additives
present a health hazard.<
Always observe all applicable environ-
mental laws and regulations when dis-
posing of used coolant additives.<
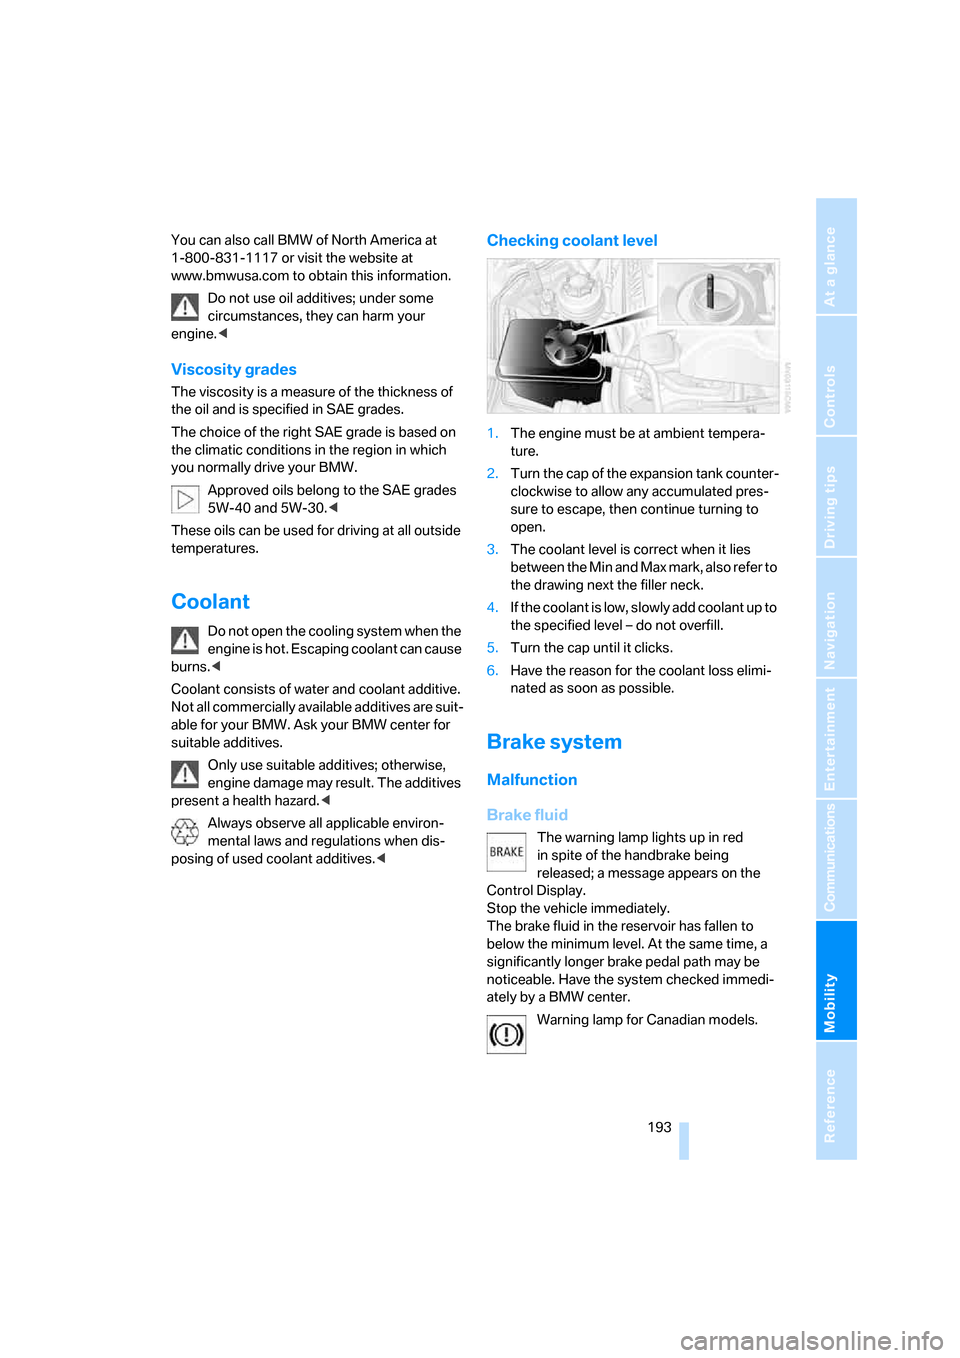
Checking coolant level
1.The engine must be at ambient tempera-
ture.
2.Turn the cap of the expansion tank counter-
clockwise to allow any accumulated pres-
sure to escape, then continue turning to
open.
3.The coolant level is correct when it lies
between the Min and Max mark, also refer to
the drawing next the filler neck.
4.If the coolant is low, slowly add coolant up to
the specified level – do not overfill.
5.Turn the cap until it clicks.
6.Have the reason for the coolant loss elimi-
nated as soon as possible.
Brake system
Malfunction
Brake fluid
The warning lamp lights up in red
in spite of the handbrake being
released; a message appears on the
Control Display.
Stop the vehicle immediately.
The brake fluid in the reservoir has fallen to
below the minimum level. At the same time, a
significantly longer brake pedal path may be
noticeable. Have the system checked immedi-
ately by a BMW center.
Warning lamp for Canadian models.
Page 195 of 236
Under the hood
194 When you continue driving, an increased
brake pedal path can be necessary, and
significantly longer braking distances may be
required. Please adapt your driving style
accordingly.<
Brake pads
The warning lamp lights up in red
in spite of the handbrake being
released; a message appears on the
Control Display.
The brake pads have reached their minimum
pad thickness. Have the brake pads replaced as
soon as possible.
Warning lamp for Canadian models.
For your own safety: use only brake pads
that BMW has approved for your particu-
lar vehicle model. As BMW cannot assess the
suitability of other brake pads for use on your
vehicle, BMW is unable to assume continued
responsibility for the vehicle's operating safety
if non-approved pads are installed.<
Page 220 of 236
Reference 219
At a glance
Controls
Driving tips
Communications
Navigation
Entertainment
Mobility
Brake pads194
– breaking-in114
Brakes
– ABS Antilock Brake
System86
– brake fluid193
– brake force display90
– brake pads194
– breaking-in114
– CBC Cornering Brake
Control86
– handbrake60
Brake system114
– brake fluid level193
– brake pads114,194
– brake rotors116
– breaking-in114
– warning lamp13,193
Brake wear warning
– brake pads194
– warning lamp194
Braking
– electronic brake-force
distribution86
– refer to Braking safely115
Braking safely115
Breakdown assistance176
Breakdown services, refer to
Roadside Assistance203
Breaking-in114
Breaking-in the clutch114
Breaking-in the
differential114
"Brightness"83,94
Brightness of Control
Display83
Button for starting engine58
Buttons on steering wheel11
Bypassing route sections136
C
California law
– Event Data Recorders196
California Proposition
65 Warning6
"Call"168Call
– accepting166
– displaying accepted168
– ending167
– in absence168
– starting167
Calling
– from phone book167
– from Top 8 list168
– redialing168
Can holder, refer to Cup
holders109
Capacity of luggage
compartment210
Car battery, refer to Vehicle
battery200
Car care, refer to the Caring
for your vehicle brochure
Car-care products, refer to the
Caring for your vehicle
brochure
"Car data"76
Care196
– refer to the Caring for your
vehicle brochure
Cargo loading
– securing cargo117
– stowing cargo117
– vehicle116
Caring for artificial leather,
refer to the Caring for your
vehicle brochure
Caring for leather, refer to the
Caring for your vehicle
brochure
Caring for light-alloy wheels,
refer to the Caring for your
vehicle brochure
Caring for plastic, refer to the
Caring for your vehicle
brochure
Caring for the carpet, refer to
the Caring for your vehicle
brochure
Caring for the vehicle finish,
refer to the Caring for your
vehicle brochureCar key, refer to Keys/remote
control28
Car phone162
– installation location, refer to
Center armrest108
– refer to Mobile phone162
– refer to separate Owner's
Manual
Car radio, refer to Radio144
Car wash116
– refer to Before driving into a
car wash116
– refer to the Caring for your
vehicle brochure
– with comfort access37
Catalytic converter, refer to
Hot exhaust system114
"Categories"151
CBC Cornering Brake
Control86
CBS Condition Based
Service195
"CD"140,153
CD changer153
– controls140
– fast forward/reverse157
– installation location157
– playing a track155
– random play sequence156
– repeating a track156
– selecting a CD153
– selecting a track154
– switching on/off140
– tone control141
– volume141
CD player153
– controls140
– fast forward/reverse157
– playing a track155
– random play sequence156
– repeating a track156
– selecting a track154
– switching on/off140
– tone control141
– volume141
Center armrest, adjusting
height108