2006 BMW 650I CONVERTIBLE ignition
[x] Cancel search: ignitionPage 62 of 236
Controls
61Reference
At a glance
Driving tips
Communications
Navigation
Entertainment
Mobility
Reverse gear
Select only when the vehicle is stationary.
Press the gearshift lever to the left, overcoming
a slight resistance.
The backup lamps switch on automatically with
the ignition switched on.
SMG Sequential Manual
Gearbox*
The concept
The SMG Sequential Manual Gearbox is an
automated manual transmission in which an
electrohydraulic system handles the clutching
and gear changes.
You operate the SMG using the selector-lever
in the center console and two shift paddles on
the steering wheel.
It offers the following functions:
>Choice of manual or automatic mode:
Sequential mode or Drive mode
>Choice of two drive programs: Normal or
Sport, refer to Dynamic Driving Control
page64
>Automatic downshifting and protection
against incorrect shifting even in sequential
operation
>Acceleration assistant, refer to page64.
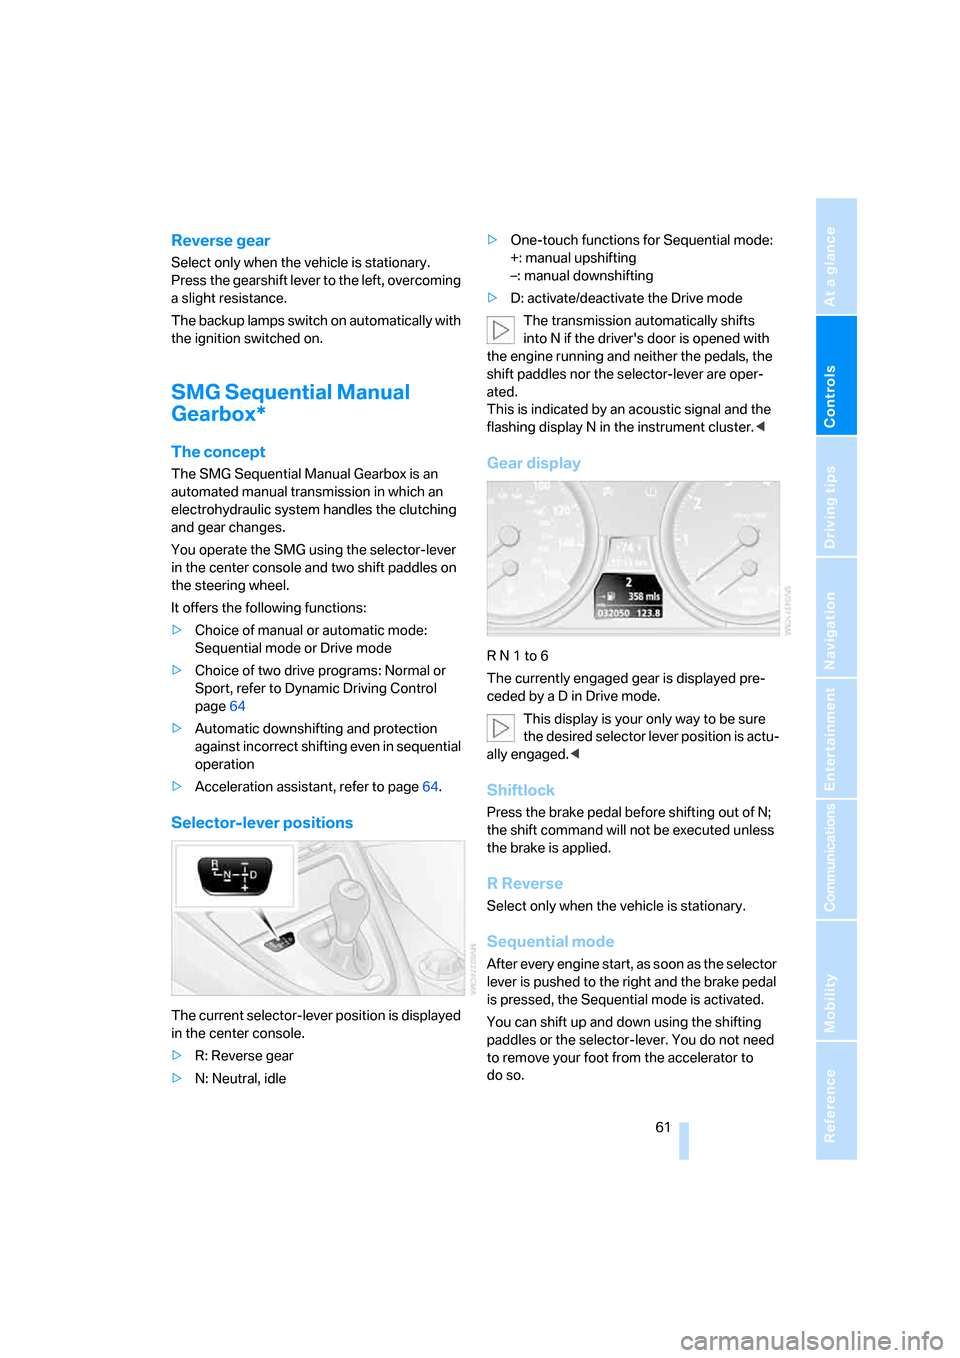
Selector-lever positions
The current selector-lever position is displayed
in the center console.
>R: Reverse gear
>N: Neutral, idle>One-touch functions for Sequential mode:
+: manual upshifting
–: manual downshifting
>D: activate/deactivate the Drive mode
The transmission automatically shifts
into N if the driver's door is opened with
the engine running and neither the pedals, the
shift paddles nor the selector-lever are oper-
ated.
This is indicated by an acoustic signal and the
flashing display N in the instrument cluster.<
Gear display
R N 1 to 6
The currently engaged gear is displayed pre-
ceded by a D in Drive mode.
This display is your only way to be sure
the desired selector lever position is actu-
ally engaged.<
Shiftlock
Press the brake pedal before shifting out of N;
the shift command will not be executed unless
the brake is applied.
R Reverse
Select only when the vehicle is stationary.
Sequential mode
After every engine start, as soon as the selector
lever is pushed to the right and the brake pedal
is pressed, the Sequential mode is activated.
You can shift up and down using the shifting
paddles or the selector-lever. You do not need
to remove your foot from the accelerator to
do so.
Page 65 of 236
Driving
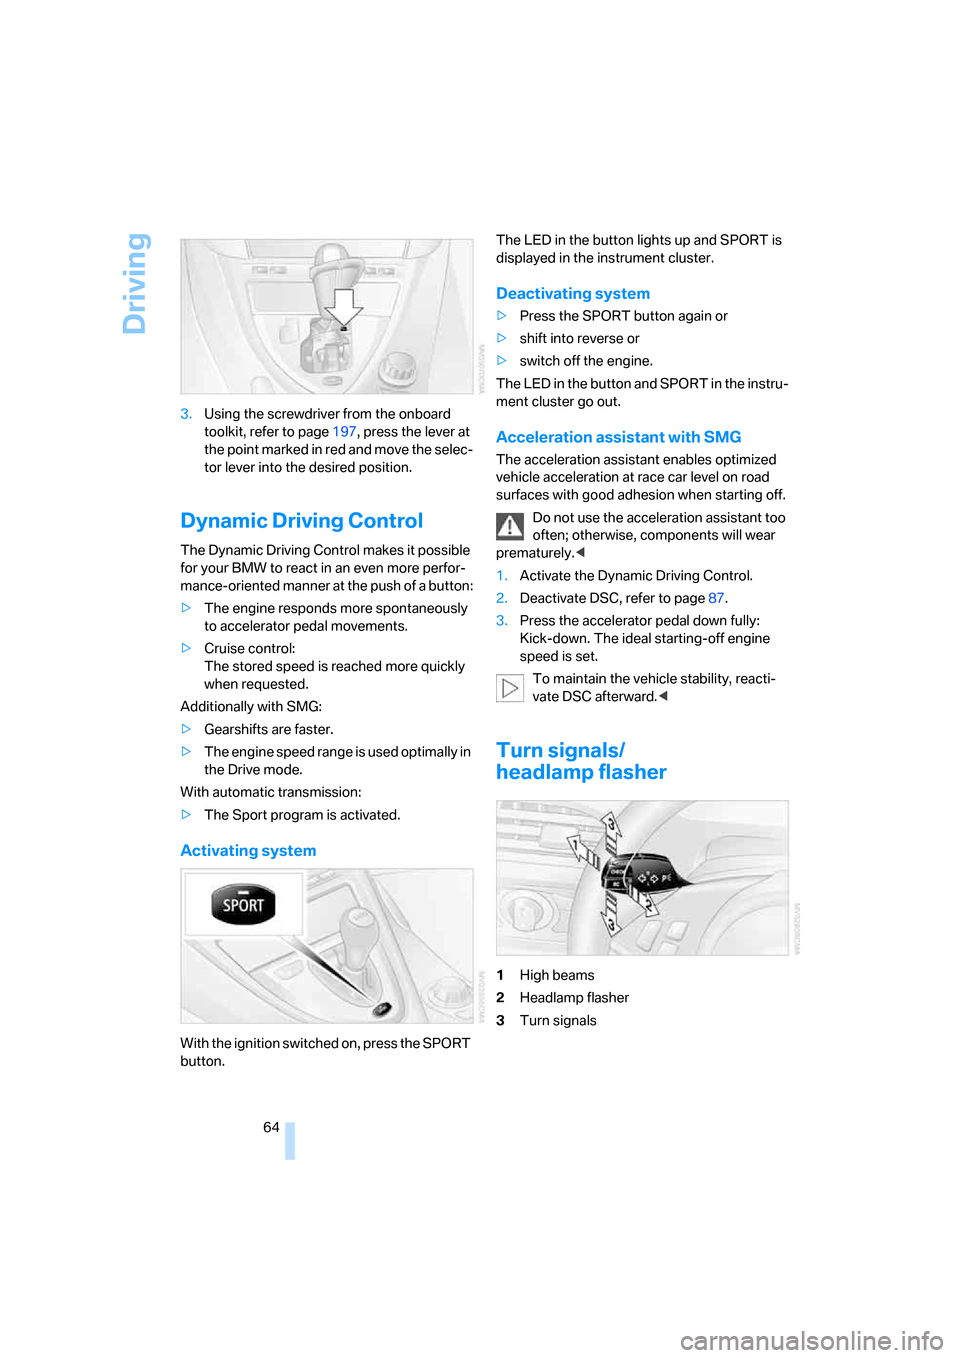
64 3.Using the screwdriver from the onboard
toolkit, refer to page197, press the lever at
the point marked in red and move the selec-
tor lever into the desired position.
Dynamic Driving Control
The Dynamic Driving Control makes it possible
for your BMW to react in an even more perfor-
mance-oriented manner at the push of a button:
>The engine responds more spontaneously
to accelerator pedal movements.
>Cruise control:
The stored speed is reached more quickly
when requested.
Additionally with SMG:
>Gearshifts are faster.
>The engine speed range is used optimally in
the Drive mode.
With automatic transmission:
>The Sport program is activated.
Activating system
With the ignition switched on, press the SPORT
button.The LED in the button lights up and SPORT is
displayed in the instrument cluster.
Deactivating system
>Press the SPORT button again or
>shift into reverse or
>switch off the engine.
The LED in the button and SPORT in the instru-
ment cluster go out.
Acceleration assistant with SMG
The acceleration assistant enables optimized
vehicle acceleration at race car level on road
surfaces with good adhesion when starting off.
Do not use the acceleration assistant too
often; otherwise, components will wear
prematurely.<
1.Activate the Dynamic Driving Control.
2.Deactivate DSC, refer to page87.
3.Press the accelerator pedal down fully:
Kick-down. The ideal starting-off engine
speed is set.
To maintain the vehicle stability, reacti-
vate DSC afterward.<
Turn signals/
headlamp flasher
1High beams
2Headlamp flasher
3Turn signals
Page 68 of 236
Controls
67Reference
At a glance
Driving tips
Communications
Navigation
Entertainment
Mobility
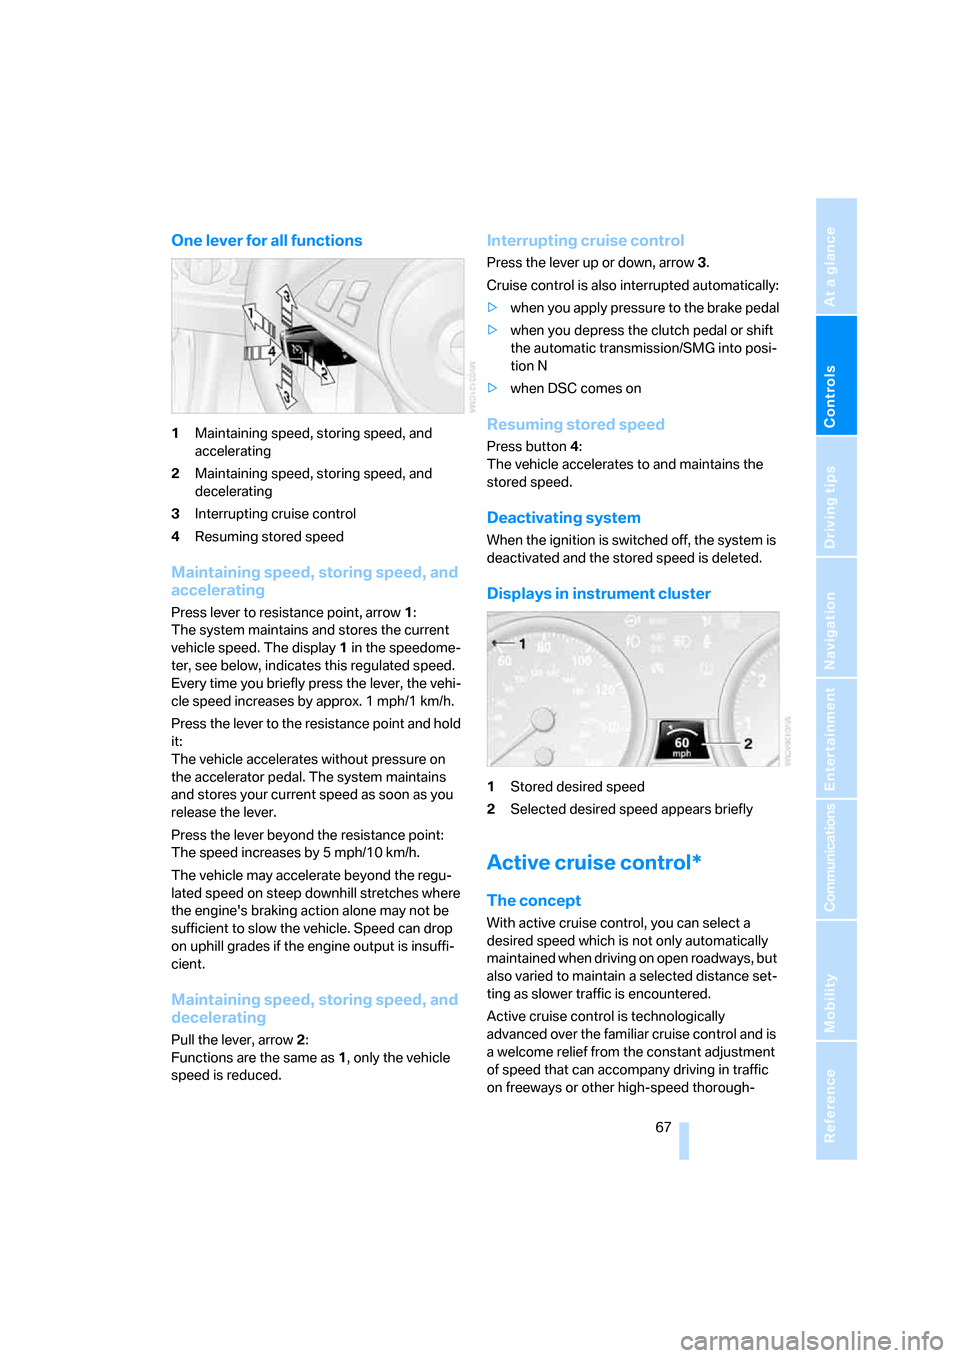
One lever for all functions
1Maintaining speed, storing speed, and
accelerating
2Maintaining speed, storing speed, and
decelerating
3Interrupting cruise control
4Resuming stored speed
Maintaining speed, storing speed, and
accelerating
Press lever to resistance point, arrow 1:
The system maintains and stores the current
vehicle speed. The display1 in the speedome-
ter, see below, indicates this regulated speed.
Every time you briefly press the lever, the vehi-
cle speed increases by approx. 1 mph/1 km/h.
Press the lever to the resistance point and hold
it:
The vehicle accelerates without pressure on
the accelerator pedal. The system maintains
and stores your current speed as soon as you
release the lever.
Press the lever beyond the resistance point:
The speed increases by 5 mph/10 km/h.
The vehicle may accelerate beyond the regu-
lated speed on steep downhill stretches where
the engine's braking action alone may not be
sufficient to slow the vehicle. Speed can drop
on uphill grades if the engine output is insuffi-
cient.
Maintaining speed, storing speed, and
decelerating
Pull the lever, arrow2:
Functions are the same as1, only the vehicle
speed is reduced.
Interrupting cruise control
Press the lever up or down, arrow3.
Cruise control is also interrupted automatically:
>when you apply pressure to the brake pedal
>when you depress the clutch pedal or shift
the automatic transmission/SMG into posi-
tion N
>when DSC comes on
Resuming stored speed
Press button4:
The vehicle accelerates to and maintains the
stored speed.
Deactivating system
When the ignition is switched off, the system is
deactivated and the stored speed is deleted.
Displays in instrument cluster
1Stored desired speed
2Selected desired speed appears briefly
Active cruise control*
The concept
With active cruise control, you can select a
desired speed which is not only automatically
maintained when driving on open roadways, but
also varied to maintain a selected distance set-
ting as slower traffic is encountered.
Active cruise control is technologically
advanced over the familiar cruise control and is
a welcome relief from the constant adjustment
of speed that can accompany driving in traffic
on freeways or other high-speed thorough-
Page 71 of 236
Driving
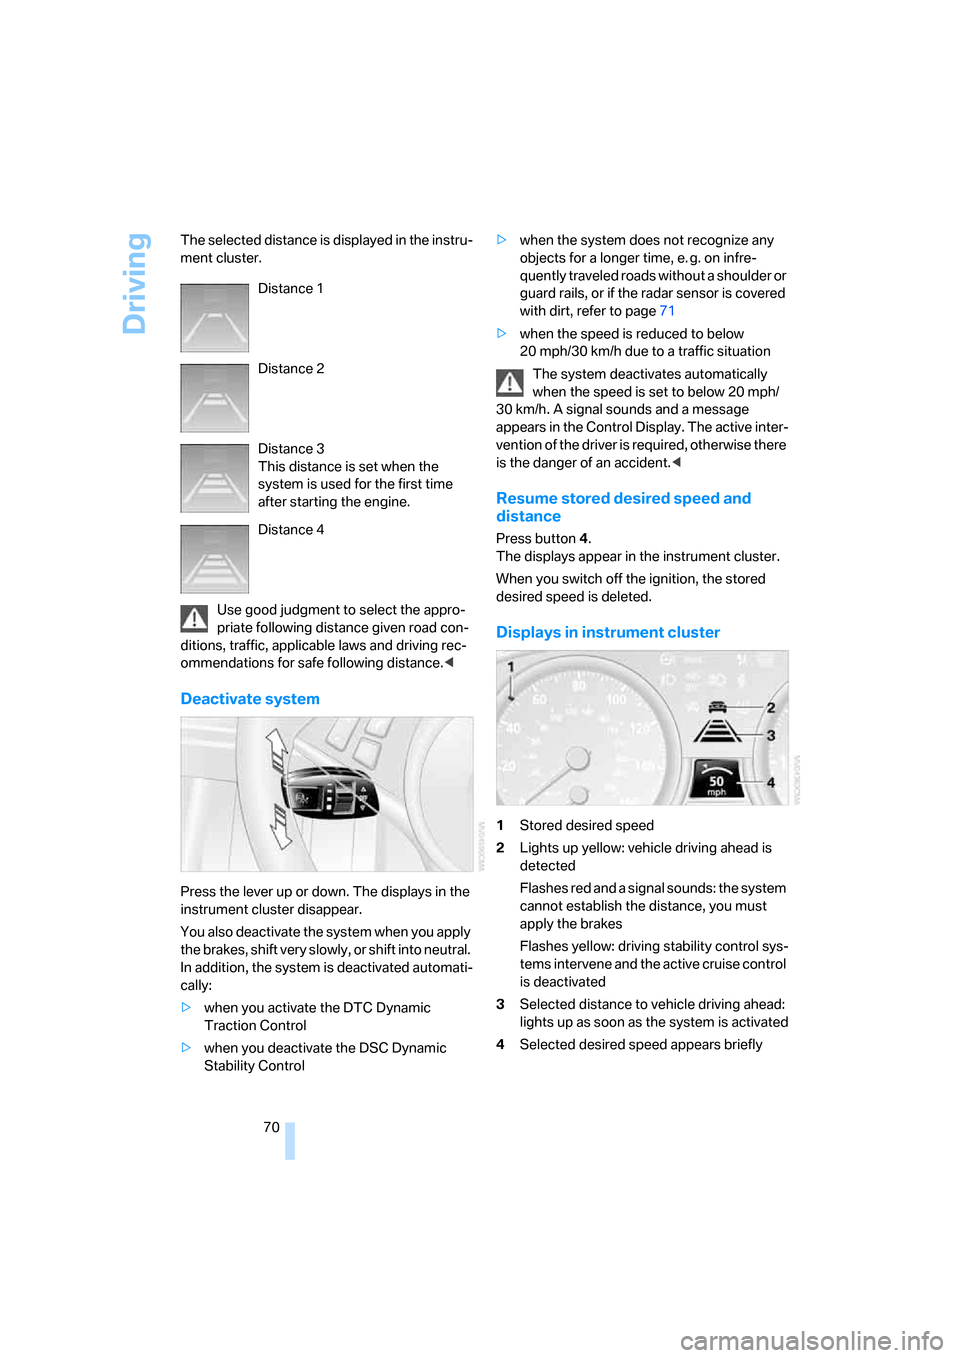
70 The selected distance is displayed in the instru-
ment cluster.
Use good judgment to select the appro-
priate following distance given road con-
ditions, traffic, applicable laws and driving rec-
ommendations for safe following distance.<
Deactivate system
Press the lever up or down. The displays in the
instrument cluster disappear.
You also deactivate the system when you apply
the brakes, shift very slowly, or shift into neutral.
In addition, the system is deactivated automati-
cally:
>when you activate the DTC Dynamic
Traction Control
>when you deactivate the DSC Dynamic
Stability Control>when the system does not recognize any
objects for a longer time, e. g. on infre-
quently traveled roads without a shoulder or
guard rails, or if the radar sensor is covered
with dirt, refer to page71
>when the speed is reduced to below
20 mph/30 km/h due to a traffic situation
The system deactivates automatically
when the speed is set to below 20 mph/
30 km/h. A signal sounds and a message
appears in the Control Display. The active inter-
vention of the driver is required, otherwise there
is the danger of an accident.<
Resume stored desired speed and
distance
Press button 4.
The displays appear in the instrument cluster.
When you switch off the ignition, the stored
desired speed is deleted.
Displays in instrument cluster
1Stored desired speed
2Lights up yellow: vehicle driving ahead is
detected
Flashes red and a signal sounds: the system
cannot establish the distance, you must
apply the brakes
Flashes yellow: driving stability control sys-
tems intervene and the active cruise control
is deactivated
3Selected distance to vehicle driving ahead:
lights up as soon as the system is activated
4Selected desired speed appears briefly Distance 1
Distance 2
Distance 3
This distance is set when the
system is used for the first time
after starting the engine.
Distance 4
Page 73 of 236
Driving
72 your vehicle when there is a slow-moving vehi-
cle, stopped vehicle or stationary object ahead
of you, as for example at a traffic light or when
approaching a parked vehicle. Also, the system
does not react to oncoming traffic, pedestrians
or other types of potential traffic such as a rider
on horseback. It is also possible that the system
may not detect smaller moving objects such as
motorcycles or bicycles. Be especially alert
when encountering any of these situations as
the system will neither automatically brake, nor
provide a warning to you. Also, be aware that
every decrease in the distance setting allows
your vehicle to come closer to a vehicle in front
of you and requires a heightened amount of
alertness.<
If your vehicle is actively following a vehicle in
front of you and the vehicle ahead speeds up or
the lane ahead becomes clear, then your vehi-
cle will accelerate to the speed you have
selected. Be aware that changing to a clear,
unobstructed lane will also result in your vehicle
accelerating.
Be certain to deactivate the system when
you pull into an exit lane for a highway off-
ramp.<
Also, vehicles traveling in a staggered manner
on a highway may cause a delay in the system's
reaction to a vehicle in front of you or may cause
the system to react to a vehicle actually in the
lane next to you. Always be ready to take action
or apply the brakes if necessary.
Active cruise control can only decelerate the
vehicle to approx. 20 mph/30 km/h. If the sys-
tem reduces vehicle speed below 20 mph/
30 km/h or if DSC/ABS is engaged while driving,
the system will automatically deactivate.
Remember, the system cannot stop your
vehicle. In addition, the system is deacti-
vated whenever the driver applies the vehicle
brakes, shifts into neutral, or deactivates DSC.
After any deactivation, the system will no longer
automatically activate the vehicle brakes, which
means the driver must intervene and resume
manual braking. You should then reactivate the
system only when you are fully aware of the
prior speed and distance settings.
driver must constantly monitor traffic and inter-
vene if necessary.
When you switch off the engine or ignition,
active cruise control is fully switched off, too,
and any settings you have selected are can-
celed.
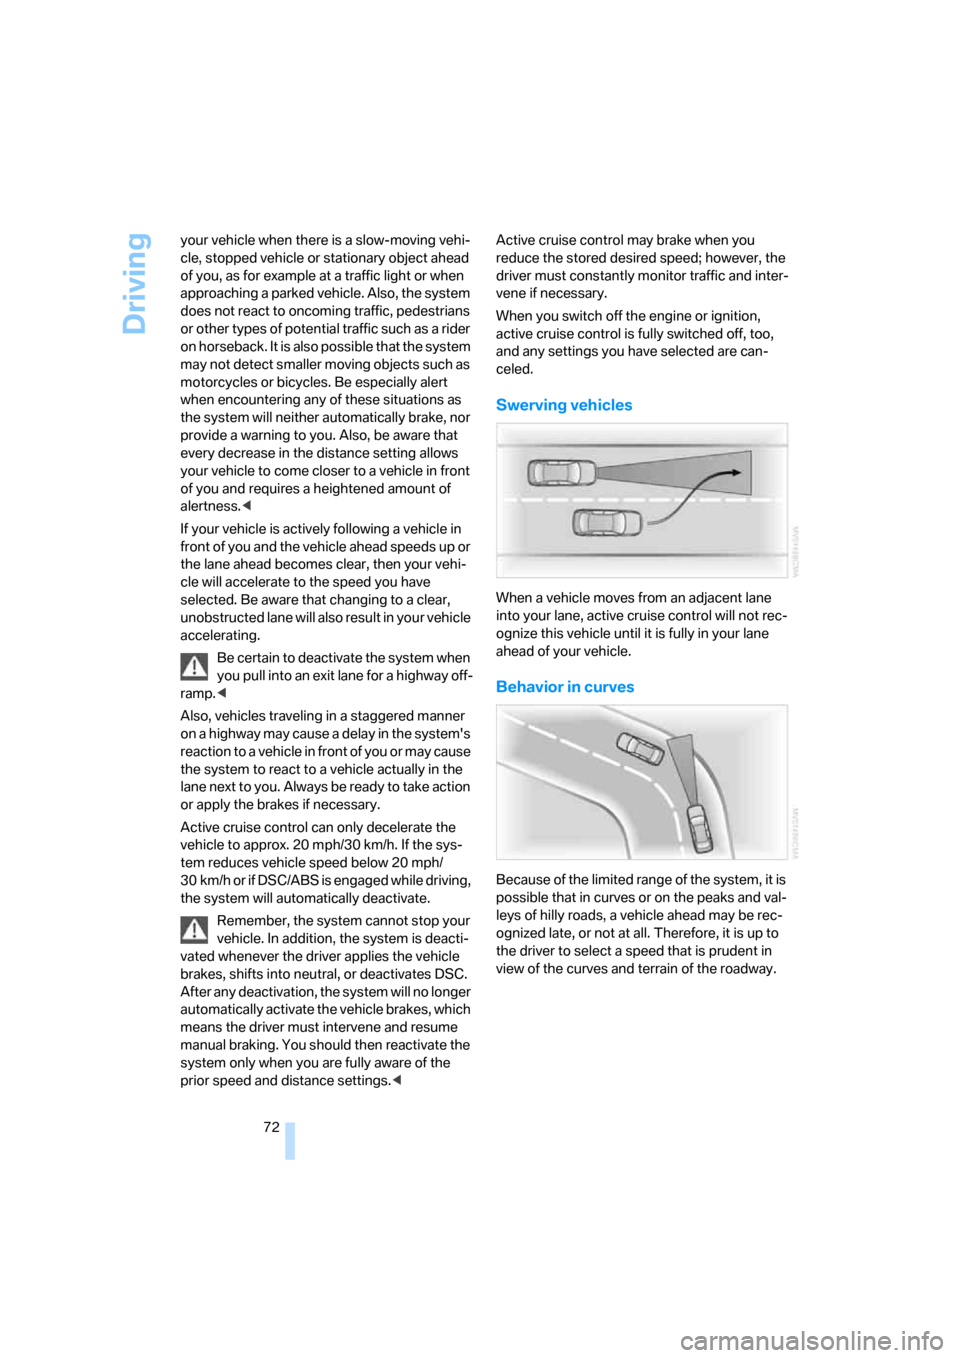
Swerving vehicles
When a vehicle moves from an adjacent lane
into your lane, active cruise control will not rec-
ognize this vehicle until it is fully in your lane
ahead of your vehicle.
Behavior in curves
Because of the limited range of the system, it is
possible that in curves or on the peaks and val-
leys of hilly roads, a vehicle ahead may be rec-
ognized late, or not at all. Therefore, it is up to
the driver to select a speed that is prudent in
view of the curves and terrain of the roadway.
Page 75 of 236
Everything under control
74
Everything under control
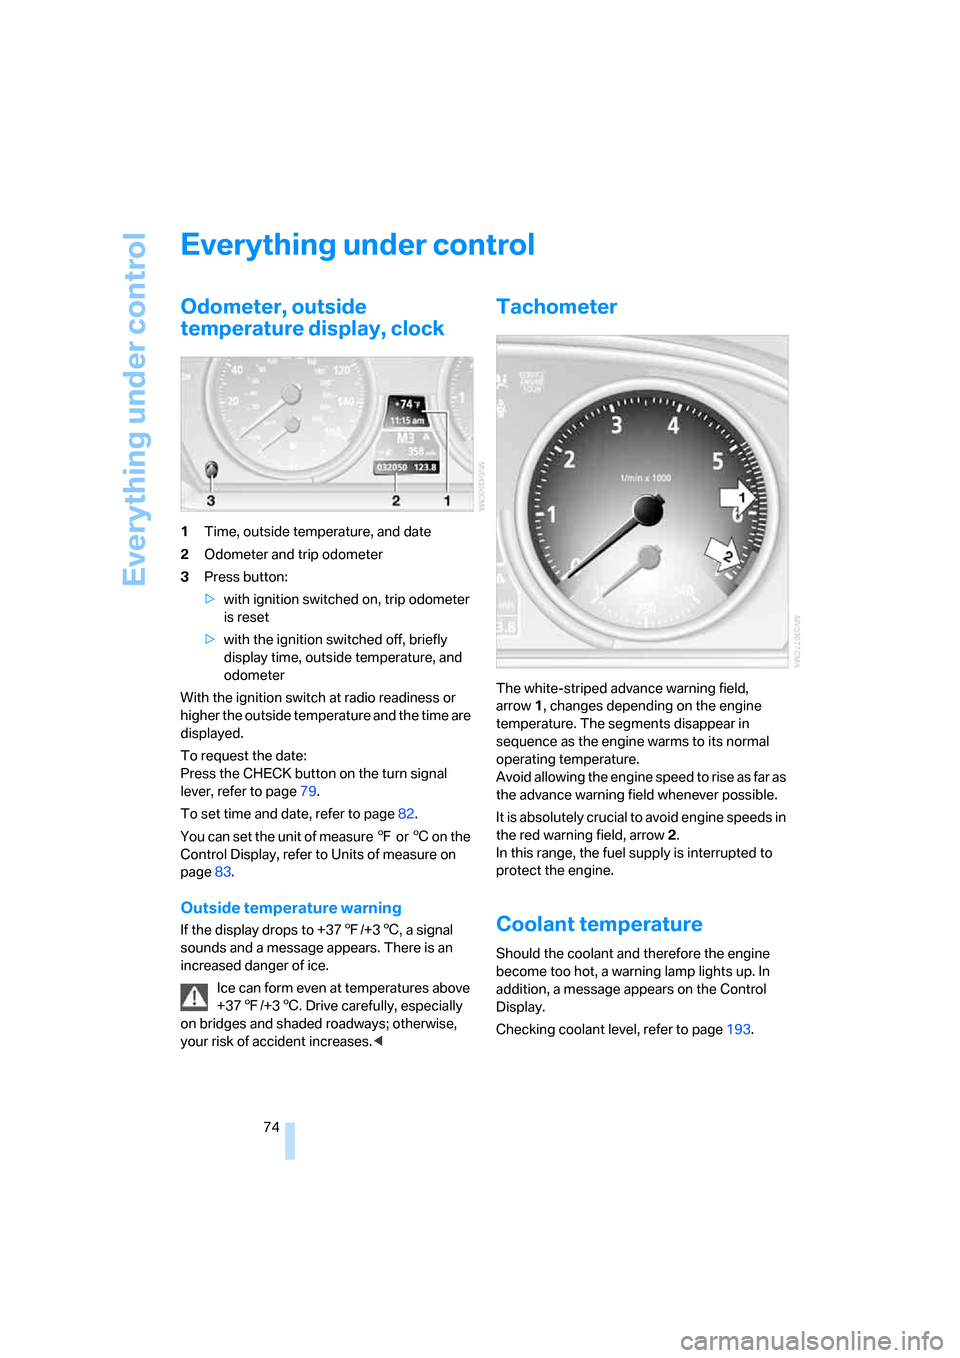
Odometer, outside
temperature display, clock
1Time, outside temperature, and date
2Odometer and trip odometer
3Press button:
>with ignition switched on, trip odometer
is reset
>with the ignition switched off, briefly
display time, outside temperature, and
odometer
With the ignition switch at radio readiness or
higher the outside temperature and the time are
displayed.
To request the date:
Press the CHECK button on the turn signal
lever, refer to page79.
To set time and date, refer to page82.
You can set the unit of measure 7 or 6 on the
Control Display, refer to Units of measure on
page83.
Outside temperature warning
If the display drops to +377/+36, a signal
sounds and a message appears. There is an
increased danger of ice.
Ice can form even at temperatures above
+377/+36. Drive carefully, especially
on bridges and shaded roadways; otherwise,
your risk of accident increases.<
Tachometer
The white-striped advance warning field,
arrow1, changes depending on the engine
temperature. The segments disappear in
sequence as the engine warms to its normal
operating temperature.
Avoid allowing the engine speed to rise as far as
the advance warning field whenever possible.
It is absolutely crucial to avoid engine speeds in
the red warning field, arrow2.
In this range, the fuel supply is interrupted to
protect the engine.
Coolant temperature
Should the coolant and therefore the engine
become too hot, a warning lamp lights up. In
addition, a message appears on the Control
Display.
Checking coolant level, refer to page193.
Page 76 of 236
Controls
75Reference
At a glance
Driving tips
Communications
Navigation
Entertainment
Mobility
Engine oil temperature gauge
During normal operation, the engine oil temper-
ature is between approx. 1607/706 and
approx. 3407/1706.
If the engine oil temperature is too high, a mes-
sage appears on the Control Display.
Fuel gauge
Fuel tank capacity: approx. 18.5 gallons/
70 liters. You can find information on refueling
on page182.
If the tilt of the vehicle varies for a longer period,
for example when you are driving in mountain-
ous areas, the indicator may fluctuate slightly.
Reserve
After the reserve quantity has been reached, a
message appears for a short time on the Con-
trol Display; the remaining range is shown in the
onboard computer. Below a range of approx.
30 miles/50 km, the message remains on the
Control Display.
Refuel as soon as possible once your
remaining range falls below 30 miles/
50 km; otherwise, engine functions are not
ensured and damage can occur.<
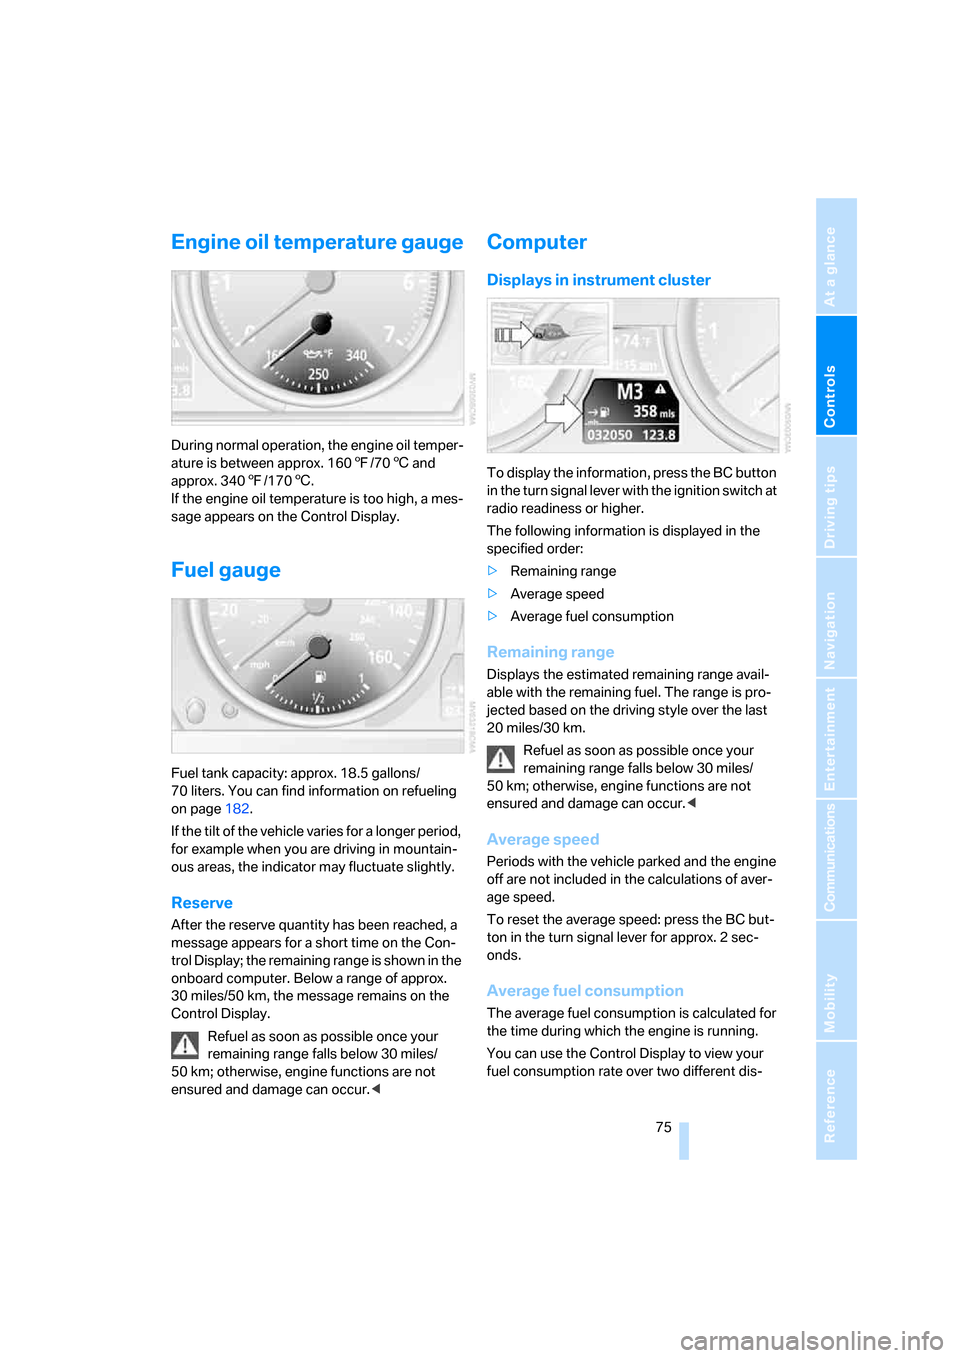
Computer
Displays in instrument cluster
To display the information, press the BC button
in the turn signal lever with the ignition switch at
radio readiness or higher.
The following information is displayed in the
specified order:
>Remaining range
>Average speed
>Average fuel consumption
Remaining range
Displays the estimated remaining range avail-
able with the remaining fuel. The range is pro-
jected based on the driving style over the last
20 miles/30 km.
Refuel as soon as possible once your
remaining range falls below 30 miles/
50 km; otherwise, engine functions are not
ensured and damage can occur.<
Average speed
Periods with the vehicle parked and the engine
off are not included in the calculations of aver-
age speed.
To reset the average speed: press the BC but-
ton in the turn signal lever for approx. 2 sec-
onds.
Average fuel consumption
The average fuel consumption is calculated for
the time during which the engine is running.
You can use the Control Display to view your
fuel consumption rate over two different dis-
Page 78 of 236
Controls
77Reference
At a glance
Driving tips
Communications
Navigation
Entertainment
Mobility
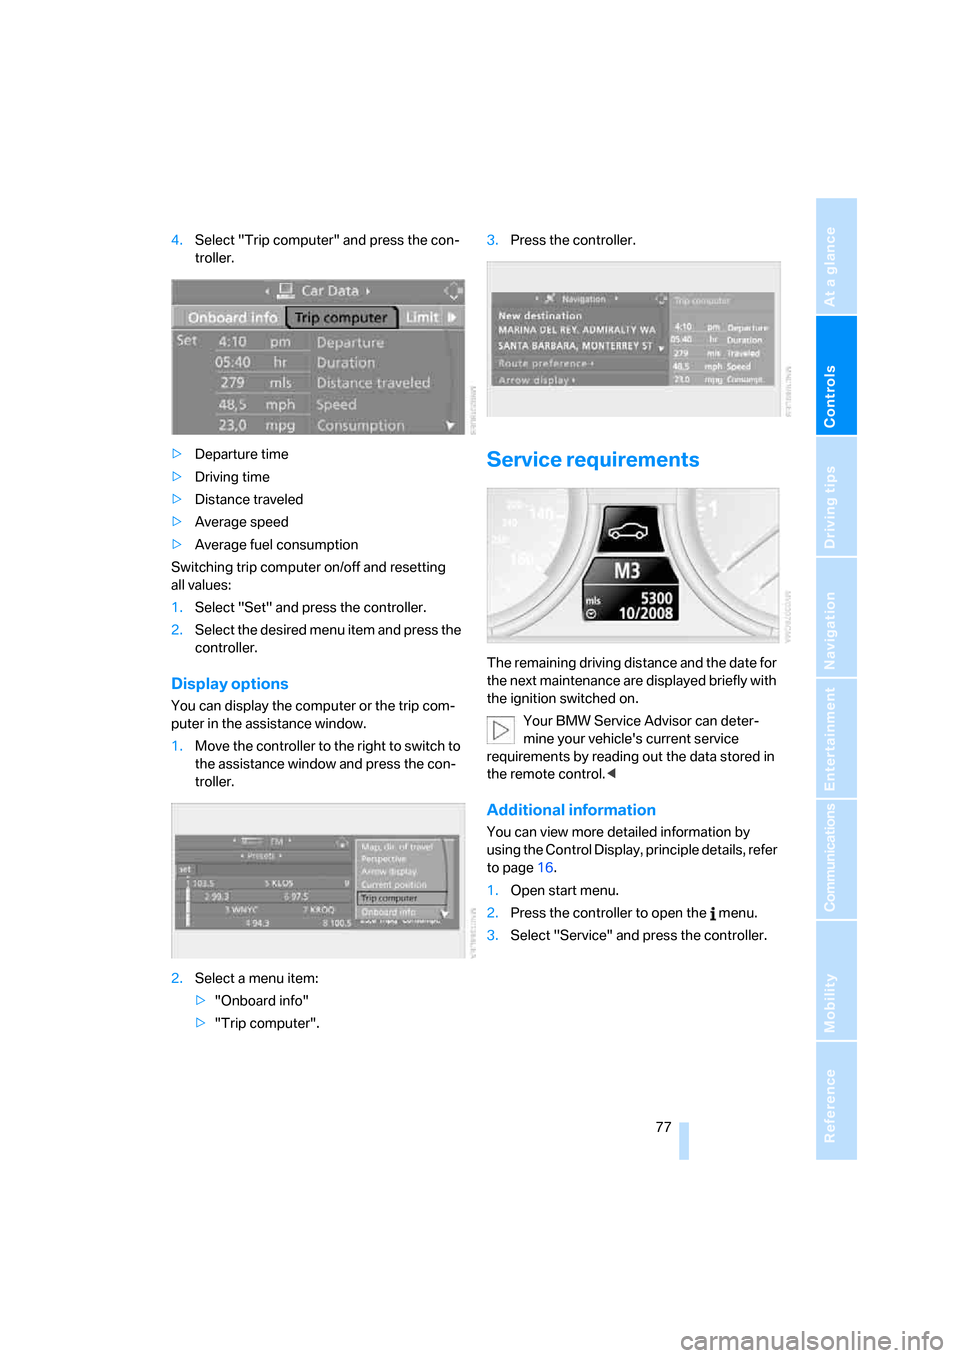
4.Select "Trip computer" and press the con-
troller.
>Departure time
>Driving time
>Distance traveled
>Average speed
>Average fuel consumption
Switching trip computer on/off and resetting
all values:
1.Select "Set" and press the controller.
2.Select the desired menu item and press the
controller.
Display options
You can display the computer or the trip com-
puter in the assistance window.
1.Move the controller to the right to switch to
the assistance window and press the con-
troller.
2.Select a menu item:
>"Onboard info"
>"Trip computer".3.Press the controller.
Service requirements
The remaining driving distance and the date for
the next maintenance are displayed briefly with
the ignition switched on.
Your BMW Service Advisor can deter-
mine your vehicle's current service
requirements by reading out the data stored in
the remote control.<
Additional information
You can view more detailed information by
using the Control Display, principle details, refer
to page16.
1.Open start menu.
2.Press the controller to open the menu.
3.Select "Service" and press the controller.