2006 BMW 650I CONVERTIBLE fuel
[x] Cancel search: fuelPage 75 of 236
Everything under control
74
Everything under control
Odometer, outside
temperature display, clock
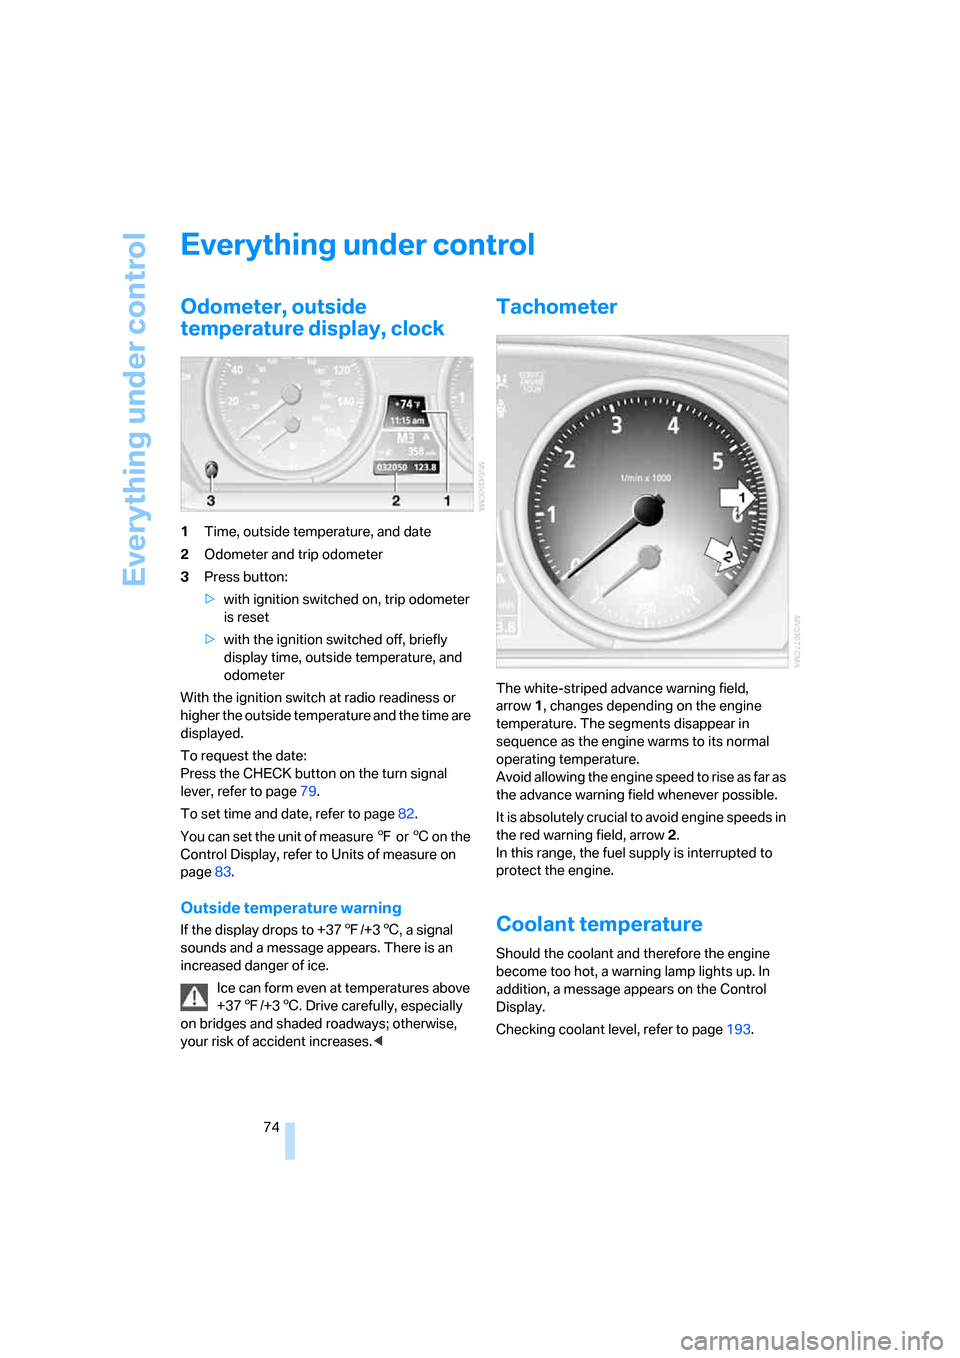
1Time, outside temperature, and date
2Odometer and trip odometer
3Press button:
>with ignition switched on, trip odometer
is reset
>with the ignition switched off, briefly
display time, outside temperature, and
odometer
With the ignition switch at radio readiness or
higher the outside temperature and the time are
displayed.
To request the date:
Press the CHECK button on the turn signal
lever, refer to page79.
To set time and date, refer to page82.
You can set the unit of measure 7 or 6 on the
Control Display, refer to Units of measure on
page83.
Outside temperature warning
If the display drops to +377/+36, a signal
sounds and a message appears. There is an
increased danger of ice.
Ice can form even at temperatures above
+377/+36. Drive carefully, especially
on bridges and shaded roadways; otherwise,
your risk of accident increases.<
Tachometer
The white-striped advance warning field,
arrow1, changes depending on the engine
temperature. The segments disappear in
sequence as the engine warms to its normal
operating temperature.
Avoid allowing the engine speed to rise as far as
the advance warning field whenever possible.
It is absolutely crucial to avoid engine speeds in
the red warning field, arrow2.
In this range, the fuel supply is interrupted to
protect the engine.
Coolant temperature
Should the coolant and therefore the engine
become too hot, a warning lamp lights up. In
addition, a message appears on the Control
Display.
Checking coolant level, refer to page193.
Page 76 of 236
Controls
75Reference
At a glance
Driving tips
Communications
Navigation
Entertainment
Mobility
Engine oil temperature gauge
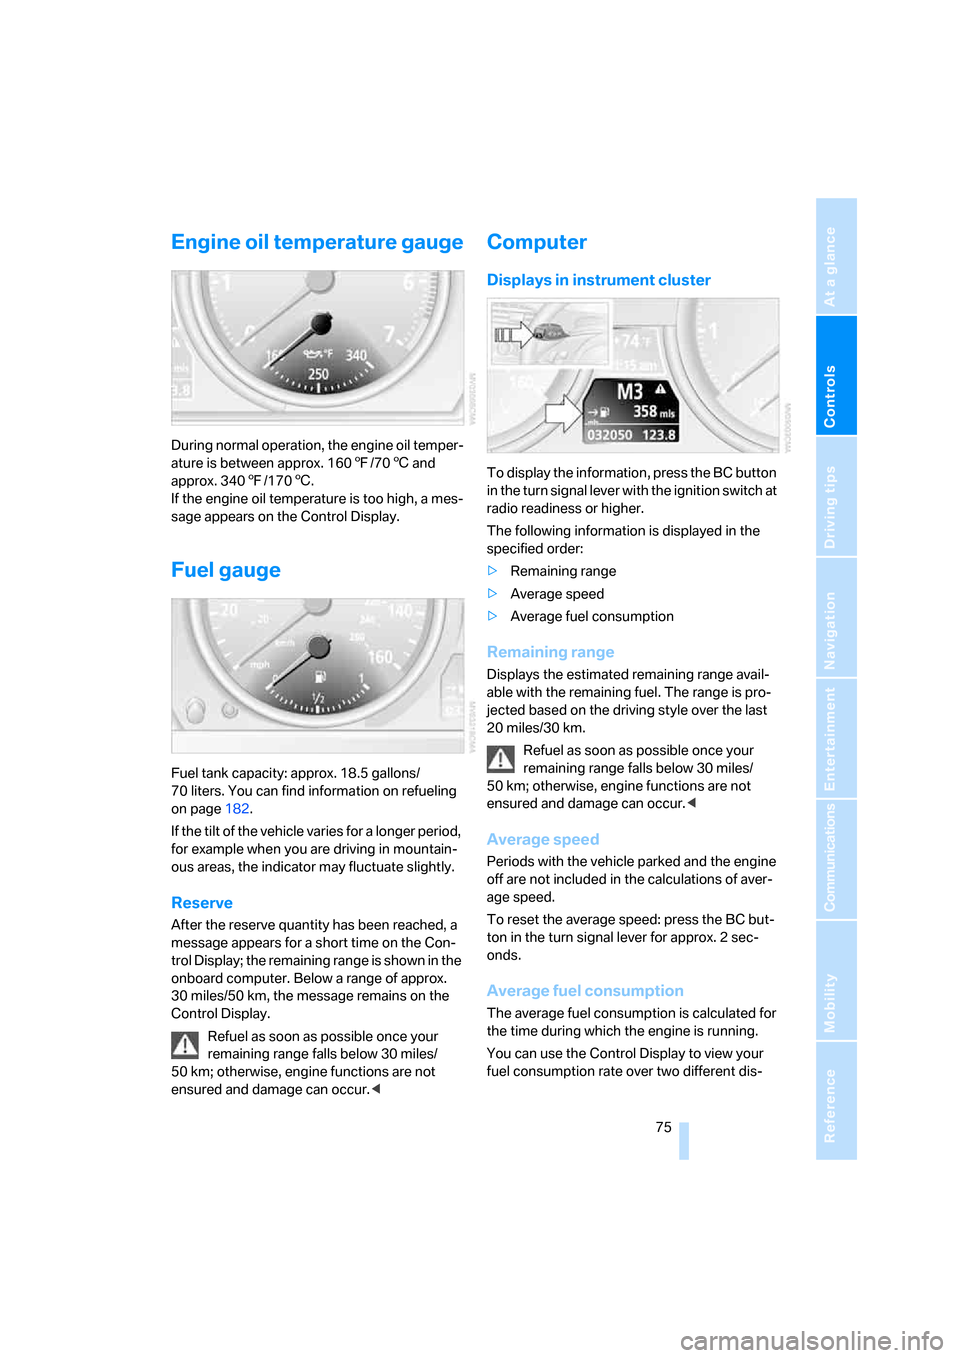
During normal operation, the engine oil temper-
ature is between approx. 1607/706 and
approx. 3407/1706.
If the engine oil temperature is too high, a mes-
sage appears on the Control Display.
Fuel gauge
Fuel tank capacity: approx. 18.5 gallons/
70 liters. You can find information on refueling
on page182.
If the tilt of the vehicle varies for a longer period,
for example when you are driving in mountain-
ous areas, the indicator may fluctuate slightly.
Reserve
After the reserve quantity has been reached, a
message appears for a short time on the Con-
trol Display; the remaining range is shown in the
onboard computer. Below a range of approx.
30 miles/50 km, the message remains on the
Control Display.
Refuel as soon as possible once your
remaining range falls below 30 miles/
50 km; otherwise, engine functions are not
ensured and damage can occur.<
Computer
Displays in instrument cluster
To display the information, press the BC button
in the turn signal lever with the ignition switch at
radio readiness or higher.
The following information is displayed in the
specified order:
>Remaining range
>Average speed
>Average fuel consumption
Remaining range
Displays the estimated remaining range avail-
able with the remaining fuel. The range is pro-
jected based on the driving style over the last
20 miles/30 km.
Refuel as soon as possible once your
remaining range falls below 30 miles/
50 km; otherwise, engine functions are not
ensured and damage can occur.<
Average speed
Periods with the vehicle parked and the engine
off are not included in the calculations of aver-
age speed.
To reset the average speed: press the BC but-
ton in the turn signal lever for approx. 2 sec-
onds.
Average fuel consumption
The average fuel consumption is calculated for
the time during which the engine is running.
You can use the Control Display to view your
fuel consumption rate over two different dis-
Page 77 of 236
Everything under control
76 tances, refer to Displays on Control Display or
Trip computer.
To reset the average fuel consumption: press
the BC button in the turn signal lever for approx.
2seconds.
Displays on Control Display
You can also call up the computer via iDrive, for
principle details, refer to page16.
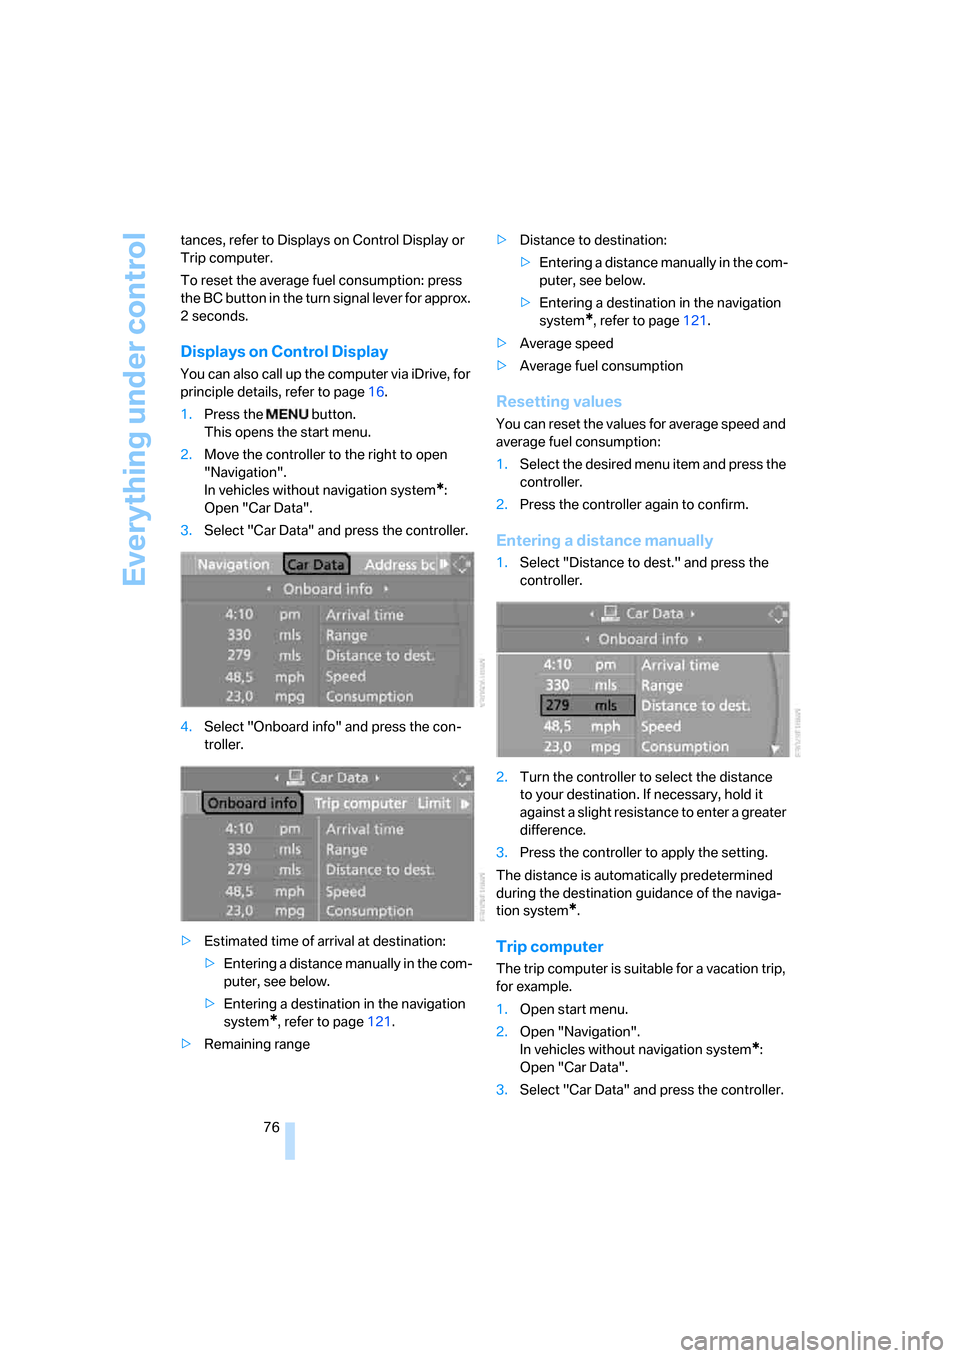
1.Press the button.
This opens the start menu.
2.Move the controller to the right to open
"Navigation".
In vehicles without navigation system
*:
Open "Car Data".
3.Select "Car Data" and press the controller.
4.Select "Onboard info" and press the con-
troller.
>Estimated time of arrival at destination:
>Entering a distance manually in the com-
puter, see below.
>Entering a destination in the navigation
system
*, refer to page121.
>Remaining range>Distance to destination:
>Entering a distance manually in the com-
puter, see below.
>Entering a destination in the navigation
system
*, refer to page121.
>Average speed
>Average fuel consumption
Resetting values
You can reset the values for average speed and
average fuel consumption:
1.Select the desired menu item and press the
controller.
2.Press the controller again to confirm.
Entering a distance manually
1.Select "Distance to dest." and press the
controller.
2.Turn the controller to select the distance
to your destination. If necessary, hold it
against a slight resistance to enter a greater
difference.
3.Press the controller to apply the setting.
The distance is automatically predetermined
during the destination guidance of the naviga-
tion system
*.
Trip computer
The trip computer is suitable for a vacation trip,
for example.
1.Open start menu.
2.Open "Navigation".
In vehicles without navigation system
*:
Open "Car Data".
3.Select "Car Data" and press the controller.
Page 78 of 236
Controls
77Reference
At a glance
Driving tips
Communications
Navigation
Entertainment
Mobility
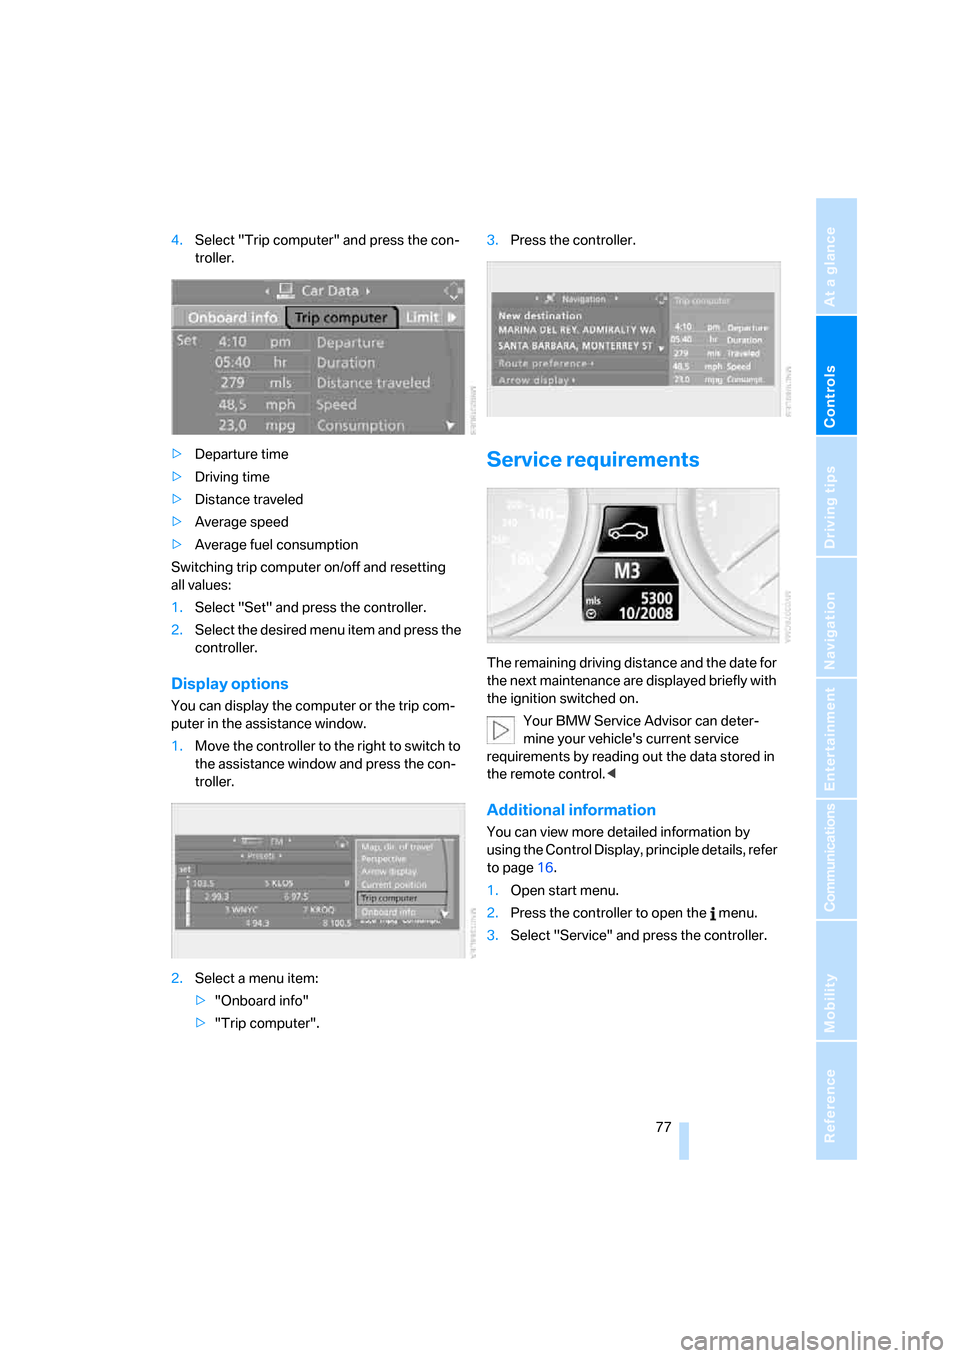
4.Select "Trip computer" and press the con-
troller.
>Departure time
>Driving time
>Distance traveled
>Average speed
>Average fuel consumption
Switching trip computer on/off and resetting
all values:
1.Select "Set" and press the controller.
2.Select the desired menu item and press the
controller.
Display options
You can display the computer or the trip com-
puter in the assistance window.
1.Move the controller to the right to switch to
the assistance window and press the con-
troller.
2.Select a menu item:
>"Onboard info"
>"Trip computer".3.Press the controller.
Service requirements
The remaining driving distance and the date for
the next maintenance are displayed briefly with
the ignition switched on.
Your BMW Service Advisor can deter-
mine your vehicle's current service
requirements by reading out the data stored in
the remote control.<
Additional information
You can view more detailed information by
using the Control Display, principle details, refer
to page16.
1.Open start menu.
2.Press the controller to open the menu.
3.Select "Service" and press the controller.
Page 84 of 236
Controls
83Reference
At a glance
Driving tips
Communications
Navigation
Entertainment
Mobility
Activating hour signal*
You will hear three tones just before each full
hour.
Select "Hour memo" and press the controller.
The hour signal is activated.
Setting time format
1.Select "Time format" and press the control-
ler.
2.Select the desired format and press the
controller.
The setting is stored for the remote control cur-
rently in use.
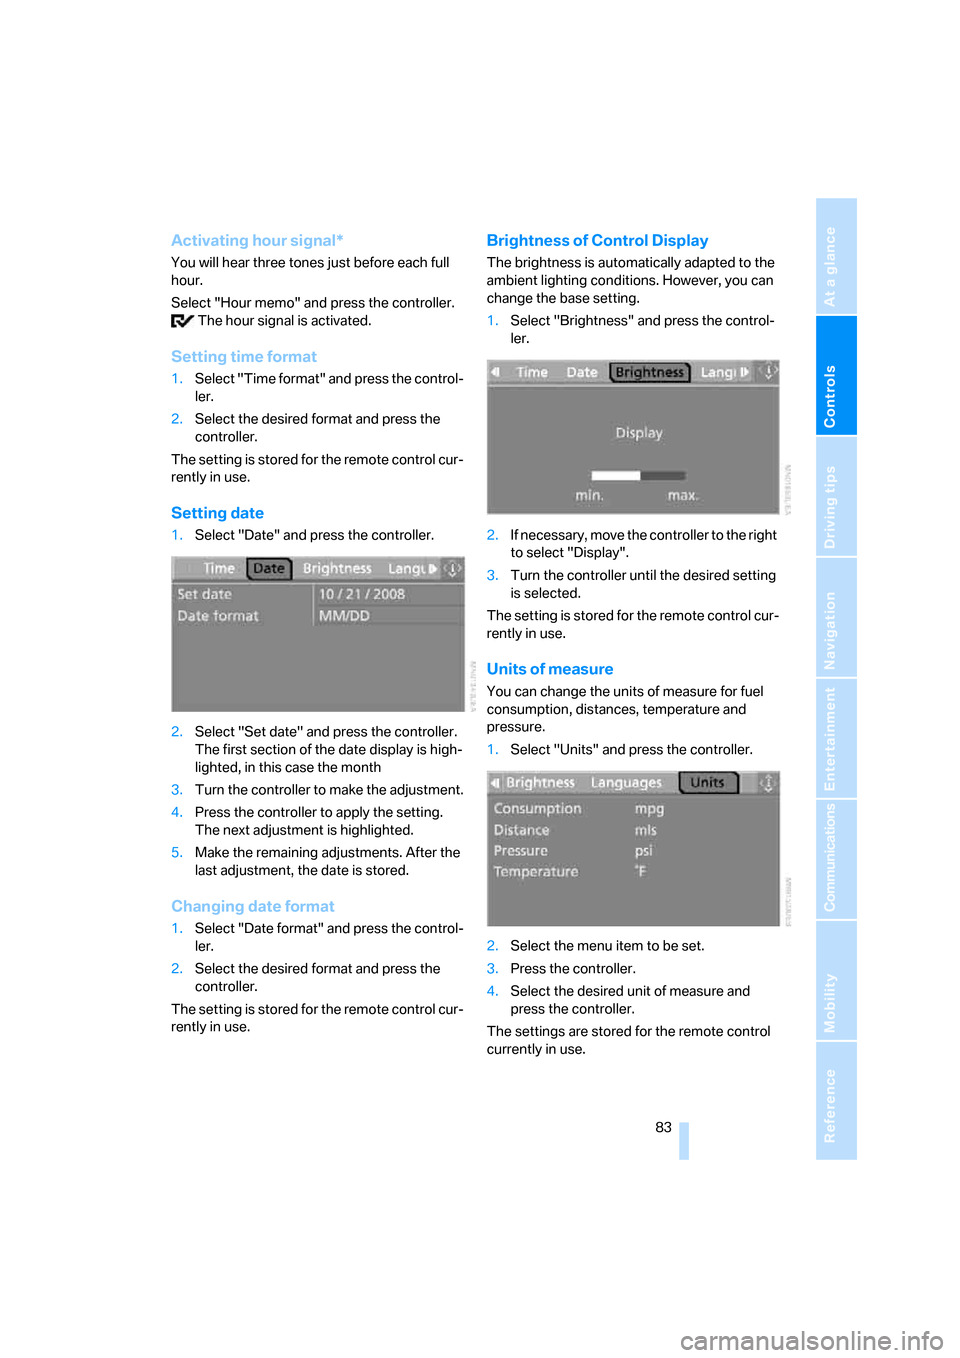
Setting date
1.Select "Date" and press the controller.
2.Select "Set date" and press the controller.
The first section of the date display is high-
lighted, in this case the month
3.Turn the controller to make the adjustment.
4.Press the controller to apply the setting.
The next adjustment is highlighted.
5.Make the remaining adjustments. After the
last adjustment, the date is stored.
Changing date format
1.Select "Date format" and press the control-
ler.
2.Select the desired format and press the
controller.
The setting is stored for the remote control cur-
rently in use.
Brightness of Control Display
The brightness is automatically adapted to the
ambient lighting conditions. However, you can
change the base setting.
1.Select "Brightness" and press the control-
ler.
2.If necessary, move the controller to the right
to select "Display".
3.Turn the controller until the desired setting
is selected.
The setting is stored for the remote control cur-
rently in use.
Units of measure
You can change the units of measure for fuel
consumption, distances, temperature and
pressure.
1.Select "Units" and press the controller.
2.Select the menu item to be set.
3.Press the controller.
4.Select the desired unit of measure and
press the controller.
The settings are stored for the remote control
currently in use.
Page 182 of 236
Mobility
This section helps you maintain your
mobility by supplying important information
on vital topics including fuels and lubricants,
wheels and tires, service, maintenance and
breakdown assistance.
Mobility
Page 183 of 236
Refueling
182
Refueling
Always switch off the engine before refu-
eling; otherwise, no fuel can be dispensed
into the tank and a message is displayed.<
When handling fuel, always observe all
applicable precautionary measures and
regulations. Never transport reserve fuel con-
tainers in the vehicle. They can leak and cause
an explosion or a fire in an accident.<
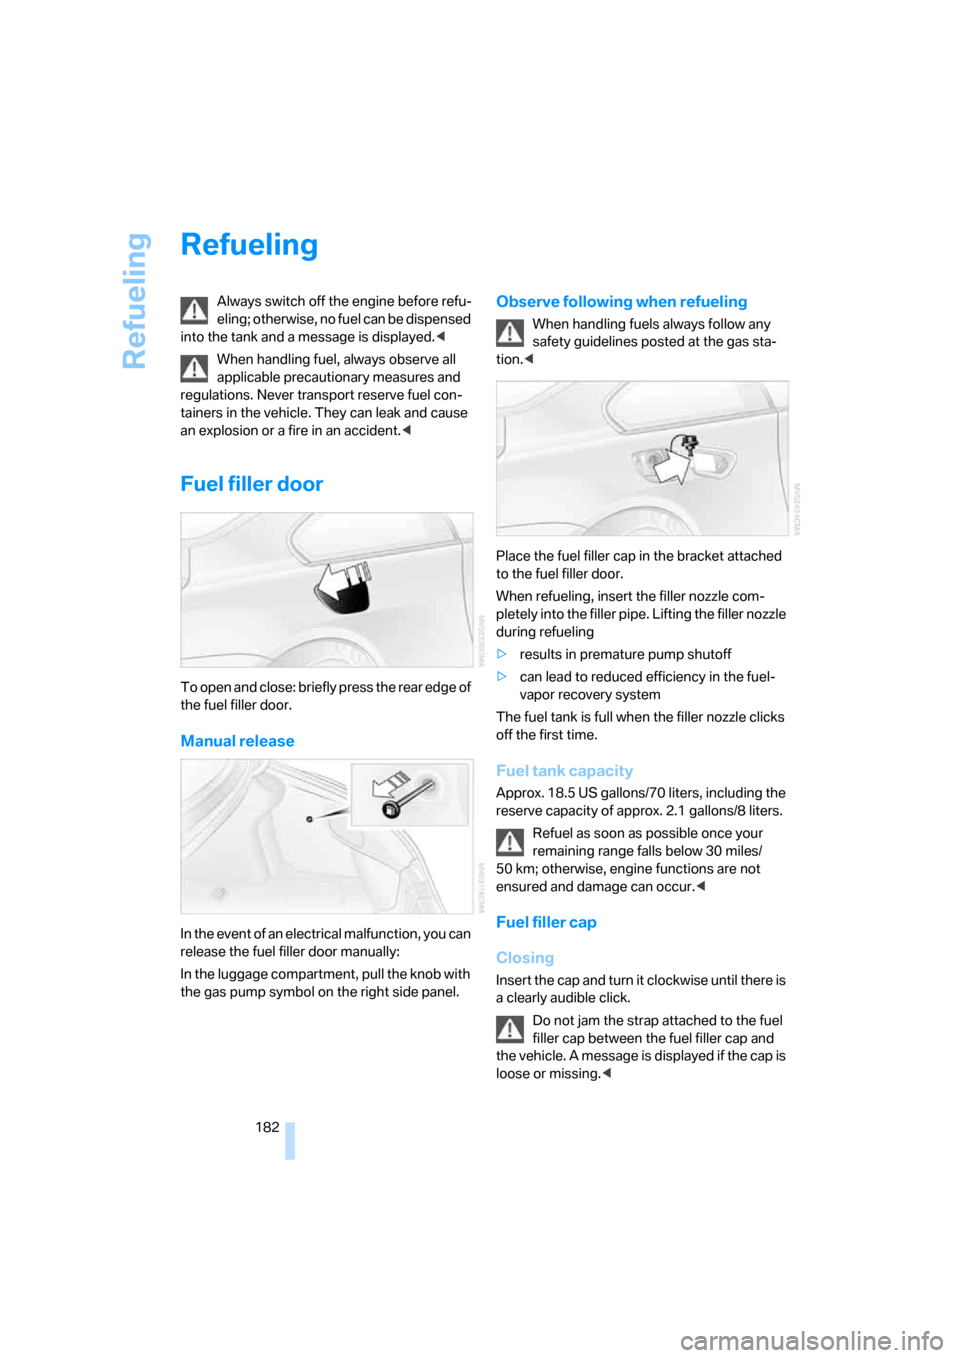
Fuel filler door
To open and close: briefly press the rear edge of
the fuel filler door.
Manual release
In the event of an electrical malfunction, you can
release the fuel filler door manually:
In the luggage compartment, pull the knob with
the gas pump symbol on the right side panel.
Observe following when refueling
When handling fuels always follow any
safety guidelines posted at the gas sta-
tion.<
Place the fuel filler cap in the bracket attached
to the fuel filler door.
When refueling, insert the filler nozzle com-
pletely into the filler pipe. Lifting the filler nozzle
during refueling
>results in premature pump shutoff
>can lead to reduced efficiency in the fuel-
vapor recovery system
The fuel tank is full when the filler nozzle clicks
off the first time.
Fuel tank capacity
Approx. 18.5 US gallons/70 liters, including the
reserve capacity of approx. 2.1 gallons/8 liters.
Refuel as soon as possible once your
remaining range falls below 30 miles/
50 km; otherwise, engine functions are not
ensured and damage can occur.<
Fuel filler cap
Closing
Insert the cap and turn it clockwise until there is
a clearly audible click.
Do not jam the strap attached to the fuel
filler cap between the fuel filler cap and
the vehicle. A message is displayed if the cap is
loose or missing.<
Page 184 of 236
Mobility
183Reference
At a glance
Controls
Driving tips
Communications
Navigation
Entertainment
Fuel specifications
Never used leaded gasoline; it will perma-
nently damage the catalytic converter.<
Required fuel
Premium unleaded gasoline
The minimum Octane Rating is 91.
If you use gasoline with this minimum Octane
Rating, the engine may produce knocking
sounds when starting at high outside tempera-
tures. This has no effect on the engine life.
Minimum Octane Rating corresponds to the
Anti Knock Index AKI and is determined accord-
ing to the so-called (R+M)/2 method.
Use high-quality brands
Field experience has demonstrated significant
differences in fuel quality: volatility, composi-
tion, additives, etc., among gasolines offered for
sale in the United States and Canada. Fuels
containing up to and including 10 % ethanol or
other oxygenates with up to 2.8 % oxygen by
weight, that is, 15 % MTBE or 3 % methanol
plus an equivalent amount of co-solvent, will
not void the applicable warranties with respect
to defects in materials or workmanship.
The use of poor-quality fuels may result in
problems relating to drivability and start-
ing, and to a tendency to stall, especially under
certain environmental conditions such as high
ambient temperature and high altitude.
Should you encounter drivability problems,
which you suspect could be related to the fuel
you are using, we recommend that you respond
by switching to a recognized high-quality
brand.
Failure to comply with these recommendations
may also result in unscheduled maintenance.<