2006 BMW 550I TOURING wheel
[x] Cancel search: wheelPage 101 of 259

Controls
99Reference
At a glance
Driving tips
Communications
Navigation
Entertainment
Mobility
>in dense fog, heavy rain or snowfall
>when displaying very hot objects such as
transformers, car exhausts etc.
>when the image briefly freezes during nor-
mal system adjustment.
BMW Night Vision's potential benefits
can be limited by the driving style of the
driver, the size and relative temperature of the
detected objects, dirt or contamination on the
camera lens, adverse weather like snow, rain or
fog, and other factors not mentioned here. It will
always be the driver's responsibility to drive at a
speed and in a manner that recognizes potential
hazards and adjust accordingly.
BMW Night Vision is not a substitute or replace-
ment for driver responsibility or for accommo-
dating the visibility conditions and the traffic sit-
uation. The forward view illuminated by the
headlamps must always be the basis for making
safe driving decisions, otherwise a safety risk
will result.<
Activating BMW Night Vision
1.Turn the light switch to position2 or3, refer
to page101.
2.With low beams switched on:
>Press the button. Depending on the
vehicle's equipment, the location of the
button may differ somewhat.
>Press one of the programmable buttons
on the steering wheel, refer to page53.
The image will be displayed on the Control Dis-
play after a few seconds. Depending on the last
mode selected, either the normal or full screen
image will be displayed.Due to the system's need to adjust periodically,
a still image is displayed at certain intervals for
fractions of a second. This is normal and not an
indication of a problem.
To prevent driving without headlamps, at a
speed of more than approx. 3 mph/5 km/h and
when dark, the thermal image on the Control
Display is only shown when the low beams are
on.
Deactivating BMW Night Vision
>Press the button.
>Press the button on the steering wheel.
>Press the button.
>Via iDrive", refer to Selecting settings.
Selecting settings
iDrive, for explanation of principle, refer to
page16.
1.Activate BMW Night Vision.
2.Press the controller to display the menu
items.
Page 106 of 259

Lamps
104
Fog lamps*
The parking lamps or low beams must be
switched on for the fog lamps to operate. The
green indicator lamp in the instrument cluster
lights up whenever the fog lamps are on.
The fog lamps are switched off whenever the
high beams are switched on.
If the automatic headlamp control is acti-
vated, the low beams will come on auto-
matically when you switch on the fog lamps.<
Instrument lighting
You can control the lighting intensity by using
the knurled wheel.
Interior lamps
The interior lamps, footwell lamps, door entry
lighting
and courtesy lamps* are controlled
automatically.
With the courtesy lamps, LED lights are located
in the door handles to illuminate the exterior
area before the doors.
To protect the battery, all lamps in the
vehicle are switched off approx. 15 min-
utes after radio readiness is switched off, refer
to Start/Stop button on page58.<
Switching interior lamps on and off
manually
Press the button.
If you want the interior lamps to remain off con-
tinuously, maintain pressure on the button for
approx. 3 seconds.
Reading lamps
Reading lamps are located in the front and rear
adjacent to the interior lamps. Press the button
briefly to switch the lamps on and off.
Page 110 of 259

Climate
108 body. Therefore, open these vents for maxi-
mum cooling.
AUC Automatic recirculated-air
control/recirculated-air mode
You can respond to pollutants or
unpleasant odors in the immediate
environment by suspending the
supply of outside air. The system then recircu-
lates the air currently within the vehicle. During
AUC operation, a sensor detects pollutants in
the outside air and controls the shut-off auto-
matically.
By pressing the button repeatedly, you can
request three operating modes:
>LED off: outside air flows in continuously.
>Right LED on, AUC mode: the system
detects pollutants in the outside air and
shuts off the supply as needed.
>Left LED on, recirculated-air mode: the
supply of outside air is permanently shut off.
If condensation starts to form on the
inside window surfaces during operation
in the recirculated-air mode, you should switch
it off while also increasing the air volume as
required.
The recirculated-air mode should not be used
over an extended period of time, as the air qual-
ity inside the vehicle deteriorates continu-
ously.<
Residual heat
The heat stored in the engine is
used to heat the passenger com-
partment, e.g. while stopped at a
school to pick up a child.
The function can be switched on when the fol-
lowing conditions are met:
>up to 15 minutes after switching off the
engine
>with engine at operating temperature
>with sufficient battery voltage
>at an outside temperature below 777/
256The LED lights up when the function is
switched on.
From radio readiness the interior temperature,
the air volume and the air distribution can be
set.
Switching off automatic climate control
The air volume, the heater and the
cooling function are all switched
off.
You can restart the automatic cli-
mate control by pressing any of its buttons
except the REST button.
Front ventilation
1Knurled wheels to smoothly open and close
air vents
2Levers to change the air vent direction
Do not drop any foreign objects into the
vent outlets, otherwise these could be
catapulted outwards and lead to injuries.<
Ventilation for cooling
Adjust the vent outlets to direct the flow of cool
air in your direction, for instance, if the interior
has become too warm, etc.
Draft-free ventilation
Set the vent outlets so that the air flows past
you and is not directed straight at you.
Page 111 of 259

Controls
109Reference
At a glance
Driving tips
Communications
Navigation
Entertainment
Mobility
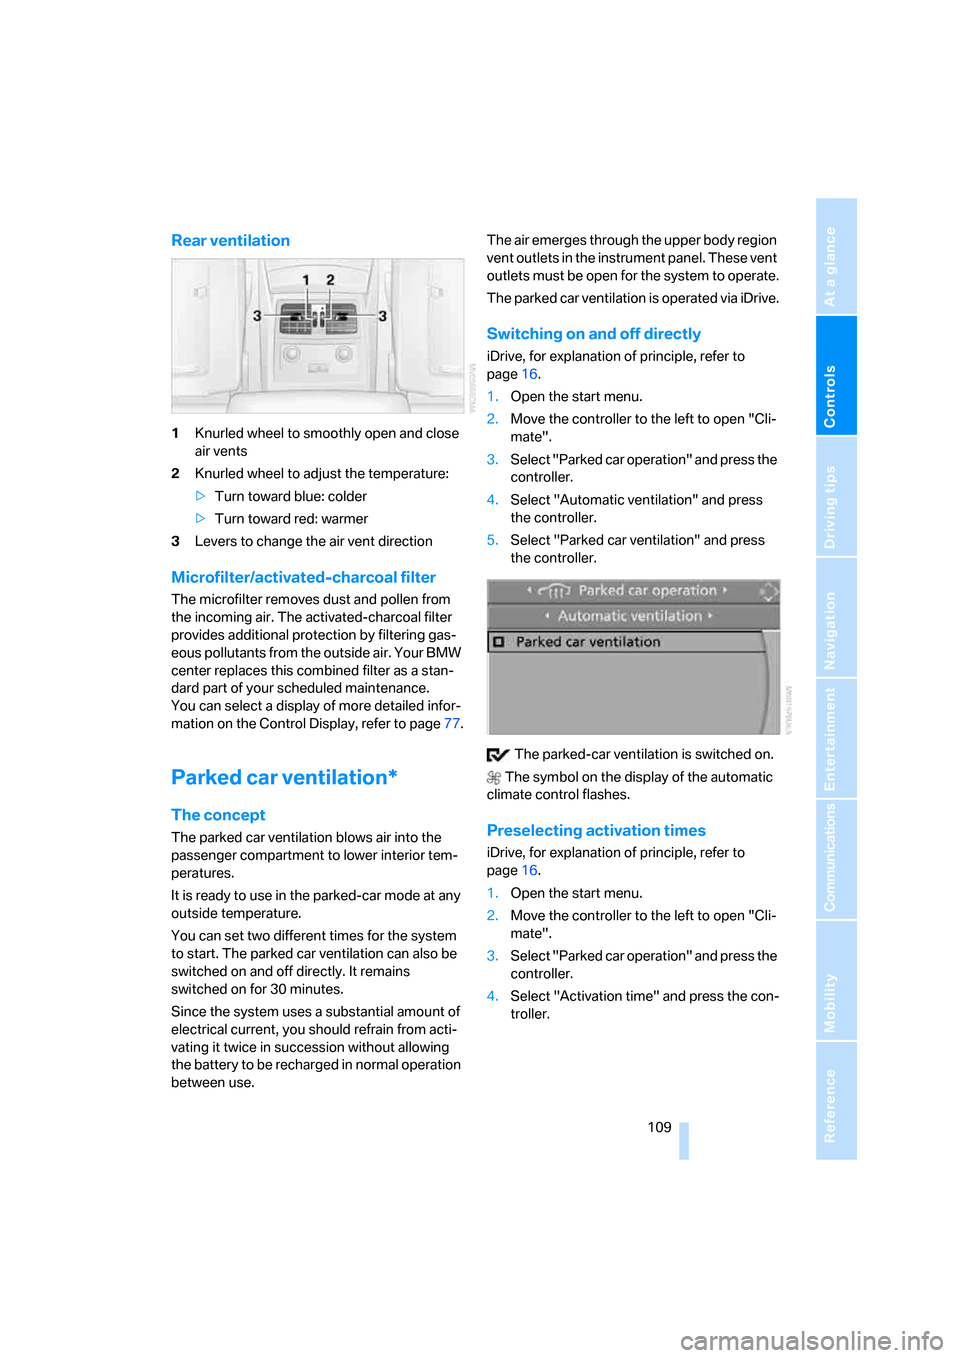
Rear ventilation
1Knurled wheel to smoothly open and close
air vents
2Knurled wheel to adjust the temperature:
>Turn toward blue: colder
>Turn toward red: warmer
3Levers to change the air vent direction
Microfilter/activated-charcoal filter
The microfilter removes dust and pollen from
the incoming air. The activated-charcoal filter
provides additional protection by filtering gas-
eous pollutants from the outside air. Your BMW
center replaces this combined filter as a stan-
dard part of your scheduled maintenance.
You can select a display of more detailed infor-
mation on the Control Display, refer to page77.
Parked car ventilation*
The concept
The parked car ventilation blows air into the
passenger compartment to lower interior tem-
peratures.
It is ready to use in the parked-car mode at any
outside temperature.
You can set two different times for the system
to start. The parked car ventilation can also be
switched on and off directly. It remains
switched on for 30 minutes.
Since the system uses a substantial amount of
electrical current, you should refrain from acti-
vating it twice in succession without allowing
the battery to be recharged in normal operation
between use.The air emerges through the upper body region
vent outlets in the instrument panel. These vent
outlets must be open for the system to operate.
The parked car ventilation is operated via iDrive.
Switching on and off directly
iDrive, for explanation of principle, refer to
page16.
1.Open the start menu.
2.Move the controller to the left to open "Cli-
mate".
3.Select "Parked car operation" and press the
controller.
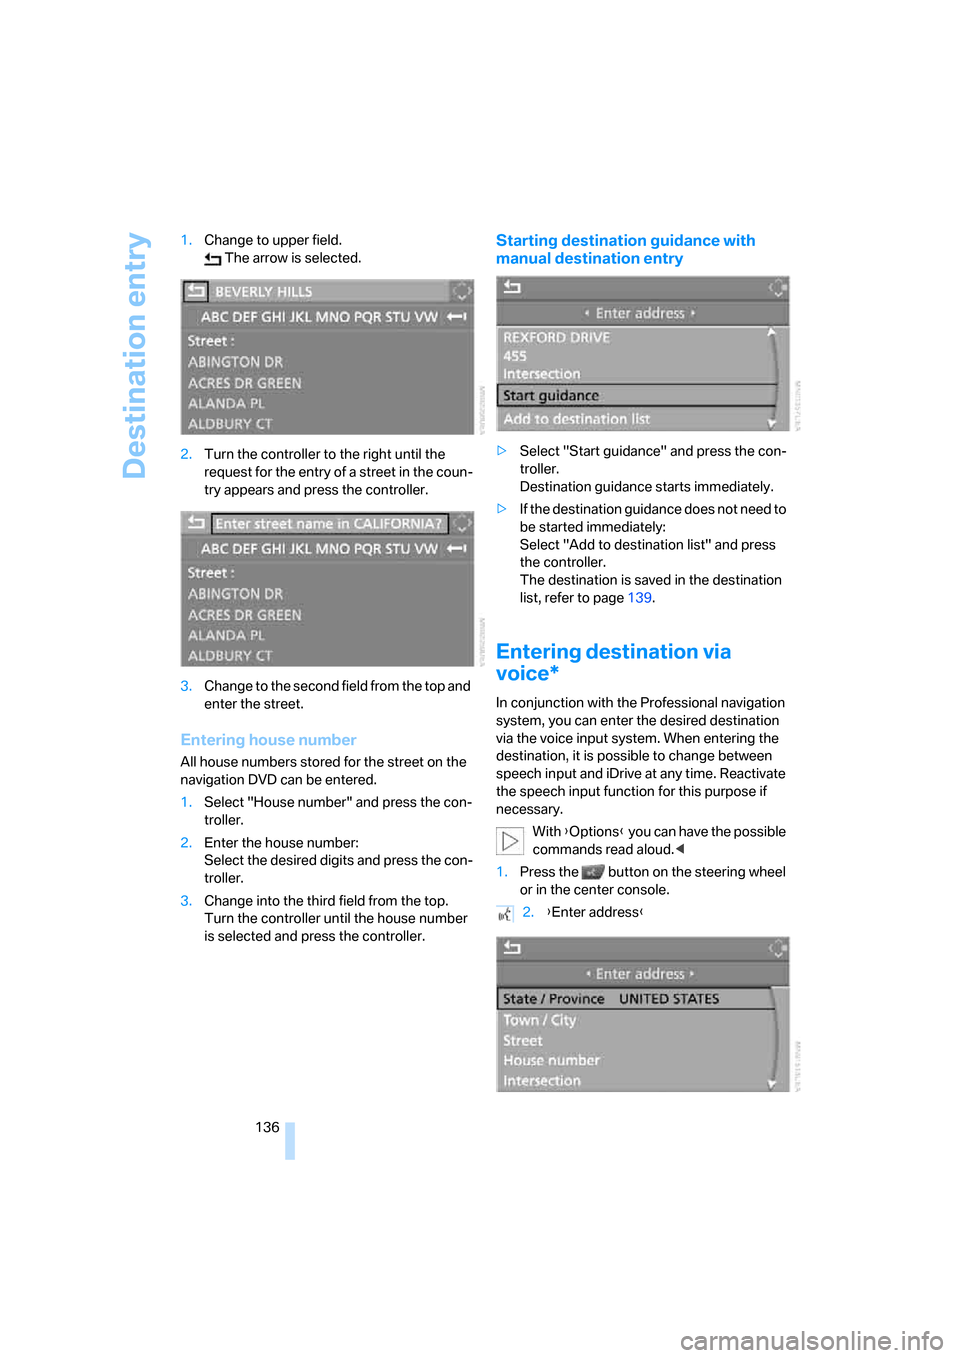
4.Select "Automatic ventilation" and press
the controller.
5.Select "Parked car ventilation" and press
the controller.
The parked-car ventilation is switched on.
The symbol on the display of the automatic
climate control flashes.
Preselecting activation times
iDrive, for explanation of principle, refer to
page16.
1.Open the start menu.
2.Move the controller to the left to open "Cli-
mate".
3.Select "Parked car operation" and press the
controller.
4.Select "Activation time" and press the con-
troller.
Page 138 of 259

Destination entry
136 1.Change to upper field.
The arrow is selected.
2.Turn the controller to the right until the
request for the entry of a street in the coun-
try appears and press the controller.
3.Change to the second field from the top and
enter the street.
Entering house number
All house numbers stored for the street on the
navigation DVD can be entered.
1.Select "House number" and press the con-
troller.
2.Enter the house number:
Select the desired digits and press the con-
troller.
3.Change into the third field from the top.
Turn the controller until the house number
is selected and press the controller.
Starting destination guidance with
manual destination entry
>Select "Start guidance" and press the con-
troller.
Destination guidance starts immediately.
>If the destination guidance does not need to
be started immediately:
Select "Add to destination list" and press
the controller.
The destination is saved in the destination
list, refer to page139.
Entering destination via
voice*
In conjunction with the Professional navigation
system, you can enter the desired destination
via the voice input system. When entering the
destination, it is possible to change between
speech input and iDrive at any time. Reactivate
the speech input function for this purpose if
necessary.
With {Options} you can have the possible
commands read aloud.<
1.Press the button on the steering wheel
or in the center console.
2.{Enter address}
Page 149 of 259

Navigation
Driving tips
147Reference
At a glance
Controls
Communications
Entertainment
Mobility
1.Select "Navigation" and press the control-
ler.
2.Change into the third field from the top.
Turn the controller until "Route list" is
selected and press the controller.
To exit the menu:
Select the arrow and press the controller.
Destination guidance
through voice instructions
Switching voice instructions on/off
Voice instructions can be switched on or off
during the destination guidance in the arrow or
map view:
Select the symbol and press the controller.
To switch the voice instructions on and off at
any time:
1.Open the start menu.
2.Press the controller to open the menu.
3.Turn the controller until "Display settings"
is selected and press the controller.4.Change to upper field if necessary. Turn the
controller until "Languages" is selected and
press the controller.
5.Select "Navigation voice instructions on"
and press the controller.
The voice instructions are switched on.
The setting is stored for the remote control cur-
rently in use
*.
Repeating and canceling voice
instructions
With the programmable buttons on the steering
wheel you can also make the following settings,
refer to page53:
>Repeat the voice instruction:
Press button.
>Switch voice instructions on/off:
Hold the button down.
Setting volume of voice instructions
The volume can only be adjusted while a voice
instruction is being output.
Page 154 of 259

On/off and tone
152
On/off and tone
The following audio sources have shared con-
trols and setting options:
>Professional radio
* or
Business radio
>CD player
>CD changer
*
Controls
The audio sources can be operated using:
>Buttons in the area of the CD player
>iDrive
>Buttons on steering wheel, refer to page11
Buttons in area of CD player
The layout of the buttons can vary depending
on your vehicle's equipment.
Single drive:
Two drives:1Entertainment sound output on/off, volume
>Press: switch on/off.
When you switch on, the last set radio
station or CD track is played.
>Turn: adjust volume.
2Drive for audio CDs
3 Eject CD
4 Station scan/track search
>Change radio station.
>Select track for CD player and
CD changer.
5Drive for navigation DVDs
Operation via iDrive
iDrive, for explanation of principle, refer to
page16.
1.Press the button.
This opens the start menu.
2.Move the controller backwards to open
"Entertainment".
You have the following choices:
>"FM" and "AM": radio reception
>"WB": Weather Band station
>"SAT": satellite radio
>"CD": CD player or CD changer
>"Audio Aux": external audio device
>"Set": depending on the audio source,
other adjustments can be made, e.g. with
the radio: update station with strongest
reception, save station, tone control, sam-
ple stations.
Page 155 of 259

Navigation
Entertainment
Driving tips
153Reference
At a glance
Controls
Communications
Mobility
From another menu, you can switch
directly to the screen last displayed,
refer to Comfort opening of menu items on
page18.<
The selected audio source is stored for the
remote control currently in use.
Switching on/off
In order to switch the Entertainment sound out-
put on and off:
Press knob1 next to the CD player.
This symbol on the Control Display indi-
cates that sound output is switched off.
For a single drive, the sound output is available
for approx. 20 minutes with the ignition
switched off.
Switch on the sound output again for this pur-
pose.
Adjusting volume
Turn knob1 next to the CD player until the
desired volume is set.
You can also adjust the volume with buttons on
the steering wheel, refer to page11.
The setting is stored for the remote control cur-
rently in use.
Tone control
You can alter various tone settings, e. g. treble
and bass, or the speed-dependent volume
increase.
The tone settings are set for all audio sources at
once.
The settings are stored for the remote key cur-
rently in use.
Changing tone settings
1.Press the button.
This opens the start menu.
2.Press the controller to open the menu.
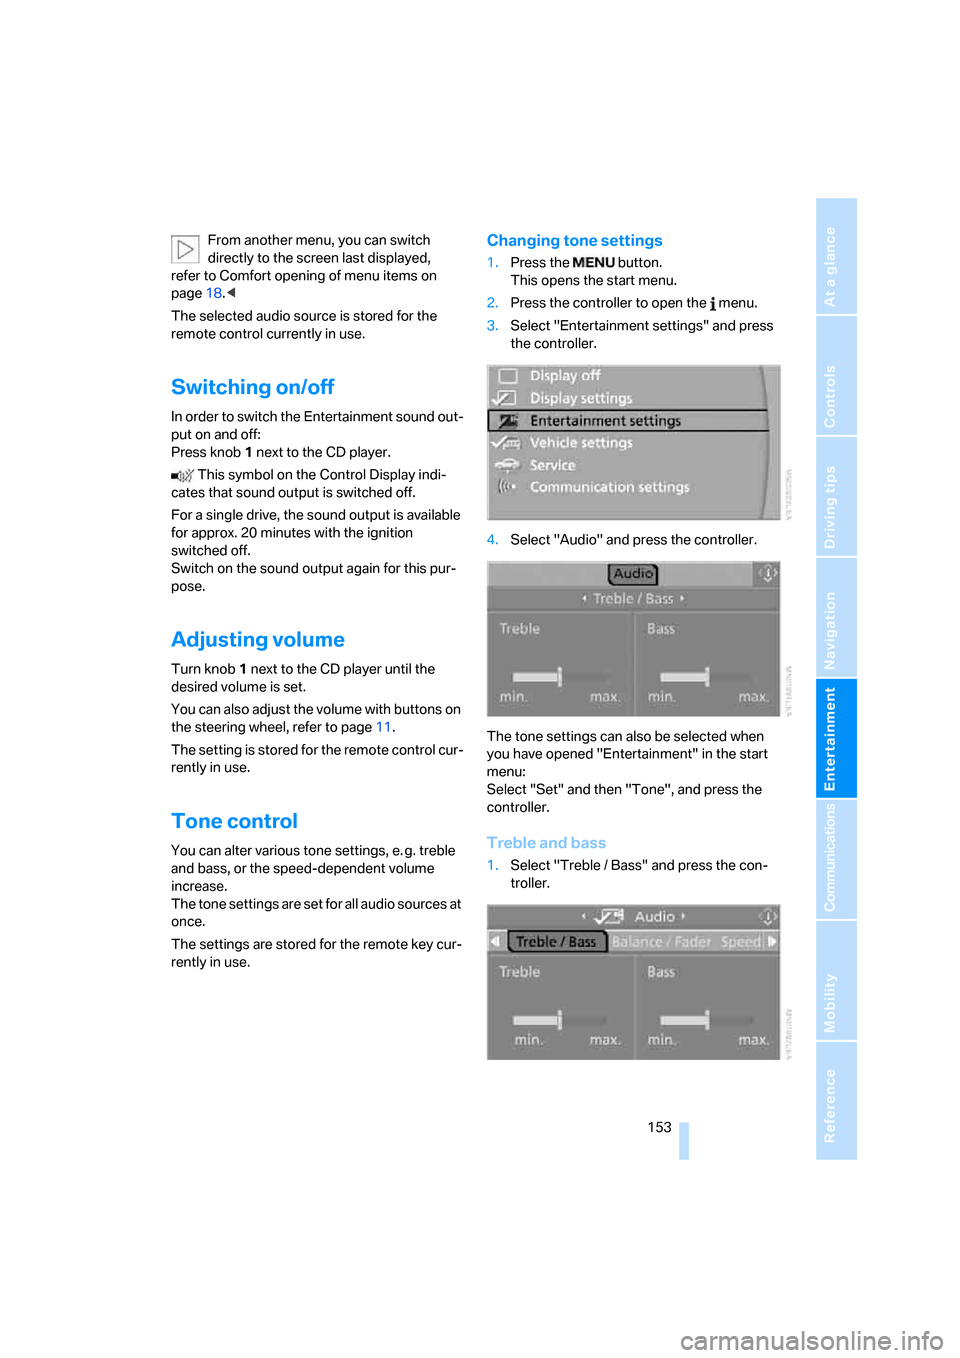
3.Select "Entertainment settings" and press
the controller.
4.Select "Audio" and press the controller.
The tone settings can also be selected when
you have opened "Entertainment" in the start
menu:
Select "Set" and then "Tone", and press the
controller.
Treble and bass
1.Select "Treble / Bass" and press the con-
troller.