2006 BMW 545I SEDAN lock
[x] Cancel search: lockPage 76 of 259

Everything under control
74
Everything under control
Odometer, outside
temperature display, clock
1Time, outside temperature and data
2Odometer and trip odometer
3Press button:
>with ignition switched on, trip odometer
is reset
>briefly display the time, outside temper-
ature and odometer with the ignition
switched off
From radio readiness the outside temperature
and the time are displayed.
Date retrieval:
Press CHECK button on turn signal lever, refer
to page80.
Time and date setting, refer to page82.
You can set the unit of measure 7 or 6 on the
Control Display, refer to Units of measure on
page84.
Outside temperature warning
If the display drops to +377/+36, a signal
sounds and a warning lamp lights up. A mes-
sage appears on the Control Display. There is
an increased danger of ice.
Even at temperatures above +377/
+36 ice can form. Therefore, drive care-
fully, e.g. on bridges and sections of road in the
shade, otherwise there is an increased accident
risk.<
Tachometer
The white-striped advance warning field,
arrow1, changes depending on the engine
temperature. With increasing engine tempera-
ture the advance warning field becomes corre-
spondingly smaller. Avoid allowing the engine
speed to rise as far as the orange warning sec-
tor whenever possible.
Be sure to avoid engine speeds in the red warn-
ing field, arrow2. In this range, the fuel supply is
interrupted to protect the engine.
Coolant temperature
Should the coolant, and with it the engine
become too hot, a warning lamp lights up. In
addition, a message appears on the Control
Display.
Checking coolant level, refer to page207.
Page 88 of 259

Technology for comfort, convenience and safety
86 iDrive, for explanation of principle, refer to
page16.
1.Open the start menu.
2.Press the controller to open the menu.
3.Select "Vehicle settings" and press the
controller.
4.Change to upper field if necessary. Turn the
controller until "PDC" is selected and press
the controller.
5.Select "PDC display on" and press the con-
troller.
The PDC screen is activated.
The display appears on the Control Display as
soon as PDC is activated.
System limits
Even with PDC, final responsibility for
estimating the distance between the
vehicle and any obstructions always remains
with the driver. Even when sensors are pro-
vided, there is a blind spot in which objects can
no longer be detected. This applies especially
in those cases where the system approaches
the physical constraints of ultrasonic measure-
ment, as occurs with tow bars and trailer cou-
plings, and in the vicinity of thin or wedge-
shaped objects. Low objects already displayed,
e.g. a curb, can disappear from the detection
area of the sensors again before a continuous
tone sounds. Higher, protruding objects, e.g.
ledges, cannot be detected. Loud sources of
sound, inside and outside the vehicle, could
drown out the PDC signal tone.<
Driving stability control
systems
Your BMW is equipped with an extended array
of systems designed to enhance and maintain
vehicle stability under extreme conditions.
ABS Antilock Brake System
ABS prevents locking of the wheels during
braking. Safe steering response is maintained
even during full braking. Active safety is thus
increased.
The ABS is operational every time you start the
engine. Braking safely refer to page125.
CBC Cornering Brake Control
When braking during curves or when braking
during a lane change, driving stability and steer-
ing response are improved further.
Electronic brake-force distribution
The system controls the brake pressure in the
rear wheels to ensure stable braking behavior.
DBC Dynamic Brake Control
When you apply the brakes rapidly, this system
automatically produces the maximum braking
force boost and thus helps to achieve the short-
est possible braking distance during full brak-
ing. This system exploits all of the benefits pro-
vided by ABS.
Do not reduce the pressure on the brake pedal
for the duration of the full braking.
DSC Dynamic Stability Control
DSC prevents traction loss in the driving wheels
when starting off and accelerating. DSC also
identifies unstable driving conditions, such as a
loss of traction at the rear of the vehicle or slid-
ing of the vehicle in its front wheels. In these
cases, DSC helps the vehicle maintain a safe
course within physical limits by reducing engine
output and through braking actions in the indi-
vidual wheels.
The laws of physics cannot be repealed,
even with DSC. An appropriate driving
style always remains the responsibility of the
Page 91 of 259

Controls
89Reference
At a glance
Driving tips
Communications
Navigation
Entertainment
Mobility
Malfunction
If the HDC display goes out in the HDC mode or
is not shown:
HDC is temporarily not available, as the brake
temperature is too high.
Dynamic Drive*
The concept
Dynamic Drive minimizes body roll and opti-
mizes vehicle stability during cornering and
evasive maneuvers.
Dynamic Drive is based on active stabilizers on
the front and rear axles. Suspension compli-
ance adapts to suit driving conditions, varying
from performance-oriented during cornering to
smooth and comfort-oriented when the vehicle
is proceeding in a straight line. During vehicle
operation, the system continuously runs
through closed-loop control cycles lasting only
fractions of a second.
The system assumes operational status each
time you start the engine.
Malfunction
The warning lamp lights up yellow and
a message is shown on the Control Dis-
play. There is a malfunction in the sys-
tem. Have the system checked as soon as pos-
sible.
If a malfunction occurs, please remember
to adapt your speed accordingly, espe-
cially in curves.
The suspension will be noticeably softer and
the vehicle will display a greater tendency to tilt
during cornering and in crosswinds.
If a message stating that you should stop is
shown on the Control Display, stop at a suitable
location and switch off the engine as soon as
possible. In this case the oil level in the reservoir
may have dropped below the minimum, possi-
bly owing to a leak in the hydraulic system.
Do not continue driving, but instead contact
your BMW center.<
Sports Wagon:
Self-leveling suspension
xDrive: the vehicle is raised somewhat at
the rear after locking. This is normal and is
linked to minor noises.<
Malfunction
The warning lamp for self-leveling sus-
pension lights up yellow and a message
is shown on the Control Display. A mal-
function has occurred in the self-leveling sus-
pension. Stop and check the vehicle. If it is con-
siderably lower at the rear than at the front, and
possibly also on one side – rear left compared to
rear right –, go to the nearest BMW center or a
workshop that works according to BMW repair
procedures with correspondingly trained per-
sonnel. Drive with appropriate caution in the
meantime. The vehicle has reduced ground
clearance and driving comfort may be notice-
ably reduced. Even if the position of the vehicle
is normal, go to the nearest BMW center or a
workshop that works according to BMW repair
procedures with correspondingly trained per-
sonnel.
Flat Tire Monitor FTM
The concept
The Flat Tire Monitor keeps track of the infla-
tion pressures in the tires as you drive. The sys-
tem provides an alert whenever the inflation
pressure drops significantly in relation to the
pressure in another tire.
In the event of a pressure loss, the rolling radius
and therefore the rotation speed of the wheels
change. This change is detected and is
reported as a flat tire.
Functional requirement
In order to assure the reliable reporting of a flat
tire, the system must be initialized for the cor-
rect tire inflation pressure.
Page 100 of 259

Technology for comfort, convenience and safety
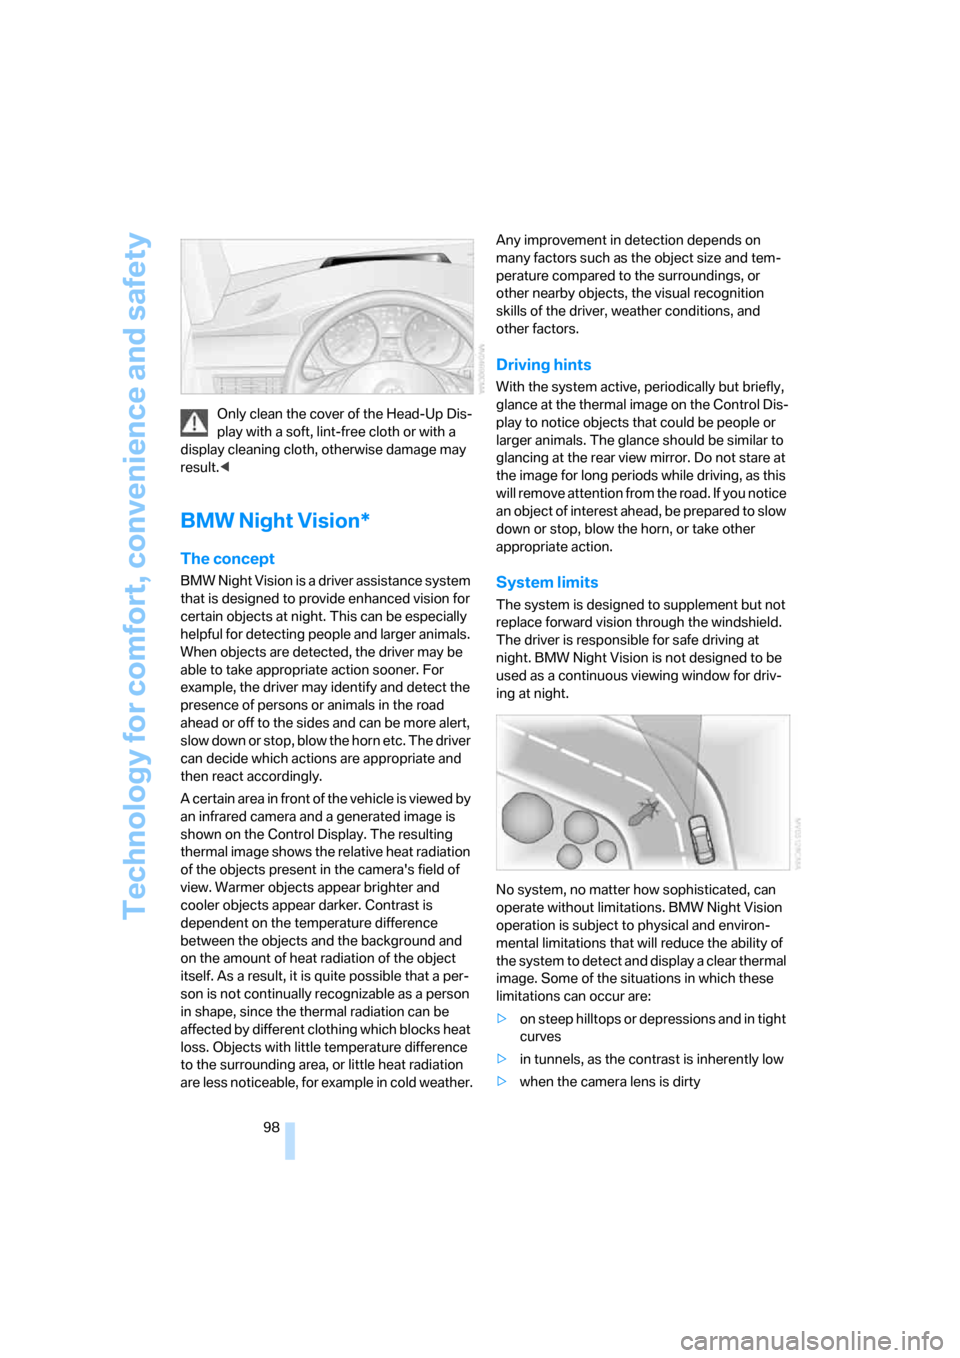
98 Only clean the cover of the Head-Up Dis-
play with a soft, lint-free cloth or with a
display cleaning cloth, otherwise damage may
result.<
BMW Night Vision*
The concept
BMW Night Vision is a driver assistance system
that is designed to provide enhanced vision for
certain objects at night. This can be especially
helpful for detecting people and larger animals.
When objects are detected, the driver may be
able to take appropriate action sooner. For
example, the driver may identify and detect the
presence of persons or animals in the road
ahead or off to the sides and can be more alert,
slow down or stop, blow the horn etc. The driver
can decide which actions are appropriate and
then react accordingly.
A certain area in front of the vehicle is viewed by
an infrared camera and a generated image is
shown on the Control Display. The resulting
thermal image shows the relative heat radiation
of the objects present in the camera's field of
view. Warmer objects appear brighter and
cooler objects appear darker. Contrast is
dependent on the temperature difference
between the objects and the background and
on the amount of heat radiation of the object
itself. As a result, it is quite possible that a per-
son is not continually recognizable as a person
in shape, since the thermal radiation can be
affected by different clothing which blocks heat
loss. Objects with little temperature difference
to the surrounding area, or little heat radiation
are less noticeable, for example in cold weather.Any improvement in detection depends on
many factors such as the object size and tem-
perature compared to the surroundings, or
other nearby objects, the visual recognition
skills of the driver, weather conditions, and
other factors.
Driving hints
With the system active, periodically but briefly,
glance at the thermal image on the Control Dis-
play to notice objects that could be people or
larger animals. The glance should be similar to
glancing at the rear view mirror. Do not stare at
the image for long periods while driving, as this
will remove attention from the road. If you notice
an object of interest ahead, be prepared to slow
down or stop, blow the horn, or take other
appropriate action.
System limits
The system is designed to supplement but not
replace forward vision through the windshield.
The driver is responsible for safe driving at
night. BMW Night Vision is not designed to be
used as a continuous viewing window for driv-
ing at night.
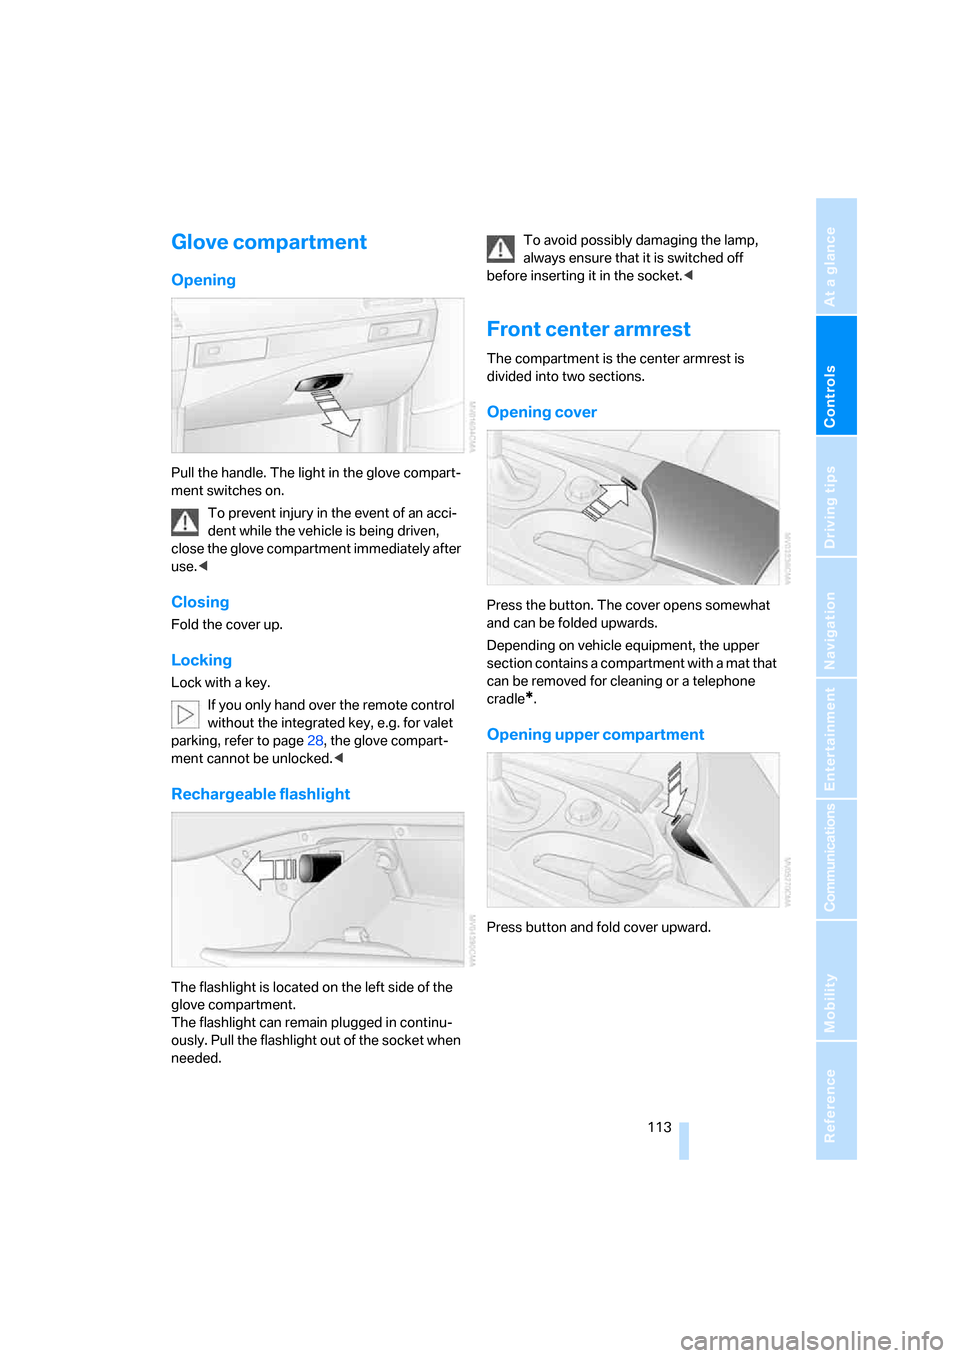
No system, no matter how sophisticated, can
operate without limitations. BMW Night Vision
operation is subject to physical and environ-
mental limitations that will reduce the ability of
the system to detect and display a clear thermal
image. Some of the situations in which these
limitations can occur are:
>on steep hilltops or depressions and in tight
curves
>in tunnels, as the contrast is inherently low
>when the camera lens is dirty
Page 115 of 259

Controls
113Reference
At a glance
Driving tips
Communications
Navigation
Entertainment
Mobility
Glove compartment
Opening
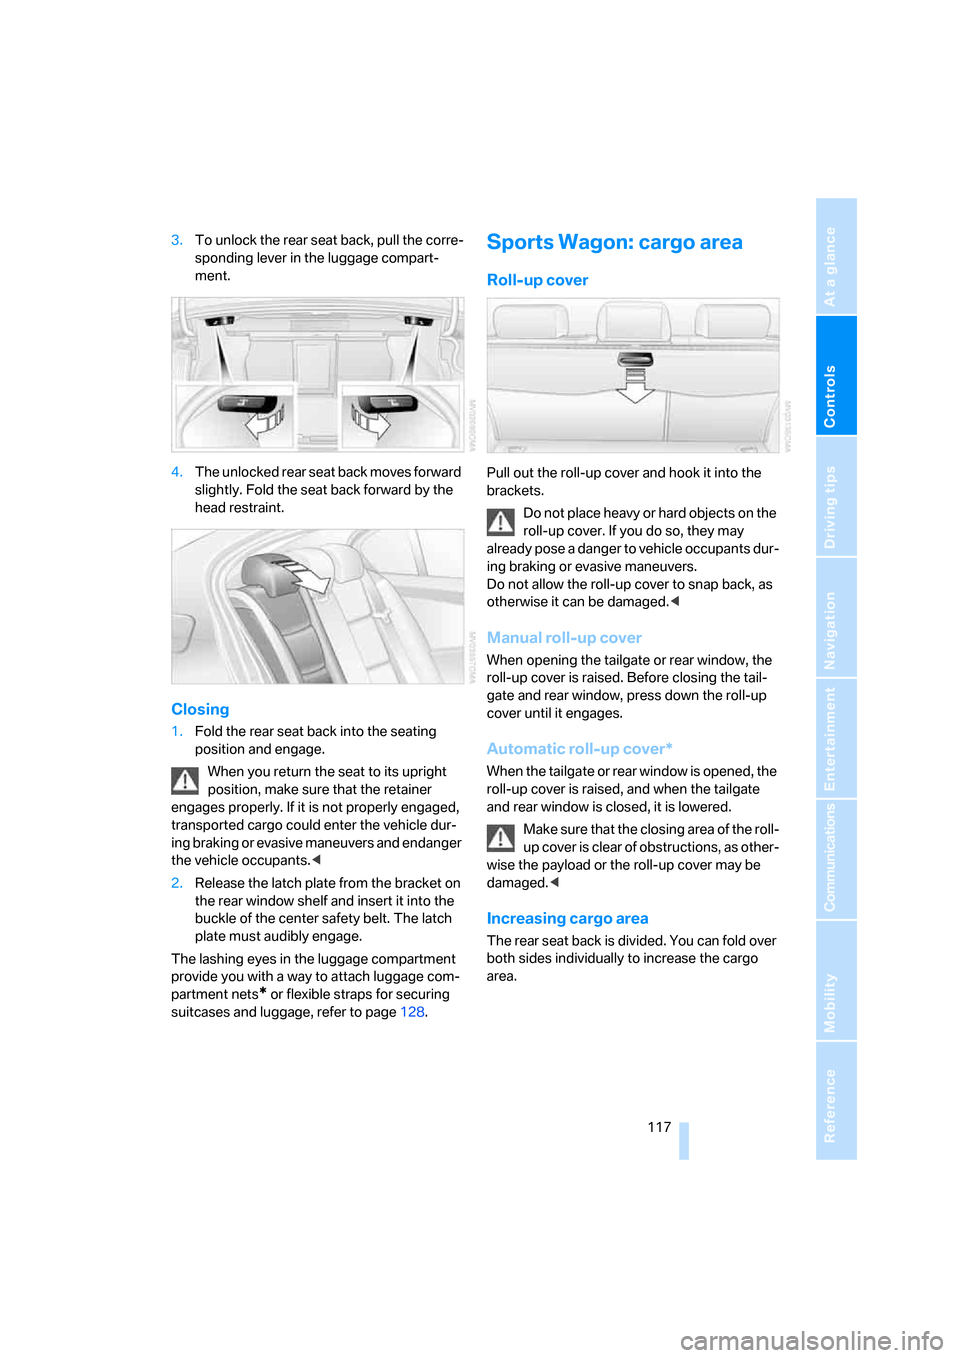
Pull the handle. The light in the glove compart-
ment switches on.
To prevent injury in the event of an acci-
dent while the vehicle is being driven,
close the glove compartment immediately after
use.<
Closing
Fold the cover up.
Locking
Lock with a key.
If you only hand over the remote control
without the integrated key, e.g. for valet
parking, refer to page28, the glove compart-
ment cannot be unlocked.<
Rechargeable flashlight
The flashlight is located on the left side of the
glove compartment.
The flashlight can remain plugged in continu-
ously. Pull the flashlight out of the socket when
needed.To avoid possibly damaging the lamp,
always ensure that it is switched off
before inserting it in the socket.<
Front center armrest
The compartment is the center armrest is
divided into two sections.
Opening cover
Press the button. The cover opens somewhat
and can be folded upwards.
Depending on vehicle equipment, the upper
section contains a compartment with a mat that
can be removed for cleaning or a telephone
cradle
*.
Opening upper compartment
Press button and fold cover upward.
Page 119 of 259

Controls
117Reference
At a glance
Driving tips
Communications
Navigation
Entertainment
Mobility
3.To unlock the rear seat back, pull the corre-
sponding lever in the luggage compart-
ment.
4.The unlocked rear seat back moves forward
slightly. Fold the seat back forward by the
head restraint.
Closing
1.Fold the rear seat back into the seating
position and engage.
When you return the seat to its upright
position, make sure that the retainer
engages properly. If it is not properly engaged,
transported cargo could enter the vehicle dur-
ing braking or evasive maneuvers and endanger
the vehicle occupants.<
2.Release the latch plate from the bracket on
the rear window shelf and insert it into the
buckle of the center safety belt. The latch
plate must audibly engage.
The lashing eyes in the luggage compartment
provide you with a way to attach luggage com-
partment nets
* or flexible straps for securing
suitcases and luggage, refer to page128.
Sports Wagon: cargo area
Roll-up cover
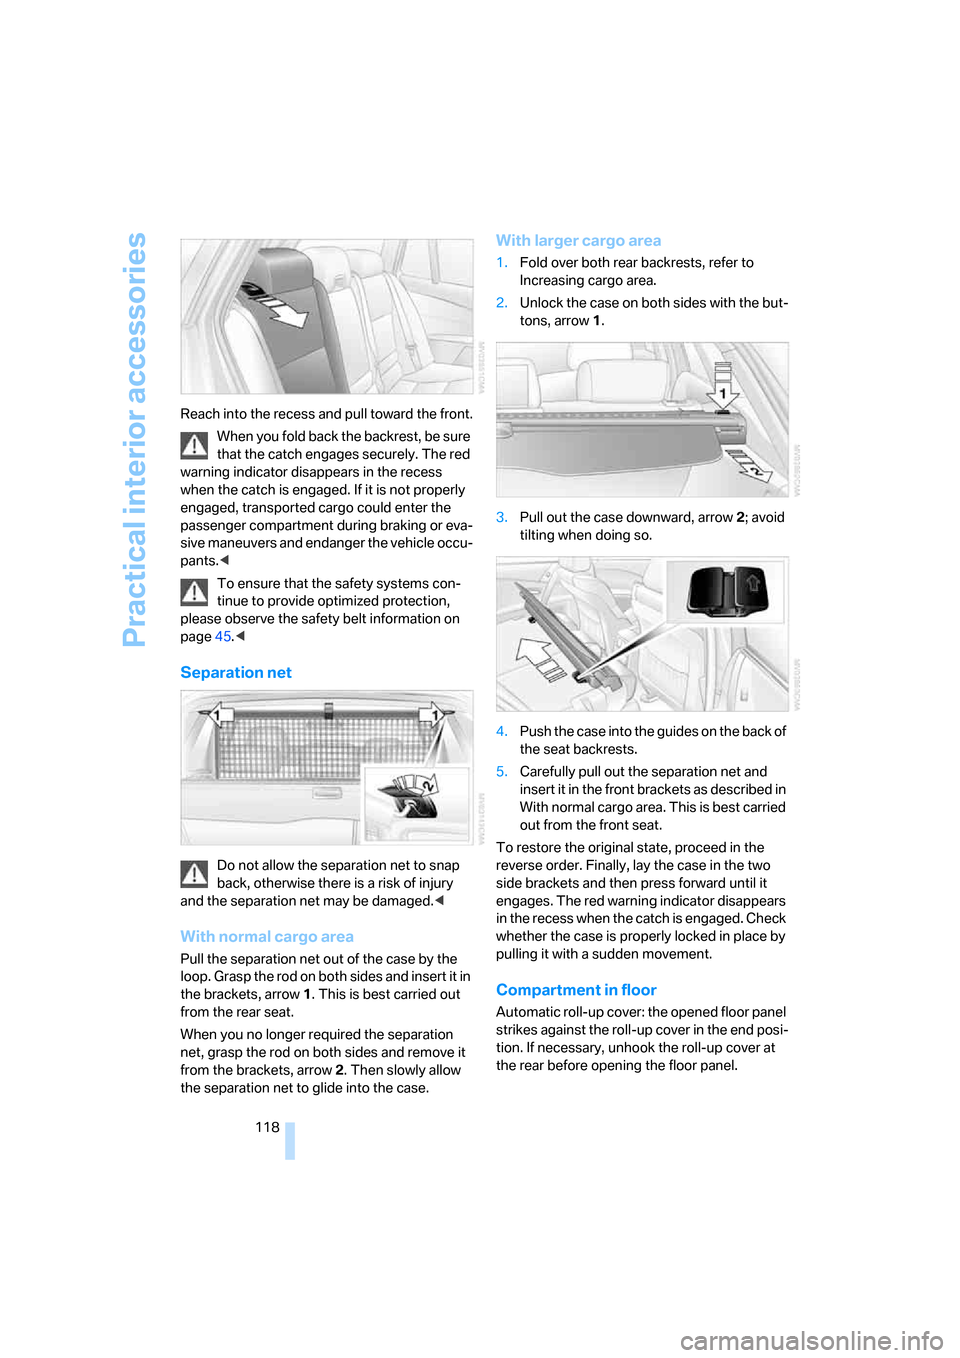
Pull out the roll-up cover and hook it into the
brackets.
Do not place heavy or hard objects on the
roll-up cover. If you do so, they may
already pose a danger to vehicle occupants dur-
ing braking or evasive maneuvers.
Do not allow the roll-up cover to snap back, as
otherwise it can be damaged.<
Manual roll-up cover
When opening the tailgate or rear window, the
roll-up cover is raised. Before closing the tail-
gate and rear window, press down the roll-up
cover until it engages.
Automatic roll-up cover*
When the tailgate or rear window is opened, the
roll-up cover is raised, and when the tailgate
and rear window is closed, it is lowered.
Make sure that the closing area of the roll-
up cover is clear of obstructions, as other-
wise the payload or the roll-up cover may be
damaged.<
Increasing cargo area
The rear seat back is divided. You can fold over
both sides individually to increase the cargo
area.
Page 120 of 259

Practical interior accessories
118 Reach into the recess and pull toward the front.
When you fold back the backrest, be sure
that the catch engages securely. The red
warning indicator disappears in the recess
when the catch is engaged. If it is not properly
engaged, transported cargo could enter the
passenger compartment during braking or eva-
sive maneuvers and endanger the vehicle occu-
pants.<
To ensure that the safety systems con-
tinue to provide optimized protection,
please observe the safety belt information on
page45.<
Separation net
Do not allow the separation net to snap
back, otherwise there is a risk of injury
and the separation net may be damaged.<
With normal cargo area
Pull the separation net out of the case by the
loop. Grasp the rod on both sides and insert it in
the brackets, arrow1. This is best carried out
from the rear seat.
When you no longer required the separation
net, grasp the rod on both sides and remove it
from the brackets, arrow2. Then slowly allow
the separation net to glide into the case.
With larger cargo area
1.Fold over both rear backrests, refer to
Increasing cargo area.
2.Unlock the case on both sides with the but-
tons, arrow1.
3.Pull out the case downward, arrow2; avoid
tilting when doing so.
4.Push the case into the guides on the back of
the seat backrests.
5.Carefully pull out the separation net and
insert it in the front brackets as described in
With normal cargo area. This is best carried
out from the front seat.
To restore the original state, proceed in the
reverse order. Finally, lay the case in the two
side brackets and then press forward until it
engages. The red warning indicator disappears
in the recess when the catch is engaged. Check
whether the case is properly locked in place by
pulling it with a sudden movement.
Compartment in floor
Automatic roll-up cover: the opened floor panel
strikes against the roll-up cover in the end posi-
tion. If necessary, unhook the roll-up cover at
the rear before opening the floor panel.
Page 121 of 259

Controls
119Reference
At a glance
Driving tips
Communications
Navigation
Entertainment
Mobility
Opening: reach into the recess and swing up
the handle.
The floor panel flap can be locked.
The partitions in the compartment can be rear-
ranged.
Folding up spare tire cover
1.Swing up the cover.
2.Detach the hook from the bracket and hook
into the floor panel flap.
Before swinging down, return the hook to its
original position.
Storage area package*
Retaining straps
You can unhook the right-hand retaining strap,
e.g. to open the side panel. To unhook at the
rear end, pull downward; to hook in, press it into
the opening. In addition, it can also be secured
in the center. This makes it possible to secure
objects of different sizes.
Hooks
Two hooks can be used to secure smaller
objects.Press at bottom and fold out until they lock.
Compartments in floor
Front compartment:
>To open the front floor panel flap, pull
upward on the handle.
>To close the front floor panel flap, press
downward until it locks.
Rear compartment:
To open, reach into the recess and swing up the
handle.
The rear floor panel flap can be locked.
Dividing up rear compartment
Fold out the partitions and press down.
Use the separation net, refer to page118,
otherwise objects could be thrown