2006 BMW 525XI SEDAN stop start
[x] Cancel search: stop startPage 79 of 259
Controls
77Reference
At a glance
Driving tips
Communications
Navigation
Entertainment
Mobility
3.Select "Car Data" and press the controller.
4.Select "Trip computer" and press the con-
troller.
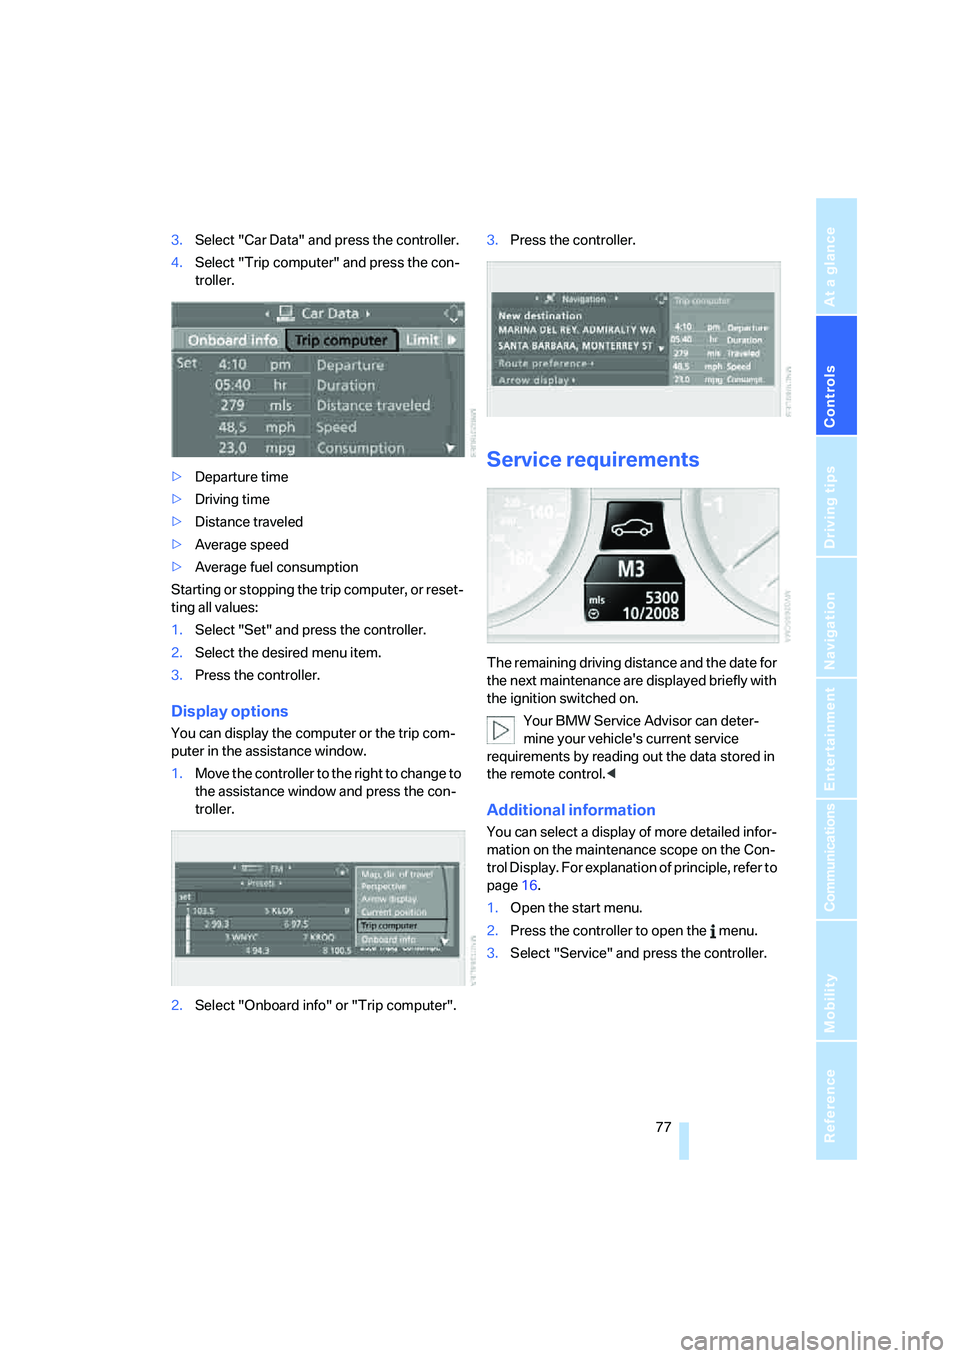
>Departure time
>Driving time
>Distance traveled
>Average speed
>Average fuel consumption
Starting or stopping the trip computer, or reset-
ting all values:
1.Select "Set" and press the controller.
2.Select the desired menu item.
3.Press the controller.
Display options
You can display the computer or the trip com-
puter in the assistance window.
1.Move the controller to the right to change to
the assistance window and press the con-
troller.
2.Select "Onboard info" or "Trip computer".3.Press the controller.
Service requirements
The remaining driving distance and the date for
the next maintenance are displayed briefly with
the ignition switched on.
Your BMW Service Advisor can deter-
mine your vehicle's current service
requirements by reading out the data stored in
the remote control.<
Additional information
You can select a display of more detailed infor-
mation on the maintenance scope on the Con-
trol Display. For explanation of principle, refer to
page16.
1.Open the start menu.
2.Press the controller to open the menu.
3.Select "Service" and press the controller.
Page 83 of 259
Controls
81Reference
At a glance
Driving tips
Communications
Navigation
Entertainment
Mobility
The symbols also indicate the status of the ser-
vice requirements display, refer to page77.
Displays after completion of trip
Malfunction reports generated during the trip
are shown consecutively when you switch off
the ignition.
Before the display disappears, you can display
the messages once again. Press the CHECK
button for approx. 2 seconds. If several mes-
sages are present, you can continue to press
the CHECK button to view them in succession.
The display goes out
>automatically after a brief period
>when you press the CHECK button again
for approximately 2 seconds
Speed limit
You can enter a speed and a Check Control
message indicates when you have reached this
speed. This enables you, for example, to
receive warnings if you exceed a speed limit in
an urban area.
You are only warned of reaching this speed a
second time if your vehicle speed falls below it
again by at least 3 mph/5 km/h.
Displaying, setting or changing limit
iDrive, for explanation of principle, refer to
page16.
1.Open the start menu.
2.Open "Navigation".
Without navigation system
*:
Open "Car Data".
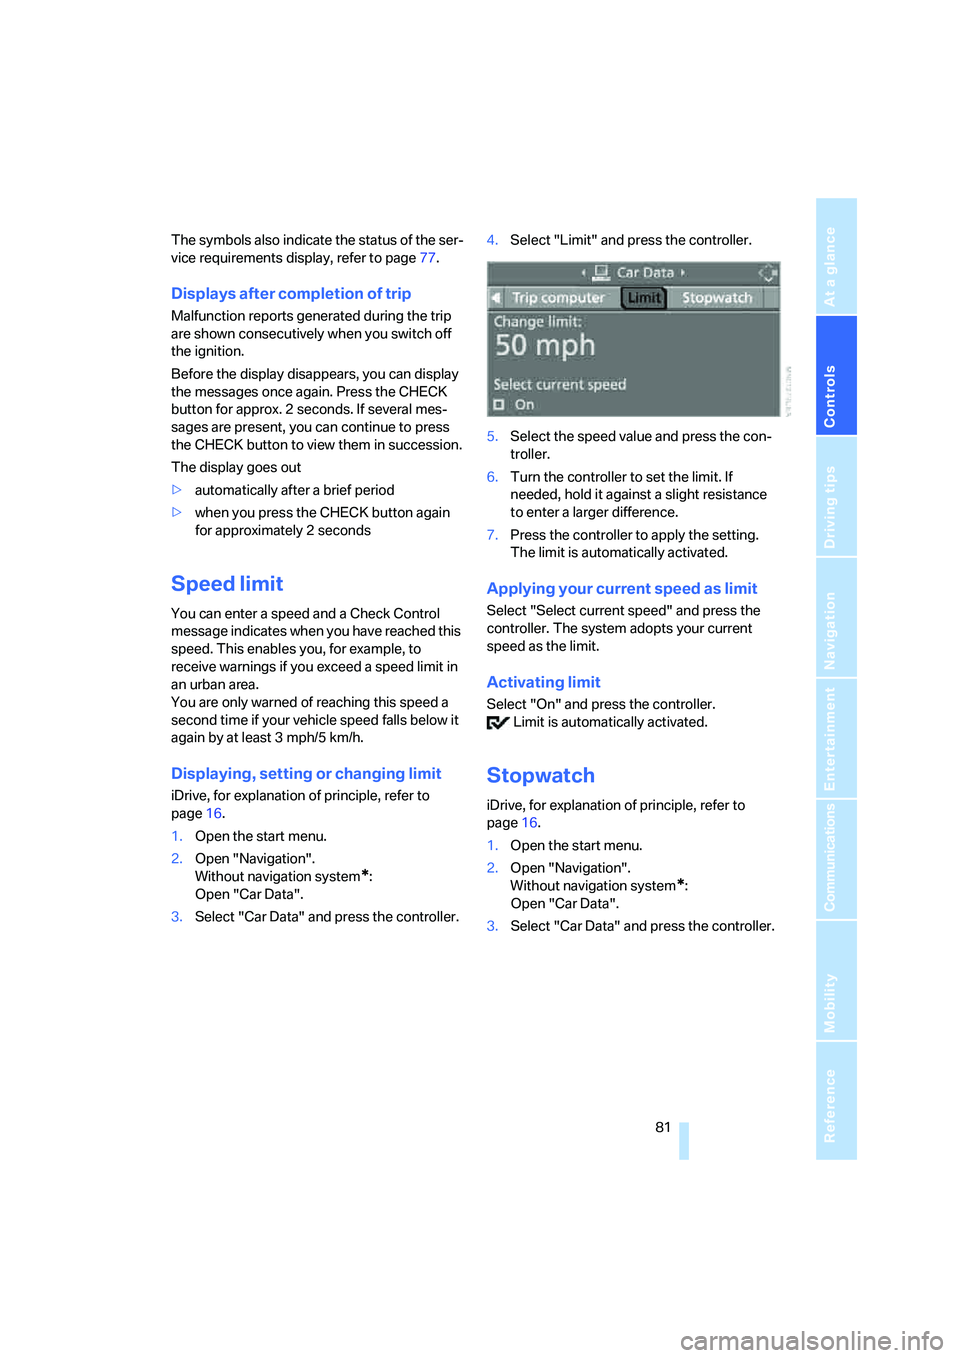
3.Select "Car Data" and press the controller.4.Select "Limit" and press the controller.
5.Select the speed value and press the con-
troller.
6.Turn the controller to set the limit. If
needed, hold it against a slight resistance
to enter a larger difference.
7.Press the controller to apply the setting.
The limit is automatically activated.
Applying your current speed as limit
Select "Select current speed" and press the
controller. The system adopts your current
speed as the limit.
Activating limit
Select "On" and press the controller.
Limit is automatically activated.
Stopwatch
iDrive, for explanation of principle, refer to
page16.
1.Open the start menu.
2.Open "Navigation".
Without navigation system
*:
Open "Car Data".
3.Select "Car Data" and press the controller.
Page 84 of 259
Everything under control
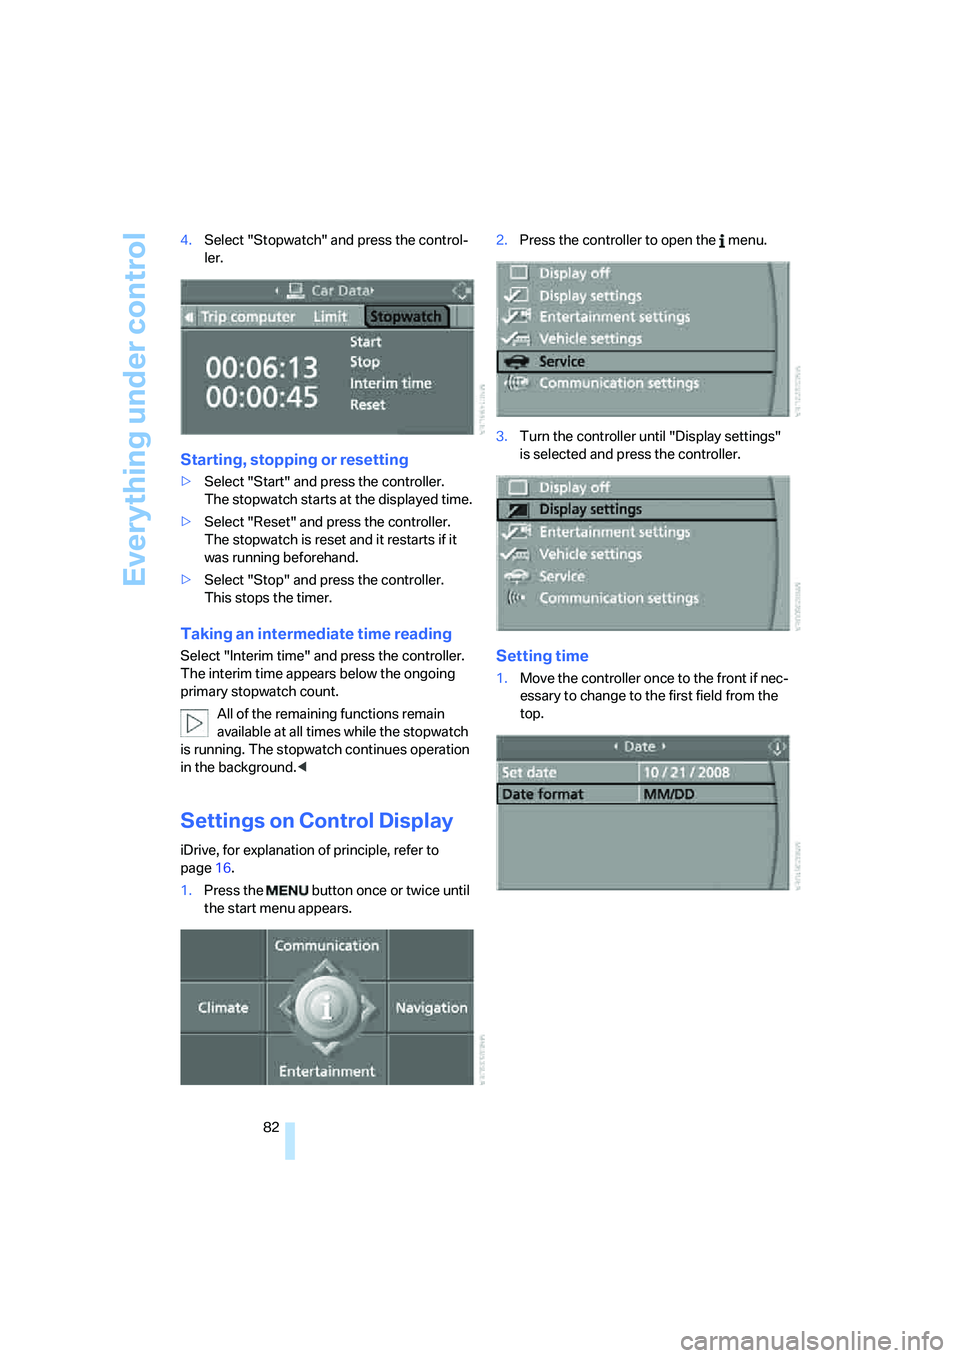
82 4.Select "Stopwatch" and press the control-
ler.
Starting, stopping or resetting
>Select "Start" and press the controller.
The stopwatch starts at the displayed time.
>Select "Reset" and press the controller.
The stopwatch is reset and it restarts if it
was running beforehand.
>Select "Stop" and press the controller.
This stops the timer.
Taking an intermediate time reading
Select "Interim time" and press the controller.
The interim time appears below the ongoing
primary stopwatch count.
All of the remaining functions remain
available at all times while the stopwatch
is running. The stopwatch continues operation
in the background.<
Settings on Control Display
iDrive, for explanation of principle, refer to
page16.
1.Press the button once or twice until
the start menu appears.2.Press the controller to open the menu.
3.Turn the controller until "Display settings"
is selected and press the controller.
Setting time
1.Move the controller once to the front if nec-
essary to change to the first field from the
top.
Page 91 of 259
Controls
89Reference
At a glance
Driving tips
Communications
Navigation
Entertainment
Mobility
Malfunction
If the HDC display goes out in the HDC mode or
is not shown:
HDC is temporarily not available, as the brake
temperature is too high.
Dynamic Drive*
The concept
Dynamic Drive minimizes body roll and opti-
mizes vehicle stability during cornering and
evasive maneuvers.
Dynamic Drive is based on active stabilizers on
the front and rear axles. Suspension compli-
ance adapts to suit driving conditions, varying
from performance-oriented during cornering to
smooth and comfort-oriented when the vehicle
is proceeding in a straight line. During vehicle
operation, the system continuously runs
through closed-loop control cycles lasting only
fractions of a second.
The system assumes operational status each
time you start the engine.
Malfunction
The warning lamp lights up yellow and
a message is shown on the Control Dis-
play. There is a malfunction in the sys-
tem. Have the system checked as soon as pos-
sible.
If a malfunction occurs, please remember
to adapt your speed accordingly, espe-
cially in curves.
The suspension will be noticeably softer and
the vehicle will display a greater tendency to tilt
during cornering and in crosswinds.
If a message stating that you should stop is
shown on the Control Display, stop at a suitable
location and switch off the engine as soon as
possible. In this case the oil level in the reservoir
may have dropped below the minimum, possi-
bly owing to a leak in the hydraulic system.
Do not continue driving, but instead contact
your BMW center.<
Sports Wagon:
Self-leveling suspension
xDrive: the vehicle is raised somewhat at
the rear after locking. This is normal and is
linked to minor noises.<
Malfunction
The warning lamp for self-leveling sus-
pension lights up yellow and a message
is shown on the Control Display. A mal-
function has occurred in the self-leveling sus-
pension. Stop and check the vehicle. If it is con-
siderably lower at the rear than at the front, and
possibly also on one side – rear left compared to
rear right –, go to the nearest BMW center or a
workshop that works according to BMW repair
procedures with correspondingly trained per-
sonnel. Drive with appropriate caution in the
meantime. The vehicle has reduced ground
clearance and driving comfort may be notice-
ably reduced. Even if the position of the vehicle
is normal, go to the nearest BMW center or a
workshop that works according to BMW repair
procedures with correspondingly trained per-
sonnel.
Flat Tire Monitor FTM
The concept
The Flat Tire Monitor keeps track of the infla-
tion pressures in the tires as you drive. The sys-
tem provides an alert whenever the inflation
pressure drops significantly in relation to the
pressure in another tire.
In the event of a pressure loss, the rolling radius
and therefore the rotation speed of the wheels
change. This change is detected and is
reported as a flat tire.
Functional requirement
In order to assure the reliable reporting of a flat
tire, the system must be initialized for the cor-
rect tire inflation pressure.
Page 92 of 259
Technology for comfort, convenience and safety
90 The initialization must be repeated after
each time the tire inflation pressure is cor-
rected and after every tire or wheel change.<
System limits
The Flat Tire Monitor cannot indicate
sudden severe tire damage caused by
outside factors and does not detect a natural,
even pressure drop in all four tires.<
In the following situations, the system could be
delayed or malfunction:
>System has not been initialized
>Driving on snowy or slippery road surface
>Sporty driving style: slip in the drive wheels,
high lateral acceleration
>Driving with snow chains
*
When you are driving with the compact wheel*
the Flat Tire Monitor is unable to function.
Initializing system
The initialization finishes during driving,
which can be interrupted at any time.
When driving resumes, the initialization is con-
tinued automatically. Do not initialize the sys-
tem when driving with snow chains
* or com-
pact wheel
*.<
iDrive, for explanation of principle, refer to
page16.
1.Press the button.
This opens the start menu.
2.Press the controller to open the menu.
3.Select "Vehicle settings" and press the
controller.
4.Select "FTM" and press the controller.
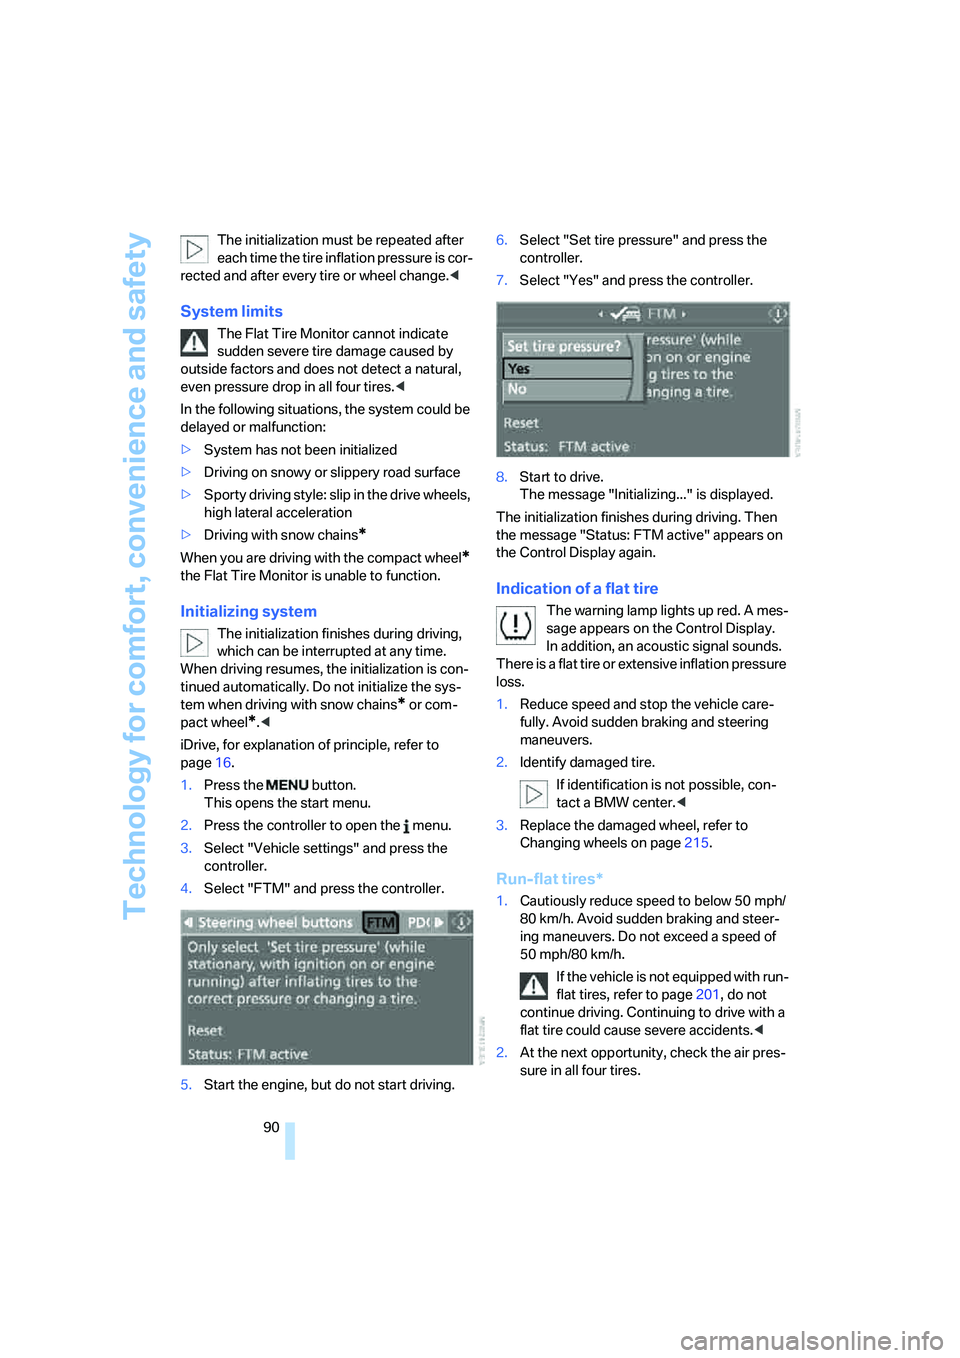
5.Start the engine, but do not start driving.6.Select "Set tire pressure" and press the
controller.
7.Select "Yes" and press the controller.
8.Start to drive.
The message "Initializing..." is displayed.
The initialization finishes during driving. Then
the message "Status: FTM active" appears on
the Control Display again.
Indication of a flat tire
The warning lamp lights up red. A mes-
sage appears on the Control Display.
In addition, an acoustic signal sounds.
There is a flat tire or extensive inflation pressure
loss.
1.Reduce speed and stop the vehicle care-
fully. Avoid sudden braking and steering
maneuvers.
2.Identify damaged tire.
If identification is not possible, con-
tact a BMW center.<
3.Replace the damaged wheel, refer to
Changing wheels on page215.
Run-flat tires*
1.Cautiously reduce speed to below 50 mph/
80 km/h. Avoid sudden braking and steer-
ing maneuvers. Do not exceed a speed of
50 mph/80 km/h.
If the vehicle is not equipped with run-
flat tires, refer to page201, do not
continue driving. Continuing to drive with a
flat tire could cause severe accidents.<
2.At the next opportunity, check the air pres-
sure in all four tires.
Page 94 of 259
Technology for comfort, convenience and safety
92
All wheels are yellow
Flat tire or a major drop in inflation pressure in
several tires. A message appears on the Control
Display.
Gray
The system cannot detect a flat tire.
Reasons for this can be:
>TPM is being reset
>Temporary interference due to systems or
devices which use the same radio fre-
quency
>Malfunction
Resetting system
Reset the system again after each correc-
tion of the tire inflation pressure and after
every tire or wheel change.<
Resetting finishes during driving, which can be
interrupted at any time. When driving resumes,
resetting is continued automatically. Do not
reset the system when driving with a compact
wheel
*.
iDrive, for explanation of principle, refer to
page16.
1.Press the button.
This opens the start menu.
2.Press the controller to open the menu.
3.Select "Vehicle settings" and press the
controller.
4.Select "TPM" and press the controller.
5.Start the engine, but do not start driving.
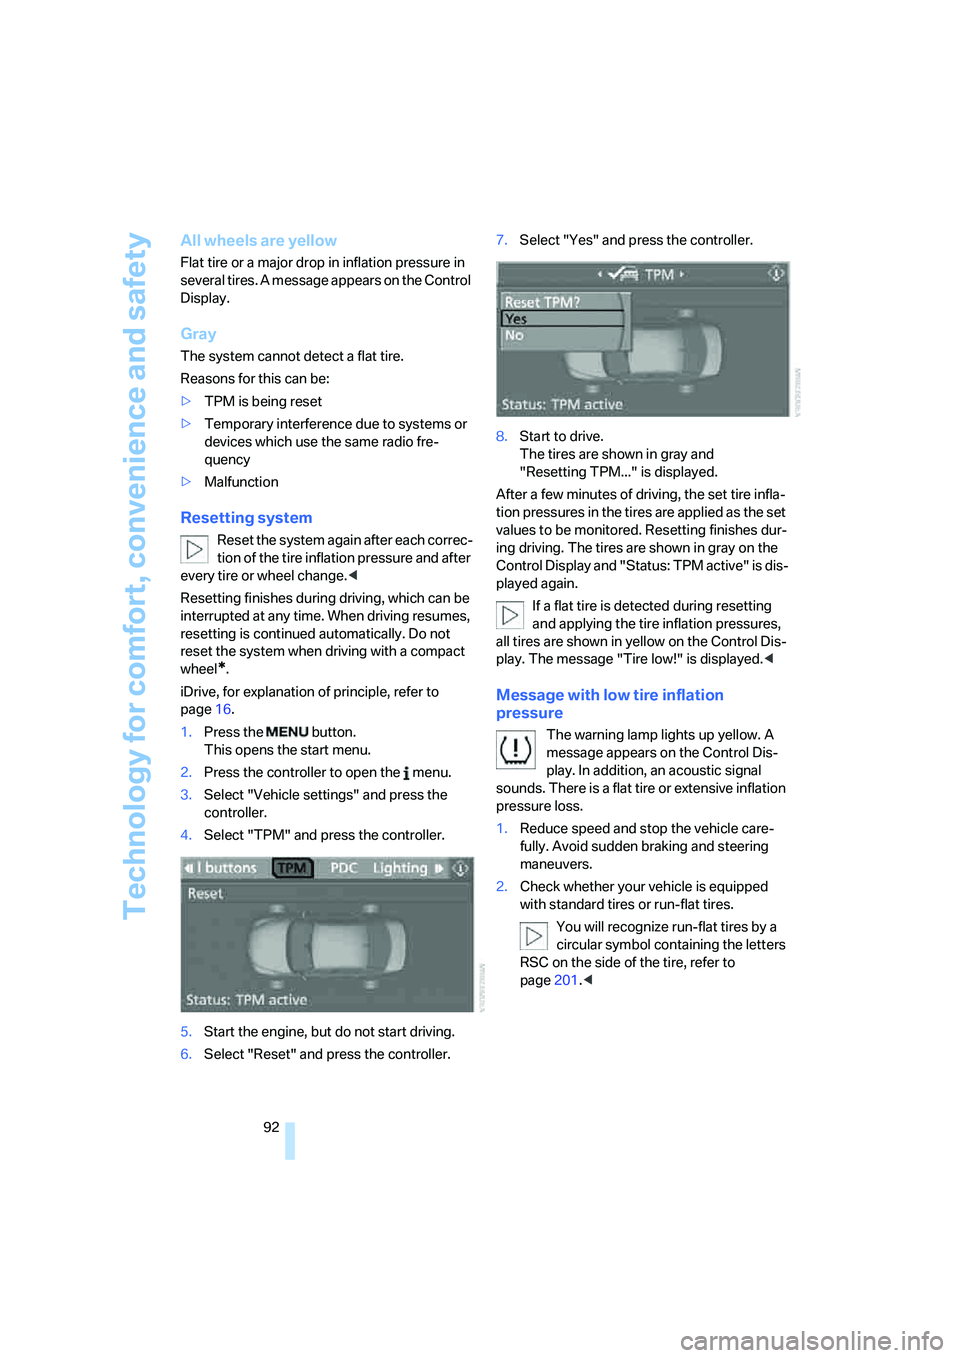
6.Select "Reset" and press the controller.7.Select "Yes" and press the controller.
8.Start to drive.
The tires are shown in gray and
"Resetting TPM..." is displayed.
After a few minutes of driving, the set tire infla-
tion pressures in the tires are applied as the set
values to be monitored. Resetting finishes dur-
ing driving. The tires are shown in gray on the
Control Display and "Status: TPM active" is dis-
played again.
If a flat tire is detected during resetting
and applying the tire inflation pressures,
all tires are shown in yellow on the Control Dis-
play. The message "Tire low!" is displayed.<
Message with low tire inflation
pressure
The warning lamp lights up yellow. A
message appears on the Control Dis-
play. In addition, an acoustic signal
sounds. There is a flat tire or extensive inflation
pressure loss.
1.Reduce speed and stop the vehicle care-
fully. Avoid sudden braking and steering
maneuvers.
2.Check whether your vehicle is equipped
with standard tires or run-flat tires.
You will recognize run-flat tires by a
circular symbol containing the letters
RSC on the side of the tire, refer to
page201.<
Page 104 of 259
Lamps
102 4.Select "Lighting" and press the controller.
5.Select "Pathway lighting" and press the
controller.
6.Turn the controller to select the desired
duration.
7.Press the controller to apply the setting.
Daytime running lamps*
If desired, the light switch can remain in posi-
tion0, 1 or 3.
In position0 and 3 the exterior lighting is auto-
matically switched off after the vehicle is
switched off. In position1 the parking lamps
light up after the ignition is switched off.
Switch on the parking lamps if required as
described under Parking lamps.
Adaptive Head Light*
The concept
Adaptive Head Light is a variable headlamp
control system that enables better illumination
of the road surface. Depending on the steering
angle and other parameters, the light from the
headlamp follows the course of the road.
Activating Adaptive Head Light
In switch position3, the Adaptive Head Light is
active and the automatic headlamp control
is
switched on, refer to page101.
To avoid dazzling oncoming traffic, the Adap-
tive Head Light is not active when driving in
reverse and points toward the passenger side
when the vehicle is stopped.
Malfunction
The LED next to the symbol for automatic head-
lamp control flashes. Adaptive Head Light is
malfunctioning or has failed. Have the system
checked as soon as possible.
High beams/
roadside parking lamps
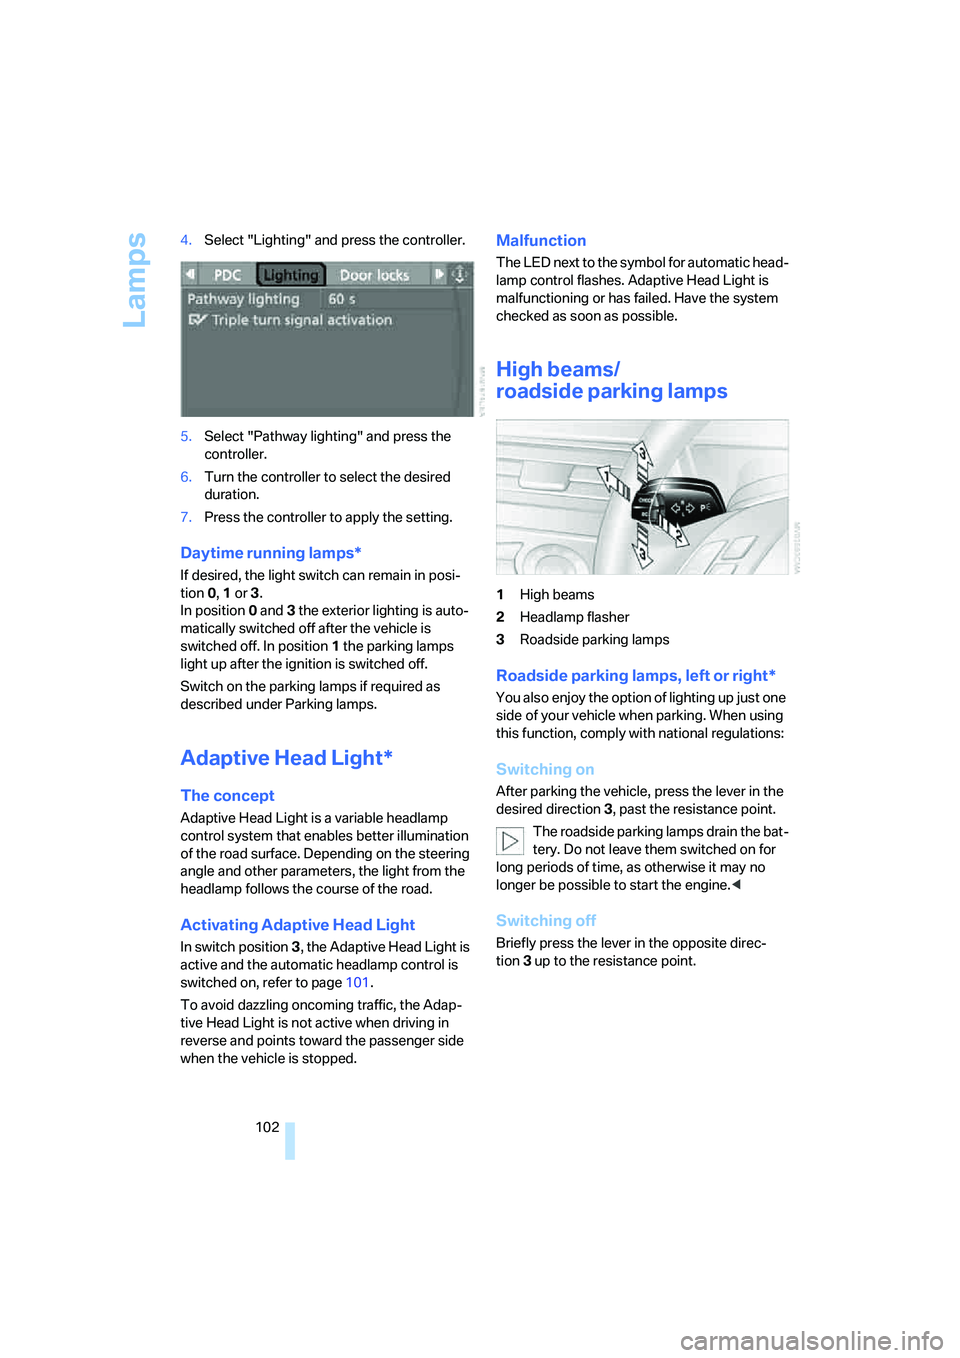
1High beams
2Headlamp flasher
3Roadside parking lamps
Roadside parking lamps, left or right*
You also enjoy the option of lighting up just one
side of your vehicle when parking. When using
this function, comply with national regulations:
Switching on
After parking the vehicle, press the lever in the
desired direction3, past the resistance point.
The roadside parking lamps drain the bat-
tery. Do not leave them switched on for
long periods of time, as otherwise it may no
longer be possible to start the engine.<
Switching off
Briefly press the lever in the opposite direc-
tion 3 up to the resistance point.
Page 106 of 259
Lamps
104
Fog lamps*
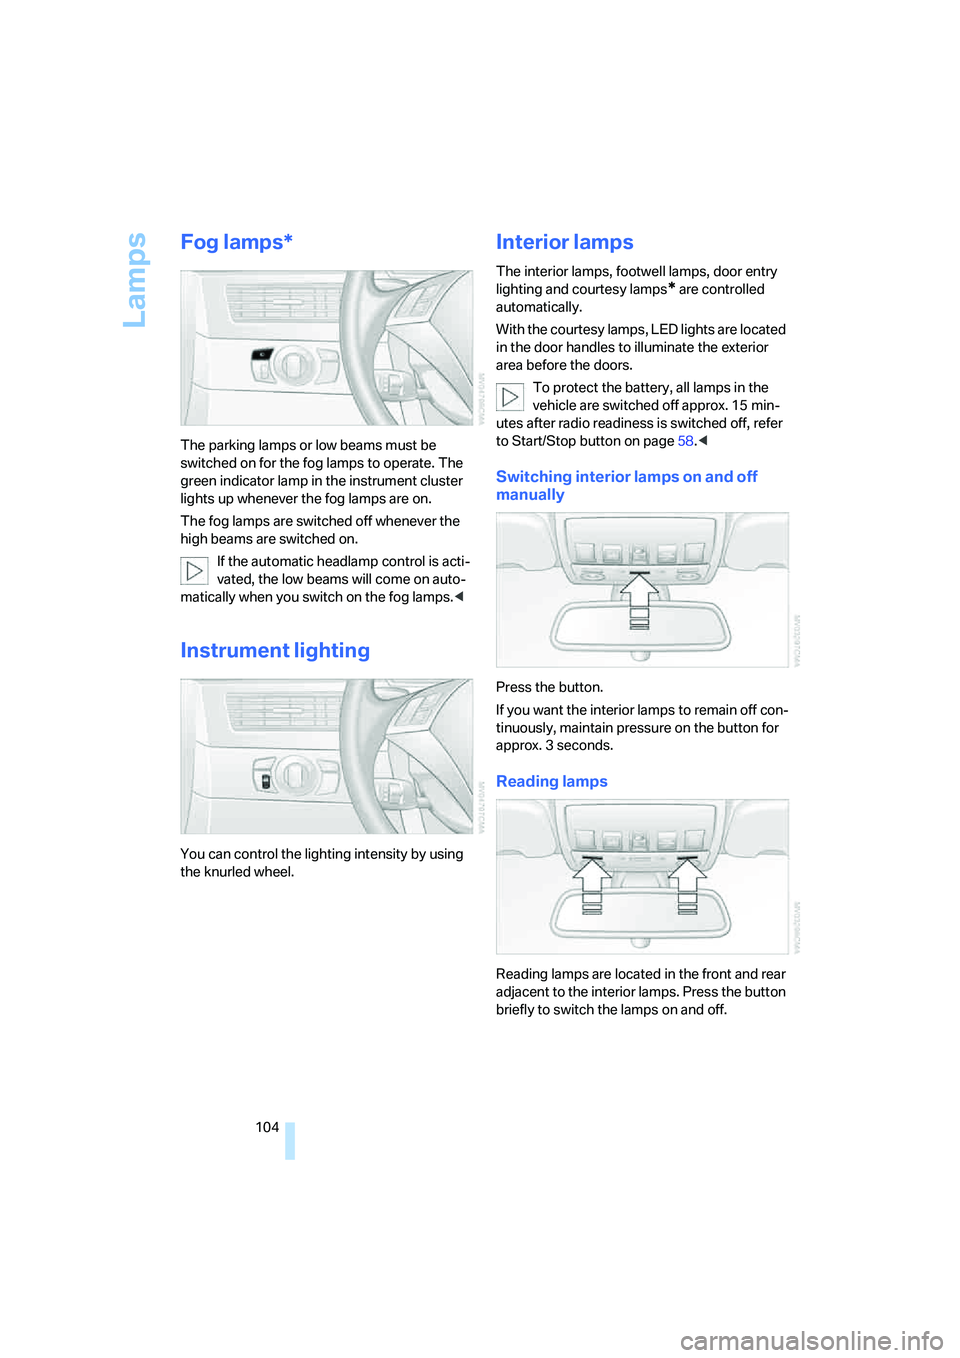
The parking lamps or low beams must be
switched on for the fog lamps to operate. The
green indicator lamp in the instrument cluster
lights up whenever the fog lamps are on.
The fog lamps are switched off whenever the
high beams are switched on.
If the automatic headlamp control is acti-
vated, the low beams will come on auto-
matically when you switch on the fog lamps.<
Instrument lighting
You can control the lighting intensity by using
the knurled wheel.
Interior lamps
The interior lamps, footwell lamps, door entry
lighting
and courtesy lamps* are controlled
automatically.
With the courtesy lamps, LED lights are located
in the door handles to illuminate the exterior
area before the doors.
To protect the battery, all lamps in the
vehicle are switched off approx. 15 min-
utes after radio readiness is switched off, refer
to Start/Stop button on page58.<
Switching interior lamps on and off
manually
Press the button.
If you want the interior lamps to remain off con-
tinuously, maintain pressure on the button for
approx. 3 seconds.
Reading lamps
Reading lamps are located in the front and rear
adjacent to the interior lamps. Press the button
briefly to switch the lamps on and off.