2006 BMW 525I low beam
[x] Cancel search: low beamPage 12 of 248
At a glance
11Reference
Controls
Driving tips
Communications
Navigation
Entertainment
Mobility
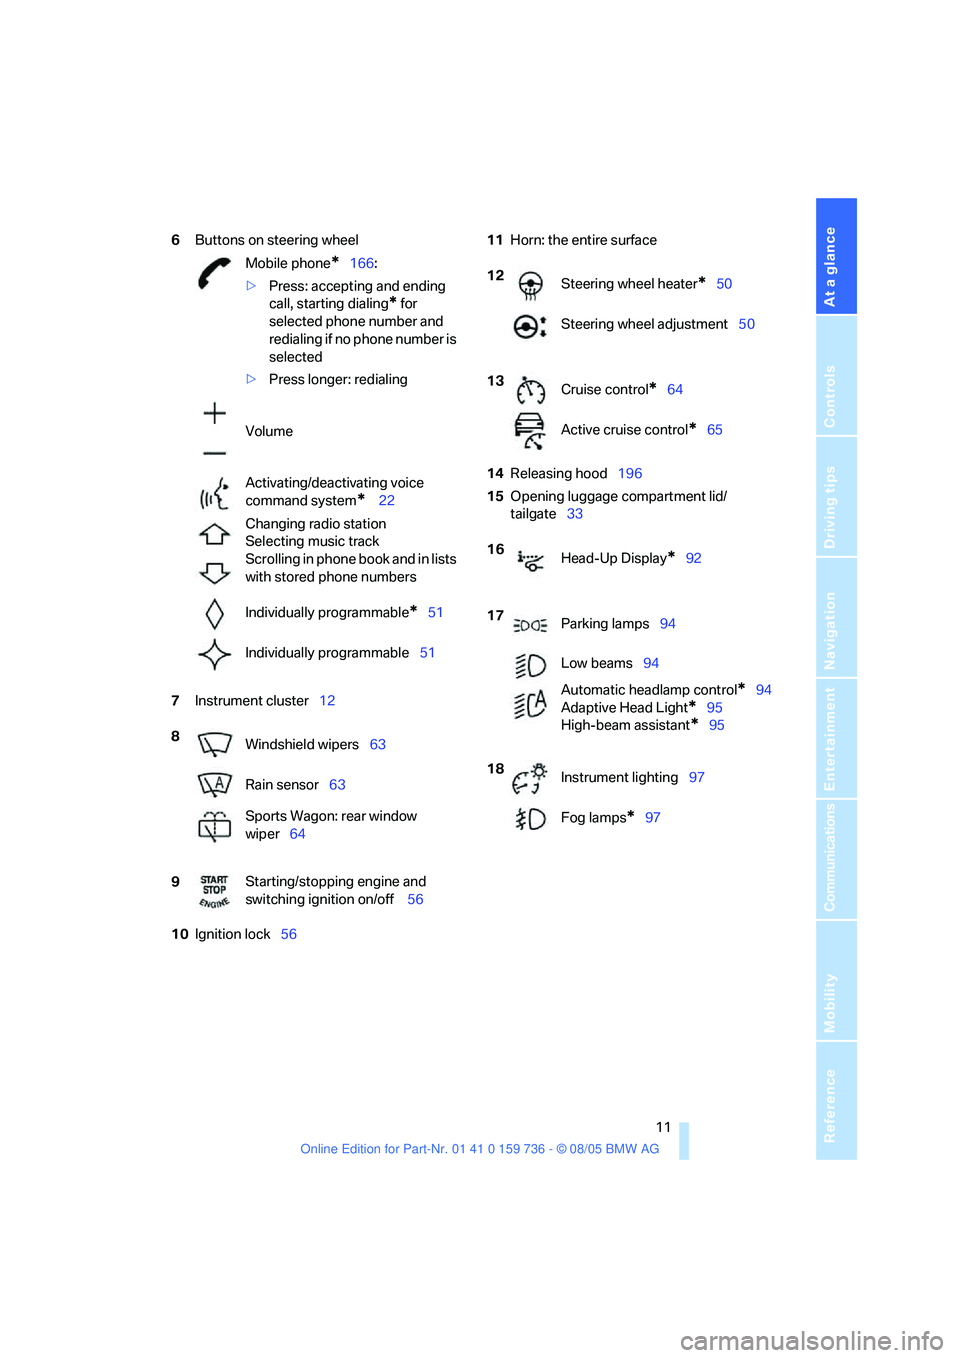
6Buttons on steering wheel
7Instrument cluster12
10Ignition lock5611Horn: the entire surface
14Releasing hood196
15Opening luggage compartment lid/
tailgate33 Mobile phone
*166:
>Press: accepting and ending
call, starting dialing
* for
selected phone number and
redialing if no phone number is
selected
>Press longer: redialing
Volume
Activating/deactivating voice
command system
* 22
Changing radio station
Selecting music track
Scrolling in phone book and in lists
with stored phone numbers
Individually programmable
*51
Individually programmable51
8
Windshield wipers63
Rain sensor63
Sports Wagon: rear window
wiper64
9Starting/stopping engine and
switching ignition on/off 56
12
Steering wheel heater*50
Steering wheel adjustment50
13
Cruise control
*64
Active cruise control
*65
16
Head-Up Display
*92
17
Parking lamps94
Low beams94
Automatic headlamp control
*94
Adaptive Head Light
*95
High-beam assistant
*95
18
Instrument lighting97
Fog lamps
*97
Page 14 of 248
At a glance
13Reference
Controls
Driving tips
Communications
Navigation
Entertainment
Mobility
Indicator and warning lamps
The concept
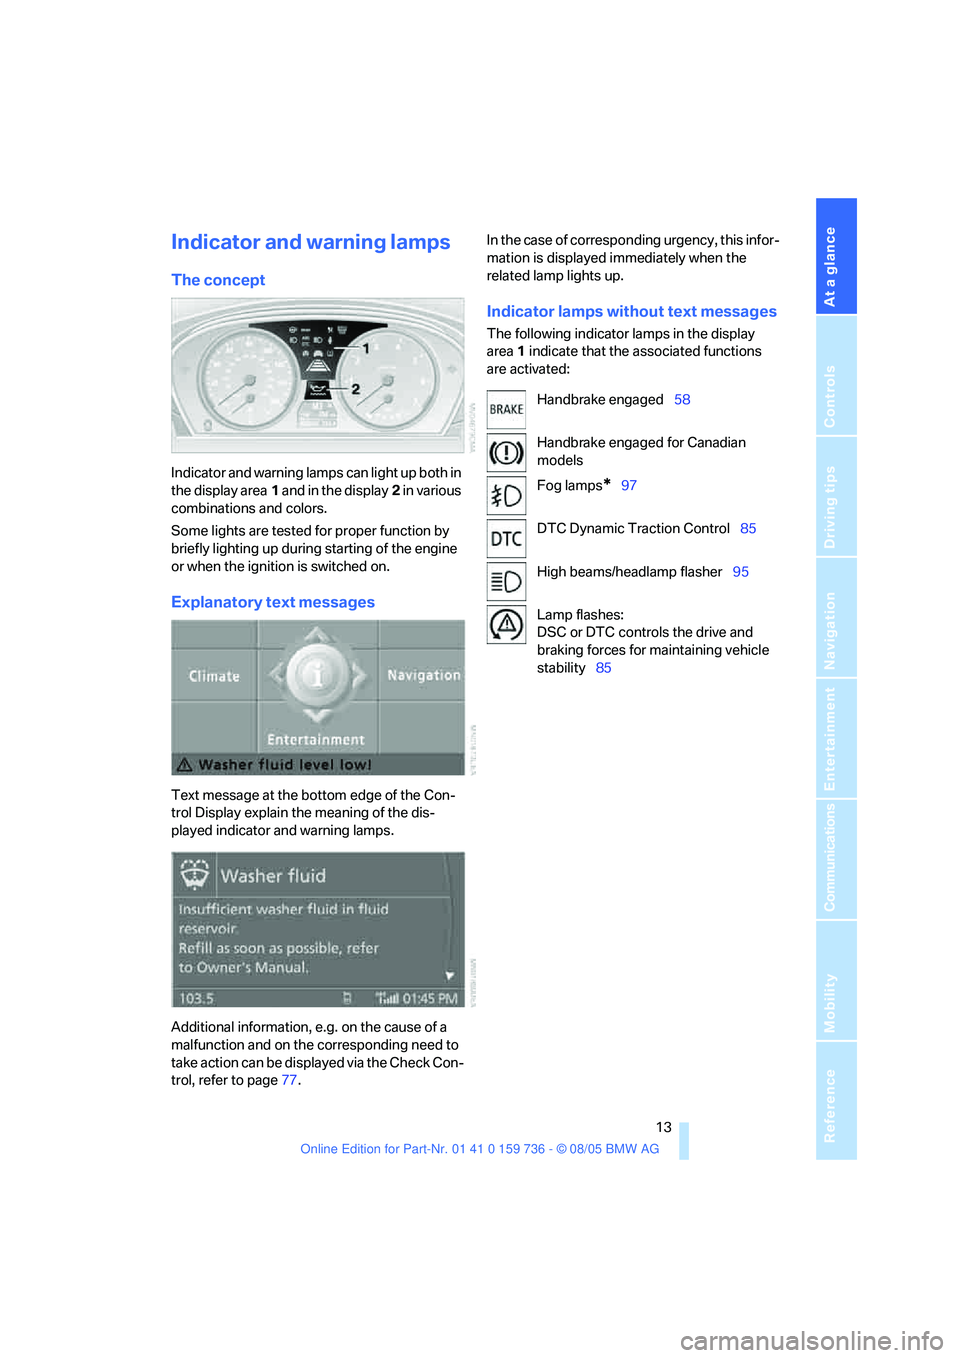
Indicator and warning lamps can light up both in
the display area1 and in the display2 in various
combinations and colors.
Some lights are tested for proper function by
briefly lighting up during starting of the engine
or when the ignition is switched on.
Explanatory text messages
Text message at the bottom edge of the Con-
trol Display explain the meaning of the dis-
played indicator and warning lamps.
Additional information, e.g. on the cause of a
malfunction and on the corresponding need to
take action can be displayed via the Check Con-
trol, refer to page77.In the case of corresponding urgency, this infor-
mation is displayed immediately when the
related lamp lights up.
Indicator lamps without text messages
The following indicator lamps in the display
area1 indicate that the associated functions
are activated:
Handbrake engaged58
Handbrake engaged for Canadian
models
Fog lamps
*97
DTC Dynamic Traction Control85
High beams/headlamp flasher95
Lamp flashes:
DSC or DTC controls the drive and
braking forces for maintaining vehicle
stability85
Page 38 of 248
Controls
37Reference
At a glance
Driving tips
Communications
Navigation
Entertainment
Mobility
>To changes in the vehicle's tilt if someone
attempts to steal the wheels or tow the
vehicle
>To interruptions in battery voltage
Unauthorized operations are briefly signaled by
the alarm system:
>with an acoustic alarm
>by switching on
the hazard warning flashers
>by flashing the high beams
Arming and disarming alarm system
When you lock or unlock the vehicle, either with
the remote control or at the door lock, the alarm
system is armed or disarmed at the same time.
The luggage compartment lid/tailgate can also
be opened with the system armed with the
button on the remote control, refer to page33.
When the luggage compartment lid/tailgate is
closed, it is locked and monitored again.
Switching off alarm
>Unlock the vehicle using the remote control,
refer to page30, or
>insert the remote control as far as possible
into the ignition lock, refer to page56.
Indicator lamp displays
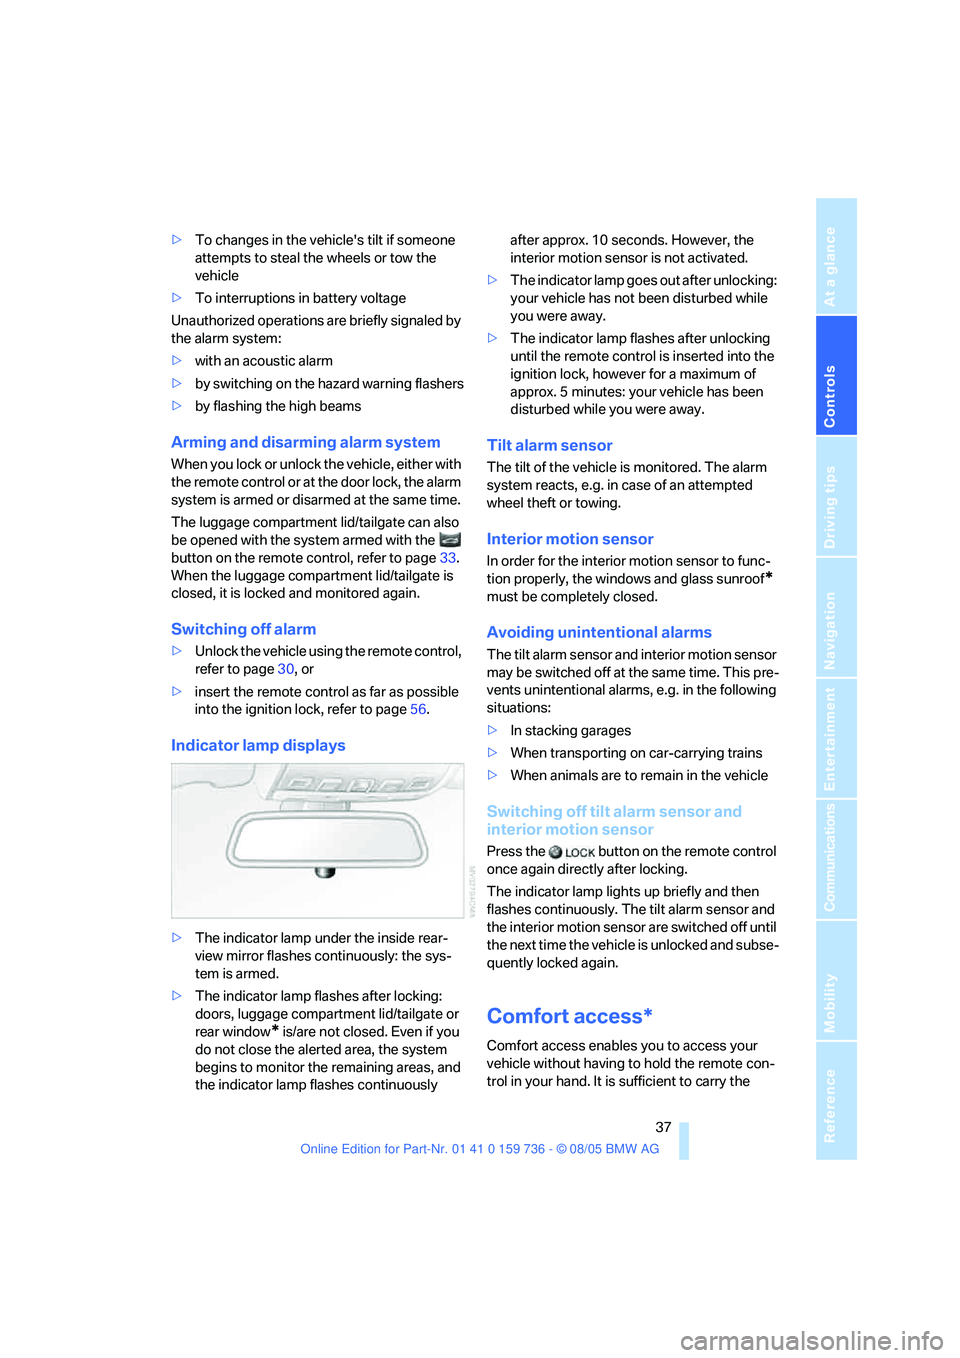
>The indicator lamp under the inside rear-
view mirror flashes continuously: the sys-
tem is armed.
>The indicator lamp flashes after locking:
doors, luggage compartment lid/tailgate or
rear window
* is/are not closed. Even if you
do not close the alerted area, the system
begins to monitor the remaining areas, and
the indicator lamp flashes continuously after approx. 10 seconds. However, the
interior motion sensor is not activated.
>The indicator lamp goes out after unlocking:
your vehicle has not been disturbed while
you were away.
>The indicator lamp flashes after unlocking
until the remote control is inserted into the
ignition lock, however for a maximum of
approx. 5 minutes: your vehicle has been
disturbed while you were away.
Tilt alarm sensor
The tilt of the vehicle is monitored. The alarm
system reacts, e.g. in case of an attempted
wheel theft or towing.
Interior motion sensor
In order for the interior motion sensor to func-
tion properly, the windows and glass sunroof
*
must be completely closed.
Avoiding unintentional alarms
The tilt alarm sensor and interior motion sensor
may be switched off at the same time. This pre-
vents unintentional alarms, e.g. in the following
situations:
>In stacking garages
>When transporting on car-carrying trains
>When animals are to remain in the vehicle
Switching off tilt alarm sensor and
interior motion sensor
Press the button on the remote control
once again directly after locking.
The indicator lamp lights up briefly and then
flashes continuously. The tilt alarm sensor and
the interior motion sensor are switched off until
the next time the vehicle is unlocked and subse-
quently locked again.
Comfort access*
Comfort access enables you to access your
vehicle without having to hold the remote con-
trol in your hand. It is sufficient to carry the
Page 63 of 248
Driving
62
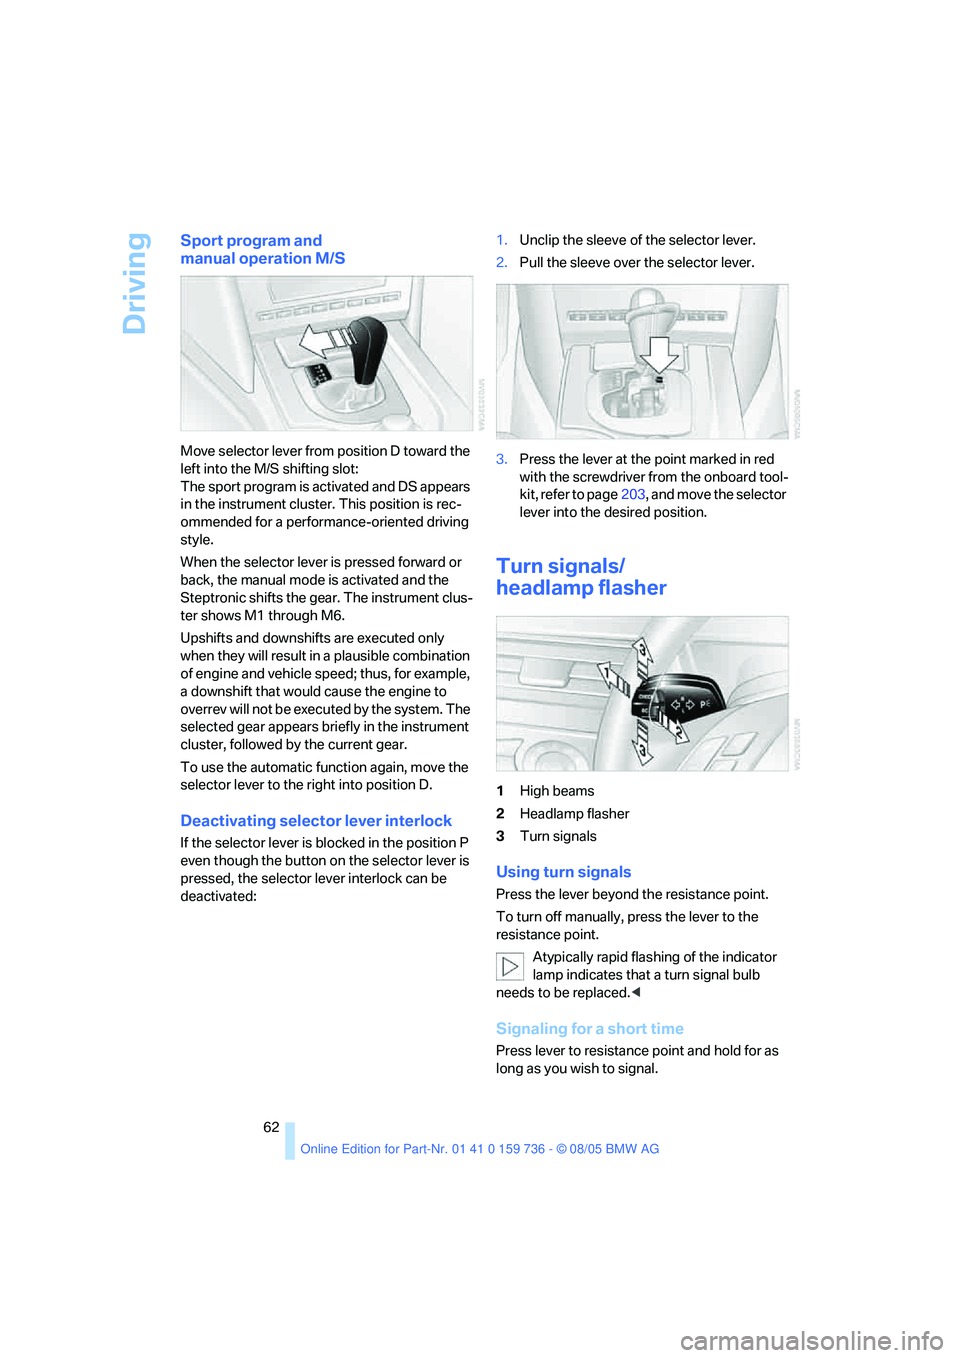
Sport program and
manual operation M/S
Move selector lever from position D toward the
left into the M/S shifting slot:
The sport program is activated and DS appears
in the instrument cluster. This position is rec-
ommended for a performance-oriented driving
style.
When the selector lever is pressed forward or
back, the manual mode is activated and the
Steptronic shifts the gear. The instrument clus-
ter shows M1 through M6.
Upshifts and downshifts are executed only
when they will result in a plausible combination
of engine and vehicle speed; thus, for example,
a downshift that would cause the engine to
overrev will not be executed by the system. The
selected gear appears briefly in the instrument
cluster, followed by the current gear.
To use the automatic function again, move the
selector lever to the right into position D.
Deactivating selector lever interlock
If the selector lever is blocked in the position P
even though the button on the selector lever is
pressed, the selector lever interlock can be
deactivated:1.Unclip the sleeve of the selector lever.
2.Pull the sleeve over the selector lever.
3.Press the lever at the point marked in red
with the screwdriver from the onboard tool-
kit, refer to page203, and move the selector
lever into the desired position.
Turn signals/
headlamp flasher
1High beams
2Headlamp flasher
3Turn signals
Using turn signals
Press the lever beyond the resistance point.
To turn off manually, press the lever to the
resistance point.
Atypically rapid flashing of the indicator
lamp indicates that a turn signal bulb
needs to be replaced.<
Signaling for a short time
Press lever to resistance point and hold for as
long as you wish to signal.
Page 94 of 248
Controls
93Reference
At a glance
Driving tips
Communications
Navigation
Entertainment
Mobility
Setting brightness
The brightness of the display is automatically
adapted to the ambient lighting conditions.
However, you can change the base setting.
With the low beams switched on, the brightness
can also be adjusted with the knurled wheel of
the instrument lighting.
iDrive, for principle details, refer to page16.
1.Open the start menu.
2.Press the controller to open the menu.
3.Select "Display settings" and press the
controller.
4.Select "Brightness" and press the control-
ler.
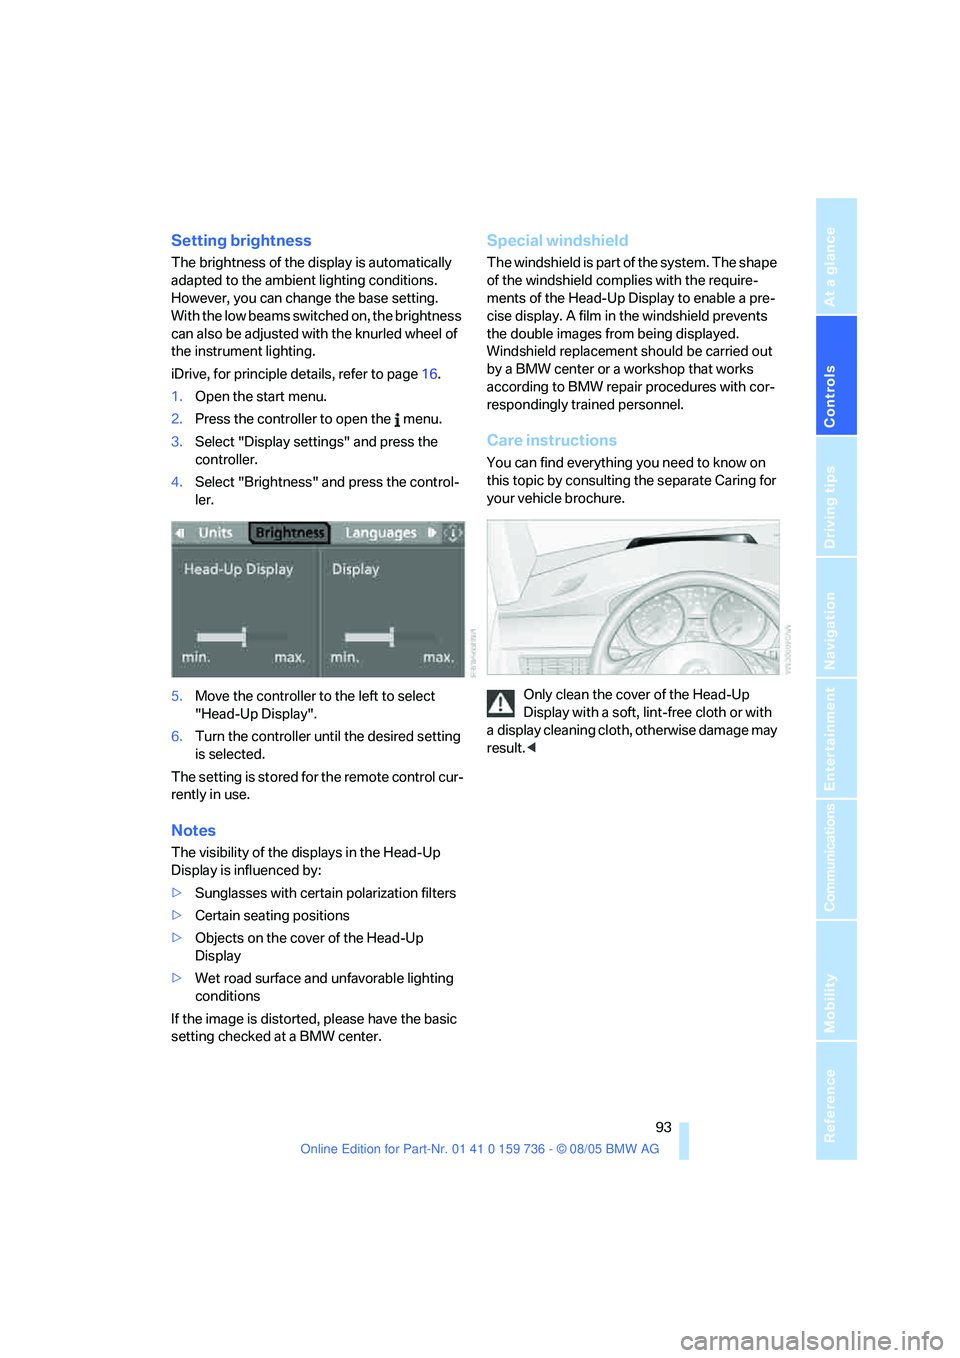
5.Move the controller to the left to select
"Head-Up Display".
6.Turn the controller until the desired setting
is selected.
The setting is stored for the remote control cur-
rently in use.
Notes
The visibility of the displays in the Head-Up
Display is influenced by:
>Sunglasses with certain polarization filters
>Certain seating positions
>Objects on the cover of the Head-Up
Display
>Wet road surface and unfavorable lighting
conditions
If the image is distorted, please have the basic
setting checked at a BMW center.
Special windshield
The windshield is part of the system. The shape
of the windshield complies with the require-
ments of the Head-Up Display to enable a pre-
cise display. A film in the windshield prevents
the double images from being displayed.
Windshield replacement should be carried out
by a BMW center or a workshop that works
according to BMW repair procedures with cor-
respondingly trained personnel.
Care instructions
You can find everything you need to know on
this topic by consulting the separate Caring for
your vehicle brochure.
Only clean the cover of the Head-Up
Display with a soft, lint-free cloth or with
a display cleaning cloth, otherwise damage may
result.<
Page 95 of 248
Lamps
94
Lamps
Parking lamps/low beams
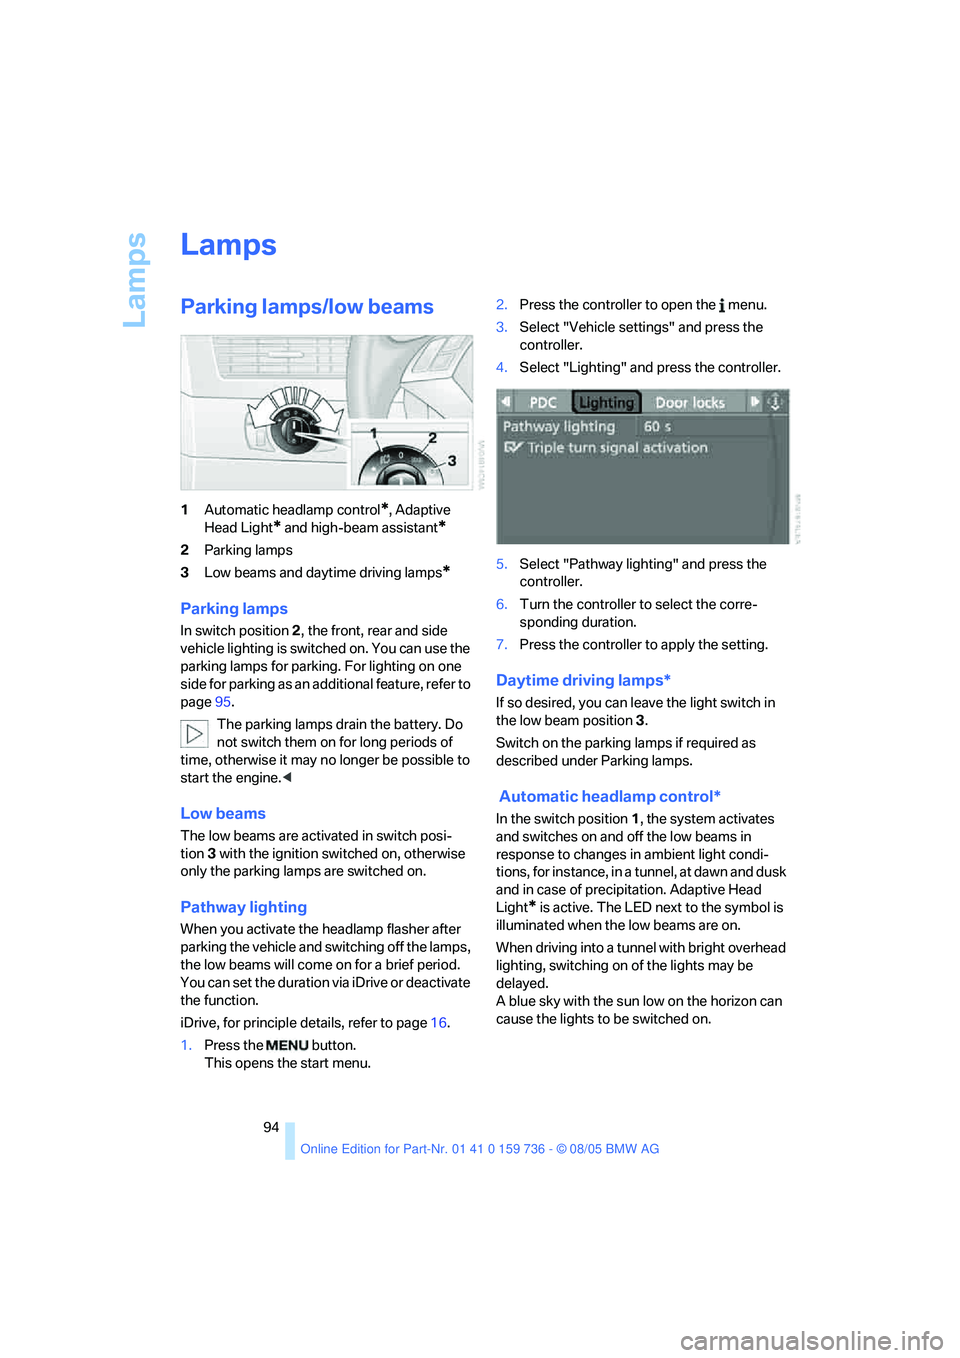
1Automatic headlamp control*, Adaptive
Head Light
* and high-beam assistant*
2Parking lamps
3Low beams and daytime driving lamps
*
Parking lamps
In switch position2, the front, rear and side
vehicle lighting is switched on. You can use the
parking lamps for parking. For lighting on one
side for parking as an additional feature, refer to
page95.
The parking lamps drain the battery. Do
not switch them on for long periods of
time, otherwise it may no longer be possible to
start the engine.<
Low beams
The low beams are activated in switch posi-
tion 3 with the ignition switched on, otherwise
only the parking lamps are switched on.
Pathway lighting
When you activate the headlamp flasher after
parking the vehicle and switching off the lamps,
the low beams will come on for a brief period.
You can set the duration via iDrive or deactivate
the function.
iDrive, for principle details, refer to page16.
1.Press the button.
This opens the start menu.2.Press the controller to open the menu.
3.Select "Vehicle settings" and press the
controller.
4.Select "Lighting" and press the controller.
5.Select "Pathway lighting" and press the
controller.
6.Turn the controller to select the corre-
sponding duration.
7.Press the controller to apply the setting.
Daytime driving lamps*
If so desired, you can leave the light switch in
the low beam position3.
Switch on the parking lamps if required as
described under Parking lamps.
Automatic headlamp control*
In the switch position1, the system activates
and switches on and off the low beams in
response to changes in ambient light condi-
tions, for instance, in a tunnel, at dawn and dusk
and in case of precipitation. Adaptive Head
Light
* is active. The LED next to the symbol is
illuminated when the low beams are on.
When driving into a tunnel with bright overhead
lighting, switching on of the lights may be
delayed.
A blue sky with the sun low on the horizon can
cause the lights to be switched on.
Page 96 of 248

Controls
95Reference
At a glance
Driving tips
Communications
Navigation
Entertainment
Mobility
The low beams remain switched on inde-
pendent of the ambient lighting condi-
tions when you switch on the fog lamps
*.
With the daytime driving lamps
* activated, the
low beams are always switched on when the
ignition is switched on.<
The automatic headlamp control cannot
serve as a substitute for your personal
judgment in determining when the lamps
should be switched on in response to ambient
lighting conditions. For example, the sensors
cannot detect fog of hazy weather. To avoid
safety risks, you should always switch on the
lamps manually under these conditions.<
Adaptive Head Light*
The concept
Adaptive Head Light is a variable headlamp
control system that enables better illumination
of the road surface. Depending on the steering
angle and other parameters, the light from the
headlamp follows the course of the road.
Activating Adaptive Head Light
In the switch position1, the Adaptive Head
Light is active and the automatic headlamp con-
trol
* is switched on.
To avoid dazzling oncoming traffic, the Adap-
tive Head Light is not active when driving in
reverse and points toward the passenger side
when the vehicle is stopped.
Malfunction
The LED next to the symbol for automatic head-
lamp control flashes. Adaptive Head Light is
malfunctioning or has failed. Have the system
checked as soon as possible.
High beams/
roadside parking lamps
1High beams
2Headlamp flasher
3Roadside parking lamps
Roadside parking lamps, left or right*
You also enjoy the option of lighting up just one
side of your vehicle when parking. When using
this function, comply with national regulations:
After parking the vehicle, press the lever in the
desired direction3, past the resistance point.
The roadside parking lamps drain the bat-
tery. Do not switch them on for long peri-
ods of time, otherwise it may no longer be pos-
sible to start the engine.<
High-beam assistant*
The concept
This system automatically switches the high
beams on and off again. A sensor on the front of
the inside rearview mirror controls the process.
The assistant ensures that the high beams are
switched on whenever the traffic situation
allows. This reduces the strain on you while at
the same time providing you with the best pos-
sible visibility. Of course, you can intervene at
any time and switch the high beams on and off
in the accustomed manner.
Page 97 of 248
Lamps
96
Activating high-beam assistant
1.Turn the light switch to switch position1,
refer to page94.
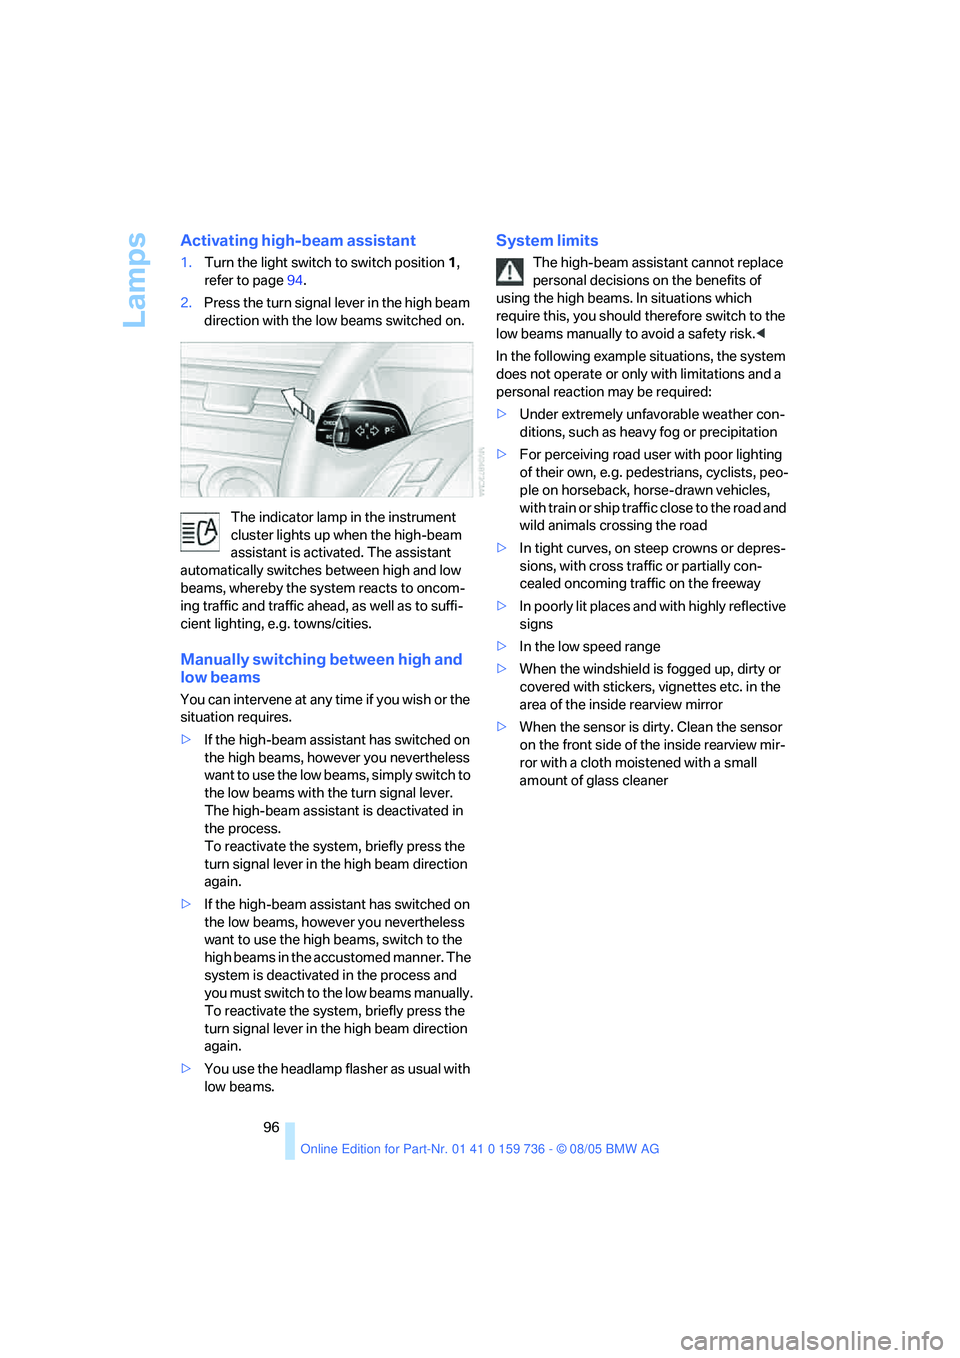
2.Press the turn signal lever in the high beam
direction with the low beams switched on.
The indicator lamp in the instrument
cluster lights up when the high-beam
assistant is activated. The assistant
automatically switches between high and low
beams, whereby the system reacts to oncom-
ing traffic and traffic ahead, as well as to suffi-
cient lighting, e.g. towns/cities.
Manually switching between high and
low beams
You can intervene at any time if you wish or the
situation requires.
>If the high-beam assistant has switched on
the high beams, however you nevertheless
want to use the low beams, simply switch to
the low beams with the turn signal lever.
The high-beam assistant is deactivated in
the process.
To reactivate the system, briefly press the
turn signal lever in the high beam direction
again.
>If the high-beam assistant has switched on
the low beams, however you nevertheless
want to use the high beams, switch to the
high beams in the accustomed manner. The
system is deactivated in the process and
you must switch to the low beams manually.
To reactivate the system, briefly press the
turn signal lever in the high beam direction
again.
>You use the headlamp flasher as usual with
low beams.
System limits
The high-beam assistant cannot replace
personal decisions on the benefits of
using the high beams. In situations which
require this, you should therefore switch to the
low beams manually to avoid a safety risk.<
In the following example situations, the system
does not operate or only with limitations and a
personal reaction may be required:
>Under extremely unfavorable weather con-
ditions, such as heavy fog or precipitation
>For perceiving road user with poor lighting
of their own, e.g. pedestrians, cyclists, peo-
ple on horseback, horse-drawn vehicles,
with train or ship traffic close to the road and
wild animals crossing the road
>In tight curves, on steep crowns or depres-
sions, with cross traffic or partially con-
cealed oncoming traffic on the freeway
>In poorly lit places and with highly reflective
signs
>In the low speed range
>When the windshield is fogged up, dirty or
covered with stickers, vignettes etc. in the
area of the inside rearview mirror
>When the sensor is dirty. Clean the sensor
on the front side of the inside rearview mir-
ror with a cloth moistened with a small
amount of glass cleaner