2006 BMW 330XI IDRIVE SEDAN remote start
[x] Cancel search: remote startPage 54 of 245
Driving
52
Driving
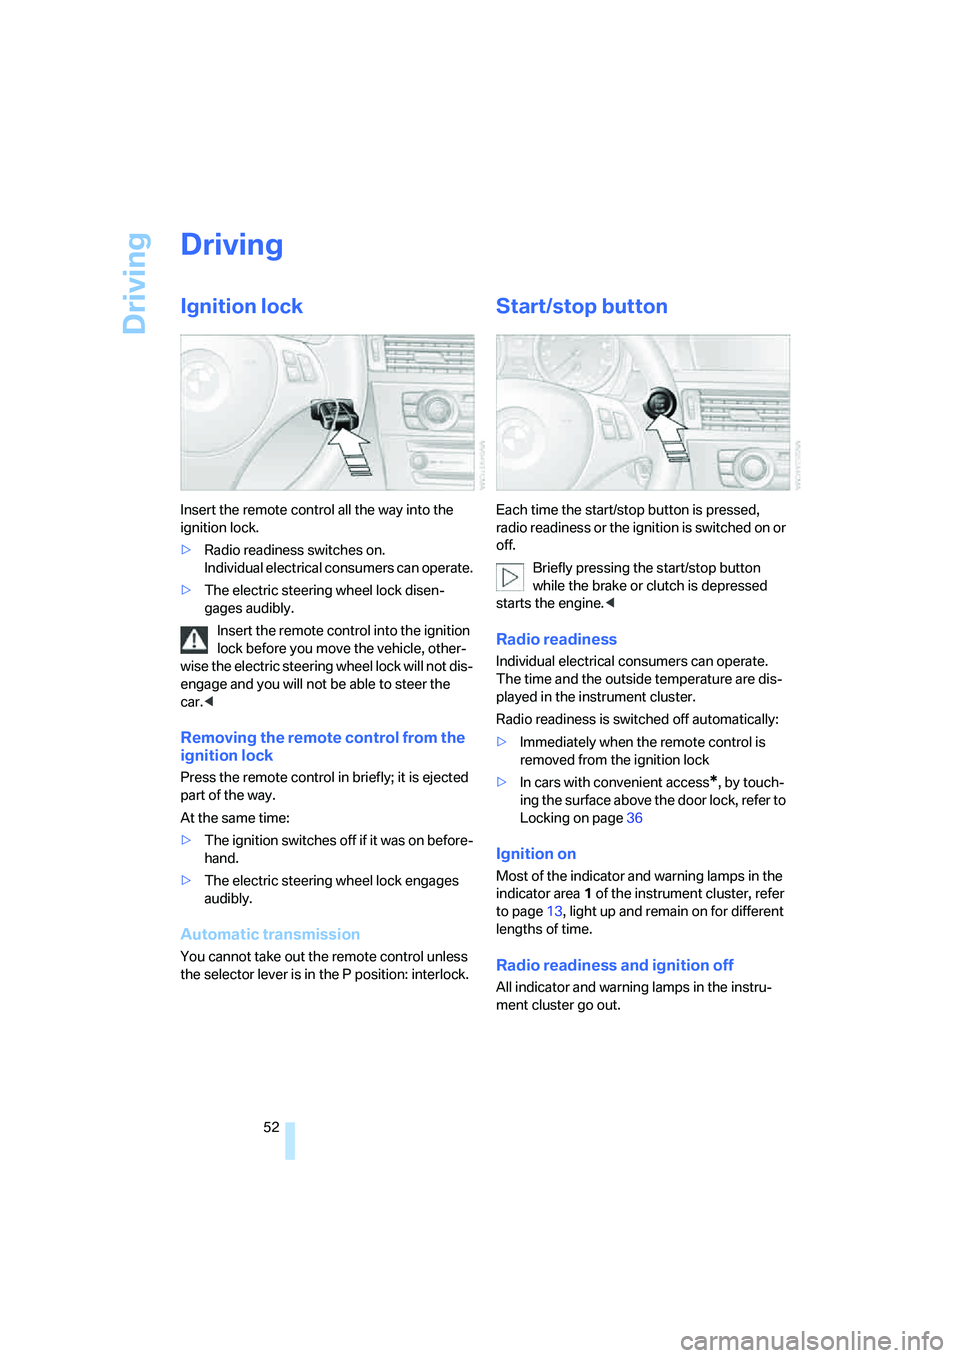
Ignition lock
Insert the remote control all the way into the
ignition lock.
>Radio readiness switches on.
Individual electrical consumers can operate.
>The electric steering wheel lock disen-
gages audibly.
Insert the remote control into the ignition
lock before you move the vehicle, other-
wise the electric steering wheel lock will not dis-
engage and you will not be able to steer the
car.<
Removing the remote control from the
ignition lock
Press the remote control in briefly; it is ejected
part of the way.
At the same time:
>The ignition switches off if it was on before-
hand.
>The electric steering wheel lock engages
audibly.
Automatic transmission
You cannot take out the remote control unless
the selector lever is in the P position: interlock.
Start/stop button
Each time the start/stop button is pressed,
radio readiness or the ignition is switched on or
off.
Briefly pressing the start/stop button
while the brake or clutch is depressed
starts the engine.<
Radio readiness
Individual electrical consumers can operate.
The time and the outside temperature are dis-
played in the instrument cluster.
Radio readiness is switched off automatically:
>Immediately when the remote control is
removed from the ignition lock
>In cars with convenient access
*, by touch-
ing the surface above the door lock, refer to
Locking on page36
Ignition on
Most of the indicator and warning lamps in the
indicator area1 of the instrument cluster, refer
to page13, light up and remain on for different
lengths of time.
Radio readiness and ignition off
All indicator and warning lamps in the instru-
ment cluster go out.
Page 55 of 245
Controls
53Reference
At a glance
Driving tips
Communications
Navigation
Entertainment
Mobility
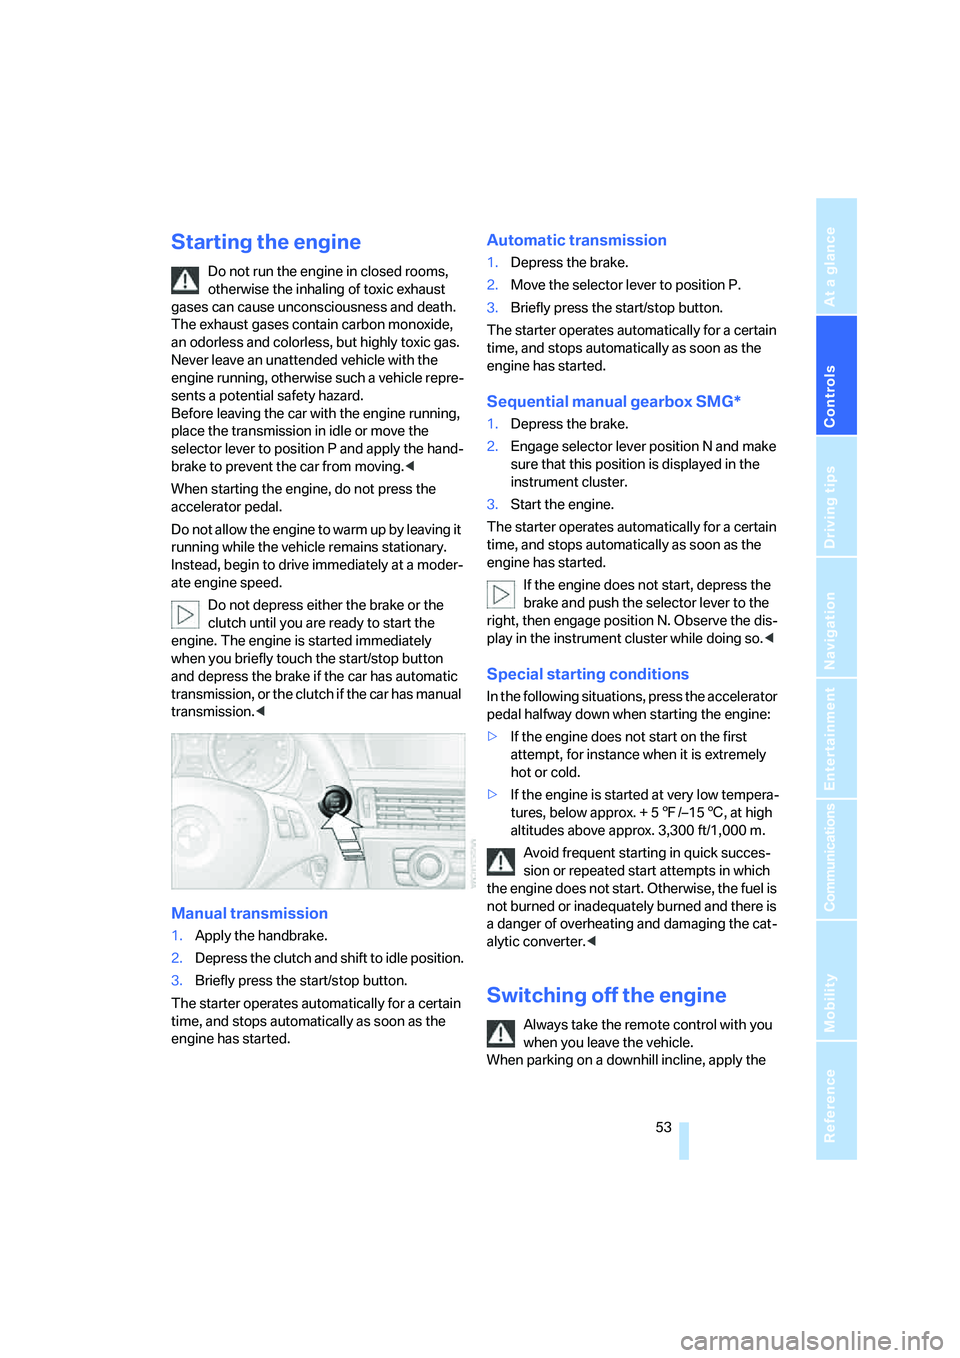
Starting the engine
Do not run the engine in closed rooms,
otherwise the inhaling of toxic exhaust
gases can cause unconsciousness and death.
The exhaust gases contain carbon monoxide,
an odorless and colorless, but highly toxic gas.
Never leave an unattended vehicle with the
engine running, otherwise such a vehicle repre-
sents a potential safety hazard.
Before leaving the car with the engine running,
place the transmission in idle or move the
selector lever to position P and apply the hand-
brake to prevent the car from moving.<
When starting the engine, do not press the
accelerator pedal.
Do not allow the engine to warm up by leaving it
running while the vehicle remains stationary.
Instead, begin to drive immediately at a moder-
ate engine speed.
Do not depress either the brake or the
clutch until you are ready to start the
engine. The engine is started immediately
when you briefly touch the start/stop button
and depress the brake if the car has automatic
transmission, or the clutch if the car has manual
transmission.<
Manual transmission
1.Apply the handbrake.
2.Depress the clutch and shift to idle position.
3.Briefly press the start/stop button.
The starter operates automatically for a certain
time, and stops automatically as soon as the
engine has started.
Automatic transmission
1.Depress the brake.
2.Move the selector lever to position P.
3.Briefly press the start/stop button.
The starter operates automatically for a certain
time, and stops automatically as soon as the
engine has started.
Sequential manual gearbox SMG*
1.Depress the brake.
2.Engage selector lever position N and make
sure that this position is displayed in the
instrument cluster.
3.Start the engine.
The starter operates automatically for a certain
time, and stops automatically as soon as the
engine has started.
If the engine does not start, depress the
brake and push the selector lever to the
right, then engage position N. Observe the dis-
play in the instrument cluster while doing so.<
Special starting conditions
In the following situations, press the accelerator
pedal halfway down when starting the engine:
>If the engine does not start on the first
attempt, for instance when it is extremely
hot or cold.
>If the engine is started at very low tempera-
tures, below approx. + 57/–156, at high
altitudes above approx. 3,300 ft/1,000 m.
Avoid frequent starting in quick succes-
sion or repeated start attempts in which
the engine does not start. Otherwise, the fuel is
not burned or inadequately burned and there is
a danger of overheating and damaging the cat-
alytic converter.<
Switching off the engine
Always take the remote control with you
when you leave the vehicle.
When parking on a downhill incline, apply the
Page 59 of 245

Controls
57Reference
At a glance
Driving tips
Communications
Navigation
Entertainment
Mobility
Acceleration assistant
The acceleration assistant provides for optimal,
racing-style acceleration when starting off on a
non-slippery surface.
Do not use the acceleration assistant too
frequently, otherwise components could
wear prematurely.<
1.Activate Dynamic Driving Control.
2.Deactivate DSC, refer to page85.
3.Quickly depress the accelerator pedal all
the way: kick-down. The optimal engine
speed for pulling away is achieved.
To maintain driving stability, reactivate
DSC afterward.<
Automatic transmission with
Steptronic*
In addition to fully automatic operation, you can
also manually shift with the Steptronic, refer to
page58.
Vehicle parking
To prevent the vehicle from rolling,
always select position P and apply the
handbrake before leaving the vehicle with the
engine running.<
Disengaging the remote control
In order to remove the remote control from the
ignition lock, you must first move the selector
lever to position P and switch off the engine:
interlock.
Selector lever positions
P R N D M/S + –
Displays in the instrument cluster
P R N D DS M1 to M6
The selector lever position is displayed, or the
current gear in the manual mode.
Changing selector lever positions
>With the ignition switched on or the engine
running, the selector lever can be moved
out of position P: interlock.
>Before moving the lever away from P or N
with the vehicle stationary, first depress the
brake; otherwise the selector lever will
refuse to move: shiftlock.
To prevent the vehicle from creeping
after you select a driving position,
depress the brake until you are ready to
start.<
A lock prevents you from inadvertently engag-
ing selector lever positions R and P. To cancel
the lock, press the button on the front of the
selector lever, refer to arrow.
P Park
Select only when the vehicle is stationary. The
rear wheels are locked.
Page 75 of 245
Controls
73Reference
At a glance
Driving tips
Communications
Navigation
Entertainment
Mobility
Settings and information
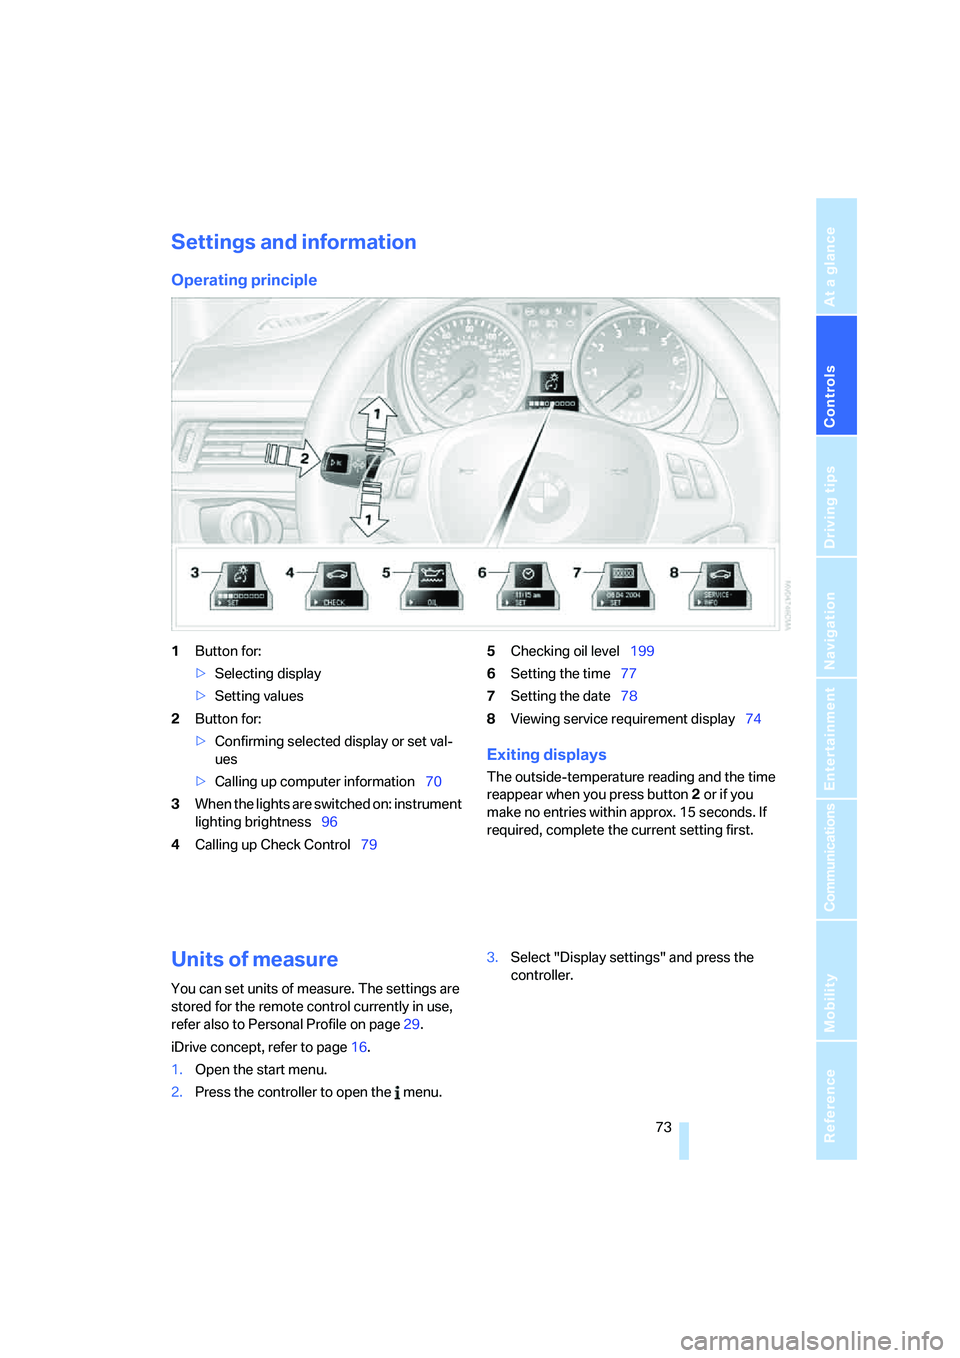
Operating principle
1Button for:
>Selecting display
>Setting values
2Button for:
>Confirming selected display or set val-
ues
>Calling up computer information70
3When the lights are switched on: instrument
lighting brightness96
4Calling up Check Control795Checking oil level199
6Setting the time77
7Setting the date78
8Viewing service requirement display74
Exiting displays
The outside-temperature reading and the time
reappear when you press button2 or if you
make no entries within approx. 15 seconds. If
required, complete the current setting first.
Units of measure
You can set units of measure. The settings are
stored for the remote control currently in use,
refer also to Personal Profile on page29.
iDrive concept, refer to page16.
1.Open the start menu.
2.Press the controller to open the menu.3.Select "Display settings" and press the
controller.
Page 76 of 245
Everything under control
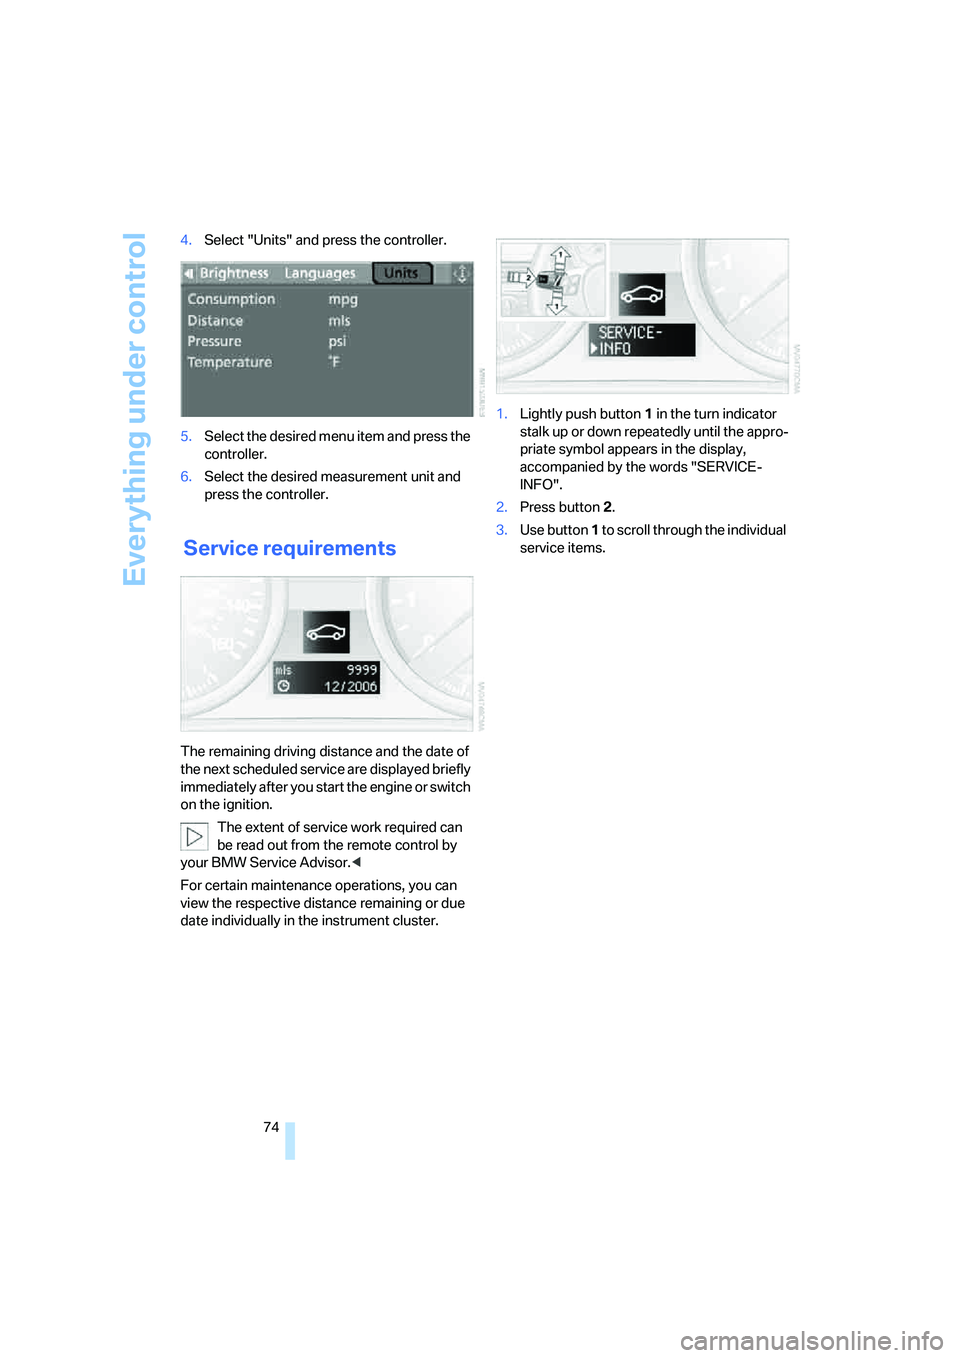
74 4.Select "Units" and press the controller.
5.Select the desired menu item and press the
controller.
6.Select the desired measurement unit and
press the controller.
Service requirements
The remaining driving distance and the date of
the next scheduled service are displayed briefly
immediately after you start the engine or switch
on the ignition.
The extent of service work required can
be read out from the remote control by
your BMW Service Advisor.<
For certain maintenance operations, you can
view the respective distance remaining or due
date individually in the instrument cluster.1.Lightly push button 1 in the turn indicator
stalk up or down repeatedly until the appro-
priate symbol appears in the display,
accompanied by the words "SERVICE-
INFO".
2.Press button 2.
3.Use button 1 to scroll through the individual
service items.
Page 79 of 245
Controls
77Reference
At a glance
Driving tips
Communications
Navigation
Entertainment
Mobility
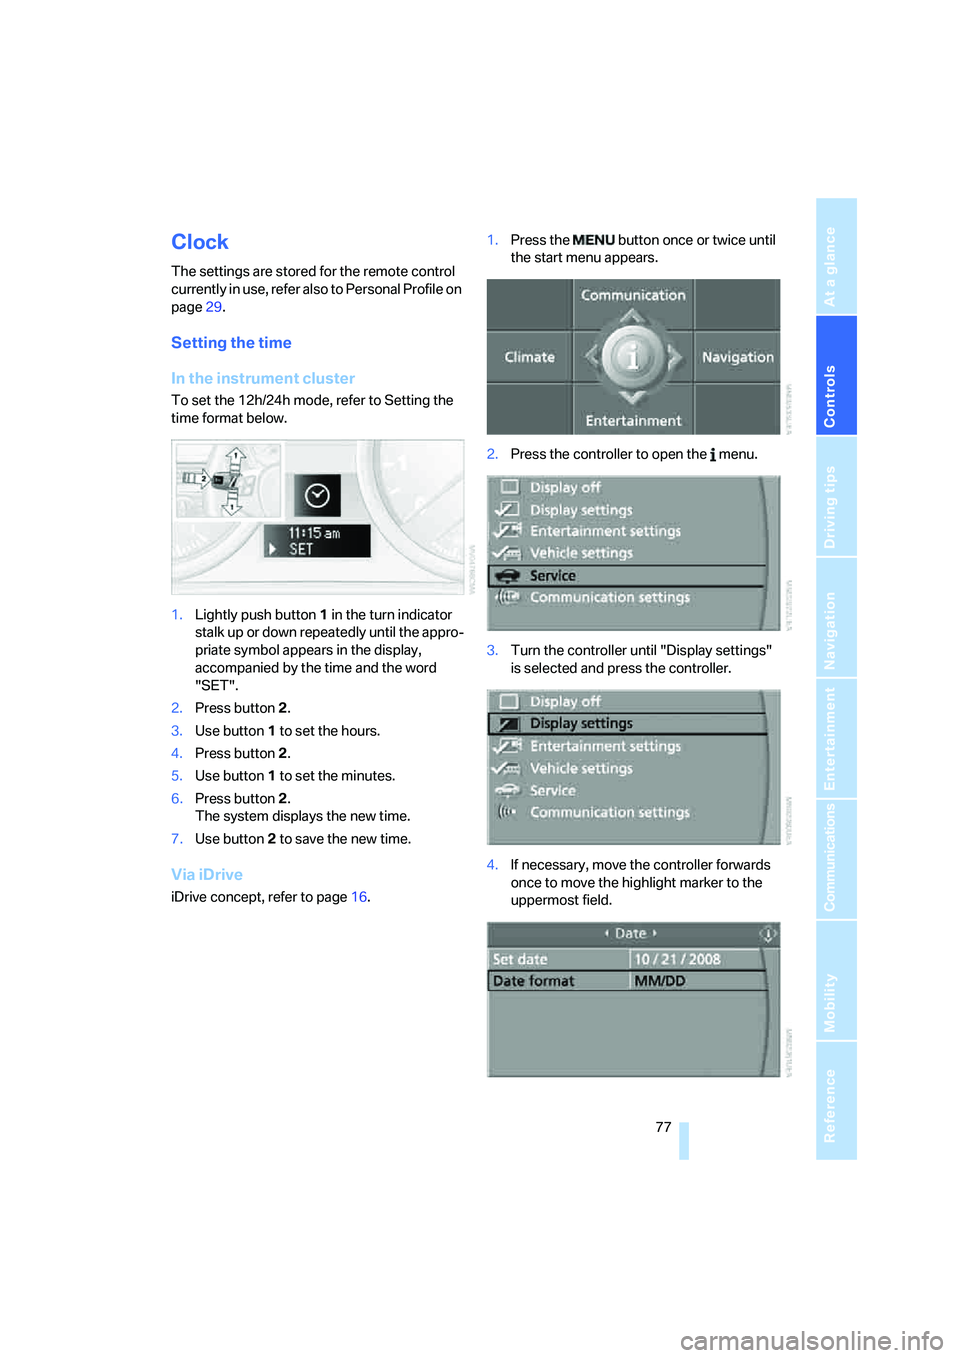
Clock
The settings are stored for the remote control
currently in use, refer also to Personal Profile on
page29.
Setting the time
In the instrument cluster
To set the 12h/24h mode, refer to Setting the
time format below.
1.Lightly push button 1 in the turn indicator
stalk up or down repeatedly until the appro-
priate symbol appears in the display,
accompanied by the time and the word
"SET".
2.Press button 2.
3.Use button 1 to set the hours.
4.Press button 2.
5.Use button 1 to set the minutes.
6.Press button 2.
The system displays the new time.
7.Use button 2 to save the new time.
Via iDrive
iDrive concept, refer to page16.1.Press the button once or twice until
the start menu appears.
2.Press the controller to open the menu.
3.Turn the controller until "Display settings"
is selected and press the controller.
4.If necessary, move the controller forwards
once to move the highlight marker to the
uppermost field.
Page 80 of 245

Everything under control
78 5.Turn the controller until "Time" is selected
and press the controller.
6.Turn the controller until "Set time" is
selected and press the controller.
Adjusting settings
7.Turn the controller to set the hours and
press the controller.
8.Turn the controller to set the minutes and
press the controller.
The system accepts the new time.
Switching on the hour signal*
You will hear three tones just before each full
hour.
Select "Hour memo" and press the controller.
The hour signal is activated.
Setting the time format
1.Open the start menu.
2.Press the controller to open the menu.
3.Select "Display settings" and press the
controller.
4.Select "Time" and press the controller.
5.Select "Time format" and press the control-
ler.6.Select the desired format and press the
controller.
Date
The settings are stored for the remote control
currently in use, refer also to Personal Profile on
page29.
Setting the date
In the instrument cluster
To set the dd/mm or mm/dd date format, refer
to Setting the date format below.
1.Lightly push button 1 in the turn indicator
stalk up or down repeatedly until the appro-
priate symbol appears in the display,
accompanied by the date and the word
"SET".
2.Press button 2.
3.Use button 1 to set the day of the month.
4.Press button 2.
5.Set the month and the yea r i n t he s a m e w a y .
6.Press button 2.
The system displays the new date.
7.Use button 2 to save the new date.
Via iDrive
iDrive concept, refer to page16.
1.Open the start menu.
2.Press the controller to open the menu.
3.Select "Display settings" and press the
controller.
Page 84 of 245
Everything under control
82
Starting, stopping or resetting
>Select "Start" and press the controller.
The stopwatch starts at the displayed time.
>Select "Reset" and press the controller.
The stopwatch is reset and restarts if it was
running beforehand.
>Select "Stop" and press the controller.
This stops the timer.
Taking an interim time reading
Select "Interim time" and press the controller.
The interim time appears below the ongoing
primary stopwatch count.
All of the remaining functions remain
available at all times while the stopwatch
is running. The stopwatch continues operation
in the background.<
Altering settings
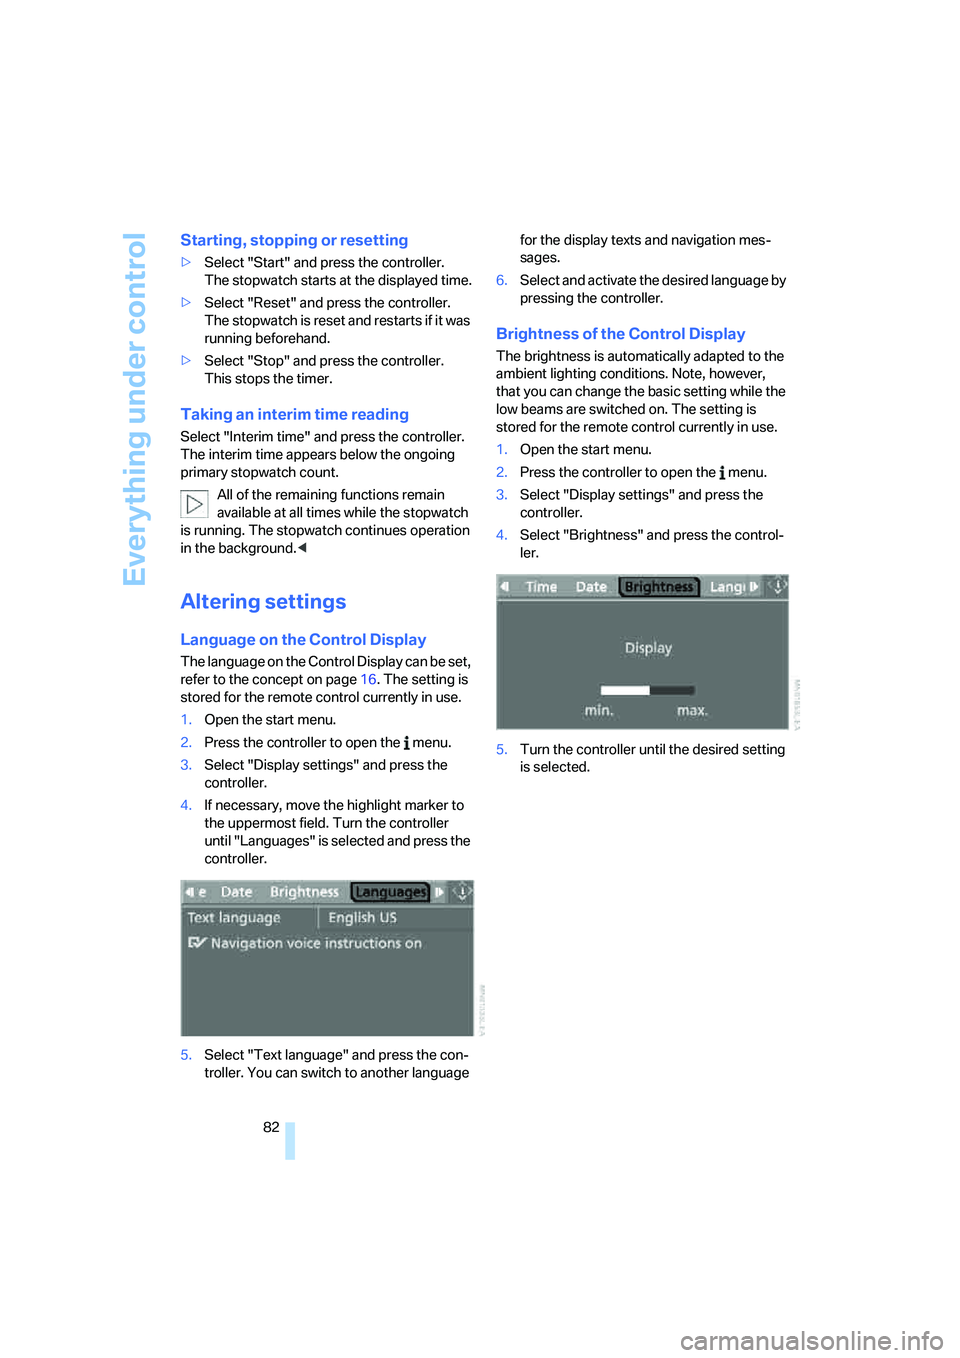
Language on the Control Display
The language on the Control Display can be set,
refer to the concept on page16. The setting is
stored for the remote control currently in use.
1.Open the start menu.
2.Press the controller to open the menu.
3.Select "Display settings" and press the
controller.
4.If necessary, move the highlight marker to
the uppermost field. Turn the controller
until "Languages" is selected and press the
controller.
5.Select "Text language" and press the con-
troller. You can switch to another language for the display texts and navigation mes-
sages.
6.Select and activate the desired language by
pressing the controller.
Brightness of the Control Display
The brightness is automatically adapted to the
ambient lighting conditions. Note, however,
that you can change the basic setting while the
low beams are switched on. The setting is
stored for the remote control currently in use.
1.Open the start menu.
2.Press the controller to open the menu.
3.Select "Display settings" and press the
controller.
4.Select "Brightness" and press the control-
ler.
5.Turn the controller until the desired setting
is selected.