2006 BMW 330CI CONVERTABLE light
[x] Cancel search: lightPage 126 of 190
126
Inclines:
To prevent overheating and, as a
result, diminished braking effec-
tiveness, drive down long or steep
downhill grades in a gear which
requires the least braking. Otherwise,
even light but consistent pedal pres-
sure can lead to high temperatures,
brake wear and possibly even brake
failure.<
The braking power of the engine can be
further enhanced by downshifting the
automatic transmission in manual
mode, if necessary, into first gear. This
helps avoid placing excessive loads on
the brake system.
Do not coast with the clutch
depressed or with the transmis-
sion or selector lever in Neutral. Do not
coast with the engine switched off. Oth-
erwise, the engine provides no braking
effect while the transmission is in idling
position, and there is no power-assist
for braking or steering when the engine
is off.
Floor mats, floor carpets or other
objects must not be in the area near the
brake or accelerator pedal, as this
could impair the movement of the ped-
als.<
Corrosion on the brake rotorsLimited vehicle use, extended periods
with the vehicle parked or in storage,
and operating conditions in which brak-
ing is restricted to gentle, low-pressure
applications will all increase the ten-
dency for corrosion to form on the
rotors and contamination to accumulate
on the brake pads. This occurs because
the minimal pressure which must be
exerted by the pads to clean the rotors
by brake applications is not reached.
If the brake rotors are corroded, they
will tend to respond to braking with a
pulsating effect that even extended
brake applications will fail to cure.
Brake pads
For your own safety: use only
brake pads that BMW has
released for your particular vehicle
model. BMW cannot evaluate non-
approved brake pads to determine if
they are suitable for use, and therefore
cannot ensure the operating safety of
the vehicle if they are installed.<
Portable phone in the vehicle
BMW advises against using
mobile equipment, e.g. cellular
phones, inside the vehicle without con-
necting them directly to an outside
antenna. Otherwise, it cannot be ruled
out that vehicle electronics and the
mobile equipment interfere with one
another. In addition, it is not ensured
that the radio waves emitted during
transmission are directed outside of the
vehicle interior.<
General driving notes
Page 128 of 190
128
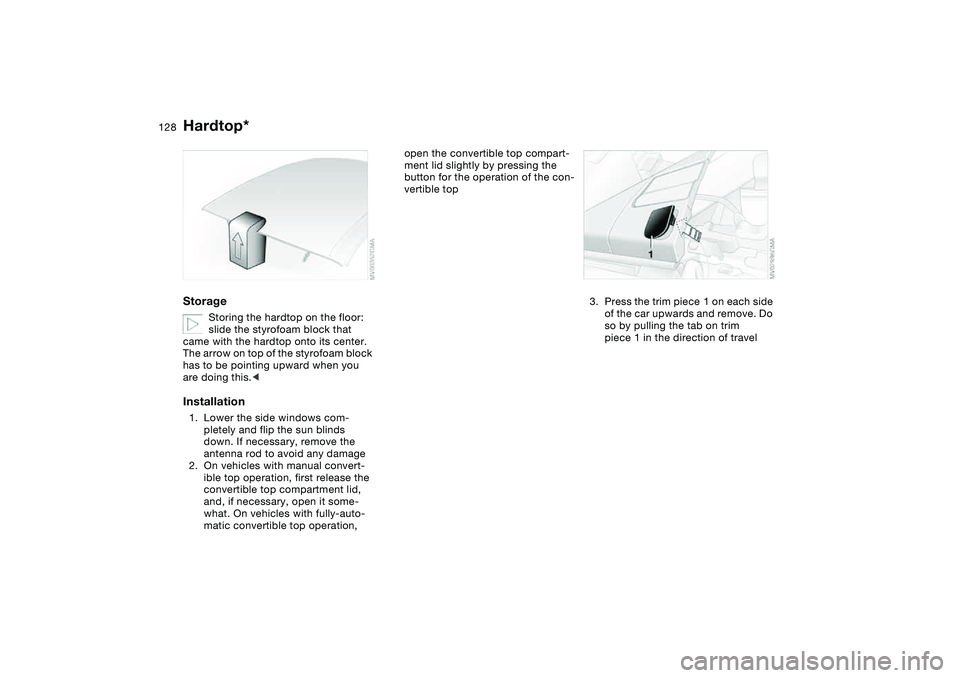
Storage
Storing the hardtop on the floor:
slide the styrofoam block that
came with the hardtop onto its center.
The arrow on top of the styrofoam block
has to be pointing upward when you
are doing this.<
Installation1. Lower the side windows com-
pletely and flip the sun blinds
down. If necessary, remove the
antenna rod to avoid any damage
2. On vehicles with manual convert-
ible top operation, first release the
convertible top compartment lid,
and, if necessary, open it some-
what. On vehicles with fully-auto-
matic convertible top operation,
open the convertible top compart-
ment lid slightly by pressing the
button for the operation of the con-
vertible top
3. Press the trim piece 1 on each side
of the car upwards and remove. Do
so by pulling the tab on trim
piece 1 in the direction of travel
Hardtop*
Page 129 of 190
129
4. Open the two locking levers at the
front of the hardtop. Press on the
buttons to do so. The levers will
release slightly. Open the levers as
far as possible
5. Before installing, first flip down the
cover panels 2 that are located
underneath the left and right inte-
rior lamps. To do this, press on the
slight bump on cover panel 2.
There is a holder in the cover panel
to securely store the trim pieces
that have been removed. Pull the
adapter 3 out of the holder, clip the
trim piece into the bottom and rein-
sert the adapter
6. Open the red locking levers as far
as the stop will allow, see arrow 4
7. Position the hardtop onto the sup-
port brackets with the help of a
second person. Be sure to put the
mountings exactly into the proper
brackets
Lift the hardtop carefully. Be
extremely careful not to shift the
seals. Seals that have been shifted out
of place or actually pulled out cause
leaks.<
8. In the back, close the red locking
levers by turning to the inside as far
as the stop located behind the trim
will allow. Flip the cover panels
back into place
9. To lock the hardtop in the front,
close the front locking levers until
you hear them engage
10. Check the seal between the wind-
shield frame and the hardtop on
both the left and right sides. If it is
folded or bent out of place, you
should smooth it back into position
by hand to ensure secure and reli-
able sealing.RemovalFollow the same procedure as when
installing, just reverse the steps.
Hardtop*
OverviewControlsMaintenanceRepairsDataIndex
Page 136 of 190
136
If there is a total loss of tire inflation
pressure, 0 psi/0 kPa, or obvious tire
damage, you can determine the dis-
tance you may continue driving based
on the following values:
>With a light load:
1 to 2 persons without luggage:
approx. 155 miles/250 km
>With a medium load:
2 persons, luggage compartment full;
or 4 persons without luggage:
approx. 90 miles/150 km
>With a full load:
4 persons or more, luggage compart-
ment full:
approx. 30 miles/50 km
Drive cautiously. Do not exceed a
speed of 50 mph / 80 km/h. Be
aware that vehicle handling will be
altered when there is a loss in inflation
pressure. Anticipate, e.g., reduced
tracking during braking, longer braking
distances and changed steering char-
acteristics.
For safety reasons, BMW recommends
not having damaged Run Flat tires
repaired. In this case, consult your
BMW center.<
New wheels and tires
Have new wheels and tires
mounted only by a skilled profes-
sional. Work that is improperly carried
out could result in consequential dam-
age and pose safety hazards.<
Ask your BMW center for details con-
cerning the correct wheel and tire com-
bination. Have the wheels balanced
each time a wheel or tire has been
replaced.
The correct wheel and tire combination
also affects different systems such as
ABS or DSC. The function of these sys-
tems is impaired if improper wheel and
tire combinations are used.
BMW advises against using
retreaded tires, as driving safety
could otherwise be impaired. This is
due to the possible variations in casing
structures and, in some cases, to their
extreme age, which can lead to a
decrease in their durability.<
The correct wheels and tires
BMW recommends using only
wheels and tires that have been
tested and approved by BMW for the
particular vehicle model, as otherwise
body contact and serious accidents can
result despite the use of the same nom-
inal size, e.g. due to manufacturing tol-
erances. BMW cannot evaluate all tires
and wheels on the market, and is thus
unable to guarantee that the vehicle will
continue to perform safely if unap-
proved tires and/or wheels are
mounted.<
To maintain good handling and vehicle
response, use only tires of a single
brand and tread configuration. After a
flat tire, have the previous wheel and
tire combination restored as soon as
possible.
Recommended tire sizes and
brandsFor each tire size, certain tire brands
have been tested, classified as road-
safe and approved by BMW. You can
find out about these from a professional
Run Flat tires*
Page 137 of 190
137
tire center, preferably your BMW cen-
ter. Observe any country-specific regu-
lations, e.g. on making a corresponding
entry in the vehicle documents.
The factory-approved radial belt tires
are matched to your vehicle and pro-
vide optimum safety and driving com-
fort when used properly.Run Flat tiresIf your vehicle is equipped with Run Flat
tires, refer to Run Flat tires, use only
these tires since no spare wheel is
available in the event of a flat.Special characteristics of winter
tiresBMW recommends the use of winter
tires for operation under winter road
conditions. While all-season tires with
M+S designation provide better winter
traction than summer tires, they gener-
ally do not achieve the full performance
of winter tires.
Run Flat tires:
If your vehicle is equipped with Run Flat
tires, refer to Run Flat tires, please note
the following: when mounting new tires
or replacing summer tires with winter tires, or vice versa, use only Run Flat
tires since no spare wheel is available
in the event of a flat. Your BMW center
wil be glad to advise you.
Observing speed ratings:
Never exceed the maximum
speed for which the winter tires
are rated. Unprofessional attempts by
laymen to service tires can lead to dam-
age and accidents. Have this work per-
formed by skilled professionals only.
The technicians at your BMW center
will be glad to assist you with the
required professional knowledge and
specialized equipment.<
StorageAlways store tires in a cool, dry place.
Store them away from light whenever
possible. Protect the tires against con-
tact with oil, grease and fuel. Do not
exceed the maximum tire inflation pres-
sures specified on the tire sidewall.
Snow chains*Only certain snow chains have been
tested by BMW and determined and
approved as roadworthy. Consult your
BMW center for details. BMW recom-
mends using only these approved fine-
link snow chains. Use them in pairs on
either summer or winter tires, but only
on both rear wheels.
Comply with all manufacturer's safety
precautions when mounting the chains.
Do not exceed a speed of 30 mph /
50 km/h when using snow chains.
You cannot mount snow chains with the
following tires:
>225/50 R 16
>225/45 R 17
>245/40 R 17
>225/40 R 18
>255/35 R 18.
Do not initialize the Flat Tire Moni-
tor after mounting snow chains to
the tires.
When driving with snow chains, it may
be useful to turn off the DSC for a short
time, refer to page 92.<
New wheels and tires
OverviewControlsMaintenanceRepairsDataIndex
Page 144 of 190
144
Coolant
Do not add coolant to the cooling
system when the engine is hot. If
you attempt to do so, escaping coolant
can cause burns.<
Coolant consists of water as well as an
additive such as antifreeze with corro-
sion inhibitor. Not all commercially
available additives are suitable for your
BMW. Your BMW center knows which
additives are appropriate.
Only use approved additives, as
the engine could otherwise be
damaged. The additives are hazardous
to your health; therefore, follow the
instructions on the containers.<
Comply with the applicable envi-
ronmental laws regulating the dis-
posal of antifreeze with corrosion inhib-
itor.<
Checking the coolant level and
adding coolantCheck the coolant level when the
engine is cold, approx. 687/+206.
1. Open the cap for the expansion tank
by turning it slightly counterclock-
wise to allow accumulated pressure
to escape, then open
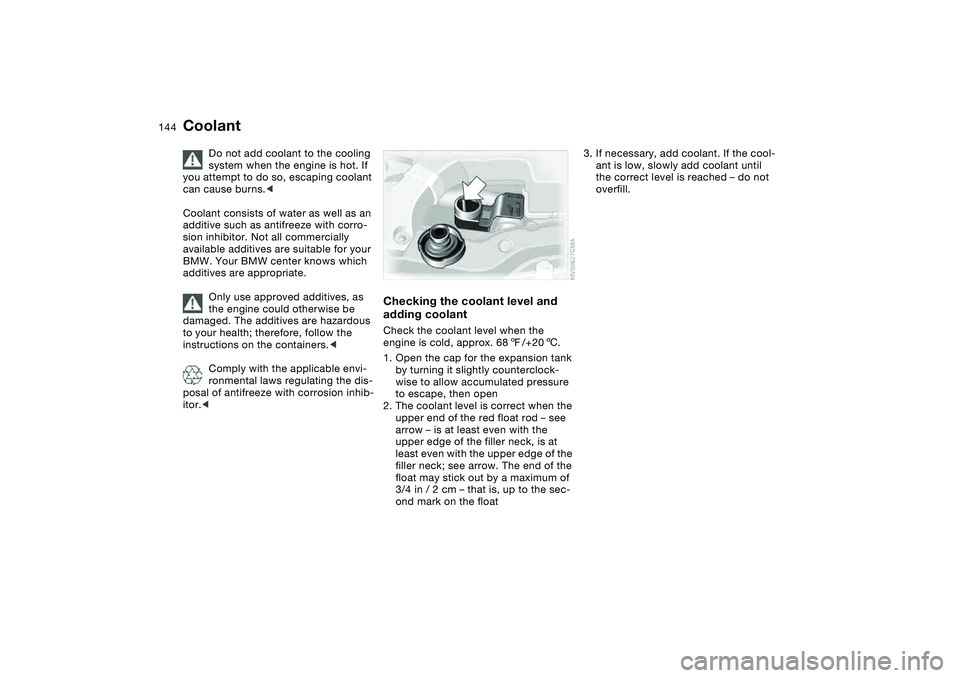
2. The coolant level is correct when the
upper end of the red float rod – see
arrow – is at least even with the
upper edge of the filler neck, is at
least even with the upper edge of the
filler neck; see arrow. The end of the
float may stick out by a maximum of
3/4 in / 2 cm – that is, up to the sec-
ond mark on the float
3. If necessary, add coolant. If the cool-
ant is low, slowly add coolant until
the correct level is reached – do not
overfill.
Page 149 of 190
149
engine misfiring for even a short period
of time can seriously damage emission
control system components, especially
the catalytic converter.
SERVICE ENGINE SOON warn-
ing lamp for Canadian models.
If the gas cap is not on tight
enough, the OBD system can
detect leaking vapor and the indicator
will light up. If the gas cap is then tight-
ened, the indicator will usually go out
after a short period of time.
Page 154 of 190
154
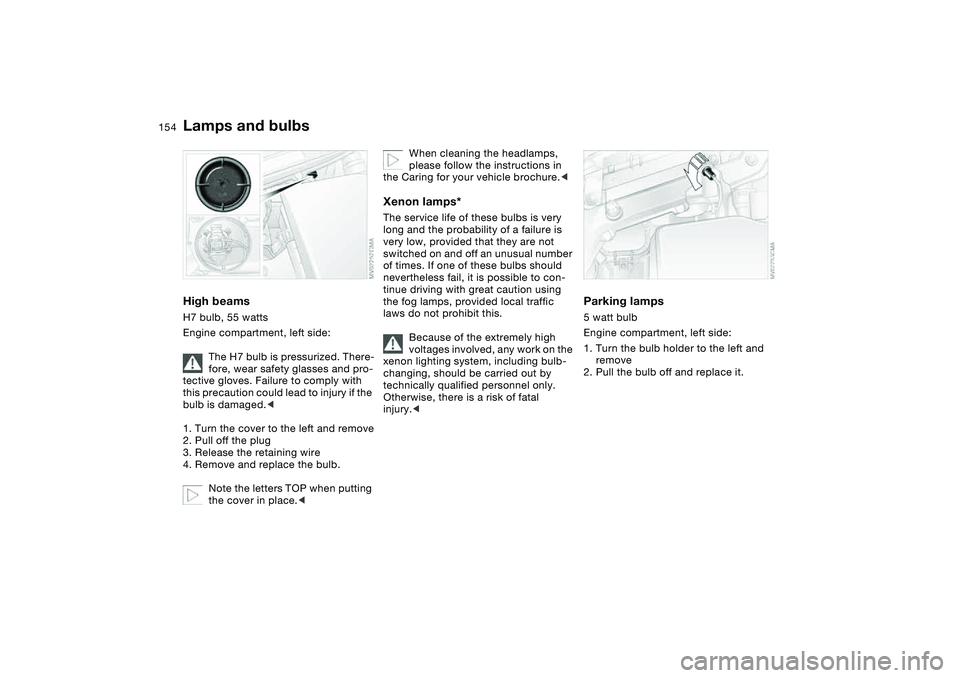
High beamsH7 bulb, 55 watts
Engine compartment, left side:
The H7 bulb is pressurized. There-
fore, wear safety glasses and pro-
tective gloves. Failure to comply with
this precaution could lead to injury if the
bulb is damaged.<
1. Turn the cover to the left and remove
2. Pull off the plug
3. Release the retaining wire
4. Remove and replace the bulb.
Note the letters TOP when putting
the cover in place.<
When cleaning the headlamps,
please follow the instructions in
the Caring for your vehicle brochure.<
Xenon lamps*The service life of these bulbs is very
long and the probability of a failure is
very low, provided that they are not
switched on and off an unusual number
of times. If one of these bulbs should
nevertheless fail, it is possible to con-
tinue driving with great caution using
the fog lamps, provided local traffic
laws do not prohibit this.
Because of the extremely high
voltages involved, any work on the
xenon lighting system, including bulb-
changing, should be carried out by
technically qualified personnel only.
Otherwise, there is a risk of fatal
injury.<
Parking lamps5 watt bulb
Engine compartment, left side:
1. Turn the bulb holder to the left and
remove
2. Pull the bulb off and replace it.
Lamps and bulbs