2006 BMW 330CI CONVERTABLE manual transmission
[x] Cancel search: manual transmissionPage 77 of 190

77
Automatic transmission with Steptronic*In addition to the fully automatic opera-
tion, you can also shift gears manually
with Steptronic, refer to page 78.
When you move the selector lever from
the D position to the left into the M/S
range, the performance-oriented shift
programs of the automatic transmission
are engaged. Steptronic enters the
manual selection mode and executes
the desired shift whenever you tap the
selector lever in the direction indicated
by + or –. Whenever you want to use
automatic again, just move the selector
lever toward the right to position D.
Under normal operating conditions, fuel
consumption is lowest when driving in
position D.Selector lever positionsP R N D M/S + –Starting the engineThe engine can only be started in selec-
tor lever positions P – for Park – or N –
for Neutral.
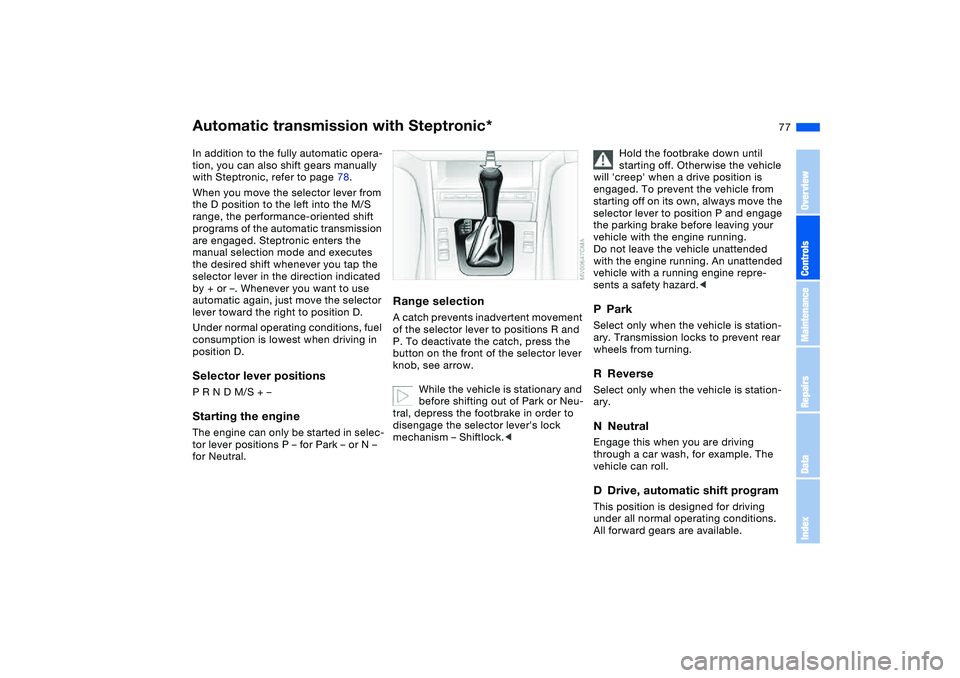
Range selectionA catch prevents inadvertent movement
of the selector lever to positions R and
P. To deactivate the catch, press the
button on the front of the selector lever
knob, see arrow.
While the vehicle is stationary and
before shifting out of Park or Neu-
tral, depress the footbrake in order to
disengage the selector lever's lock
mechanism – Shiftlock.<
Hold the footbrake down until
starting off. Otherwise the vehicle
will 'creep' when a drive position is
engaged. To prevent the vehicle from
starting off on its own, always move the
selector lever to position P and engage
the parking brake before leaving your
vehicle with the engine running.
Do not leave the vehicle unattended
with the engine running. An unattended
vehicle with a running engine repre-
sents a safety hazard.<
PParkSelect only when the vehicle is station-
ary. Transmission locks to prevent rear
wheels from turning.RReverseSelect only when the vehicle is station-
ary.NNeutralEngage this when you are driving
through a car wash, for example. The
vehicle can roll.DDrive, automatic shift programThis position is designed for driving
under all normal operating conditions.
All forward gears are available.
OverviewControlsMaintenanceRepairsDataIndex
Page 78 of 190

78
KickdownYou can achieve maximum road perfor-
mance using kickdown.
Depress the accelerator pedal past the
increased resistance point at the full-
throttle position.
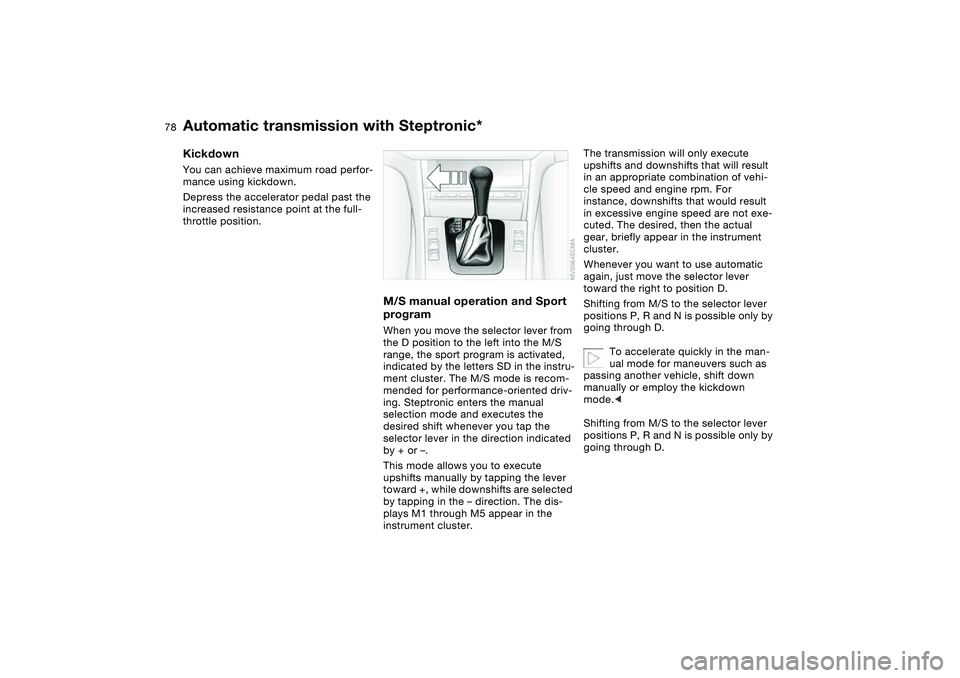
M/S manual operation and Sport
programWhen you move the selector lever from
the D position to the left into the M/S
range, the sport program is activated,
indicated by the letters SD in the instru-
ment cluster. The M/S mode is recom-
mended for performance-oriented driv-
ing. Steptronic enters the manual
selection mode and executes the
desired shift whenever you tap the
selector lever in the direction indicated
by + or –.
This mode allows you to execute
upshifts manually by tapping the lever
toward +, while downshifts are selected
by tapping in the – direction. The dis-
plays M1 through M5 appear in the
instrument cluster.
The transmission will only execute
upshifts and downshifts that will result
in an appropriate combination of vehi-
cle speed and engine rpm. For
instance, downshifts that would result
in excessive engine speed are not exe-
cuted. The desired, then the actual
gear, briefly appear in the instrument
cluster.
Whenever you want to use automatic
again, just move the selector lever
toward the right to position D.
Shifting from M/S to the selector lever
positions P, R and N is possible only by
going through D.
To accelerate quickly in the man-
ual mode for maneuvers such as
passing another vehicle, shift down
manually or employ the kickdown
mode.<
Shifting from M/S to the selector lever
positions P, R and N is possible only by
going through D.
Automatic transmission with Steptronic*
Page 125 of 190

125
General driving notesHot exhaust system
High temperatures occur with
every vehicle equipped with a cat-
alytic converter. Heat shields are
installed adjacent to some sections of
the exhaust system. Never remove
these shields; do not apply undercoat-
ing to their surfaces. When driving,
standing at idle and parking the vehicle,
take care to avoid contact between the
hot exhaust system and flammable
materials, e.g. hay, leaves, grass, etc.
Such contact could lead to a fire,
resulting in serious personal injury and
property damage.<
Parking the vehicleCondensation forms in the air condi-
tioner system during operation, which
then exits under the vehicle. It is thus
not unusual for a small puddle to form
under the car while the system is run-
ning.Before driving through a car washFold in the exterior mirrors manually
because they could otherwise be dam-
aged due to the width of the vehicle.
Hydroplaning
When driving on wet or slushy
roads, reduce vehicle speed. If
you do not, a wedge of water may form
between tire and road surface. This
phenomenon is referred to as hydro-
planing, and can lead to partial or com-
plete loss of traction, vehicle control
and braking effectiveness.<
The risk of hydroplaning increases as
the tread depth of the tires decreases,
refer also to Tire tread on page 135.
Driving through water
Do not drive through water on the
road if it is deeper than 1 ft/30 cm,
and then only at walking speed. Other-
wise, the vehicle's engine, the electrical
systems and the transmission may be
damaged.<
Braking safelyYour BMW is equipped with ABS as a
standard feature. If you are in a situa-
tion which requires full braking, it is
best to brake using maximum brake
pressure: panic stop. Since the vehicle
maintains steering responsiveness, you
can avoid possible obstacles with a
minimum of steering effort, despite the
full brake application.
Pulsation at the brake pedal combined
with sounds from the hydraulic circuits
indicates to the driver that ABS is in its
active mode.
Do not drive with your foot resting
on the brake pedal. Otherwise,
even light but consistent pedal pres-
sure can lead to high temperatures,
brake wear and possibly even brake
failure.<
Wet roads:
if the roads are wet or if there is heavy
rain, it is advisable to gently press the
brakes for a brief moment every few
miles/kilometers. Monitor traffic condi-
tions to ensure that this maneuver does
not endanger other road users. The
heat generated in this process helps
dry the pads and rotors. Immediate
braking force is then available if neces-
sary.
OverviewControlsMaintenanceRepairsDataIndex
Page 126 of 190

126
Inclines:
To prevent overheating and, as a
result, diminished braking effec-
tiveness, drive down long or steep
downhill grades in a gear which
requires the least braking. Otherwise,
even light but consistent pedal pres-
sure can lead to high temperatures,
brake wear and possibly even brake
failure.<
The braking power of the engine can be
further enhanced by downshifting the
automatic transmission in manual
mode, if necessary, into first gear. This
helps avoid placing excessive loads on
the brake system.
Do not coast with the clutch
depressed or with the transmis-
sion or selector lever in Neutral. Do not
coast with the engine switched off. Oth-
erwise, the engine provides no braking
effect while the transmission is in idling
position, and there is no power-assist
for braking or steering when the engine
is off.
Floor mats, floor carpets or other
objects must not be in the area near the
brake or accelerator pedal, as this
could impair the movement of the ped-
als.<
Corrosion on the brake rotorsLimited vehicle use, extended periods
with the vehicle parked or in storage,
and operating conditions in which brak-
ing is restricted to gentle, low-pressure
applications will all increase the ten-
dency for corrosion to form on the
rotors and contamination to accumulate
on the brake pads. This occurs because
the minimal pressure which must be
exerted by the pads to clean the rotors
by brake applications is not reached.
If the brake rotors are corroded, they
will tend to respond to braking with a
pulsating effect that even extended
brake applications will fail to cure.
Brake pads
For your own safety: use only
brake pads that BMW has
released for your particular vehicle
model. BMW cannot evaluate non-
approved brake pads to determine if
they are suitable for use, and therefore
cannot ensure the operating safety of
the vehicle if they are installed.<
Portable phone in the vehicle
BMW advises against using
mobile equipment, e.g. cellular
phones, inside the vehicle without con-
necting them directly to an outside
antenna. Otherwise, it cannot be ruled
out that vehicle electronics and the
mobile equipment interfere with one
another. In addition, it is not ensured
that the radio waves emitted during
transmission are directed outside of the
vehicle interior.<
General driving notes
Page 165 of 190

165
Towing and tow-starting the vehicle
Always comply with all applicable
towing laws and regulations.<
Using the towing eyeletThe screw-in towing eyelet is located in
the luggage compartment under the
floor panel; be sure that it remains with
the vehicle at all times. It can be
attached at the front or rear of your
BMW.
Observe the following instruc-
tions in order to avoid damaging
the towing eyelet or the vehicle: use
only the towing eyelet supplied with the
vehicle, and screw it in firmly until it
stops. Use the towing eyelet for towing
on paved roads only. Avoid subjecting
the towing eyelet to lateral loads, e.g.
do not lift the vehicle using the towing
eyelet.<
Access to the threaded socketPress out the cover in the front or rear
bumper with a screwdriver at the top of
the recess.Being towed
Make sure that the ignition key is
in position 1, because the steering
lock could otherwise engage and the
vehicle could no longer be steered.
There is no power assist while the
engine is off. Therefore, you will need to
exert more force to brake and steer the
vehicle.<
Turn on the hazard warning flashers, if
required by national regulations. If the
electrical system has failed, clearly
identify the vehicle being towed, e.g. by
placing a sign or a warning triangle in
the rear window.
Vehicles with manual transmission:
gearshift lever in idling position.
Vehicles with automatic transmission:
selector lever in position N.
Do not exceed a towing speed of
45 mph / 70 km/h, nor a towing
distance of 90 miles/150 km, because
the automatic transmission could other-
wise be damaged.<
Vehicles with sequential manual gear-
box SMG: selector lever in position N.Towing methodsIn some countries, it is not permitted to
tow the vehicle with a tow bar or tow
rope on public roads.
Familiarize yourself with the applicable
towing regulations for the country in
which you are driving.
OverviewControlsMaintenanceRepairsDataIndex
Page 166 of 190

166
With a tow bar
The towing vehicle must not be
lighter than the vehicle being
towed; otherwise, vehicle handling can
no longer be controlled.<
The towing eyelets of both vehicles
should be on the same side.
If the tow bar can only be used in a
diagonal position, please note the fol-
lowing:
>Clearance is restricted while you are
driving around corners
>The inclination of the tow bar pro-
duces lateral force.
Only attach the tow bar to the
towing eyelets. Other parts of the
vehicles could otherwise be dam-
aged.<
With a tow ropeWhen the towing vehicle is driving off,
make sure that the tow rope is taut.
Use nylon ropes or straps for tow-
ing because they prevent sudden
jerking movements. Attach the tow rope
only to the towing eyelets. Other parts
of the vehicles could otherwise be
damaged.<
With a tow truckHave the BMW transported by a tow
truck with a lift sling, or on a flatbed.
Never allow passengers to ride in
a towed vehicle for any reason.<
Do not lift the vehicle by the tow-
ing eyelet, nor by parts of the
body or chassis. Otherwise damage
could result.
automatic transmissions. Jump-
starting, refer to page 163.<
Only tow-start vehicles with catalytic
converters if the engine is cold. It is
better to have the engine jump-started,
refer to page 163.
1. Turn on hazard warning flashers;
comply with national regulations
2. Turn the ignition key to position 2
3. Engage the 3rd gear
4. Have the vehicle towed with the
clutch pedal completely depressed
and then slowly release the clutch
pedal. After the engine has started,
immediately depress the clutch pedal
again completely
5. Pull over at a suitable location,
remove the tow bar or tow rope, and
turn on the hazard warning flashers
6. Have the vehicle checked.
Vehicles with sequential manual gear-
box SMG:
>Have the vehicle towed with the
selector lever in position N
>Select sequential mode. The correct
gear will automatically be selected
and engaged.
Towing and tow-starting the vehicle
Page 172 of 190

172
Weights
325Ci 330Ci
Curb weight
with manual transmission/SMG
with automatic transmissionlbs/kg
lbs/kg3,560/1,615
3,627/1,6453,616/1,640
3,704/1,675
Approved gross vehicle weight
with manual transmission/SMG
with automatic transmissionlbs/kg
lbs/kg4,442/2,015
4,509/2,0454,497/2,040
4,575/2,075
Approved front axle load lbs/kg 2,083/945 2,094/950
Approved rear axle load lbs/kg 2,546/1,155 2,579/1,170
Approved maximum roof load for the hardtop lbs/kg 165/75 165/75
Luggage compartment capacity
with the convertible top compartment raisedcu ft/l
cu ft/l9.2/260
10.6/3009.2/260
10.6/300
Approved axle loads and approved gross vehicle weight must never be exceeded.
Page 180 of 190

Everything from A to ZFlat tire 157
Flat Tire Monitor 92
space-saver spare tire 157
Flat Tire Monitor 92
indicator lamp 18, 19, 93
Fluid reservoir for washer
systems 142
Fog lamps
indicator lamp 20
Follow me home lamps 95
Footbrake, refer to Braking
safely 125
Front airbags 59
Front fog lamps 97
Front seat adjustment 51
Fuel
display 85
quality 24
volume 173
Fuel consumption
display 89
Fuel display, refer to Fuel
gauge 85
Fuel economy, refer to
Energy control 84
Fuel filler door 23
release following an elec-
trical malfunction 23
Fuel level indicator, refer to
Fuel gauge 85
Fuel reserve indicator, refer
to Fuel gauge 85Fuel tank capacity 173
Fully-automatic convertible
top 44
activation 44
convenience operation
30, 31
opening, closing 45
remote control 30
Fuses 161
G
Garage door opener, refer to
Integrated universal
remote control 110
Gasoline consumption, refer
to Average fuel consump-
tion 89
Gasoline, refer to Fuel spec-
ifications 24
Gear indicator 75, 79
Gear lever
automatic transmission
with Steptronic 77
sequential manual gear-
box SMG 73
Gearbox
manual transmission 72
Gearshift lever
manual transmission 72
General driving notes 125
Glove compartment 109Grills, refer to Ventilation
100, 104
Gross weight, refer to
Weights 172
H
Handbrake, refer to Parking
brake 71
Hands-free system 113
Hardtop 127
Hardtop preparation 127
Hardtop, refer to the sepa-
rate Owner's Manual 127
Hazard warning flashers 14
Hazard warning triangle 22
Head restraints 52
Headlamp cleaning system
cleaning headlamps 82
washer fluid 142, 173
Headlamp control, auto-
matic 95
Headlamp flasher 97
indicator lamp 20
Headlamps
bulb replacement 153
care, refer to the Caring
for your vehicle brochure
Heated mirrors 57
Heated rear window
air conditioning 102
automatic climate
control 107Heated seats 57
Heating
exterior mirrors 57
rear window 102, 107
seats 57
Heating and ventilation
100, 104
Heavy loads, refer to Cargo
loading 118
Height adjustment
seats 51
steering wheel 58
Height, refer to
Dimensions 171
High beams 80, 81, 97
bulb replacement 154
headlamp flasher 97
indicator lamp 20
Holder for beverages 113
Hood release 138
Horn 14
Hub cap 158
Hydraulic brake assistant,
refer to DBC 127
Hydroplaning 125
I
Ice warning 88
Ignition 69
Ignition key 28
positions 69
Ignition lock 69