2006 BMW 328I COUPE fuse
[x] Cancel search: fusePage 57 of 239
Controls
55Reference
At a glance
Driving tips
Communications
Navigation
Entertainment
Mobility
Displays in the instrument cluster
P R N D DS M1 to M6
The selector lever position is displayed, or the
current gear in the manual mode.
Changing selector lever positions
>With the ignition switched on or the engine
running, the selector lever can be moved
out of position P: interlock.
>Before moving the lever away from P or N
with the vehicle stationary, first depress the
brake; otherwise the selector lever will
refuse to move: shiftlock.
To prevent the vehicle from creeping
after you select a driving position,
depress the brake until you are ready to
start.<
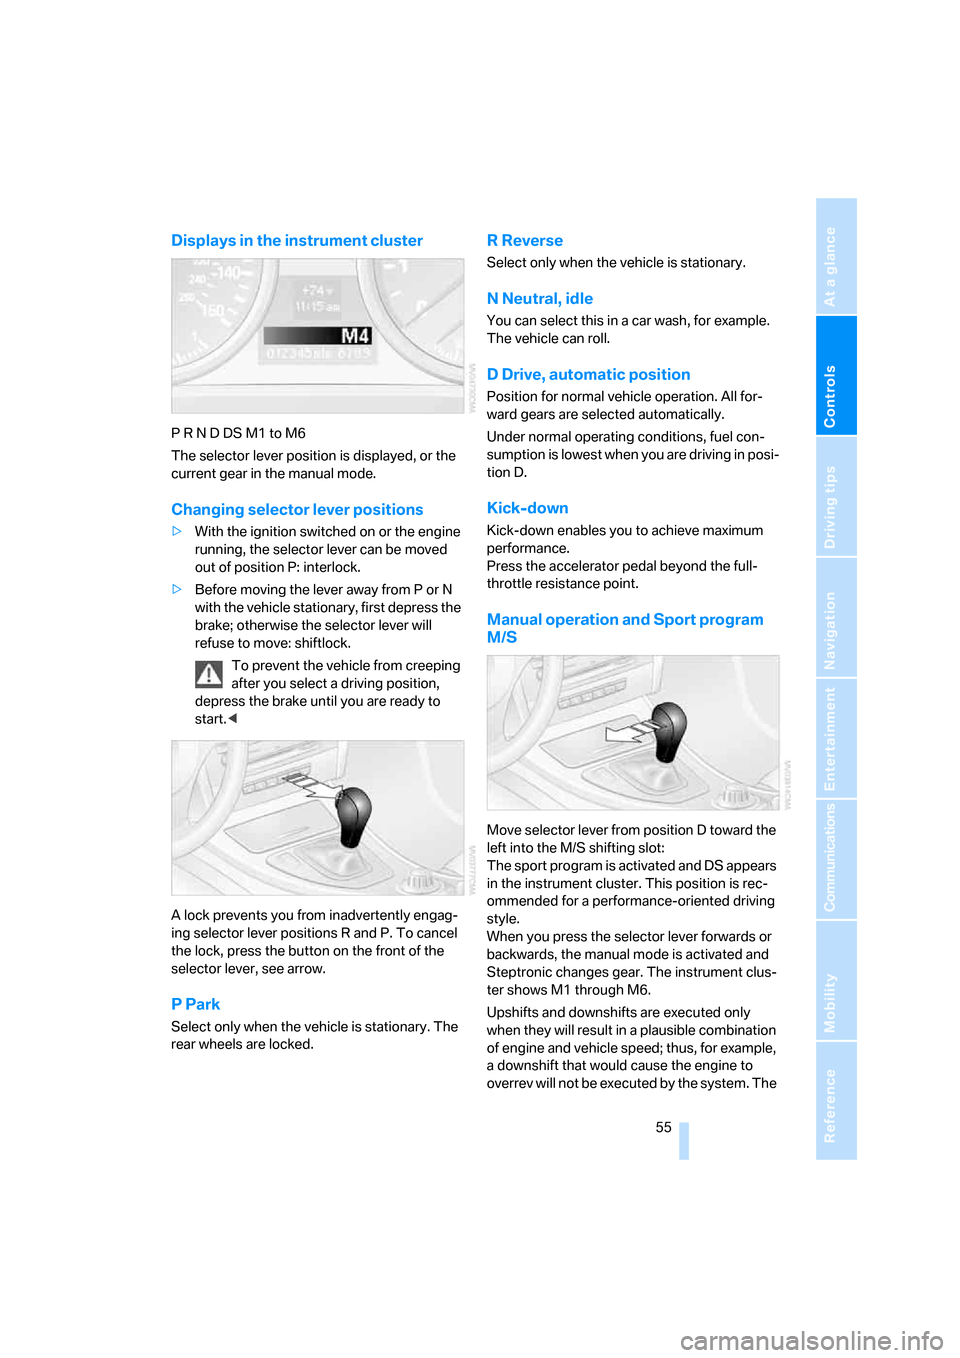
A lock prevents you from inadvertently engag-
ing selector lever positions R and P. To cancel
the lock, press the button on the front of the
selector lever, see arrow.
P Park
Select only when the vehicle is stationary. The
rear wheels are locked.
R Reverse
Select only when the vehicle is stationary.
N Neutral, idle
You can select this in a car wash, for example.
The vehicle can roll.
D Drive, automatic position
Position for normal vehicle operation. All for-
ward gears are selected automatically.
Under normal operating conditions, fuel con-
sumption is lowest when you are driving in posi-
tion D.
Kick-down
Kick-down enables you to achieve maximum
performance.
Press the accelerator pedal beyond the full-
throttle resistance point.
Manual operation and Sport program
M/S
Move selector lever from position D toward the
left into the M/S shifting slot:
The sport program is activated and DS appears
in the instrument cluster. This position is rec-
ommended for a performance-oriented driving
style.
When you press the selector lever forwards or
backwards, the manual mode is activated and
Steptronic changes gear. The instrument clus-
ter shows M1 through M6.
Upshifts and downshifts are executed only
when they will result in a plausible combination
of engine and vehicle speed; thus, for example,
a downshift that would cause the engine to
overrev will not be executed by the system. The
ba8_E9293_US.book Seite 55 Freitag, 5. Mai 2006 1:02 13
Page 58 of 239
Driving
56 gear selected appears briefly in the instrument
cluster, followed by the gear actually in use.
To use the automatic function again, move the
selector lever to the right into position D.
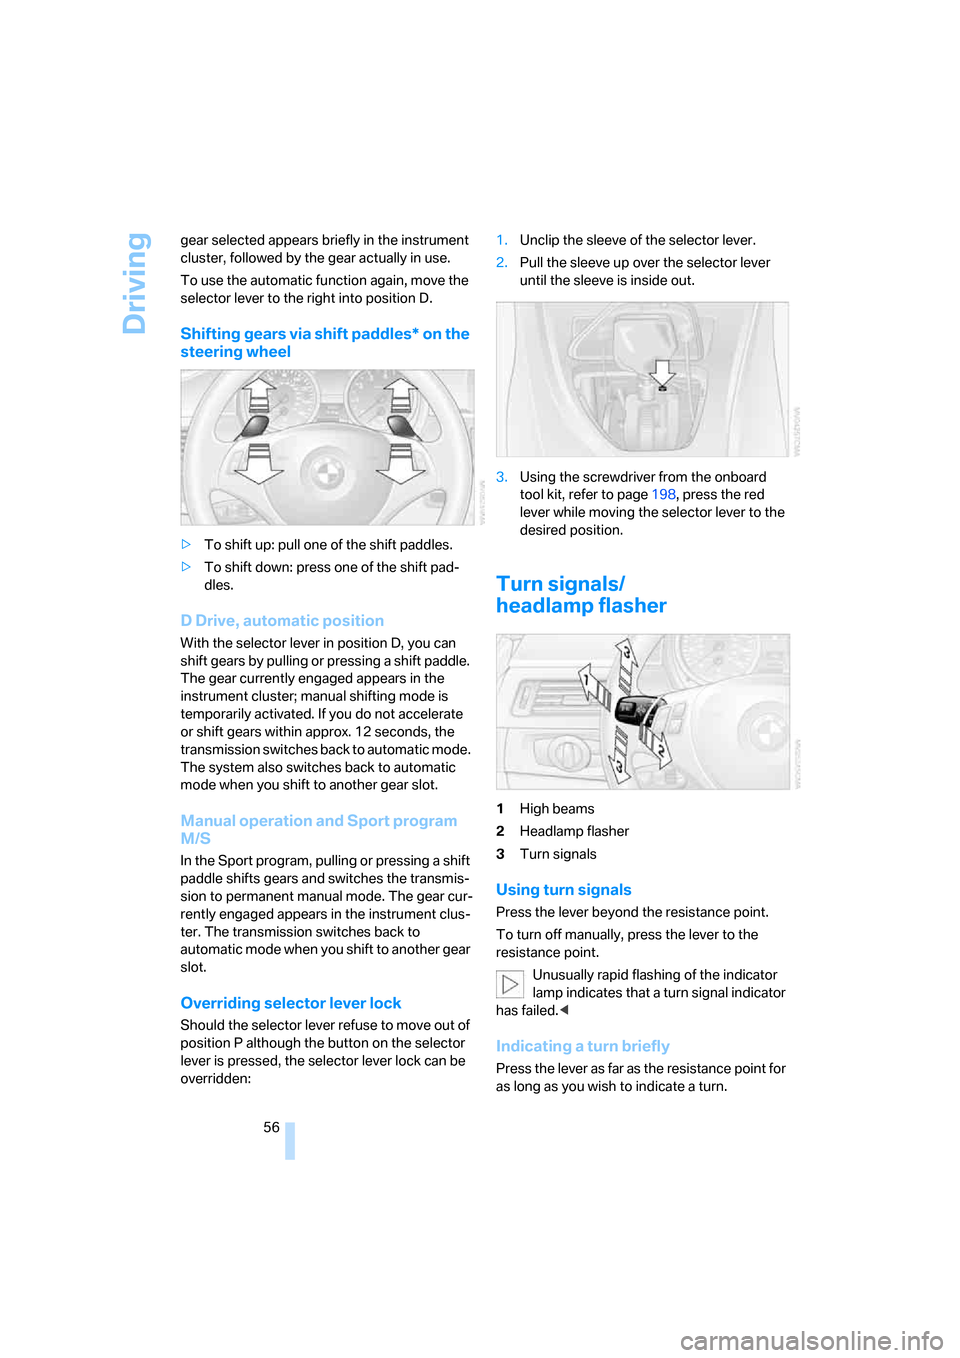
Shifting gears via shift paddles* on the
steering wheel
>To shift up: pull one of the shift paddles.
>To shift down: press one of the shift pad-
dles.
D Drive, automatic position
With the selector lever in position D, you can
shift gears by pulling or pressing a shift paddle.
The gear currently engaged appears in the
instrument cluster; manual shifting mode is
temporarily activated. If you do not accelerate
or shift gears within approx. 12 seconds, the
transmission switches back to automatic mode.
The system also switches back to automatic
mode when you shift to another gear slot.
Manual operation and Sport program
M/S
In the Sport program, pulling or pressing a shift
paddle shifts gears and switches the transmis-
sion to permanent manual mode. The gear cur-
rently engaged appears in the instrument clus-
ter. The transmission switches back to
automatic mode when you shift to another gear
slot.
Overriding selector lever lock
Should the selector lever refuse to move out of
position P although the button on the selector
lever is pressed, the selector lever lock can be
overridden:1.Unclip the sleeve of the selector lever.
2.Pull the sleeve up over the selector lever
until the sleeve is inside out.
3.Using the screwdriver from the onboard
tool kit, refer to page198, press the red
lever while moving the selector lever to the
desired position.
Turn signals/
headlamp flasher
1High beams
2Headlamp flasher
3Turn signals
Using turn signals
Press the lever beyond the resistance point.
To turn off manually, press the lever to the
resistance point.
Unusually rapid flashing of the indicator
lamp indicates that a turn signal indicator
has failed.<
Indicating a turn briefly
Press the lever as far as the resistance point for
as long as you wish to indicate a turn.
ba8_E9293_US.book Seite 56 Freitag, 5. Mai 2006 1:02 13
Page 166 of 239
Telephoning
164
Preparation via the mobile phone
8.Further steps must be carried out with the
mobile phone and vary depending on the
model. Please refer to your mobile phone's
operating instructions, e.g. under the topics
of Searching for a Bluetooth device, Con-
necting or Pairing.
Pairing
Depending on your mobile phone, you will see
messages, first in the mobile phone's display or
on the Control Display, requesting you to enter
the same Bluetooth passkey previously deter-
mined by you.
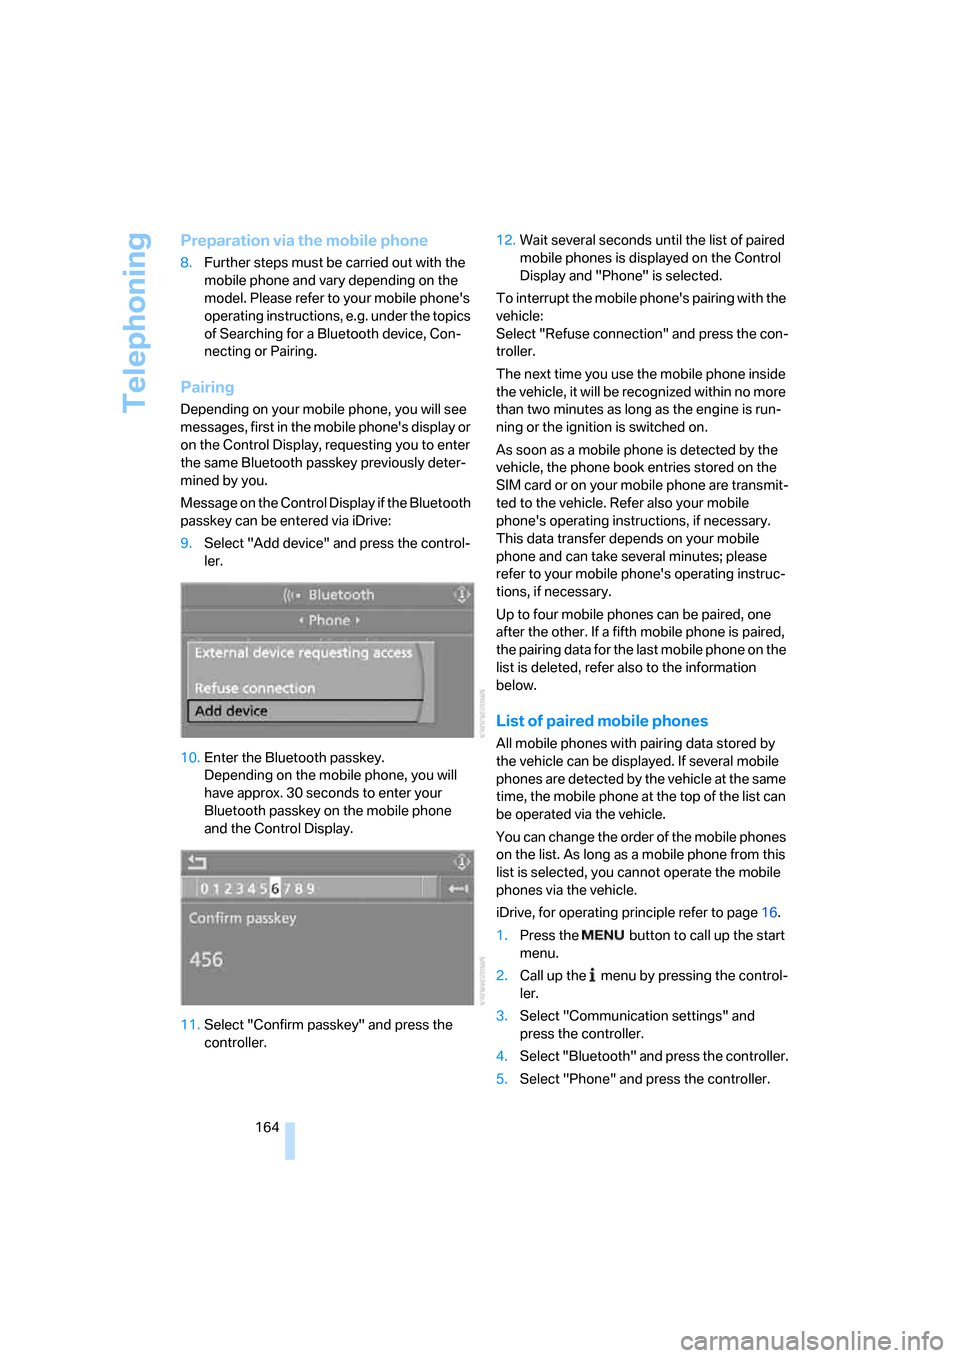
Message on the Control Display if the Bluetooth
passkey can be entered via iDrive:
9.Select "Add device" and press the control-
ler.
10.Enter the Bluetooth passkey.
Depending on the mobile phone, you will
have approx. 30 seconds to enter your
Bluetooth passkey on the mobile phone
and the Control Display.
11.Select "Confirm passkey" and press the
controller.12.Wait several seconds until the list of paired
mobile phones is displayed on the Control
Display and "Phone" is selected.
To interrupt the mobile phone's pairing with the
vehicle:
Select "Refuse connection" and press the con-
troller.
The next time you use the mobile phone inside
the vehicle, it will be recognized within no more
than two minutes as long as the engine is run-
ning or the ignition is switched on.
As soon as a mobile phone is detected by the
vehicle, the phone book entries stored on the
SIM card or on your mobile phone are transmit-
ted to the vehicle. Refer also your mobile
phone's operating instructions, if necessary.
This data transfer depends on your mobile
phone and can take several minutes; please
refer to your mobile phone's operating instruc-
tions, if necessary.
Up to four mobile phones can be paired, one
after the other. If a fifth mobile phone is paired,
the pairing data for the last mobile phone on the
list is deleted, refer also to the information
below.
List of paired mobile phones
All mobile phones with pairing data stored by
the vehicle can be displayed. If several mobile
phones are detected by the vehicle at the same
time, the mobile phone at the top of the list can
be operated via the vehicle.
You can change the order of the mobile phones
on the list. As long as a mobile phone from this
list is selected, you cannot operate the mobile
phones via the vehicle.
iDrive, for operating principle refer to page16.
1.Press the
button to call up the start
menu.
2.Call up the menu by pressing the control-
ler.
3.Select "Communication settings" and
press the controller.
4.Select "Bluetooth" and press the controller.
5.Select "Phone" and press the controller.
ba8_E9293_US.book Seite 164 Freitag, 5. Mai 2006 1:02 13
Page 203 of 239

Mobility
201Reference
At a glance
Controls
Driving tips
Communications
Navigation
Entertainment
Changing wheels
Your BMW is equipped with Run-Flat Tires as
standard. This removes the need to change a
wheel immediately in the event of a puncture.
For information on continuing to drive with a
damaged tire, refer to Indication of a flat tire on
page83.
The symbol identifying Run-Flat Tires is a circle
with the letters RSC on the sidewall, refer to
Run-Flat Tires, page189.
When mounting new tires or changing over
from summer to winter tires and vice versa,
mount Run-Flat Tires for your own safety. In the
event of a flat, no spare wheel is available. Your
BMW center will be glad to advise you. Refer
also to New wheels and tires, page189.
The tools for changing wheels are avail-
able as optional accessories from your
BMW center.<
Jack mounting points
The jacking points are at the positions shown in
the illustration.
Vehicle battery
Battery care
The battery is 100 % maintenance-free, the
electrolyte will last for the life of the battery
when the vehicle is operated in a temperate cli-
mate. Your BMW center will be glad to advise in
all matters concerning the battery.
Charging the battery
Only charge the battery in the vehicle via the
terminals in the engine compartment with the
engine off. Connections, refer to Jump starting
on page204.
Disposal
Have old batteries disposed of by your
BMW center or hand them in to a recy-
cling center. Maintain the battery in an upright
position for transport and storage. Always
secure the battery against tipping over during
transport.<
Power failure
After a temporary power loss, the functioning of
some equipment may be limited and require
reinitialization. Individual settings may likewise
have been lost and will have to be programmed:
>Time and date
These values must be updated, refer to
page73.
>Radio
In some cases, stations may have to be
stored again, refer to page146.
>Navigation system
Operability must be waited for, refer to
page120.
>Seat and mirror memory
The positions must be stored again, refer to
page44.
>Inside rearview mirror with digital compass
The system must be calibrated, refer to
page103.
Fuses
Never attempt to repair a blown fuse and
do not replace a defective fuse with a sub-
stitute of another color or amperage rating, oth-
erwise this could lead to a circuit overload, ulti-
mately resulting in a fire in the vehicle.<
ba8_E9293_US.book Seite 201 Freitag, 5. Mai 2006 1:02 13
Page 204 of 239
Replacing components
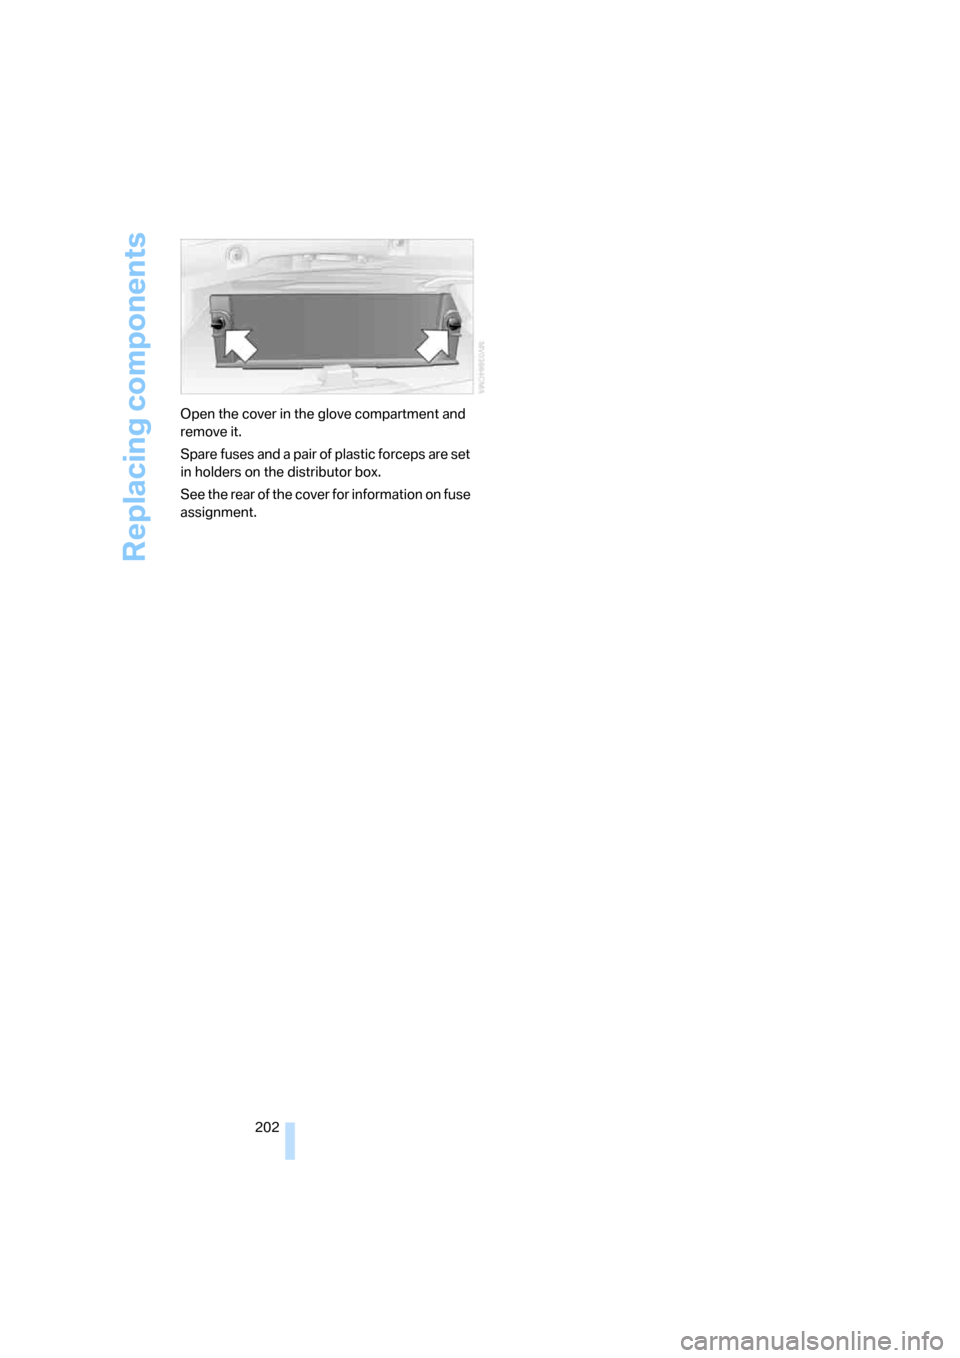
202 Open the cover in the glove compartment and
remove it.
Spare fuses and a pair of plastic forceps are set
in holders on the distributor box.
See the rear of the cover for information on fuse
assignment.
ba8_E9293_US.book Seite 202 Freitag, 5. Mai 2006 1:02 13
Page 226 of 239
Everything from A - Z
224 Filter
– refer to Microfilter/activated-
charcoal filter for automatic
climate control99
Fine wood, refer to Caring for
your vehicle brochure
First aid pouch203
Fixture for remote control,
refer to Ignition lock52
Flashlight, refer to
Rechargeable flashlight104
Flash when locking/
unlocking30
Flat
– Flat Tire Monitor82
– Run-Flat Tires189
– Tire Pressure Monitor
TPM84
Flat tire
– Tire Pressure Monitor84
Flat Tire Monitor FTM82
– indicating a flat tire83
– indicator/warning lamp83
– initializing the system83
– malfunction84
– snow chains83,190
– system limits83
Flat tires, refer to Tire
condition188
Floor mats, carpets, refer to
Caring for your vehicle
brochure
Fluid reservoir, refer to
Washer fluid reservoir58
"FM", waveband140,144
FM, waveband144
Fog lamps93
– indicator lamp13,93
Folding in the mirrors, before
driving into a car wash114
Folding up the floor panel108
Footbrake, refer to Braking
safely113
Footwell lamp, refer to Interior
lamps93
For your own safety5
Front airbags87
"FTM"83FTM, refer to Flat Tire
Monitor82
Fuel182
– average consumption68
– display67
– high-quality brands182
– quality182
– specifications182
– tank contents, refer to
Capacities213
Fuel clock, refer to Fuel
gauge67
Fuel display, refer to Fuel
gauge67
Fuel filler door182
– releasing in the event of
electrical malfunction182
Fuses201
G
Garage door opener, refer to
Integrated universal remote
control101
Gasoline, refer to Required
fuel182
Gasoline display, refer to Fuel
gauge67
Gasoline engine, checking oil
level192
Gear indicator
– automatic transmission with
Steptronic54
Gearshift lever
– automatic transmission with
Steptronic55
– manual transmission54
Gearshifts
– automatic transmission with
Steptronic55
– manual transmission54
General driving notes112Glass sunroof, electric37
– closing after electrical
malfunction38
– convenient operation31
– initializing38
– opening, closing38
– operation with convenient
access36
– pinch protection system38
– power failure38
– raising38
Glove compartment104
– rechargeable flashlight104
GPS navigation, refer to
Navigation system120
Grills95
Gross vehicle weight, refer to
Weights212
H
Handbrake54
– indicator lamp54
Hand lamp, refer to
Rechargeable flashlight104
Hands-free system14
Hazard warning flashers14
HD, refer to Digital radio147
Head airbags87
Headlamp control,
automatic90
Headlamp flasher56
– indicator lamp11,13
Headlamps
– care, refer to Caring for your
vehicle brochure
Head restraints42
– front, removing43
– rear, removing43
– sitting safely40
Heated
– mirrors47
– rear window98
– seats44
Heating
– mirrors47
– rear window98
– residual heat98
– seats44
ba8_E9293_US.book Seite 224 Freitag, 5. Mai 2006 1:02 13
Page 233 of 239
Reference 231
At a glance
Controls
Driving tips
Communications
Navigation
Entertainment
Mobility
"Service
requirements"72,176,193
Service requirements71
"Service Status"176
"Set date"75
"Set" for audio mode140
"Set time"74
Settings
– changing settings on the
Control Display78
– clock, 12h/24h mode74
– date format75
– language78
Settings and information70
Settings menu, refer to
imenu17
Setting times, refer to
Preselecting switch-on
times99
Shifting gears
– automatic transmission with
Steptronic55
– manual transmission54
Shiftlock
– automatic transmission,
refer to Changing selector
lever positions55
Short commands for the voice
command system214
Shortest route in navigation,
refer to Selecting route130
"Short route" in
navigation131
"Show current position"126
"Show destination
position"126
Shuffled, refer to Random
– CD changer155
– CD player155
Side airbags87
Side windows, refer to
Windows37
Signal horn, refer to
Horn10,11
Sitting safely40
– with airbags40
– with head restraint40
– with safety belts40
Ski bag108Sliding/tilt sunroof, refer to
Glass sunroof, electric37
Slot for remote control52
Smokers' package, refer to
Ashtray106
Snap-in adapter, refer to
Center armrest storage
compartment104
Socket, On-Board Diagnosis
OBD197
Socket, refer to Connecting
electrical appliances107
Song search, refer to Playing a
track154
SOS, refer to Initiating an
emergency call203
Sound output for
entertainment on/off140
Spare fuses201
Spare fuses, refer to
Fuses201
Spark plugs, refer to Service
requirements71
Speaking, refer to Voice
instructions for navigation
system135
Speed
– Run-Flat Tires83
– with winter tires190
Speed-dependent volume
control141
Speed limit77
Speed limit warning, refer to
Speed limit77
Speedometer12
"Speed volume", refer to Tone
control142
Spray nozzles, refer to
Cleaning windshield and
headlamps58
Stability control, refer to
Driving stability control
systems81
Start/stop button52
– starting the engine53
– switching off the engine53
"Start guidance"124,
128,129,132Starting, refer to Starting the
engine53
Starting assistance, refer to
Jump starting204
Starting difficulties
– jump starting204
– temperature53
Starting the engine
– start/stop button52
Start menu17
"State / Province" in
destination entry122
Station
– refer to Radio144
"Status"72
Status of this Owner's Manual
at time of printing5
Steering wheel48
– adjustment48
– block, refer to Electric
steering wheel lock48
– buttons on steering
wheel11
– lock52
– lock, refer to Electric
steering wheel lock48
– locking with convenient
access35
"Steering wheel buttons"48
Steering with variable ratio,
refer to Active steering87
Steptronic, refer to Automatic
transmission with
Steptronic54
"Stopwatch"78
Stopwatch78
Storage compartments105
Storage nets108
"Store" for satellite radio151
"Store in address book" in
navigation128
"Store" on the radio146
Storing current position128
Storing radio stations146
Storing seat positions, refer to
Seat and mirror memory44
Storing tires190
Stowage, refer to Storage
compartments105
ba8_E9293_US.book Seite 231 Freitag, 5. Mai 2006 1:02 13