2006 BMW 325XI TOURING flat tire
[x] Cancel search: flat tirePage 14 of 160

Cockpit
12
Instrument cluster
1Speedometer
2Indicator lamps for turn signals
3Indicator and warning lamps13
4Displays for active cruise control
*50
5Tachometer57
6Energy Control58
7Display for
>Clock57
>Outside temperature57
>Indicator and warning lamps638Display for
>Position of automatic transmission
*44
>Computer58
>Date of next scheduled service, and
remaining distance to be driven61
>Odometer and trip odometer57
>Initializing Flat Tire Monitor69
>Checking engine oil level
*113
>Settings and information59
9Fuel gauge58
10Resetting trip odometer57
Page 61 of 160

Reference
At a glance
Controls
Driving tips
Mobility
59
To reset average fuel consumption: press the
button in the turn indicator stalk for approx.
2seconds.
Settings and information
Operating principle
1Button for:
>Selecting display
>Setting values
2Button for:
>Confirming selected display or set val-
ues
>Calling up computer information58
3When the lights are switched on: instrument
lighting brightness76
4Calling up Check Control63
5Checking engine oil level*113
6Initializing the Flat Tire Monitor69
7Setting the time628Setting the date63
9Viewing service requirement display61
10Setting formats and units of measure,
resetting to factory settings60
11Adjusting settings
>Confirmation signals when locking and
unlocking the vehicle21
>Response during unlocking
procedure20
>Automatic locking22
>Pathway lighting74
>Daytime driving lamps75
>Triple turn signal activation46
>Seat and mirror memory35
Page 70 of 160
Technology for driving comfort and safety
68
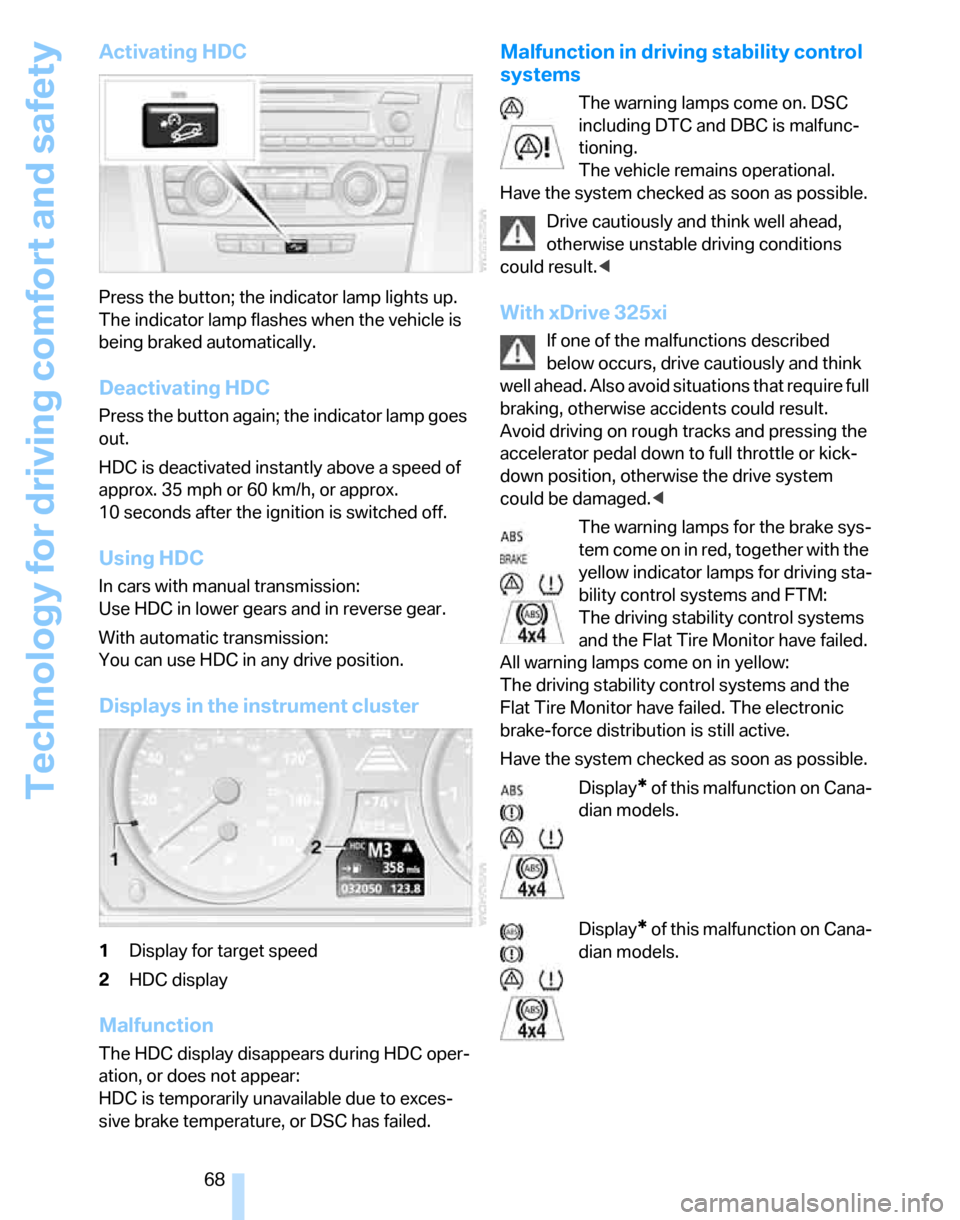
Activating HDC
Press the button; the indicator lamp lights up.
The indicator lamp flashes when the vehicle is
being braked automatically.
Deactivating HDC
Press the button again; the indicator lamp goes
out.
HDC is deactivated instantly above a speed of
approx. 35 mph or 60 km/h, or approx.
10 seconds after the ignition is switched off.
Using HDC
In cars with manual transmission:
Use HDC in lower gears and in reverse gear.
With automatic transmission:
You can use HDC in any drive position.
Displays in the instrument cluster
1Display for target speed
2HDC display
Malfunction
The HDC display disappears during HDC oper-
ation, or does not appear:
HDC is temporarily unavailable due to exces-
sive brake temperature, or DSC has failed.
Malfunction in driving stability control
systems
The warning lamps come on. DSC
including DTC and DBC is malfunc-
tioning.
The vehicle remains operational.
Have the system checked as soon as possible.
Drive cautiously and think well ahead,
otherwise unstable driving conditions
could result.<
With xDrive 325xi
If one of the malfunctions described
below occurs, drive cautiously and think
well ahead. Also avoid situations that require full
braking, otherwise accidents could result.
Avoid driving on rough tracks and pressing the
accelerator pedal down to full throttle or kick-
down position, otherwise the drive system
could be damaged.<
The warning lamps for the brake sys-
tem come on in red, together with the
yellow indicator lamps for driving sta-
bility control systems and FTM:
The driving stability control systems
and the Flat Tire Monitor have failed.
All warning lamps come on in yellow:
The driving stability control systems and the
Flat Tire Monitor have failed. The electronic
brake-force distribution is still active.
Have the system checked as soon as possible.
Display
* of this malfunction on Cana-
dian models.
Display
* of this malfunction on Cana-
dian models.
Page 71 of 160

Reference
At a glance
Controls
Driving tips
Mobility
69
Drive-off assistant
The drive-off assistant enables you to drive off
smoothly on uphill gradients. It is not necessary
to use the handbrake for this.
1.Hold the car in place by depressing the
brake.
2.Release the brake and drive off without
delay.
The drive-off assistant holds the car in
place for approx. 2 seconds after the
brake is released. Depending on vehicle load,
the car may roll backwards a little during this
time span. Drive off without delay after releas-
ing the brake. Otherwise, the drive-off assistant
will no longer hold the car in place after approx.
2 seconds and the car will start to roll back-
wards.<
Malfunction
The warning lamps for the brake sys-
tem light up in yellow. The drive-off
assistant has failed. The car will not
be held in place after the brake is
released. Have the system checked as soon as
possible.
Canadian models display these warn-
ing lamps.
Flat Tire Monitor FTM
The concept
The Flat Tire Monitor monitors tire pressures
while the car is being driven. The system
reports any significant loss of pressure in one
tire in relation to another.
If a tire loses pressure, its rolling radius
changes, and this in turn alters the speed of
rotation. This change is detected and is
reported as a flat tire.
Functional requirement
In order to assure the reliable reporting of a flat
tire, the system must be initialized for the cor-
rect tire inflation pressure.The system must be reinitialized each
time a tire inflation pressure has been cor-
rected or a wheel or tire has been changed.<
System limitations
The Flat Tire Monitor is unable to warn
the driver of sudden, severe tire damage
caused by external factors, nor can it identify
the gradual loss of pressure that will inevitably
occur in all four tires over a lengthy period of
time.<
In the following situations, the system could be
delayed or malfunction:
>System has not been initialized
>Driving on snowy or slippery road surface
>Performance-oriented style of driving: slip
in the drive wheels, high lateral acceleration
>If snow chains are attached
Initializing the system
The initialization is completed during driv-
ing, which can be interrupted at any time.
When driving resumes, the initialization is con-
tinued automatically.
Do not initialize the system while snow chains
are attached.<
Operating principle, refer to page59.
1.Start the engine immediately before pulling
away, but do not drive off yet.
2.Lightly push button 1 in the turn indicator
stalk up or down repeatedly until the appro-
priate symbol appears in the display,
accompanied by the word "INIT".
3.Press button 2 t o c o n f i r m y o u r c h o i c e o f t h e
Flat Tire Monitor.
Page 72 of 160
Technology for driving comfort and safety
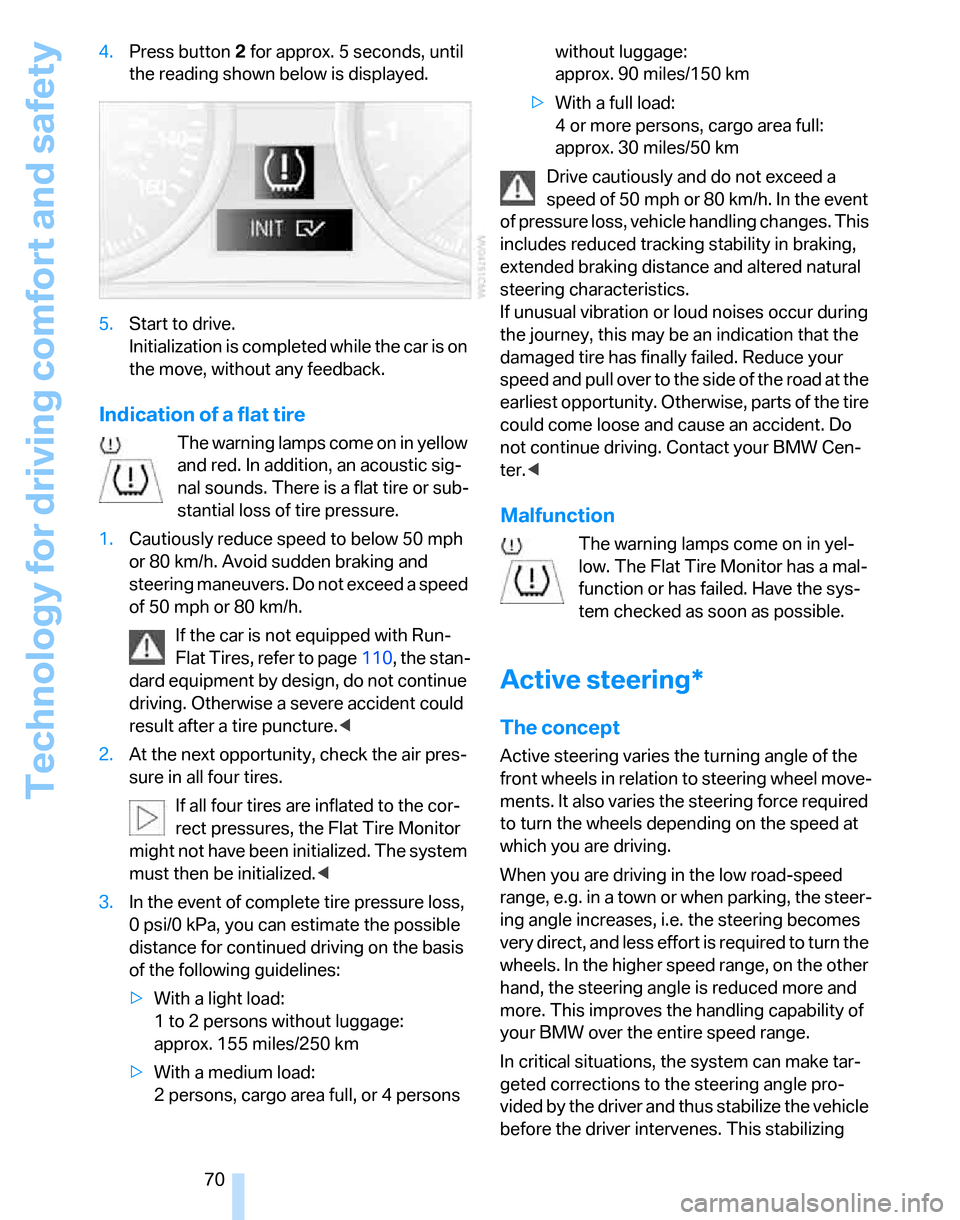
70 4.Press button 2 for approx. 5 seconds, until
the reading shown below is displayed.
5.Start to drive.
Initialization is completed while the car is on
the move, without any feedback.
Indication of a flat tire
The warning lamps come on in yellow
and red. In addition, an acoustic sig-
nal sounds. There is a flat tire or sub-
stantial loss of tire pressure.
1.Cautiously reduce speed to below 50 mph
or 80 km/h. Avoid sudden braking and
steering maneuvers. Do not exceed a speed
of 50 mph or 80 km/h.
If the car is not equipped with Run-
Flat Tires, refer to page110, the stan-
dard equipment by design, do not continue
driving. Otherwise a severe accident could
result after a tire puncture.<
2.At the next opportunity, check the air pres-
sure in all four tires.
If all four tires are inflated to the cor-
rect pressures, the Flat Tire Monitor
might not have been initialized. The system
must then be initialized.<
3.In the event of complete tire pressure loss,
0 psi/0 kPa, you can estimate the possible
distance for continued driving on the basis
of the following guidelines:
>With a light load:
1 to 2 persons without luggage:
approx. 155 miles/250 km
>With a medium load:
2 persons, cargo area full, or 4 persons without luggage:
approx. 90 miles/150 km
>With a full load:
4 or more persons, cargo area full:
approx. 30 miles/50 km
Drive cautiously and do not exceed a
speed of 50 mph or 80 km/h. In the event
of pressure loss, vehicle handling changes. This
includes reduced tracking stability in braking,
extended braking distance and altered natural
steering characteristics.
If unusual vibration or loud noises occur during
the journey, this may be an indication that the
damaged tire has finally failed. Reduce your
speed and pull over to the side of the road at the
earliest opportunity. Otherwise, parts of the tire
could come loose and cause an accident. Do
not continue driving. Contact your BMW Cen-
ter.<
Malfunction
The warning lamps come on in yel-
low. The Flat Tire Monitor has a mal-
function or has failed. Have the sys-
tem checked as soon as possible.
Active steering*
The concept
Active steering varies the turning angle of the
front wheels in relation to steering wheel move-
ments. It also varies the steering force required
to turn the wheels depending on the speed at
which you are driving.
When you are driving in the low road-speed
range, e.g. in a town or when parking, the steer-
ing angle increases, i.e. the steering becomes
very direct, and less effort is required to turn the
wheels. In the higher speed range, on the other
hand, the steering angle is reduced more and
more. This improves the handling capability of
your BMW over the entire speed range.
In critical situations, the system can make tar-
geted corrections to the steering angle pro-
vided by the driver and thus stabilize the vehicle
before the driver intervenes. This stabilizing
Page 108 of 160
Wheels and tires
106
Wheels and tires
Tire inflation pressures
Information for your safety
It is not merely the tires' service life, but also
driving comfort and, to a great extent, driving
safety that depend on the condition of the tires
and the maintenance of the specified tire pres-
sure.
Check the tire inflation pressure regularly
and correct it, if necessary: at least twice a
month and before starting long trips. If you fail
to observe this precaution you may be driving
on tires with incorrect tire pressures, a condi-
tion that can not only compromise your vehi-
cle's driving stability, but also lead to tire dam-
age and the risk of an accident. Do not drive
with deflated, i.e. flat tires, except when using
Run-Flat Tires. A flat tire will seriously impair
your vehicle's handling and braking response.
Attempts to drive on a flat tire can lead to loss of
control over the vehicle.<
Checking pressure
Only check tire inflation pressure when the
tires are cold. This means after a maximum of
1.25 miles/2 km driving or when the vehicle has
been parked for at least 2 hours. When tires are
warm, the tire inflation pressure is higher.
After correcting tire inflation pressures,
always reinitialize the Flat Tire Monitor,
refer to page69.<
Inflation pressure specifications
The tables below provide all the correct inflation
pressures for the specified tire sizes at ambient
temperature.
The inflation pressures apply to the tire
sizes approved and tire brands recom-
mended by BMW; a list of these is available
from your BMW Center.<
For correct identification of the right tire infla-
tion pressures, observe the following:
>Tire sizes for your vehicle>Load conditions
>Maximum allowable driving speed
Tire inflation pressures for driving up to
100 mph or 160 km/h
For normal driving up to 100 mph or 160 km/h
and to achieve optimum driving comfort, adjust
pressures to the respective tire inflation pres-
sures listed on the following pages in the col-
umns for traveling speeds up to a maximum of
100 mph or 160 km/h.
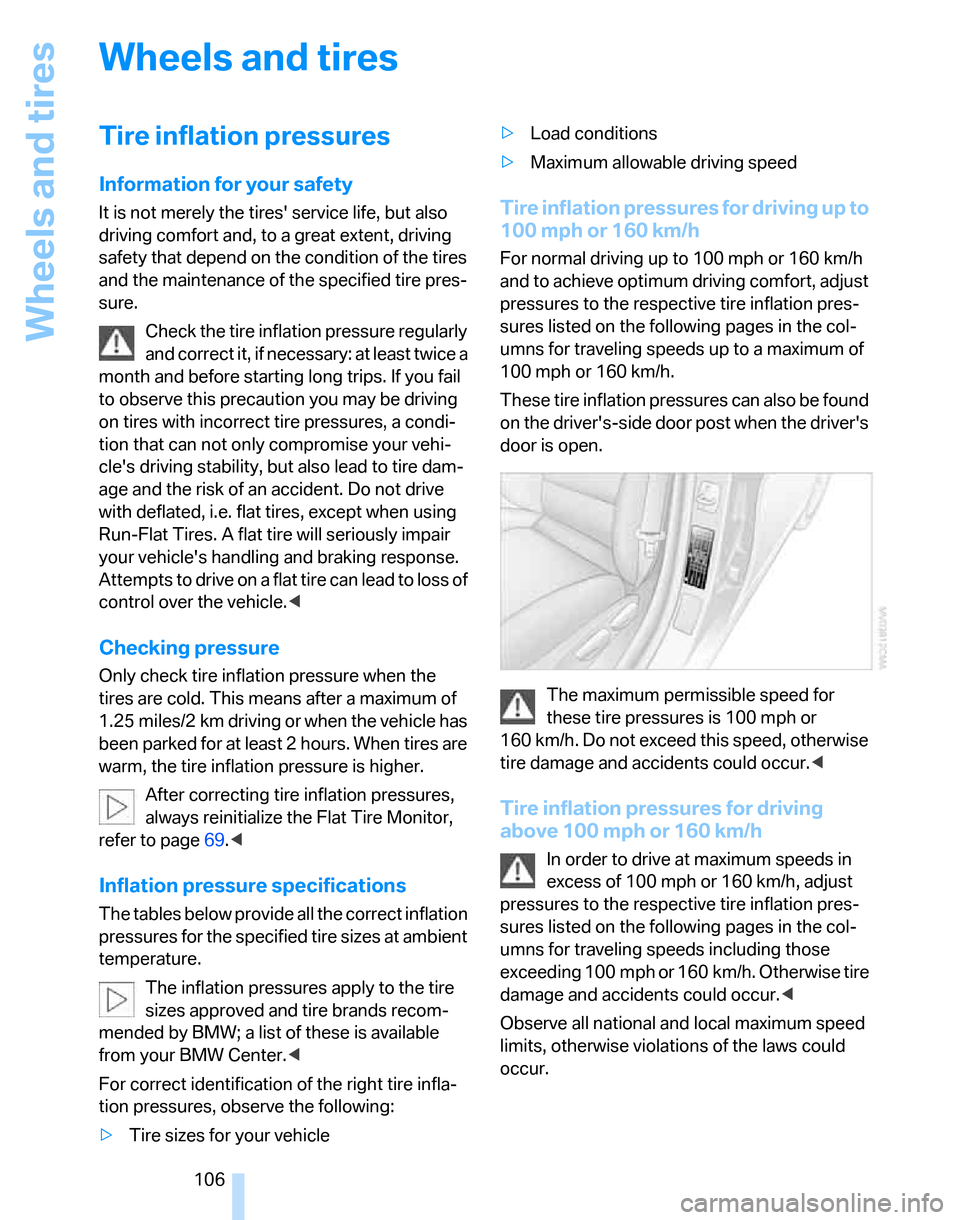
These tire inflation pressures can also be found
on the driver's-side door post when the driver's
door is open.
The maximum permissible speed for
these tire pressures is 100 mph or
160 km/h. Do not exceed this speed, otherwise
tire damage and accidents could occur.<
Tire inflation pressures for driving
above 100 mph or 160 km/h
In order to drive at maximum speeds in
excess of 100 mph or 160 km/h, adjust
pressures to the respective tire inflation pres-
sures listed on the following pages in the col-
umns for traveling speeds including those
exceeding 100 mph or 160 km/h. Otherwise tire
damage and accidents could occur.<
Observe all national and local maximum speed
limits, otherwise violations of the laws could
occur.
Page 109 of 160
Reference
At a glance
Controls
Driving tips
Mobility
107
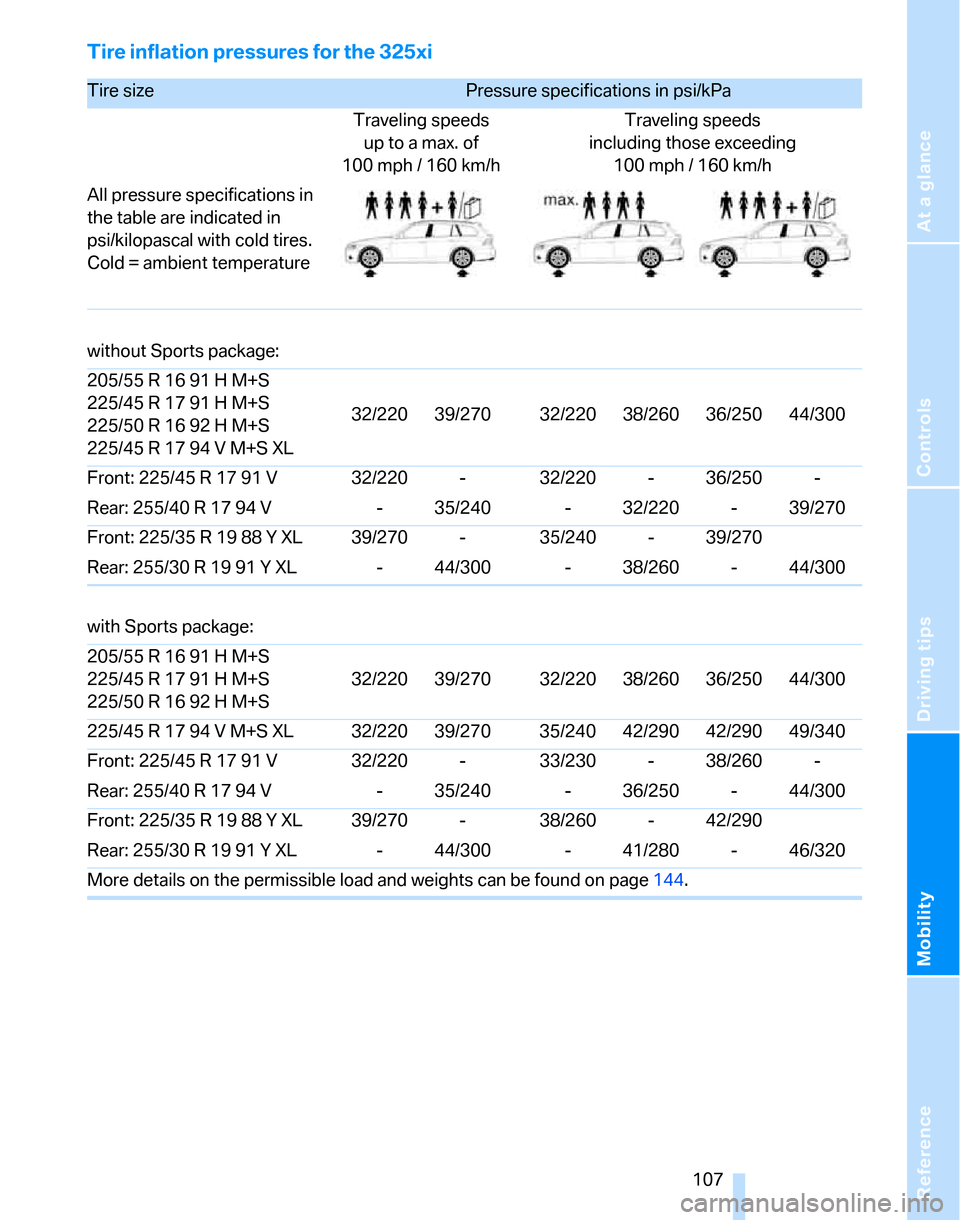
Tire inflation pressures for the 325xi
Tire size Pressure specifications in psi/kPa
Traveling speeds
up to a max. of
100 mph / 160 km/hTraveling speeds
including those exceeding
100 mph / 160 km/h
All pressure specifications in
the table are indicated in
psi/kilopascal with cold tires.
Cold = ambient temperature
without Sports package:
205/55 R 16 91 H M+S
225/45 R 17 91 H M+S
225/50 R 16 92 H M+S
225/45 R 17 94 V M+S XL32/220 39/270 32/220 38/260 36/250 44/300
Front: 225/45 R 17 91 V 32/220 - 32/220 - 36/250 -
Rear: 255/40 R 17 94 V - 35/240 - 32/220 - 39/270
Front: 225/35 R 19 88 Y XL 39/270 - 35/240 - 39/270
Rear: 255/30 R 19 91 Y XL - 44/300 - 38/260 - 44/300
with Sports package:
205/55 R 16 91 H M+S
225/45 R 17 91 H M+S
225/50 R 16 92 H M+S32/220 39/270 32/220 38/260 36/250 44/300
225/45 R 17 94 V M+S XL 32/220 39/270 35/240 42/290 42/290 49/340
Front: 225/45 R 17 91 V 32/220 - 33/230 - 38/260 -
Rear: 255/40 R 17 94 V - 35/240 - 36/250 - 44/300
Front: 225/35 R 19 88 Y XL 39/270 - 38/260 - 42/290
Rear: 255/30 R 19 91 Y XL - 44/300 - 41/280 - 46/320
More details on the permissible load and weights can be found on page144.
Page 111 of 160
Reference
At a glance
Controls
Driving tips
Mobility
109
Temperature
The temperature grades are A, the highest, B,
and C, representing the tire's resistance to the
generation of heat and its ability to dissipate
heat when tested under controlled conditions
on a specified indoor laboratory test wheel.
Sustained high temperature can cause the
material of the tire to degenerate and reduce
tire life, and excessive temperature can lead to
sudden tire failure. The grade C corresponds to
a level of performance which all passenger car
tires must meet under the Federal Motor Vehi-
cle Safety Standard No. 109. Grades B and A
represent higher levels of performance on the
laboratory test wheel than the minimum
required by law.
The temperature grade for this tire is
established for a tire that is properly
inflated and not overloaded. Excessive speed,
underinflation, or excessive loading, either sep-
arately or in combination, can cause heat
buildup and possible tire failure.<
RSC – Run-Flat Tires
You will recognize Run-Flat Tires by a circular
symbol containing the letters RSC on the side
of the tire, refer to page110.
M+S
Winter and all-season tires.
These have better winter properties than sum-
mer tires.
XL
Designation for specially reinforced tires.
Tire condition
Inspect your tires frequently for tread wear,
signs of damage and for foreign objects lodged
in the tread. Check the tread depth.
Minimum tread depth
The tread depth should not drop below 1/8 in/
3 mm, although, for example, European legisla-
tion only specifies a minimum tread depth of 1/16 in/1.6 mm. At tread depths below 1/8 in/
3 mm there is an increased risk of high-speed
hydroplaning, even when only small amounts of
water are present on the road surface.
When winter tires wear down past a tread depth
of 1/6 in/4 mm, they become perceptibly less
suitable for winter conditions. In the interest of
safety, new tires should be installed.
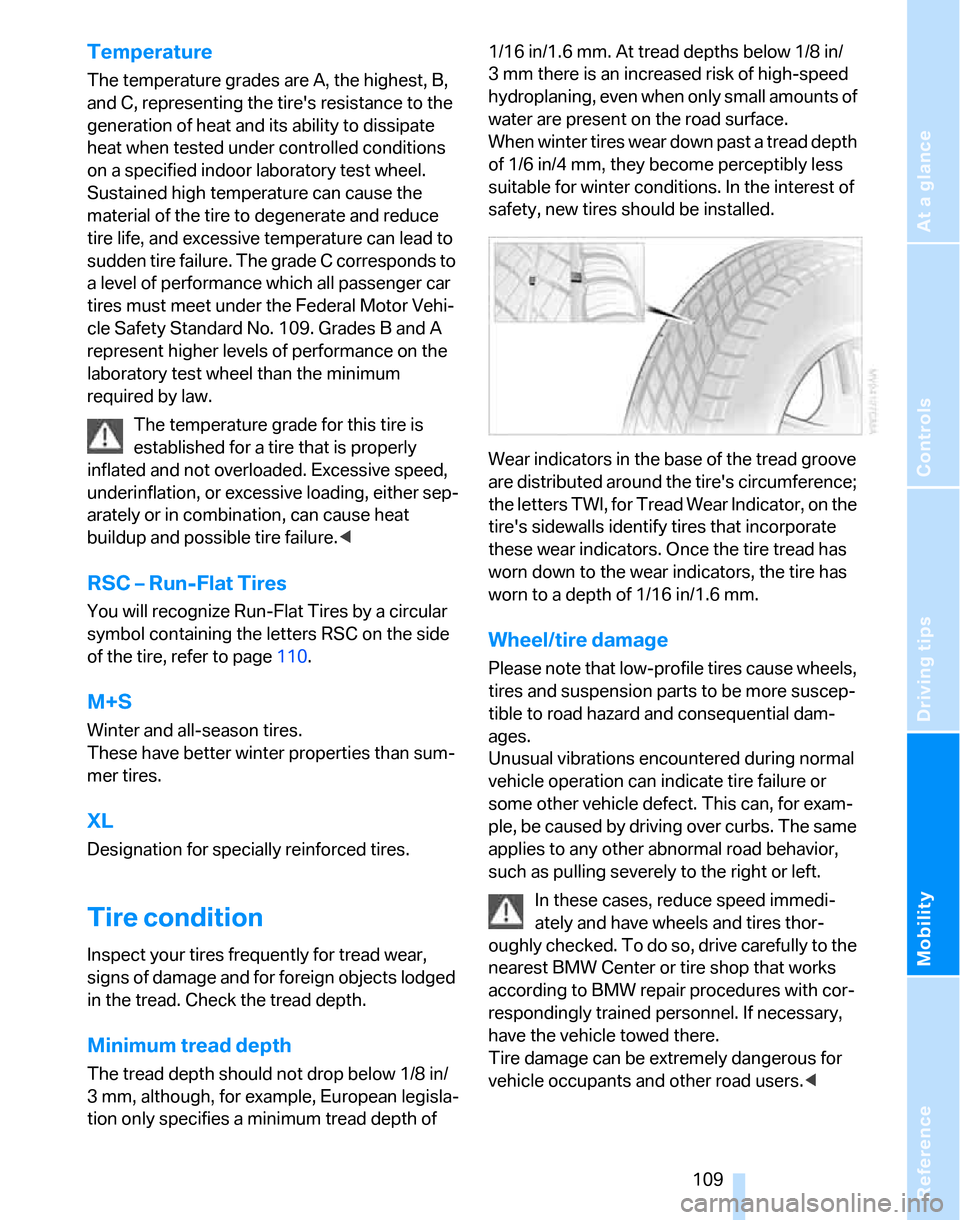
Wear indicators in the base of the tread groove
are distributed around the tire's circumference;
the letters TWI, for Tread Wear Indicator, on the
tire's sidewalls identify tires that incorporate
these wear indicators. Once the tire tread has
worn down to the wear indicators, the tire has
worn to a depth of 1/16 in/1.6 mm.
Wheel/tire damage
Please note that low-profile tires cause wheels,
tires and suspension parts to be more suscep-
tible to road hazard and consequential dam-
ages.
Unusual vibrations encountered during normal
vehicle operation can indicate tire failure or
some other vehicle defect. This can, for exam-
ple, be caused by driving over curbs. The same
applies to any other abnormal road behavior,
such as pulling severely to the right or left.
In these cases, reduce speed immedi-
ately and have wheels and tires thor-
oughly checked. To do so, drive carefully to the
nearest BMW Center or tire shop that works
according to BMW repair procedures with cor-
respondingly trained personnel. If necessary,
have the vehicle towed there.
Tire damage can be extremely dangerous for
vehicle occupants and other road users.<