2006 BMW 325XI TOURING steering
[x] Cancel search: steeringPage 73 of 160

Reference
At a glance
Controls
Driving tips
Mobility
71
intervention is simultaneously deactivated
when DSC is switched off, refer to page66.
Malfunction
The warning lamps come on. Active
steering is no longer operational. At
low speeds, greater steering wheel
movements are required, whereas at
higher speeds the vehicle reacts more sensi-
tively to steering wheel movements. Drive cau-
tiously and think well ahead. Have the system
checked.
If the warning lamp lights up during the first
engine starting following a power supply inter-
ruption, the system must be activated by being
initialized.
Brake Force Display*
The brake lamps light up in two stages,
depending on how sharply you apply the
brakes.
>Normal braking:
The brake lamps and the center brake lamp
light up.
>Sharp braking:
The illuminated surface of the brake lamps
is enlarged, as long as the rear fog light is
not switched on.
Airbags
The following airbags are located under the
marked covers:
1Front airbags
2Head airbags
3Side airbags
Protective action
Observe the adjustment instructions on
page31 to ensure the best possible per-
sonal protection.<
The front airbags help protect the driver and
front passenger by responding to frontal impacts in which safety belts alone cannot pro-
vide adequate restraint. When needed, the
head and side airbags help provide protection in
the event of side impact. The relevant side air-
bag supports the side upper body area. The
head air bag supports the head.
The airbags will purposely not be activated by
every collision, e.g. not by more minor acci-
dents, certain roll-over situations and rear-end
collisions.
Do not apply adhesive materials to the
cover panels of the airbags, cover them or
modify them in any other way. Do not attach
Page 74 of 160

Technology for driving comfort and safety
72 seat covers, cushions or other objects not spe-
cifically approved for seats with integral side air-
bags to the front seats. Do not hang items of
clothing such as coats or jackets over the back-
rests. Do not attempt to remove the airbag
retention system from the vehicle. Do not mod-
ify the individual components of the system or
its wiring in any way. This includes the uphol-
stered covers on the steering wheel, instrument
panel, seats and roof posts, as well as the sides
of the roof lining. Do not attempt to remove or
dismantle the steering wheel.
Do not touch the individual components imme-
diately after the system has been triggered,
because there is a danger of burns.
In the event of malfunctions, deactivation, or
triggering of the airbag restraint system, have
the testing, repair, removal, and disposal of air-
bag generators executed only by a BMW Cen-
ter or a workshop that works according to BMW
repair procedures with correspondingly trained
personnel and has the required explosives
licenses. Unprofessional attempts to service
the system could lead to failure in an emer-
gency or undesired airbag activation, either of
which could result in personal injury.<
Warning notices and information about the air-
bags can also be found on the sun visors.
Automatic deactivation of the front
passenger airbags
An analysis of the impression in the front pas-
senger seat cushion determines whether and
how the seat is occupied. The front and side air-
bags for the front passenger are activated or
deactivated by the system accordingly.
The indicator lamp above the interior
rearview mirror shows the current status
of the front passenger airbags, deactivated or
activated, refer to Status of front passenger air-
bags below.
Before transporting a child on the front
passenger seat, read the safety precau-
tions and handling instructions under Trans-
porting children safely, refer to page39.
The front and side airbags can also be deacti-
vated by adolescents and adults sitting in cer-
tain positions; the indicator lamp for the front passenger airbags comes on. In such cases, the
passenger should change his or her sitting
position so that the front passenger airbags are
activated and the indicator lamp goes out. If the
desired airbag status cannot be achieved by
changing the sitting position, transport the rele-
vant passenger on a rear seat. Do not attach
seat covers, seat cushion padding, ball mats or
other items to the front passenger seat unless
they are specifically recommended by BMW.
Do not place any items under the seat which
could press against the seat from below. Other-
wise a correct analysis of the seat cushion is not
ensured.<
Status of front passenger airbags
The indicator lamp for the front passenger air-
bags shows the functional status of the front
passenger's front and side airbags in accor-
dance with whether and how the front passen-
ger seat is occupied. The indicator lamp shows
whether the front passenger airbags are acti-
vated or deactivated.
>The indicator lamp comes on as intended
when a child in a specially designated child-
restraint system is detected on the seat.
The front and side airbags for the front pas-
senger are not activated.
>The indicator lamp does not come on as
long as a person of sufficient size and in a
correct sitting position is detected on the
seat.
The front and side airbags for the front pas-
senger are activated.
>The indicator lamp does not come on if the
seat is empty.
The front and side airbags for the front pas-
senger are not activated.
Page 78 of 160

Lamps
76 of the road surface. Depending on the steering
angle and other parameters, the light from the
headlamp follows the course of the road.
Activating Adaptive Head Light
With the ignition on, turn the light switch to the
automatic headlamp control position, refer to
page74.
To avoid dazzling the drivers of oncoming vehi-
cles, Adaptive Head Light is not active when the
car is driven in reverse, and directs the light to
the front passenger's side when the vehicle is at
a standstill.
Malfunction
The LED next to the symbol for automatic head-
lamp control flashes. Adaptive Head Light is
malfunctioning or has failed. Have the system
checked as soon as possible.
High beams/roadside parking
lamps
1High beams
2Headlamp flasher
3Roadside parking lamps
*
Roadside parking lamps, left or right*
There is an additional option of switching on the
lamps on the side of the car facing the road
when parked, if permitted in the country of use.
After parking the vehicle, press the lever up or
down beyond the pressure point, arrow 3.
The roadside parking lamps drain the bat-
tery. Therefore, do not leave them on for
unduly long periods of time, otherwise the bat-tery might not have enough power to start the
engine.<
Fog lamps*
The parking lamps or low beams must
be switched on for the fog lamps to
operate. The green indicator lamp in
the instrument cluster lights up whenever the
fog lamps are on.
Depending on your vehicle's equipment ver-
sion, the fog lamps are switched off when you
activate the headlamp flasher or switch on the
high beams
*.
If the automatic headlamp control is acti-
vated, the low beams will come on auto-
matically when you switch on the fog lamps.<
Instrument lighting
You can adjust the brightness of the instrument
lighting only when the parking lamps or the low
beams are switched on.
1.Lightly push button 1 up or down repeat-
edly until the appropriate symbol appears in
Page 81 of 160

Reference
At a glance
Controls
Driving tips
Mobility
79
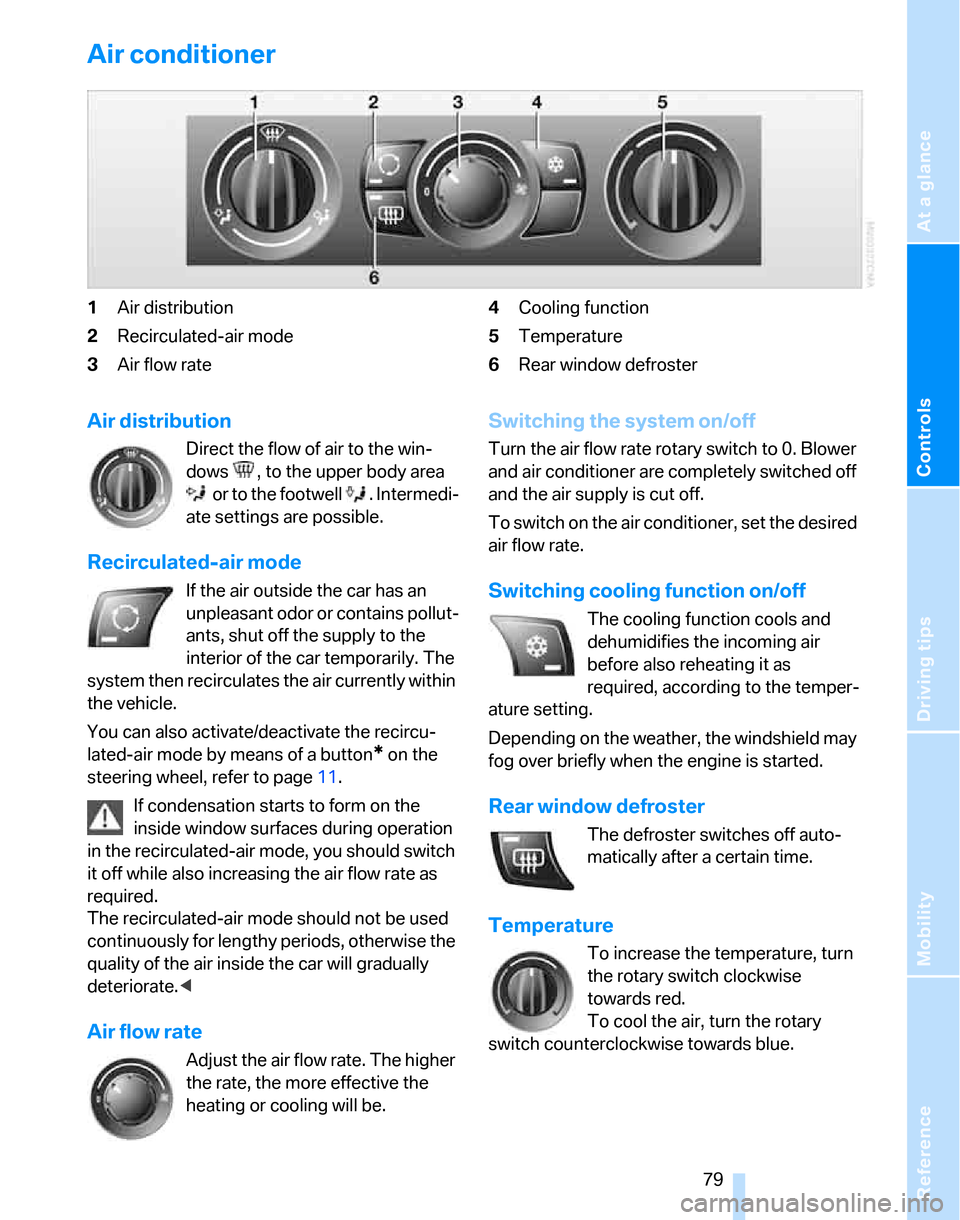
Air conditioner
1Air distribution
2Recirculated-air mode
3Air flow rate4Cooling function
5Temperature
6Rear window defroster
Air distribution
Direct the flow of air to the win-
dows , to the upper body area
or to the footwell . Intermedi-
ate settings are possible.
Recirculated-air mode
If the air outside the car has an
unpleasant odor or contains pollut-
ants, shut off the supply to the
interior of the car temporarily. The
system then recirculates the air currently within
the vehicle.
You can also activate/deactivate the recircu-
lated-air mode by means of a button
* on the
steering wheel, refer to page11.
If condensation starts to form on the
inside window surfaces during operation
in the recirculated-air mode, you should switch
it off while also increasing the air flow rate as
required.
The recirculated-air mode should not be used
continuously for lengthy periods, otherwise the
quality of the air inside the car will gradually
deteriorate.<
Air flow rate
Adjust the air flow rate. The higher
the rate, the more effective the
heating or cooling will be.
Switching the system on/off
Turn the air flow rate rotary switch to 0. Blower
and air conditioner are completely switched off
and the air supply is cut off.
To switch on the air conditioner, set the desired
air flow rate.
Switching cooling function on/off
The cooling function cools and
dehumidifies the incoming air
before also reheating it as
required, according to the temper-
ature setting.
Depending on the weather, the windshield may
fog over briefly when the engine is started.
Rear window defroster
The defroster switches off auto-
matically after a certain time.
Temperature
To increase the temperature, turn
the rotary switch clockwise
towards red.
To cool the air, turn the rotary
switch counterclockwise towards blue.
Page 84 of 160

Climate
82 should therefore open them for maximum cool-
ing.
AUTO program
The AUTO program adjusts the air
distribution to the windshield and
side windows, towards the upper
body area and into the footwell for you. The air
flow rate and your temperature specifications
will be adapted to outside influences as a result
of seasonal changes, e.g. sunlight or window
condensation.
The cooling is switched on automatically with
the AUTO program.
Adjusting air flow rate manually
Press the left side of the button to
reduce airflow. Press the right side
of the button to increase it.
You can reactivate the automatic mode for the
air flow rate with the AUTO button.
Switching the system on/off
With the blower at its lowest setting, press the
left side of the button to switch off the auto-
matic climate control. All indicators go out.
Press any button except REST to reactivate the
automatic climate control.
AUC Automatic recirculated-air
control/Recirculated-air mode
Switch on the desired operating
mode by pressing this button
repeatedly:
>LEDs off: outside air flows in continuously.
>Left-hand LED on, AUC mode: a sensor
detects pollutants in the outside air. If nec-
essary, the system blocks the supply of out-
side air and recirculates the inside air. As
soon as the concentration of pollutants in
the outside air has decreased sufficiently,
the system automatically switches back to
outside air supply.
>Right-hand LED on, recirculated-air mode:
the supply of outside air is permanently shut off. The system then recirculates the
air currently within the vehicle.
If condensation starts to form on the
inside window surfaces during operation
in the recirculated-air mode, you should switch
it off while also increasing the air flow rate as
required.
The recirculated-air mode should not be used
over an extended period of time, otherwise the
air quality inside the car will deteriorate contin-
uously.<
Via the button* on the steering wheel
You can switch between operating modes via a
button
on the steering wheel, refer to page11:
>When outside air is coming in, you can use
the button on the steering wheel to switch
between outside air and recirculated-air
mode.
>When recirculated-air mode or AUC mode
is switched on, you can use the button on
the steering wheel to switch between recir-
culated-air mode and AUC mode.
Residual heat
The heat stored in the engine is
used to heat the passenger com-
partment, e.g. while stopped at a
school to pick up a child.
The function can be switched on when the fol-
lowing conditions are met:
>Up to 15 minutes after the engine has been
switched off
>While the engine is at operating tempera-
ture
>As long as battery voltage is sufficient
>At an outside temperature below 777/
256
The LED is lit when the function is on.
As of radio readiness, you can set the interior
temperature, the air flow rate and the air distri-
bution.
Page 90 of 160

Practical interior accessories
88
Connecting
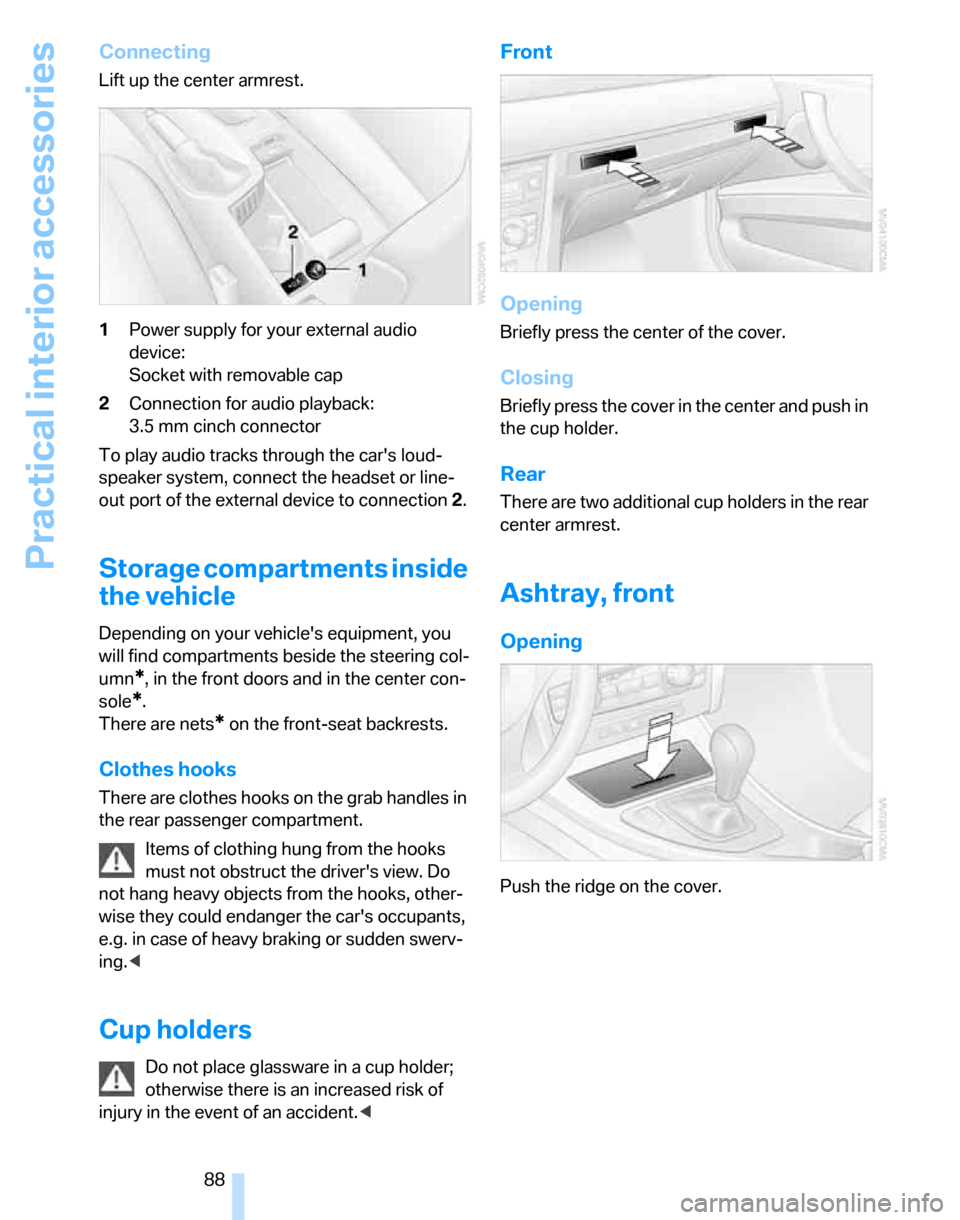
Lift up the center armrest.
1Power supply for your external audio
device:
Socket with removable cap
2Connection for audio playback:
3.5 mm cinch connector
To play audio tracks through the car's loud-
speaker system, connect the headset or line-
out port of the external device to connection 2.
Storage compartments inside
the vehicle
Depending on your vehicle's equipment, you
will find compartments beside the steering col-
umn
*, in the front doors and in the center con-
sole
*.
There are nets
* on the front-seat backrests.
Clothes hooks
There are clothes hooks on the grab handles in
the rear passenger compartment.
Items of clothing hung from the hooks
must not obstruct the driver's view. Do
not hang heavy objects from the hooks, other-
wise they could endanger the car's occupants,
e.g. in case of heavy braking or sudden swerv-
ing.<
Cup holders
Do not place glassware in a cup holder;
otherwise there is an increased risk of
injury in the event of an accident.<
Front
Opening
Briefly press the center of the cover.
Closing
Briefly press the cover in the center and push in
the cup holder.
Rear
There are two additional cup holders in the rear
center armrest.
Ashtray, front
Opening
Push the ridge on the cover.
Page 99 of 160

Reference
At a glance
Controls
Driving tips
Mobility
97
there is no assurance that the radiation which
results from transmission will be dissipated
from the vehicle interior.<
Interior and exterior mirrors, automatic
dimming feature*
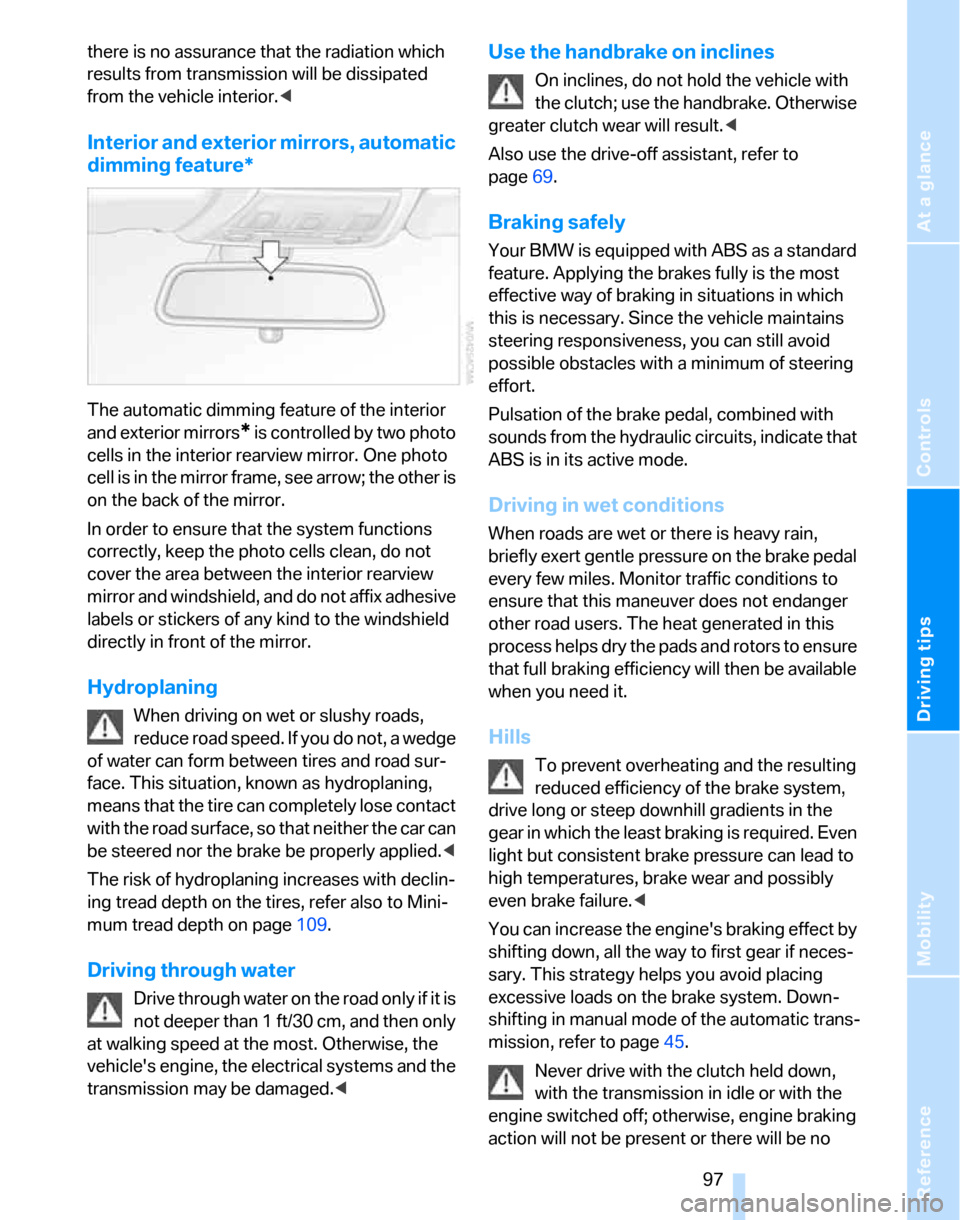
The automatic dimming feature of the interior
and exterior mirrors
* is controlled by two photo
cells in the interior rearview mirror. One photo
cell is in the mirror frame, see arrow; the other is
on the back of the mirror.
In order to ensure that the system functions
correctly, keep the photo cells clean, do not
cover the area between the interior rearview
mirror and windshield, and do not affix adhesive
labels or stickers of any kind to the windshield
directly in front of the mirror.
Hydroplaning
When driving on wet or slushy roads,
reduce road speed. If you do not, a wedge
of water can form between tires and road sur-
face. This situation, known as hydroplaning,
means that the tire can completely lose contact
with the road surface, so that neither the car can
be steered nor the brake be properly applied.<
The risk of hydroplaning increases with declin-
ing tread depth on the tires, refer also to Mini-
mum tread depth on page109.
Driving through water
Drive through water on the road only if it is
not deeper than 1 ft/30 cm, and then only
at walking speed at the most. Otherwise, the
vehicle's engine, the electrical systems and the
transmission may be damaged.<
Use the handbrake on inclines
On inclines, do not hold the vehicle with
the clutch; use the handbrake. Otherwise
greater clutch wear will result.<
Also use the drive-off assistant, refer to
page69.
Braking safely
Your BMW is equipped with ABS as a standard
feature. Applying the brakes fully is the most
effective way of braking in situations in which
this is necessary. Since the vehicle maintains
steering responsiveness, you can still avoid
possible obstacles with a minimum of steering
effort.
Pulsation of the brake pedal, combined with
sounds from the hydraulic circuits, indicate that
ABS is in its active mode.
Driving in wet conditions
When roads are wet or there is heavy rain,
briefly exert gentle pressure on the brake pedal
every few miles. Monitor traffic conditions to
ensure that this maneuver does not endanger
other road users. The heat generated in this
process helps dry the pads and rotors to ensure
that full braking efficiency will then be available
when you need it.
Hills
To prevent overheating and the resulting
reduced efficiency of the brake system,
drive long or steep downhill gradients in the
gear in which the least braking is required. Even
light but consistent brake pressure can lead to
high temperatures, brake wear and possibly
even brake failure.<
You can increase the engine's braking effect by
shifting down, all the way to first gear if neces-
sary. This strategy helps you avoid placing
excessive loads on the brake system. Down-
shifting in manual mode of the automatic trans-
mission, refer to page45.
Never drive with the clutch held down,
with the transmission in idle or with the
engine switched off; otherwise, engine braking
action will not be present or there will be no
Page 100 of 160

Things to remember when driving
98 power assistance to the brakes or steering.
Never allow floor mats, carpets or any other
objects to protrude into the area around the
pedals, otherwise pedal function could be
impaired.<
Corrosion on brake rotors
When the vehicle is driven only occasionally,
during extended periods when the vehicle is not
used at all, and in operating conditions where
brake applications are less frequent, there is an
increased tendency for corrosion to form on
rotors, while contaminants accumulate on the
brake pads. This occurs because the minimum
pressure which must be exerted by the pads
during brake applications to clean the rotors is
not reached.
Should corrosion form on the brake rotors, the
brakes will tend to respond with a pulsating
effect that even extended application will fail to
cure.
When the vehicle is parked
Condensation forms while the automatic cli-
mate control is in operation, and then exits
under the vehicle. Traces of condensed water
under the vehicle are therefore normal.
Before driving into a car wash
For general information about taking care of
your BMW, refer to the Caring for your vehicle
brochure.
With convenient access and automatic
transmission
Insert the remote control into the ignition
switch.
The engine can be switched off when the selec-
tor lever is in position N. Refer also to page27.
Cargo loading
To avoid loading the tires beyond their
approved carrying capacity, never over-
load the vehicle. Overloading can lead to over-
heating and increases the rate at which damage develops inside the tires. The ultimate result
can assume the form of a sudden blow-out.<
Determining loading limit
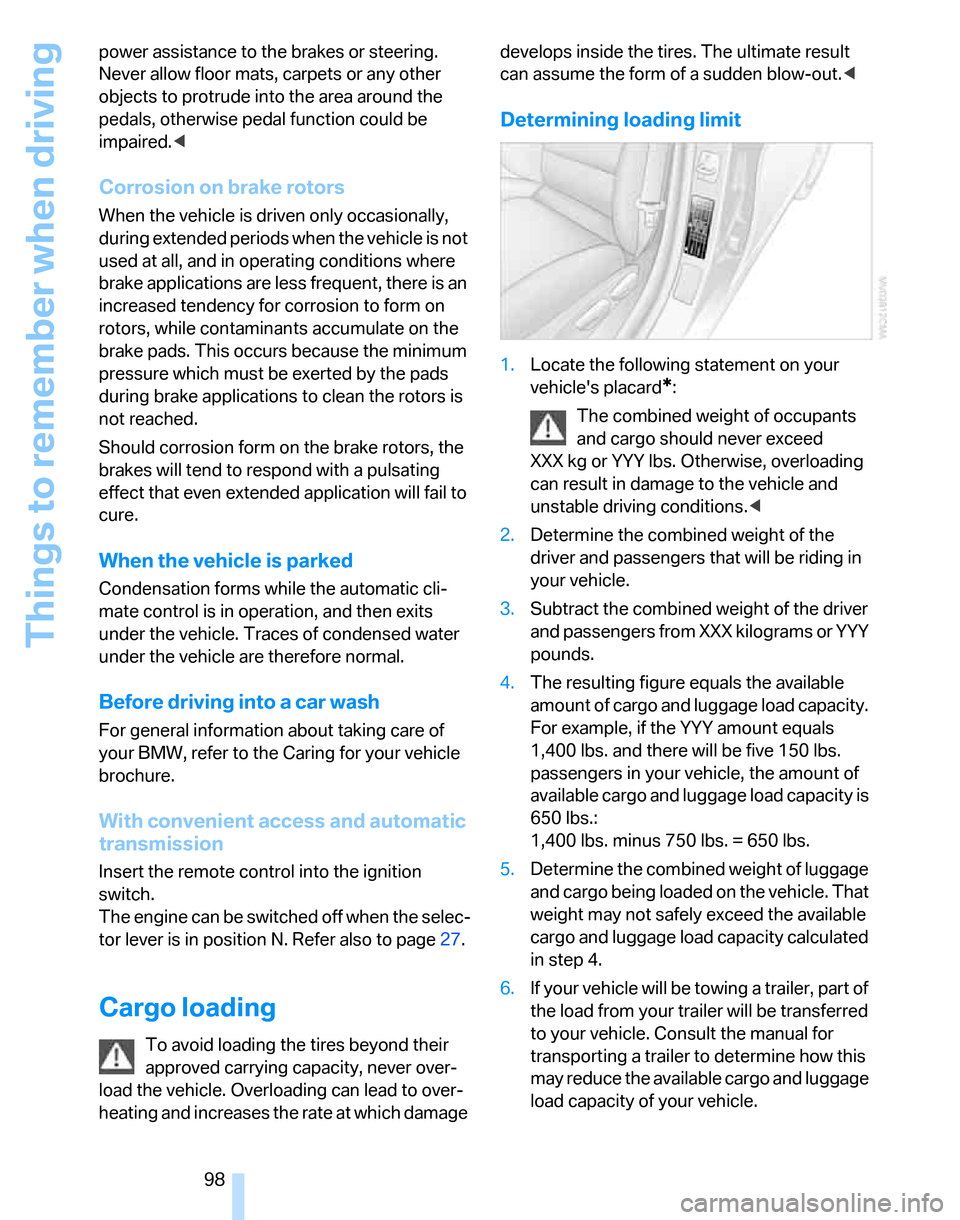
1.Locate the following statement on your
vehicle's placard
*:
The combined weight of occupants
and cargo should never exceed
XXX kg or YYY lbs. Otherwise, overloading
can result in damage to the vehicle and
unstable driving conditions.<
2.Determine the combined weight of the
driver and passengers that will be riding in
your vehicle.
3.Subtract the combined weight of the driver
and passengers from XXX kilograms or YYY
pounds.
4.The resulting figure equals the available
amount of cargo and luggage load capacity.
For example, if the YYY amount equals
1,400 lbs. and there will be five 150 lbs.
passengers in your vehicle, the amount of
available cargo and luggage load capacity is
650 lbs.:
1,400 lbs. minus 750 lbs. = 650 lbs.
5.Determine the combined weight of luggage
and cargo being loaded on the vehicle. That
weight may not safely exceed the available
cargo and luggage load capacity calculated
in step 4.
6.If your vehicle will be towing a trailer, part of
the load from your trailer will be transferred
to your vehicle. Consult the manual for
transporting a trailer to determine how this
may reduce the available cargo and luggage
load capacity of your vehicle.