2006 BMW 325XI TOURING service
[x] Cancel search: servicePage 74 of 160

Technology for driving comfort and safety
72 seat covers, cushions or other objects not spe-
cifically approved for seats with integral side air-
bags to the front seats. Do not hang items of
clothing such as coats or jackets over the back-
rests. Do not attempt to remove the airbag
retention system from the vehicle. Do not mod-
ify the individual components of the system or
its wiring in any way. This includes the uphol-
stered covers on the steering wheel, instrument
panel, seats and roof posts, as well as the sides
of the roof lining. Do not attempt to remove or
dismantle the steering wheel.
Do not touch the individual components imme-
diately after the system has been triggered,
because there is a danger of burns.
In the event of malfunctions, deactivation, or
triggering of the airbag restraint system, have
the testing, repair, removal, and disposal of air-
bag generators executed only by a BMW Cen-
ter or a workshop that works according to BMW
repair procedures with correspondingly trained
personnel and has the required explosives
licenses. Unprofessional attempts to service
the system could lead to failure in an emer-
gency or undesired airbag activation, either of
which could result in personal injury.<
Warning notices and information about the air-
bags can also be found on the sun visors.
Automatic deactivation of the front
passenger airbags
An analysis of the impression in the front pas-
senger seat cushion determines whether and
how the seat is occupied. The front and side air-
bags for the front passenger are activated or
deactivated by the system accordingly.
The indicator lamp above the interior
rearview mirror shows the current status
of the front passenger airbags, deactivated or
activated, refer to Status of front passenger air-
bags below.
Before transporting a child on the front
passenger seat, read the safety precau-
tions and handling instructions under Trans-
porting children safely, refer to page39.
The front and side airbags can also be deacti-
vated by adolescents and adults sitting in cer-
tain positions; the indicator lamp for the front passenger airbags comes on. In such cases, the
passenger should change his or her sitting
position so that the front passenger airbags are
activated and the indicator lamp goes out. If the
desired airbag status cannot be achieved by
changing the sitting position, transport the rele-
vant passenger on a rear seat. Do not attach
seat covers, seat cushion padding, ball mats or
other items to the front passenger seat unless
they are specifically recommended by BMW.
Do not place any items under the seat which
could press against the seat from below. Other-
wise a correct analysis of the seat cushion is not
ensured.<
Status of front passenger airbags
The indicator lamp for the front passenger air-
bags shows the functional status of the front
passenger's front and side airbags in accor-
dance with whether and how the front passen-
ger seat is occupied. The indicator lamp shows
whether the front passenger airbags are acti-
vated or deactivated.
>The indicator lamp comes on as intended
when a child in a specially designated child-
restraint system is detected on the seat.
The front and side airbags for the front pas-
senger are not activated.
>The indicator lamp does not come on as
long as a person of sufficient size and in a
correct sitting position is detected on the
seat.
The front and side airbags for the front pas-
senger are activated.
>The indicator lamp does not come on if the
seat is empty.
The front and side airbags for the front pas-
senger are not activated.
Page 82 of 160
Climate
80
Defrosting windows and removing
condensation
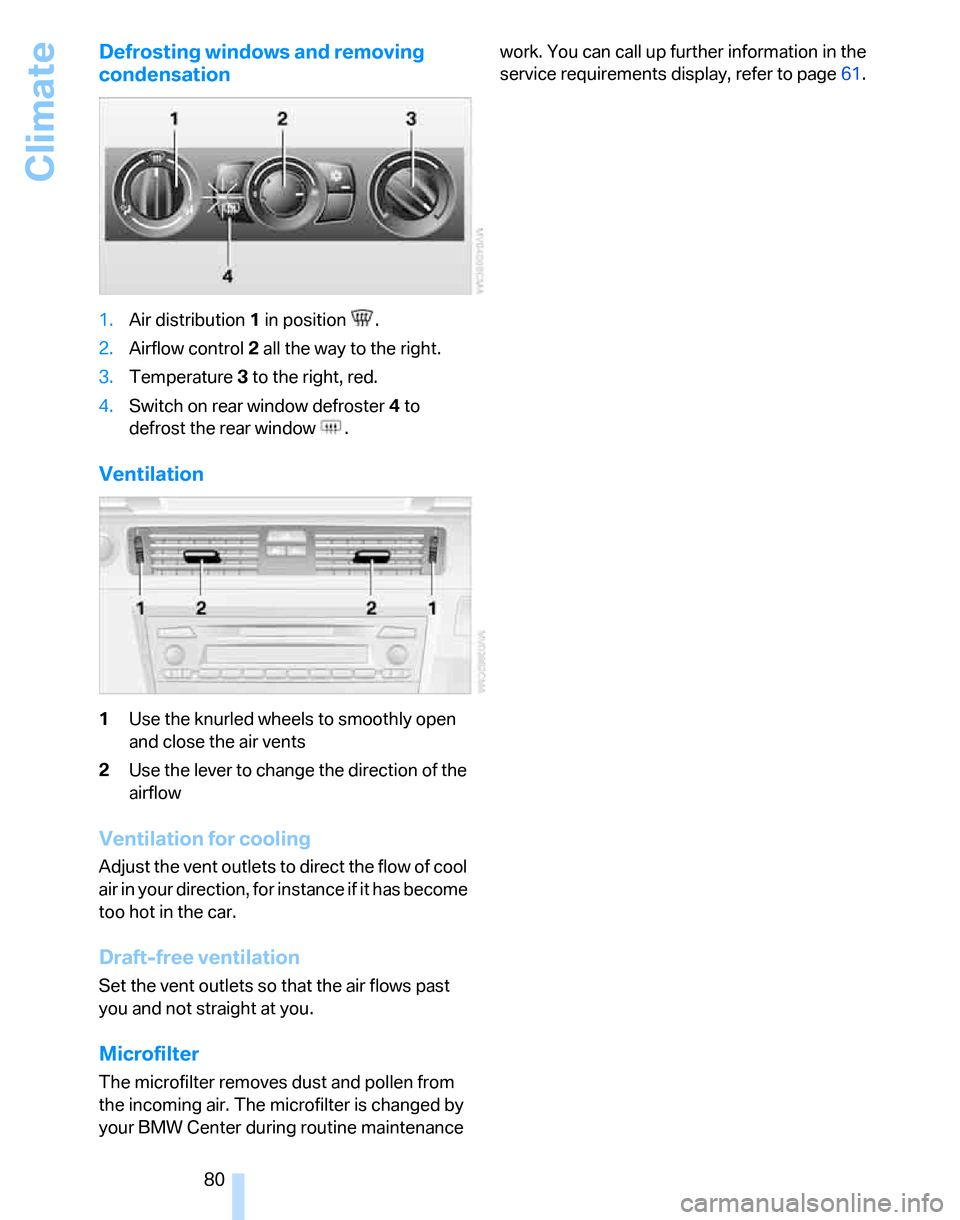
1.Air distribution1 in position .
2.Airflow control2 all the way to the right.
3.Temperature3 to the right, red.
4.Switch on rear window defroster 4 to
defrost the rear window .
Ventilation
1Use the knurled wheels to smoothly open
and close the air vents
2Use the lever to change the direction of the
airflow
Ventilation for cooling
Adjust the vent outlets to direct the flow of cool
air in your direction, for instance if it has become
too hot in the car.
Draft-free ventilation
Set the vent outlets so that the air flows past
you and not straight at you.
Microfilter
The microfilter removes dust and pollen from
the incoming air. The microfilter is changed by
your BMW Center during routine maintenance work. You can call up further information in the
service requirements display, refer to page61.
Page 85 of 160
Reference
At a glance
Controls
Driving tips
Mobility
83
Defrosting windows and removing
condensation
Quickly removes ice and conden-
sation from the windshield and
front side windows.
Switching cooling function on/off
The cooling function cools and
dehumidifies the incoming air
before also reheating it as
required, according to the temperature setting.
Depending on the weather, the windshield may
fog over briefly when the engine is started.
The cooling function is automatically switched
on along with the AUTO program. The passen-
ger compartment can only be cooled while the
engine is running.
Rear window defroster
The defroster switches off auto-
matically after a certain time.
Ventilation
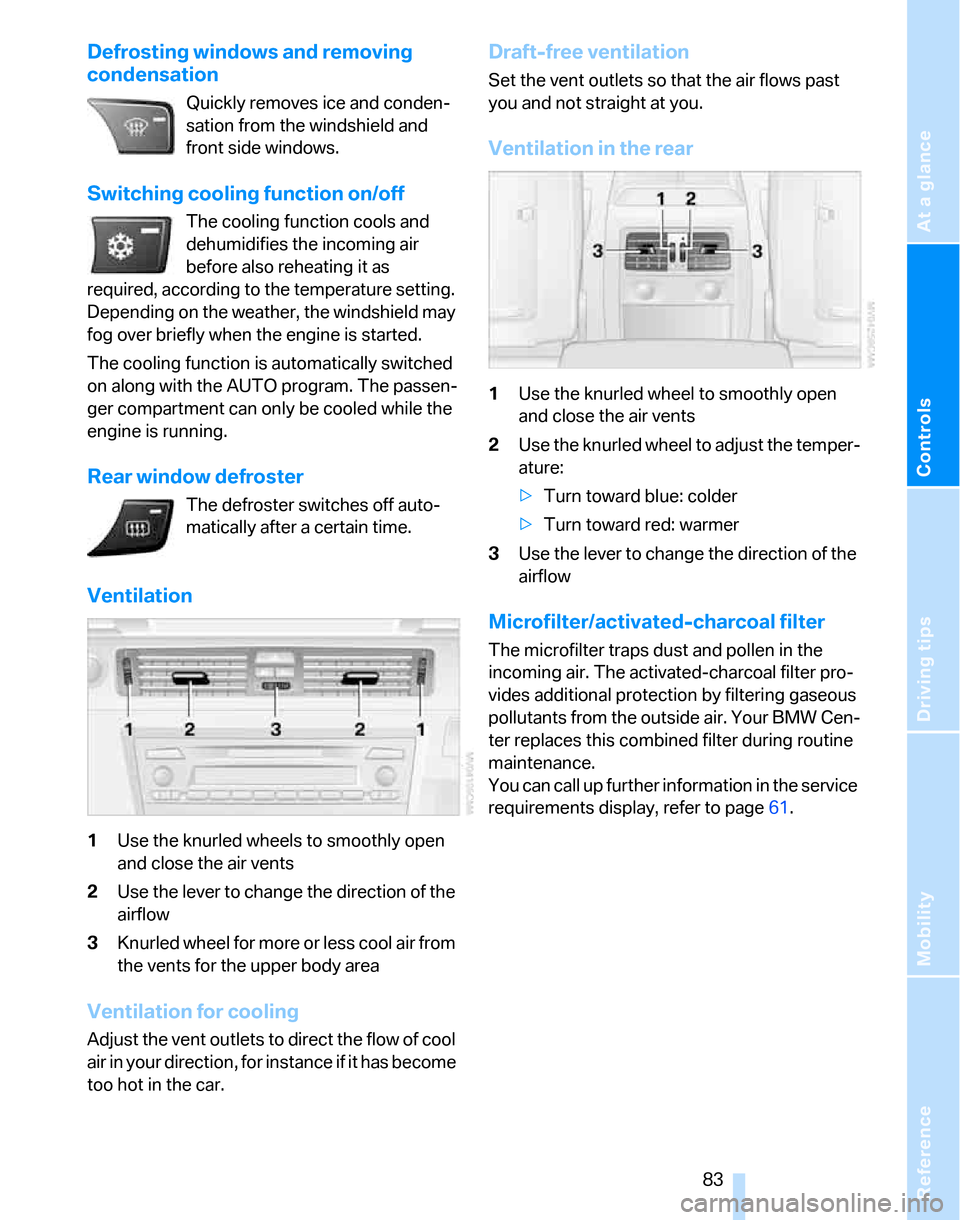
1Use the knurled wheels to smoothly open
and close the air vents
2Use the lever to change the direction of the
airflow
3Knurled wheel for more or less cool air from
the vents for the upper body area
Ventilation for cooling
Adjust the vent outlets to direct the flow of cool
air in your direction, for instance if it has become
too hot in the car.
Draft-free ventilation
Set the vent outlets so that the air flows past
you and not straight at you.
Ventilation in the rear
1Use the knurled wheel to smoothly open
and close the air vents
2Use the knurled wheel to adjust the temper-
ature:
>Turn toward blue: colder
>Turn toward red: warmer
3Use the lever to change the direction of the
airflow
Microfilter/activated-charcoal filter
The microfilter traps dust and pollen in the
incoming air. The activated-charcoal filter pro-
vides additional protection by filtering gaseous
pollutants from the outside air. Your BMW Cen-
ter replaces this combined filter during routine
maintenance.
You can call up further information in the service
requirements display, refer to page61.
Page 98 of 160
Things to remember when driving
96
Things to remember when driving
Break-in period
Moving parts need breaking-in time to adjust to
each other. Please follow the instructions below
in order to achieve the optimal service life and
economy of operation for your vehicle.
Engine and differential
Always obey all official speed limits.
Up to 1,200 miles/2,000 km
Attempt to vary both engine and vehicle
speeds, but refrain from exceeding an engine
speed of 4,500 rpm or a driving speed of
100 mph or 160 km/h.
Avoid full-throttle operation and use of the
transmission's kick-down mode.
After 1,200 miles/2,000 km
Engine and vehicle speeds can be gradually
increased.
Tires
Due to technical factors associated with their
manufacture, tires do not achieve their full trac-
tion potential until after an initial break-in
period. Therefore, drive cautiously during the
first 200 miles/300 km.
Brake system
Brakes require an initial break-in period of
approx. 300 miles/500 km to achieve optimized
contact and wear patterns between brake pads
and rotors. Drive cautiously during this break-in
period.
Clutch
The function of the clutch reaches its optimal
level only after a distance driven of approx.
300 miles/500 km. During this break-in period,
engage the clutch gently.
Following part replacement
The same break-in procedures should be
observed if any of the components mentioned
above have to be renewed in the course of the
vehicle's operating life.
General driving notes
Close the tailgate
Operate the vehicle only when the tail-
gate and rear window are closed. Other-
wise, exhaust fumes could enter the interior of
the vehicle.<
If special circumstances make it absolutely nec-
essary to drive with the tailgate or rear window
open:
1.Close all windows and the glass sunroof.
2.Increase the air flow rate of the air condi-
tioner or automatic climate control consid-
erably, refer to page79 or82.
Hot exhaust system
In all vehicles, extremely high tempera-
tures are generated in the exhaust sys-
tem. Do not remove the heat shields installed
adjacent to various sections of the exhaust sys-
tem, and never apply undercoating to them.
When driving, standing at idle and while park-
ing, take care to avoid possible contact
between the hot exhaust system and any highly
flammable materials such as hay, leaves, grass,
etc. Such contact could lead to a fire, with the
risk of serious personal injuries and property
damage.<
Mobile phone in the vehicle
BMW discourages the use of mobile
communications devices, e.g. mobile
phones, inside the vehicle without a direct con-
nection to an outside antenna. Otherwise, the
vehicle electronics and mobile communication
device can influence one another. In addition,
Page 105 of 160
Mobility
This section helps you maintain your car's
mobility by supplying important information
on vital topics including fuels and lubricants,
wheels and tires, service, maintenance and
breakdown assistance.
Mobility
Page 106 of 160
Refueling
104
Refueling
Always switch off the engine before refu-
eling, otherwise, fuel cannot be added to
the tank and a message will be displayed.<
Take all precautionary measures and
observe all applicable regulations when
handling fuel. Do not carry any spare fuel con-
tainers in your vehicle. They can develop a leak
and cause an explosion or cause a fire in the
event of an accident.<
Gas cap
Opening
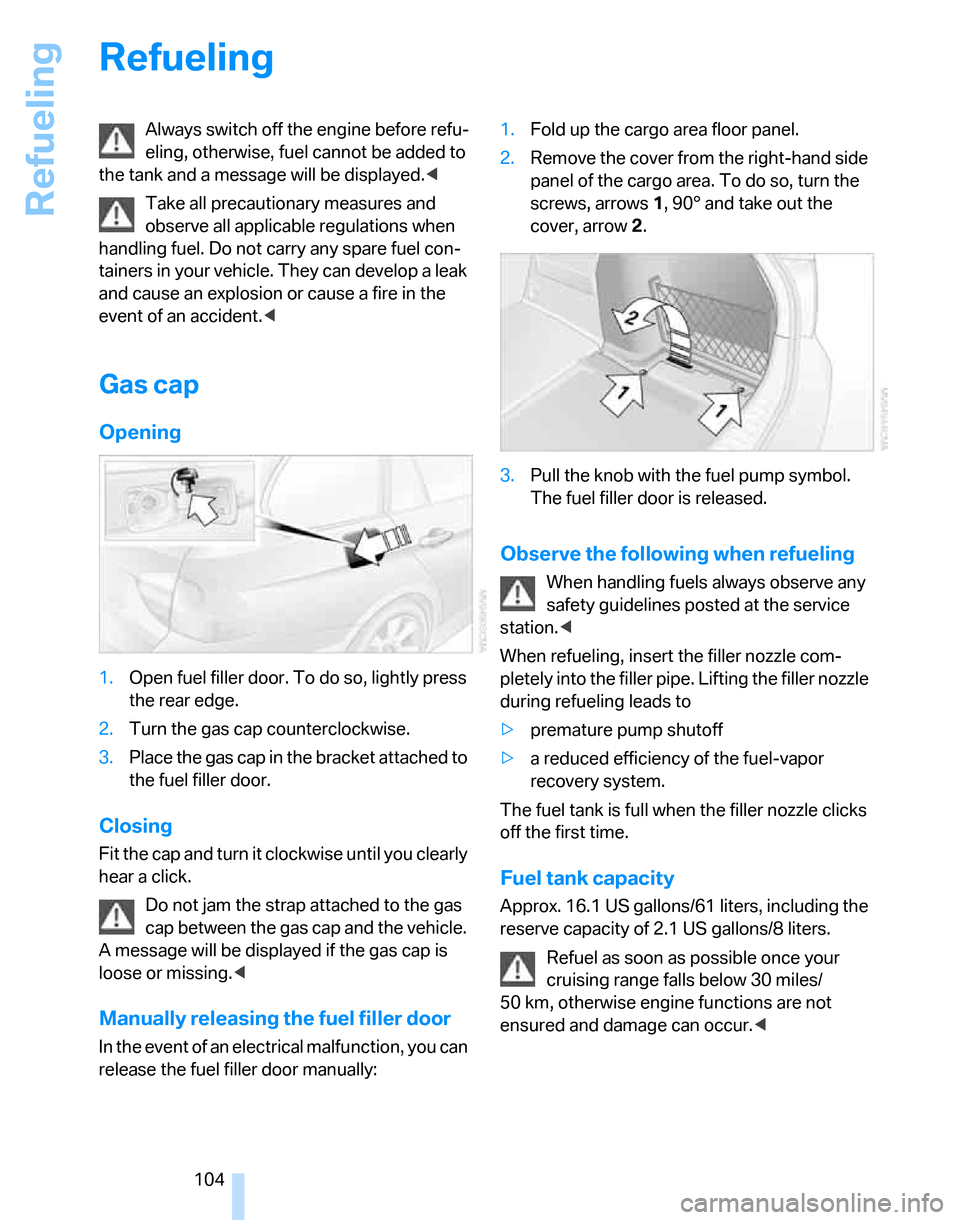
1.Open fuel filler door. To do so, lightly press
the rear edge.
2.Turn the gas cap counterclockwise.
3.Place the gas cap in the bracket attached to
the fuel filler door.
Closing
Fit the cap and turn it clockwise until you clearly
hear a click.
Do not jam the strap attached to the gas
cap between the gas cap and the vehicle.
A message will be displayed if the gas cap is
loose or missing.<
Manually releasing the fuel filler door
In the event of an electrical malfunction, you can
release the fuel filler door manually:1.Fold up the cargo area floor panel.
2.Remove the cover from the right-hand side
panel of the cargo area. To do so, turn the
screws, arrows 1, 90° and take out the
cover, arrow 2.
3.Pull the knob with the fuel pump symbol.
The fuel filler door is released.
Observe the following when refueling
When handling fuels always observe any
safety guidelines posted at the service
station.<
When refueling, insert the filler nozzle com-
pletely into the filler pipe. Lifting the filler nozzle
during refueling leads to
>premature pump shutoff
>a reduced efficiency of the fuel-vapor
recovery system.
The fuel tank is full when the filler nozzle clicks
off the first time.
Fuel tank capacity
Approx. 16.1 US gallons/61 liters, including the
reserve capacity of 2.1 US gallons/8 liters.
Refuel as soon as possible once your
cruising range falls below 30 miles/
50 km, otherwise engine functions are not
ensured and damage can occur.<
Page 108 of 160
Wheels and tires
106
Wheels and tires
Tire inflation pressures
Information for your safety
It is not merely the tires' service life, but also
driving comfort and, to a great extent, driving
safety that depend on the condition of the tires
and the maintenance of the specified tire pres-
sure.
Check the tire inflation pressure regularly
and correct it, if necessary: at least twice a
month and before starting long trips. If you fail
to observe this precaution you may be driving
on tires with incorrect tire pressures, a condi-
tion that can not only compromise your vehi-
cle's driving stability, but also lead to tire dam-
age and the risk of an accident. Do not drive
with deflated, i.e. flat tires, except when using
Run-Flat Tires. A flat tire will seriously impair
your vehicle's handling and braking response.
Attempts to drive on a flat tire can lead to loss of
control over the vehicle.<
Checking pressure
Only check tire inflation pressure when the
tires are cold. This means after a maximum of
1.25 miles/2 km driving or when the vehicle has
been parked for at least 2 hours. When tires are
warm, the tire inflation pressure is higher.
After correcting tire inflation pressures,
always reinitialize the Flat Tire Monitor,
refer to page69.<
Inflation pressure specifications
The tables below provide all the correct inflation
pressures for the specified tire sizes at ambient
temperature.
The inflation pressures apply to the tire
sizes approved and tire brands recom-
mended by BMW; a list of these is available
from your BMW Center.<
For correct identification of the right tire infla-
tion pressures, observe the following:
>Tire sizes for your vehicle>Load conditions
>Maximum allowable driving speed
Tire inflation pressures for driving up to
100 mph or 160 km/h
For normal driving up to 100 mph or 160 km/h
and to achieve optimum driving comfort, adjust
pressures to the respective tire inflation pres-
sures listed on the following pages in the col-
umns for traveling speeds up to a maximum of
100 mph or 160 km/h.
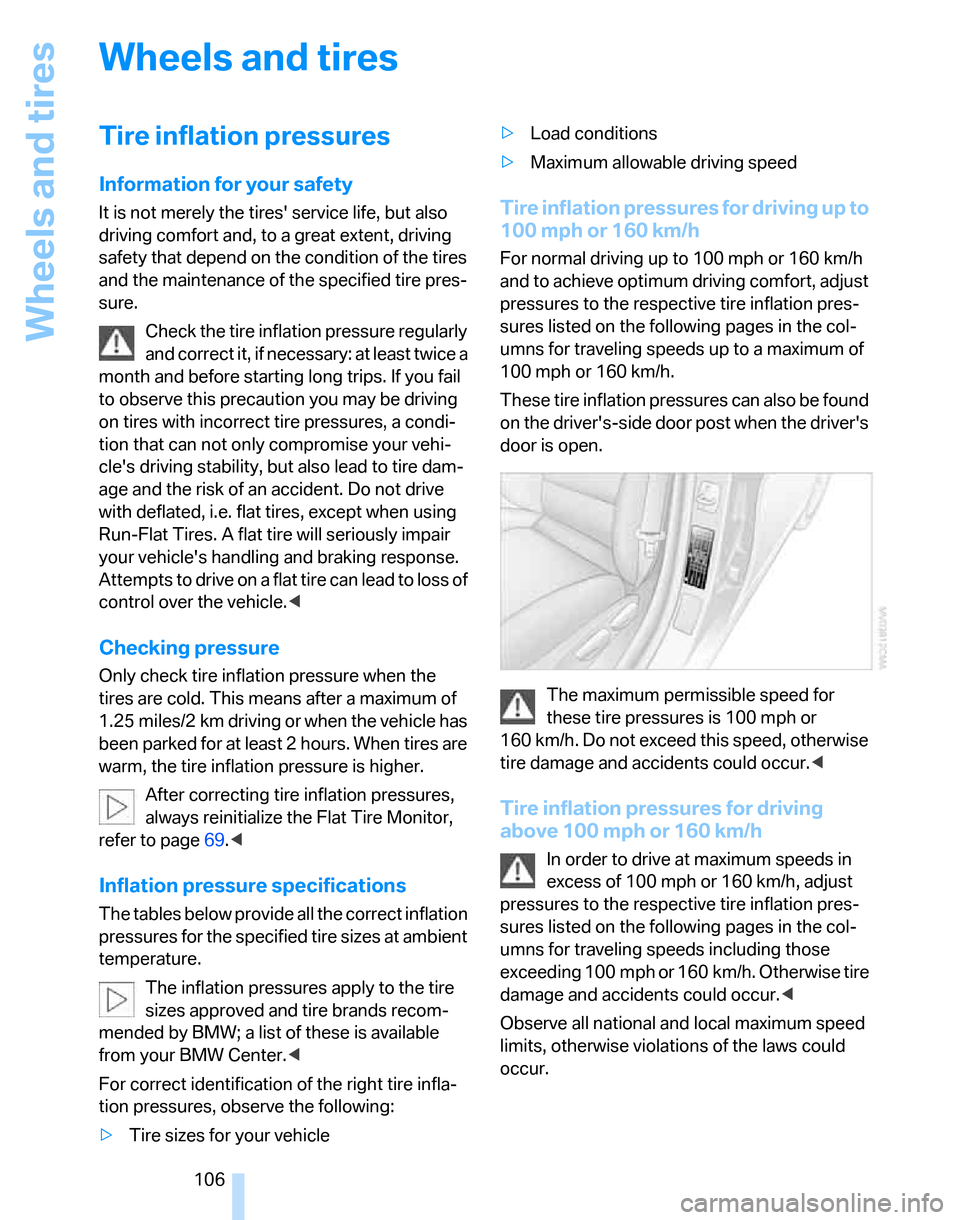
These tire inflation pressures can also be found
on the driver's-side door post when the driver's
door is open.
The maximum permissible speed for
these tire pressures is 100 mph or
160 km/h. Do not exceed this speed, otherwise
tire damage and accidents could occur.<
Tire inflation pressures for driving
above 100 mph or 160 km/h
In order to drive at maximum speeds in
excess of 100 mph or 160 km/h, adjust
pressures to the respective tire inflation pres-
sures listed on the following pages in the col-
umns for traveling speeds including those
exceeding 100 mph or 160 km/h. Otherwise tire
damage and accidents could occur.<
Observe all national and local maximum speed
limits, otherwise violations of the laws could
occur.
Page 110 of 160

Wheels and tires
108
Tire identification marks
Knowledge of the labeling on the side of the tire
makes it easier to identify and choose the right
tires.
Tire size
Speed code letter
Q = up to 100 mph or 160 km/h
T = up to 118 mph or 190 km/h
H = up to 131 mph or 210 km/h
V = up to 150 mph or 240 km/h
W = up to 167 mph or 270 km/h
Y = up to 186 mph or 300 km/h
Tire Identification Number
Tires with DOT codes meet the guidelines of
the US Department of Transport.
DOT code:
Tire age
The manufacturing date of tires is contained in
the tire coding: DOT … 0705 means that the
tire was manufactured in week 7 of 2005.
BMW recommends that you replace all tires
after 6 years at most, even if some tires may last
for 10 years.
Uniform Tire Quality Grading
Quality grades can be found where applicable
on the tire sidewall between tread shoulder and
maximum section width. For example:
Tread wear 200 Traction AA
Temperature A
DOT Quality Grades
Tread wear
Traction AA A B C
Temperature A B C
All passenger car tires must conform to
Federal Safety Requirements in addition
to these grades.<
Tread wear
The tread wear grade is a comparative rating
based on the wear rate of the tire when tested
under controlled conditions on a specified gov-
ernment test course. For example, a tire graded
150 would wear one and one-half (1γ) times as
well on the government course as a tire graded
100. The relative performance of tires depends
upon the actual conditions of their use, how-
ever, and may depart significantly from the
norm due to variations in driving habits, service
practices and differences in road characteris-
tics and climate.
Traction
The traction grades, from highest to lowest, are
AA, A, B, and C.
Those grades represent the tire's ability to stop
on wet pavement as measured under controlled
conditions on specified government test sur-
faces of asphalt and concrete. A tire marked C
may have poor traction performance.
The traction grade assigned to this tire is
based on straight-ahead braking traction
tests, and does not include acceleration, cor-
nering, hydroplaning, or peak traction charac-
teristics.< e.g.
Nominal width in mm
Aspect ratio in Ξ
Radial belt construction
Rim diameter in inches
Load rating,
not on ZR tires
Speed code letter, in
front of the R on ZR tires
225/45 R1791 V
e.g.
Manufacturer's code
for tire make
Tire size and
tire design
Tire ageDOT xxxx xxx 0705