2006 BMW 325XI TOURING radio
[x] Cancel search: radioPage 44 of 160

Driving
42
Driving
Ignition lock
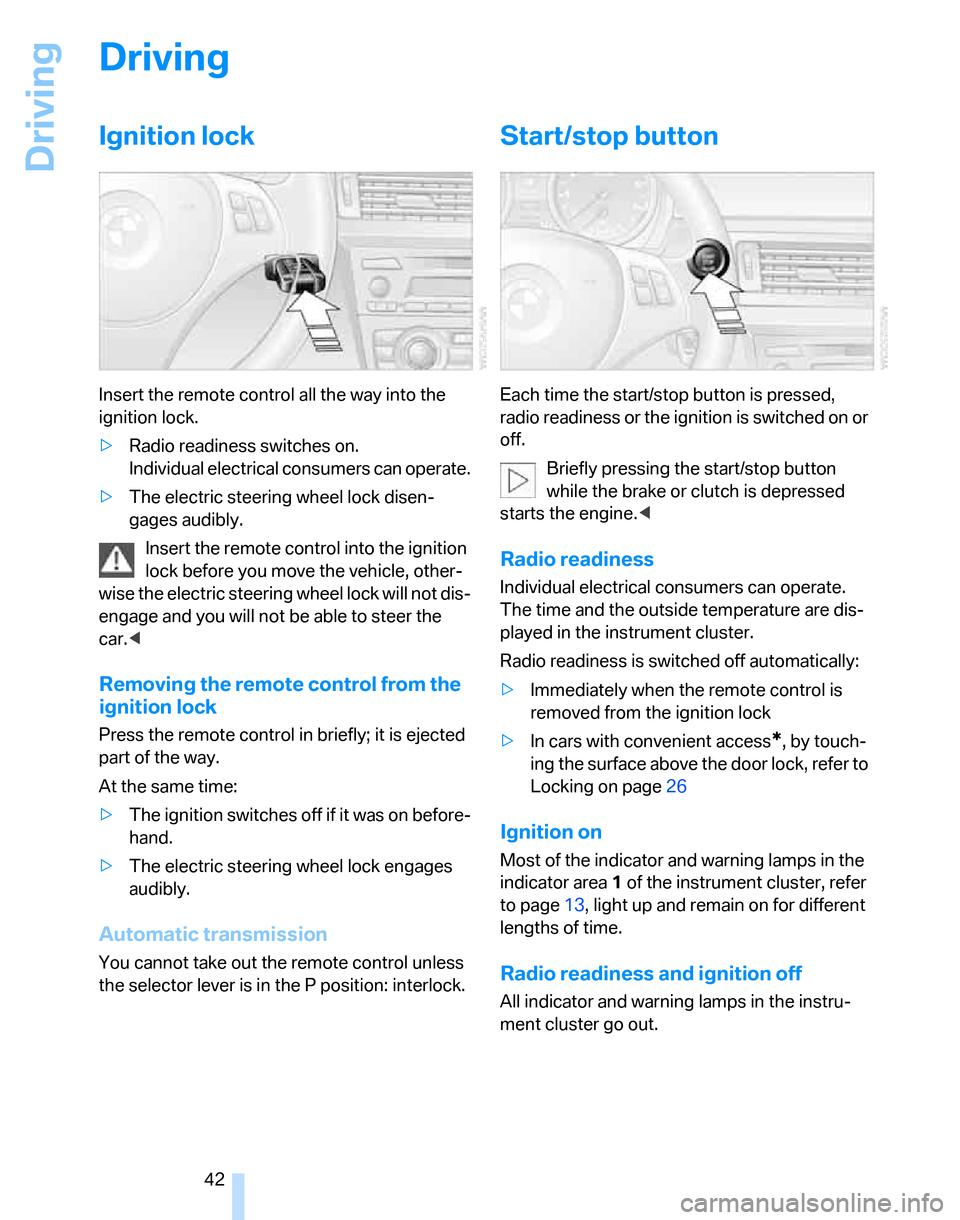
Insert the remote control all the way into the
ignition lock.
>Radio readiness switches on.
Individual electrical consumers can operate.
>The electric steering wheel lock disen-
gages audibly.
Insert the remote control into the ignition
lock before you move the vehicle, other-
wise the electric steering wheel lock will not dis-
engage and you will not be able to steer the
car.<
Removing the remote control from the
ignition lock
Press the remote control in briefly; it is ejected
part of the way.
At the same time:
>The ignition switches off if it was on before-
hand.
>The electric steering wheel lock engages
audibly.
Automatic transmission
You cannot take out the remote control unless
the selector lever is in the P position: interlock.
Start/stop button
Each time the start/stop button is pressed,
radio readiness or the ignition is switched on or
off.
Briefly pressing the start/stop button
while the brake or clutch is depressed
starts the engine.<
Radio readiness
Individual electrical consumers can operate.
The time and the outside temperature are dis-
played in the instrument cluster.
Radio readiness is switched off automatically:
>Immediately when the remote control is
removed from the ignition lock
>In cars with convenient access
*, by touch-
ing the surface above the door lock, refer to
Locking on page26
Ignition on
Most of the indicator and warning lamps in the
indicator area1 of the instrument cluster, refer
to page13, light up and remain on for different
lengths of time.
Radio readiness and ignition off
All indicator and warning lamps in the instru-
ment cluster go out.
Page 75 of 160

Reference
At a glance
Controls
Driving tips
Mobility
73
Operational readiness of airbag system
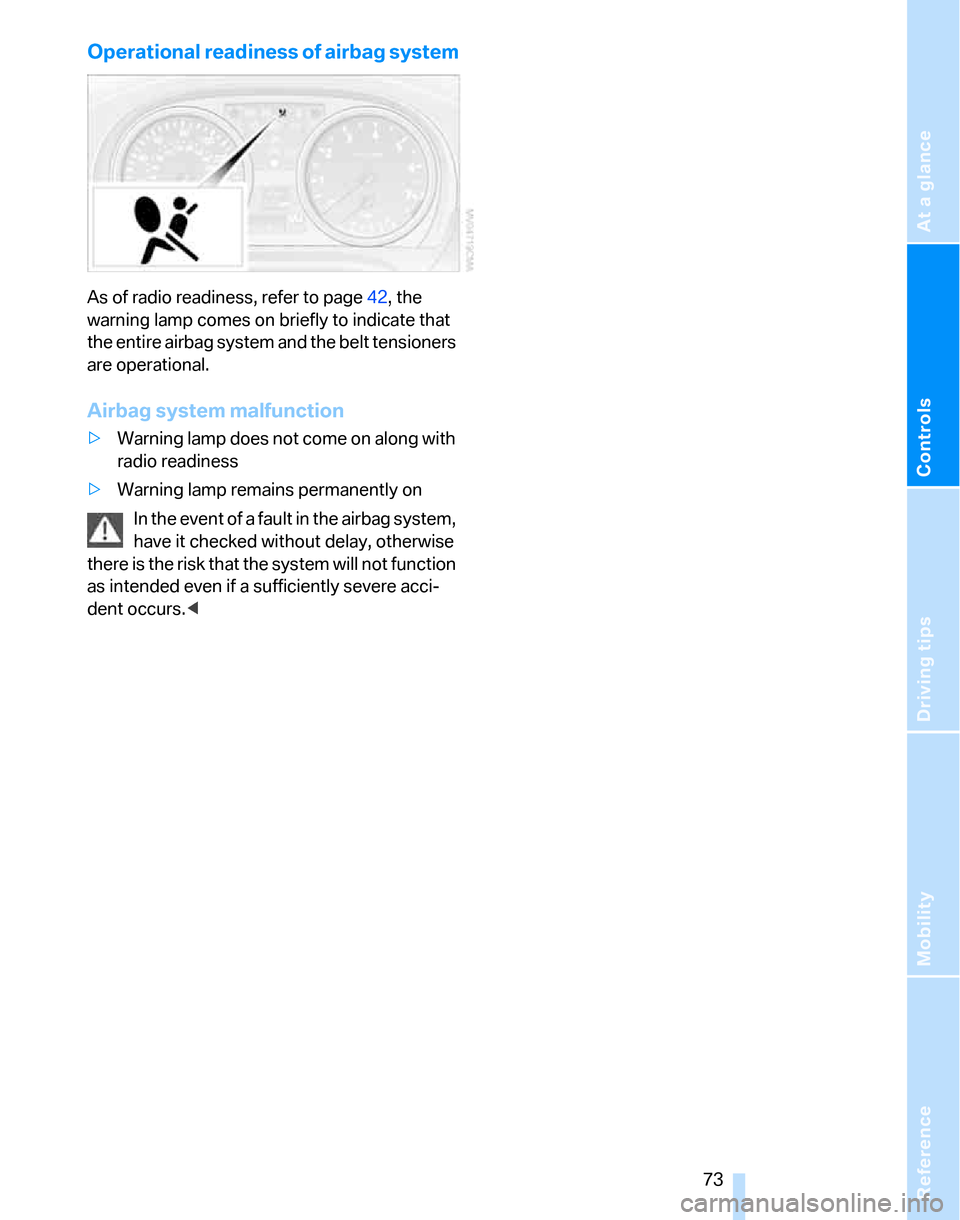
As of radio readiness, refer to page42, the
warning lamp comes on briefly to indicate that
the entire airbag system and the belt tensioners
are operational.
Airbag system malfunction
>Warning lamp does not come on along with
radio readiness
>Warning lamp remains permanently on
In the event of a fault in the airbag system,
have it checked without delay, otherwise
there is the risk that the system will not function
as intended even if a sufficiently severe acci-
dent occurs.<
Page 84 of 160

Climate
82 should therefore open them for maximum cool-
ing.
AUTO program
The AUTO program adjusts the air
distribution to the windshield and
side windows, towards the upper
body area and into the footwell for you. The air
flow rate and your temperature specifications
will be adapted to outside influences as a result
of seasonal changes, e.g. sunlight or window
condensation.
The cooling is switched on automatically with
the AUTO program.
Adjusting air flow rate manually
Press the left side of the button to
reduce airflow. Press the right side
of the button to increase it.
You can reactivate the automatic mode for the
air flow rate with the AUTO button.
Switching the system on/off
With the blower at its lowest setting, press the
left side of the button to switch off the auto-
matic climate control. All indicators go out.
Press any button except REST to reactivate the
automatic climate control.
AUC Automatic recirculated-air
control/Recirculated-air mode
Switch on the desired operating
mode by pressing this button
repeatedly:
>LEDs off: outside air flows in continuously.
>Left-hand LED on, AUC mode: a sensor
detects pollutants in the outside air. If nec-
essary, the system blocks the supply of out-
side air and recirculates the inside air. As
soon as the concentration of pollutants in
the outside air has decreased sufficiently,
the system automatically switches back to
outside air supply.
>Right-hand LED on, recirculated-air mode:
the supply of outside air is permanently shut off. The system then recirculates the
air currently within the vehicle.
If condensation starts to form on the
inside window surfaces during operation
in the recirculated-air mode, you should switch
it off while also increasing the air flow rate as
required.
The recirculated-air mode should not be used
over an extended period of time, otherwise the
air quality inside the car will deteriorate contin-
uously.<
Via the button* on the steering wheel
You can switch between operating modes via a
button
on the steering wheel, refer to page11:
>When outside air is coming in, you can use
the button on the steering wheel to switch
between outside air and recirculated-air
mode.
>When recirculated-air mode or AUC mode
is switched on, you can use the button on
the steering wheel to switch between recir-
culated-air mode and AUC mode.
Residual heat
The heat stored in the engine is
used to heat the passenger com-
partment, e.g. while stopped at a
school to pick up a child.
The function can be switched on when the fol-
lowing conditions are met:
>Up to 15 minutes after the engine has been
switched off
>While the engine is at operating tempera-
ture
>As long as battery voltage is sufficient
>At an outside temperature below 777/
256
The LED is lit when the function is on.
As of radio readiness, you can set the interior
temperature, the air flow rate and the air distri-
bution.
Page 86 of 160

Practical interior accessories
84
Practical interior accessories
Integrated universal remote
control*
The concept
The integrated universal remote control can
replace as many as three hand-held transmit-
ters for various remote-controlled devices,
such as door openers and house alarm sys-
tems. The integrated universal remote control
registers and stores signals from the original
hand-held transmitters.
The signal of an original hand-held transmitter
can be programmed on one of the three mem-
ory buttons1. After this, the programmed
memory button1 will operate the system in
question. The LED2 flashes to confirm trans-
mission of the signal.
Should you sell your vehicle one day, be sure to
delete the stored programs beforehand for your
safety, refer to page85.
To prevent possible damage or injury,
before programming or using the inte-
grated universal remote control, always inspect
the immediate area to make certain that no peo-
ple, animals or objects are within the pivoting or
travel range of the device being operated. Com-
ply also with the safety instructions supplied
with the original hand-held transmitter.<
Checking compatibility
If this symbol appears on the package
or in the instructions supplied with the
original hand-held transmitter, you can
assume that the radio remote control device will
be compatible with the integrated universal
remote control.
For additional information, please contact your
BMW Center or call: 1-800-355-3515.
You can also obtain information on the Internet
at:
www.bmwusa.com or
www.homelink.com. HomeLink is a registered trademark of Johnson
Controls, Inc.<
Programming
1Memory buttons
2LED
Fixed-code hand-held transmitters
1.Switch on the ignition, refer to page42.
2.When starting operation for the first time:
Press both outer memory buttons1 for
approx. 20 seconds until the LED2 flashes.
all stored programs are cleared.
3.Hold the original hand-held transmitter at a
distance of approx. 2 to 8 in/5 to 20 cm from
the memory buttons1.
The required distance between the
hand-held transmitter and the mem-
ory buttons1 depends on the system of the
respective original hand-held transmitter
used.<
4.Simultaneously press the transmit key on
the original hand-held transmitter and the
desired memory button 1 on the integrated
universal remote control. The LED 2 flashes
slowly at first. As soon as the LED2 flashes
rapidly, release both buttons. If the LED2
does not flash rapidly after approx. 15 sec-
onds, alter the distance.
5.To program other original hand-held trans-
mitters, repeat steps 3 and 4.
Page 89 of 160

Reference
At a glance
Controls
Driving tips
Mobility
87
Glove compartment
Opening
Pull the handle.
The light in the glove compartment switches
on.
Closing
Fold the cover up.
To prevent injury in the event of an acci-
dent while the vehicle is being driven,
close the glove compartment immediately after
use.<
Locking
To lock the glove compartment, use the inte-
grated key of the remote control or the spare
key, refer to page18.
Rechargeable flashlight*
It is on the left-hand side of the glove compart-
ment. The flashlight can remain plugged in.
Whenever required, pull the flashlight out of its
socket.
Only insert the flashlight back into the
socket when it is switched off, otherwise
there is a risk of damage.<
Center armrest
Storage compartment
The center armrest between the front seats
contains either a compartment or the cover for
the snap-in adapter
*, depending on the equip-
ment version.
Opening
Press the button, see arrow.
The lid opens.
Ventilated storage compartment
The storage compartment in the center armrest
can be ventilated: slide the switch backwards.
The temperature is controlled via the knurled
wheel for adjusting the temperature of air venti-
lating the rear of the passenger compartment,
refer to page83.
Connection for external audio device
You can connect an external audio device such
as a CD or MP3 player and play audio tracks
over the car's loudspeaker system. You can set
the volume and tone by means of the car radio,
refer to the separate Owner's Manual for Radio.
Page 126 of 160

Replacing components
124 tialization. Individual settings may likewise have
been lost and will have to be reprogrammed:
>Time and date
These values must be updated, refer to
page62.
>Radio
Stations must be stored again, refer to the
separate Owner's Manual for Radio.
>Panorama glass roof
It may only be possible to raise the sunroof,
if applicable. The system must be initialized.
Please contact your BMW Center.
>Seat and mirror memory
The positions must be stored again, refer to
page34.
>Inside rearview mirror with digital compass
The system must be calibrated, refer to
page86.
Fuses
Never attempt to repair a blown fuse and
do not replace a defective fuse with a sub-
stitute of another color or amperage rating, oth-
erwise this could lead to a circuit overload, ulti-
mately resulting in a fire in the vehicle.<
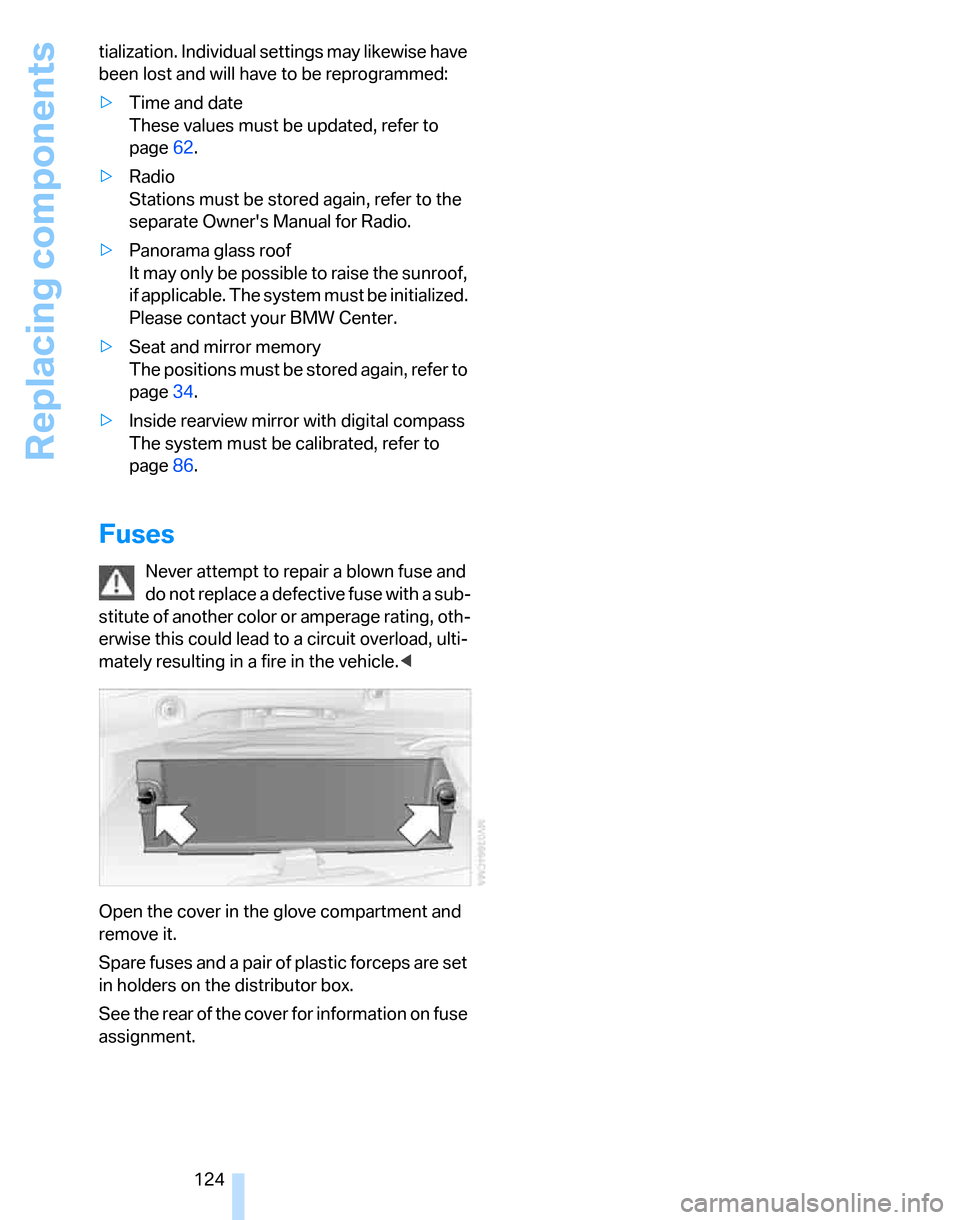
Open the cover in the glove compartment and
remove it.
Spare fuses and a pair of plastic forceps are set
in holders on the distributor box.
See the rear of the cover for information on fuse
assignment.
Page 127 of 160

Reference
At a glance
Controls
Driving tips
Mobility
125
Giving and receiving assistance
Emergency calling*
Conditions for an emergency call:
>Full preparation package mobile phone
>BMW Assist is enabled. Enabling
BMW Assist, refer to separate Owner's
Manual.
>Radio readiness is on.
>The car phone is logged on to a mobile tele-
phone network.
>The emergency call system is operable.
If your subscription contract with BMW Assist
expires, the car phone can be deactivated by a
BMW Center without having to schedule an
appointment at a workshop. Once the car
phone has been deactivated, emergency calls
are not possible. The car phone can be reacti-
vated by a BMW Center after signing a new
contract.
Initiating an emergency call
1.Briefly press the cover flap to open.
2.Press the button for at least 2 seconds.
The LED in the button lights up. As soon as the
voice connection to the BMW Assist response
center has been established, the LED flashes.
If the circumstances allow this, remain in the
vehicle until the connection has been estab-
lished. You will then be able to provide a
detailed description of the situation.If the current location of your vehicle can be
determined, it will be transmitted to the BMW
Assist response center.
If the LED is flashing but the emergency
response center cannot be heard over the
hands-free system, it is possible that the
hands-free system is malfunctioning. The
emergency response center may still be able to
hear you, however.
Under certain conditions, an emergency call is
automatically initiated immediately after a
severe accident. The automatic emergency call
is not affected by the button being pressed.
For technical reasons, the emergency call
cannot be guaranteed under unfavorable
conditions.<
Roadside Assistance
The BMW Group's Roadside Assistance ser-
vice is there to assist you around the clock in
the event of a breakdown, including on week-
ends and public holidays.
The phone numbers of the Roadside Assis-
tance in your home country can be found in the
Contact brochure.
First aid pouch*
The first aid pouch is located on the left-hand
side of the cargo area.
Some of the articles contained in the first aid
pouch have a limited service life. Therefore,
Page 129 of 160

Reference
At a glance
Controls
Driving tips
Mobility
127
Your BMW has a special nut as body ground
or negative pole.
5.Attach the second terminal clamp of the
minus/– jumper cable to the negative termi-
nal of the battery or to the engine or body
ground of the vehicle to be started.
Starting the engine
1.Start the engine of the donor vehicle and
allow it to run for a few minutes at slightly
increased idle speed.
2.Start the engine on the other vehicle in the
usual way.
If the first start attempt is not successful,
wait a few minutes before another attempt
in order to allow the discharged battery to
recharge.
3.Let the engines run for a few minutes.
4.Disconnect the jumper cables by reversing
the above connecting sequence.
If necessary, have the battery checked and
recharged.
Never use spray fluids to start the
engine.<
Tow-starting, towing away
Observe the applicable laws and regula-
tions for tow-starting and towing vehi-
cles.<
Do not transport any occupants other
than the driver in a vehicle that is being
towed.<
Using a tow fitting
The screw-in tow fitting must always be carried
in the car. It can be screwed in at the front or
rear of the BMW.
It is stored in the onboard tool kit underneath
the cover on the right-hand side of the cargo
area, refer to page119.
Use only the tow fitting provided with the
vehicle and screw it all the way in. Use the
tow fitting for towing on paved roads only. Avoid
lateral loading of the tow fitting, e.g. do not lift
the vehicle by the tow fitting. Otherwise the tow
fitting and the vehicle could be damaged.<
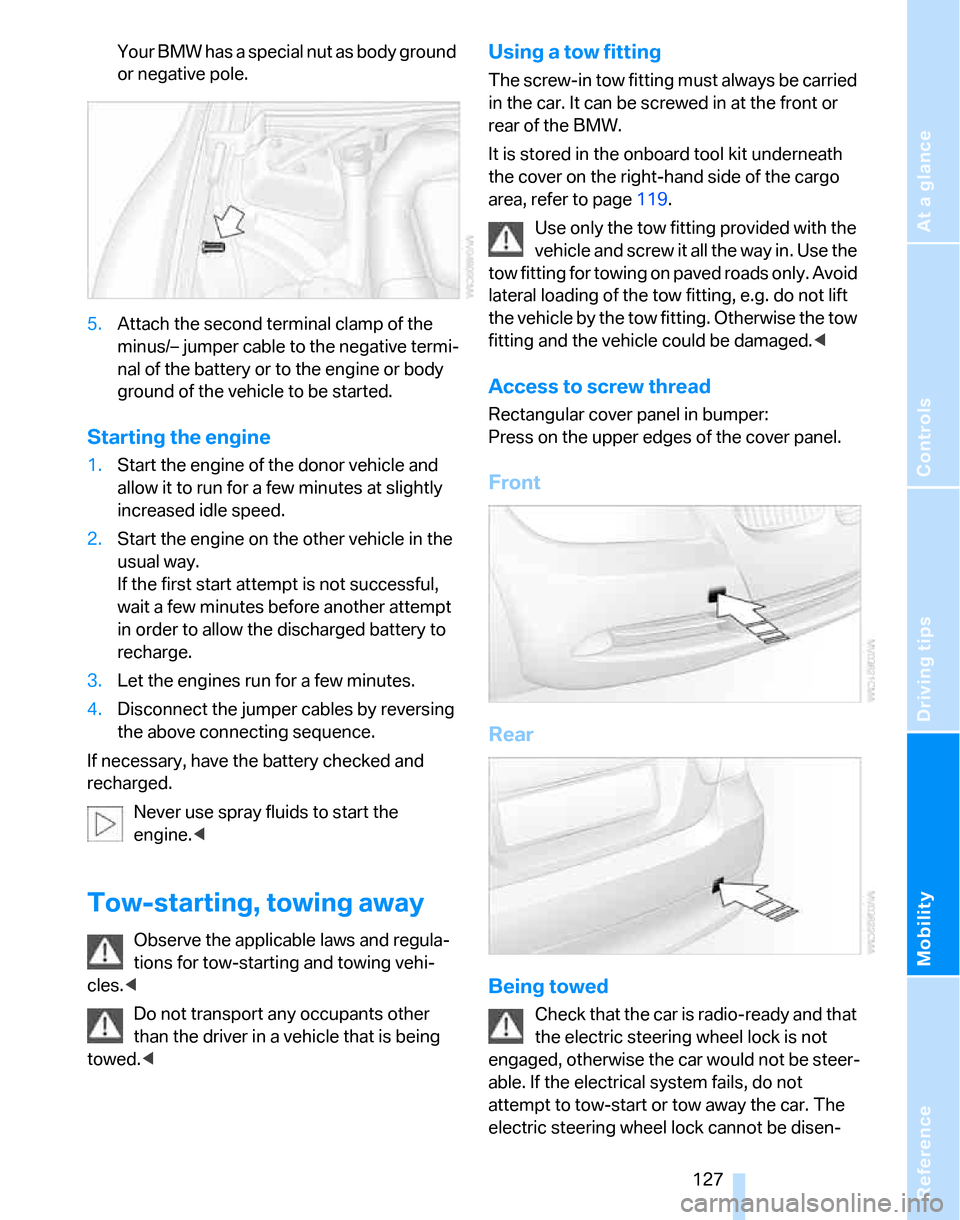
Access to screw thread
Rectangular cover panel in bumper:
Press on the upper edges of the cover panel.
Front
Rear
Being towed
Check that the car is radio-ready and that
the electric steering wheel lock is not
engaged, otherwise the car would not be steer-
able. If the electrical system fails, do not
attempt to tow-start or tow away the car. The
electric steering wheel lock cannot be disen-