2006 BMW 325I SEDAN lock
[x] Cancel search: lockPage 112 of 245

Practical interior accessories
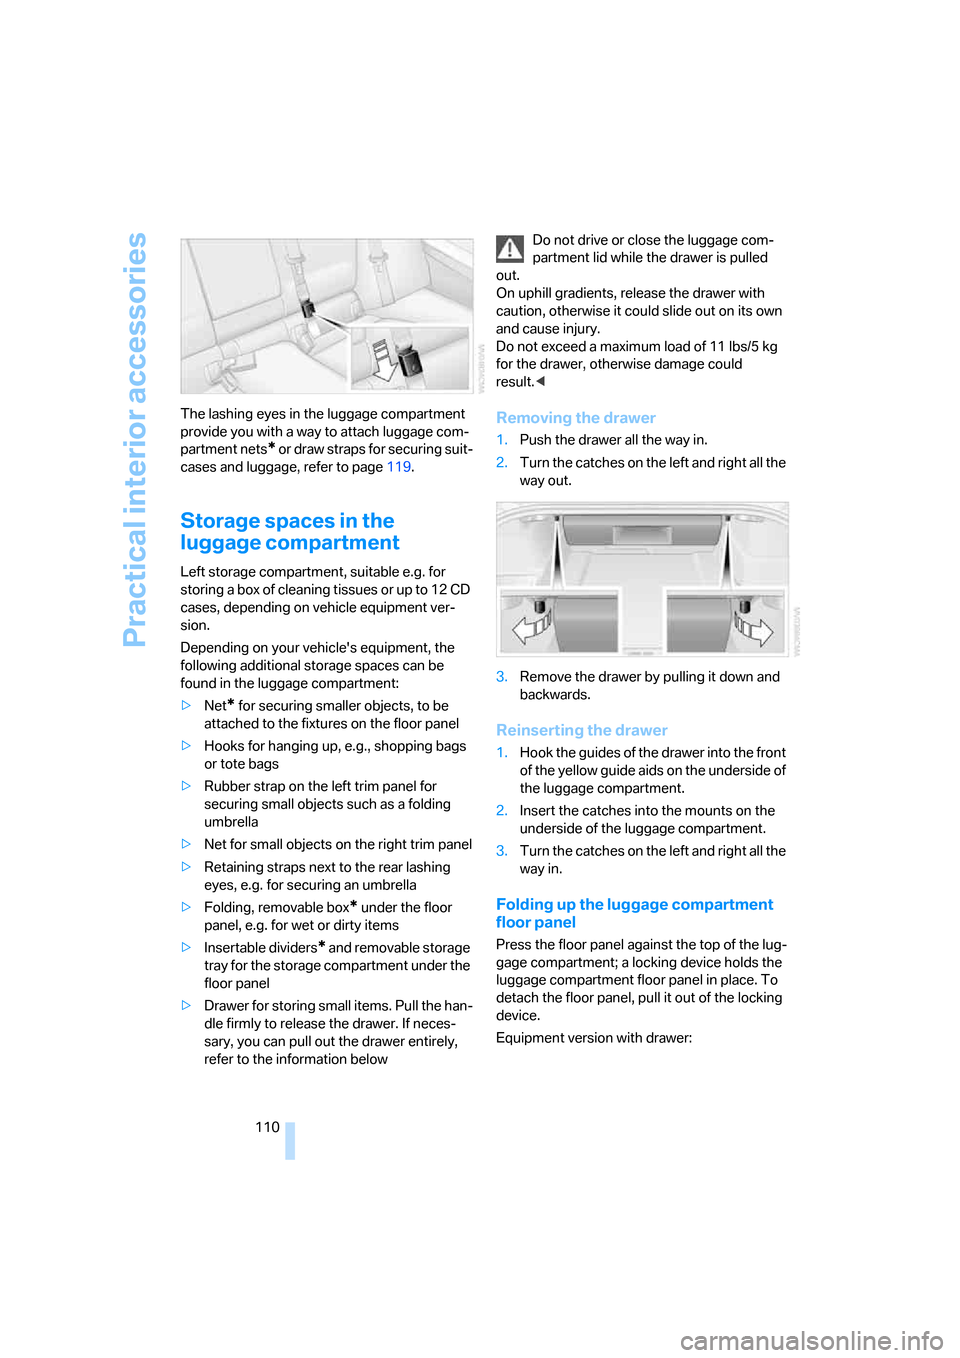
110 The lashing eyes in the luggage compartment
provide you with a way to attach luggage com-
partment nets
* or draw straps for securing suit-
cases and luggage, refer to page119.
Storage spaces in the
luggage compartment
Left storage compartment, suitable e.g. for
storing a box of cleaning tissues or up to 12 CD
cases, depending on vehicle equipment ver-
sion.
Depending on your vehicle's equipment, the
following additional storage spaces can be
found in the luggage compartment:
>Net
* for securing smaller objects, to be
attached to the fixtures on the floor panel
>Hooks for hanging up, e.g., shopping bags
or tote bags
>Rubber strap on the left trim panel for
securing small objects such as a folding
umbrella
>Net for small objects on the right trim panel
>Retaining straps next to the rear lashing
eyes, e.g. for securing an umbrella
>Folding, removable box
* under the floor
panel, e.g. for wet or dirty items
>Insertable dividers
* and removable storage
tray for the storage compartment under the
floor panel
>Drawer for storing small items. Pull the han-
dle firmly to release the drawer. If neces-
sary, you can pull out the drawer entirely,
refer to the information belowDo not drive or close the luggage com-
partment lid while the drawer is pulled
out.
On uphill gradients, release the drawer with
caution, otherwise it could slide out on its own
and cause injury.
Do not exceed a maximum load of 11 lbs/5 kg
for the drawer, otherwise damage could
result.<
Removing the drawer
1.Push the drawer all the way in.
2.Turn the catches on the left and right all the
way out.
3.Remove the drawer by pulling it down and
backwards.
Reinserting the drawer
1.Hook the guides of the drawer into the front
of the yellow guide aids on the underside of
the luggage compartment.
2.Insert the catches into the mounts on the
underside of the luggage compartment.
3.Turn the catches on the left and right all the
way in.
Folding up the luggage compartment
floor panel
Press the floor panel against the top of the lug-
gage compartment; a locking device holds the
luggage compartment floor panel in place. To
detach the floor panel, pull it out of the locking
device.
Equipment version with drawer:
Page 126 of 245

Starting the navigation system
124
Starting the navigation system
Your navigation system can use satellites to
ascertain the precise position of your vehicle
and guide you reliably to any destination you
enter.
Navigation DVD
The navigation system requires a special navi-
gation DVD. You can obtain the latest version at
your BMW Center.
Inserting navigation DVD
1.Insert the navigation DVD with the labeled
side up.
2.Wait for several seconds to allow the con-
tents of the DVD to be read in.
Removing navigation DVD
1. Press button 1.
The DVD emerges slightly from the drive.
2.Remove the DVD.
If the DVD is not ejected from the drive, it is pos-
sible that it is blocked. A message appears on
the Control Display.
Display in the assistance
window
You can display the route or the current position
in the assistance window. This display remains
visible even if you change to another applica-
tion.1.Move the controller to the right to enter the
assistance window.
2.Press the controller.
Other menu items are displayed.
3.Select the desired route view or "Current
position".
4.Press the controller.
The contents of the assistance window are con-
tinually updated as you drive.
*
Page 169 of 245

167
Entertainment
Reference
At a glance
Controls
Driving tips Communications
Navigation
Mobility
Making calls with the car phone*:
BMW Assist calls
You can use the car phone via the hands-free
system for BMW Assist calls.
When the status information "BMW Assist" or
"BMW Service" is displayed in "Communica-
tion", only BMW Assist calls are possible.
It may not be possible to establish a telephone
connection using the mobile phone while a con-
nection is being established to BMW Assist or
while a call to BMW Assist is already in
progress. If this happens, you must unpair the
mobile phone and the vehicle if you wish to
place a call with the mobile phone.
Start-up
Pairing the mobile phone with the
vehicle
The following prerequisites must be met:
>The mobile phone is ready to operate
>The Bluetooth link in the vehicle, refer to
page169, and in the mobile phone are acti-
vated
>Depending on the mobile phone, some
default settings may be necessary for the
mobile phone: e.g. via the menu item Blue-
tooth switched on or the menu item Con-
nection without confirmation.
>For pairing purposes, define any number as
the Bluetooth passkey, e.g. 1. This Blue-
tooth passkey is no longer required after
pairing has been successful.
>The ignition is switched on.
Pair the mobile phone with the vehicle
only when the car is stationary, to avoid
endangering the car's occupants and other
road users by being distracted.<
Switch on ignition
1.Insert remote control all the way into the
ignition lock.
2.Switch on ignition without operating the
brake or clutch or pressing the start/stop
button.
Preparation via iDrive
iDrive concept, refer to page16.
1.Press the button to call up the start
menu.
2.Call up the menu by pressing the control-
ler.
3.Select "Communication settings" and
press the controller.
4.Select "Bluetooth" and press the controller.
5.Select "Phone" and press the controller.
Page 179 of 245

177
Entertainment
Reference
At a glance
Controls
Driving tips Communications
Navigation
Mobility
tact points and press it downward until it
engages.
The mobile phone's battery is charged as soon
as the vehicle is in radio readiness or the steer-
ing is unlocked.
To conserve battery power, you should
avoid using the mobile phone when the
ignition is switched off.<
Remove the mobile phone
Press the button.
Page 183 of 245

181
Entertainment
Reference
At a glance
Controls
Driving tips Communications
Navigation
Mobility
5.Select "Service Status" and press the con-
troller.
The current services available from
TeleService or BMW Assist are displayed.
6.If applicable, select "Options"and press the
controller.
7.Select "Update services" and press the
controller.
Terminating services
When you terminate services, the connection to
BMW Assist is deactivated.
1.Open the start menu.
2.Press the controller to open the menu.
3.Select "Communication settings" and
press the controller.
4.Select "BMW Service settings" and press
the controller.
5.Select "Service Status" and press the con-
troller.
6.Select "Options" and press the controller.
7.Select "Terminate services" and press the
controller.
TeleService or BMW Assist is blocked from
use, and your vehicle's current position will not
be transmitted during an emergency call
*. To
cancel the service block, the system must be
reactivated, refer to page178. Your contractual
agreement is not affected by this.
The automatic service notification can be dis-
abled separately. Please contact your BMW
Center for this purpose.
Enable TeleService and, if applicable, BMW
Assist once again to log on again.
Displaying vehicle data
When TeleService or BMW Assist is activated,
the license plate and the vehicle identification
number of your vehicle can be displayed.
1.Open the start menu.
2.Press the controller to open the menu.
3.Select "Communication settings" and
press the controller.
4.Select "BMW Service settings" and press
the controller.
5.Select "Profile" and press the controller.
To adjust the license plate, please contact your
BMW Center.
BMW Contact*
You can establish a voice connection to the fol-
lowing services without enabling BMW Assist
as long as your mobile phone is paired with the
vehicle:
>Roadside Assistance
* of the BMW Group if
you need help in the event of a breakdown
>BMW Service if you wish to schedule a ser-
vice appointment, for example
>BMW Customer Relations
* for information
related to your vehicle
iDrive concept, refer to page16.
1.Press the button.
This opens the start menu.
2.Move the controller forwards to select
"Communication".
Page 188 of 245

Refueling
186
Refueling
Always switch off the engine before refu-
eling, otherwise, fuel cannot be added to
the tank and a message will be displayed.<
Take all precautionary measures and
observe all applicable regulations when
handling fuel. Do not carry any spare fuel con-
tainers in your vehicle. They can develop a leak
and cause an explosion or cause a fire in the
event of an accident.<
Gas cap
Opening
1.Open fuel filler door. To do so, lightly press
the rear edge.
2.Turn the gas cap counterclockwise.
3.Place the gas cap in the bracket attached to
the fuel filler door.
Closing
Fit the cap and turn it clockwise until you clearly
hear a click.
Do not jam the strap attached to the gas
cap between the gas cap and the vehicle.
A message will be displayed if the gas cap is
loose or missing.<
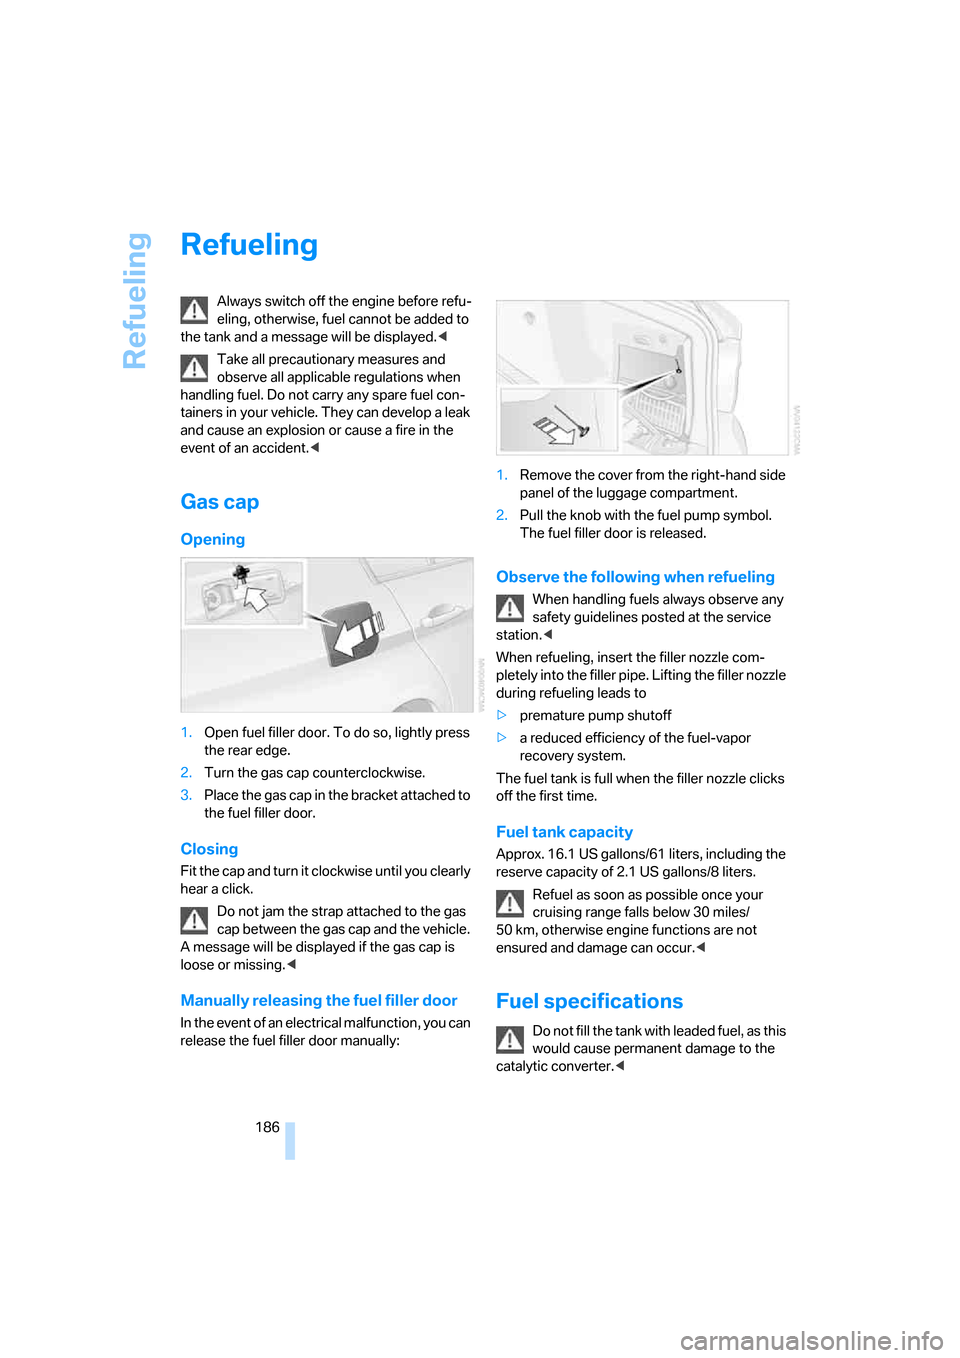
Manually releasing the fuel filler door
In the event of an electrical malfunction, you can
release the fuel filler door manually:1.Remove the cover from the right-hand side
panel of the luggage compartment.
2.Pull the knob with the fuel pump symbol.
The fuel filler door is released.
Observe the following when refueling
When handling fuels always observe any
safety guidelines posted at the service
station.<
When refueling, insert the filler nozzle com-
pletely into the filler pipe. Lifting the filler nozzle
during refueling leads to
>premature pump shutoff
>a reduced efficiency of the fuel-vapor
recovery system.
The fuel tank is full when the filler nozzle clicks
off the first time.
Fuel tank capacity
Approx. 16.1 US gallons/61 liters, including the
reserve capacity of 2.1 US gallons/8 liters.
Refuel as soon as possible once your
cruising range falls below 30 miles/
50 km, otherwise engine functions are not
ensured and damage can occur.<
Fuel specifications
Do not fill the tank with leaded fuel, as this
would cause permanent damage to the
catalytic converter.<
Page 203 of 245

Mobility
201Reference
At a glance
Controls
Driving tips
Communications
Navigation
Entertainment
Too much oil will harm the engine.
Have the vehicle checked without
delay.<
>"Please observe recalculated service inter-
val for engine oil"
Do not add engine oil. You can continue
your journey. Note the newly calculated dis-
tance remaining to the next oil service, refer
to page74. Have the system checked as
soon as possible.
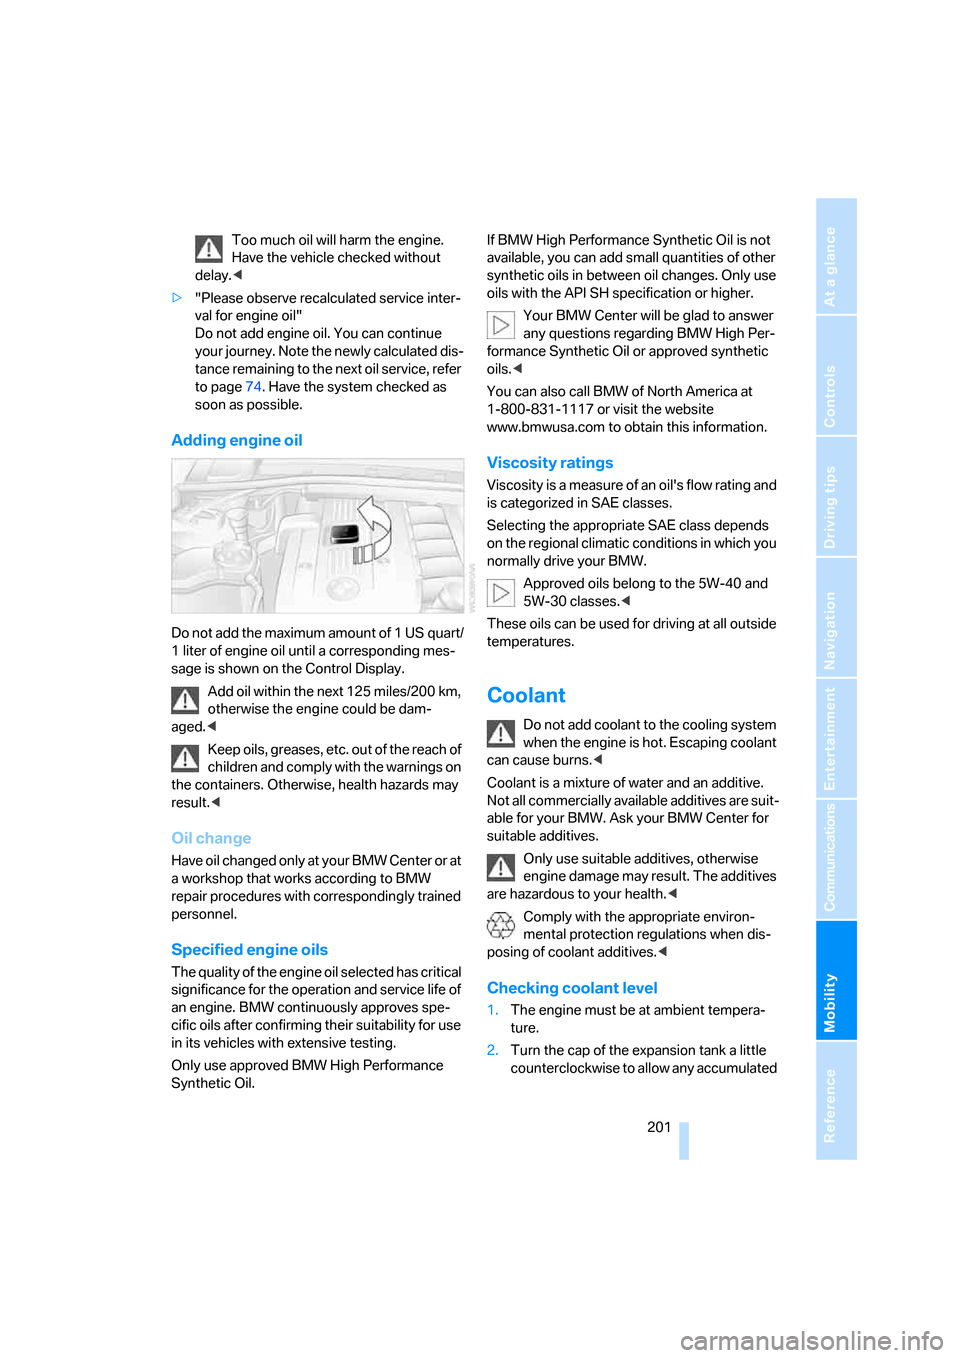
Adding engine oil
Do not add the maximum amount of 1 US quart/
1 liter of engine oil until a corresponding mes-
sage is shown on the Control Display.
Add oil within the next 125 miles/200 km,
otherwise the engine could be dam-
aged.<
Keep oils, greases, etc. out of the reach of
children and comply with the warnings on
the containers. Otherwise, health hazards may
result.<
Oil change
Have oil changed only at your BMW Center or at
a workshop that works according to BMW
repair procedures with correspondingly trained
personnel.
Specified engine oils
The quality of the engine oil selected has critical
significance for the operation and service life of
an engine. BMW continuously approves spe-
cific oils after confirming their suitability for use
in its vehicles with extensive testing.
Only use approved BMW High Performance
Synthetic Oil.If BMW High Performance Synthetic Oil is not
available, you can add small quantities of other
synthetic oils in between oil changes. Only use
oils with the API SH specification or higher.
Your BMW Center will be glad to answer
any questions regarding BMW High Per-
formance Synthetic Oil or approved synthetic
oils.<
You can also call BMW of North America at
1-800-831-1117 or visit the website
www.bmwusa.com to obtain this information.
Viscosity ratings
Viscosity is a measure of an oil's flow rating and
is categorized in SAE classes.
Selecting the appropriate SAE class depends
on the regional climatic conditions in which you
normally drive your BMW.
Approved oils belong to the 5W-40 and
5W-30 classes.<
These oils can be used for driving at all outside
temperatures.
Coolant
Do not add coolant to the cooling system
when the engine is hot. Escaping coolant
can cause burns.<
Coolant is a mixture of water and an additive.
Not all commercially available additives are suit-
able for your BMW. Ask your BMW Center for
suitable additives.
Only use suitable additives, otherwise
engine damage may result. The additives
are hazardous to your health.<
Comply with the appropriate environ-
mental protection regulations when dis-
posing of coolant additives.<
Checking coolant level
1.The engine must be at ambient tempera-
ture.
2.Turn the cap of the expansion tank a little
counterclockwise to allow any accumulated
Page 208 of 245

Replacing components
206 lasers, are officially designated as Class 1 light-
emitting diodes.
Do not remove the covers or expose the
eyes directly to the unfiltered light source
for several hours at a time, otherwise this could
cause irritation to the retina.<
Xenon lamps*
The service life of these bulbs is very long and
the probability of a failure is very low, provided
that they are not switched on and off an unusual
number of times. If a xenon lamp fails neverthe-
less, switch on the fog lamps and continue the
journey with great care, provided that local leg-
islation does not prohibit this.
Have work on the xenon lighting system
performed only by your BMW Center or a
workshop that works according to BMW repair
procedures with correspondingly trained per-
sonnel. Due to the high electrical voltages
present, there is a risk of potentially fatal acci-
dents if work is performed inappropriate.<
Parking lamps, roadside parking lamps
In the event of a malfunction, please contact
your BMW Center or a workshop that works
according to BMW repair procedures with cor-
respondingly trained personnel.
Halogen lamps
H7 bulb, 55 watts
Always wear gloves and eye protection;
the atmosphere within the H7 bulb is
pressurized. Otherwise there is a risk of injury if
the bulb is damaged.<
There are separate headlamp covers for low-
beam headlamps and high-beam headlamps.
Be careful when installing the covers, oth-
erwise leaks could occur and cause dam-
age to the headlamp system.<
For checking and adjusting headlamp
aim, please contact your BMW Center.<
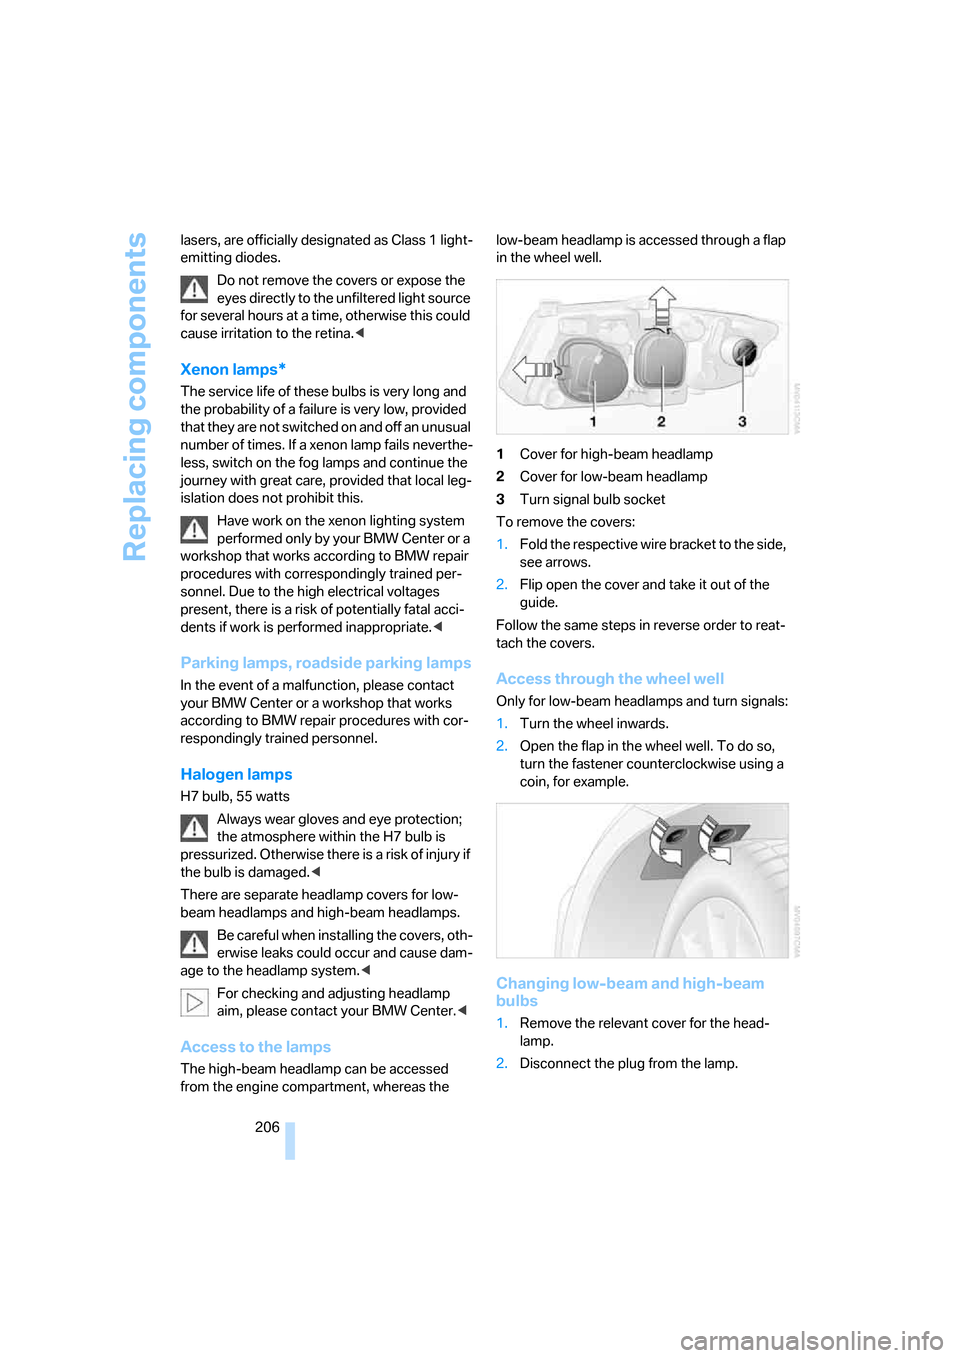
Access to the lamps
The high-beam headlamp can be accessed
from the engine compartment, whereas the low-beam headlamp is accessed through a flap
in the wheel well.
1Cover for high-beam headlamp
2Cover for low-beam headlamp
3Turn signal bulb socket
To remove the covers:
1.Fold the respective wire bracket to the side,
see arrows.
2.Flip open the cover and take it out of the
guide.
Follow the same steps in reverse order to reat-
tach the covers.
Access through the wheel well
Only for low-beam headlamps and turn signals:
1.Turn the wheel inwards.
2.Open the flap in the wheel well. To do so,
turn the fastener counterclockwise using a
coin, for example.
Changing low-beam and high-beam
bulbs
1.Remove the relevant cover for the head-
lamp.
2.Disconnect the plug from the lamp.