2006 BMW 325CI change time
[x] Cancel search: change timePage 58 of 174

58
Vehicle Memory, Key MemoryHow the system functionsNo doubt you have reflected at one
time or another on how great it would
be if you could permanently configure
your vehicle's various features and
adjustments to mirror your own individ-
ual preferences. In engineering your
vehicle, BMW has provided for a num-
ber of options for personal adjustment
that can be programmed into your vehi-
cle at your BMW center.
The available configuration data fall into
two categories, according to whether
their primary orientation is the vehicle –
Vehicle Memory – or the individual –
Key Memory. Provided that each per-
son has a separate remote-control key,
you can have your BMW center enter
adjustment data for as many as four dif-
ferent individuals into the system.
The system then relies on a bilateral
data exchange to identify the individual
user and executes the selected settings
whenever the remote control unit is
used to disengage the door locks.
Distinguishing between keysColor-coded decals have been pro-
vided to help you distinguish individual
keys with different settings.What the system can doYour BMW center can provide you with
details on the capabilities of the Vehicle
Memory and Key Memory systems.
You will see this symbol through-
out the Owner's Manual. It is to
remind you at appropriate places of the
settings that are available to you.<
Examples for Vehicle Memory:
>Various signals as acknowledgment
when locking or unlocking your vehi-
cle, refer to pages 29, 31
>Activates/deactivates the 'Follow me
home' function, refer to page 85
>Activates/deactivates daytime driv-
ing lamps, refer to page 85
>Sets the units of measure for display-
ing time, outside temperature, dis-
tance traveled and fuel consumption
in the instrument cluster
>When you shift into Reverse, an
acoustic signal indicates that PDC
has been activated, refer to page 80
>Switches on rear window defroster
automatically, refer to pages 92, 97
>Activates/deactivates various alarm
system functions, refer to page 37
>After giving an ice warning, the
onboard computer display returns to
the previous setting, refer to page 78.
Examples for Key Memory:
>Unlocks driver's door first, then the
vehicle's remaining locks, refer to
page 29
>Locks the vehicle automatically after
you start off, refer to page 32
>Automatically adjusts the driver's
seat to the personal programmed
settings when the vehicle is
unlocked, refer to page 47
>Automatic tilting of the passenger-
side mirror, refer to Automatic curb
monitor, page 48.
Page 64 of 174

64
RReverseSelect only when the vehicle is station-
ary.NNeutralAlways engage before starting the
engine, refer to Starting the engine on
page 60.Sequential modeEach time the engine is started, the
sequential mode is activated as soon as
you move the selector lever into the for-
ward driving position while the brake is
depressed.
The gears are shifted via the shift pad-
dles or the selector lever.
It is also possible to drive off in second
gear, e.g. on snow-covered roads.DDrive modeIn the drive mode all forward gears are
shifted automatically.
To switch from sequential to drive
mode: tap the selector lever to the right
toward D.
For rapid acceleration, e.g. during
passing, depress the accelerator pedal
completely: kickdown.To switch back to sequential mode: tap
the selector lever again to the right
toward D or change the current gear via
the shift paddles or the selector lever.
KickdownYou can achieve maximum acceleration
using kickdown.
Depress the accelerator pedal past the
increased resistance point at the full-
throttle position.
Shifting gearsWith the selector lever:
>To upshift, tap the selector lever
toward +
>To downshift, tap the lever toward —.
With the shift paddles on the steering
wheel:
>To upshift, pull one of the shift pad-
dles
>To downshift, push the paddle.
You accelerate from higher gears, e.g.
during passing, by manually downshift-
ing.
In the following situations, the SMG in
the sequential mode assists you:
>Upshifts and downshifts are only exe-
cuted at appropriate combinations of
engine rpm and vehicle speed. For
Sequential manual gearbox SMG*
Page 77 of 174

77
ClockIf you wish to have a permanent time
display, you can make this adjustment
in the radio display, refer to the Owner's
Manual for Radio.
You can adjust the clock and the time
display in the car radio as follows.
Setting
Before the clock can be set, the
time must be showing in the
instrument cluster display.<
With the ignition key in position 1 or
higher.
To set ahead: turn the right button to
the right.
To set back: turn the right button to the
left.
The adjustment speed will increase the
longer you continue to hold the right
button.
To change the display mode: press the
right button briefly.
Every time you press the button, the
clock display alternates between the
12-hour and 24-hour mode.
In ignition key position 0: the time is
displayed for a few seconds after you
press the left button, refer to Odometer
on page 74.
OverviewControlsMaintenanceRepairsDataIndex
Page 78 of 174
78
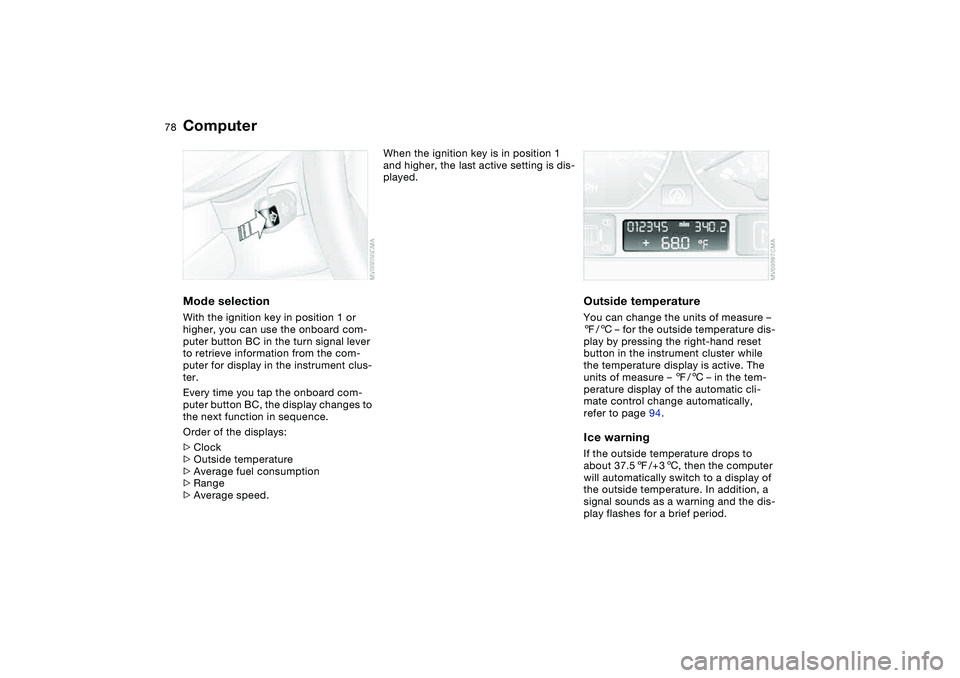
ComputerMode selectionWith the ignition key in position 1 or
higher, you can use the onboard com-
puter button BC in the turn signal lever
to retrieve information from the com-
puter for display in the instrument clus-
ter.
Every time you tap the onboard com-
puter button BC, the display changes to
the next function in sequence.
Order of the displays:
>Clock
>Outside temperature
>Average fuel consumption
>Range
>Average speed.
When the ignition key is in position 1
and higher, the last active setting is dis-
played.
Outside temperatureYou can change the units of measure –
7/6 – for the outside temperature dis-
play by pressing the right-hand reset
button in the instrument cluster while
the temperature display is active. The
units of measure – 7/6 – in the tem-
perature display of the automatic cli-
mate control change automatically,
refer to page 94.Ice warningIf the outside temperature drops to
about 37.57/+36, then the computer
will automatically switch to a display of
the outside temperature. In addition, a
signal sounds as a warning and the dis-
play flashes for a brief period.
Page 83 of 174
83
System limitations
The Flat Tire Monitor cannot pro-
vide you with advance warning of
sudden and severe tire damage caused
by external factors and does not detect
the balanced and very gradual pressure
loss that takes place in all four tires
over an extended period of time.<
On the other hand, the following situa-
tions can lead to a delayed detection of
pressure loss and even to the system
not functioning:
>Driving on snow-covered or slippery
roads
>Performance-oriented driving: slip at
the drive wheels, high levels of lateral
acceleration
>When driving with snow chains, false
warnings and undetected pressure
losses may occur
>When driving with a space-saver
spare tire, the Flat Tire Monitor can-
not function.
Initializing the system
Each time you correct the pres-
sure in a tire, or change a wheel or
tire, reinitialize the system immediately
afterwards. This requires a bit of driv-
ing.<
1. Before driving off, start the engine
but do not start driving
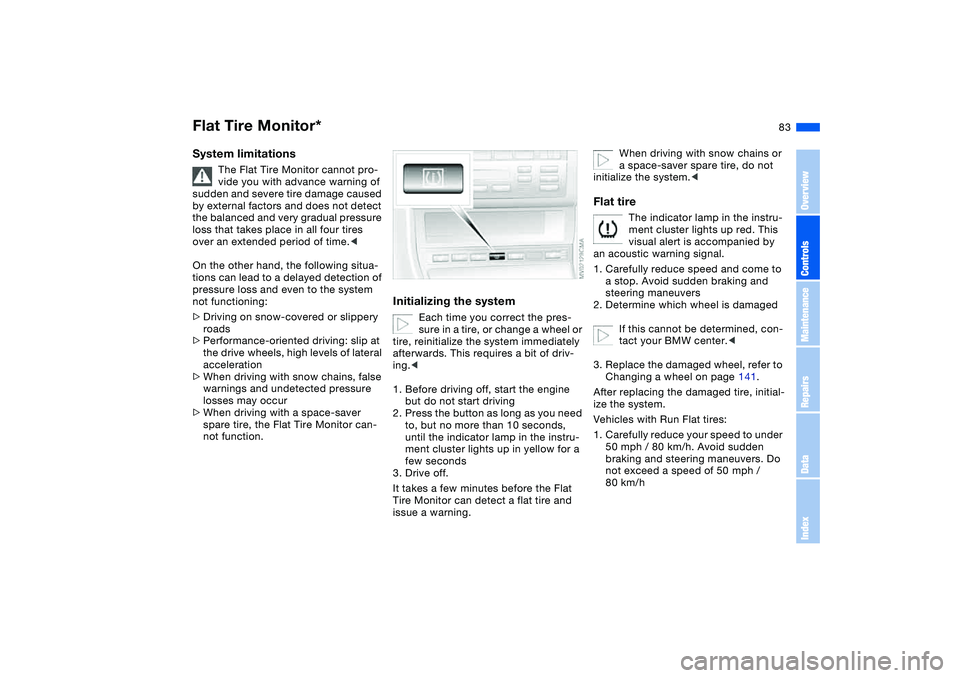
2. Press the button as long as you need
to, but no more than 10 seconds,
until the indicator lamp in the instru-
ment cluster lights up in yellow for a
few seconds
3. Drive off.
It takes a few minutes before the Flat
Tire Monitor can detect a flat tire and
issue a warning.
When driving with snow chains or
a space-saver spare tire, do not
initialize the system.<
Flat tire
The indicator lamp in the instru-
ment cluster lights up red. This
visual alert is accompanied by
an acoustic warning signal.
1. Carefully reduce speed and come to
a stop. Avoid sudden braking and
steering maneuvers
2. Determine which wheel is damaged
If this cannot be determined, con-
tact your BMW center.<
3. Replace the damaged wheel, refer to
Changing a wheel on page 141.
After replacing the damaged tire, initial-
ize the system.
Vehicles with Run Flat tires:
1. Carefully reduce your speed to under
50 mph / 80 km/h. Avoid sudden
braking and steering maneuvers. Do
not exceed a speed of 50 mph /
80 km/h
Flat Tire Monitor*
OverviewControlsMaintenanceRepairsDataIndex
Page 85 of 174
85 Lamps
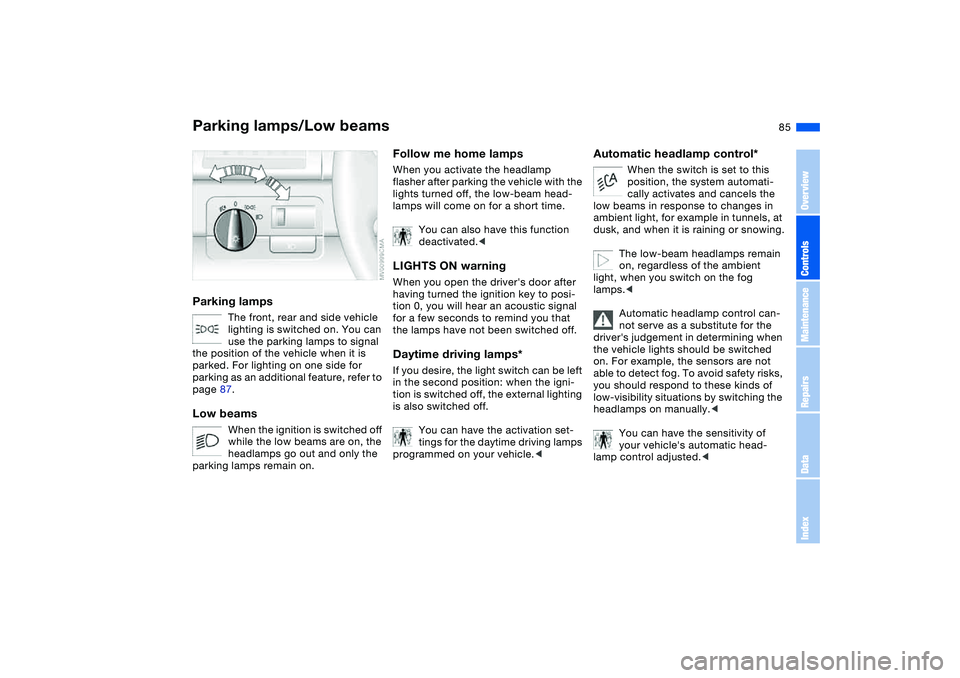
Parking lamps/Low beamsParking lamps
The front, rear and side vehicle
lighting is switched on. You can
use the parking lamps to signal
the position of the vehicle when it is
parked. For lighting on one side for
parking as an additional feature, refer to
page 87.
Low beams
When the ignition is switched off
while the low beams are on, the
headlamps go out and only the
parking lamps remain on.
Follow me home lampsWhen you activate the headlamp
flasher after parking the vehicle with the
lights turned off, the low-beam head-
lamps will come on for a short time.
You can also have this function
deactivated.
tion 0, you will hear an acoustic signal
for a few seconds to remind you that
the lamps have not been switched off.Daytime driving lamps*If you desire, the light switch can be left
in the second position: when the igni-
tion is switched off, the external lighting
is also switched off.
You can have the activation set-
tings for the daytime driving lamps
programmed on your vehicle.<
Automatic headlamp control*
When the switch is set to this
position, the system automati-
cally activates and cancels the
low beams in response to changes in
ambient light, for example in tunnels, at
dusk, and when it is raining or snowing.
The low-beam headlamps remain
on, regardless of the ambient
light, when you switch on the fog
lamps.<
Automatic headlamp control can-
not serve as a substitute for the
driver's judgement in determining when
the vehicle lights should be switched
on. For example, the sensors are not
able to detect fog. To avoid safety risks,
you should respond to these kinds of
low-visibility situations by switching the
headlamps on manually.<
You can have the sensitivity of
your vehicle's automatic head-
lamp control adjusted.<
OverviewControlsMaintenanceRepairsDataIndex
Page 121 of 174
121
If there is a total loss of tire inflation
pressure, 0 psi/0 kPa, or obvious tire
damage, you can determine the dis-
tance you may continue driving based
on the following values:
>With a light load:
1 to 2 persons without luggage:
approx. 155 miles/250 km
>With a medium load:
2 persons, luggage compartment full;
or 4 persons without luggage:
approx. 90 miles/150 km
>With a full load:
4 persons or more, luggage compart-
ment full:
approx. 30 miles/50 km
Drive cautiously. Do not exceed a
speed of 50 mph / 80 km/h. Be
aware that vehicle handling will be
altered when there is a loss in inflation
pressure. Anticipate, e.g., reduced
tracking during braking, longer braking
distances and changed steering char-
acteristics.
For safety reasons, BMW recommends
not having damaged Run Flat tires
repaired. In this case, consult your
BMW center.<
New wheels and tires
Have new wheels and tires
mounted only by a skilled profes-
sional. Work that is improperly carried
out could result in consequential dam-
age and pose safety hazards.<
Ask your BMW center for details con-
cerning the correct wheel and tire com-
bination. Have the wheels balanced
each time a wheel or tire has been
replaced.
The correct wheel and tire combination
also affects different systems such as
ABS or DSC. The function of these sys-
tems is impaired if improper wheel and
tire combinations are used.
BMW advises against using
retreaded tires, as driving safety
could otherwise be impaired. This is
due to the possible variations in casing
structures and, in some cases, to their
extreme age, which can lead to a
decrease in their durability.<
The correct wheels and tires
BMW recommends using only
wheels and tires that have been
tested and approved by BMW for the
particular vehicle model, as otherwise
body contact and serious accidents can
result despite the use of the same nom-
inal size, e.g. due to manufacturing tol-
erances. BMW cannot evaluate all tires
and wheels on the market, and is thus
unable to guarantee that the vehicle will
continue to perform safely if unap-
proved tires and/or wheels are
mounted.<
To maintain good handling and vehicle
response, use only tires of a single
brand and tread configuration. After a
flat tire, have the previous wheel and
tire combination restored as soon as
possible.
Recommended tire sizes and
brandsFor each tire size, certain tire brands
have been tested, classified as road-
safe and approved by BMW. You can
find out about these from a professional
Run Flat tires*
OverviewControlsMaintenanceRepairsDataIndex
Page 129 of 174
129
Adding brake fluidFor adding brake fluid or for determin-
ing and correcting the cause of brake
fluid loss, consult your BMW center.
Your BMW center is familiar with the
specifications for factory-approved
brake fluids – DOT 4.
Brake fluid loss may result in extended
brake pedal travel.
Brake fluid is hygroscopic, that is,
it absorbs moisture from the air
over time.
In order to ensure the brake system's
safety and reliability, have the brake
fluid changed every two years by a
BMW center. Refer to the Service and
Warranty Information Booklet for US
models or the Warranty and Service
Guide Booklet for Canadian models.
Brake fluid is toxic and damages the
vehicle's paint. You should always store
it in its closed original container and in
a location which is out of reach of chil-
dren.
Do not spill the brake fluid and do not
fill the brake fluid reservoir beyond the
MAX mark. The brake fluid could ignite
upon contact with hot engine parts and
cause serious burns.<
Comply with the applicable envi-
ronmental laws regulating
the disposal of brake fluid.<
Brake fluid
OverviewControlsMaintenanceRepairsDataIndex