2006 BMW 323I SEDAN ESP
[x] Cancel search: ESPPage 207 of 245
Mobility
205Reference
At a glance
Controls
Driving tips
Communications
Navigation
Entertainment
Replacing components
Onboard tool kit
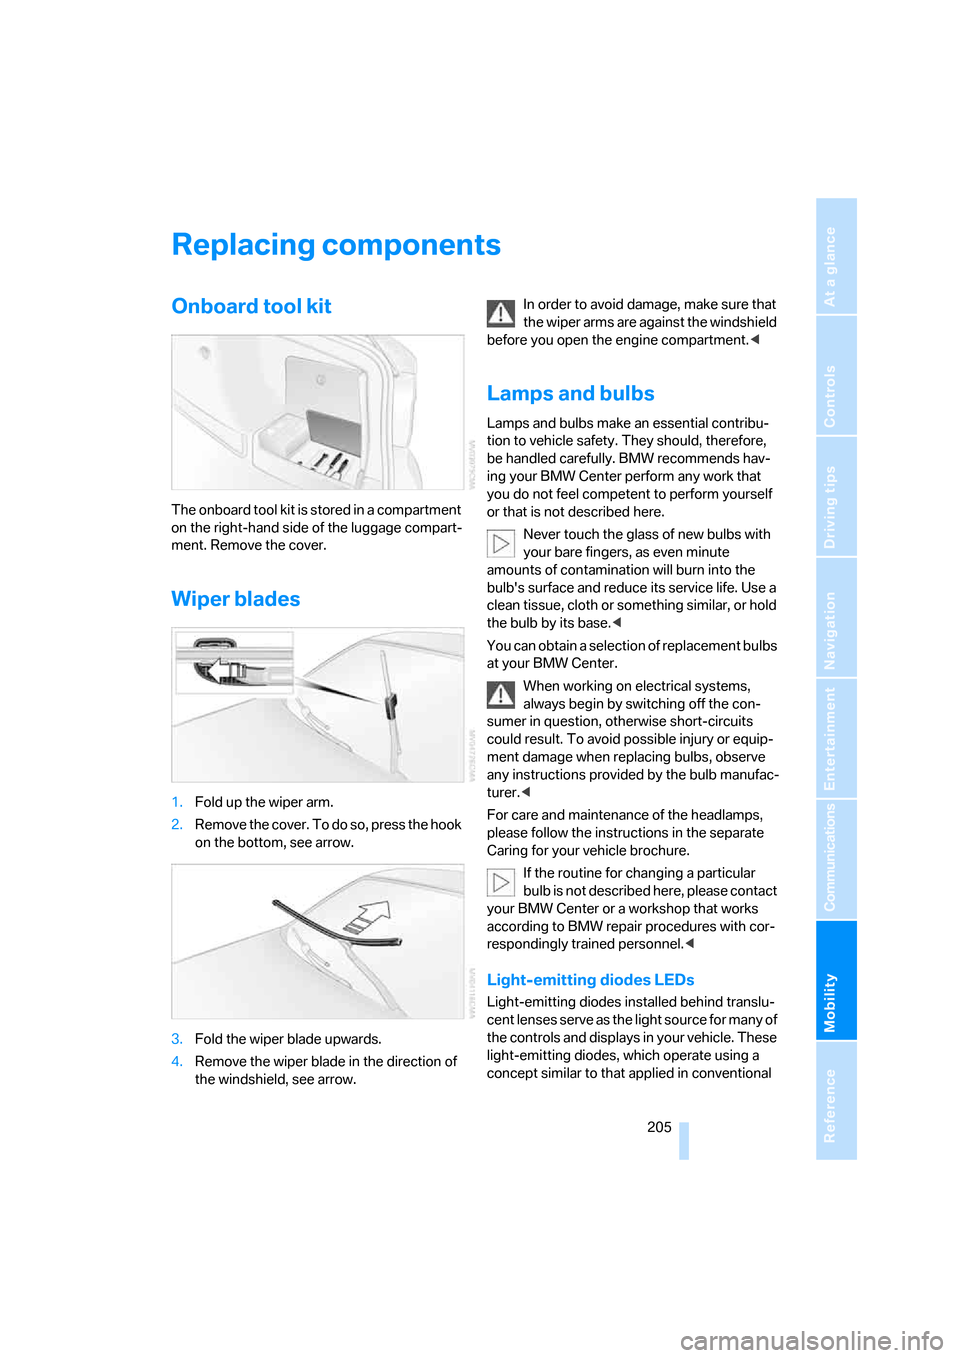
The onboard tool kit is stored in a compartment
on the right-hand side of the luggage compart-
ment. Remove the cover.
Wiper blades
1.Fold up the wiper arm.
2.Remove the cover. To do so, press the hook
on the bottom, see arrow.
3.Fold the wiper blade upwards.
4.Remove the wiper blade in the direction of
the windshield, see arrow.In order to avoid damage, make sure that
the wiper arms are against the windshield
before you open the engine compartment.<
Lamps and bulbs
Lamps and bulbs make an essential contribu-
tion to vehicle safety. They should, therefore,
be handled carefully. BMW recommends hav-
ing your BMW Center perform any work that
you do not feel competent to perform yourself
or that is not described here.
Never touch the glass of new bulbs with
your bare fingers, as even minute
amounts of contamination will burn into the
bulb's surface and reduce its service life. Use a
clean tissue, cloth or something similar, or hold
the bulb by its base.<
You can obtain a selection of replacement bulbs
at your BMW Center.
When working on electrical systems,
always begin by switching off the con-
sumer in question, otherwise short-circuits
could result. To avoid possible injury or equip-
ment damage when replacing bulbs, observe
any instructions provided by the bulb manufac-
turer.<
For care and maintenance of the headlamps,
please follow the instructions in the separate
Caring for your vehicle brochure.
If the routine for changing a particular
bulb is not described here, please contact
your BMW Center or a workshop that works
according to BMW repair procedures with cor-
respondingly trained personnel.<
Light-emitting diodes LEDs
Light-emitting diodes installed behind translu-
c e n t l e n s e s s e r v e a s t h e l i g h t s o u r c e f o r m a n y o f
the controls and displays in your vehicle. These
light-emitting diodes, which operate using a
concept similar to that applied in conventional
Page 208 of 245
Replacing components
206 lasers, are officially designated as Class 1 light-
emitting diodes.
Do not remove the covers or expose the
eyes directly to the unfiltered light source
for several hours at a time, otherwise this could
cause irritation to the retina.<
Xenon lamps*
The service life of these bulbs is very long and
the probability of a failure is very low, provided
that they are not switched on and off an unusual
number of times. If a xenon lamp fails neverthe-
less, switch on the fog lamps and continue the
journey with great care, provided that local leg-
islation does not prohibit this.
Have work on the xenon lighting system
performed only by your BMW Center or a
workshop that works according to BMW repair
procedures with correspondingly trained per-
sonnel. Due to the high electrical voltages
present, there is a risk of potentially fatal acci-
dents if work is performed inappropriate.<
Parking lamps, roadside parking lamps
In the event of a malfunction, please contact
your BMW Center or a workshop that works
according to BMW repair procedures with cor-
respondingly trained personnel.
Halogen lamps
H7 bulb, 55 watts
Always wear gloves and eye protection;
the atmosphere within the H7 bulb is
pressurized. Otherwise there is a risk of injury if
the bulb is damaged.<
There are separate headlamp covers for low-
beam headlamps and high-beam headlamps.
Be careful when installing the covers, oth-
erwise leaks could occur and cause dam-
age to the headlamp system.<
For checking and adjusting headlamp
aim, please contact your BMW Center.<
Access to the lamps
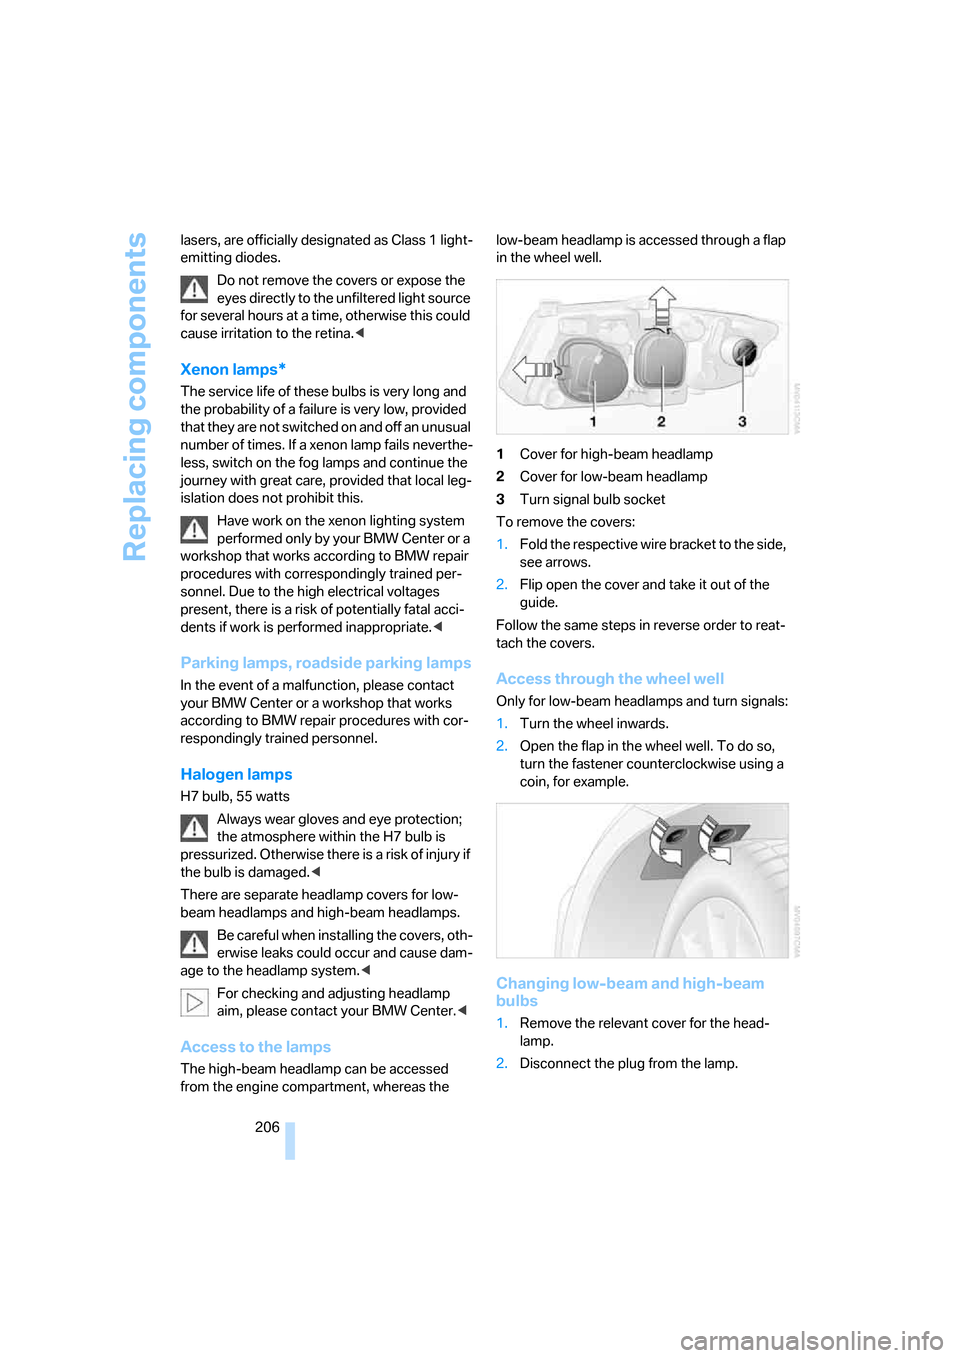
The high-beam headlamp can be accessed
from the engine compartment, whereas the low-beam headlamp is accessed through a flap
in the wheel well.
1Cover for high-beam headlamp
2Cover for low-beam headlamp
3Turn signal bulb socket
To remove the covers:
1.Fold the respective wire bracket to the side,
see arrows.
2.Flip open the cover and take it out of the
guide.
Follow the same steps in reverse order to reat-
tach the covers.
Access through the wheel well
Only for low-beam headlamps and turn signals:
1.Turn the wheel inwards.
2.Open the flap in the wheel well. To do so,
turn the fastener counterclockwise using a
coin, for example.
Changing low-beam and high-beam
bulbs
1.Remove the relevant cover for the head-
lamp.
2.Disconnect the plug from the lamp.
Page 209 of 245
Mobility
207Reference
At a glance
Controls
Driving tips
Communications
Navigation
Entertainment
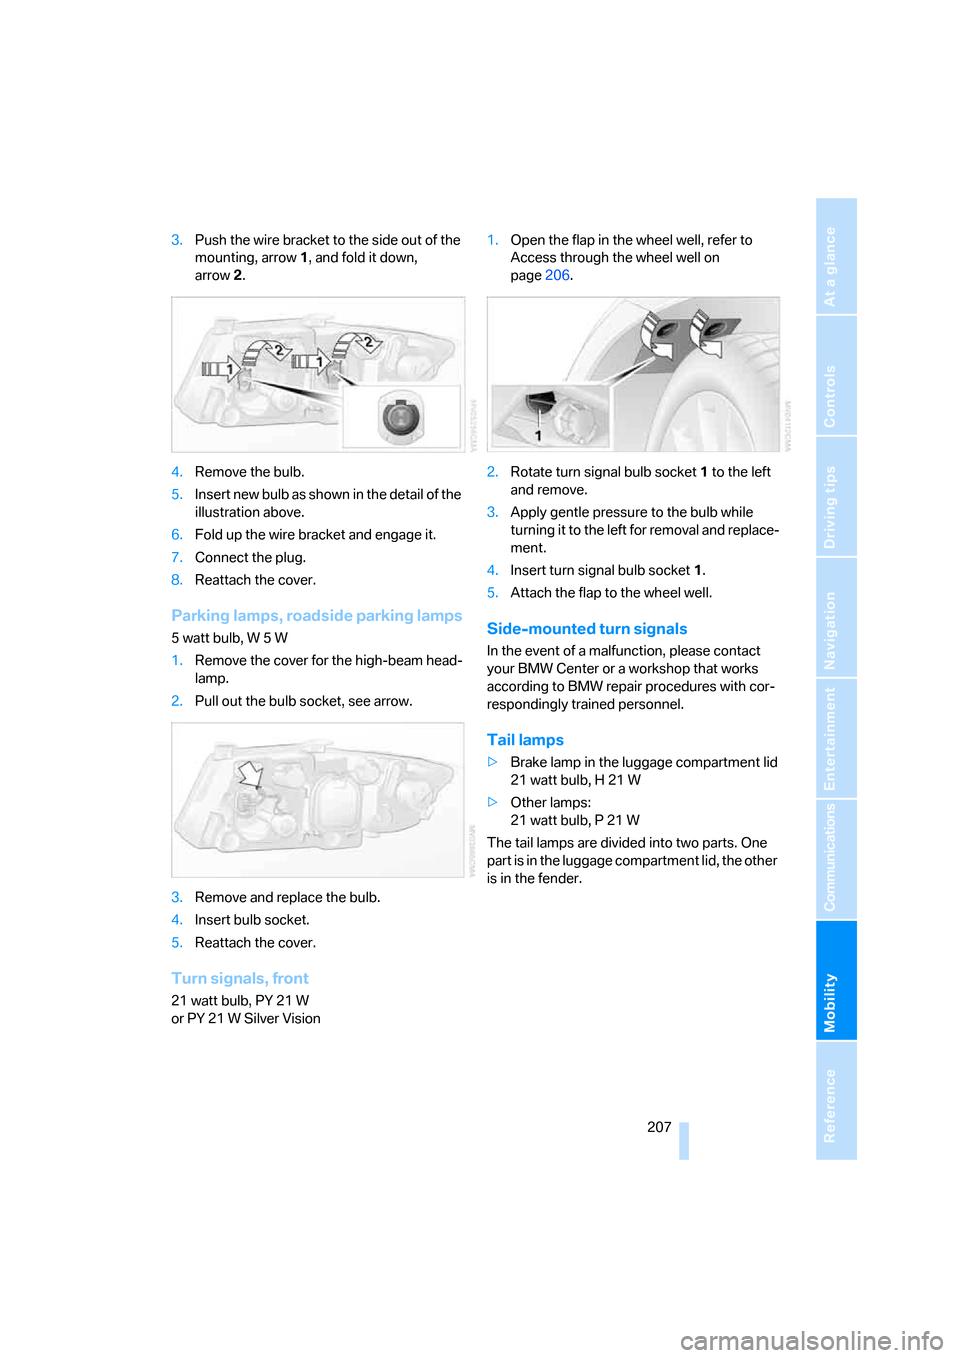
3.Push the wire bracket to the side out of the
mounting, arrow1, and fold it down,
arrow2.
4.Remove the bulb.
5.Insert new bulb as shown in the detail of the
illustration above.
6.Fold up the wire bracket and engage it.
7.Connect the plug.
8.Reattach the cover.
Parking lamps, roadside parking lamps
5 watt bulb, W 5 W
1.Remove the cover for the high-beam head-
lamp.
2.Pull out the bulb socket, see arrow.
3.Remove and replace the bulb.
4.Insert bulb socket.
5.Reattach the cover.
Turn signals, front
21 watt bulb, PY 21 W
or PY 21 W Silver Vision1.Open the flap in the wheel well, refer to
Access through the wheel well on
page206.
2.Rotate turn signal bulb socket 1 to the left
and remove.
3.Apply gentle pressure to the bulb while
turning it to the left for removal and replace-
ment.
4.Insert turn signal bulb socket 1.
5.Attach the flap to the wheel well.
Side-mounted turn signals
In the event of a malfunction, please contact
your BMW Center or a workshop that works
according to BMW repair procedures with cor-
respondingly trained personnel.
Tail lamps
>Brake lamp in the luggage compartment lid
21 watt bulb, H 21 W
>Other lamps:
21 watt bulb, P 21 W
The tail lamps are divided into two parts. One
part is in the luggage compartment lid, the other
is in the fender.
Page 211 of 245

Mobility
209Reference
At a glance
Controls
Driving tips
Communications
Navigation
Entertainment
according to BMW repair procedures with cor-
respondingly trained personnel.
Changing wheels
Your BMW is equipped with Run-Flat Tires as
standard. This removes the need to change a
wheel immediately in the event of a puncture.
The symbol identifying Run-Flat Tires is a circle
with the letters RSC on the sidewall, refer to
Run-Flat Tires, page196.
When mounting new tires or changing over
from summer to winter tires and vice versa,
mount Run-Flat Tires for your own safety. In the
event of a flat, moreover, no spare wheel is
available. Your BMW Center will be glad to
advise you. Refer also to New wheels and tires,
page196.
The tools for changing wheels are avail-
able as optional accessories from your
BMW Center.<
Jack mounting points
The jacking points are at the positions shown in
the illustration.
Vehicle battery
Battery care
The battery is 100 % maintenance-free, the
electrolyte will last for the life of the battery
when the vehicle is operated in a temperate cli-
mate. Your BMW Center will be glad to advise in
all matters concerning the battery.
Charging the battery
Only charge the battery in the vehicle via the
terminals in the engine compartment with the
engine off. Connections, refer to Jump starting
on page212.
Disposal
Have old batteries disposed of by your
BMW Center or hand them in to a recy-
cling center. Maintain the battery in an upright
position for transport and storage. Always
secure the battery against tipping over during
transport.<
Power failure
After a temporary power loss, the functioning of
some equipment may be limited and require ini-
tialization. Individual settings may likewise have
been lost and will have to be reprogrammed:
>Time and date
These values must be updated, refer to
page77.
>Radio
In some cases, stations may have to be
stored again, refer to page150.
>Navigation system
Operability must be waited for, refer to
page124.
>Seat and mirror memory
The positions must be stored again, refer to
page44.
>Inside rearview mirror with digital compass
The system must be calibrated, refer to
page105.
Fuses
Never attempt to repair a blown fuse and
do not replace a defective fuse with a sub-
stitute of another color or amperage rating, oth-
erwise this could lead to a circuit overload, ulti-
mately resulting in a fire in the vehicle.<
Page 213 of 245
Mobility
211Reference
At a glance
Controls
Driving tips
Communications
Navigation
Entertainment
Giving and receiving assistance
Emergency calling*
Conditions for an emergency call:
>Full preparation package mobile phone
>BMW Assist is enabled. Enabling BMW
Assist, refer to page178.
>Radio readiness is on.
>The car phone is logged on to a mobile tele-
phone network.
>The emergency call system is operable.
If your subscription contract with BMW Assist
expires, the car phone can be deactivated by a
BMW Center without having to schedule an
appointment at a workshop. Once the car
phone has been deactivated, emergency calls
are not possible. The car phone can be reacti-
vated by a BMW Center after signing a new
contract.
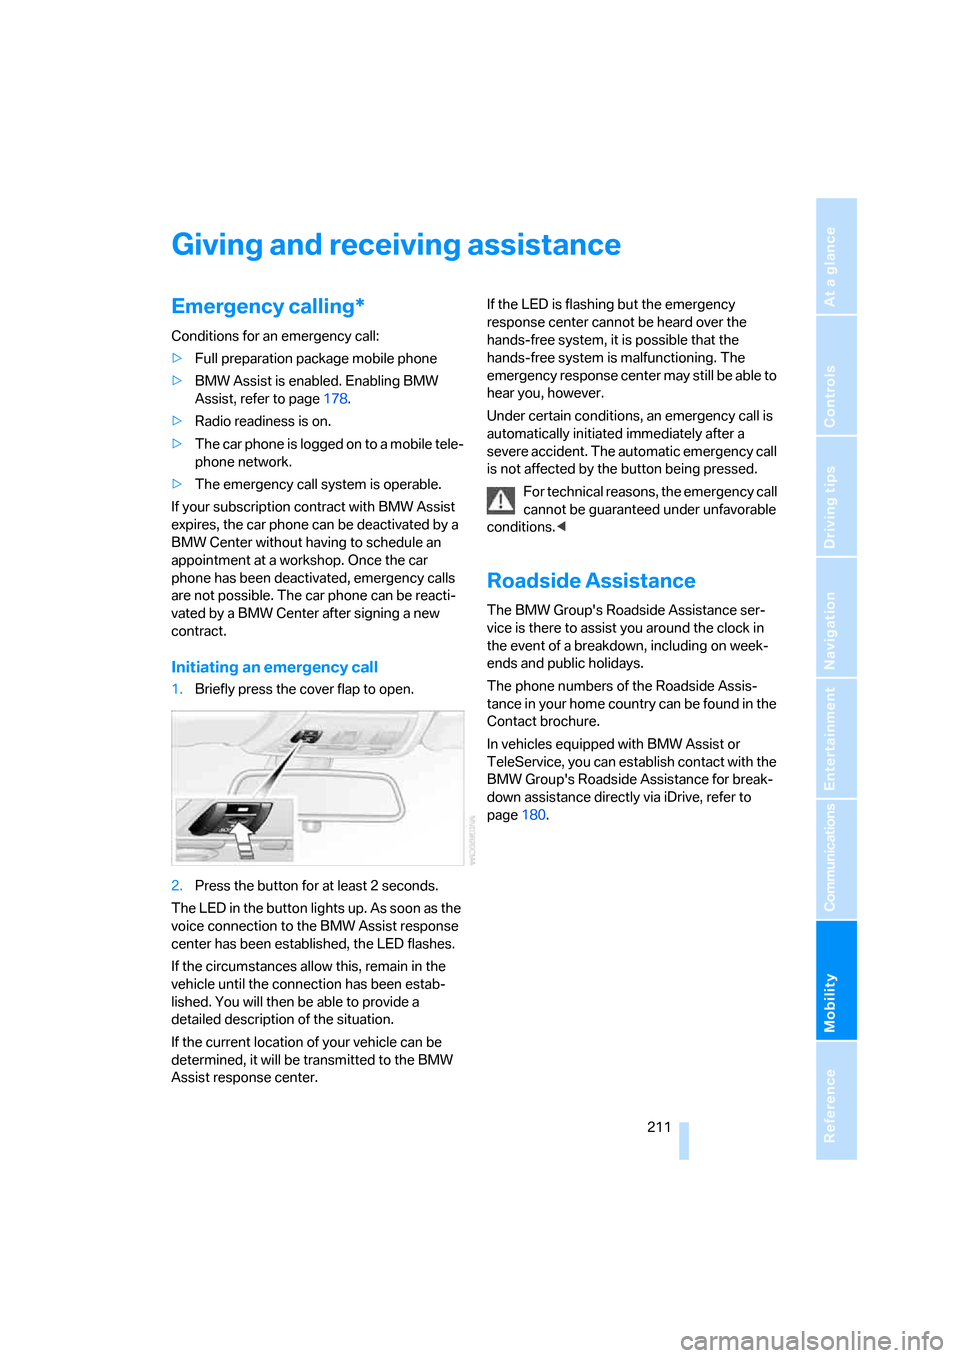
Initiating an emergency call
1.Briefly press the cover flap to open.
2.Press the button for at least 2 seconds.
The LED in the button lights up. As soon as the
voice connection to the BMW Assist response
center has been established, the LED flashes.
If the circumstances allow this, remain in the
vehicle until the connection has been estab-
lished. You will then be able to provide a
detailed description of the situation.
If the current location of your vehicle can be
determined, it will be transmitted to the BMW
Assist response center.If the LED is flashing but the emergency
response center cannot be heard over the
hands-free system, it is possible that the
hands-free system is malfunctioning. The
emergency response center may still be able to
hear you, however.
Under certain conditions, an emergency call is
automatically initiated immediately after a
severe accident. The automatic emergency call
is not affected by the button being pressed.
For technical reasons, the emergency call
cannot be guaranteed under unfavorable
conditions.<
Roadside Assistance
The BMW Group's Roadside Assistance ser-
vice is there to assist you around the clock in
the event of a breakdown, including on week-
ends and public holidays.
The phone numbers of the Roadside Assis-
tance in your home country can be found in the
Contact brochure.
In vehicles equipped with BMW Assist or
TeleService, you can establish contact with the
BMW Group's Roadside Assistance for break-
down assistance directly via iDrive, refer to
page180.
Page 233 of 245

Reference 231
At a glance
Controls
Driving tips
Communications
Navigation
Entertainment
Mobility
Emergency release
– luggage compartment lid
from inside34
Emergency services, refer to
Roadside Assistance211
Emissions test, refer to
Service requirements74
"Enable services"179
"End call"171
Energy-conscious driving,
refer to Energy Control70
Energy Control70
Engine
– breaking in116
– data218
– overheated, refer to Coolant
temperature69
– speed218
– starting53
– starting, convenient
access35
– switching off53
Engine compartment199
Engine coolant, refer to
Coolant201
Engine oil
– adding201
– BMW Maintenance
System203
– checking level199
– intervals between changes,
refer to Service
requirements74
"Engine oil level"200
Engine output, refer to Engine
data218
Engine speed218
Engine starting, refer to
Starting the engine53
"Enter address"126
Entering destination126
Entering the address128
Entering the intersection127
"Entertainment"144
"Entertainment
settings"145,152
Environmentally friendly
driving, refer to Energy
Control70"Equalizer", refer to Tone
control146
Equalizer, refer to Tone
control146
Error messages, refer to
Check Control79
"ESN"154
ESP Electronic Stability
Program, refer to DSC
Dynamic Stability
Control84
Event data recorders204
Exhaust system, refer to Hot
exhaust system
116
Exterior mirrors45
– adjusting45
– automatic dimming
feature117
– automatic heating46
External audio
device107,162
Eyes
– for tow-starting and towing
away213
– for tying down loads119
F
Fader, tone control145
Failure messages, refer to
Check Control79
Failure of an electrical
consumer209
False alarm, refer to Avoiding
unintentional alarms35
Fastening safety belts, refer to
Safety belts45
Fastest route for
navigation134
Fast forward
– CD changer160
– CD player160
"Fast route" in navigation135
Filter
– refer to Microfilter/activated-
charcoal filter for automatic
climate control101
First aid pouch212Fixture for remote control,
refer to Ignition lock52
Flashlight, refer to
Rechargeable flashlight106
Flash when locking/
unlocking31
Flat
– Run-Flat Tires196
Flat Tire Monitor FTM88
– indicating a flat tire89
– initializing the system88
– malfunction89
– snow chains88,197
– system limits88
Flat tires, refer to Tire
condition195
"FM", waveband144,148
FM, waveband148
Fog lamps95
– indicator lamp13,95
Footbrake, refer to Braking
safely117
Footwell lamps96
For your own safety5
Front airbags90
Front seat adjustment40
"FTM"88
FTM, refer to Flat Tire
Monitor88
Fuel186
– display70
– high-quality brands186
– quality186
– specifications186
– tank capacity221
Fuel clock, refer to Fuel
gauge
70
Fuel consumption, refer to
Average fuel
consumption71
Fuel display, refer to Fuel
gauge70
Fuel filler door186
– releasing in the event of
electrical malfunction186
Fuses209
Page 244 of 245
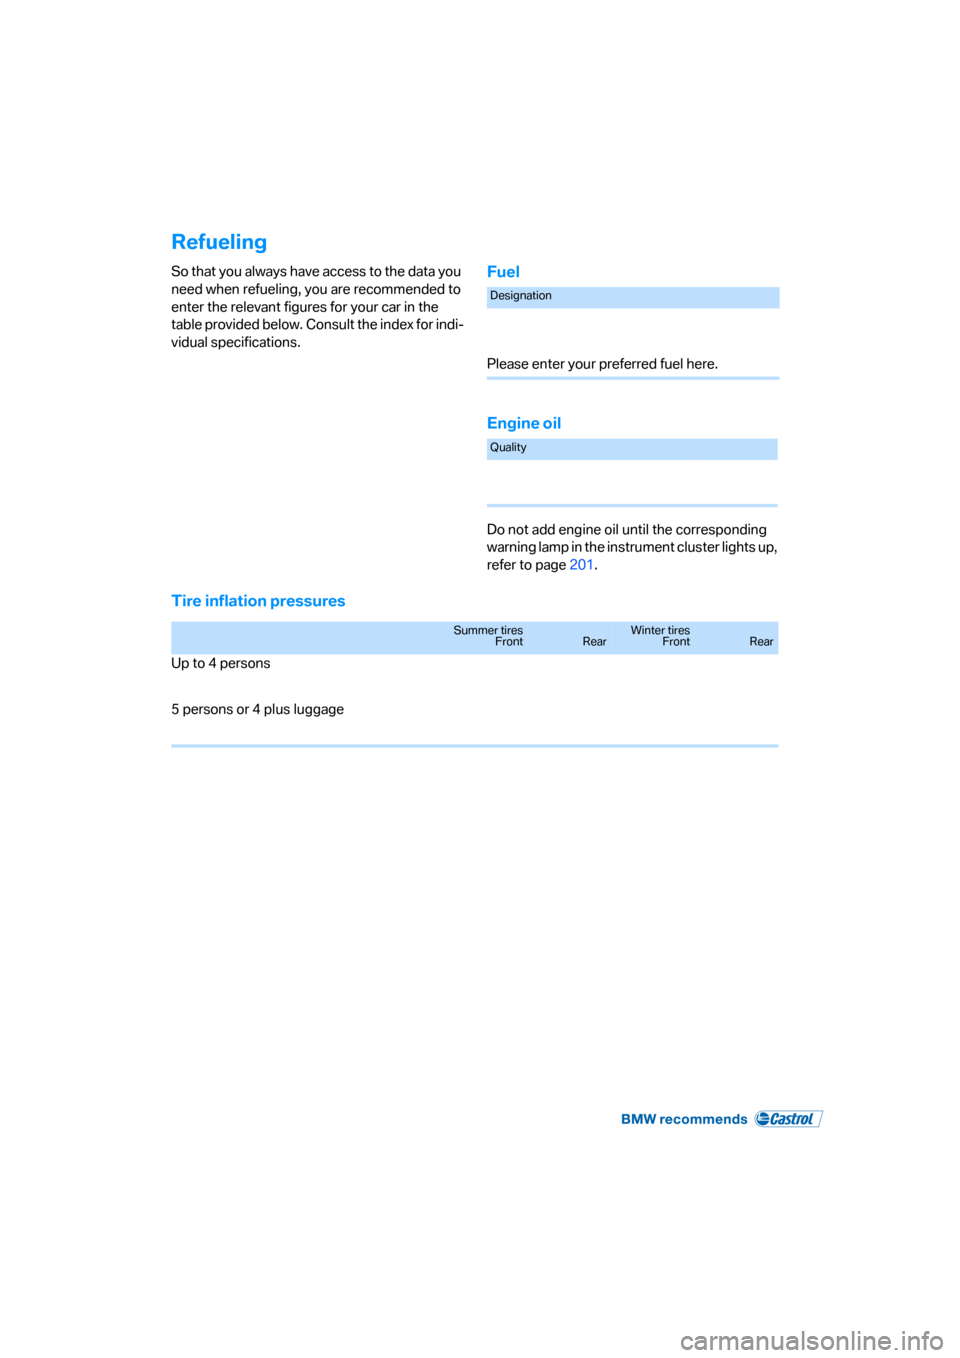
Refueling
So that you always have access to the data you
need when refueling, you are recommended to
enter the relevant figures for your car in the
table provided below. Consult the index for indi-
vidual specifications.Fuel
Engine oil
Do not add engine oil until the corresponding
warning lamp in the instrument cluster lights up,
refer to page201.
Tire inflation pressures
Designation
Please enter your preferred fuel here.
Quality
Summer tires
FrontRearWinter tires
FrontRear
Up to 4 persons
5 persons or 4 plus luggage