2006 BMW 323I SEDAN engine
[x] Cancel search: enginePage 172 of 245

Telephoning
170 3.Select the menu and press the controller.
4.Select "Communication settings" and
press the controller.
5.Select "Bluetooth" and press the controller.
6.Select "Settings" and press the controller.
The Bluetooth link is activated.
7.Select "Bluetooth communication active"
and press the controller to activate or deac-
tivate the link.
Adjusting volume
Turn the knob during a c all to select the desired
volume.
This volume for the hands-free system is main-
tained, even if the other audio sources are set to
minimum volume.
You can also adjust the volume with buttons on
the steering wheel, refer to page10.The setting is stored for the remote control cur-
rently in use.
Operation via iDrive
You can operate the following functions using
iDrive:
>Dialing phone numbers
>Selecting phone numbers from the phone
book
>Selecting stored phone numbers, e.g. from
the list of accepted calls
>Ending a call
When the ignition and radio readiness are
switched off, e.g. after taking the remote control
out of the ignition switch, you can continue an
ongoing call via the hands-free system for no
more than 25 minutes.
Requirements
The mobile phone's pairing data are stored by
the vehicle and the mobile phone is operational.
The engine is running or the ignition is switched
on.
The mobile phone is recognized by the vehicle.
iDrive concept, refer to page16.
1.Press the button.
This opens the start menu.
2.Move the controller forwards to call up
"Communication".
Receiving calls
If you have the phone number of the caller
stored in the phone book and the phone num-
Page 176 of 245

Telephoning
174 and is confirmed by a tone, depending on
the type of mobile phone you are using.
Switching between mobile
phone and hands-free system
From mobile phone to hands-free
system
You can continue ongoing calls outside of the
vehicle's Bluetooth range via the hands-free
system as long as the engine is running or the
ignition is switched on. Depending on your
mobile phone, the system automatically
switches to hands-free mode.
With mobile phones that do not automatically
switch to hands-free mode:
>Depending on the type of mobile phone you
are using, you can continue the conversa-
tion via the hands-free system, if necessary.
Refer to the display on your mobile phone
and/or your mobile phone's operating
instructions.
>Press the button above the storage
compartment. The changeover can take
several seconds.
From hands-free system to mobile
phone
If you are making a call via the hands-free sys-
tem, you can also continue the call via the
mobile phone, if necessary, depending on your
mobile phone model. Refer to the display on
your mobile phone and/or your mobile phone's
operating instructions.
Operation by voice
commands*
The concept
You can operate your mobile phone without
having to take a hand off the steering wheel.
During your entries, you will be guided in many
cases by announcements and questions.
The same prerequisites apply as for operation
via iDrive, refer to page170.
Symbols in the Owner's Manual
Saying commands
Activating the system
1.Briefly press the button on the steering
wheel.
A sound signal indicates that you can say
commands.
2.Say the command.
The text or numbers that the voice com-
mand system has registered will appear on
the Control Display.
Ending/canceling operation by voice
commands
Briefly press the button on the steering
wheel or
In dialogs where text is spoken, e.g. a name
rather than a command, canceling is only possi-
ble using the button on the steering wheel.
Having the possible commands read
aloud
The system recognizes specific commands
that must be pronounced exactly word for word.
You can have the possible commands for any
function read aloud to you:
{...}Say the specified commands word for
word.
{{...}} Indicates responses of the system.
{Cancel}.
{Help}
Page 188 of 245

Refueling
186
Refueling
Always switch off the engine before refu-
eling, otherwise, fuel cannot be added to
the tank and a message will be displayed.<
Take all precautionary measures and
observe all applicable regulations when
handling fuel. Do not carry any spare fuel con-
tainers in your vehicle. They can develop a leak
and cause an explosion or cause a fire in the
event of an accident.<
Gas cap
Opening
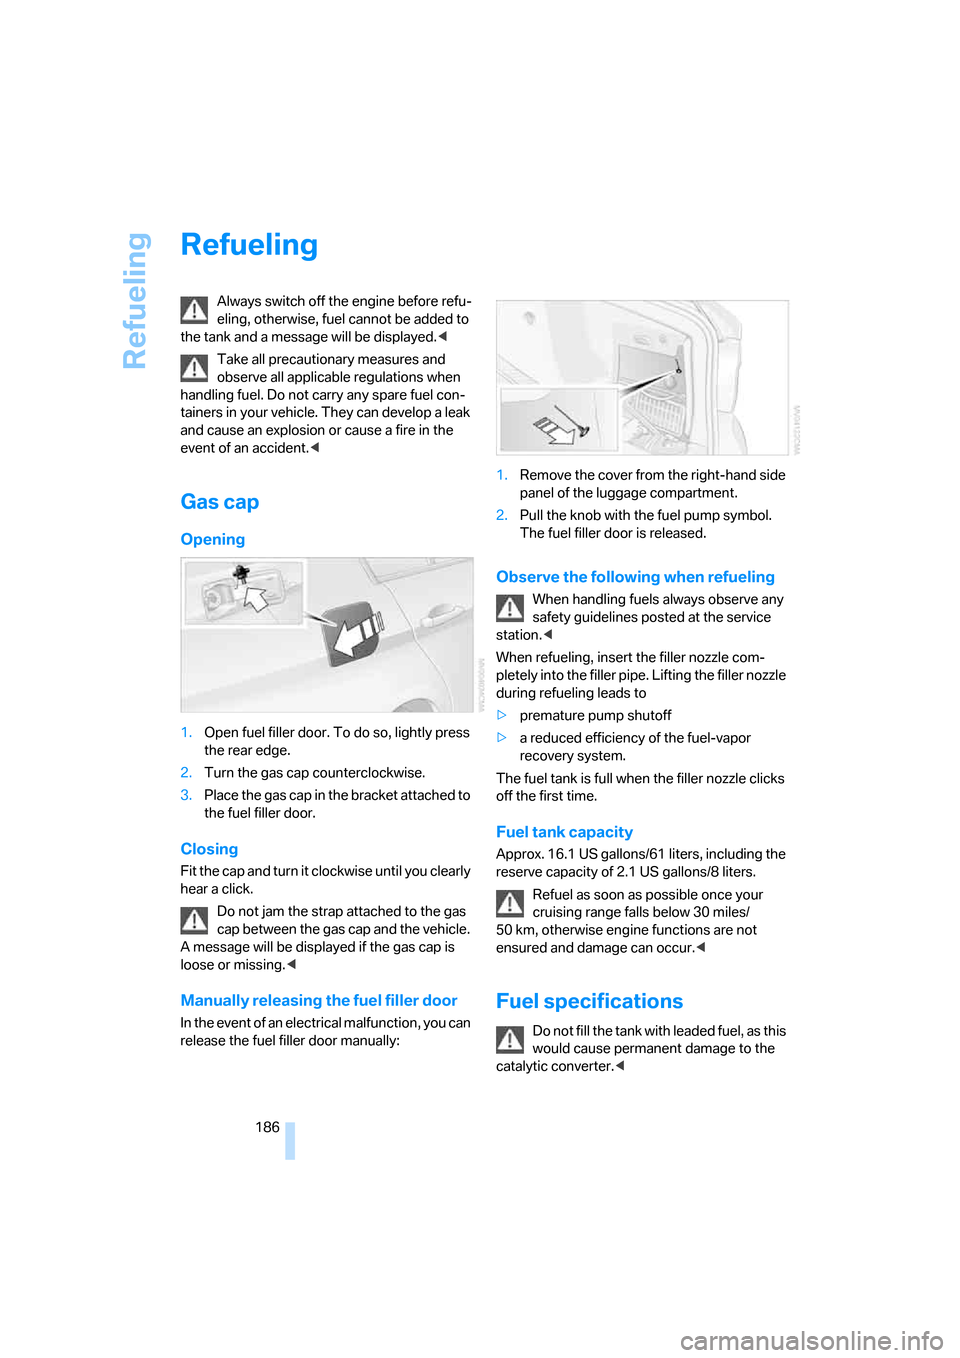
1.Open fuel filler door. To do so, lightly press
the rear edge.
2.Turn the gas cap counterclockwise.
3.Place the gas cap in the bracket attached to
the fuel filler door.
Closing
Fit the cap and turn it clockwise until you clearly
hear a click.
Do not jam the strap attached to the gas
cap between the gas cap and the vehicle.
A message will be displayed if the gas cap is
loose or missing.<
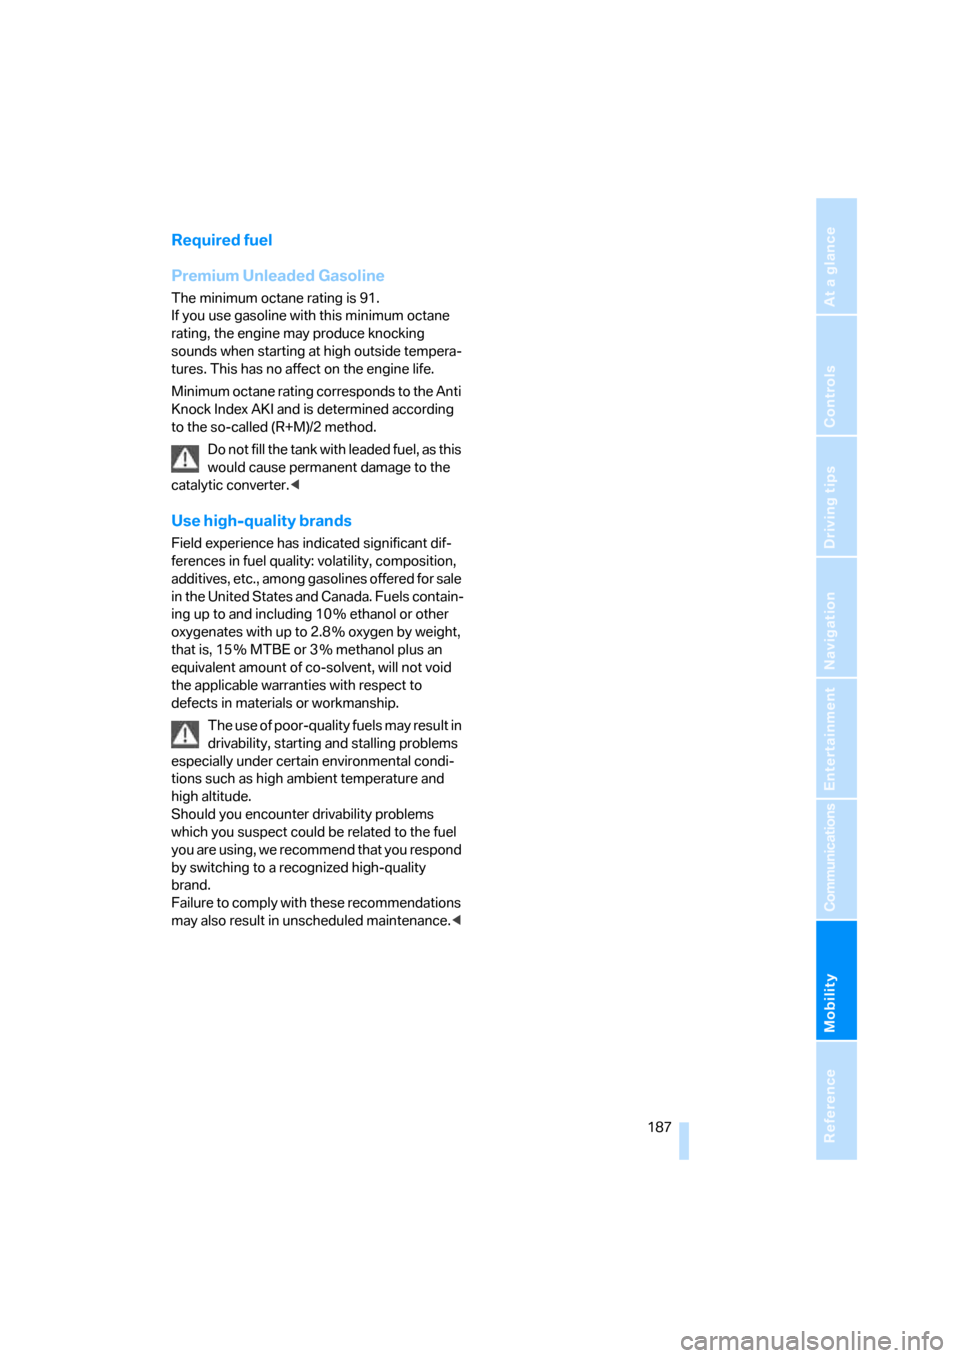
Manually releasing the fuel filler door
In the event of an electrical malfunction, you can
release the fuel filler door manually:1.Remove the cover from the right-hand side
panel of the luggage compartment.
2.Pull the knob with the fuel pump symbol.
The fuel filler door is released.
Observe the following when refueling
When handling fuels always observe any
safety guidelines posted at the service
station.<
When refueling, insert the filler nozzle com-
pletely into the filler pipe. Lifting the filler nozzle
during refueling leads to
>premature pump shutoff
>a reduced efficiency of the fuel-vapor
recovery system.
The fuel tank is full when the filler nozzle clicks
off the first time.
Fuel tank capacity
Approx. 16.1 US gallons/61 liters, including the
reserve capacity of 2.1 US gallons/8 liters.
Refuel as soon as possible once your
cruising range falls below 30 miles/
50 km, otherwise engine functions are not
ensured and damage can occur.<
Fuel specifications
Do not fill the tank with leaded fuel, as this
would cause permanent damage to the
catalytic converter.<
Page 189 of 245

Mobility
187Reference
At a glance
Controls
Driving tips
Communications
Navigation
Entertainment
Required fuel
Premium Unleaded Gasoline
The minimum octane rating is 91.
If you use gasoline with this minimum octane
rating, the engine may produce knocking
sounds when starting at high outside tempera-
tures. This has no affect on the engine life.
Minimum octane rating corresponds to the Anti
Knock Index AKI and is determined according
to the so-called (R+M)/2 method.
Do not fill the tank with leaded fuel, as this
would cause permanent damage to the
catalytic converter.<
Use high-quality brands
Field experience has indicated significant dif-
ferences in fuel quality: volatility, composition,
additives, etc., among gasolines offered for sale
in the United States and Canada. Fuels contain-
ing up to and including 10 % ethanol or other
oxygenates with up to 2.8 % oxygen by weight,
that is, 15 % MTBE or 3 % methanol plus an
equivalent amount of co-solvent, will not void
the applicable warranties with respect to
defects in materials or workmanship.
The use of poor-quality fuels may result in
drivability, starting and stalling problems
especially under certain environmental condi-
tions such as high ambient temperature and
high altitude.
Should you encounter drivability problems
which you suspect could be related to the fuel
you are using, we recommend that you respond
by switching to a recognized high-quality
brand.
Failure to comply with these recommendations
may also result in unscheduled maintenance.<
Page 201 of 245

Mobility
199Reference
At a glance
Controls
Driving tips
Communications
Navigation
Entertainment
Important parts of the engine compartment
1Expansion tank for coolant, refer to
page201
2Washer fluid reservoir for headlamp clean-
ing system and window washer system,
refer to page603Jump-starting connection, refer to
page212
4Filler neck for engine oil, refer to Adding
engine oil
5Reservoir for brake fluid, under the cover of
the microfilter
Engine oil
The engine oil consumption is dependent on
driving style and driving conditions.
Checking oil level
Your car is equipped with an electronic oil-level
monitor.
For a precise measurement and display of the
oil level, it is necessary that the engine be at
operating temperature, e.g. after uninterrupted
driving for at least approx. 6.5 miles/10 km. You
can have the oil level displayed while you are
driving, or while the vehicle is at a standstill on a
level surface and the engine is running.
Display in the instrument cluster
1.Lightly push button 1 in the turn indicator
stalk up or down repeatedly until the appro-
priate symbol is shown in the display,
accompanied by the word "OIL".
2.Press button 2 in the turn indicator stalk.
The oil level is checked and the reading dis-
played.
Page 202 of 245

Under the hood
200
Possible displays
1Oil level OK
2Oil level is being checked.
This can take about 3 minutes if the car is at
a standstill on a level surface, or about
5 minutes while the car is on the move.
3Oil level down to minimum:
Add 1 US quart/1 liter of engine oil as soon
as possible, refer also to Adding engine oil.
4Oil level is too high.
Too much oil will harm the engine.
Have the vehicle checked without
delay.<
5The oil level sensor is defective.
Do not add engine oil. You can continue
your journey. Note the newly calculated dis-
tance remaining to the next oil service, refer
to page203. Have the system checked as
soon as possible.
Display via iDrive
iDrive concept, refer to page16.
1.Press the button.
This opens the start menu.
2.Press the controller to open the menu.3.Select "Service" and press the controller.
4.If necessary, move the highlight marker to
the uppermost field. Turn the controller
until "Service requirements" is selected and
press the controller.
5.If necessary, move the highlight marker to
the second field from the top. Turn the con-
troller until "Engine oil level" is selected and
press the controller. The oil level is dis-
played.
Possible messages
>"Engine oil level O.K."
>"No measured value available: Updating
engine oil level measurement..."
The engine oil level is measured. This can
take about 3 minutes if the car is at a stand-
still on a level surface and the engine is run-
ning, and about 5 minutes while the car is on
the move.
>"Oil level at the minimum! Refill with 1 quart
engine oil."
Add engine oil as soon as possible, but no
more than 1 US quart/1 liter, refer also to
Adding engine oil below.
>"Engine oil level too high"
Page 203 of 245

Mobility
201Reference
At a glance
Controls
Driving tips
Communications
Navigation
Entertainment
Too much oil will harm the engine.
Have the vehicle checked without
delay.<
>"Please observe recalculated service inter-
val for engine oil"
Do not add engine oil. You can continue
your journey. Note the newly calculated dis-
tance remaining to the next oil service, refer
to page74. Have the system checked as
soon as possible.
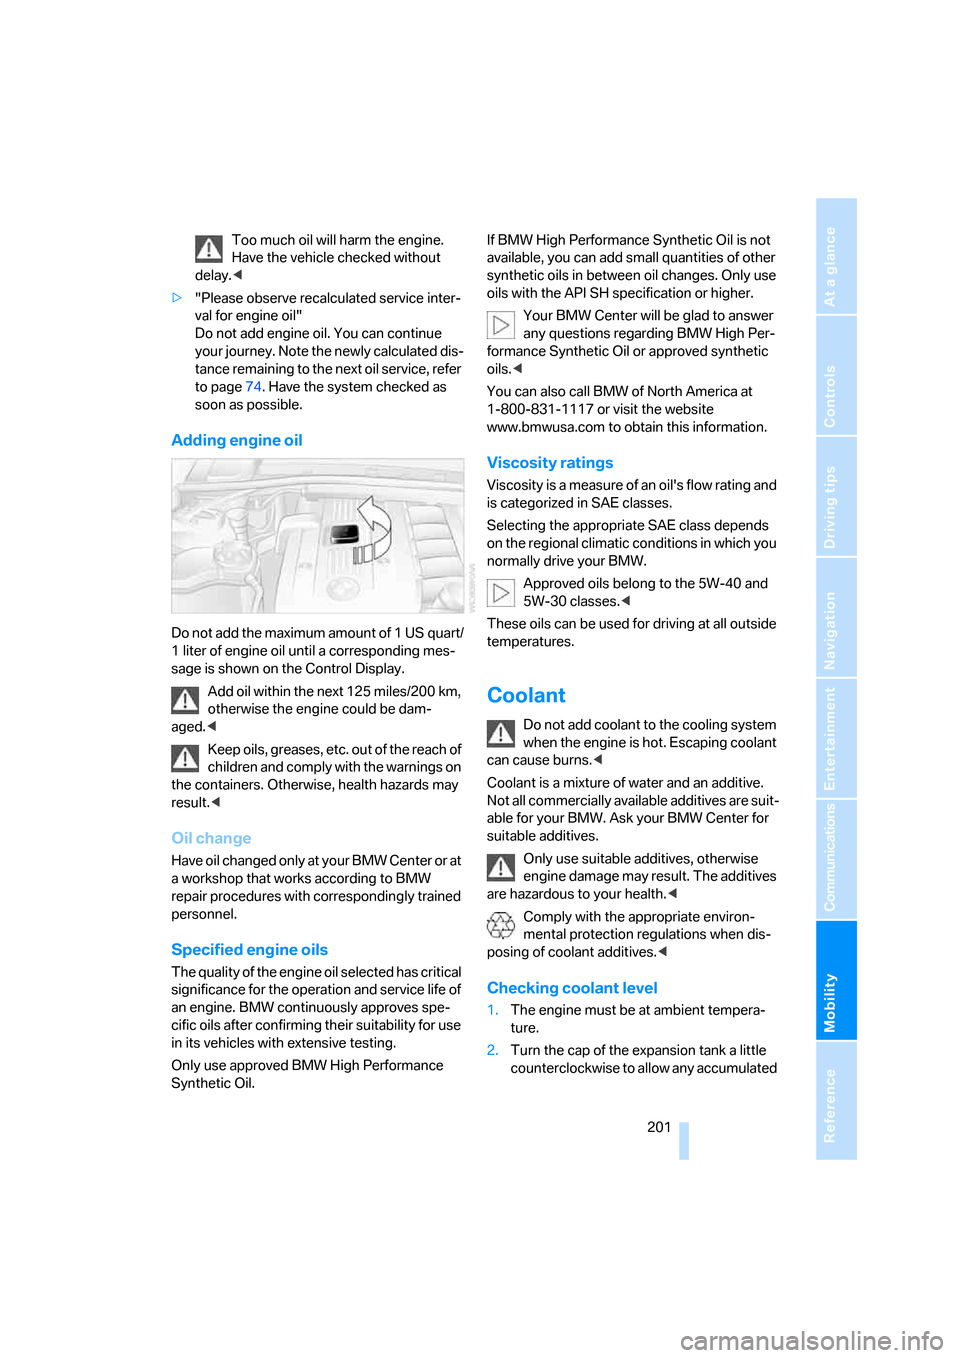
Adding engine oil
Do not add the maximum amount of 1 US quart/
1 liter of engine oil until a corresponding mes-
sage is shown on the Control Display.
Add oil within the next 125 miles/200 km,
otherwise the engine could be dam-
aged.<
Keep oils, greases, etc. out of the reach of
children and comply with the warnings on
the containers. Otherwise, health hazards may
result.<
Oil change
Have oil changed only at your BMW Center or at
a workshop that works according to BMW
repair procedures with correspondingly trained
personnel.
Specified engine oils
The quality of the engine oil selected has critical
significance for the operation and service life of
an engine. BMW continuously approves spe-
cific oils after confirming their suitability for use
in its vehicles with extensive testing.
Only use approved BMW High Performance
Synthetic Oil.If BMW High Performance Synthetic Oil is not
available, you can add small quantities of other
synthetic oils in between oil changes. Only use
oils with the API SH specification or higher.
Your BMW Center will be glad to answer
any questions regarding BMW High Per-
formance Synthetic Oil or approved synthetic
oils.<
You can also call BMW of North America at
1-800-831-1117 or visit the website
www.bmwusa.com to obtain this information.
Viscosity ratings
Viscosity is a measure of an oil's flow rating and
is categorized in SAE classes.
Selecting the appropriate SAE class depends
on the regional climatic conditions in which you
normally drive your BMW.
Approved oils belong to the 5W-40 and
5W-30 classes.<
These oils can be used for driving at all outside
temperatures.
Coolant
Do not add coolant to the cooling system
when the engine is hot. Escaping coolant
can cause burns.<
Coolant is a mixture of water and an additive.
Not all commercially available additives are suit-
able for your BMW. Ask your BMW Center for
suitable additives.
Only use suitable additives, otherwise
engine damage may result. The additives
are hazardous to your health.<
Comply with the appropriate environ-
mental protection regulations when dis-
posing of coolant additives.<
Checking coolant level
1.The engine must be at ambient tempera-
ture.
2.Turn the cap of the expansion tank a little
counterclockwise to allow any accumulated
Page 205 of 245

Mobility
203Reference
At a glance
Controls
Driving tips
Communications
Navigation
Entertainment
Maintenance
BMW Maintenance System
The BMW Maintenance System supports the
preservation of the traffic and operating safety
of your BMW. The service schedule also
includes operations related to the vehicle's
comfort and convenience features, such as
replacement of the filters for the inside air. The
objective is to optimize efforts with respect to
minimal vehicle maintenance costs.
If and when you come to sell your BMW, a com-
prehensive record of servicing will prove a sig-
nificant benefit.
CBS Condition Based Service
Sensors and special algorithms take the differ-
ent driving conditions of your BMW into
account. Condition Based Service uses this to
determine the current and future service
requirements. By letting you define a service
and maintenance regimen that reflects your
own individual requirements, the system builds
the basis for trouble-free driving.
On the Control Display, you can have the
remaining times or distances for selected main-
tenance tasks and any legally prescribed dates
displayed, refer to page74:
>Engine oil
>Brakes: separately for front and rear
>Microfilter/activated-charcoal filter
>Brake fluid
>Spark plugs
>Vehicle check>Legally mandated inspections depending
on local regulations
Service data in the remote control
Your vehicle continuously stores service-
requirement information in the remote control
while you are driving. Your BMW Service Advi-
sor can read out this data from the remote con-
trol unit, and propose an optimized mainte-
nance approach. Whenever you take your car in
for servicing you should therefore hand your
BMW Service Advisor the remote control unit
that you last used.
Make sure that the date is always set cor-
rectly, refer to page78; otherwise the
effectiveness of Condition Based Service CBS
is not assured.<
Service and Warranty Information
Booklet for US models and Warranty
and Service Guide Booklet for
Canadian models
Please consult your Service and Warranty Infor-
mation Booklet for US models and Warranty
and Service Guide Booklet for Canadian models
for additional information on service require-
ments.
BMW recommends that you have service
and repair operations performed at your
BMW Center.
Take the time to ensure that these service pro-
cedures are confirmed by entries in your vehi-
cle's Service and Warranty Information Booklet
for US models and Warranty and Service Guide
Booklet for Canadian models. These entries
verify that your vehicle has received the speci-
fied regular maintenance.<